


Installation, Service and User
INSTRUCTIONS
FOR THE
ZERO MODEL:
PR265D
Refrigerator
ZERO APPLIANCES (PTY) LTD
WARNING: THIS APPLIANCE MUST BE EARTHED
ENSURE THAT THE GAS SUPPLY HOSE IS NOT IN
CONTACT WITH OR NEAR THE BURNER BOX
Author: Rudi Updated: 2 October 2018
Version: 1.0 Revision: 1 P a g e | 1

Instructions for Installation, Operation & Service
Manufacturer: Zero Appliances, Chloorkop, Ext. 44, Kempton Park, Gauteng, South Africa.
MODEL: PR265D PARAFFIN Refrigerator & Freezer
Important Information and Safety Instructions
It is important to read through these instructions carefully before beginning to use the refrigerator.
To ensure reliable refrigeration and economical operation, the refrigerator must be installed and used
as described in this manual.
Retain these instructions for future use.
Warnings:
- Thoroughly dry any spilt paraffin (kerosene) before attempting to light the wick.
- Do not overfill the paraffin (kerosene) tank.
- Keep the tank level at all times to avoid spillage.
- Do not check for leaks with an open flame.
- Do not smoke while checking for leaks.
- Ensure that the refrigerator is standing level.
- All paraffin-burning appliances consume air (oxygen). To avoid endangering your
life, do not use this appliance in an unventilated room. Make sure there is an open
window or designated ventilation opening to provide air supply. Do not obstruct
the flow of combustion and ventilation air. Provide additional ventilation for any
additional fuel burning appliances and additional occupants.
- Do not store or use gasoline or other flammable vapour and liquids in the vicinity of
this or any other appliance.
- Do not spray aerosols in the vicinity of this appliance while it is operating.
.
Author: Rudi Updated: 2 October 2018
Version: 1.0 Revision: 1 P a g e | 2

Data Plate
The data plate, located on the back of the refrigerator will register your model number, serial number
and product number.
Record these details here, for easier access if the need for a service should arise.
Model Number ____________________________
Serial Number ____________________________
Product Number____________________________
Installation Instructions
Placement of the Refrigerator
The room should have a capacity (length x width x height) of at least 20m³ and must be adequately
ventilated as well as follow all relevant national and local regulations.
Further, the room should have a window (which can be opened). It is important that the refrigerator is
not subject to radiation of heat from a stove etc.
For best performance also at high ambient temperatures, there must be free air circulation over and at
the rear of the refrigerator.
The refrigerator is designed for a free-standing installation and the clearance to the rear wall and to
the possible side walls, should be at least 50mm. The clearance above the refrigerator should be at
least 600mm.
NB: The refrigerator must be adjusted to a vertical and horizontal level position, see bubble spirit
level supplied with the refrigerator. Use the feet on the refrigerator to adjust its position.
TO START PARAFFIN (KEROSENE) OPERATION
1. Loosen the retainer screws on the element and slide the element out of the
bottom of the chimney.
2. Remove the paraffin
(kerosene) tank filler
cap.
Author: Rudi Updated: 2 October 2018
Version: 1.0 Revision: 1 P a g e | 3
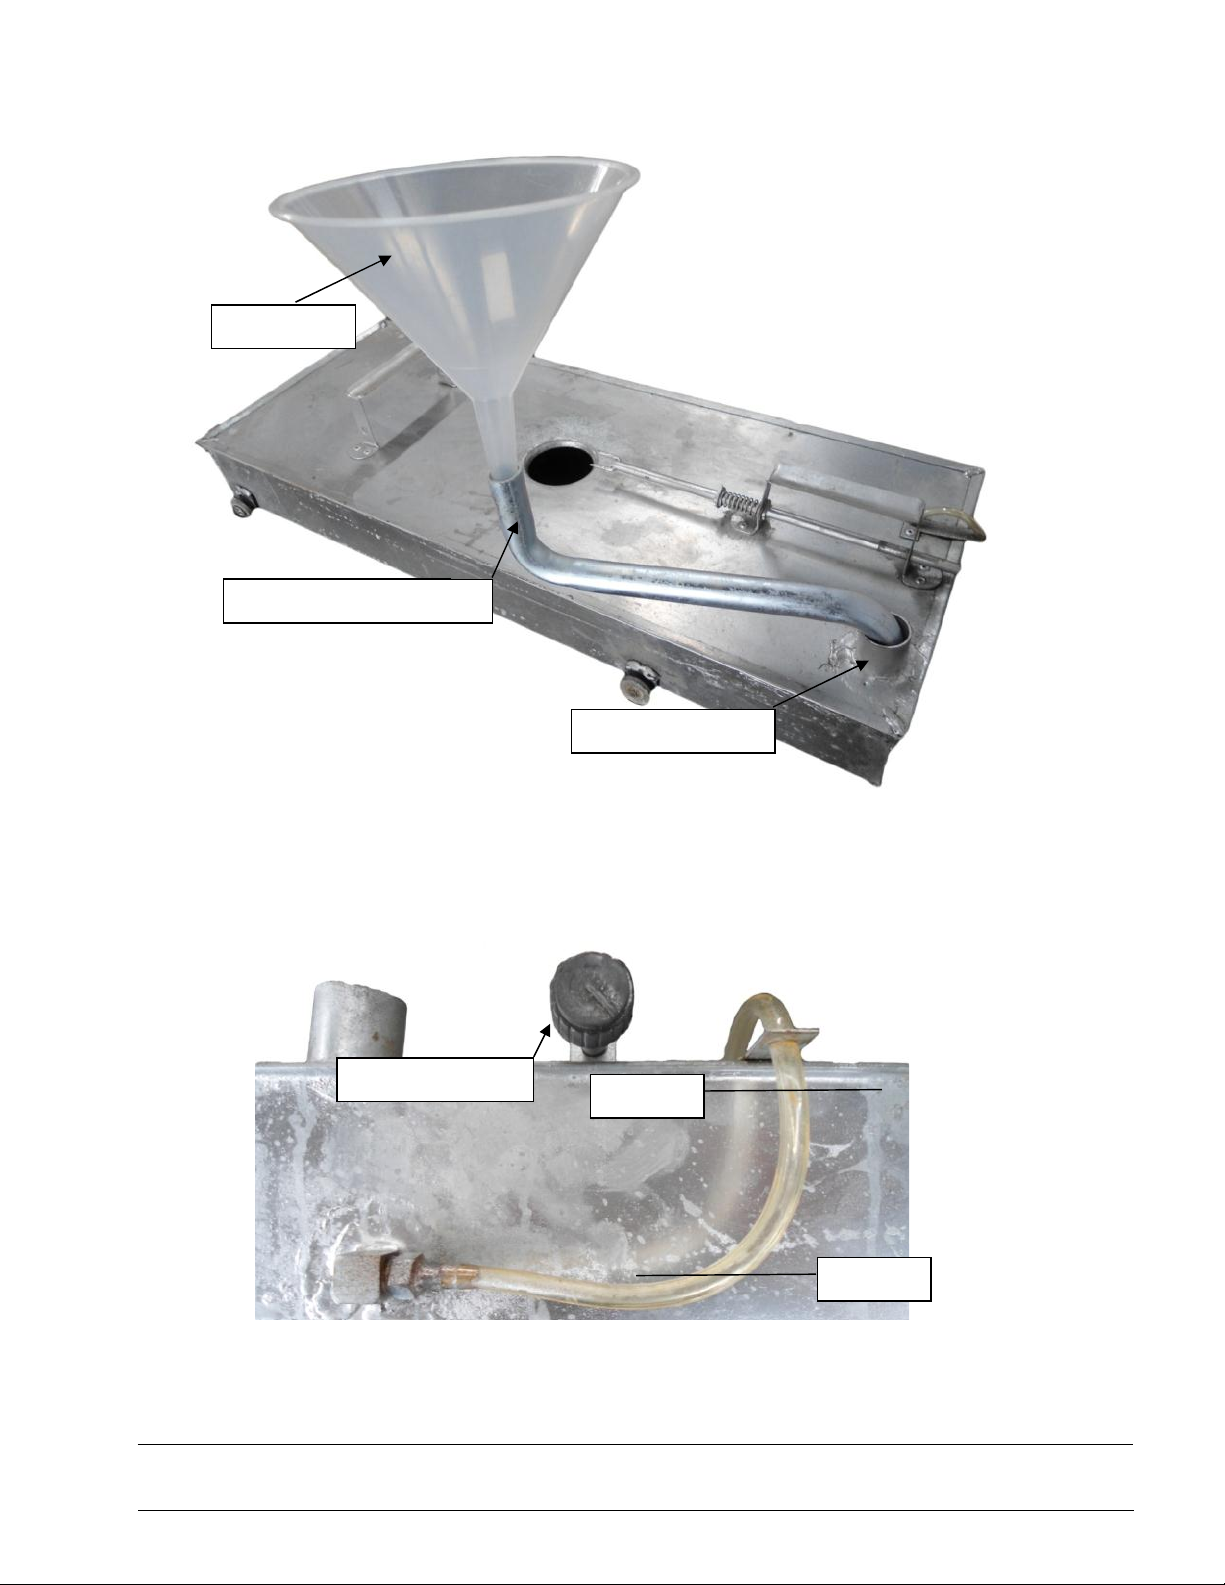
3. Insert the one side of the paraffin filler tube (B) into the filler orifice (A). Insert the
funnel (C) into the top of the paraffin filler tube (B). See image below.
Funnel (C)
Paraffin filler tube Paraffin filler tube (B)
Filler Orifice (A)
4. Fill the tank with paraffin (kerosene) until the paraffin (kerosene) reaches the
maximum filling level on the tank level indicator. The tank will take approximately
8 liters to fill. (Be careful to not overfill the tank). Use only illuminating paraffin
(kerosene) and thoroughly dry any spilt paraffin (kerosene) before attempting to
light the wick. See image below.
5. When filling is complete remove the funnel ©, paraffin filler tube (B) & reposition
the filler cap. Store funnel & paraffin filler tube in a safe place for future use.
Control rod (D)
Max
Min
Author: Rudi Updated: 2 October 2018
Version: 1.0 Revision: 1 P a g e | 4
 Loading...