

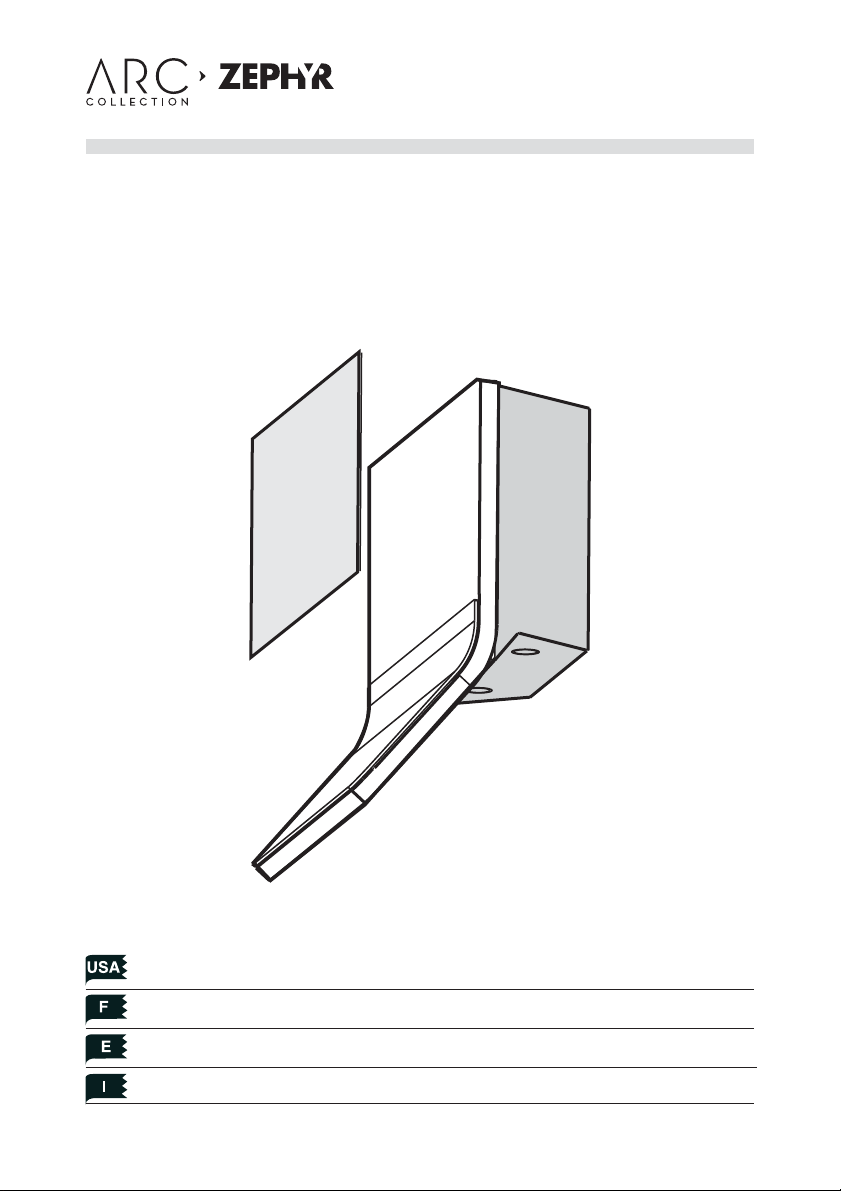
Pattern Glass
AHG-00BL
AHG-00WH
For use with Horizon range hood
customer service
1.888.880.8368
User instructions Pag. 2
Notice d’utilisation Pag. 4
Manual de utilización Pag. 6
Istruzioni per l’uso Pag. 8

The glass can be installed
either prior to or after installation of the hood. If the
hood has not been mounted
to the wall, place it on a solid work surface.
1. Open the top glass door. See Fig.1
WARNING! Hold the glass to prevent it from falling
after the next stage.
Installation instructions
2. Undo the (6) wing nuts
securing the glass to the
panel. Fig.2
www.zephyronline.com
3. Remove the glass.
A
4. Position the glass from the kit
on the door panel by sliding it
until it touches the rear lip ensuring that the pins are within the
slots. Fig.3B
B
B
- 2 -

5. Replace the 6 wing nuts,
tightening only the two at the
front and leaving the other 4
loose. Fig.4
6. Close the door carefully until it latches.
- Check for correct alignment:
the side edges have to be aligned, and the distance between the top secured glass and the lower glass should be approximately 1/16” across the
whole width. Fig. 5
- If the glass is positioned correctly
you may continue
to step 9, otherwise
please continue to
the next stage.
min 1/16"
Installation instructions
7. Open the door
again, then loosen
the 2 front wing
nuts and adjust the
alignment by sliding the glass.
8. Tighten the 2 front wing nuts and try closing the door again.
Please Note! If the alignment is still not correct, repeat the procedure
from step 7.
9. Open the door and tighten the 4 remaining nuts.
Now the glass has been fully secured to the hood.
- 3 -
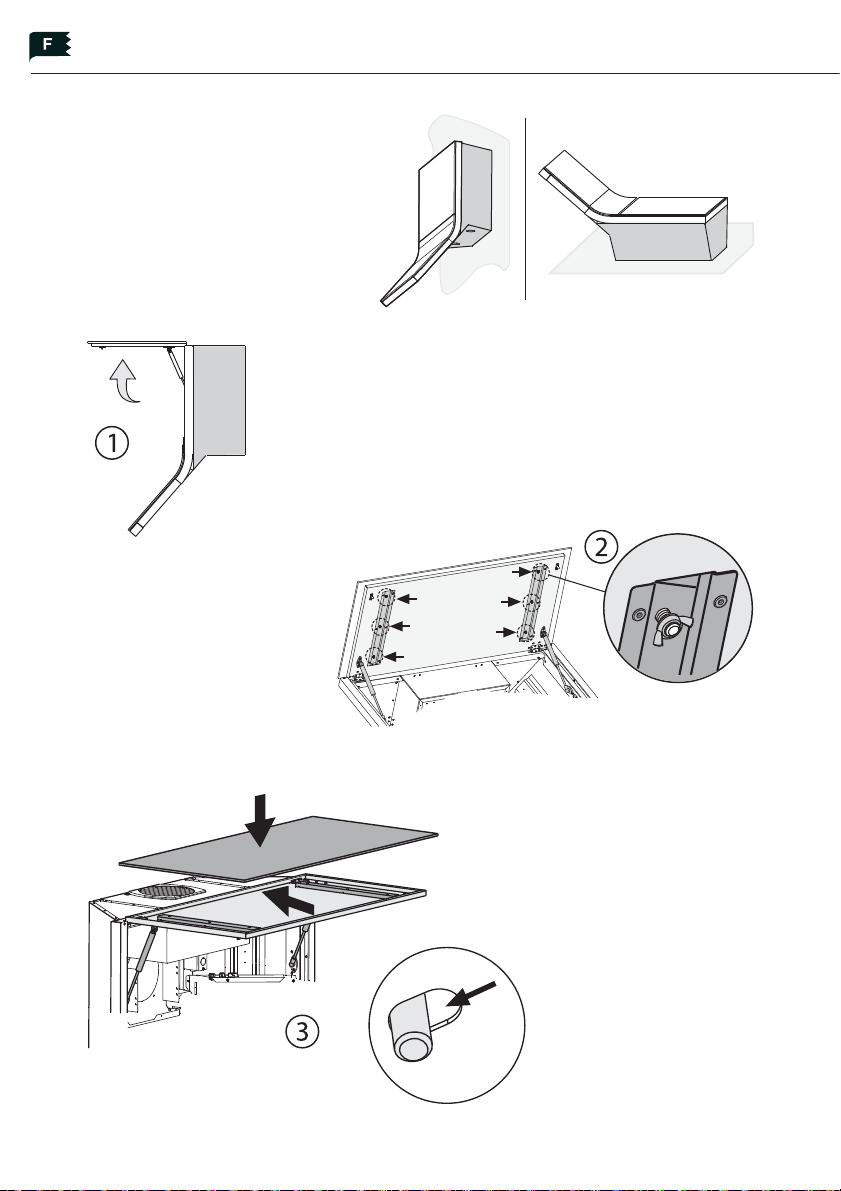
Il est possible d’installer le
verre avec le produit déjà xé
au mur ou avant sa xation. Si
l’appareil n’a pas encore été
xé au mur, posez-le sur un
plan de travail stable.
1. Ouvrir la
porte. Fig.1
Notice d’utilisation
ATTENTION! Maintenez le verre pour éviter qu’il tombe
après la phase suivante.
2. Dévissez les (6) écrous
oreilles qui xent le verre
au panneau. Fig.2
www.zephyronline.com
3. . Enlevez le verre.
A
4. Positionnez le verre du kit sur
le panneau, en le faisant glisser
jusqu’à la butée arrière et assurezvous que les goujons rentrent dans
les fentes. Comme illustré g.3B
B
B
- 4 -

5. Vissez les (6) écrous oreilles ;
serrez seulement les deux écrous
avant et ne vissez pas à fond les
4 autres. Fig.4
6. Fermez doucement la porte
jusqu’à son accrochage.
- Contrôlez si l’accouplement est
correct : lês angles latéraux doivent etre accouplés, et la distance
entre le verre supérieur et le verre inférieur doit être d’1/16” environ, sur toute la
largeur. Fig. 5
- Si le positionnement
du verre est correct,
passez à la phase 9,
sinon continuez avec
la phase suivante.
7. Ouvrez à nouveau
la porte, desserrez
les (2) écrous oreilles
avant et corrigez le
désalignement en
faisant glisser le verre.
min 1/16"
Notice d’utilisation
8. Serrez les (2) écrous oreilles avant et fermez la porte pour une véri cation ultérieure.
Remarque! Se l’alignement n’est pas encore correct, répétez l’opération à partir
de la phase 7.
9. Ouvrez la porte et serrez les (4) écrous oreilles qui n’étaient pas vissés à fond.
A ce point, le verre est xé complètement à la hotte.
- 5 -

Es posible instalar el vidrio
cuando todavía el producto
no se ha jado a la pared o
también después del montaje. Si el aparato aún no está
jado a la pared, apóyelo sobre una super cie de trabajo
estable.
1. Abra la puerta. Fig.1
www.zephyronline.com
Manual de utilización
2. Desenrosque las (6)
tuercas palomilla que jan
el vidrio al panel. Fig.2
3. . Extraiga el vidrio.
¡ATENCIÓN! Sostenga el vidrio para evitar, después de la
siguiente fase, que se caiga.
A
B
4. . Coloque el vidrio del Kit en el
panel deslizándolo hasta el tope
posterior y veri cando que los
pernos se introduzcan en las ranuras. Se ilustra en la g. 3B
- 6 -
B

5. Enrosque las (6) tuercas palomilla apretando sólo las dos de
la parte delantera y dejando las
otras 4 no enroscadas completamente. Fig.4
6. Cierre cuidadosamente la
puerta acompañándola hasta
el enganche
- Controle que el acoplamiento sea correcto: los angulos laterales tienen que
ser alineados y la distancia entre el vidrio superior jado y el inferior, debe ser
siempre de aproximadamente 1/16”. Fig. 5
- Si la colocación del
vidrio se ha realizado
en forma correcta,
pase a la fase 9, de lo
contrario, continúe
con la fase sucesiva.
min 1/16"
Manual de utilización
7. Abra nuevamente
la puerta, a oje las
(2) tuercas palomilla
delanteras y recupere la desalineación
haciendo deslizar el vidrio.
8. Apriete las (2) tuercas palomilla delanteras y cierre la puerta para una nueva
veri cación.
Nota: Si la alineación todavía no es la correcta, repita la operación desde la
fase 7.
9. Abra la puerta y apriete las (4) tuercas palomilla no enroscadas completamente.
A partir de este momento, el vidrio se ha jado completamente a la campana.
- 7 -

E’ possibile installare il vetro
sia con il prodotto ancora da
ssare alla parete sia dopo il
montaggio.
Se l’apparecchio non è stato
ssato alla parete, appoggiarlo su un piano di lavoro
stabile.
www.zephyronline.com
Istruzioni per l’uso
1. Aprire lo sportello. Fig.1
ATTENZIONE! Sostenere il vetro per evitare, dopo la
successiva fase, che non cada.
2. Svitare i (6) dadi a farfalla che ssano il vetro al
pannello.Fig.2
3. Rimuovere il vetro.
A
B
4. Posizionare il vetro del Kit sul
pannello, facendolo scorrere no
alla battuta posteriore g. 3A, e
assicurando che i perni vadano
all’interno delle asole. Come illustrato nella g.3B
- 8 -
B

5. Avvitare i (6) dadi a farfalla,
serrando solo i due della parte
anteriore, lasciando gli altri 4
non avvitati completamente.
Fig.4
6. Chiudere cautamente lo
sportello accompagnandolo
no all’aggancio.
- Controllare se l’accoppiamen- t o
sia corretto: gli spigoli laterali devono essere allineati, e la distanza fra il
vetro superiore ssato e quello inferiore, deve essere di circa 1/16”, su tutta
la larghezza. Fig. 5
- Se il posizionamento del vetro
è quindi ottimale
passare alla fase 9
, altrimenti continuare con la fase
successiva.
7. Aprire nuovamente lo sportello,
allentare i (2) dadi
a farfalla anteriori e
recuperare il disallineamento, facendo scorrere il vetro.
8. Serrare i (2) dadi a farfalla anteriori e chiudere lo sportello per un ulteriore veri ca.
Nota! Se l’allineamento non è ancora corretto, ripetere l’operazione dalla
fase 7.
min 1/16"
Istruzioni per l’uso
9. Aprire lo sportello e serrare i (4) dadi a farfalla non avvitati completamente.
A questo punto il vetro è ssato completamente alla cappa.
- 9 -

www.zephyronline.com
- 10 -

- 11 -

3FA0162
 Loading...