

Page 1

Please read this manual carefully before operating
your set.
Retain it for future reference.
Record the serial number of the set.
See the label attached on the bottom of the set and
quote this information to your dealer when you
require service.
Model number : LXG-120
Serial number :
LXG-120
OWNER’S MANUAL
Page 2

LCD
PROJECTOR
1
Page 3

CONTENTS
INDEX
Safety Instructions 3
1
Feature Locations 7
Installation and Connection 11
Connecting to a Desktop PC 15
2
Connecting to a Notebook PC 16
Connecting to a Macintosh Desktop PC
Connecting to a Macintosh PowerBook
Connecting to a Video Source 21
Connecting to a D-TV Settop Box 22
Turning on the Projector 23
3
Operating the Projector 24
Function checking 26
Selecting source mode 27
Using Still function 28
Selecting language 29
4
Checking lamp time 30
Using Flip Horizontal / Vertical function
Using Blank function 33
Selecting PC screen size input signal
17
20
31
35
INTRODUCTION
CONNECTION
INSTALLATION AND
BASIC
FUNCTIONS
SPECIAL
FUNCTIONS
Before operating the
unit, please read this
manual carefully.
5
Using Resize function 36
Adjusting screen display 37
6
Using Tracking function 39
Adjusting Video 41
DISPLAY
POSITION
VIDEO
TRACKING/
Supported Monitor Display 42
7
Maintenance 43
Troubleshooting 44
Memo 45
Specifications 46
INFORMATION
2
Page 4

SAFETY INSTRUCTIONS
WARNING
RISK OF ELECTRIC SHOCK
DO NOT OPEN
WARNING:
TO REDUCE THE RISK OF ELECTRIC SHOCK DO NOT REMOVE
COVER (OR BACK). NO USER SERVICEABLE PARTS INSIDE.
REFER SERVICING TO QUALIFIED SERVICE PERSONNEL.
The lightning flash with arrowhead symbol, within an equilateral triangle, is
intended to alert the user to the presence of uninsulated “dangerous voltage” within the product’s enclosure that may be of sufficient magnitude to
constitute a risk of electric shock to persons.
The exclamation point within an equilateral triangle is intended to alert the
user to the presence of important operating and maintenance (servicing)
instructions in the literature accompanying the appliance.
WARNING:
TO PREVENT FIRE OR SHOCK HAZARDS, DO NOT EXPOSE THIS PRODUCT
TO RAIN OR MOISTURE.
CAUTION:
REFER LAMP REPLACEMENT TO QUALIFIED SERVICE PERSONNEL ONLY.
.
REGULATORY INFORMATION:
This equipment has been tested and found to comply with the limits for a Class B digital device, pursuant to Part
15 of the FCC Rules. These limits are designed to provide reasonable protection against harmful interference when
the equipment is operated in a residential installation. This equipment generates, uses and can radiate radio frequency energy and, if not installed and used in accordance with the instruction manual, may cause harmful interference to radio communications. However, there is no guarantee that interference will not occur in a particular installation. If this equipment does cause harmful interference to radio or television reception, which can be determined
by turning the equipment off and on, the user is encouraged to try to correct the interference by one or more of
the following measures:
• Reorient or relocate the receiving antenna.
• Increase the separation between the equipment and receiver.
• Connect the equipment into an outlet on a circuit different from that to which the receiver is connected.
• Consult the dealer or an experienced radio/TV technician for help.
CAUTION:
Do not attempt to modify this product in any way without written authorization from Zenith Electronics
Corporation. Unauthorized modification could void the user’s authority to operate this product
The responsible party for this device compliance is:
Zenith Electronics Corporation
201 James Record Road
Huntsville, AL 35824, USA
1-888-865-3026
3
.
Page 5

PORTABLE CART WARNING
SAFETY INSTRUCTIONS
Important safeguards for you and your new product
Your product has been manufactured and tested with your safety in mind. However,
improper use can result in potential electrical shock or fire hazards. To avoid defeating
the safeguards that have been built into your new product, please read and observe
the following safety points when installing and using your new product, and save them
for future reference.
Observing the simple precautions discussed in this booklet can help you get many
years of enjoyment and safe operation that are built into your new product.
This product complies with all applicable U.S. Federal safety requirements, and those
of the Canadian Standards Association.
INTRODUCTION
1. Read Instructions
All the safety and operating instructions should be read before the product is operated.
2. Follow Instructions
All operating and use instructions
should be followed.
3. Retain Instructions
The safety and operating instructions
should be retained for future refer-
ence.
4.Heed Warnings
All warnings on the product and in the
operating instructions should be
adhered to.
5. Cleaning
Unplug this product from the wall outlet before cleaning. Do not use liquid
cleaners or aerosol cleaners. Use a
damp cloth for cleaning.
bowl, kitchen sink, or laundry tub, in a
wet basement, or near a swimming
pool.
7.Accessories
Do not place this product on an
unstable cart, stand, tripod, bracket,
or table. The product may fall, causing serious injury to a child or adult,
and serious damage to the product.
Use only with a cart, stand, tripod,
bracket, or table recommended by the
manufacturer, or sold with the product. Any mounting of the product
should follow the manufacturer’s
instructions, and should use a mounting accessory recommended by the
manufacturer.
8. Transporting Product
A product and cart combination
should be moved with care. Quick
6. Water and Moisture
Do not use this product near water for example, near a bath tub, wash
4
Page 6

SAFETY INSTRUCTIONS
stops, excessive force, and uneven
surfaces may cause the product and
cart combination to overturn.
9. Attachments
Do not use attachments not recommended by the product manufacturer
as they may cause hazards.
10. Ventilation
Slots and openings in the cabinet are
provided for ventilation and to ensure
reliable operation of the product and
to protect it from overheating. These
openings must not be blocked or covered. The openings should never be
blocked by placing the product on a
bed, sofa, rug, or other similar surface. This product should not be
placed in a built-in installation such as
a bookcase or rack unless proper
ventilation is provided or the manufacturer’s instructions have been
adhered to.
11. Power Sources
This product should be operated only
from the type of power source indicated on the marking label. If you are not
sure of the type of power supply to
your home, consult your product dealer or local power company. For products intended to operate from battery
power, or other sources, refer to the
operating instructions.
12. Line-Cord Polarization
This product is equipped with a 3-wire
grounding-type alternating-current line
plug. This plug will fit into the power
outlet only one way. This is a safety
feature. If you are unable to insert the
plug fully into the outlet, contact your
electrician to replace your obsolete
outlet. Do not defeat the safety purpose of the three-wire ground-type
plug.
13. Power-Cord Protection
Power-supply cords should be routed
so that they are not likely to be
walked on or pinched by items placed
upon or against them, paying particular attention to cords at plugs, convenience receptacles, and the point
where they exit from the product.
14. Lightning
For added protection for this product
during a lightning storm, or when it is
left unattended and unused for long
periods of time, unplug it from the wall
outlet and disconnect the antenna or
cable system. This will prevent damage to the product due to lightning
and power-line surges.
15. Overloading
Do not overload wall outlets and
extension cords as this can result in a
risk of fire or electric shock.
16. Object and Liquid Entry
Never push objects of any kind into
this product through openings as they
may touch dangerous voltage points
or short-out parts that could result in a
fire or electric shock. Never spill liquid
of any kind on the product.
5
Page 7

SAFETY INSTRUCTIONS
17. Servicing
Do not attempt to service this product
yourself as opening or removing covers may expose you to dangerous
voltage or other hazards. Refer all
servicing to qualified service personnel.
18. Damage Requiring
Service
Unplug this product from the wall outlet and refer servicing to qualified service personnel under the following
conditions:
a. If the power-supply cord or plug is
damaged.
b. If liquid has been spilled, or objects
have fallen into the product.
c. If the product has been exposed to
rain or water.
d. If the product does not operate
normally by following the operating
instructions. Adjust only those controls that are covered by the operating instructions as an improper
adjustment of other controls may
result in damage and will often
require extensive work by a qualified technician to restore the product to its normal operation.
e. If the product has been dropped or
the cabinet has been damaged.
19. Replacement Parts
When replacement parts are required,
be sure the service technician has
used replacement parts specified by
the manufacturer or have the same
characteristics as the original part.
Unauthorized substitutions may result
in fire, electric shock, or other hazards.
20. Safety Check
Upon completion of any service or
repairs to this product, ask the service
technician to perform safety checks to
determine that the product is in proper operating condition.
21. Wall or Ceiling Mounting
The product should be mounted to a
wall or ceiling only as recommended
by the manufacturer.
22. Heat
The product should be situated away
from heat sources such as radiators,
heat registers, stoves, or other products (including amplifiers) that produce heat.
23. Eye Protection
Do not look directly into the lens when
the projector is in use. Eye damage
may occur.
INTRODUCTION
f. If the product exhibits a distinct
change in performance.
6
Page 8

Feature Locations
Main Body
Main Body
Rear remote
control sensor
Power buttonSpeaker Control panel
POWER
Handle
Horizontal
leveler
Front remote
control sensor
Rear Connector Panel
Rear Connector Panel
Zoom ring
Foot
SOURCE BLANK
VOL- VOL+
MENU
ENTER
Focus ring
Indicators
Foot adjusting
button
Lens cover
Computer Out
Computer Audio
Mouse
Mouse
Computer Out
Computer
Audio
Audio Video S-VideoR L/MONO
Computer In
Computer In
S-Video
AC
K
Audio / Video
Main power button
Kensington Security
System Connector
(Refer to page 12)
Rear remote control sensor
7
Page 9

Control Panel
Control Panel
INTRODUCTION
menu button
Selects or closes
menus.
D , E buttons
Selects menus and
items in the menus.
source button
Switches to PC or
AV mode.
menu enter
vol vol
source
blank
enter button
Checks present mode and
saves the change of functions.
volume (Left/Right) buttons
Adjusts volume level and
functions of menus.
blank button
POWER
power button
8
Page 10

Feature Locations
power
source menu
mouse
drag
laser
enter
blank still
resize mute
vol vol
auto tracking
zoom
L
-
m
o
u
s
e
m
o
u
s
e
-
R
Remote Control
Remote Control
power button
L-mouse button
(Zoom-out button)
mouse drag button
auto tracking button
source button
blank button
resize button
volume button
menu button
R-mouse button
(Zoom-in button)
pointer button
laser button
enter button
still button
mute button
zoom button
Inserting the batteries
Inserting the batteries
1
9
Slide the battery cover
in the direction of the
arrow to remove.
Insert two AAbatteries
with correct polarity.
2
Replace the battery
compartment cover as
3
shown.
Page 11

Functions on the Remote Control
Functions on the Remote Control
INTRODUCTION
Button
Button
power button Switches power ON/OFF.
source button Switches to PC or AV mode.
menu button Displays or hides the menu.
L-mouse button * Corresponds to the Left - Click of PC Mouse. This button
(Zoom-out button) registers a menu selection and selects other custom functions.
R-mouse button * Corresponds to the Right - Click of PC Mouse. This button
(Zoom-in button) registers a menu selection and selects other custom functions.
pointer button * After selecting menus, controls selecting and adjusting
mouse drag button Used to select and drag an icon in PC mode.
enter button Checks the present mode and saves the change of functions.
zoom button Refer to page 38.
resize button Refer to page 36.
auto tracking button
blank button Refer to page 33.
still button Refer to page 28.
mute button Cuts off audio.
volume button Adjusts volume level.
laser button Displays a bright red laser pointer.
Function
Function
* Downsizes the screen on the zoom function.
* Enlarges the screen size on zoom function.
functions with the direction of up, down, left, right.
* Moves the screen with the direction of up, down, left, right
on zoom function.
* Moves and releases the selected icon on PC screen.
Refer to page 39.
(Don’t look at laser beam directly as it may cause eye damage.)
Wave length: 650nm
Max. output: <1mW
10
Page 12
Installation and Connection
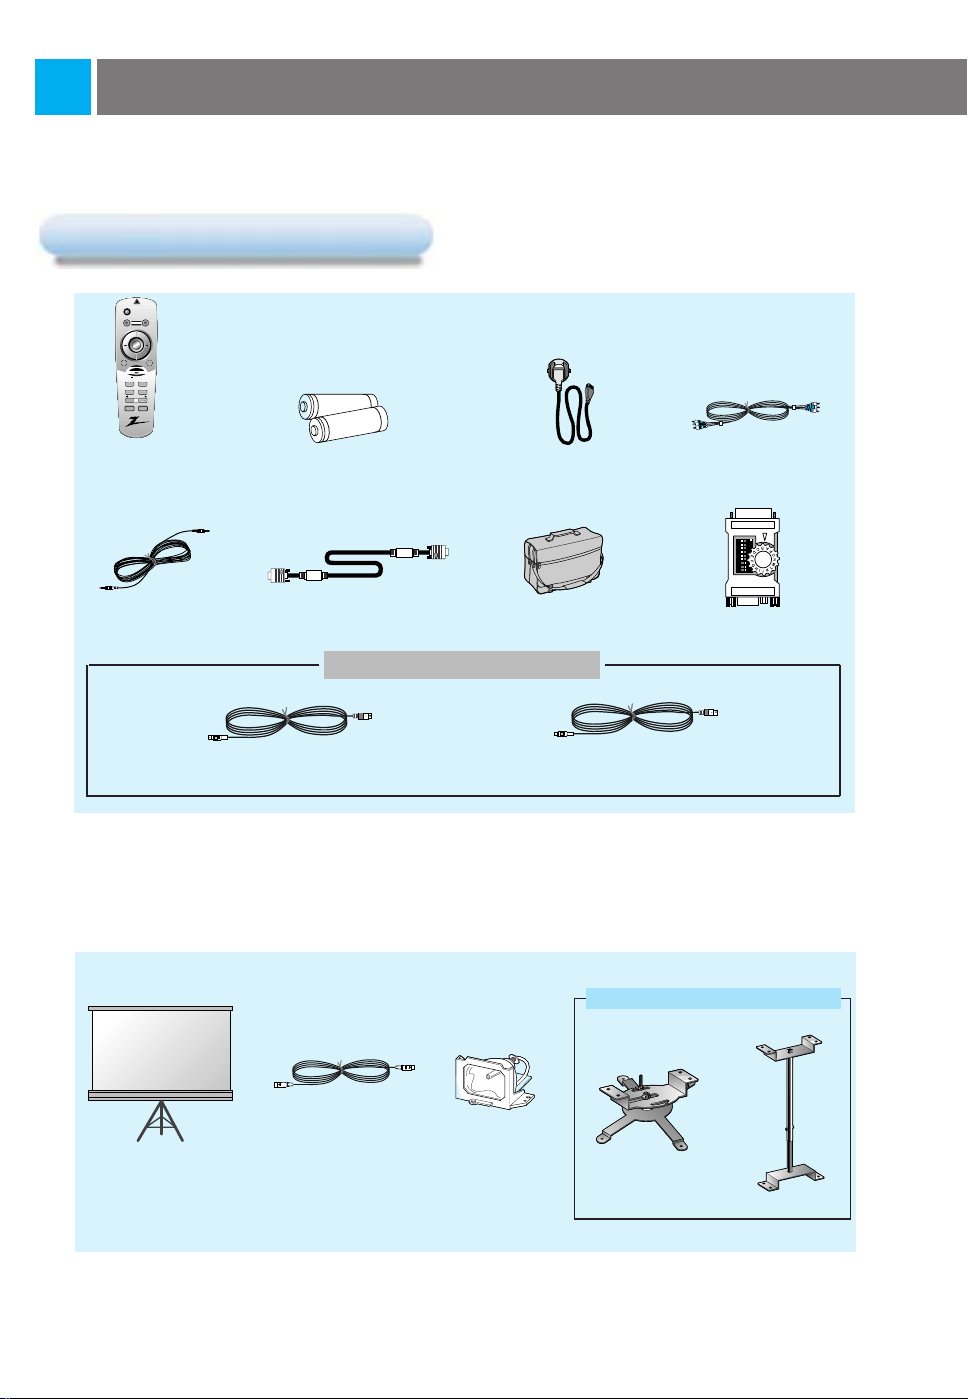
Accessories
Accessories
power
source menu
m
e
o
s
u
u
s
o
e
-
m
R
-
L
mouse
laser
drag
enter
blank still
resize mute
vol vol
zoom
auto tracking
1.5V
1.5V
Remote Control
Audio Cable Computer Cable
Batteries 2 (size AA) Power Cord
Portable Bag
Audio/Video Cable
1 2 3 4 5 6 7 8 9
ON
MAC Desktop Adapter
Mouse Connecting Cables
PS/2 Mouse Cable
(IBM PC or Compatible)
MAC Serial Mouse Cable
Optional Extras
●
Contact the service center for lamp replacement.
●
Contact your dealer to purchase other items.
●
When applying a ceiling mount, use only the ceiling mount for this unit (contact your dealer).
Ceiling mount for LCD projector
Screen for projecting
11
S-Video Cable
Lamp
Page 13

Using Kensington Security System
K
AC
Using Kensington Security System
●
Kensington Security System is an optional item.
●
The projector has a Kensington Security System Connector on the back panel. Connect the Kensington
Security system cable as below.
●
For the detailed installation and use of the Kensington Security System, refer to the user’s guide
attached to the Kensington Security System set.
For further information, contact http://www.kensington.com, the internet homepage of the
Kensington company that deals with electronic equipment such as notebook PCs or LCD projectors.
CONNECTION
INST ALLA TION AND
12
Page 14

Installation and Connection
MENU ENTE
Projector Status Indicators
Projector Status Indicators
● Lamp Indicator, operation indicator and temperature indicator at the top of the projector shows the user the operating status of the projector.
Lamp Indicator
Operation Indicator
Lamp Indicator
Temperature Indicator
Temperature indicator
Orange
Green
Off
Green (flashing)
Red
Red (flashing)
Green (flashing)
Orange
Red
Red (flashing)
Operation indicator
Standby.
In Operation.
Power Off.
Indicates lamp is warming up.
Projection lamp will expire within 100 hours of
operation.
*Replace the Lamp.
Indicates failure of Lamp or associated circuitry.
Contact your service center.
The Lamp cover is not closed.
Indicates over temperature conditions. Unit will
turn off automatically.
*Temperature is too high.
Projector has shut off due to over temperature
condition. Contact your service center.
Projector has a defective internal cooling fan.
Contact your service center.
*
is the warning message on screen.
13
Page 15

Basic Operation of the Projector
Basic Operation of the Projector
POWER
SOURCE BLANK
VOL- VOL+
MENU
ENTER
1. Place the projector on a sturdy and horizontal
1
surface with the PC or AV source.
2. Place the projector in the correct distance
2
from the screen. The distance between the
projector and the screen determines the actual size of the image.
CONNECTION
INST ALLA TION AND
Screen size
Horizontal distance from
projector to screen
610x460cm(300inch) 12.55m-16.35m
410x300cm(200inch) 8.35m-10.87m
200x150cm(100inch) 4.16m-5.42m
160x120cm(70inch) 2.90m-3.78m
120x90cm(50inch) 2.06m-2.69m
81x61cm(40inch) 1.64m-2.15m
3. Turn the projector so that the lens is at a right
3
angle to the screen. If the projector is not at a
right angle, the screen image will not be square.
At this time adjust position of image.
(Refer to page 37.)
4. Connect the cables of the projector to a 120V,
4
60Hz wall power socket.
14
Page 16

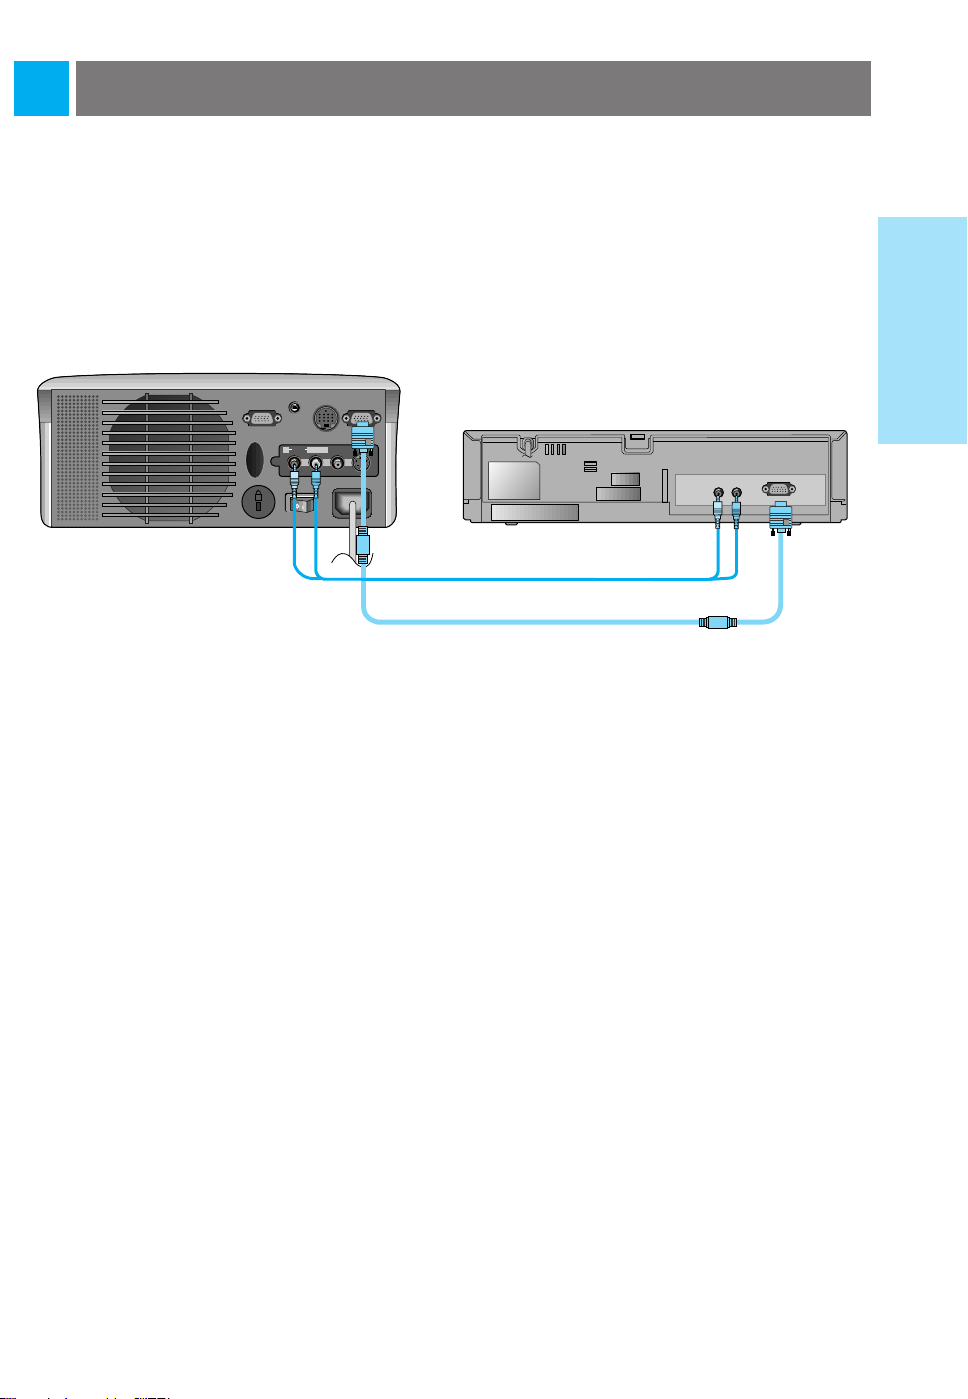
Connecting to a Desktop PC
Computer Out
AC
Computer In
Mouse
Computer
Audio
K
Audio Video S-VideoR L/MONO
● You can connect the projector to a computer’s VGA, SVGA, XGA and SXGA output.
● You can resize the image for VGA, SVGA output.
● Refer to page 42 for the projector supported monitor display.
d
c
a
b
Connections
a. Connect either end of the computer cable to Computer In of the projector.
b. Connect the monitor cable from the PC monitor to Computer Out of the projector in order to see the pro-
jected image on a PC monitor.
c. Connect the audio cable from the PC (LINE OUT sound port) to Computer Audio of the projector.
* If the PC has two audio out ports of SPEAKER OUT and LINE OUT, connect to LINE OUT port for best
sound quality.
d. Connect the PS/2 mouse(for IBM PC or compatible) cable (6 pin) to the Mouse of the projector.
15
Page 17

Connecting to a Notebook PC
Computer Out
AC
Computer In
Mouse
Computer
Audio
K
Audio Video
S-Video
R L/MONO
a
b
CONNECTION
INST ALLA TION AND
c
Connections
a. Connect either end of the computer cable to Computer In of the projector.
b. Connect the audio cable from the PC to Computer Audio of the projector.
c. Connect the PS/2 mouse(for IBM PC or compatible) cable(6 pin) to the Mouse of the projector.
16
Page 18

Connecting to a Macintosh Desktop PC
Computer Out Computer In
Mouse
Computer
Audio
K
Audio Video S-VideoR L/MONO
1 2 3 4 5 6 7 8 9
ON
● You must use the Macintosh desktop adapter to connect the projector to a Macintosh PC.
c
b
a
d
f
e
Connections
a. Connect either end of the computer cable to the Computer In of the projector.
b. Connect the monitor cable from the Macintosh monitor to Computer Out of the projector in order to see
the projected image on a Macintosh monitor.
c. Set the adjusting number and letter of the Macintosh desktop adapter to the resolution you want to use
and connect the adapter to the Macintosh. (Refer to page 18-19)
d. Connect the computer cable to the Macintosh desktop adapter.
e. Connect the audio cable from the PC to the Computer Audio of the projector.
f. Connect the mouse cable (4 pin) from the Macintosh mouse port to the Mouse of the projector.
17
Page 19

How to use the Macintosh desktop adapter
1 2 3 4 5 6 7 8 9
ON
How to use the Macintosh desktop adapter
Adjusting letter code
Adjusting number code
(Dip Switch)
a. How to use
Set 1-6 to OFF status and 7-9 to ON status on the dip switches. Select the adjusting letter
which is correct to the Macintosh and the monitor. (Refer to page 19.)
CONNECTION
INST ALLATION AND
b. Notes for Connecting to the Macintosh PowerBook
If you have problems after connecting the PowerBook to the projector, set dip switch number
9 to OFF status and restart the Macintosh PowerBook.
18
Page 20

Connecting to a Macintosh Desktop PC
MAC llci, llsi
MAC llvi, llvx
LC
LCII
LCIII
LC 475, LC 550
LC 575
Performa
400,405,410,430,600,600CD
450
Quadra
700,900
605,610,650,800,950
840AV
Centris
610,650
660AV
PowerBook
160,165C,180,180C
DUO DOC, MINI DOC
8 24 BOARD
12¥RGB
512x384
24.5
60
N
N
N
N
N
N
N
N
N
N
N
N
N
N
N
N
N
N
output
resolution
horizontal frequency(KHz)
vertical frequency(Hz)
adjusting letter
13¥x14¥ RGB
640x480
35
66
J
J
J
J
J
J
J
J
J
J
J
J
J
J
J
J
J
J
15¥Portrait
640x870
68.8
75
O
O
O
O
O
O
O
O
O
O
O
O
O
O
VGA
640x480
31
60
G
G
M
G
G
G
G
G
G
G
G
G
G
G
G
G
SVGA
800x600
35
56
G
G
G
G
G
G
G
G
G
G
SVGA
800x600
56 or 72
G
G
G
16¥Color
832x624
50
75
F
F
F
F
F
F
F
F
F
F
F
F
F
19¥Color
1024x768
60
75
D
D
D
D
D
D
19¥Color
1024x768
60 or 70
G
G
G
2Page Mono
1150x870
68.7
75
M
M
M
M
M
M
M
M
21¥Color
1152x870
68.7
75
P
P
P
P
P
P
P
P
NTSC
NTSC
15.7
60
L
L
L
L
L
L
L
L
PAL
PAL
16
50
H
H
H
H
H
H
H
H
MACS
output spec
Adjusting letter code of MAC desktop adapter based upon types of MAC and output spec.
Adjusting letter code of MAC desktop adapter based upon types of MAC and output spec.
19
Page 21

Connecting to a Macintosh PowerBook
Computer Out Computer In
Mouse
Computer
Audio
K
Audio Video S-VideoR L/MONO
1 2 3 4 5 6 7 8 9
ON
b
CONNECTION
INST ALLA TION AND
c
a
d
e
Connections
a. Connect either end of the computer cable to the Computer In of the projector.
b. Set the adjusting number and letter of the Macintosh desktop adapter to the resolution you want to use
and connect the adapter to the Macintosh PowerBook.(Refer to page 18-19)
c. Connect the other end of the computer cable to the Macintosh desktop adapter.
d. Connect the audio cable from the PC to the Computer Audio of the projector.
e. Connect the mouse cable from the Macintosh mouse port to the Mouse of the projector.
20
Page 22

Connecting to a Video Source
Computer Out Computer In
Mouse
Computer
Audio
K
Audio Video S-VideoR L/MONO
S VIDEO
(R) AUDIO (L) VIDEO
OUT
IN
● In AV input mode, if the auto video system recognition fails to detect a correct video input signal, press the
auto tracking button on the remote control.
● You can connect a VCR, a camcorder, a DVD or any other compatible video image source to the projector.
a
b
Standard Audio/Video Connection
a. When connecting the projector to an A/V source, connect the A/V input ports of the projector to the out-
put ports of the A/V source with A/V cables of the same color. The video cable is yellow. The left audio is
white and right audio is red.
S-VHS Video Connection
b. Connect S-Video input port of the projector to S-Video output port of A/V source with S-Video cable.
* For better picture quality, use the S-Video connection rather than the A/V connection.
* If you connect S-Video cable and Video cable simultaneously, only the S-Video source will be displayed.
* For Mono Audio Input, connect the single audio cable to the Audio L port of the projector.
21
Page 23
Connecting to a DTV Settop Box
Computer Out Computer In
Mouse
Computer
Audio
K
Audio Video S-VideoR L/MONO
DTV OUT
(R) AUDIO (L)
● To receive HDTV programing, a DTV receiver (Set-top Box) must be connected to the projector.
Connections
DTV Set-top Box
b
a
CONNECTION
INST ALLATION AND
a. Connect the Computer In of the projector to DTV OUT of the D-TV Set-top Box.
b. Connect the Audio input ports (R, L/Mono) of the projector to the Audio output ports (R, L) of the D-TV
Set-top Box.
22
Page 24

Turning on the Projector
24
POWER
MENU
SOURCE BLANK
ENTER
VOL- VOL+
Remove the lens cover of the projector.
1
Press the main power button on the back panel.
2
Press the power button on the remote control or top cover. (Green operation indicator flashes
during warming up of the lamp.)
3
●
An image appears after the green power indicator has flashed for some time.
Select the source mode.
4
●
Press the source button repeatedly to change between PC and A/V Inputs.
Adjust volume level.
5
●
Press volume buttons to increase or decrease sound level.
• Do not shut off the main power (back panel switch) or unplug the power cord while the
ventilation fan is in operation.
23
Page 25

POWER
MENU
SOURCE BLANK
ENTER
VOL- VOL+
Operating the Projector
Focusing and Positioning the Screen Image
Focusing and Positioning the Screen Image
When an image appears on the screen, make certain that the picture is focused and fits properly on the screen.
Focus ringZoom ring
● To adjust the focus of the image, rotate the focus (outer) ring on the lens.
● To adjust the size of the image, rotate the zoom (inner) ring on the lens.
BASIC
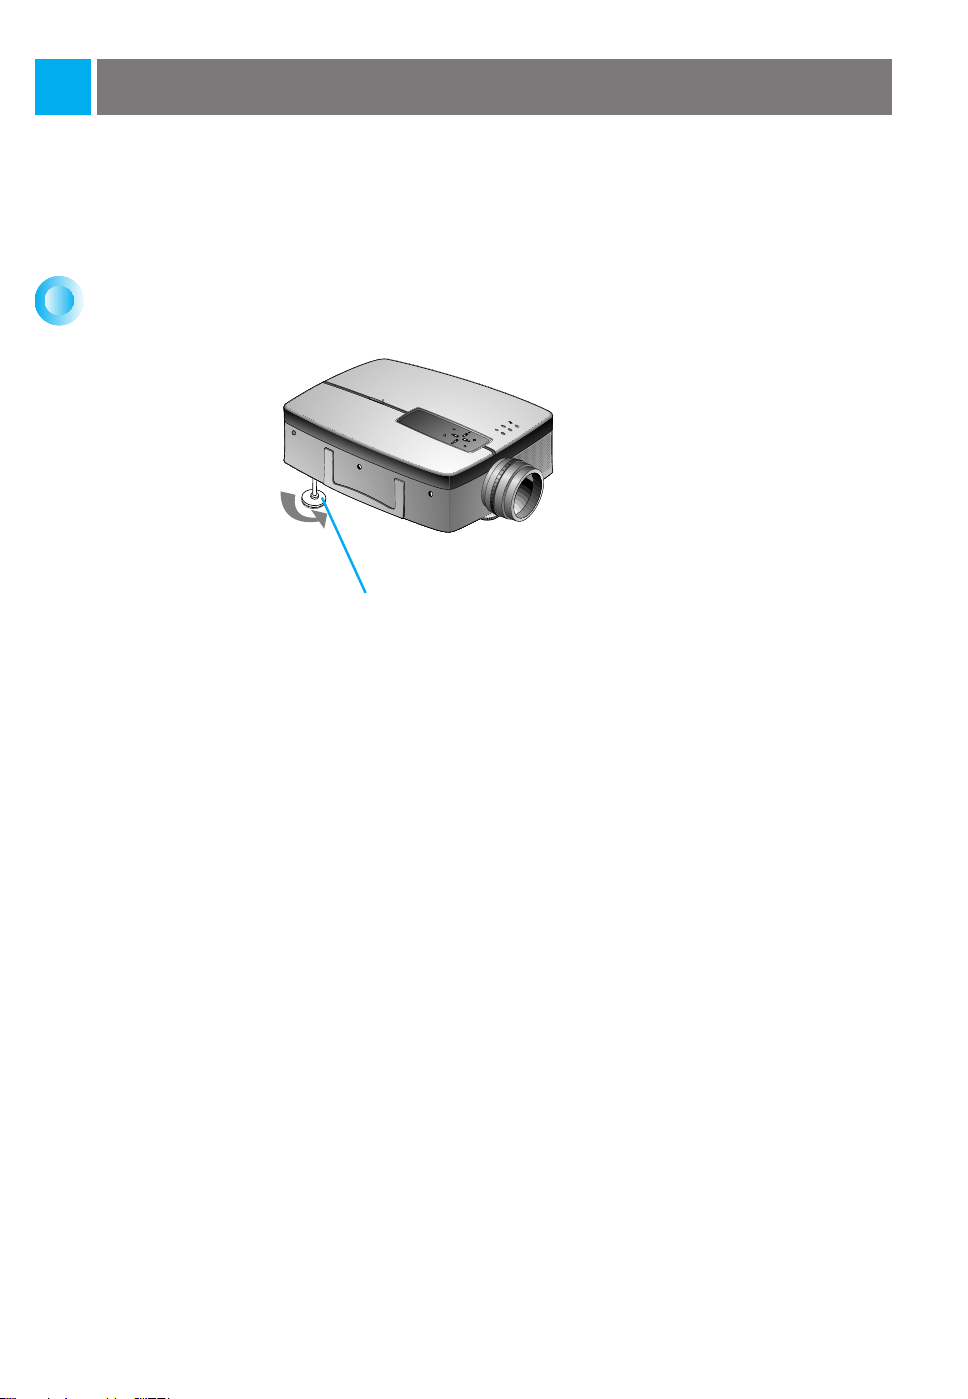
To raise or lower the image on the screen, extend or retract the foot at the bottom of the projector by pushing foot adjuster as shown below.
Push
1. Carefully press the foot adjuster button while you support the other side of the projector. This unlocks the foot and allows
it move freely. Be careful not to drop the projector.
2. While pressing the foot adjuster button, raise or lower the projector to place the image in the proper position on the
screen.
3. Release the button to lock the foot in its new position.
4. To fine-tune the height of the projector, rotate the front foot to raise or lower it.
5. Once the projector height has been adjusted, do not press down on the projector.
FUNCTIONS
24
Page 26
POWER
MENU
SOURCE BLANK
ENTER
VOL- VOL+
Operating the Projector
If the projector is installed on a surface that is not stable or flat, the projected image shape
will be distorted.
Horizontal leveler
● To correct this condition, adjust the projector’s position using the horizontal leveler as shown above.
25
Page 27
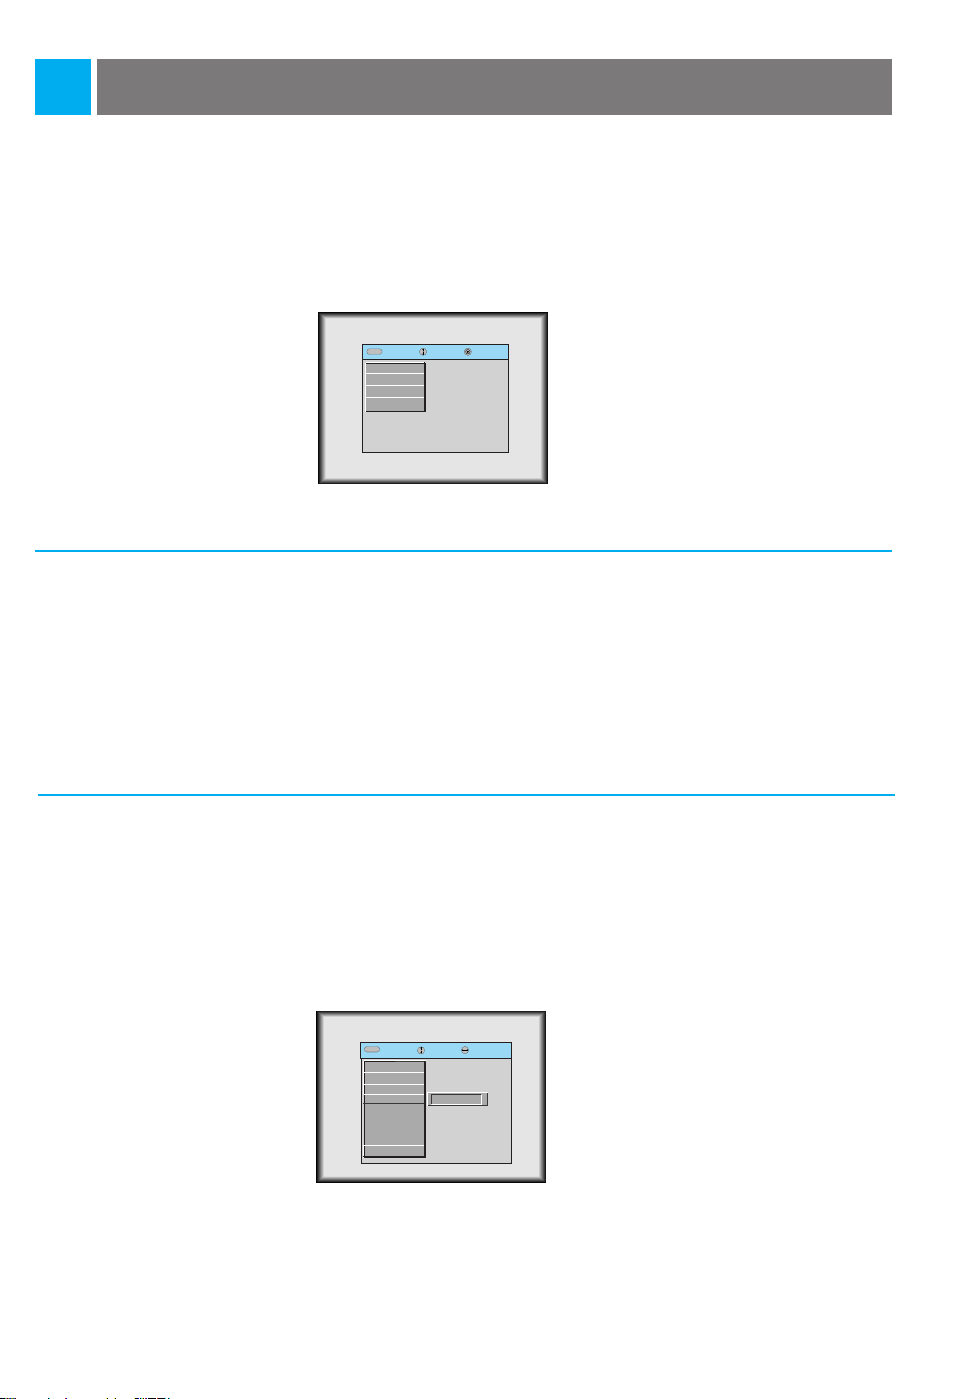
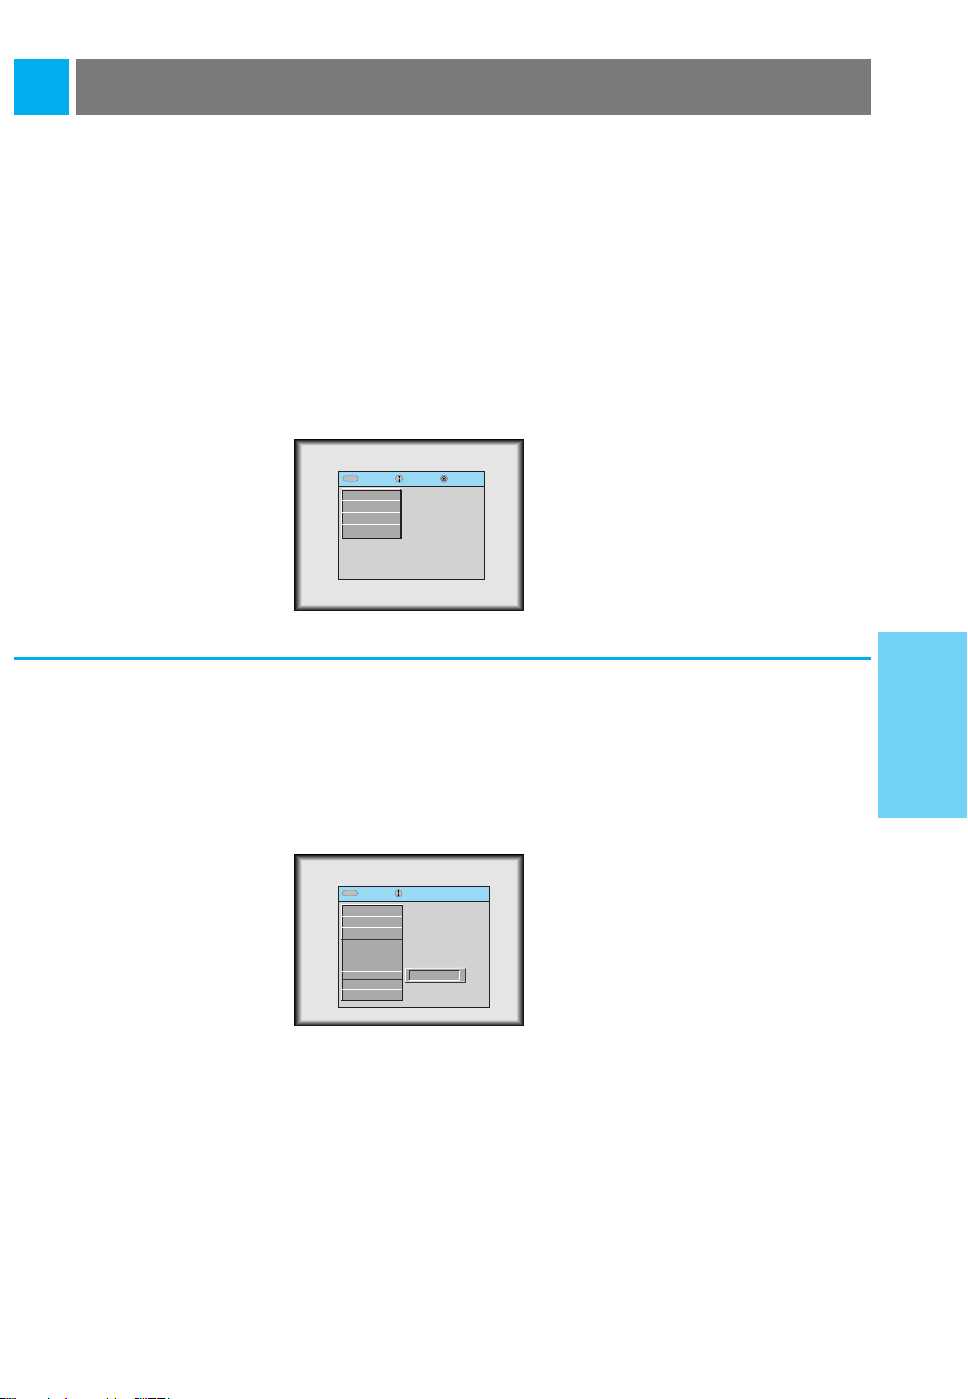
Function checking
MenuMenu
Press the menu button.
1
Move the pointer button up or down to select a menu and press the enter button. Each press of the
button will cycle through the available menus.
2
exit move enter
G
VIDEO
G
POSITION
G
SPECIAL
G
TRACKING
MenuMenu
exit move enter
G
VIDEO
G
POSITION
G
SPECIAL
E
TRACKING
Press Enter to Start
Auto Tracking
Clock
Phase
3
Move the
●
Without an input signal from a PC or Video source, the On-Screen Display (OSD) doesn’t appear.
pointer button up or down to select a function that you want to use or adjust.
● To exit the menu display, press the
MenuMenu
exit move select
G
VIDEO
G
POSITION
E
SPECIAL
Language
Flip Horizontal
Flip Vertical
Blank Image
Lamp Time
VGA Text
G
TRACKING
English
menu button repeatedly.
G
MenuMenu
exit move adjust
E
VIDEO
Contrast
Brightness
Color R
Color G
Color B
Reset
G
POSITION
G
SPECIAL
G
TRACKING
MenuMenu
exit move adjust
G
VIDEO
E
POSITION
Horizontal
Vertical
Keystone
Zoom
Resize
G
SPECIAL
G
TRACKING
* In AV mode, Horizontal / Vertical in POSITION menu, VGA Text in SPECIAL menu and TRACKING menu
are not displayed.
* The sub menus for the VIDEO menu in AV mode are different from those in the PC mode (Refer to page 41).
8080
BASIC
FUNCTIONS
00
26
Page 28

Selecting source mode
Press the source button
1
Each press of the source button changes the display as shown below.
2
27
PC AV
Page 29
Using Still function
Press the still button.
1
• You can freeze the input image from a PC or AV source.
BASIC
FUNCTIONS
Moving Image
To return to normal video, press the
2
still
button again.
Still Image
28
Page 30
Selecting language
Press the menu button and move the pointer button up or down to select the SPECIAL menu
as shown below.
1
MenuMenu
exit move enter
G
VIDEO
G
POSITION
G
SPECIAL
G
TRACKING
Press the enter button and move the pointer button up or down to select the Language item.
2
Move the pointer button left or right to select the language you want to use.
3
●
On-Screen-Display(OSD) will change to the language chosen.
●
To exit the menu display, press the menu button repeatedly.
MenuMenu
exit move select
G
VIDEO
G
POSITION
E
SPECIAL
Language
English
Flip Horizontal
Flip Vertical
Blank Image
Lamp Time
VGA Text
G
TRACKING
G
29
Page 31
Checking lamp time
Press the menu button and move the pointer button up or down to select the SPECIAL menu as
below.
1
MenuMenu
exit move enter
G
VIDEO
G
POSITION
G
SPECIAL
G
TRACKING
Press the enter button and move the pointer button up or down to select the Lamp Time item.
2
MenuMenu
exit move
G
VIDEO
G
POSITION
E
SPECIAL
Language
Flip Horizontal
Flip Vertical
Blank Image
Lamp Time
VGA Text
G
TRACKING
●
The elapsed lamp time is displayed in hours.
●
When the lamp time has reached 1400 hours, the lamp indicator changes to red color.
0 Hr
30
SPECIAL
FUNCTIONS
Page 32

Using Flip Horizontal / Vertical function
Flip Horizontal Function
Flip Horizontal Function
●
This function reverses the left and the right side of the projected image. Use this function when projecting from behind
onto a transparent screen being viewed from the opposite side.
Press the menu button and move the pointer button up or down to select the SPECIAL menu.
1
MenuMenu
exit move enter
G
VIDEO
G
POSITION
G
SPECIAL
G
TRACKING
Press the enter button and move the pointer button up or down to select the Flip Horizontal
item.
2
MenuMenu
G
G
E
G
Press the enter button to see reversed image.
3
●
Each time you press the button, the image will be reversed.
●
To exit the menu display, press the menu button repeatedly.
MenuMenu
exit move enter
G
VIDEO
G
POSITION
E
SPECIAL
Language
Press Enter to Flip
Flip Horizontal
Flip Vertical
Blank Image
Lamp Time
VGA Text
G
TRACKING
exit move enter
VIDEO
POSITION
SPECIAL
Language
Flip Horizontal
Press Enter to Flip
Flip Vertical
Blank Image
Lamp Time
VGA Text
TRACKING
MenuMenu
exit move enter
G
VIDEO
G
POSITION
E
SPECIAL
Language
Flip Horizontal
Press Enter to Flip
Flip Vertical
Blank Image
Lamp Time
VGA Text
G
TRACKING
31
Page 33

Flip V
Flip V
●
This function reverses the upper and the lower side of the projected image.
●
When you hang the projector upside down from the ceiling, you must reverse all the sides(left, right, upper, lower)
ertical Function
ertical Function
of the image.
Press the menu button and move the pointer button up or down to select the SPECIAL menu.
1
MenuMenu
exit move enter
G
VIDEO
G
POSITION
G
SPECIAL
G
TRACKING
Press the enter button and move the pointer button up or down to select the Flip Vertical item.
2
MenuMenu
exit move enter
G
VIDEO
G
POSITION
E
SPECIAL
Language
Flip Horizontal
Press Enter to Flip
Flip Vertical
Blank Image
Lamp Time
VGA Text
G
TRACKING
SPECIAL
FUNCTIONS
Press the enter button to see the reverse image.
3
●
Each time you press the button, the image will be reversed.
●
To exit the menu display, press the menu button repeatedly.
MenuMenu
exit move enter
G
VIDEO
G
POSITION
E
SPECIAL
Language
Flip Horizontal
Press Enter to Flip
Flip Vertical
Blank Image
Lamp Time
VGA Text
G
TRACKING
G
TRACKING
VGA Text
Lamp Time
Blank Image
Flip Vertical
Press Enter to Flip
Flip Horizontal
Language
E
SPECIAL
G
POSITION
G
VIDEO
exit move enter
MenuMenu
32
Page 34

Using Blank function
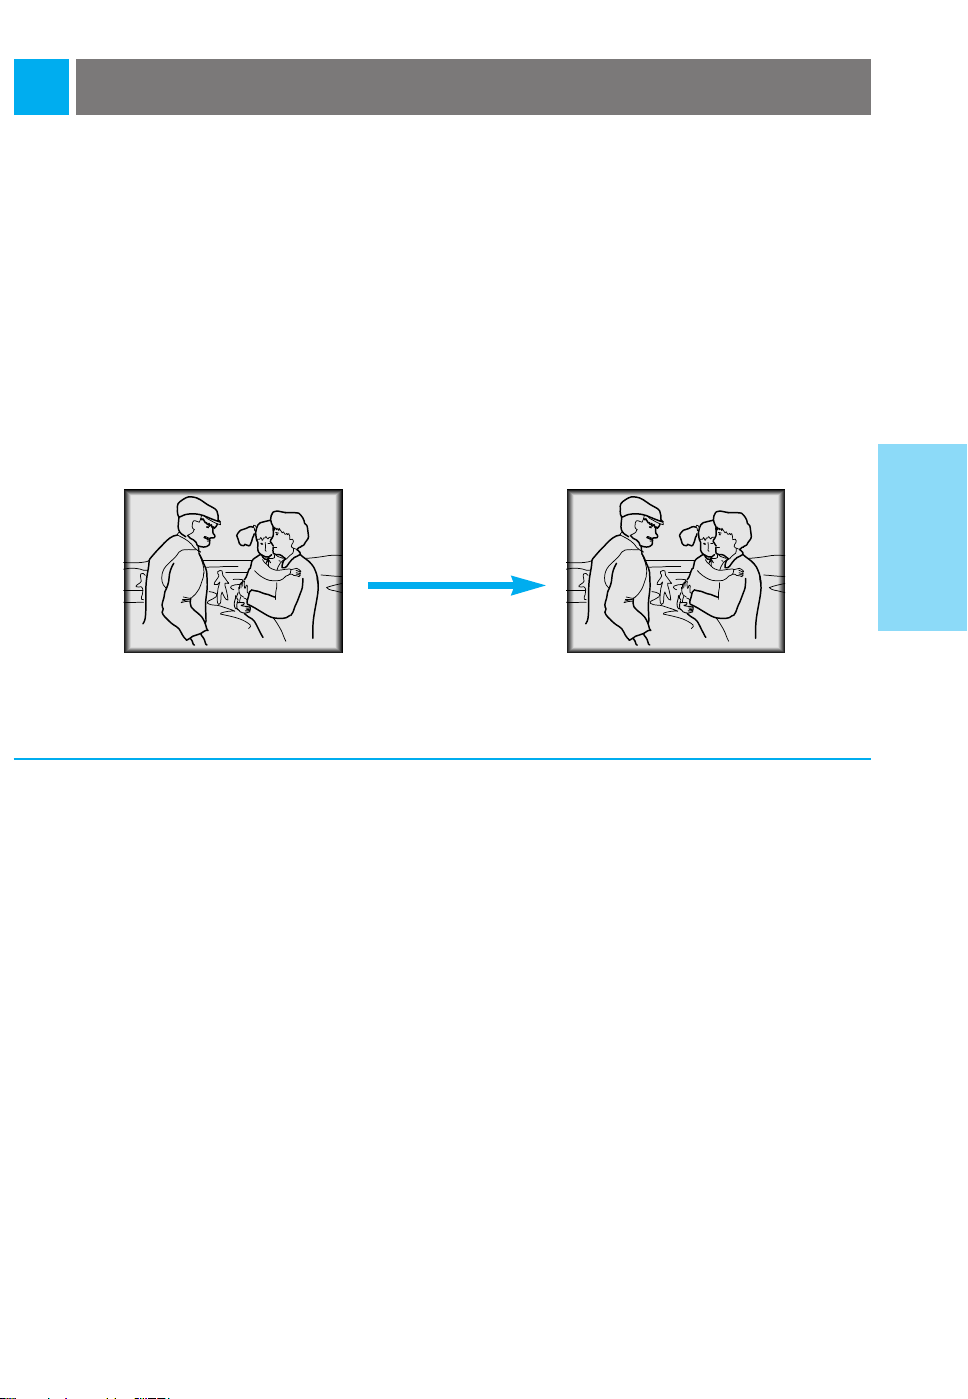
● This function blanks the Video and mutes the Audio.
Press the blank button.
1
●
The screen will blank and the audio is muted.
● You can choose the background color. Refer to page 34.
To exit the blank status, press the
2
33
blank
button again.
Page 35

TITLE
Selecting Blank Image color
Selecting Blank Image color
Press the menu button and move the pointer button up or down to select the SPECIAL menu.
1
MenuMenu
exit move enter
G
VIDEO
G
POSITION
G
SPECIAL
G
TRACKING
Press the enter button and move the pointer button up or down to select the Blank Image item.
2
Move the pointer button left or right to select the color you want to use.
3
●
Background color changes to the selected color.
●
To exit the menu display, press the menu button repeatedly.
MenuMenu
exit move select
G
VIDEO
G
POSITION
E
SPECIAL
Language
Flip Horizontal
Flip Vertical
Blank Image
Lamp Time
VGA Text
G
TRACKING
Blue
G
SPECIAL
FUNCTIONS
34
Page 36

Selecting PC screen size input signal
●
When using the PC input mode, before turning on the PC, select the appropriate screen size in the SPECIAL menu. This will enable the image size of the PC in DOS mode to fit on the projection screen.
●
For other screen size signals except 640X400 70Hz and 720X400 70Hz, the projected image sizes are
adjusted automatically.
Press the menu button and move the pointer button up or down to select the SPECIAL menu
as below.
1
MenuMenu
exit move enter
G
VIDEO
G
POSITION
G
SPECIAL
G
TRACKING
Press the enter button and move the pointer button up or down to select the VGA Text item.
2
Move the pointer button left or right to select the screen size you want to use.
3
MenuMenu
exit move select
G
VIDEO
G
POSITION
E
SPECIAL
Language
Flip Horizontal
Flip Vertical
Blank Image
Lamp Time
VGA Text
G
TRACKING
●
a. Selecting 720X400
: If the input signals are 720X400 70Hz or 640X400 70Hz , the projected image size will always be adjust -
ed to the format of 720X400 70Hz.
b. Selecting 640X400
: If the input signals are 720X400 70Hz or 640X400 70Hz , the projected image size will always be adjust -
ed to the format of 640X400 70Hz.
●
To exit menu display, press the menu button repeatedly.
720X400
G
35
Page 37

Using Resize function
POWER
MENU
SOURCE BLANK
ENTER
VOL- VOL+
Press the resize button.
Each press of the button changes the display as below.
PC mode
Scaled
AV/DTV mode
4 : 3
DISPLAY
POSITION
Original
16 : 9
● You can also use this function by using the menu button.
36
Page 38

TITLEAdjusting screen display
Positioning
Positioning
●
If the image size does not fit the screen properly, set the position of the image by selecting the
Horizontal / Vertical item.
●
Keystone function adjusts the upper and lower width of the projected image to prevent the image
shape from appearing skewed. This can occur if the screen and projector are not perpendicular to
one another.
Press the menu button and move the pointer button up or down to select the POSITION menu.
1
MenuMenu
exit move enter
G
VIDEO
G
POSITION
G
SPECIAL
G
TRACKING
Press the enter button and move the pointer button up or down to select the Horizontal,
Vertical or Keystone item.
2
PC mode
MenuMenu
exit move adjust
G
VIDEO
E
POSITION
Horizontal
Vertical
Keystone
Zoom
Resize
G
SPECIAL
G
TRACKING
00
Press the pointer button and move the button left or right or press the volume buttons to adjust
the image on the screen.
3
●
Horizontal, Vertical, Keystoneare adjusted from -50 to +50.
●
To exit the menu display, press the menu button repeatedly.
37
Page 39

Zoom Function
POWER
MENU
SOURCE BLANK
ENTER
VOL- VOL+
Zoom Function
Press the zoom button.
1
Move the pointer button to the position you wish to see enlarged. Press the enter button to
enlarge the selected areas.
2
Press the L-mouse or R-mouse button to adjust the zoom level.
3
●
L-mouse button makes the image look smaller.
●
R-mouse button makes the image look larger.
11/25
Move to the position you want to see the enlarged display by moving the pointer button left,
right, up, or down.
4
Press the zoom button again to return to normal viewing.
25/25
5
● You can also use this function by using the menu button.
● In the zoom mode, you can adjust horizontal / vertical position with the pointer
button.
38
DISPLAY
POSITION
Page 40

TITLEUsing Tracking function
POWER
MENU
SOURCE BLANK
ENTER
VOL- VOL+
Auto T
Auto T
racking Function
racking Function
● Auto Tracking Function
This function automatically adjusts the difference of horizontal width and tremor of the image. This difference is caused
by discord of the internal signal of the projector and diverse graphic signals of PC.
Press the auto tracking button.
Auto Tracking
● Image positioning and tremor adjusting are automatically performed.
39
● You can also access this function by using the menu button.(
PC mode)
● Perform this function while on a stationary image because you may not get the best
video quality on a moving image from a PC graphic signal.
● This function should be performed using a stationary image from the PC.
Page 41

TITLE
Clock / Phase Function
Clock / Phase Function
● Clock Function
This function adjusts the horizontal width of the projected image to enable the image to fit on the screen size.
● Phase Function
This function is for the detailed adjustment of the clock function.
Press the menu button and move the pointer button up or down to select the TRACKING
menu.
1
MenuMenu
exit move enter
G
VIDEO
G
POSITION
G
SPECIAL
G
TRACKING
Press the enter button and move the pointer button up or down to select the Clock or Phase
item.
2
MenuMenu
exit move adjust
G
VIDEO
G
POSITION
G
SPECIAL
E
TRACKING
Auto Tracking
Clock
Phase
00
Move the pointer button left or right or press the volume buttons to adjust the screen condition.
3
●
To exit the menu display, press the menu button repeatedly.
TRACKING
40
Page 42
Adjusting Video
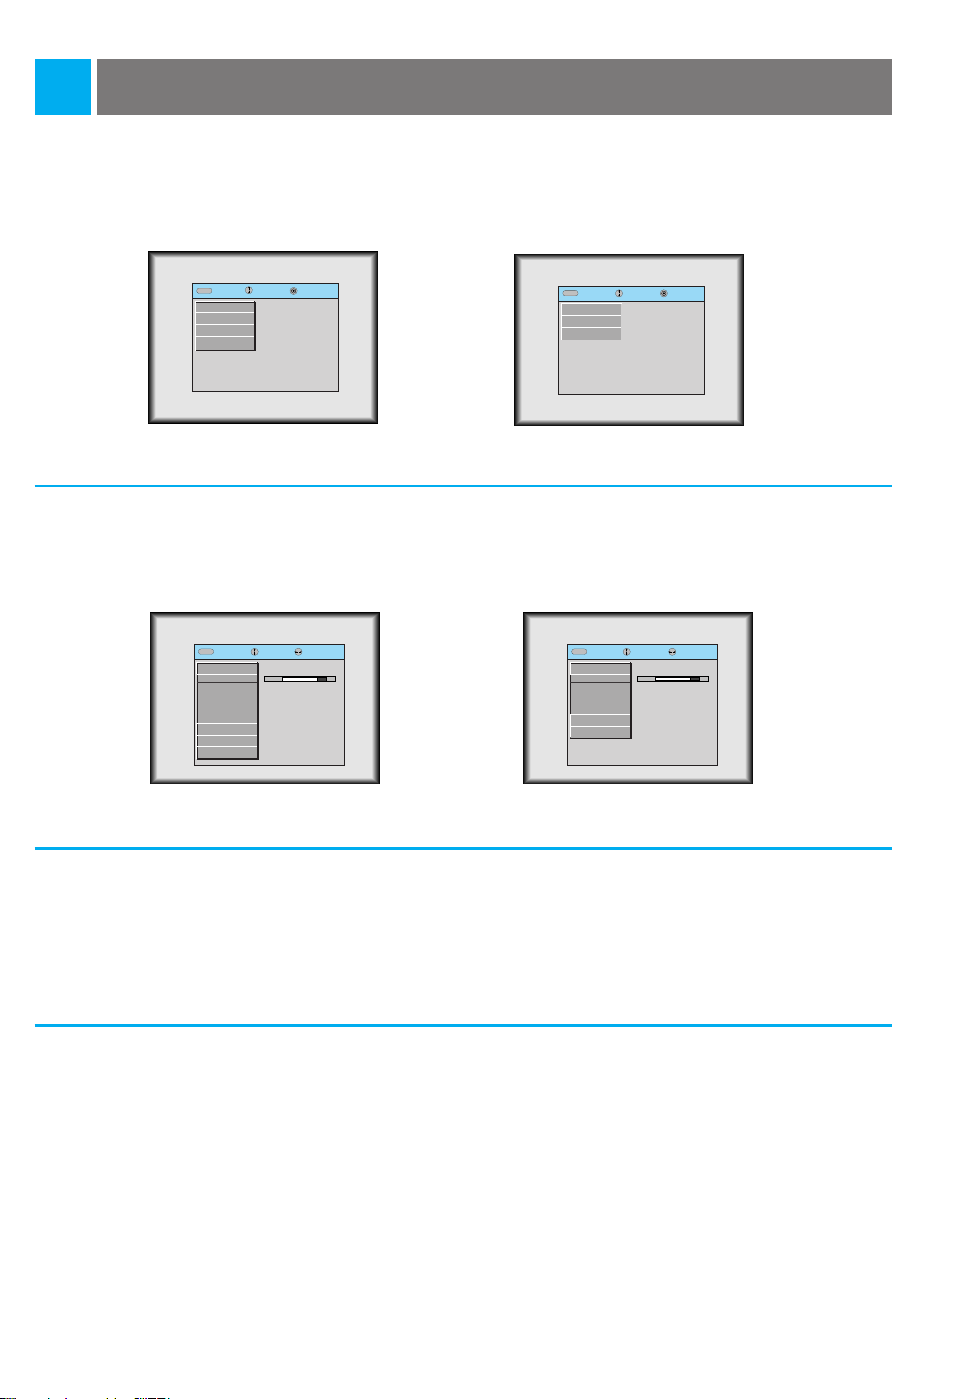
Press the menu button and move the pointer button up or down to select the VIDEO menu.
1
Press the enter button.
2
PC Mode
MenuMenu
exit move enter
G
VIDEO
G
POSITION
G
SPECIAL
G
TRACKING
PC Mode
AV Mode
MenuMenu
exit move enter
G
VIDEO
G
POSITION
G
SPECIAL
AV Mode
MenuMenu
exit move adjust
E
VIDEO
Contrast
Brightness
Color R
Color G
Color B
Reset
G
POSITION
G
SPECIAL
G
TRACKING
8080
MenuMenu
exit move adjust
E
VIDEO
Contrast
Brightness
Color
Tint
Reset
G
POSITION
G
SPECIAL
8080
Move the pointer button up or down to select the desired video item.
3
Move the pointer button left or right or press the volume buttons to adjust the selected video
item:
4
●
To restore the original image condition select the Reset item and press ENTER.
●
To exit the menu display, press the menu button repeatedly.
41
Page 43
Supported Monitor Display
Sources Format Vertical Freq.(Hz) Horizontal Freq. (kHz)
VGAEGA 640X350 70.090Hz 31.468kHz
640X350 85.080Hz 37.861kHz
PC98 / VGA text 640X400 85.080Hz 37.861kHz
720X400 70.082Hz 31.469kHz
720X400 85.039Hz 37.927kHz
VGA 640X480 59.940Hz 31.469kHz
640X480 66.667Hz 35.00kHz
640X480 72.800Hz 37.861kHz
640X480 75.00Hz 37.500kHz
640X480 85.008Hz 43.269kHz
640X480 100.040Hz 53.011kHz
640X480 120.00Hz 64.062kHz
SVGA 800X600 56.250Hz 35.156kHz
800X600 60.317Hz 37.879kHz
800X600 72.188Hz 48.077kHz
800X600 75.00Hz 46.875kHz
800X600 85.061Hz 53.674kHz
800X600 90.00Hz 56.00kHz
800X600 100.00Hz 64.016kHz
XGA 1024X768 43.479Hz 35.522kHz
1024X768 60.004Hz 48.363kHz
1024X768 70.069Hz 56.476kHz
1024X768 75.029Hz 60.023kHz
1024X768 84.997Hz 68.677kHz
SXGA 1152X864 60.053Hz 54.348kHz
1152X864 70.016Hz 63.995kHz
1152X864 75.00Hz 67.500kHz
1152X864 85.057Hz 77.487kHz
1280X960 60.00Hz 60.00kHz
1280X960 75.00Hz 75.00kHz
1280X960 85.002Hz 85.938kHz
1280X1024 60.020Hz 63.981kHz
1280X1024 75.025Hz 79.976kHz
1280X1024 85.024Hz 91.146kHz
UXGA 1600X1200 60.00Hz 75.00kHz
MAC 16
¥
832X624 74.550Hz 49.725kHz
19
¥
1024X768 60.004Hz 48.363kHz
1024X768 75.029Hz 60.023kHz
20
¥
1152X870 75.062Hz 68.681kHz
HD 1920X1080i 60.00Hz 33.750kHz
1280X720p 60.00Hz 45.00kHz
● The projector displays images at a resolution of 1024 x 768 pixels. To display higher resolution images
(1152 x 864 mode, 1280 x 1024 mode), the projector compresses it to 1024 x 768. The following table lists the
display formats supported by the projector.
● If the projector does not support the input signal, the OUT OF RANGE message will appear on the screen.
● The projector supports DDC1/2B type as Plug & Play function.(Auto recognition of PC monitor)
INFORMA TION
42
Page 44

Maintenance
●
The projector requires very little maintenance. You should keep the lens clean because any dirt or stains may
appear on the screen. Clean the air filter attached at the bottom of the projector periodically because a
clogged air filter prevents proper ventilation that is necessary to cool the projector and prevents it from overheating. If any parts need to be replaced, contact your service center.
●
When cleaning any part of the projector, always turn the power off and unplug the projector first.
Cleaning the lens
Cleaning the lens
Clean the lens if dirt or dust appears on the surface of it. Wipe the lens surface gently with a soft, dry lint-free
cloth, or use an air spray.
To remove dirt or stains on the lens, moisten a soft cloth with water and a neutral detergent and wipe the lens
surface gently.
Cleaning the Projector Case
Cleaning the Projector Case
To remove dirt or dust, wipe the casing with a soft, dry, lint-free cloth. To remove stubborn dirt or stains, moist en a soft cloth with water and a neutral detergent and then wipe the casing.
Do not use alcohol, benzene, thinners or other chemical detergents as these can cause damage to the case.
Cleaning the
Cleaning the
The air filter, which is located at the bottom of the projector, should be cleaned after every 100 hours of use.
If it is not cleaned periodically, it can become clogged with dust and prevent the projector from being ventilated properly. This may cause overheating and damage of the projector.
To clean the air filter :
1. Stand the projector on its side so that the handle is on the top, and you can easily access the air filter.
2. Push the opening tip of the air filter cover and remove the cover.
3. To clean the filter, use a small vacuum cleaner designed for computers or other office equipment. Or you
may use a dry, lint-free cloth.
If it is difficult to remove dirt or the filter is torn, contact your the service center for replacement.
4. Close the filter cover after cleaning.
Air Filter
Air Filter
43
Page 45

Troubleshooting
Before calling for service, please check the following symptoms/solutions.
You may be able to avoid a service call.
Symptom Cause Solution Page
Operation indicator -Power Cable is loose. • Tighten power cable securely to projector 25
does not light. and power outlet.
Projected image -Lamp is about to fail. • Contact service center to replace lamp. 13
gets darker or
deteriorates.
Temperature -Cooling fan not working. • Contact service center. 13, 43
indicator is red. -Internal circuits damaged. • Contact service center.
-Air filter clogged. • Clean air filter.
-Room is hot. • Cool off room.
No image -Power off. • Turn power on. 15 - 23
appears on-screen. -Lens cap on. • Remove lens cap.
-Source not selected/off. • Select correct source, turn source on.
-Unit warming up. • Lamp at full power after 40 seconds.
Menu will not appear. -Source not connected. • Connect source. 15 - 22, 27
“NO SIGNAL” -Source not connected. • Connect source. 15 - 22, 27
message appears. -Source not sending • Check all connections.
out a signal. • Check source operation.
“OUT OF RANGE” -Not a supported format. • Change to supported format. 42
message appears. • Change format of source signal output.
No sound. -Volume level too low. • Increase sound level. 15 - 23
-Connection problem. • Connect cables securely.
Image color is wrong. -Incorrect color balance. • Adjust color balance. 41
-Wrong video settings. • Adjust Video menu options.
Blurred or out of -Out of focus or position. • Focus and position image on screen. 23 - 24
focus image. -Tracking wrong. • Adjust tracking. 39
-Lens dirty. • Clean lens, see maintenance. 43
INFORMA TION
44
Page 46

Memo
45
Page 47
Specifications.
LXG-120
0.9 in. (22.9 mm)
1024 (Horizontal) x 768 (Vertical) pixels
40-300 in. (1.01-7.6 m)
5.03-54.08 ft. (1.64-16.35 m.)
39.3 ft. (12 m)
1W
4:3 (horizontal:vertical)
1:1.3
NTSC/PAL/SECAM/NTSC4.43/PAL-M/PAL-N
AC 120V 60Hz
3.9 in. (98.5 mm) (including front foot)
9.3 in. (238 mm)
13.18 in. (329.5 mm) (including lens)
7.5 lbs. (3.4 kg)
Model
LCD panel size
resolution
screen size
projecting distance
remote control distance
speaker system
horizontal / vertical ratio
zoom ratio
Video Compatibility
Power
height
width
length
weight
Operating Condition
temperature
In operation : 32-104°F(0°C-35°C)
In storage and transit : -4-140°F(-20°C-60°C)
humidity
In operation : 20 - 80% relative humidity by dry hygrometer
In storage : 10 - 90% relative humidity by dry hygrometer
46
Page 48

P/NO : 3828VA0245G (3840VA0026E)
206-3671
 Loading...