


Workstation
Connect
User Guide
MN-004208-06EN Rev. A

ZEBRA and the stylized Zebra head are trademarks of Zebra Technologies Corporation, registered in
many jurisdictions worldwide. All other trademarks are the property of their respective owners.
© 2022 Zebra Technologies Corporation and/or its affiliates. All rights reserved.
Information in this document is subject to change without notice. The software described in this document
is furnished under a license agreement or nondisclosure agreement. The software may be used or copied
only in accordance with the terms of those agreements.
For further information regarding legal and proprietary statements, please go to:
SOFTWARE:zebra.com/linkoslegal
COPYRIGHTS:zebra.com/copyright
WARRANTY:zebra.com/warranty
END USER LICENSE AGREEMENT: zebra.com/eula
Terms of Use
Proprietary Statement
This manual contains proprietary information of Zebra Technologies Corporation and its subsidiaries
(“Zebra Technologies”). It is intended solely for the information and use of parties operating and
maintaining the equipment described herein. Such proprietary information may not be used, reproduced,
or disclosed to any other parties for any other purpose without the express, written permission of Zebra
Technologies.
Product Improvements
Continuous improvement of products is a policy of Zebra Technologies. All specifications and designs are
subject to change without notice.
Liability Disclaimer
Zebra Technologies takes steps to ensure that its published Engineering specifications and manuals are
correct; however, errors do occur. Zebra Technologies reserves the right to correct any such errors and
disclaims liability resulting therefrom.
Limitation of Liability
In no event shall Zebra Technologies or anyone else involved in the creation, production, or delivery of the
accompanying product (including hardware and software) be liable for any damages whatsoever
(including, without limitation, consequential damages including loss of business profits, business
interruption, or loss of business information) arising out of the use of, the results of use of, or inability to
use such product, even if Zebra Technologies has been advised of the possibility of such damages. Some
jurisdictions do not allow the exclusion or limitation of incidental or consequential damages, so the above
limitation or exclusion may not apply to you.
i

About This Document
Introduction
This guide provides information about developing applications for Zebra Workstation Connect.
IMPORTANT: If you have a problem with your equipment, contact Zebra Global Customer Support for
your region. Contact information is available at: zebra.com/support
Configurations
This guide covers the following configurations:
.
1
About This Document
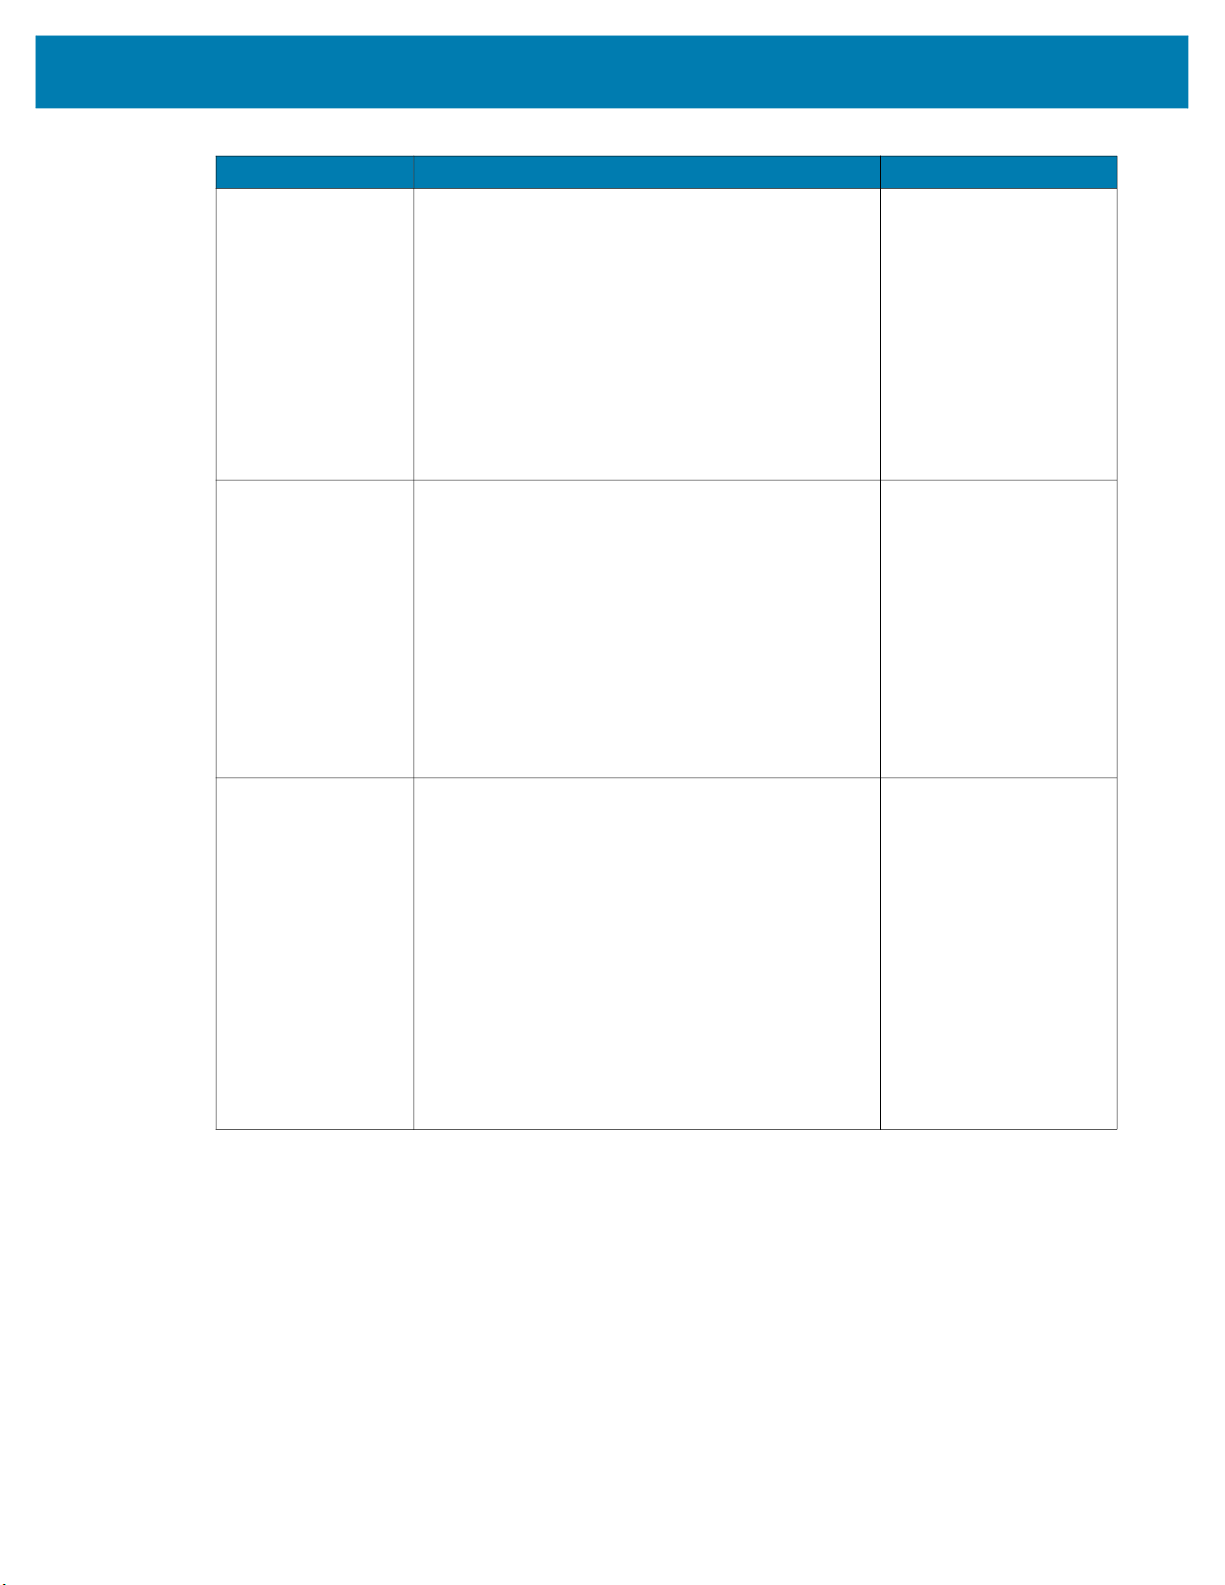
Configuration Description Device Compatibility
CRD-EC5X-1SWS-01 Workstation Docking Cradle Kit with Standard Cup,
HDMI, Ethernet, and multiple USB Ports.
Included in kit:
• Cradle
• (CRD-EC5X-1SWS-02),
• Power Supply
(i.e. PWRBGA12V50W0WW)
• DC Cable
(i.e. CBL-DC-388A1-01)
Country specific AC line cord sold separately.
CRD-TC5X-1SWS-01 Workstation Docking Cradle Kit with Standard Cup,
HDMI, Ethernet, and multiple USB Ports.
Included in kit:
• Cradle
(CRD-TC5X-1SWS1-01),
• Power Supply
(i.e. PWRBGA12V50W0WW)
• DC Cable
(i.e. CBL-DC-388A1-01)
Country specific AC line cord sold
separately.
CRD-ET5X-1SWS-01 Workstation Docking Cradle Kit with Standard Cup,
HDMI, Ethernet, and multiple USB Ports.
Included in kit:
• Cradle with Rugged I/O Adaptor
(CRD-ET5X-1SCOM2R)
• Cradle
(CRD-ET5X-1SCOM1)
• Power Supply
(i.e. PWRBGA12V50W0WW)
• DC Cable
(i.e. CBL-DC-388A1-01)
Country specific AC line cord sold
separately.
EC50 and EC55 Mobile
Computers
TC52, TC52x, TC57,
TC57x, TC52ax,
TC52x-HC and
TC52ax-HC Mobile
Computers
ET56 Mobile Computers
Supported Peripherals
Peripherals supported by the Zebra Workstation Cradle include:
• External touch and non-touch HDMI monitor
• USB-A Keyboard
• USB-A Mouse
• USB-A Headsets and Headphones
• Zebra External Scanners (connected via USB-A):
2

• DS9308, DS9908, DS8108, DS4608, DS2208, DS2278, DS3678-SR, DS3608-SR, and
DS9308-SR.
NOTE: For ET5x tablets, headsets can be connected via the USB-C port on the tablet. USB-A headsets or
headphones connected to the USB-A ports of the communication cradle are not supported.
Revision History
Changes to the original guide are listed below:
Change Date Description
-06 Rev A 8/22 Feature updates in this version include:
About This Document
• Shortcut Folder Grouping
• Reset ZWC Configurations
• Customization of Shortcut Icons
• Ctrl + and Ctrl - to Zoom in or out while using Chrome
• Lock UI Feedback
• Troubleshooting
-05 Rev A 5/22 Feature updates in this version include:
• Kiosk Mode
• Disable Freeform Windows
• Expanded SIP behavior
• Application notifications
• ALT + Tab shortcut to cycle through certain foreground applications on
the mobile device
-04 Rev A 3/22 Feature updates in this version include:
• Alt+F4 keyboard shortcut support
• Application shortcut groups
• Copy screen capture to clipboard
-03 Rev A 12/21 Feature updates in this version include:
• Relaunch and reset
• Keyboard commands
• Screen capture
• Creating a shortcut for a website or file
• Audio Path Routing best practices
3

About This Document
Change Date Description
-02 Rev A 10/21 Feature updates in this version include:
• Advanced application permissions on desktop home screen
• Enable or disable the All Apps button on desktop taskbar
• Enable or disable mobile device running applications icons on desktop
taskbar
• Access to device settings from the taskbar status icons
• Soft Input Panel (SIP) taskbar icon
• Configuration of the external keyboard layout
• DS9308 USB scanner support (ET56 Only)
-01 Rev A 8/21 Initial Release
4

Service Information
If you have a problem with your equipment, contact Zebra Global Customer Support for your region.
Contact information is available at zebra.com/support
When contacting support, please have the following information available:
• Serial number of the unit
• Model number or product name
• Software/firmware type or version number
Zebra responds to calls by email, telephone or fax within the time limits set forth in support agreements.
If your problem cannot be solved by Zebra Customer Support, you may need to return your equipment for
servicing and will be given specific directions. Zebra is not responsible for any damages incurred during
shipment if the approved shipping container is not used. Shipping the units improperly can possibly void
the warranty.
If you purchased your Zebra business product from a Zebra business partner, contact that business
partner for support.
About This Document
.
5

Contents
About This Document ........................................................................................................................ 1
Introduction ...................................................................................................................... 1
Configurations.................................................................................................................. 1
Supported Peripherals ..................................................................................................... 2
Revision History ............................................................................................................... 3
Service Information ......................................................................................................... 5
Zebra Workstation Connect Features............................................................................................... 8
Workstation Connect User Interface Overview ................................................................ 8
Supported Keyboard Commands..................................................................................... 9
Opening Applications ..................................................................................................... 10
Using the All Applications Button ................................................................................... 11
Running Applications on the External Monitor and on the Mobile Device...................... 13
Relaunching and Resetting Applications ................................................................ 16
Lock Screen Notification......................................................................................... 17
Application Notifications ......................................................................................... 18
Best Practices for Kiosk Application Behavior ............................................................... 18
Using the Navigation Buttons on the Taskbar................................................................ 19
Using the Desktop Home Screen Menu ................................................................................. 20
Adding a Shortcut for an Application, Website, or File ........................................... 21
Customizing Shortcut Icons ............................................................................. 23
Creating Shortcut Groups....................................................................................... 26
Drag and Drop Shortcuts From One Group to Another......................................... 27
Exporting All Shortcuts ........................................................................................... 29
Removing Shortcuts ............................................................................................... 30
Changing the Home Screen Wallpaper .................................................................. 31
Suspend and Lock the Mobile Computer ............................................................... 31
Docking and Undocking Behavior.................................................................................. 32
Using the Notification Icon and Panel ........................................................................... 34
Using Status Icons ......................................................................................................... 35
Battery Status Settings UI ...................................................................................... 36
6

Wi-Fi Settings UI..................................................................................................... 37
Bluetooth Settings UI.............................................................................................. 39
Using the Audio Settings Icon....................................................................................... 40
Best Available Audio Output Paths......................................................................... 42
Soft Input Panel (SIP) Hover Text................................................................................. 43
Screen Capture............................................................................................................. 44
Screen Dimming............................................................................................................. 46
Resetting Configurations............................................................................................................46
Troubleshooting .............................................................................................................................. 48
7

Zebra Workstation Connect Features
Zebra Workstation Connect is a powerful value-add software solution for workers to transform Zebra
mobile computers into mobile-driven workstations, doubling the functionality of their devices and
increasing workforce productivity. Administrators can optimize the application’s user experience by altering
the application configuration to fit a specific use case. For more configuration information, refer to the
Workstation Connect Administrator’s Guide.
This document describes the default features of Zebra Workstation Connect. These tasks can be
performed on an external monitor while connected to peripherals, including keyboard, mouse, and
headsets.
NOTE: The features described in this section are available strictly on devices that are enabled to run
Zebra Workstation Connect and configured by an administrator.
Workstation Connect User Interface Overview
Workstation Connect provides interface options on a desktop home screen presented on an external
monitor that allows users to carry out various tasks, including creating application shortcuts, changing the
wallpaper of the desktop home screen, interacting with running applications, controlling audio output, and
managing application notifications.
8

Zebra Workstation Connect Features
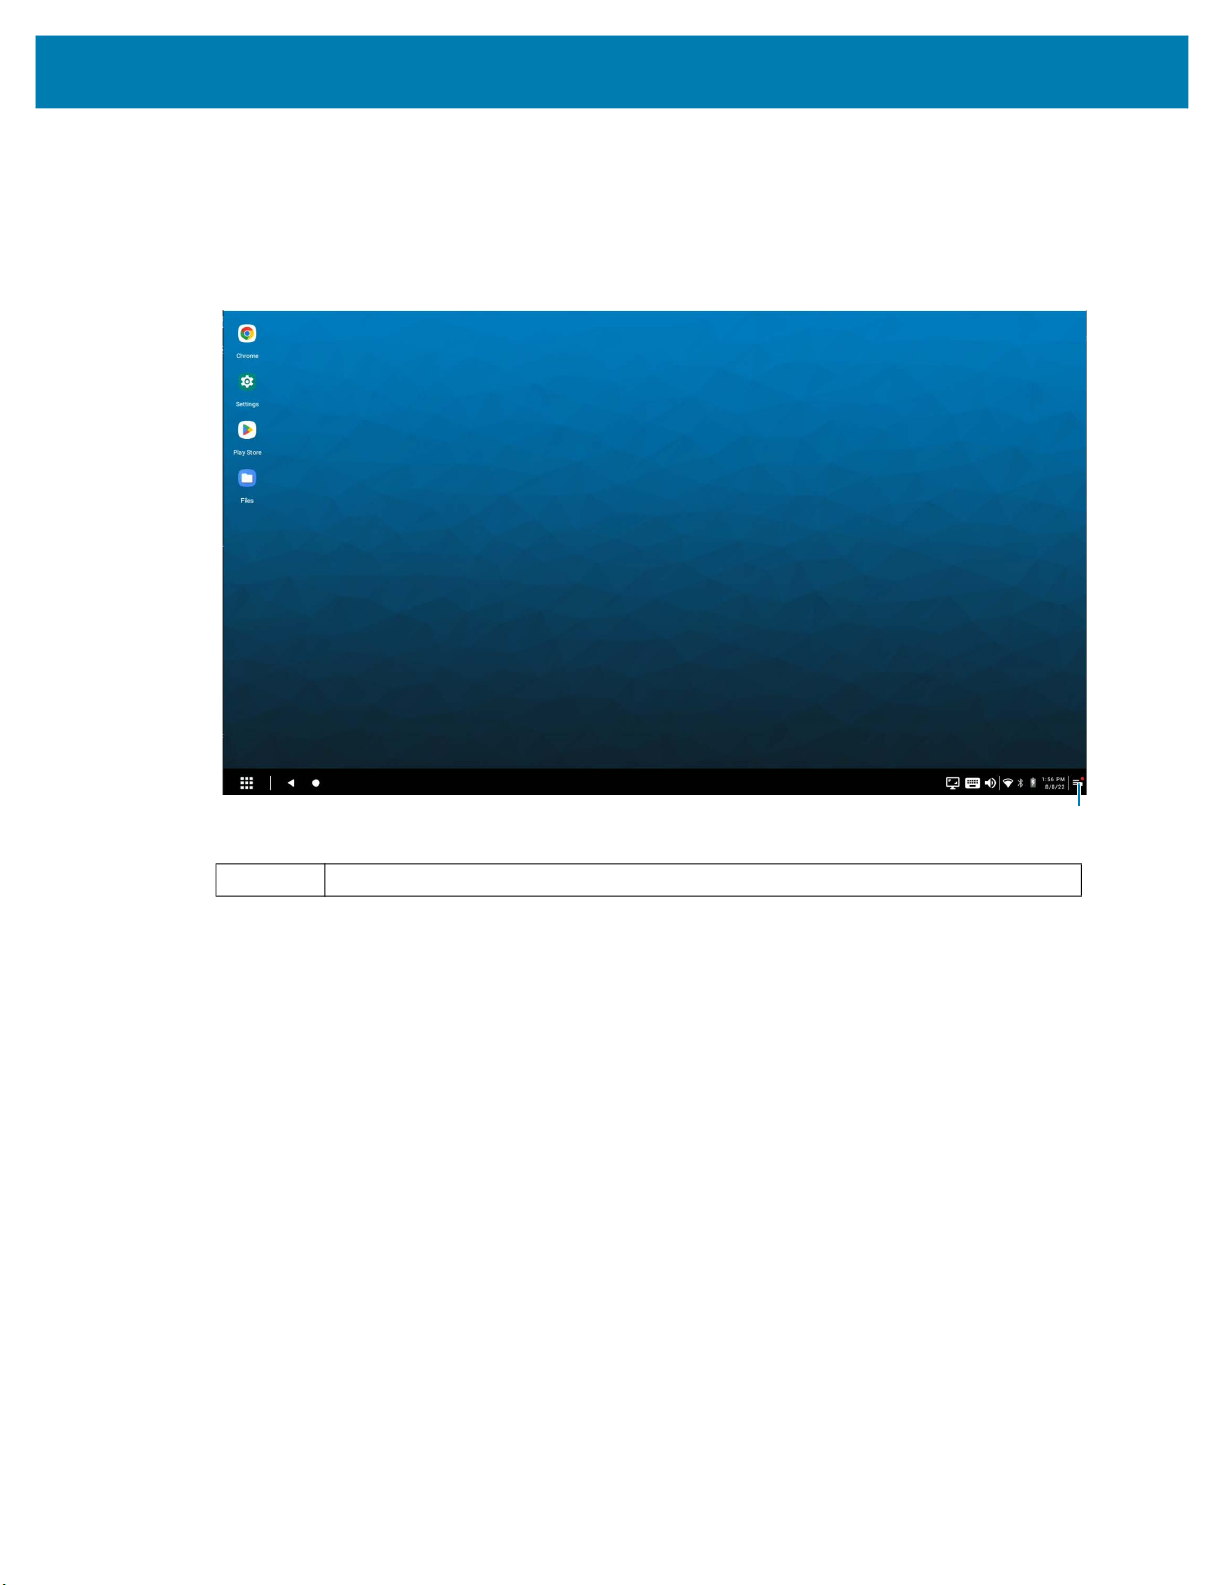
Figure 1 Workstation Connect UI Overview
All
Applications
1 All Applications
2 Status Icons
3 Notification Icons
Supported Keyboard Commands
Workstation Connect supports keyboard shortcuts when using an external keyboard to carry out specific
tasks when enabled by the administrator configuration.
Table 1 Workstation Connect Supported Keyboard Shortcuts
Command Action
Print Screen Initiates screen capture of the secondary display contents only.
A screen capture of the primary display contents can also be captured using
a separate mechanism invoked from the device UI.
Refer to the User Guide for additional information about the device being
used with Workstation Connect.
Windows + L Suspends the mobile device, causing both the primary and secondary
displays to be shut off.
When the device is active, it may or may not be locked depending on the lock
settings configured by the administrator.
For additional information on wake up behavior, go to Suspend and Lock the
Mobile Computer.
Alt + F4 Closes specific applications in the foreground on the secondary display only.
This action preserves the previous state of the application before closing.
Alt + Tab Displays supported applications running in the foreground and cycles
through them using the arrow keys on the keyboard.
Status Icons
Notification Icon
9
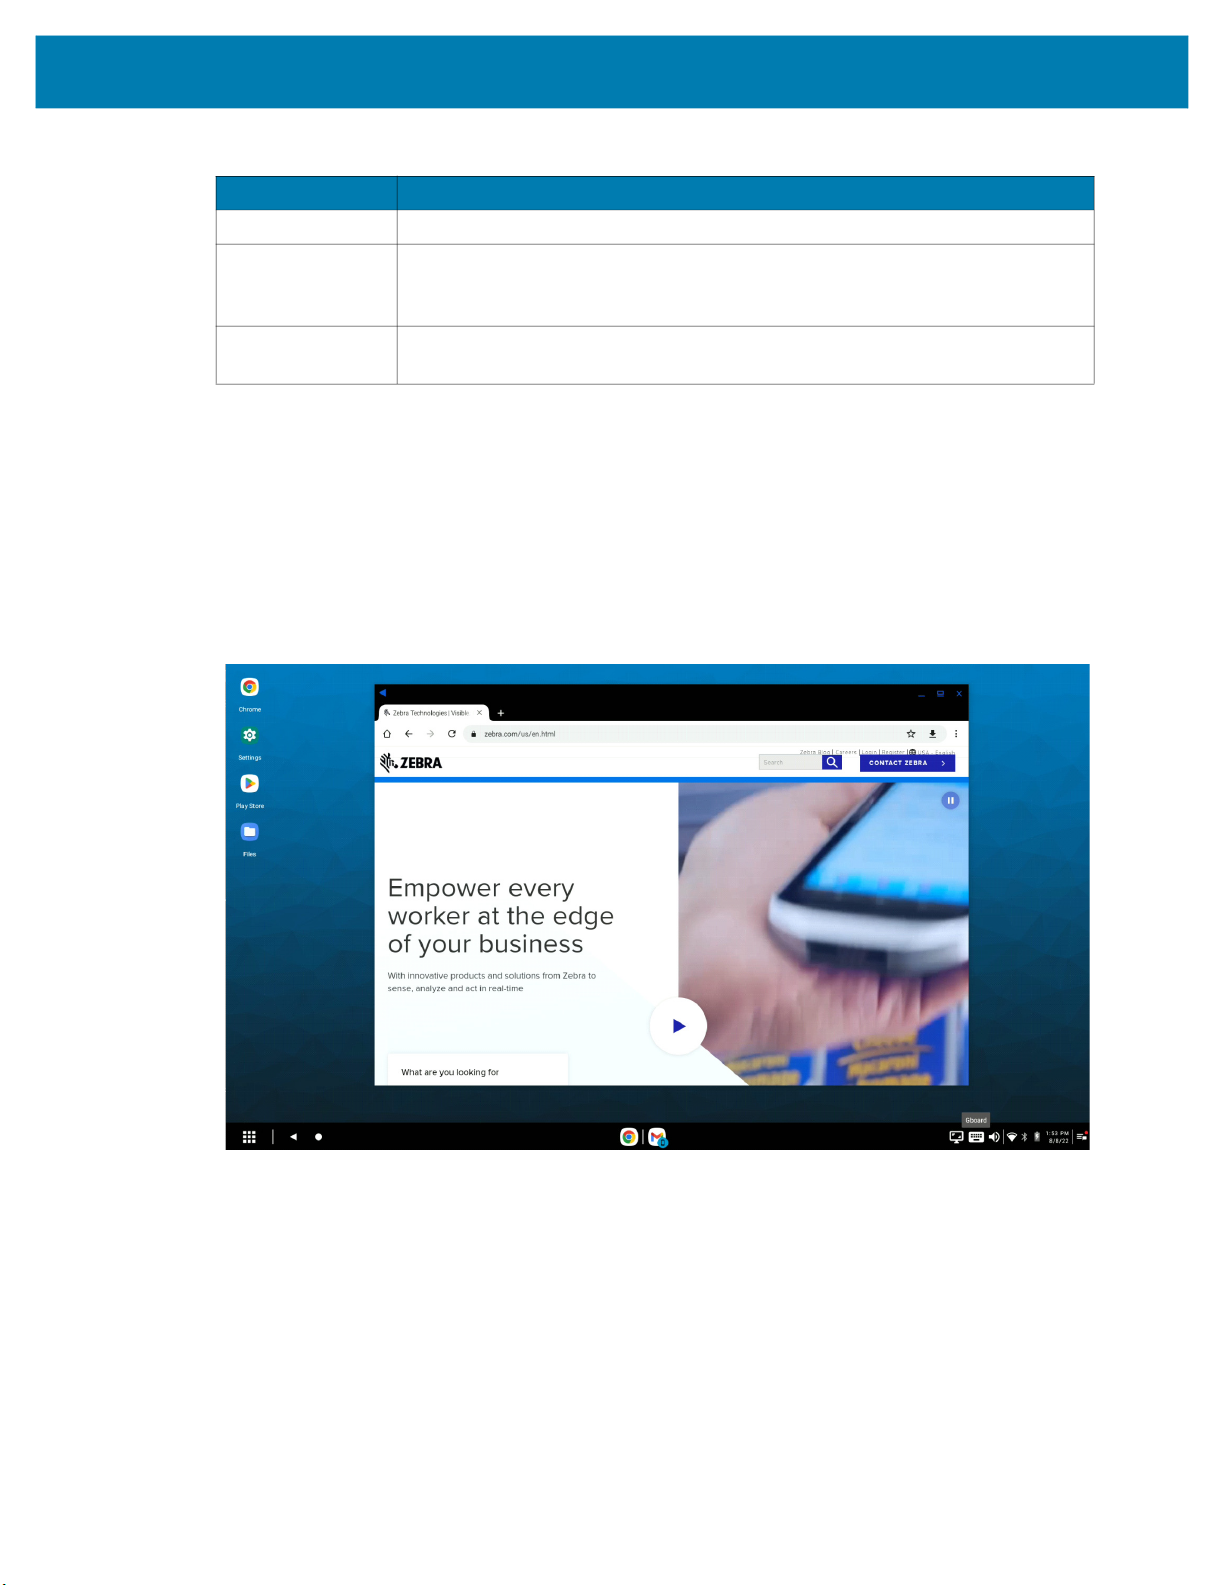
Table 1 (Continued)Workstation Connect Supported Keyboard Shortcuts
Command Action
Ctrl + and Ctrl - Zooms in or out while using Chrome.
Spacebar (twice) Wakes up the device from suspend mode and automatically presents the
Esc Acts as a Back button on the desktop screen for an application in focus
Opening Applications
When an application is launched for the first time on the desktop home screen, it displays on an
independent and resizable window. If the application has previously run on the desktop, it opens in its
initial display state unless the application was closed while minimized. The top icons on the right side of the
window allow the user to see the application in full screen or close the application. Clicking/tapping and
dragging any of the side or bottom edges of the application window resizes the window.
Figure 2 Application Launched from the Desktop Home Screen
Zebra Workstation Connect Features
lock screen to enter the PIN or password without touching the device,
mouse, or monitor touch panel.
mode.
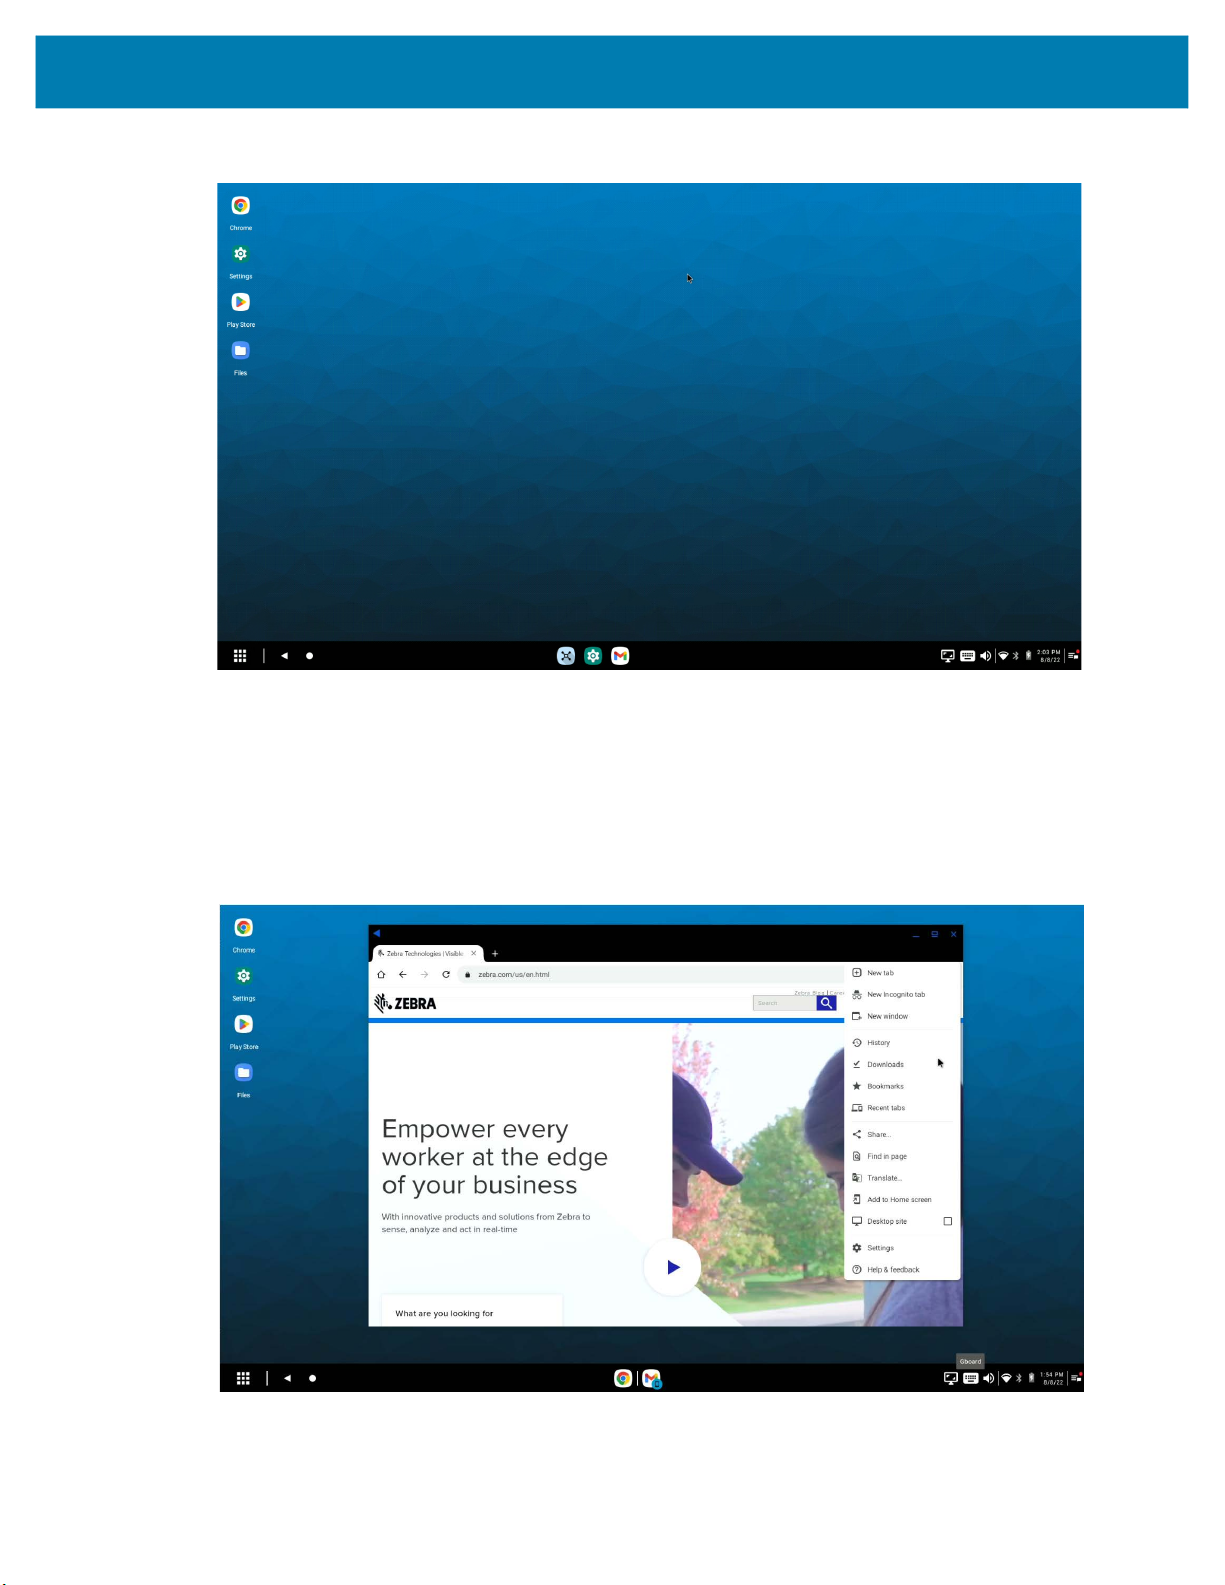
If an application is viewed on Chrome, the three dots on the top right side of the browser window open a
menu that presents the Desktop Site option. This option presents the web page or web-based application
with a desktop UI. This causes Chrome to identify itself as a desktop client instead of a mobile client.
Therefore, the browser produces a different result only if the web page or web-based application defines
additional page content or layout for mobile and desktop clients.
10
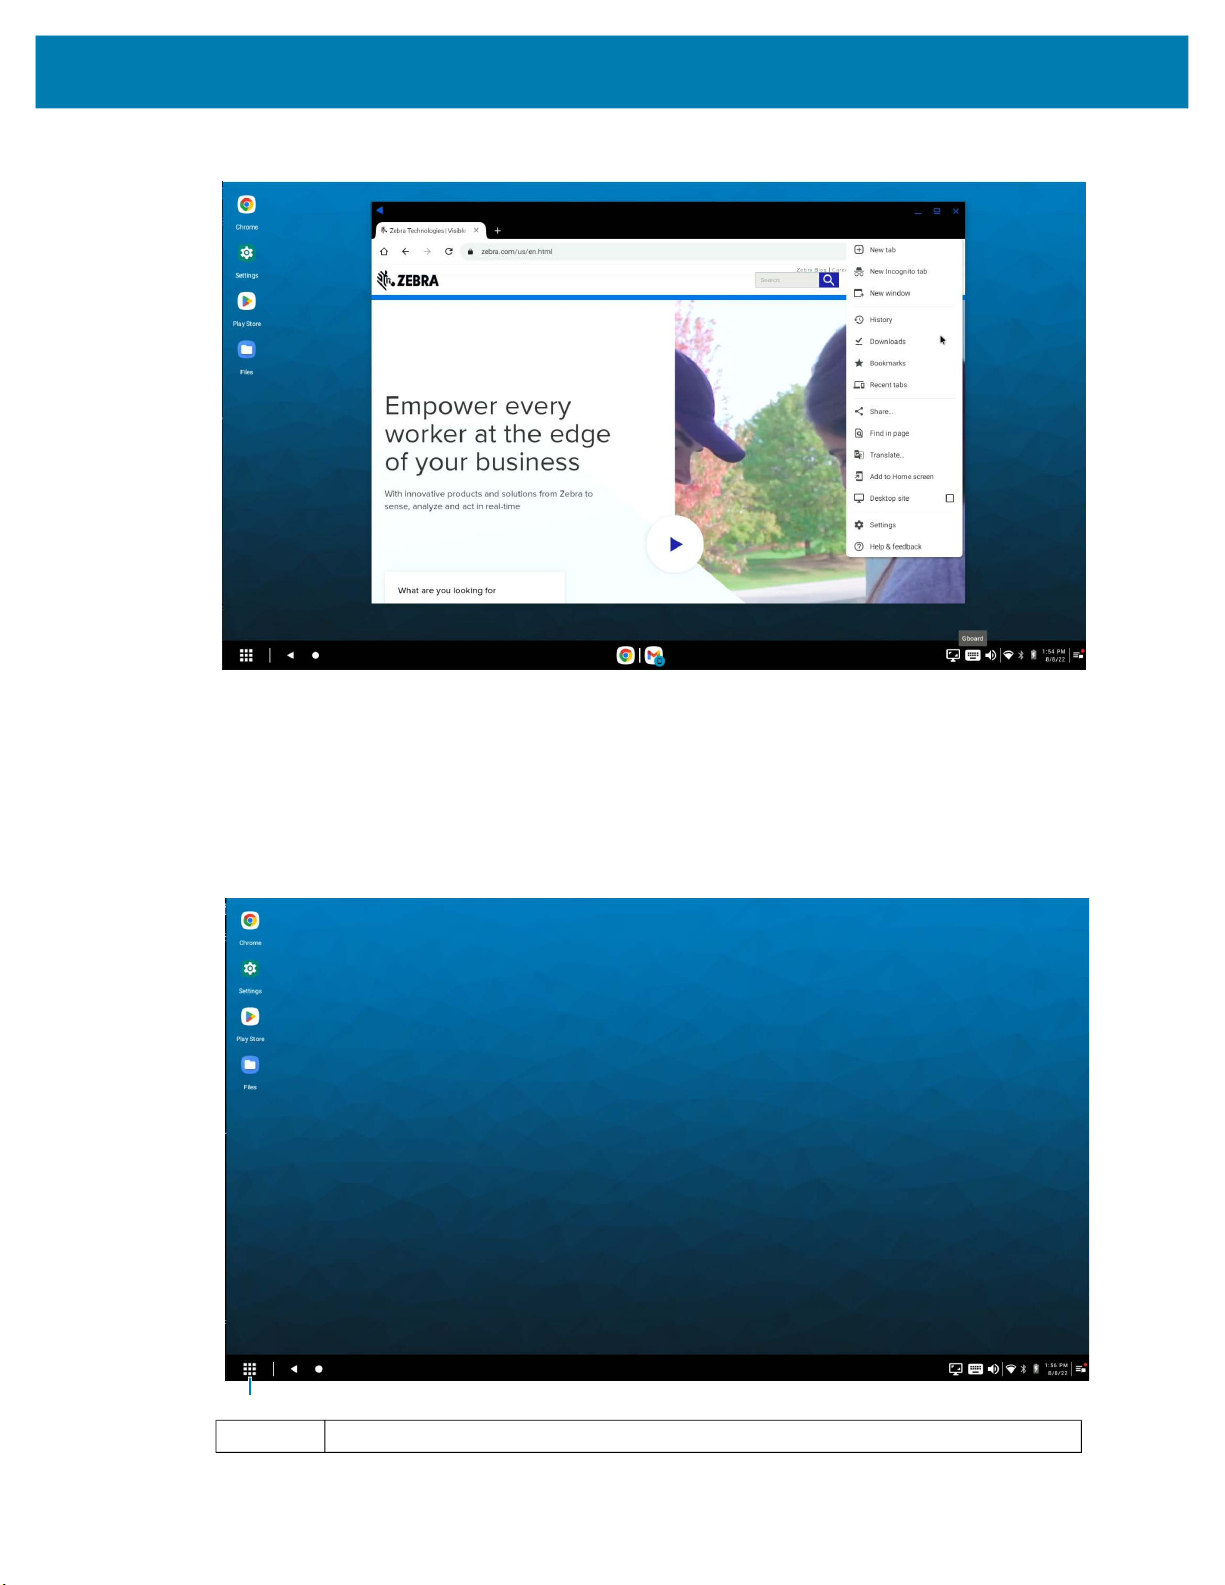
Zebra Workstation Connect Features
Figure 3 Web Based Application UI
Using the All Applications Button
The following displays on the external monitor when the mobile computer is docked in the Zebra
Workstation Cradle. Users can view the taskbar at the bottom of the screen with the All Applications button
on the left.
Figure 4 All Applications Button
1
1 All Applications Button
11
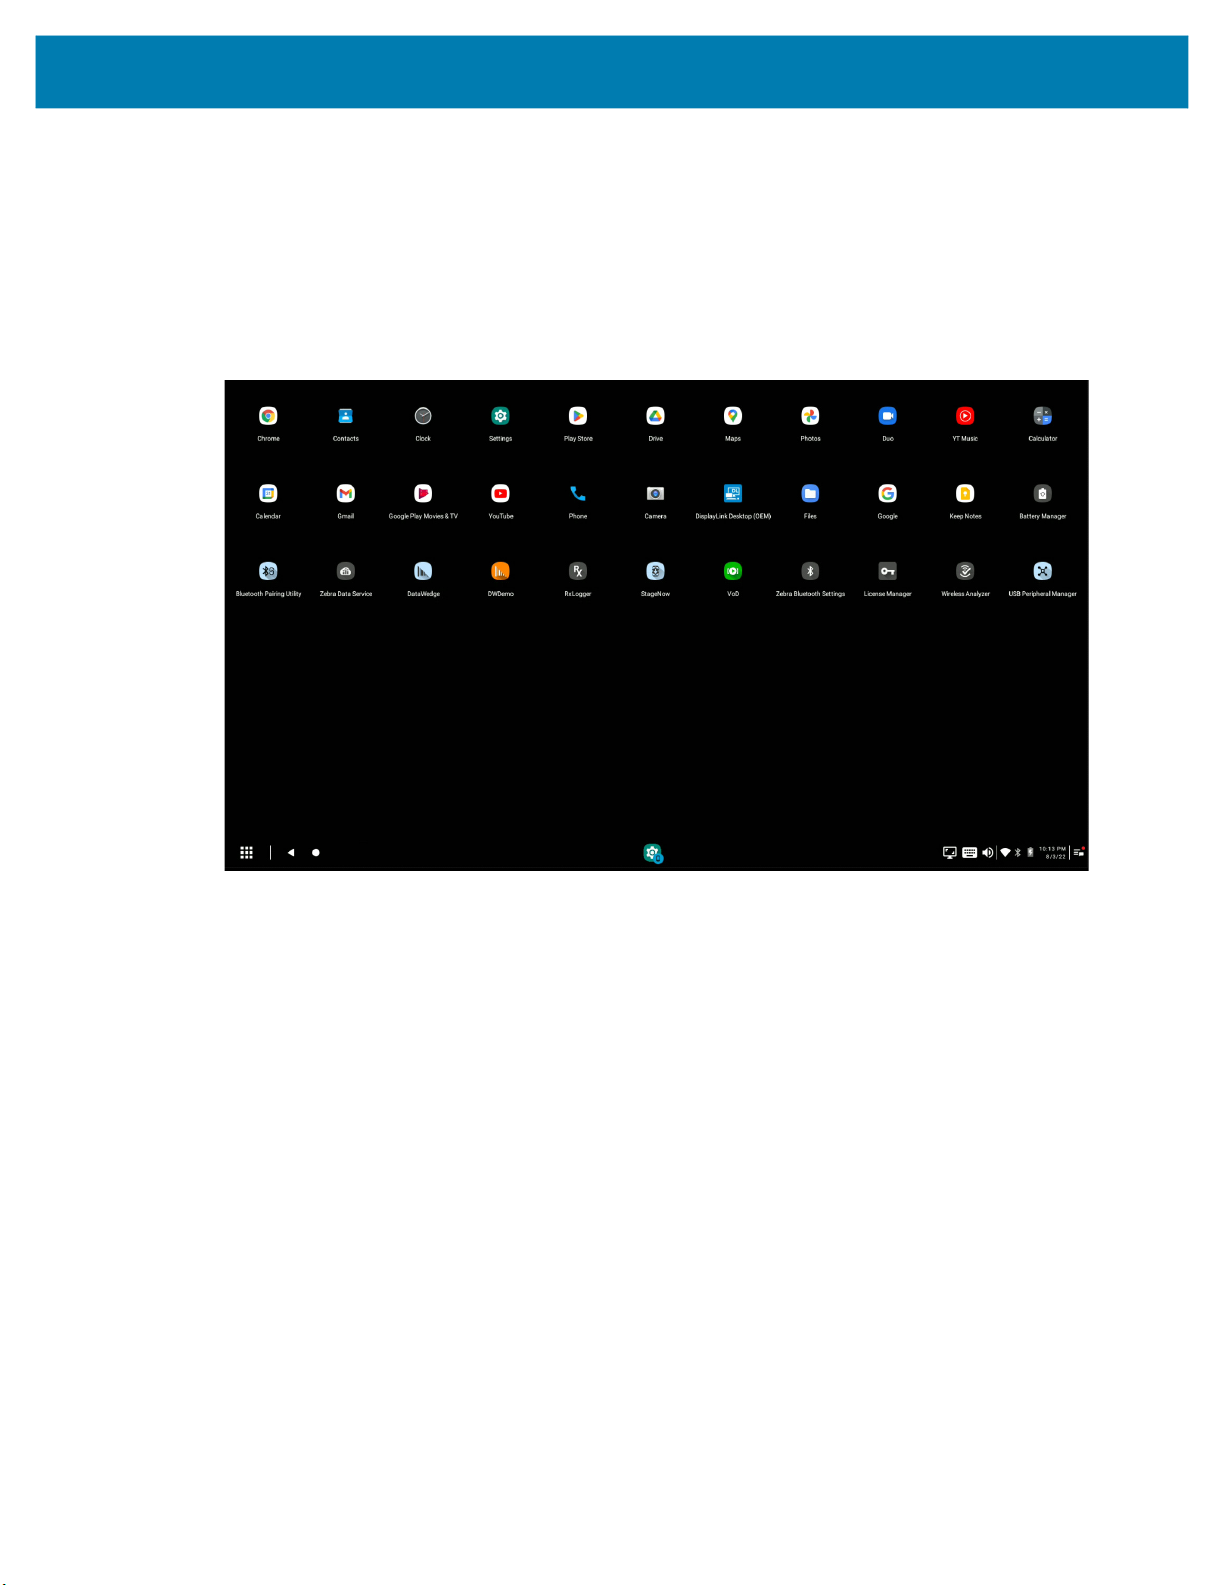
Zebra Workstation Connect Features
The All Applications button allows the user to access all the available applications on the device for use
on the external monitor. Once an application icon is clicked (a single mouse click or a single tap if using a
touch monitor), the application launches on the desktop. An application icon appears on the taskbar to
indicate that the application is running on the desktop home screen. If the administrator configures
advanced application permissions, only applications that are permitted to be launched on the desktop
home screen appear on the All Applications panel. Click or tap the All Applications button to dismiss the
All Applications panel if it is currently displayed.
Figure 5 All Applications Panel
When the administrator disables the All Applications button, the icon is unavailable and displayed to the
user as disabled, as shown in the image below.
12
Zebra Workstation Connect Features
Figure 6 Disabled All Applications Icon
1
1 All Applications Button (Disabled)
Running Applications on the External Monitor and on the Mobile Device
When an application runs on the desktop home screen, an associated icon is on the taskbar for that
application. Any application running on the desktop is in one of three states at any given time:
• Minimized (not showing),
• Maximized (showing at maximum size),
• Restored (showing at selected size).
Clicking the application icon on the taskbar toggles between showing (either maximized or restored,
depending on its last state) and not showing.
Clicking on an application icon that is currently showing minimizes the application. When the application is
minimized, an additional click (or tap) on the taskbar icon of the same application is required to restore the
application on the desktop home screen.
13

Zebra Workstation Connect Features
Figure 7 Moving Desktop Applications to the Mobile Device
1
2
1 Desktop Applications
2 Mobile Applications
A vertical line separates desktop and mobile application icons on the taskbar. Desktop applications display
on the left side of the line, and mobile applications are on the right side with a blue mobile badge on the
application icon.
14

Zebra Workstation Connect Features
Figure 8 Mobile Application Shortcuts
1
1 Blue Mobile Badge
A right-click using the mouse (or a tap and hold if using a touch monitor) on any taskbar icon brings up a
menu for the corresponding application. The menu options can be used to relaunch and reset an
application, move it to the mobile device screen or the external monitor, or close the application if the
administrator has configured advanced application permissions. Only applications that are permitted to
move between the mobile computer screen and the desktop home screen display this option as enabled
on the home screen menu from the taskbar icon.
If the administrator disables the user’s ability to view mobile application icons on the desktop taskbar. In
that case, these icons are not visible on the right side of the taskbar, as shown in Figure 8. This prevents
the user from moving applications from the mobile device screen to the desktop home screen from the
taskbar, closing an application running on the mobile device screen, and resetting the application window
size on the mobile device screen.
15

Zebra Workstation Connect Features
Figure 9 Desktop Home Screen With Mobile Applications Disabled
Relaunching and Resetting Applications
To relaunch or reset an application, right-click on the application icon on the taskbar to access its context
menu. When this option is selected, the currently running application closes and reopens in its default size
and position. All application data left unsaved before selecting the Relaunch and Reset option is lost.
Figure 10 Relaunch and Reset Contextual Menu
16
Zebra Workstation Connect Features
NOTE: If the Administrator has disabled the ability to resize applications, each application window is
opened in full screen and remains in that state until it is minimized or closed. Windows are not resizable
if free-form window functionality is disabled.
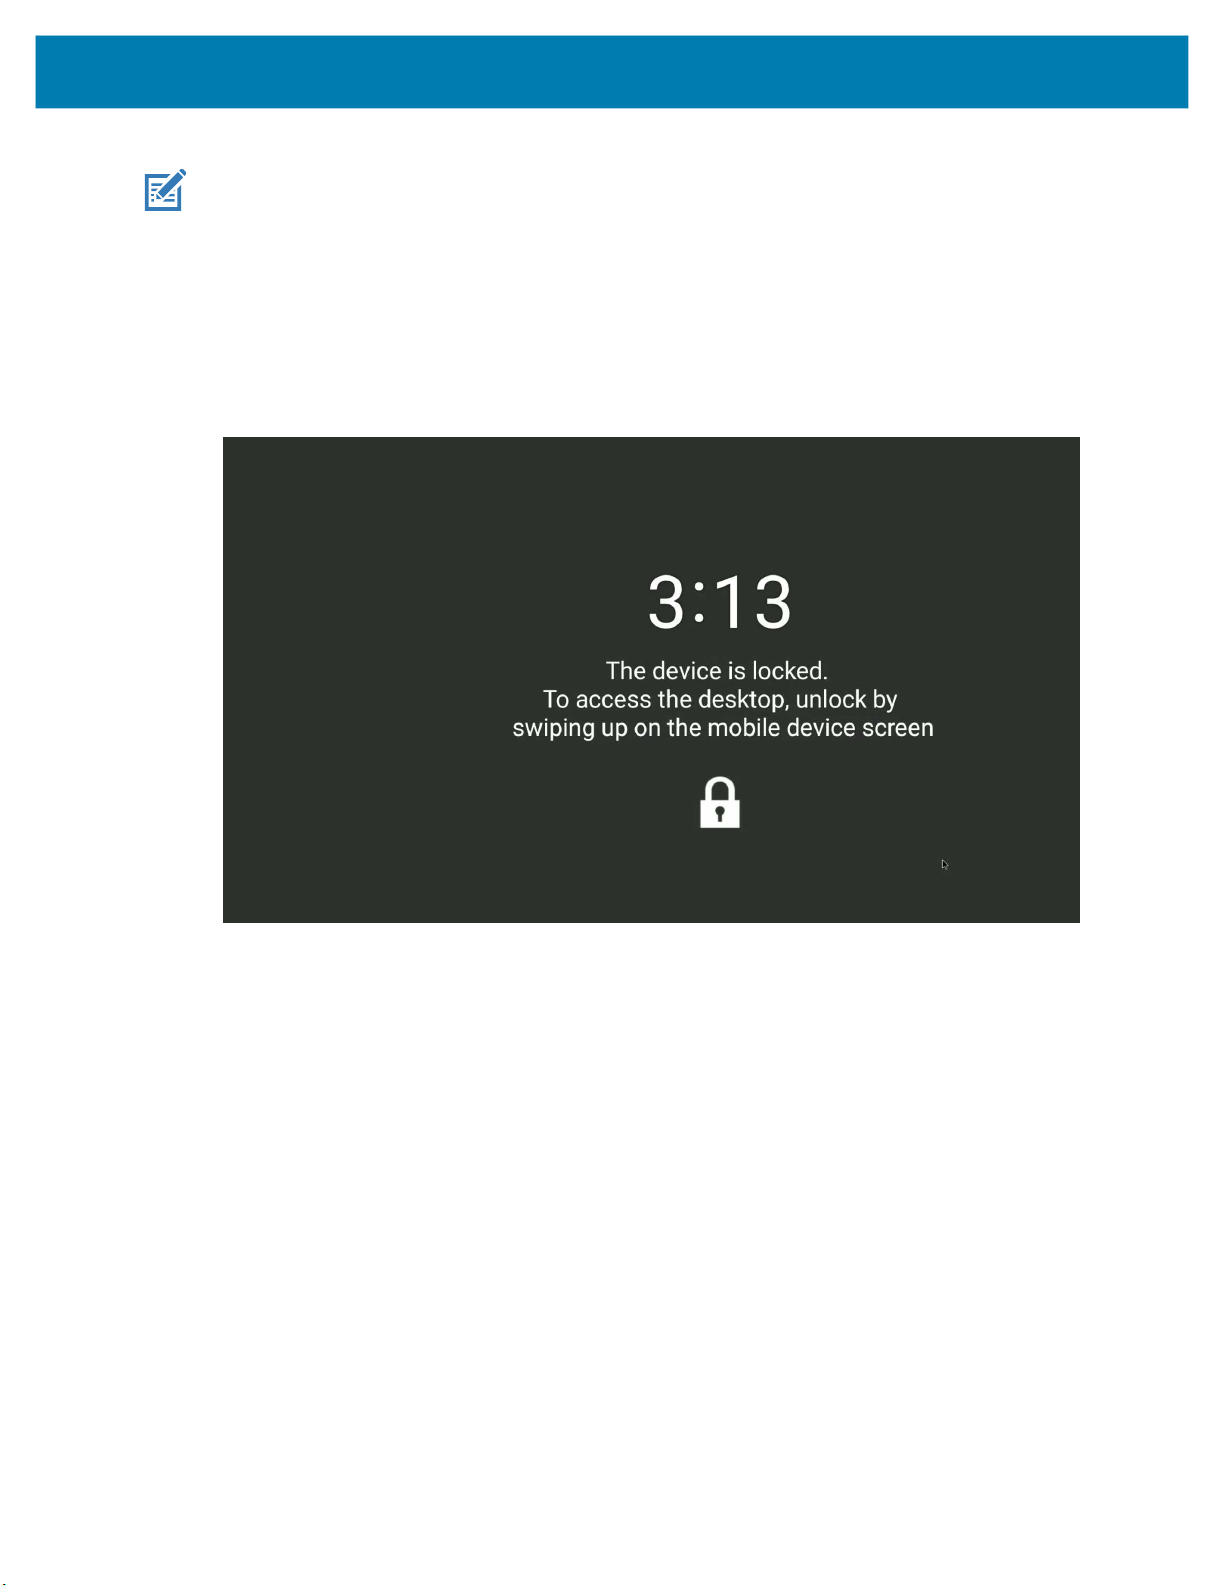
Lock Screen Notification
When the device is docked and locked the external monitor displays a message on the lock screen
directing the user to unlock the device.
Figure 11 Lock Screen
17

Zebra Workstation Connect Features
Application Notifications
When an application running on the desktop generates a notification, a solid red dot displays on top of the
application indicating that there are new notifications to view.
Figure 12 Application Notifications
Best Practices for Kiosk Application Behavior
For use cases that necessitate Workstation Connect operating as a kiosk that runs a non-transactional
application such as a loyalty reward program, specific components of the application can be disabled to
meet this requirement. In this state, UI elements such as freeform windows, application shortcuts, or
toolbar icons are disabled to allow a steady state application or sleep screen to run without interaction with
the desktop experience.
NOTE: When available, the Printscreen keyboard shortcut can be used to capture a screenshot;
however, no toast notification displays.
NOTE: Use the Alt + F4 keyboard shortcut to close a specific application.
NOTE: When applications run with this specific behavior, users can still bring up the contextual menu
by right-clicking on the desktop shortcuts or the applications running on the taskbar.
For additional information, refer to the Workstation Connect Administrator’s Guide.
18

Zebra Workstation Connect Features
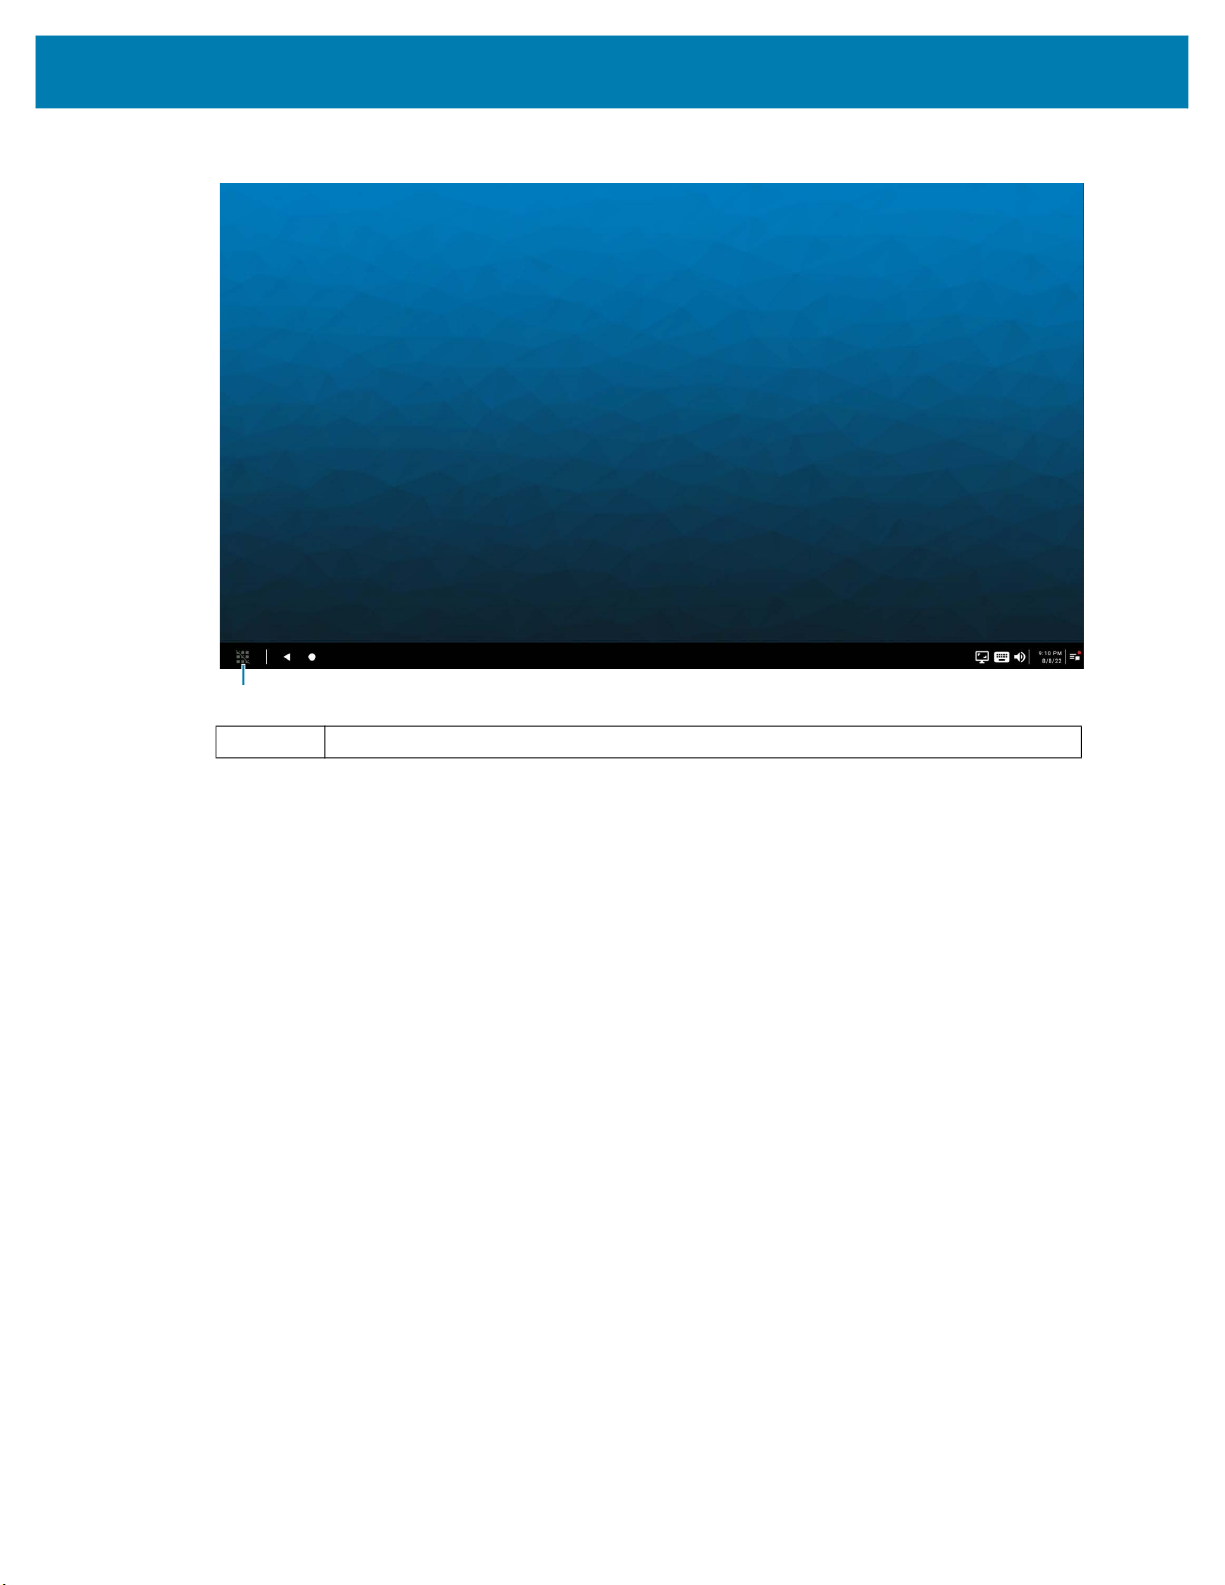
Using the Navigation Buttons on the Taskbar
The Back and Home navigation buttons are located on the left side of the taskbar. The Home button
brings the desktop home screen to the foreground, which minimizes all applications currently running on
the desktop that are not already minimized. Click the icon on the taskbar to restore the application to its
previous state. Relaunching an application running in a minimized state on the desktop also restores the
application. The behavior of the Back button is specific to the application in use and is located on the title
bar of an application running on the desktop and behaves similarly to the taskbar Back button and the
escape shortcut key.
For additional information on the contextual behavior of the Back button, refer to
/techdocs.zebra.com/zwc/usage/.
Figure 13 Navigation Buttons
1
2
1 Back
2 Home
19
Zebra Workstation Connect Features
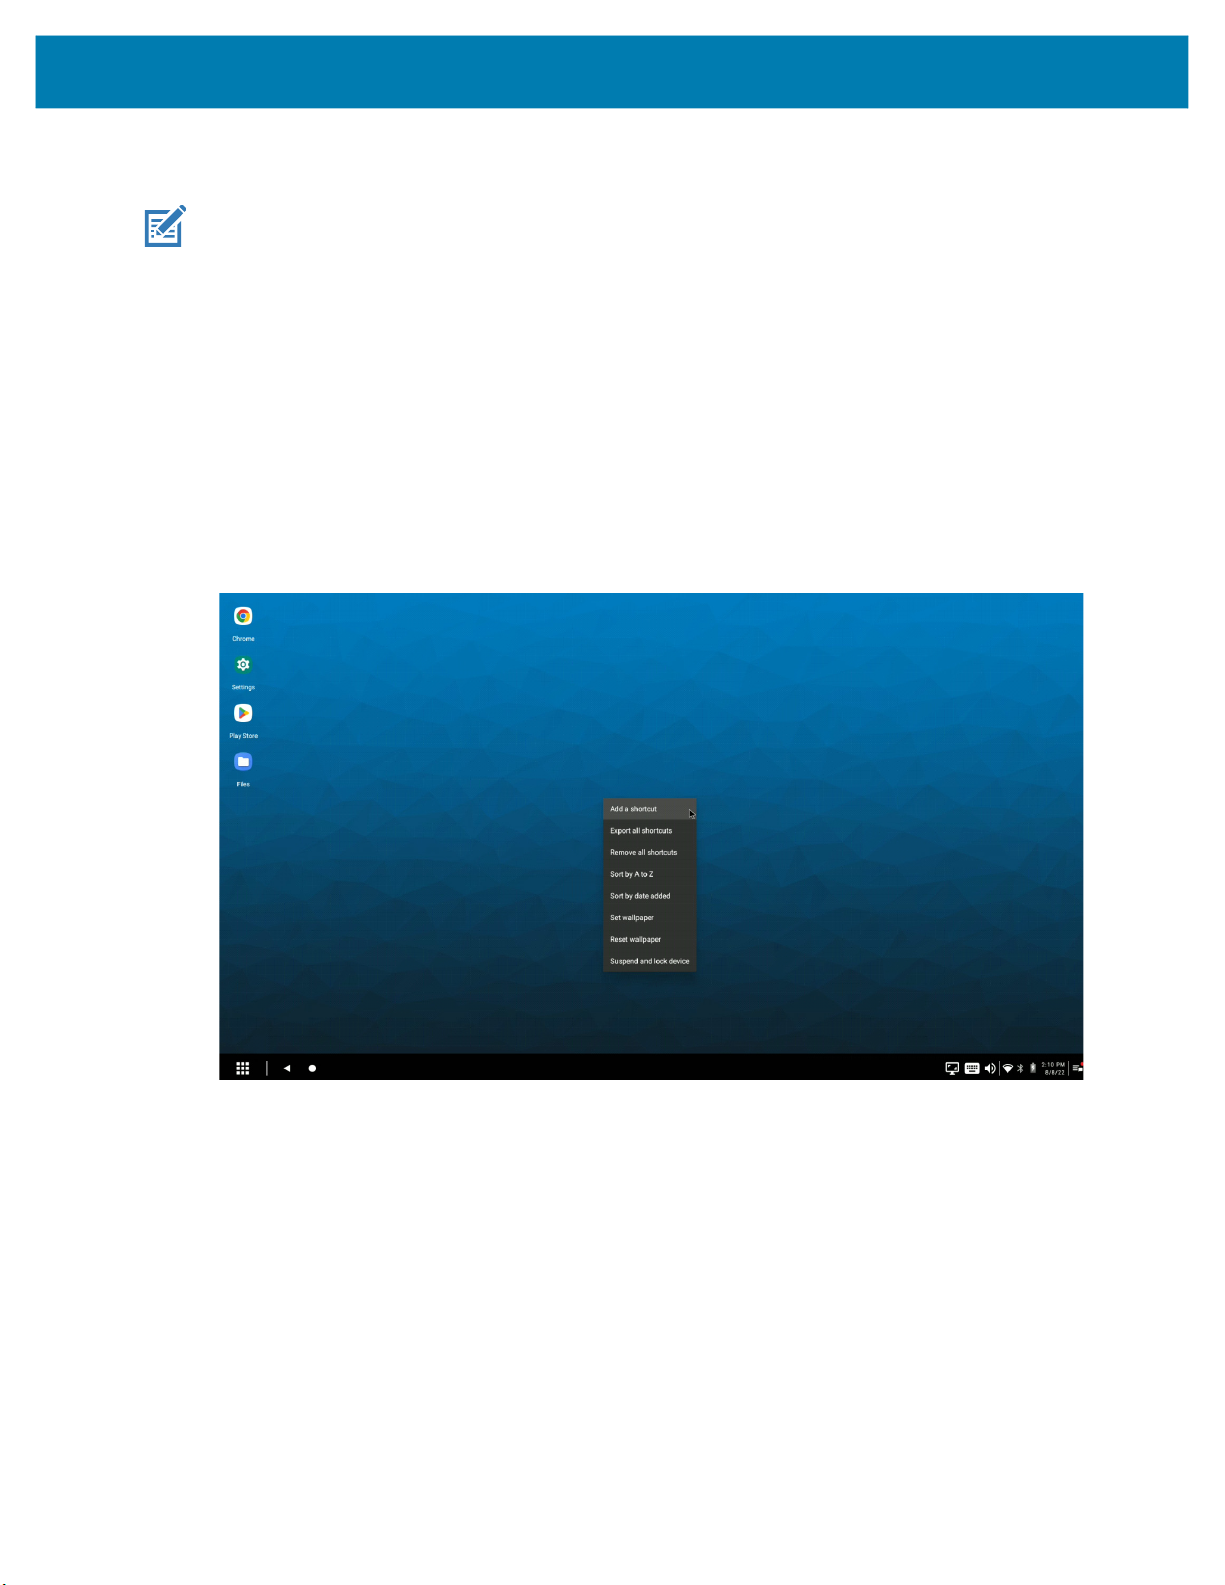
Using the Desktop Home Screen Menu
NOTE: Depending on the resolution, the application will render its pixel density accordingly to 160dp.
Right-clicking anywhere on the desktop home screen (or a long press if using a mobile computer) presents
a home screen menu that allows:
• Adding an application, website or file shortcut to the home screen for quick access.
• Exporting all shortcuts.
• Removing all shortcuts.
• Sorting shortcuts by alphabetical order or by the date the shortcut was added.
• Setting or modifying the wallpaper.
• Suspending and locking the device.
Figure 14 Desktop Home Screen Menu
20
Zebra Workstation Connect Features
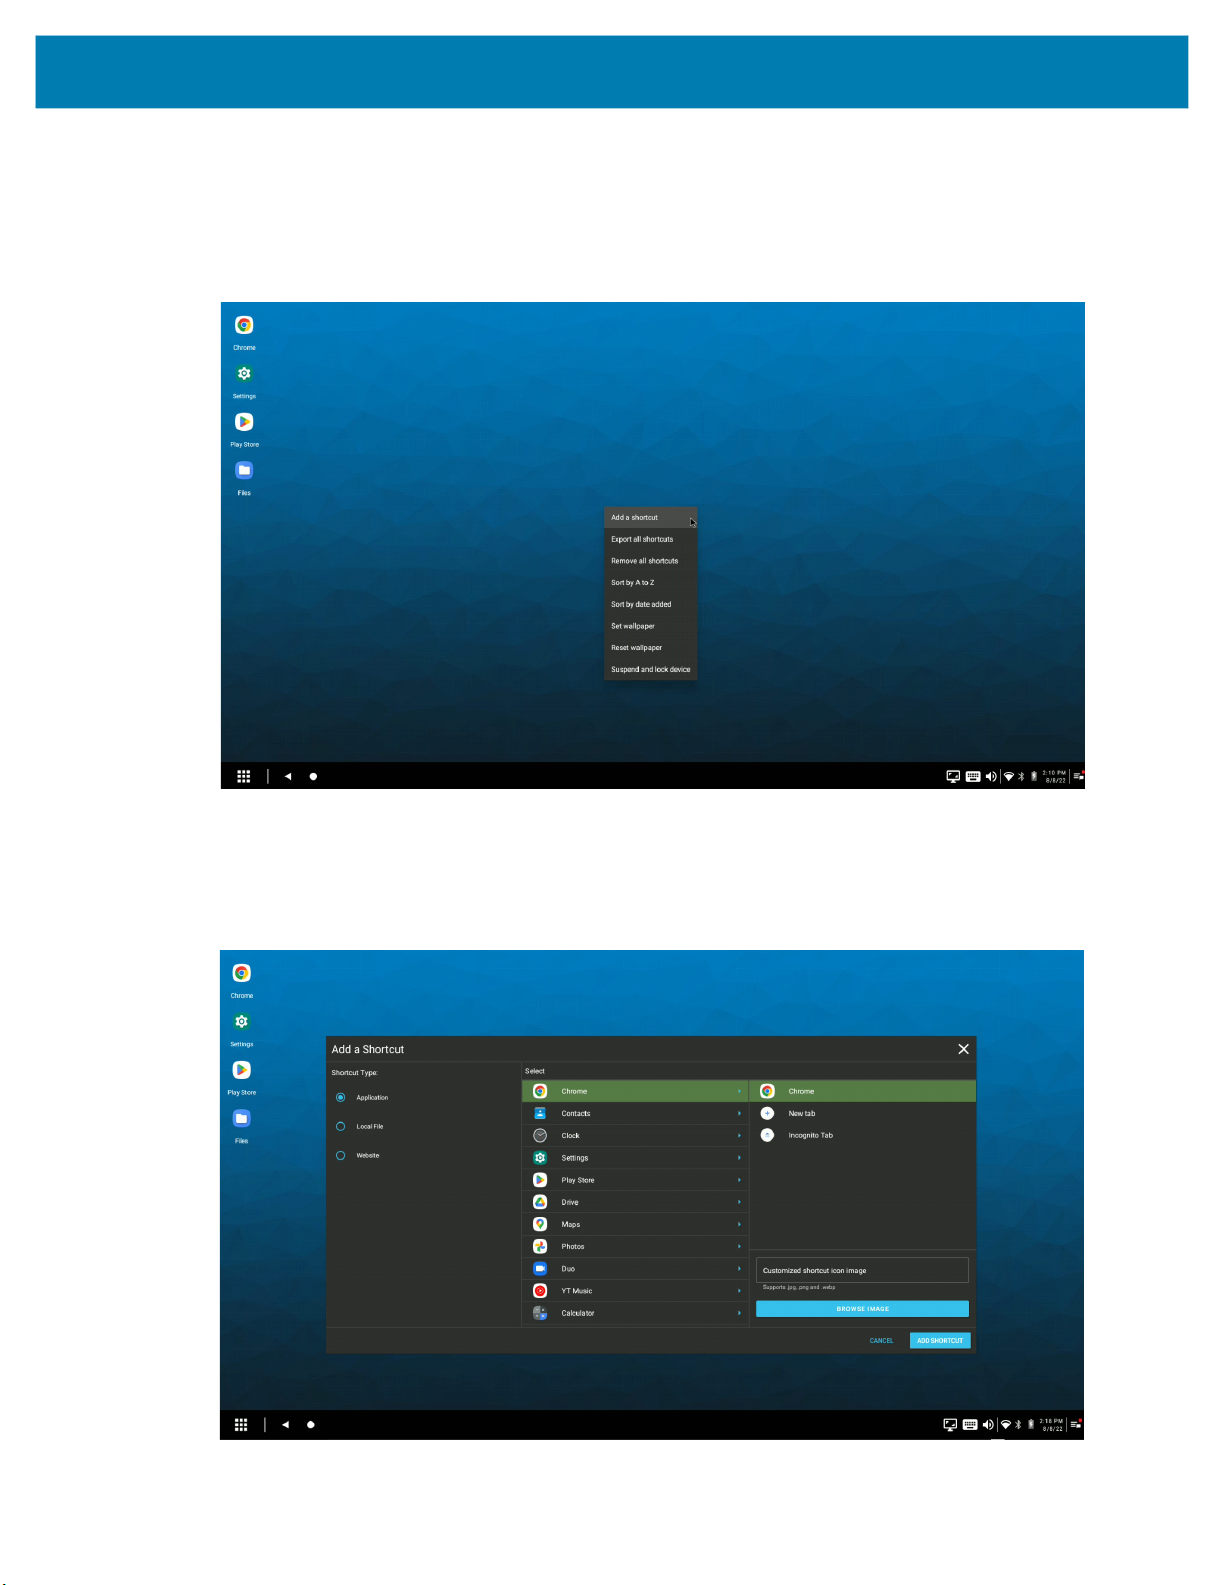
Adding a Shortcut for an Application, Website, or File
To add a shortcut to the desktop, select Add a shortcut from the home screen menu and select the
application to be added to the desktop.
Figure 15 Adding a Shortcut
Once an application is selected, a shortcut displays on the desktop home screen. If the administrator has
configured advanced application permissions, only applications permitted to become shortcuts by the
administrator are displayed as candidates.
Figure 16 Creating a New Application Shortcut
21
Zebra Workstation Connect Features
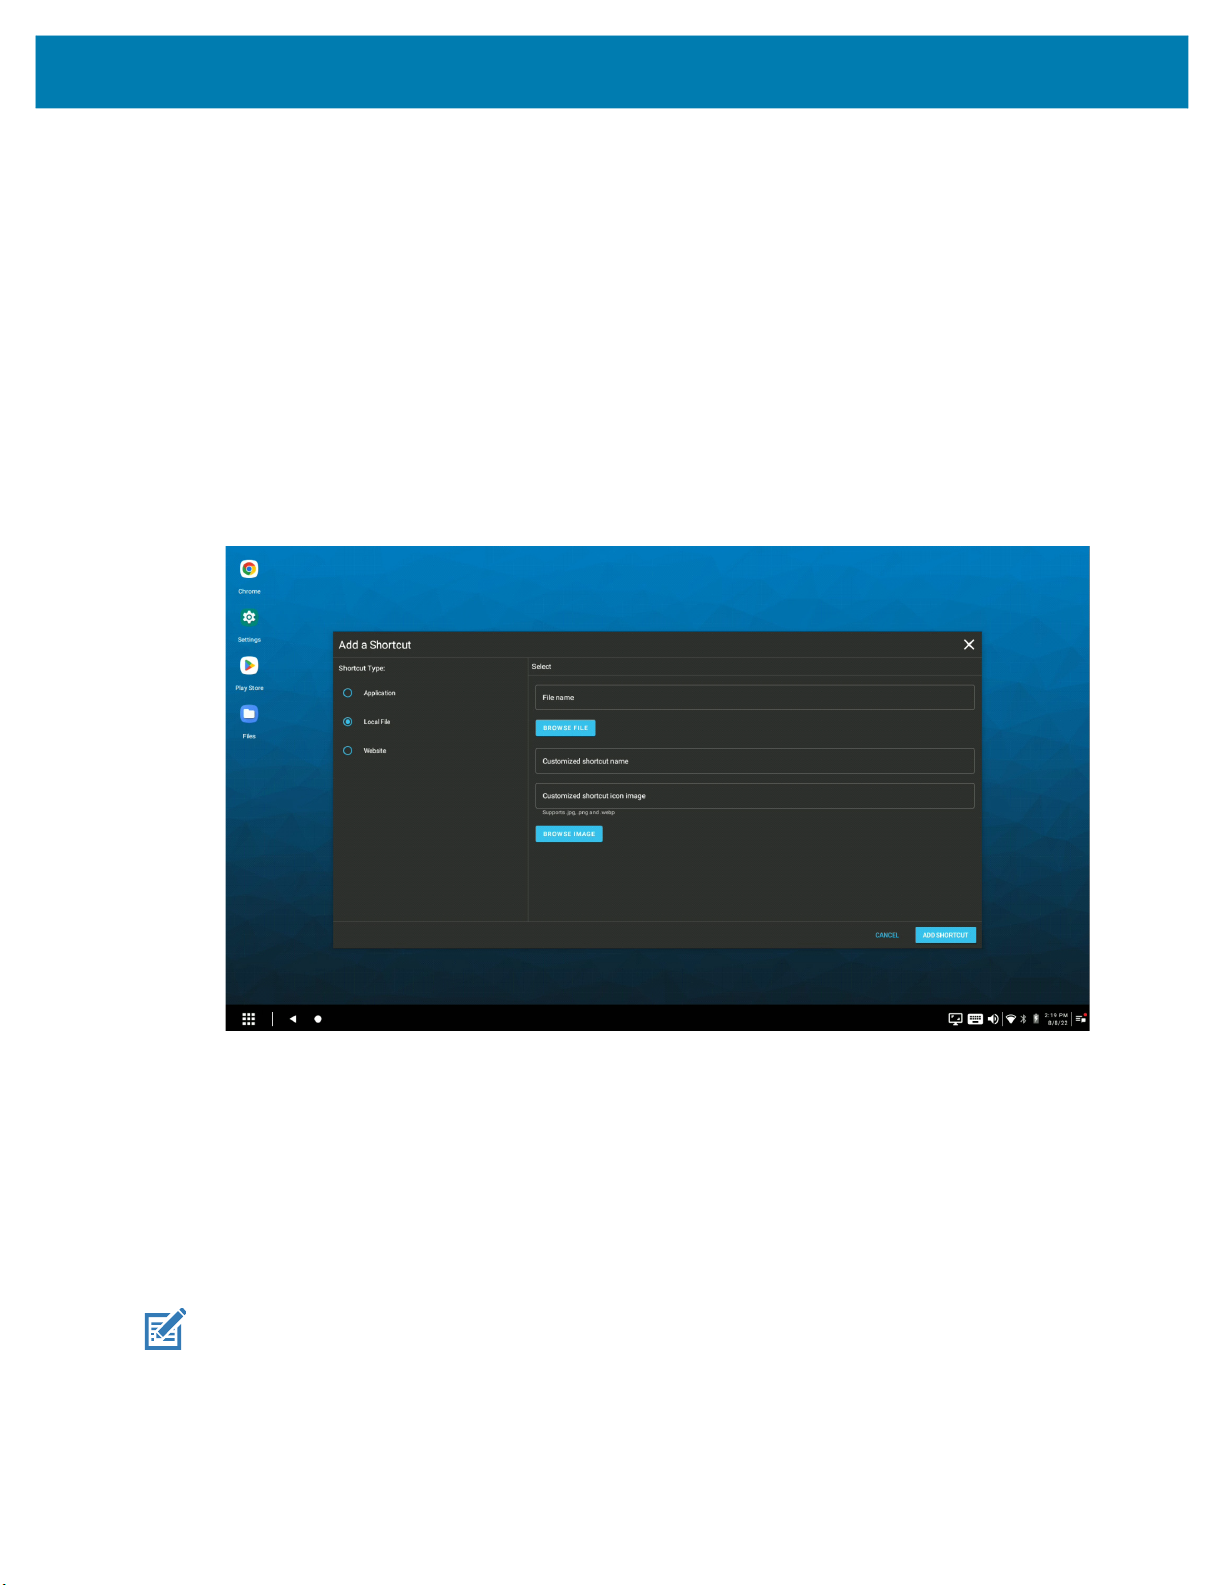
Click Browse File and navigate to a file to create a shortcut. When adding a shortcut to a media file, the
media file must be physically located at any of the following paths.
1. Internal SD card - any location (storage/emulated/0 – root, documents, download, pictures, DCIM)
2. /enterprise/usr
3. data/tmp/public
To add a shortcut to a non-media file, the non-media file should be physical located at any of the following
paths:
1. /enterprise/usr
2. data/tmp/public
Figure 17 Creating a New File Shortcut
To create a new shortcut for a website, enter its address and shortcut name in the associated form fields.
Next, a web shortcut opens in the current default browser. Depending on how many browsers are installed
on the device, Workstation Connect presents the following options:
• If only one browser is present, the web shortcut opens in that browser.
• If multiple browsers are installed, and one is set to be the default, the web shortcut opens in that
browser.
• If multiple browsers are installed, and none are set to be the default, the device user will be prompted to
choose the browser to open the web shortcut.
NOTE: When adding a website address, a protocol specification (for example: http:/ or https://) is
mandatory.
22

Zebra Workstation Connect Features
Figure 18 Creating a New Website Shortcut
NOTE: Shortcuts are saved in /enterprise/usr/zwc/ after they are exported.
Customizing Shortcut Icons
When enabled, Zebra Workstation Connect provides the ability for users to assign an image file as the
shortcut icon for a specific application
NOTE: Images must be less than or equal to 512 x 512 pixels. Supported file formats include jpg, png,
and webp. If the selected image file does not meet the criteria above, the custom image does not set
as the shortcut icon.
To create a custom icon, select the shortcut type and application.
.
23

Zebra Workstation Connect Features
Figure 19 Browse Image
Next, click the Browse Image button to launch the file explorer.
Figure 20 File Explorer
Navigate to the image file to be utilized as the shortcut icon.
24

Zebra Workstation Connect Features
Figure 21 Select Image
Click Add Shortcut.
Observe the new icon shortcut on the desktop home screen.
Figure 22 New Shortcut Icon
25

Zebra Workstation Connect Features
Creating Shortcut Groups
Create a group of application shortcuts by selecting an existing shortcut icon and dragging the icon onto
another application shortcut icon to create a folder. When creating folders, consider creating shortcut
groups based on a common use case such as productivity tools or communication applications. Shortcuts
cannot be dragged from a group onto another icon to create a new group, and multiple shortcuts cannot be
selected and dragged simultaneously to create a new group. If the Administrator disables shortcuts within
a group, the shortcut group is not visible. If only some of the applications are disabled, the folder is visible,
but the user cannot see the applications that are disabled.
Figure 23 Creating Shortcut Groups
NOTE: The device operator cannot drag a shortcut from a group onto another icon to create a new
group.
Next, name the shortcut group.
26

Zebra Workstation Connect Features
Figure 24 Application Shortcut Group Window
NOTE: Sub-groups (groups within groups) are not permitted.
Application shortcuts are accessed from inside the Group Window. To dissolve a group, drag the shortcuts
out of the folder and onto the desktop until only one application is in the folder. In this case, the folder is
dismissed automatically because the minimum number of shortcuts inside a folder is two if the
administrator disables no hidden applications. The icons can then be deleted individually from the desktop
if necessary.
The shortcut group dissolves when the second to last application shortcut is removed from the sub-group.
Both shortcuts move to the desktop based on the order specified in the administrator configuration. If the
user drags a shortcut onto the desktop where that same icon is already present, two shortcut icons display
on the desktop.
When one or more application shortcuts in a group are disabled, the icons for the disabled applications are
not shown. The group is visible because it exists and is non-empty, although it appears empty or has only
one visible icon.
Drag and Drop Shortcuts From One Group to Another
NOTE: Depending on the administrator configuration, users may not have access to this feature.
Zebra Workstation Connect allows users to drag a shortcut directly from one folder to another by clicking
on a shortcut group. Drag the shortcut from the open window to any group in the dialog box window.
NOTE: When there are more than ten applications in a shortcut group, the view of the application
shortcuts becomes scrollable vertically.
27

Zebra Workstation Connect Features
Figure 25 Drag Icon to Create a New Group
28

Exporting All Shortcuts
To define the same set of shortcuts across multiple devices, export the defined set of shortcuts. The
exported set of shortcuts can then be deployed across multiple devices. The same process is used to
define and export multiple groups of shortcuts, such as to define different sets of shortcuts on various
collections of devices. However, only one set of exported shortcuts can be deployed to a device at any
given time since deploying an exported set of shortcuts to a device replaces the shortcuts previously
defined on that device.
Select Export All Shortcuts from the desktop home screen menu to download a .csv file of the names of
the shortcuts currently defined on the home screen.
NOTE: Shortcuts are saved in /enterprise/usr/zwc/ after they are exported.
Figure 26 Export All Shortcuts Confirmation
Zebra Workstation Connect Features
29
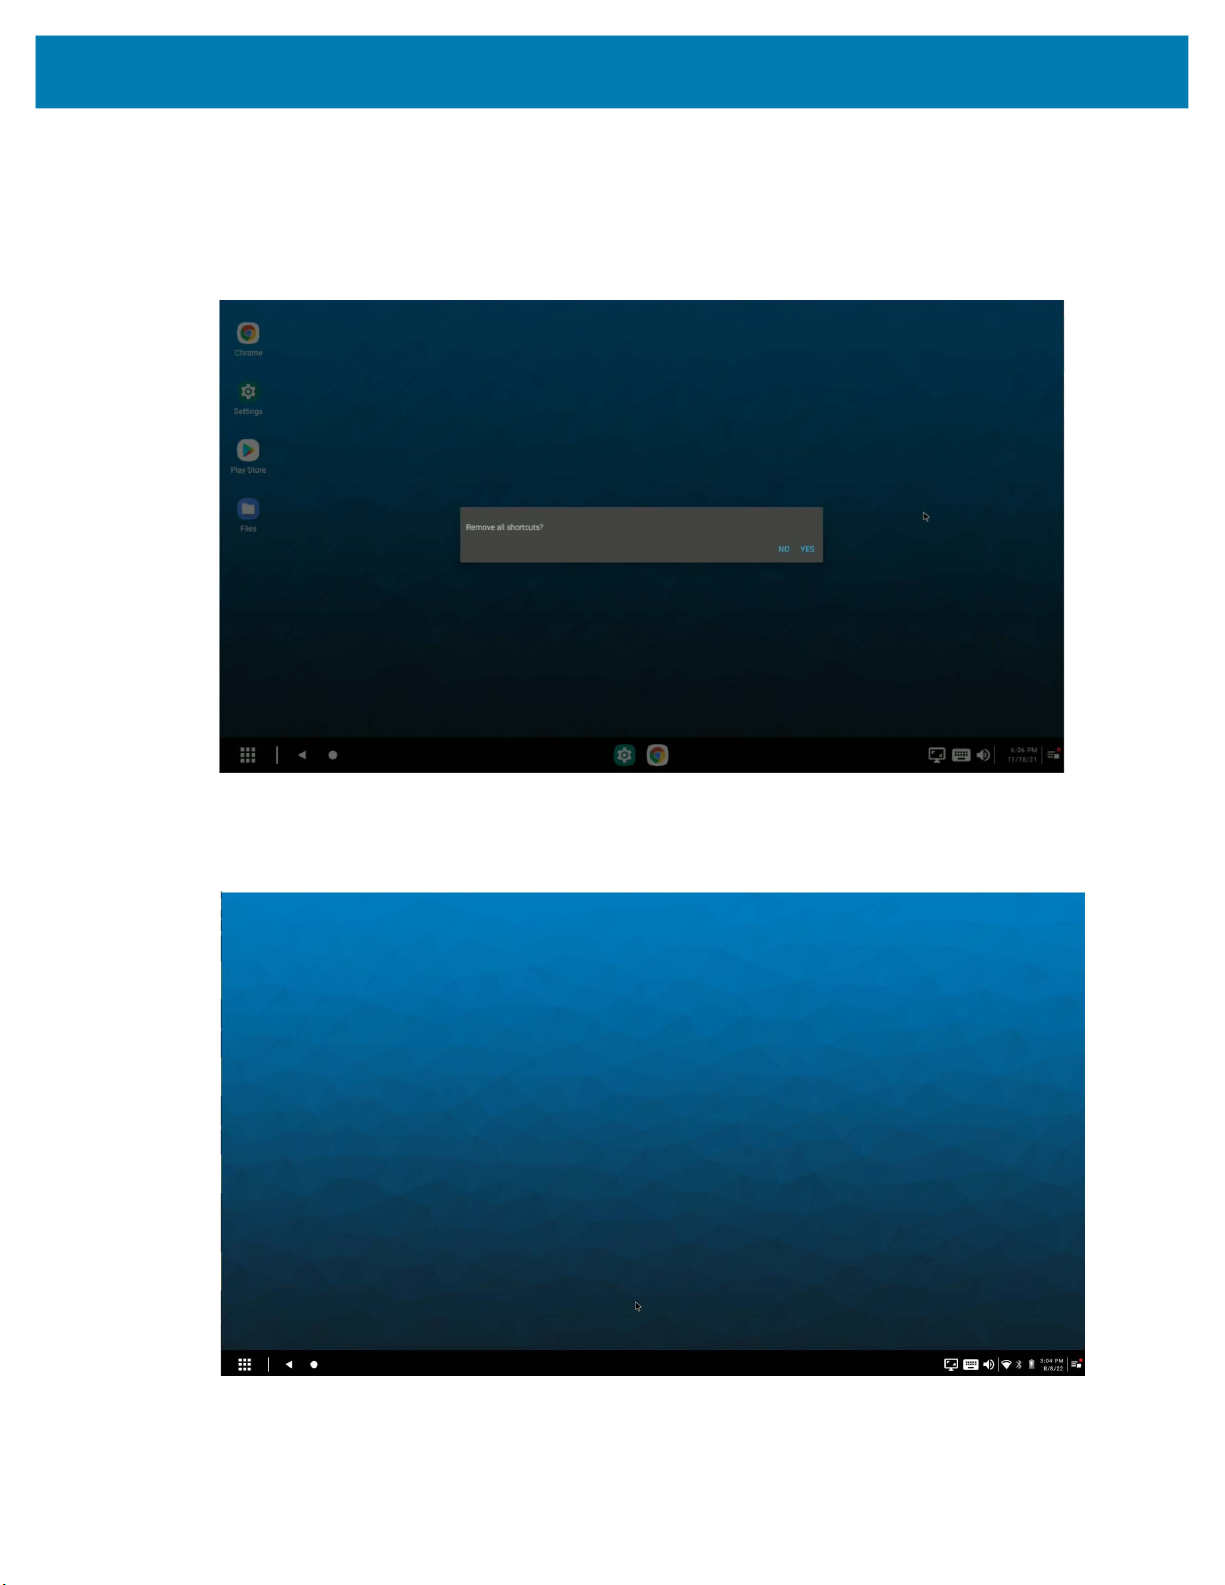
Removing Shortcuts
Select Remove All Shortcuts from the desktop home screen menu to remove all currently defined
shortcuts from the desktop home screen.
Figure 27 Confirmation
Zebra Workstation Connect Features
When the administrator configuration disables all shortcuts, there are no shortcuts on the desktop home
screen.
Figure 28 No Visible Shortcuts
30
Zebra Workstation Connect Features
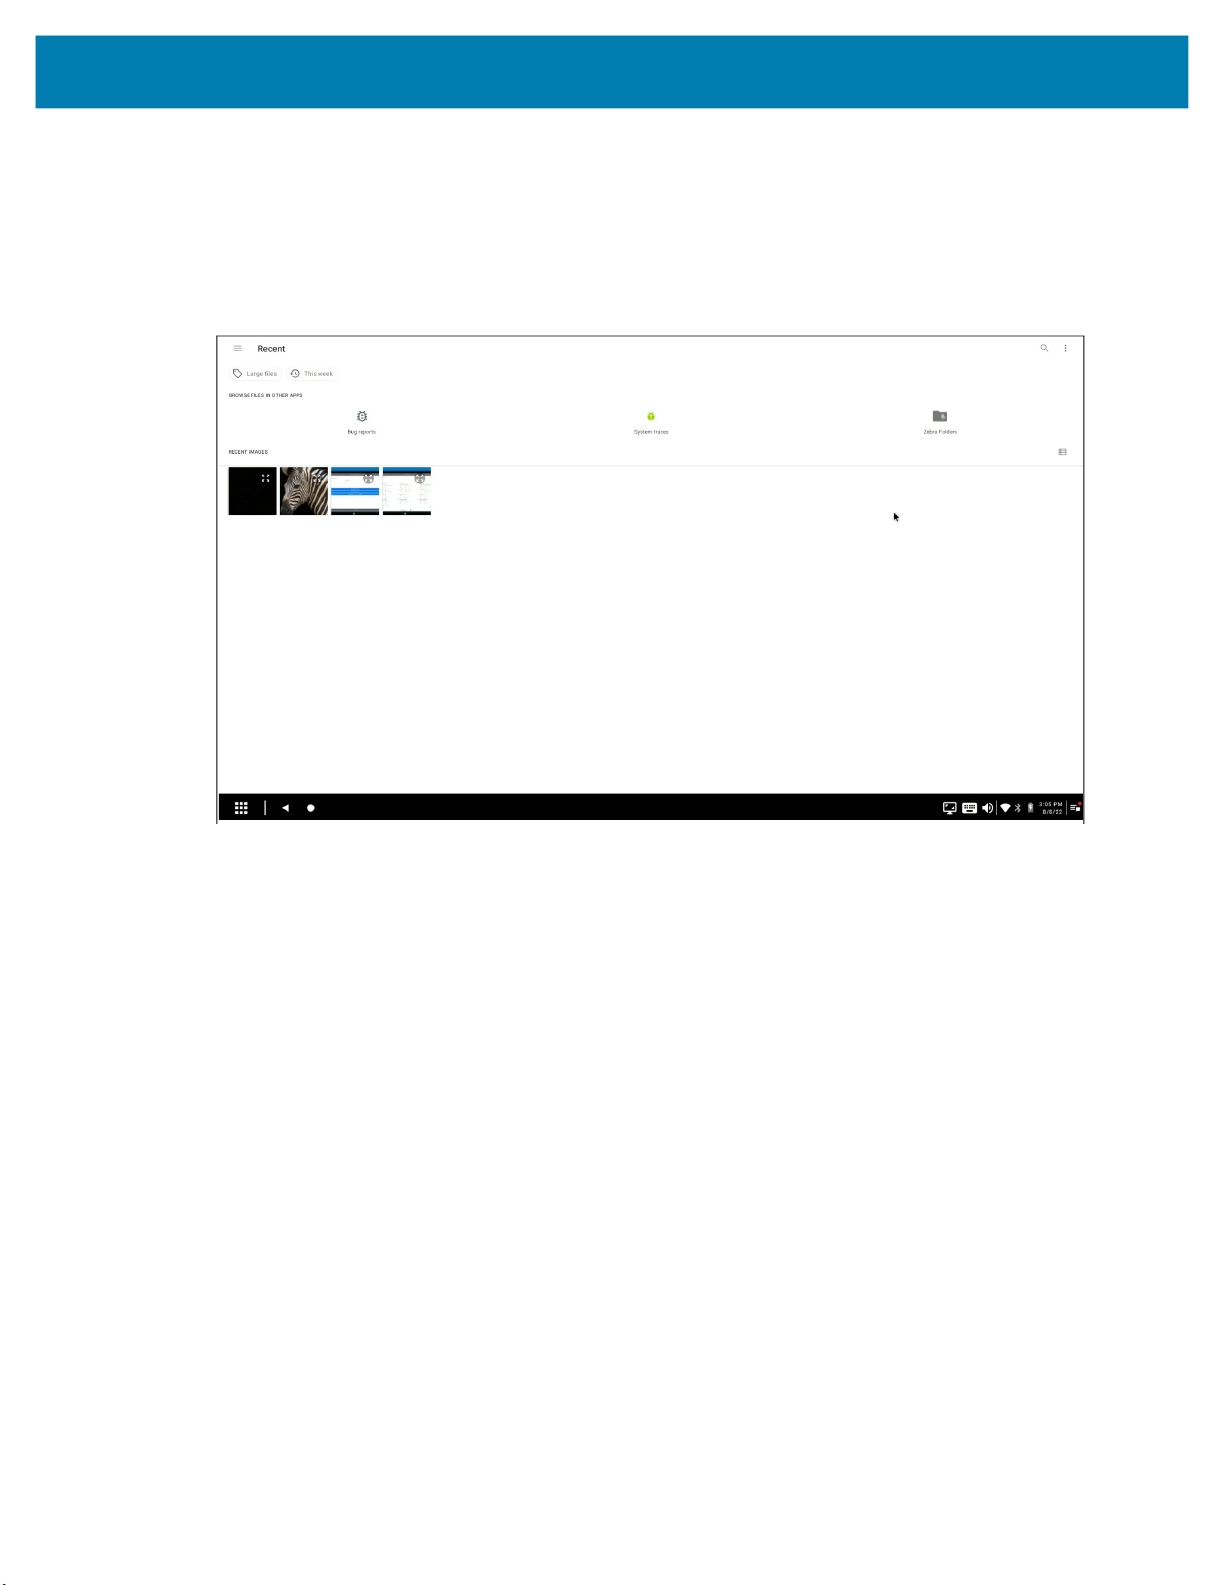
Changing the Home Screen Wallpaper
To change the home screen wallpaper, select Set Wallpaper from the desktop home screen menu and
navigate to the image gallery or any image folder available on the device. This action does not impact the
home screen of the mobile device.
Figure 29 Select New Wallpaper
Suspend and Lock the Mobile Computer
When Suspend and lock device is selected from the desktop home screen menu, the mobile device
enters suspend mode. In suspend mode, both the device and the desktop screen on the external monitor
are off. Press the spacebar twice to wake the device and enter the PIN or password (if applicable) to use
the mobile computer.
31

Zebra Workstation Connect Features
Figure 30 Suspend and Lock
NOTE: Depending on the Administrator configured screen lock type, the unlocking action required to
wake up the device from a suspended state differs. Possible settings are PIN, password, or disabled
(no security).
Docking and Undocking Behavior
When docking a device into the Zebra Workstation Cradle, application behavior depends upon the
configuration deployed by the Administrator. This behavior is observable when the administrator
configures running mobile applications to display on the taskbar. In the section below, all of the
applications shown on the taskbar ran on the device before docking. This behavior can be overridden by
re-configuring the settings using Administrator Managed Configurations.
32
Zebra Workstation Connect Features
Figure 31 Docking Behavior
The default behavior of applications while undocking is that an application running on the desktop of the
external monitor transitions to the mobile device and runs in the background. This behavior can be
overridden by re-configuring the settings using Administrator Managed Configurations. In the figure below,
the Chrome application transitions from the desktop home screen to the mobile device screen and runs in
the background when the device is undocked. Applications running in the background on the mobile
device can be viewed and restored from the Recents Panel on the mobile device.
Figure 32 Undocking Behavior
33
Zebra Workstation Connect Features
Using the Notification Icon and Panel
The notification icon is located on the far right of the taskbar and displays a red notification badge on the
icon if there are any active notifications.
Figure 33 Notification Icon
1
1 Notification Icon
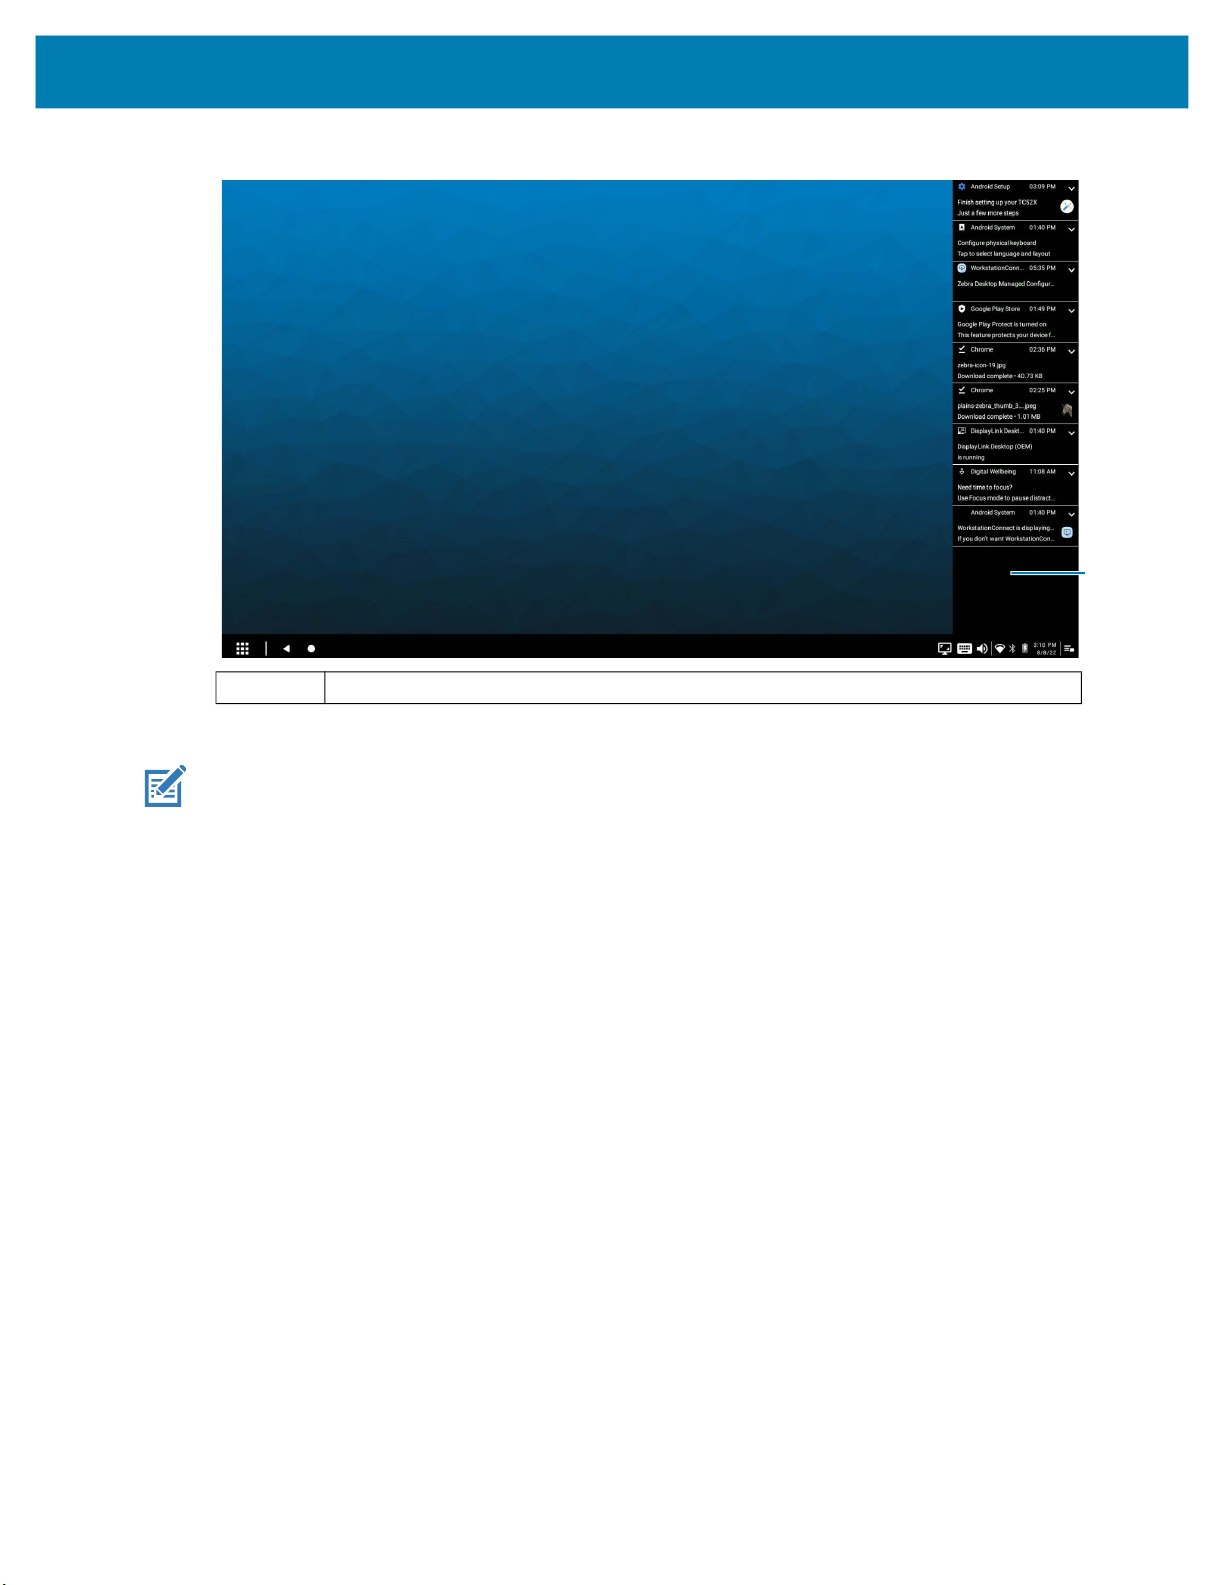
The notification panel displays all active notifications for mobile and desktop applications. Open a specific
notification by clicking on the notification to expand the panel or click the Dismiss button to remove the
notification from the panel.
34
Zebra Workstation Connect Features
Figure 34 Notification Panel
1
1 Notification Panel
NOTE: If the Administrator has configured advanced application permissions, only applications
permitted to be launched from the notification panel are opened when the notification is clicked a
second time after the notification is expanded.
Using Status Icons
Status icons are displayed on the right section of the taskbar and provide additional information when the
user hovers over an icon. When a user hovers over a specific status icon, its status displays as hover text.
When the user clicks on a specific status icon, its corresponding settings fragment displays.
The default icons are:
• Battery - displays the device battery life and statistics, including last full charge on its associated
settings fragment.
• Wi-Fi - displays the current networks available to the device on its associated settings fragment.
• Bluetooth - displays its connection state, number of currently connected devices, and allows users to
pair a new device-associated settings fragment.
• Volume Control - displays media volume, media output, call volume, and notification volume associated
settings fragment.
• Soft Input Panel (SIP) - enabled when a user clicks into a form field without a keyboard connected to
the docking station.
35
Zebra Workstation Connect Features
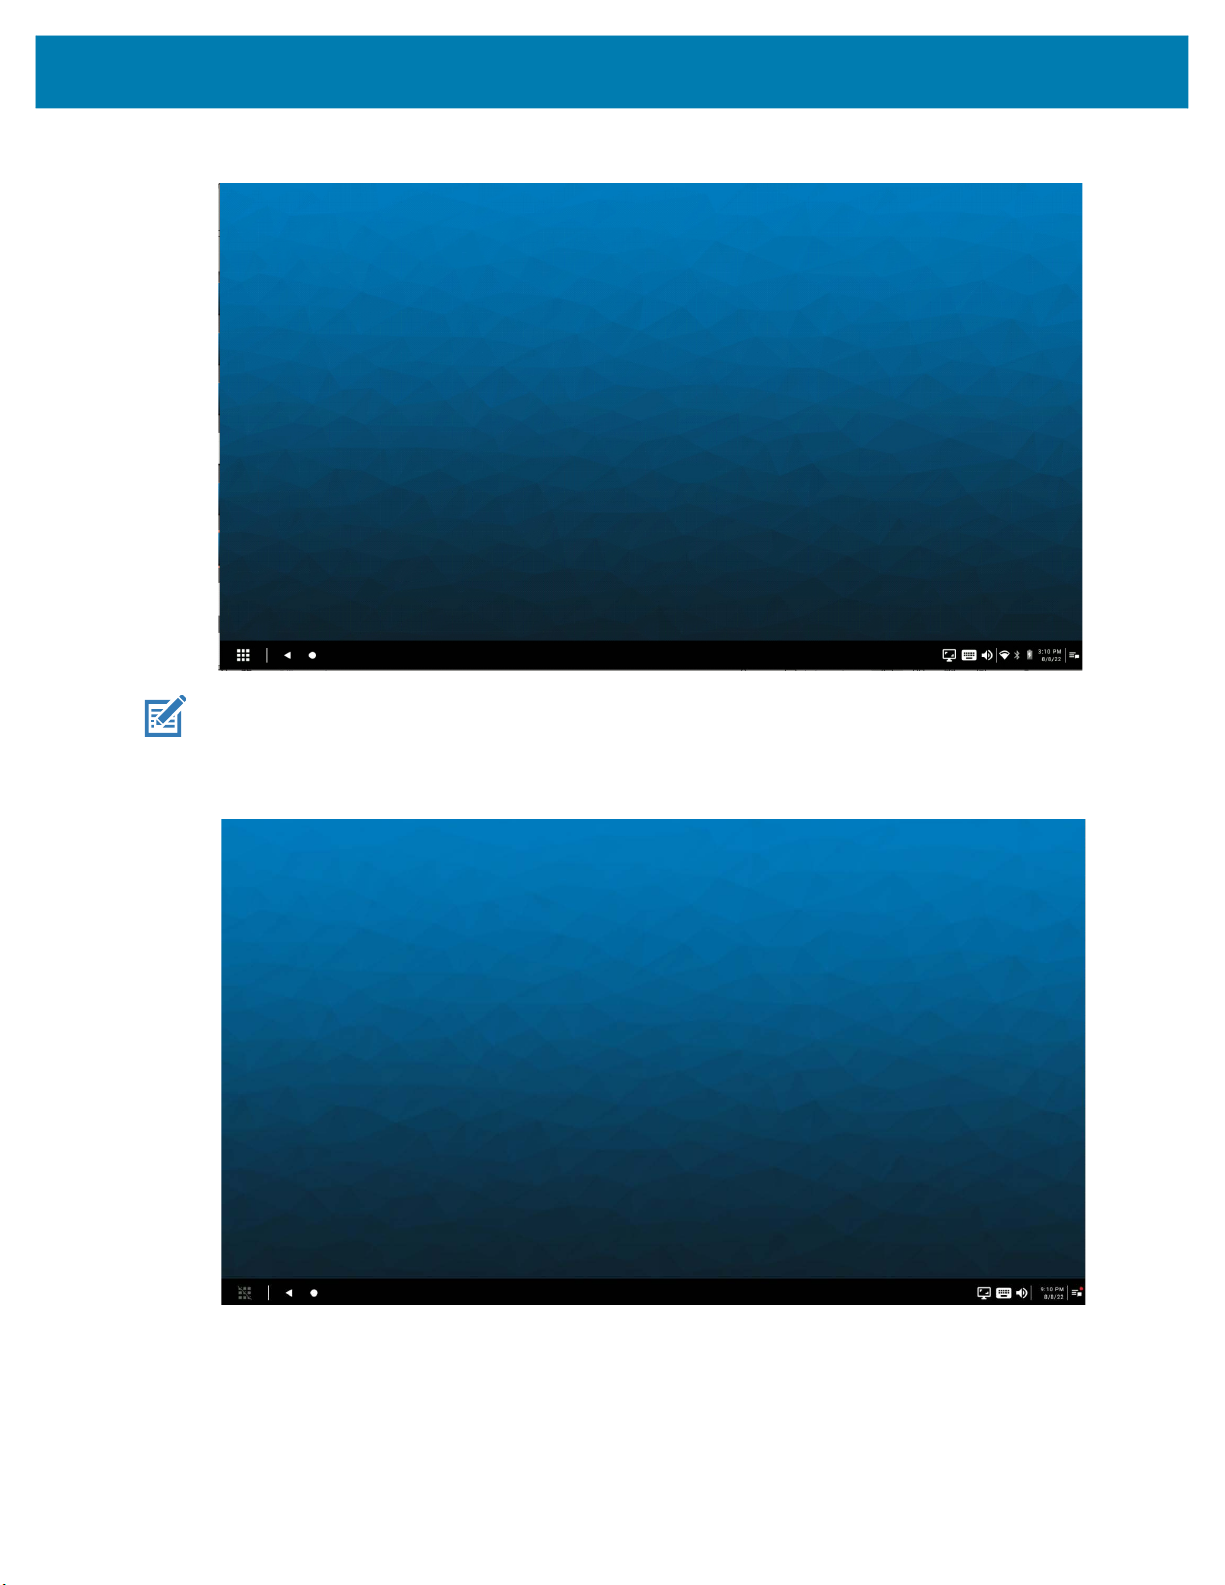
Figure 35 Visible Status Icons
NOTE: Settings icons do not appear on the taskbar when they are disabled by the Administrator.
Figure 36 Disabled Status Icons
Battery Status Settings UI
When the battery icon is clicked or tapped, the battery settings fragment displays on the desktop home
screen. Users can view the current charge state, and the last time the battery was fully charged.
36

Zebra Workstation Connect Features
Figure 37 Battery Settings Fragment
NOTE: If the Administrator has configured advanced application permissions to restrict access to the
settings fragment from the taskbar icons, the battery settings fragment does not display if a user clicks
or taps the battery icon.
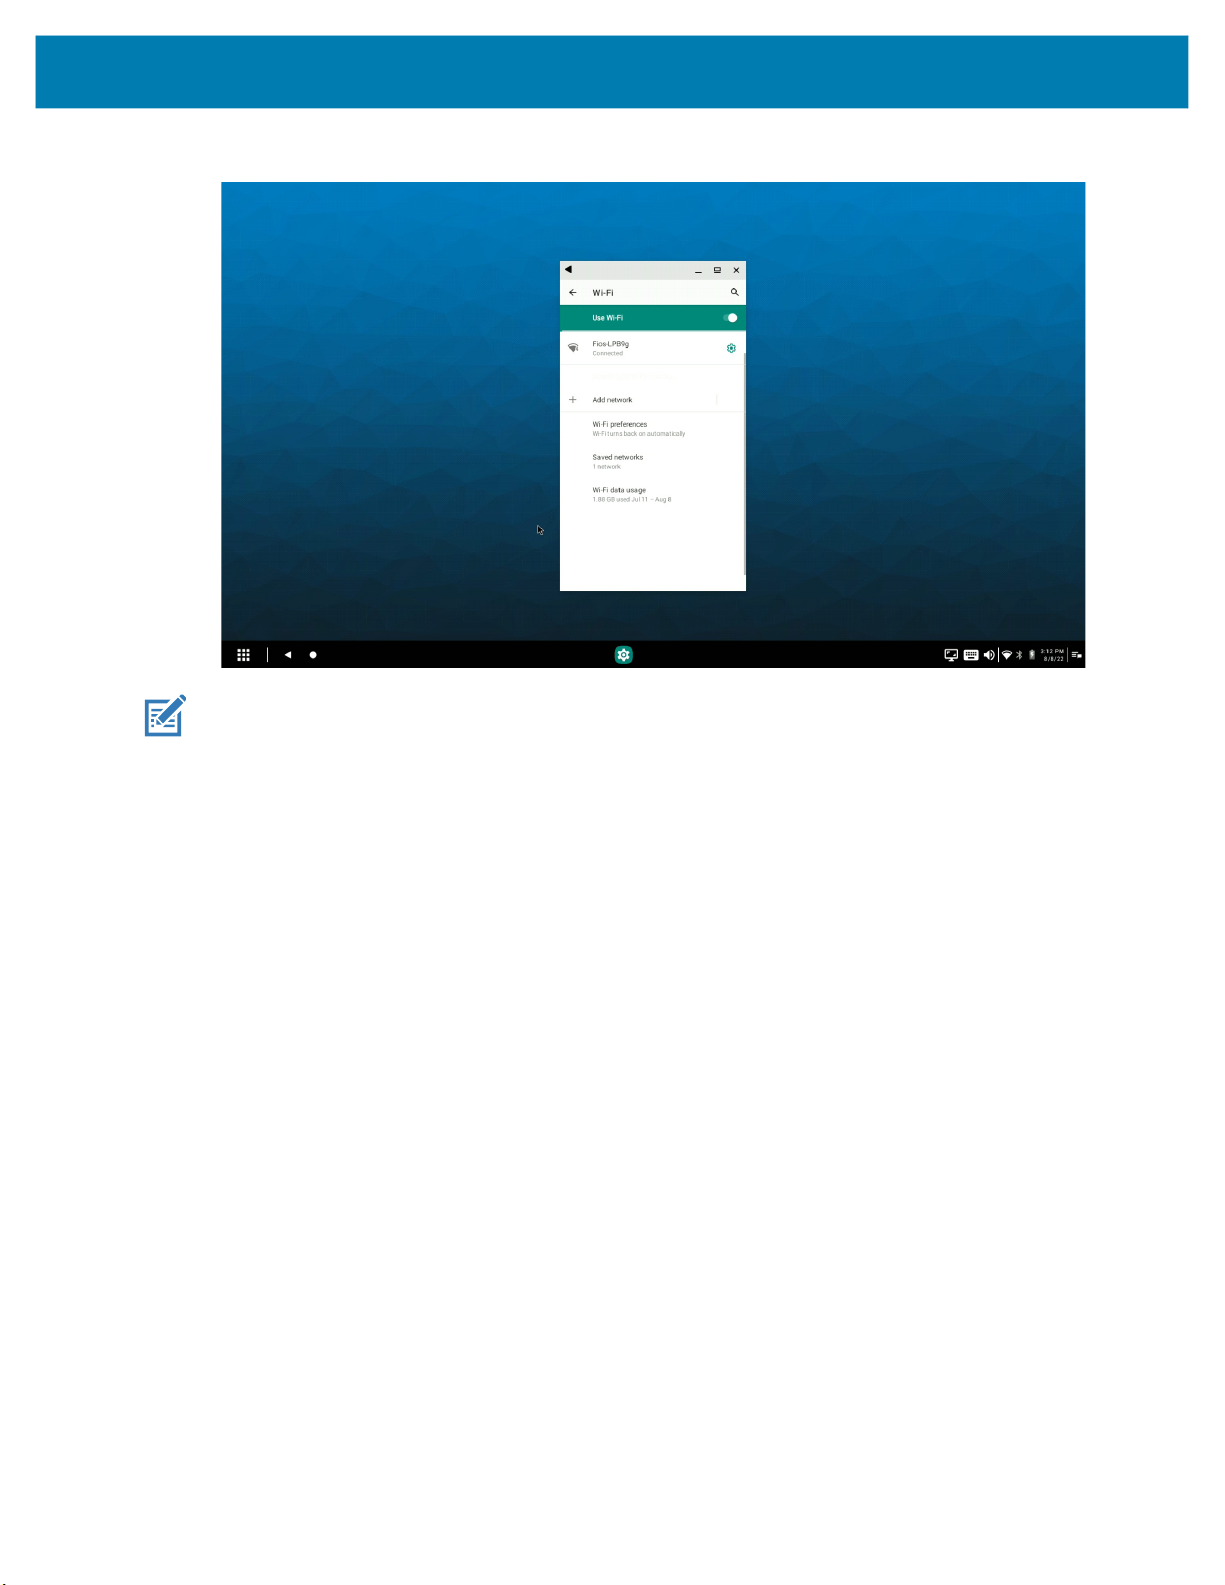
Wi-Fi Settings UI
The Wi-Fi settings fragment displays on the desktop home screen when the W-Fi icon is clicked or tapped.
Users can view the currently available connections and Wi-Fi preferences for the device.
37
Zebra Workstation Connect Features
Figure 38 Wi-Fi Settings Fragment
NOTE: If the Administrator has configured advanced application permissions and restricted access to
the settings fragment from the taskbar icons, the Wi-Fi settings fragment does not display if a user
clicks on the Wi-Fi icon.
38

Bluetooth Settings UI
When the Bluetooth icon is clicked or tapped, the Bluetooth settings fragment displays on the desktop
home screen. Users can pair with a new device or view the current connection preferences for the device.
Figure 39 Bluetooth Settings Fragment
Zebra Workstation Connect Features
NOTE: If the Administrator has configured advanced application permissions and restricted access to
the settings fragment from the taskbar icons, the Bluetooth settings fragment does not display when a
user clicks on the Bluetooth icon.
39

Zebra Workstation Connect Features
Using the Audio Settings Icon
The audio control panel is located on the left side of the status icon area. When the audio settings icon is
clicked or tapped, the following options are available:
• Control the sliders to adjust the current volume of all available audio streams.
• Display the audio output path currently selected for media streams.
• Display all the alternative audio output paths available for media streams.
• Select a new audio output path to replace the current path selected for media steam.
• Done dismisses the volume control menu.
• See more accesses Sound and Vibration in Settings.
Figure 40 Volume Control Settings Panel
1 Volume Control Panel
When the See More option is available, users can view the device setting.
1
40

Zebra Workstation Connect Features
Figure 41 Sound Settings Fragment
NOTE: If the Administrator has configured advanced application permissions to restrict access to the
Audio Settings fragment from the audio taskbar icon, the associated settings fragment does not display
if a user attempts to click or tap the See More option on the audio control panel.
Figure 42 Disabled See More Button
41

Zebra Workstation Connect Features
Best Available Audio Output Paths
If there are specific audio paths that the Administrator does not plan to use, the best path can be
configured, so that specific paths are unavailable to the user. This could reduce frustration for the device
user, who might have to override options that do not apply to the use case.
Users can change the audio path from the Desktop Audio Panel. However, depending on the administrator
configuration, the users choice may be overridden upon a dock or undock event.
NOTE: Preventing an audio path from being chosen as best does not prevent the user from choosing
to override to that audio path, it merely prevents the system from selecting it automatically.
NOTE: Each time the set of audio devices changes (including on docking and undocking) the best path
routing recalibrates and overrides any previous setting implemented by the user.
Android has its own default best path routing that is automatically applied if the administrator does not
make a change to the default configuration.
1. Cradle/Dock (USB is unavailable upon docking the device)
a. Headset
b. Headphones/speaker
2. Mobile Device Analog (3.5mm - treaded as a USB headset)
a. Headset
b. Headphones
3. Bluetooth Connected Device
a. Headset
b. Headphones/speaker
4. Monitor (HDMI is unavailable upon docking)
a. Headphones/speaker (USB or 3.5mm)
b. Integrated Speaker
5. Mobile Device Headset (Unavailable upon docking)
a. Integrated Microphone
b. Integrated Speaker
6. Mobile Device Speakerphone
42

Zebra Workstation Connect Features
Soft Input Panel (SIP) Hover Text
When a user hovers over the SIP icon, hover text is visible that informs the user that the specified SIP
settings are available.
NOTE: The default SIP configuration can be overridden by the Administrator. The user can also select
a new SIP. However, the SIP configuration resets to the default upon a dock/undock event.
Figure 43 SIP Icon Hover Text
43

Screen Capture
When enabled by the administrator, press the print screen button on the external keyboard or click the
screen capture button on the status tray of the desktop home screen to initiate a screen capture of the
content being displayed on the external monitor.
Figure 44 Screen Capture Button
Zebra Workstation Connect Features
When a screen capture is in progress, the screen capture button is disabled.
Figure 45 Disabled Screen Capture Button
A toast notification appears when a screen has been successfully captured.
44

Zebra Workstation Connect Features
Figure 46 Screen Capture Toast Notification
After the screenshot is captured, copy the image to the clipboard by clicking the Copy to Clipboard toast
notification. This screenshot can then be pasted into any mobile or desktop application that supports
pasting content from the clipboard, such as an email or document.
NOTE: Screenshots are saved in Folders > Screenshots and automatically named with timestamp
and location.
Figure 47 Screen Capture Toast Notification
45

Zebra Workstation Connect Features
Screen Dimming
Administrators can configure whether the mobile device screen is dimmed upon docking.This setting is
helpful to protect potentially sensitive data from being displayed on the device screen when work is being
done exclusively on the external monitor. Users can wake up the device from the dim by pressing the
power button on the device. Upon waking up the device from dim, remains in this state until the device is
undocked and docked again.
Resetting Configurations
NOTE: By default, the Reset to Out-of-Box State UI option is disabled and hidden from user.
Zebra Workstation Connect provides an option to reset the managed configuration shall be disabled by
default. Zebra Workstation Connect supports configuration by an Administrator to enable the UI option to
reset the managed configurations. This feature provides a way for the administrator can demo different
configurations and clear them before setting a final configuration to deploy to a device ecosystem.
To reset configuration of ZWC, right-click the menu on the all applications button and select Reset to
Out-of-Box State.
Figure 48 Reset Device Configurations
NOTE: After selecting the reset option, undock and dock the device to apply the default configuration
to ZWC.
NOTE: The ability to Reset to Out of Box State is disabled for most users. When enabled, this feature
is helpful to clear out prior configurations when developing, testing, or troubleshooting configurations,
46
Zebra Workstation Connect Features
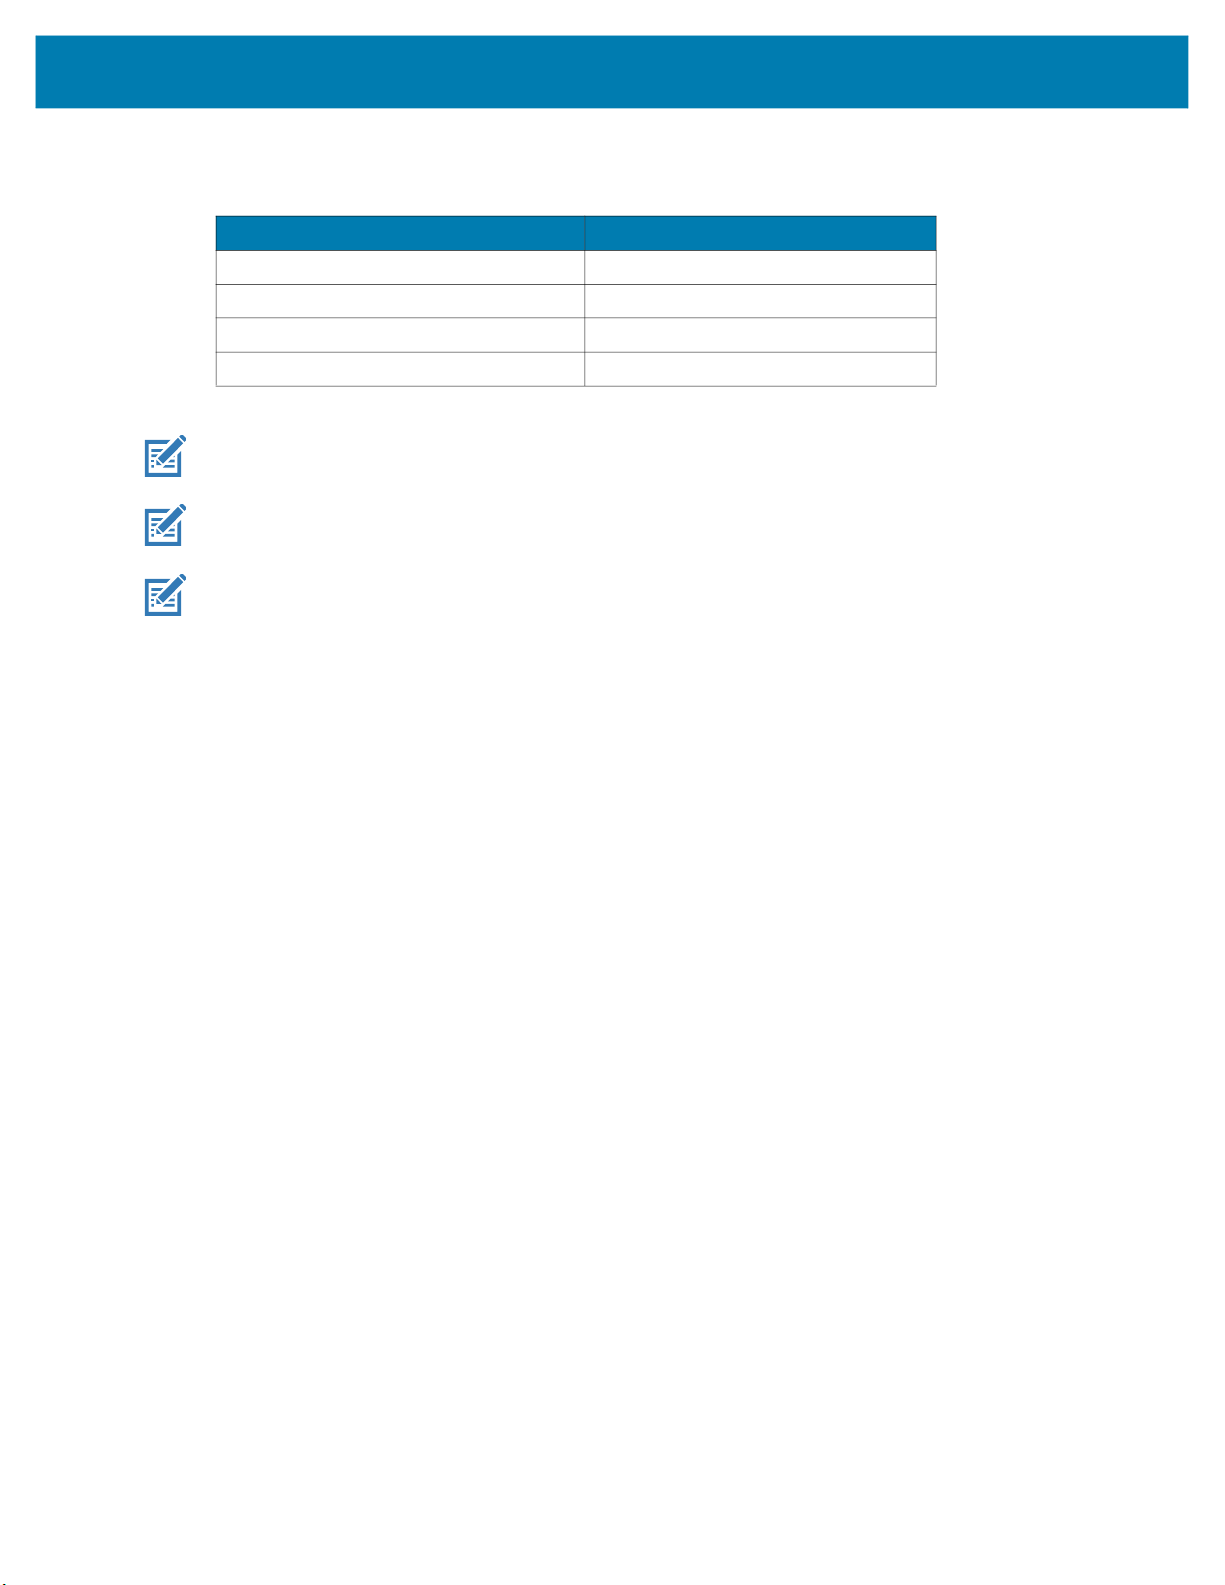
Reseting the configuration enables the following settings:
Table 2 Default Configurations
Setting Value
Resolution 1920 x 1080
Density 160 dpi
Orientation Landscape
Freeform Windows Enabled
NOTE: GMS restricted applications remain disabled after a reset is performed.
NOTE: Applications that are disabled using MXMF/StageNow remained disabled after a reset is
performed.
NOTE: Existing notifications remain visible after a reset is performed.
47

Troubleshooting
This section describes potential issues that could arise while using Zebra Workstation Connect and solutions
that could correct the problem such as undocking and docking the device or performing a reboot.
Table 3 Troubleshooting the Device
Source Problem Cause Solution
Device
(Workstation Cradle with
Mobile Computer or
Tablet)
External Monitor External Monitor does
External Monitor not
detected.
Display does not
change orientation
quickly.
Peripheral not detected. Bad cable
not power on.
The device is
powered off when
placed in the cradle
and then turns on.
It takes a little time for
the device to
recognize the
monitor.
Device not detecting
monitor.
connection.
Bad cable
connection.
Remove the device
from the cradle and
re-insert. The device
will then detect the
monitor
Wait for screen to
re-orientate.
Remove the device
from the cradle and
re-insert.
Remove cable and
re-connect.
Check the cable
connection to power
source or from the
Workstation Cradle
(HDMI).
48

zebra.com
 Loading...