

Zebra Workforce Connect: Voice Client Workforce Connect Voice Client 8.2.x Administrator Guide for Cisco CUCM

WORKFORCE CONNECT
Voice Client 8.2.x
Administrator Guide
for Cisco CUCM
MN-001181-08EN

Copyright
ZEBRA and the stylized Zebra head are trademarks of Zebra Technologies Corporation, registered in many
jurisdictions worldwide. All other trademarks are the property of their respective owners. ©2019 Zebra
Technologies Corporation and/or its affiliates. All rights reserved.
COPYRIGHTS & TRADEMARKS: For complete copyright and trademark information, go to www.zebra.com/
copyright.
WARRANTY: For complete warranty information, go to www.zebra.com/warranty.
END USER LICENSE AGREEMENT: For complete EULA information, go to www.zebra.com/eula.
Terms of Use
• Proprietary Statement
This manual contains proprietary information of Zebra Technologies Corporation and its subsidiaries
(“Zebra Technologies”). It is intended solely for the information and use of parties operating and
maintaining the equipment described herein. Such proprietary information may not be used, reproduced,
or disclosed to any other parties for any other purpose without the express, written permission of Zebra
Technologies.
• Product Improvements
Continuous improvement of products is a policy of Zebra Technologies. All specifications and designs are
subject to change without notice.
• Liability Disclaimer
Zebra Technologies takes steps to ensure that its published Engineering specifications and manuals are
correct; however, errors do occur. Zebra Technologies reserves the right to correct any such errors and
disclaims liability resulting therefrom.
• Limitation of Liability
In no event shall Zebra Technologies or anyone else involved in the creation, production, or delivery of the
accompanying product (including hardware and software) be liable for any damages whatsoever
(including, without limitation, consequential damages including loss of business profits, business
interruption, or loss of business information) arising out of the use of, the results of use of, or inability to
use such product, even if Zebra Technologies has been advised of the possibility of such damages. Some
jurisdictions do not allow the exclusion or limitation of incidental or consequential damages, so the above
limitation or exclusion may not apply to you.
Revision History
Changes to the original guide are listed below:
Change Date Description
-01 Rev A 1/2017 Initial release.
-02 Rev A 7/2017 Update to Voice Client 8.2.x.
-03 Rev A 9/2017 Update licensing information.
-04 Rev A 12/2017 Add information on configuring multiple PBXs, WiFi Preferred, importing contacts.
2

Change Date Description
-05 Rev A 3/2018 Add information on Cisco Services feature.
Add information on TCP/UDP port usage.
-06 Rev A 5/2019 Updating features for most recent release of the client.
-07 Rev A 7/2019 Updates to custom ringtone and audio prompt file formats. Update to Home Screen
Dashboard section.
-08EN Rev A5/2020 Ringtone option added to main menu. Sign out and reload are now separate options
in main menu. When selecting ringtone from SD card, option should read Custom
Ringtones.
3

Table of Contents
Copyright ........................................................................................................................................... 2
Terms of Use .................................................................................................................................... 2
Revision History ................................................................................................................................ 2
About This Guide
Introduction ..................................................................................................................................... 11
PBX Integration Statement ............................................................................................................. 11
Chapter Descriptions ...................................................................................................................... 11
Notational Conventions ................................................................................................................... 12
Related Documents and Software .................................................................................................. 12
Service Information ......................................................................................................................... 13
Configuring Basic CUCM
Introduction ..................................................................................................................................... 14
Create SIP Security Profile ............................................................................................................. 14
Create End User ............................................................................................................................. 16
Create Phone Endpoint ................................................................................................................... 18
Assign Directory Number to Endpoint ............................................................................................. 21
Configure Workforce Connect Voice Client .................................................................................... 22
Configuring Premium CUCM
Introduction ..................................................................................................................................... 23
Create End User ............................................................................................................................. 23
Create Phone Endpoint ................................................................................................................... 25
Assign Directory Number to Endpoint ............................................................................................. 28
Configure Workforce Connect Voice Client .................................................................................... 29
Configuring the Client
Introduction ..................................................................................................................................... 30
Determine Deployment Readiness ................................................................................................. 30
Connect Android Wireless Device to Network ................................................................................ 30
Install Workforce Connect Voice Client ........................................................................................... 31
Download and Install Board Support Package (BSP) Operating System ................................. 31
Download and Install Android Application Packager (APK) Client ............................................ 31
4

Table of Contents
Installing the APK Manually ................................................................................................ 31
Installing the APK Using ADB Commands .......................................................................... 31
Create a Shortcut for the Workforce Connect Voice Client ....................................................... 31
Open Workforce Connect Voice Client ........................................................................................... 32
Activate Workforce Connect Voice Client ....................................................................................... 33
Activate Using an Activation Key .............................................................................................. 33
Activate Using an MDM ............................................................................................................. 35
MDM Deployment ............................................................................................................... 35
Activate Using a USB Tether .................................................................................................... 35
Update License ......................................................................................................................... 35
Configure Workforce Connect Voice Client .................................................................................... 35
Configure Using the WFC Voice Client GUI .............................................................................. 36
Configure Using an MDM .......................................................................................................... 38
MDM Deployment ............................................................................................................... 39
Configure Using a USB Tether .................................................................................................. 39
Dynamic Configuration
Introduction ..................................................................................................................................... 40
Overview ................................................................................................................................... 40
General Device Use Cases ............................................................................................................. 40
Device Start-Up ............................................................................................................................... 41
Device Identification ........................................................................................................................ 41
Profile Configuration ....................................................................................................................... 42
Connection Attributes ................................................................................................................ 42
Dynamic Configuration .................................................................................................................... 43
Enabling Dynamic Configuration ............................................................................................... 43
Wcfvariable.xml File ................................................................................................................. 43
XML File Location ..................................................................................................................... 44
DHCP Option 150 ..................................................................................................................... 45
Configuration Resynchronization .................................................................................................... 45
Dynamic Configuration Start-Up - Server Side ............................................................................... 46
Dynamic Configuration Start-Up - Client Side ................................................................................. 47
XML File Examples ......................................................................................................................... 48
Testing Remote Dynamic Configuration ......................................................................................... 49
Settings
Introduction ..................................................................................................................................... 51
Exiting WFC Voice Client: ......................................................................................................... 51
Reloading WFC Voice Client: .................................................................................................... 51
Profile Settings ................................................................................................................................ 52
Create Profile ............................................................................................................................ 52
Change Profile Name ................................................................................................................ 52
Shared Profiles URI .................................................................................................................. 52
Load New Profile ....................................................................................................................... 53
Loading a New Profile Using the GUI ................................................................................. 53
Loading a New Profile Using XML ...................................................................................... 53
Installing the APK Using ADB Commands .......................................................................... 53
Save Current Profile .................................................................................................................. 53
Edit a Profile Using XML ........................................................................................................... 54
5

Table of Contents
Connection Parameters .................................................................................................................. 55
Configuring Multiple PBX Types ............................................................................................... 56
Audio Settings ................................................................................................................................. 57
Audio Codecs Priorities ............................................................................................................. 59
Jitter Buffer ................................................................................................................................ 60
Jitter Initial Delay ................................................................................................................. 60
Jitter Buffer Max Buffer Size ............................................................................................... 60
RTP Parameters ....................................................................................................................... 61
Real-Time Transport Protocol (RTP) Parameters - Payload Size ....................................... 61
First Real-Time Transport Protocol (RTP) Port ................................................................... 61
Last Real-Time Transport Protocol (RTP) Port ................................................................... 61
Audio Enhancements ................................................................................................................ 62
Configuring Audio Enhancements ....................................................................................... 62
Input / Output Audio ............................................................................................................ 62
Audio Debugging Tools ....................................................................................................... 62
UI Settings ...................................................................................................................................... 64
Configuration File Sections ....................................................................................................... 64
Profile Section ..................................................................................................................... 64
Footer Section ..................................................................................................................... 64
Dashboard Section .............................................................................................................. 65
Call Buttons Section ............................................................................................................ 65
Headless Mode ......................................................................................................................... 65
Background Logo ...................................................................................................................... 66
Icon Library ......................................................................................................................... 66
Custom Background Configuration ..................................................................................... 66
Custom Background Configuration ..................................................................................... 66
Buttons Padding ........................................................................................................................ 66
Dialer Padding ........................................................................................................................... 67
Graphical User Interface Design Tool ....................................................................................... 67
Using the UI Settings GUI Design Tool ............................................................................... 68
Home Screen Dashboard .......................................................................................................... 70
In-Call Dashboard ..................................................................................................................... 70
Button Configuration ................................................................................................................. 71
Call ...................................................................................................................................... 71
Dial ...................................................................................................................................... 73
Start App ............................................................................................................................. 74
Log Marker .......................................................................................................................... 75
Speed Dial 0-9 .................................................................................................................... 76
Redial .................................................................................................................................. 77
Suspend Mode .................................................................................................................... 78
History ................................................................................................................................. 79
Contacts .............................................................................................................................. 80
Favorites ............................................................................................................................. 81
Voicemail ............................................................................................................................. 82
Do Not Disturb ..................................................................................................................... 83
Directory .............................................................................................................................. 83
Add Call ............................................................................................................................... 85
Home ................................................................................................................................... 86
Hold ..................................................................................................................................... 87
Resume ............................................................................................................................... 88
Transfer ............................................................................................................................... 89
6

Table of Contents
Conference .......................................................................................................................... 90
Complete ............................................................................................................................. 91
End Call ............................................................................................................................... 92
List ....................................................................................................................................... 93
Blank ................................................................................................................................... 96
Reload ................................................................................................................................. 97
Sign Out .............................................................................................................................. 98
Ringtone .............................................................................................................................. 99
Icons ........................................................................................................................................ 100
Icon Library ....................................................................................................................... 100
Custom Icon Configuration ................................................................................................ 100
Icon Scale Type ................................................................................................................ 101
Button Color ............................................................................................................................ 103
Button Background Color .................................................................................................. 103
Button Text Color .............................................................................................................. 104
Global Button Color Settings ................................................................................................... 105
Global Button Background Color ....................................................................................... 105
Global Button Text Color ................................................................................................... 106
Reset Colors to Default ........................................................................................................... 107
Restore Buttons ...................................................................................................................... 107
Call Settings .................................................................................................................................. 108
Call Waiting Volume ................................................................................................................ 109
Call Waiting Interval ................................................................................................................ 110
Ringer OFF In Charger ........................................................................................................... 110
Disable Speaker mode ............................................................................................................ 110
Speaker on table ..................................................................................................................... 111
Call Accept Style ..................................................................................................................... 112
Configure the Glow Pad Buttons ....................................................................................... 113
Auto Answer Mode .................................................................................................................. 114
Incoming Call Voice Announcer .............................................................................................. 114
No Audio Cutoff ....................................................................................................................... 114
Audio Prompt File .................................................................................................................... 114
MOH Enabled .......................................................................................................................... 115
MOH File ................................................................................................................................. 115
Ringtones ...................................................................................................................................... 116
Line Ringtones ........................................................................................................................ 116
Miscellaneous Settings ................................................................................................................. 117
Sign OUT in Charger ............................................................................................................... 117
Setting Sign OUT in Charger ............................................................................................ 117
Flexible TLS ............................................................................................................................ 117
Setting Flexible TLS .......................................................................................................... 117
WiFi Preferred ......................................................................................................................... 117
Setting WiFi Preferred ....................................................................................................... 118
Help URL ................................................................................................................................. 118
Setting Help URL .............................................................................................................. 118
Settings Password .................................................................................................................. 118
Additional Profile URI .............................................................................................................. 119
Setting Additional Profile URI ............................................................................................ 119
Contacts URL .......................................................................................................................... 119
Setting Contacts URL ........................................................................................................ 119
Sync Contacts ......................................................................................................................... 119
7

Table of Contents
Creating a Contacts List .................................................................................................... 119
Syncing Contacts .............................................................................................................. 120
Logging
Introduction ................................................................................................................................... 121
Logging Level ................................................................................................................................ 121
Setting Logging Level ........................................................................................................ 121
Logging Types .............................................................................................................................. 122
Logging to Console ................................................................................................................. 122
Logging to File ......................................................................................................................... 122
Logging to HTTP Post URL ..................................................................................................... 122
Log Files ....................................................................................................................................... 123
Workforce Connect Logs ......................................................................................................... 123
Fusion Logs ............................................................................................................................. 123
Collecting LogCat with RxLogger .................................................................................................. 123
Enabling RXLogger ................................................................................................................. 123
Log Marker .................................................................................................................................... 125
Adding a Log Marker ............................................................................................................... 125
Configuring Log Marker ........................................................................................................... 125
Fusion Logs .................................................................................................................................. 125
Enabling Fusion Settings In Android 6 or 7 ............................................................................. 126
Enabling Fusion Settings In Android 8 or Later ....................................................................... 126
Capturing the Logs ........................................................................................................................ 126
Headless Mode and WFCVoice Service
Introduction ................................................................................................................................... 127
Integrating WFCVoice Service Plug-in .......................................................................................... 128
Enabling Headless Mode .............................................................................................................. 128
Initiating a Call .............................................................................................................................. 128
Reporting App State ...................................................................................................................... 129
WFCDemo Android Project ........................................................................................................... 130
Using the Client
Introduction ................................................................................................................................... 133
Home Screen Dashboard ............................................................................................................. 135
In-Call Dashboard ......................................................................................................................... 135
Signal Quality ................................................................................................................................ 136
Calling ........................................................................................................................................... 136
Making a Call .......................................................................................................................... 136
Receiving a Call ..............................................
Accept-Reject Buttons ....................................................................................................... 138
Sliding Tab ........................................................................................................................ 138
Glow Pad ........................................................................................................................... 138
Popup Window .................................................................................................................. 138
End Call ................................................................................................................................... 139
Add Call ................................................................................................................................... 139
Call Hold and Resume ............................................................................................................ 142
Call Park and Unpark .............................................................................................................. 142
........................................................................ 138
8

Table of Contents
Call Park ............................................................................................................................ 143
Call Unpark ....................................................................................................................... 143
Call Park Directed ................................................................................................................... 145
................................................................................................................................................ 145
Call Park Directed Retrieval .............................................................................................. 147
Voicemail ...................................................................................................................................... 148
Message Waiting ..................................................................................................................... 148
Message Retrieval .................................................................................................................. 148
Contacts ........................................................................................................................................ 149
Favorites ....................................................................................................................................... 150
Call Log / Call History ................................................................................................................... 151
View Recent Calls ................................................................................................................... 151
Dial from Call History .............................................................................................................. 151
Delete Call History .................................................................................................................. 151
View Call History ..................................................................................................................... 151
Advanced Calling Features ........................................................................................................... 153
Multiple Lines .......................................................................................................................... 153
Multiple Line Appearances ................................................................................................ 153
Busy Indicator ................................................................................................................... 154
Transfer (attended, semi-attended) ......................................................................................... 155
Ad hoc Conference ................................................................................................................. 156
Call Forward ............................................................................................................................ 158
Miscellaneous Features ................................................................................................................ 162
Ringtone .................................................................................................................................. 162
Reload ..................................................................................................................................... 162
Sign Out .................................................................................................................................. 162
Speed Dial Numbers ............................................................................................................... 162
Do Not Disturb ......................................................................................................................... 162
Suspend Mode ........................................................................................................................ 164
Directory .................................................................................................................................. 164
List ........................................................................................................................................... 165
Home ....................................................................................................................................... 165
Call Pickup .............................................................................................................................. 166
Using Call Pickup .............................................................................................................. 166
Using Group Pickup .......................................................................................................... 167
Using Other Pickup ........................................................................................................... 168
Adjusting the Ring Volume ...................................................................................................... 168
Unique Ringtone per Line Appearance ................................................................................... 169
Unique Ringtone per Contact .................................................................................................. 169
Distinctive Ringing ................................................................................................................... 169
Vibrate/Ring Tone ................................................................................................................... 169
Start Application ...................................................................................................................... 169
Log Marker .............................................................................................................................. 169
Adding a Log Marker ......................................................................................................... 169
Caller ID .................................................................................................................................. 169
Hold Recall .............................................................................................................................. 170
On-hook Dialing ...................................................................................................................... 170
9

Table of Contents
Button Actions
XML Tags
XML Example - Profile
XML Example - Footer
XML Example - Dashboard
XML Example - Call Buttons
Directory Button Configuration
Configuring the Directory Button ................................................................................................... 200
Using the Directory Button ............................................................................................................ 200
Configuring a Proxy Server
Configuring a Proxy Server ........................................................................................................... 201
Unsupported Features
Unsupported Features .................................................................................................................. 202
Network Ports and Protocols
Network Ports and Protocols ........................................................................................................ 203
Services Configuration
Introduction ................................................................................................................................... 204
Extension Mobility ......................................................................................................................... 204
IP Phone Services URL (SURL) ................................................................................................... 209
Installing IIS Web Services ..................................................................................................... 210
Creating IP Phone Services XML Files ................................................................................... 211
Example of Main Menu XML File ...................................................................................... 212
Example of Directory Entry XML Files .............................................................................. 213
Enabling the Cisco IP Phone Service ..................................................................................... 217
Using IP Phone Services in the WFC Voice Client ................................................................. 218
10

About This Guide
Introduction
This manual describes how to install, configure and use Workforce Connect Voice Client on a Cisco CUCM
network.
NOTE: Screens and windows pictured in this guide are samples and can differ from actual screens.
PBX Integration Statement
Cisco CUCM configuration references contained within this document is based on Cisco CUCM version 8.6 and
above. Generally Cisco configuration elements are maintained in subsequent releases, however this cannot be
guaranteed. The reader is advised to consult Cisco CUCM configuration guide for releases above 8.6 and use in
conjunction with this documentation.
NOTE: Workforce Connect Voice Client requires a minimum Cisco CUCM version of 8.6.
Chapter Descriptions
Topics covered in this guide are as follows:
• Configuring Basic CUCM, describes the steps you need to take to configure basic Cisco CUCM.
• Configuring Premium CUCM, describes the steps you need to take to configure premium Cisco CUCM.
• Configuring the Client, describes the steps you need to take prior to beginning to configure the device.
• Dynamic Configuration, describes the procedures to dynamically configure the WFC client using an XML
variable file.
• Settings, provides detailed information on configuring settings.
• Logging, describes the process used to capture and collect WFC Voice Client log files and Fusion log files.
• Headless Mode and WFCVoice Service, describes the procedures to configure WFC Voice client as a
background service.
• Using the Client, explains how to use the functions and features of the WFC client.
• Button Actions, includes a table listing the XML tags used to define a button action.
11

• XML Tags, includes a table listing all XML tags used in the Workforce Connect Voice Client configuration
file and where they are valid.
• XML Example - Profile, provides an XML example for the Profile section.
• XML Example - Footer, provides an XML example for the Footer section.
• XML Example - Dashboard, provides an XML example for the Dashboard section.
• XML Example - Call Buttons, provides an XML example for the In-Call Buttons section.
• Directory Button Configuration, describes the process used to configure the Directory button.
• Configuring a Proxy Server, explains how to configure a proxy server.
• Unsupported Features, provides a list of features not supported by Cisco CUCM.
• Network Ports and Protocols, provides an overview of the ports and protocols the WFC Voice Client uses
on supported Zebra devices.
• Services Configuration, provides an overview on configuring Cisco services for the WFC Voice Client.
Notational Conventions
The following conventions are used in this document:
About This Guide
• Bold text is used to highlight the following:
• Dialog box, window and screen names
• Drop-down list and list box names
• Check box and radio button names
• Icons on a screen
• Key names on a keypad
• Button names on a screen.
• Bullets (•) indicate:
• Action items
• Lists of alternatives
• Lists of required steps that are not necessarily sequential.
• Sequential lists (e.g., those that describe step-by-step procedures) appear as numbered lists.
Related Documents and Software
The following documents provide more information about the WFC Voice Client.
• Best Practices Guide: Deploying VoWLAN Over Aruba Wireless Networks, p/n MN002151Axx
• Best Practices Guide: Deploying VoWLAN Over Cisco Wireless Networks, p/n MN001146Axx
• Best Practices Guide: Deploying VoWLAN Over WiNG5 Wireless Networks, p/n MN001150Axx
For the latest version of this guide and all guides, go to: www.zebra.com/support
.
12

Service Information
If you have a problem with your equipment, contact Zebra Global Customer Support for your region. Contact
information is available at: www.zebra.com/support
When contacting support, please have the following information available:
• Serial number of the unit
• Model number or product name
• Software type and version number.
Zebra responds to calls by email, telephone or fax within the time limits set forth in support agreements.
If your problem cannot be solved by Zebra Customer Support, you may need to return your equipment for servicing
and will be given specific directions. Zebra is not responsible for any damages incurred during shipment if the
approved shipping container is not used. Shipping the units improperly can possibly void the warranty.
If you purchased your Zebra business product from a Zebra business partner, contact that business partner for
support.
About This Guide
.
13

Configuring Basic CUCM
Introduction
This section contains general instructions to configure Basic CUCM.
NOTE: Basic CUCM allows configuration of one phone line with a maximum of two calls per line. For more
information on features available in Basic CUCM, see Using the Client on page 133.
Perform the following steps to configure Cisco Basic CUCM:
• Create SIP Security Profile
• Create End User
• Create Phone Endpoint
• Assign DN to Endpoint
• Configure Workforce Connect Voice Client.
Create SIP Security Profile
To create an optional SIP security profile with digest authentication:
NOTE: If digest authentication is not required, skip to Create End User on page 16.
1. Select System > Security > Phone Security Profile.
14

Figure 1 System Menu
Configuring Basic CUCM
2. Scroll to the bottom of the list and select Third-party SIP Device Basic - Standard SIP Non-Secure Profile.
3. Select Copy.
15

Configuring Basic CUCM
Figure 2 Phone Security Profile Configuration Screen
4. Change the name of the profile to Third-party SIP Device Basic - Digest Required.
5. Select the checkbox next to Enable Digest Authentication to enable.
6. Select Save.
Create End User
To create an End User:
1. Select User Management > End User.
Figure 3 User Management Menu
2. Select Add New.
3. Enter the following:
16

Configuring Basic CUCM
• User ID
• Password
• Confirm Password
• PIN
• Confirm PIN
• Last Name
• First Name
• Telephone Number
• Department
• User Locale
• Digest Credentials
• Confirm Digest Credentials.
Figure 4 End User Configuration Screen
4. Scroll to the bottom of the screen.
5. Select Save.
17

Create Phone Endpoint
To map the End User to the Phone Endpoint:
1. Select Device > Phone.
Figure 5 Device Menu
2. Select Add New.
Configuring Basic CUCM
Figure 6 Find and List Phones Screen
18

Configuring Basic CUCM
3. Select Phone Type Third Party SIP (Basic).
Figure 7 Add New Phone Screen
19

Configuring Basic CUCM
4. For Device Information, complete fields as needed.
Figure 8 Phone Configuration Screen - Device Information
5. For Protocol Specific Information, enter information from Create SIP Security Profile on page 14.
Figure 9 Phone Configuration Screen - Protocol Specific Information
6. Select Save.
7. Select Apply Config.
20

Configuring Basic CUCM
Assign Directory Number to Endpoint
To assign a new Directory Number (DN) to an endpoint:
1. Select Add a new DN.
Figure 10 Phone Configuration Screen - Add a new DN
2. For Directory Number Information, complete fields as needed.
3. For Directory Number Settings, complete fields as needed.
21

Configuring Basic CUCM
Figure 11 Directory Number Configuration Screen
4. Scroll to the bottom of the screen.
5. Select Save.
Configure Workforce Connect Voice Client
To configure the WFC Voice Client, see Configure Workforce Connect Voice Client on page 35.
22

Configuring Premium CUCM
Introduction
This section contains general instructions to configure Premium CUCM.
Perform the following steps to configure Cisco Premium CUCM:
• Create End User
• Create Phone Endpoint
• Assign DN to Endpoint
• Configure Workforce Connect Voice Client.
Create End User
To create an End User:
1. Select User Management > End User.
Figure 12 User Management Menu
2. Select Add New.
3. Enter the following:
• User ID
• Password
• Confirm Password
• PIN
23

Configuring Premium CUCM
• Confirm PIN
• Last Name
• First Name
• Telephone Number
• Department
• User Locale.
Figure 13 End User Configuration Screen
4. Scroll to the bottom of the screen.
5. Select Save.
24

Create Phone Endpoint
To map the End User to the Phone Endpoint:
1. Select Device > Phone.
Figure 14 Device Menu
2. Select Add New.
Configuring Premium CUCM
Figure 15 Find and List Phones Screen
25

Configuring Premium CUCM
3. Select Phone Type 8865.
Figure 16 Add New Phone Screen
4. For Device Information, complete fields as needed.
Figure 17 Phone Configuration Screen - Device Information
26

Configuring Premium CUCM
5. For Protocol Specific Information, complete fields as needed.
Figure 18 Phone Configuration Screen - Protocol Specific Information
6. Select Save.
7. Select Apply Config.
27

Configuring Premium CUCM
Assign Directory Number to Endpoint
To assign a new Directory Number (DN) to an endpoint:
1. Select Add a new DN.
Figure 19 Phone Configuration Screen - Add a new DN
28

Configuring Premium CUCM
2. For Directory Number Information, complete fields as needed.
3. For Directory Number Settings, complete fields as needed.
Figure 20 Directory Number Configuration Screen
4. Scroll to the bottom of the screen.
5. Select Save.
Configure Workforce Connect Voice Client
To configure the WFC Voice Client, see Configure Workforce Connect Voice Client on page 35.
29

Configuring the Client
Introduction
This chapter describes how to install, activate and configure the Workforce Connect Voice Client (WFC Voice
Client).
Determine Deployment Readiness
Assess the suitability of your Wireless Local Area Network (WLAN) for voice traffic, using the Best Practices Guide:
Deploying VoWLAN Over Aruba Wireless Networks, Deploying VoWLAN Over Cisco Wireless Networks or
Deploying VoWLAN Over WiNG5 Wireless Networks.
.
WARNING: If your WLAN is not suitable for voice traffic, WFC Voice Client will perform on a best effort basis.
Contact the Zebra Software Support Desk for more information: www.zebra.com/support.
Connect Android Wireless Device to Network
Zebra WFC Voice Client for Android includes support for the following device types:
• Enterprise Mobile devices
• Consumer Smartphone devices (evaluation only).
Connect the Android wireless device to the network. See device instructions for more information. If you need
assistance, contact the Zebra Support at: www.zebra.com/support
.
30

Configuring the Client
Install Workforce Connect Voice Client
There are two ways to install the WFC Voice Client:
• USB tether or web server - This section describes using a USB tether or web server to install the WFC
Voice Client APK manually or using ADB commands.
• Mobile Device Manager (MDM) - For information on installing the WFC Voice Client APK using an MDM,
refer to the Workforce Connect Voice Client Configuration Guide for Mobile Device Managers.
Download and Install Board Support Package (BSP) Operating System
For instructions please refer to www.zebra.com/support and login using your partner login for latest BSP and
integration instructions. If you need assistance, contact Zebra Support at: www.zebra.com/support
Download and Install Android Application Packager (APK) Client
1. From a web browser, go to the Zebra Licensing End User Portal.
To access the Zebra Licensing End User Portal, follow the instructions in the Software Entitlement email from
Zebra. Portal access requires registration at Zebra.com and authorization as a portal user by Zebra Support.
2. From the Zebra Licensing End User Portal, download the latest WFC Voice APK file.
.
Installing the APK Manually
To install the APK manually:
1. Save the APK file to the root directory of the target device using one of the following methods:
• USB tether
• Web server download (if your network supports this option).
2. On the Android device, go to the Apps list and open the file browser.
3. Navigate to the APK file.
4. Run and install the APK file.
5. Check that the WFC Voice Client is available in the Apps Screen.
The WF Connect icon should be visible in the list of available applications.
Installing the APK Using ADB Commands
To install the APK using an Android Debug Bridge (ADB) connection, open a command prompt and send the
following ADB commands to the device:
adb install –g <apk_file_name>
adb shell dumpsys deviceidle whitelist +com.symbol.wfc.voice
adb shell appops set com.symbol.wfc.voice SYSTEM_ALERT_WINDOW allow
Where
<apk_file_name> is the name of the WFC Voice APK file.
Create a Shortcut for the Workforce Connect Voice Client
To create a shortcut:
1. In the Apps Screen, press and hold on the WF Connect icon.
31

Configuring the Client
Press and hold WF Connect icon
Drag icon to the Home screen
Figure 21 Apps Screen
2. Drag the WF Connect Icon to the Home screen.
Figure 22 Home Screen
3. Drop icon on Home screen.
Open Workforce Connect Voice Client
To open the WFC Voice Client, use one of the following methods:
• Touch the WF Connect icon on the Home screen.
32

Configuring the Client
Touch on the WF Connect icon on
the Android Home Screen.
Touch on the WF Connect icon on
the Android Apps Screen.
Figure 23 Home Screen
• Touch on the WF Connect icon on the Apps screen.
Figure 24 App Screen
The App Activation screen displays.
Activate Workforce Connect Voice Client
When the WFC Voice Client starts for the first time, the App Activation screen appears. A valid license is required
for each PBX. The WFC Voice Client is activated by using an activation key, Mobile Device Manager (MDM), or
USB tether.
NOTE: When activating a device that does not have direct access to the license source, use a proxy server. See
Configuring a Proxy Server on page 201.
Activate Using an Activation Key
To activate the WFC Voice Client:
33

Configuring the Client
Toggle Button
Clear All Fields
1. Open the WFC Voice Client.
Figure 25 App Activation Screen
2. Use one of the following activation methods:
• Keys or features - Acquires licenses from the default licensing source.
In the keys or features field, enter your activation code(s) separated by commas.
NOTE: The WFC Voice Client version 8.2.729 requires a license source URL when activating using an activation
key. Refer to the Workforce Connect Voice Client 8.2.x Administration Guide for Licensing.
3. To enter a device alias, touch the toggle button and, in the device alias field, enter a name to identify the
device on the license source.
4. Touch Register App.
The About screen appears, displaying currently licensed keys and features.
Figure 26 About Screen
5. Touch OK.
34

Configuring the Client
Activate Using an MDM
Configuring the WFC Voice Client using an MDM requires a deployment package and the WFC Voice Client
configuration file. The configuration file
including licensing information, as key and value pairs. For detailed information on the XML configuration file, see
Settings on page 51.
Define the licensing information using the following XML tags:
• license_key - Contains one or more WFC Voice Client activation keys separated by commas.
Example:
<license_key>abcd‐1234‐ab12‐cd34‐5678‐efgh‐ef56‐gh78</license_key>
• license_source - The URL of a license source.
• WFC Voice Client version 8.2.729 - Enter the following URL:
https://zebra-licensing.flexnetoperations.com/flexnet/deviceservices.
• WFC Voice Client version 8.2.730 or later - Leave this field blank.
• license_alias - Identifies the device on the license source. (Optional)
MDM Deployment
During runtime, WFC Voice Client listens for wfc.voice.ACTION_UPDATE_CONFIG intent. When the WFC Voice
Client receives the intent from an MDM, the configuration file uses
configuration parameters. Use a single intent to update multiple configuration parameters by including multiple
element and value pairs.
WFConnect.xmlstores all WFC Voice client configuration parameters,
WFConnect.xml to update the WFC Voice Client
For detailed information on MDM deployment, refer to the Workforce Connect Voice Client 8.x Configuration Guide
for Mobile Device Managers.
Activate Using a USB Tether
Send theWFConnect.xmlconfiguration file to the device using a USB tether, use an Android Debug Bridge (ADB)
connection.
NOTE: It is not recommended to install the WFConnect.xml file using a USB tether because it can cause
permission issues on the device.
1. Install the WFC Voice Client APK. See Download and Install Android Application Packager (APK) Client on
page 31.
2. Copy the WFConnect.xml file in the /sdcard/WFConnect directory.
3. Open a command prompt and send the following adb command to the device:
adb shell am start -a "wfc.voice.ACTION_NEW_CONFIG" --es "profile_uri"
"/WFConnect/WFConnect.xml"
Update License
To update all WFC Voice Client licenses, refer to the Workforce Connect Voice Client 8.2.x Administration Guide
for Licensing.
Configure Workforce Connect Voice Client
The WFC Voice Client is configured using the Graphical User Interface (GUI), an MDM, or a USB Tether.
35

Configuring the Client
Enter Settings password.
NOTE: It is not recommended to install the WFConnect.xml file using a USB tether because it can cause
permission issues on the device.
Configure Using the WFC Voice Client GUI
To configure the WFC Voice Client:
1. Touch the menu button.
Figure 27 WFC Voice Client Menu
2. Touch Settings.
Figure 28 Enter Password Screen
3. Enter the settings password. The default password is: zamboni.
4. Touch Connection Parameters.
Figure 29 Connection Parameters
36

Configuring the Client
MAC Address
Server Address
PBX Type
SIP ID
5. Select a PBX configuration. The default configuration is: PBX#1 Configuration.
For information on configuring additional PBX types, see Configuring Multiple PBX Types on page 56.
6. Enter the following information:
• For Basic CUCM:
i. Touch PBX#1 Type and select Basic CUCM.
ii. In the SIP ID field, enter the Phone Directory Number.
iii. In the User ID field, enter the Digest User (optional).
iv. In the Password field, enter the Digest Password (optional).
v. Enter the Address of the PBX server.
Figure 30 Enter Basic CUCM Parameters
• For Premium CUCM:
vi. Touch PBX#1 Type and select Premium CUCM.
vii. Ensure Device Type is Cisco 8865.
viii. In the User ID field, enter the Digest User (optional).
ix. In the Password field, enter the Digest Password (optional).
x. Enter the MAC Address. See Device Identification on page 41 for more information on MAC
addresses.
xi. Enter the Address of the PBX server.
37

Configuring the Client
MAC Address
Server Address
PBX Type
SIP ID
Figure 31 Enter Premium CUCM Parameters
NOTE: The optional parameters Server Address2 and Server Address 3 are secondary addresses, used if the
primary server address is not reachable.
NOTE: For information on optional configuration settings, see XML Tags on page 174.
7. Touch the back button three times to return to the WFC Voice Client home screen.
Figure 32 Confirmation Message
A confirmation that the Configuration has been saved to WFConnect.xml displays.
Configure Using an MDM
Configuring the WFC Voice Client using an MDM requires a deployment package and the WFC Voice Client
configuration file. The configuration file
WFConnect.xmlstores all WFC Voice client configuration parameters,
38

Configuring the Client
including licensing information, as key and value pairs. For detailed information on the XML configuration file, see
Settings on page 51.
Define the licensing information using the following XML tags:
• license_key - Contains one or more WFC Voice Client activation keys separated by commas.
Example:
<license_key>abcd‐1234‐ab12‐cd34‐5678‐efgh‐ef56‐gh78</license_key>
• license_source - The URL of a license source.
• WFC Voice Client version 8.2.729 - Enter the following URL:
https://zebra-licensing.flexnetoperations.com/flexnet/deviceservices.
• WFC Voice Client version 8.2.730 or later - Leave this field blank.
• license_alias - Identifies the device on the license source. (Optional)
MDM Deployment
During runtime, WFC Voice Client listens for wfc.voice.ACTION_UPDATE_CONFIG intent. When the WFC Voice
Client receives the intent from an MDM, the configuration file uses
configuration parameters. Use a single intent to update multiple configuration parameters by including multiple
element and value pairs.
WFConnect.xml to update the WFC Voice Client
For detailed information on MDM deployment, refer to the Workforce Connect Voice Client 8.x Configuration Guide
for Mobile Device Managers.
Configure Using a USB Tether
To send theWFConnect.xmlconfiguration file to the device using a USB tether, use an Android Debug Bridge
(ADB) connection.
NOTE: It is not recommended to install the WFConnect.xml file using a USB tether because it can cause
permission issues on the device.
1. Install the WFC Voice Client APK. See Download and Install Android Application Packager (APK) Client on
page 31.
2. Copy the WFConnect.xml file to the WFConnect directory.
3. Open a command prompt and send the following ADB command to the device:
adb shell am start -a "wfc.voice.ACTION_NEW_CONFIG" --es "profile_uri"
"/WFConnect/WFConnect.xml"
To update a specific parameter in the
send an ADB command to the device in the following format:
$ adb shell am start -a wfc.voice.ACTION_UPDATE_CONFIG --es element value
For a list of possible elements and values, see XML Tags.
WFConnect.xml configuration file using ADB, open a command prompt and
39

Dynamic Configuration
Introduction
The WFC Voice Client configuration file defines the operational environment of the SIP client running on Zebra
mobile android devices. It has various elements that define the network location of the PBX and, for each device,
unique defining operational aspects affecting the user experience. Creating this file manually and distributing this
file for each device on an enterprise-wide scale introduces significant administrative overhead.
Dynamic configuration:
• Reduces the administrative effort preparing the WFC Voice Client for enterprise operation
• Provides a flexible delivery environment for the customized configuration
• Provides a method for shared device use without manually reloading the configuration
• Provides backward compatibility for existing customers.
Rather than manually creating a unique configuration for each device, this approach dynamically configures the
WFC Voice Client using an XML variable file. File delivery can be manual, by an MDM, or automatic through
existing network services.
Overview
The chapter includes:
• Providing a new XML tag that triggers dynamic configuration
• Building a multi-user variable file to build user specific configurations for the WFC Voice Client
• Re-synchronizing the WFC Voice Client with the variable file on a regular basis
• Using DHCP resources to provide auto installation for the file.
Properly configuring these elements allows the WFC Voice Client to register to the PBX.
General Device Use Cases
• A unique user is typically a supervisor or manager with a device with a more advanced feature set that is
not shared with any other user. This extension may be shared with that person’s desk phone.
• A shared device is typically for line workers or department staff that use a phone representing a functional
area, as opposed to a specific person. The device has a basic feature and may also be uniform, sharing
common elements (e.g.; button configurations) across all shared devices.
40

Device Start-Up
There are three stages of device life-cycle in the customer environment that affect how the WFC Voice Client
obtains the suitable runtime configuration:
• Initialized out of the box configuration (no configuration)
• A rebooted device previously configured
• A device reassigned to a new extension / user
Device Identification
The Cisco environment identifies each mobile handset by a unique MAC address. This can be the literal
interpretation of the mobile device MAC address, or a pseudo MAC character string.
• Literal MAC - The WFC Voice Client interrogates and insert the mobile device’s MAC address into the
WFC Voice Client configuration using an Android API. Replacing the mobile device requires the
Administrator to modify the configuration. The replacement device then has the same configuration as the
previous device.
• Pseudo MAC - The 12 character MAC string is a simple unit identifier in the PBX. The device can be
replaced without Administration intervention. The pseudo MAC does not represent the actual device MAC
address. To place a replacement device into service, set the WFC XML configuration set to match the
existing string defined in the PBX.
Dynamic Configuration
41

Profile Configuration
For the WFC Voice Client to connect to a PBX, the Profile section of the WFConnect.xml file must contain XML
tags which the device uses to:
• Establish a link to the PBX
• Identify itself to the PBX
• Retrieve the correct privileges and settings.
NOTE: Any element in the WFC Voice Client configuration file can be replaced with a variable.
Connection Attributes
The sip_userid and sip_userpass provide access to the PBX as shown in the following example:
<Profile>
...
<profile_type>CUCM</profile_type>
<display>true</display>
<profname>CUCM-2808</profname>
<prof_password></prof_password>
<sip_userid>2808</sip_userid>
<sip_userpass>123456</sip_userpass>
<prof_description>Test-2808</prof_description>
<sip_mac></sip_mac>
<sip_remhost>10.80.212.44</sip_remhost>
...
</Profile>
Dynamic Configuration
The profile section requires:
• An IP address in the sip_remhost field to target the appropriate PBX.
• A literal or pseudo MAC address in the sip_mac field to identify the device to the PBX.
NOTE: If the MAC address is left blank the device will use the device’s physical MAC address.
When using a pseudo MAC address, the PBX device configuration remains static and the MAC address of the
device is changed to match the desired profile. The field can be populated with a 12 character hex string
resembling a MAC address.
42

Dynamic Configuration
Enabling Dynamic Configuration
The var_location tag enables dynamic configuration, and reduces the entire profile section of the
WFConnect.xml file to one line.
<WFConnect>
<Profile>
<var_location>file:///wfconnect/wfcvariable.xml</var_location>
</Profile>
NOTE: File location is for demonstration purposes. The actual file location may vary.
When the WFC Voice Client initializes and parses the XML file, this tag instructs the device to retrieve the
wfcvariable.xml file from the stated location. The location can be:
• A local file on the mobile device
• Provisioned by an MDM
• Side loaded manually
Dynamic Configuration
• A URL
Wcfvariable.xml File
This file collects and organizes XML tags to populate the run-time WFConnect.xml file. Tags that are not declared
use default values. The Users tag supports and organizes multiple users. The users section is displayed as a list
on WFC Voice Client sign-in screen. When the display tag for an entry is set to true, users can select a profile from
the list.
When the display tag is set to false, the profname and prof_password tags are used. These tags are used for
user authentication when selecting a hidden profile for a dedicated user. For a shared extension, these tags are
rarely used.
Users can each be a complete and unique configuration, or they can re-use components, such as the following
buttons example.
<Users>
<Entry>
<profile_type>CUCM</profile_type>
<display>false</display>
<profname>Manager</profname>
<prof_password>abc123</prof_password>
<dept>Mgmt-1</dept>
<sip_mac>aaaabbbbccc1</sip_mac>
<sip_remhost>192.168.10.50</sip_remhost>
<layout_location>file:///WFConnect/buttons_1001.xml</layout_location>
</Entry>
<Entry>
43

</Entry>
<Entry>
</Entry>
<Entry>
</Entry>
</Users>
Dynamic Configuration
<profile_type>CUCM</profile_type>
<display>true</display>
<profname>1002</profname>
<dept>Pharmacy</dept>
<sip_mac>aaaabbbbccc2</sip_mac>
<sip_remhost>192.168.10.50</sip_remhost>
<layout_location>file:///WFConnect/buttons_1002.xml</layout_location>
<profile_type>CUCM</profile_type>
<display>true</display>
<profname>1003</profname>
<dept>Grocery</dept>
<sip_mac>aaaabbbbccc3</sip_mac>
<sip_remhost>192.168.10.50</sip_remhost>
<layout_location>file:///WFConnect/buttons_1002.xml</layout_location>
<profile_type>CUCM</profile_type>
<display>false</display>
<profname>1050</profname>
<prof_password>jsz935</prof_password>
<dept>GM</dept>
<sip_remhost>192.168.10.49</sip_remhost>
<sip_userid>George</sip_userid>
<sip_userpass>xyz123</sip_userpass>
<layout_location>http://user.server/wfcbutton4.xml</layout_location>
XML File Location
The previous example shows the wfcvariable.xml variable file resident on the device. The variable file can also
reside on a centrally accessible server that the client can access. This provides service to all devices in the
enterprise and central administrative control.
The var_location element specifies whether the WFC Voice Client looks for the XML file on the device (a local file)
or at a network location, for example:
• Local: file:///WFConnect/wfcvariable.xml
• HTTP: http://10.5.90.10/wfcvariable.xml
• HTTPS: https://10.5.90.10/wfcvariable.xml
• TFTP: tftp://10.5.90.10/wfcvariable.xml
44

Dynamic Configuration
This provides options for deploying the configuration files. For example, an enterprise using an MDM may supply
both the Profile section and the variable file to the device and also have a central location for the variable file.
DHCP Option 150
The WFC Voice Client also supports DHCP Option 150 for retrieving the wfcvariable.xml file. If the var_location
tag is not specified in the WFConnect.xml configuration, the client attempts to download the wfcvariable.xml file
from the TFTP server specified in the Option 150 string.
Configuration Resynchronization
Synchronizing dynamic configuration ensures that devices always have the most current configuration available
from the network server or MDM. For example, when a user logs in to an extension, the configuration files may
change. The new configuration files are available when the user logs off from the current session and the WFC
service re-processes the variable files.
NOTE: The system administrator must ensure that updates are posted to the correct location available to the
WFC Voice Client client.
45

Dynamic Configuration
MC WLAN
initialization
Is DHCP
Enabled?
YY
Is Zebra Vendor
Class defined?
Are Options
186 & 188
defined?
The MC knows the
TFTP server address
(Option 186) and
the Config file name
to request from
TFTP (Option 188).
The
WFConnect.XML
file is
downloaded
from the
specified TFTP
server.
The config file has
location specified
for the variable
file
(WFCvariable.xml)
File is
downloaded to
the MC for
processing. A
WFCconfig.xml
file is built.
Y
N
N
N
Boot with
Static
Standard DHCP
Boot
Standard DHCP
Boot
Does WFConnect
file exist?
Does var_location
statement exist?
Var file downloaded
for later processing
once extension is
selected.
No Dynamic Config
process. End.
N
N
Y
Y
A
X
C
Start Up WFC for
Manual Config
<WFConnect>
<Profile>
<var_location>http://192.168.10.10/WFConnect/wfcvariable.xml<var_location>
</Profile>
Dynamic Mode
<WFConnect>
<Profile>
<var_location>http://(Option 186)(Option 188)<var_location>
</Profile>
Network Services – Option 60 Support in Sunrise products
MDM or Side loaded config file
WFConnect.xml file
Dynamic Configuration Start-Up - Server Side
The following diagram describes the steps WFC Voice Client follows on the server side to download dynamic
configuration during initialization.
Figure 33 Dynamic Configuration Start-Up Process
46

Dynamic Configuration
User selects
value, or enters
hidden
extension and
password
WFC looks for
‘Var_Location” In
Profile section.
(Local or server)
Can we
determine
which
extensions are
taken?
WFC Startup
Show Extensions
and Department in
reference table.
The MC has Var
Table loaded via
MDM, TFTP, or
manually and is
present in WFC
folder.
Has Variable
Table?
Y
N
End
A
C
B
WFC reaches web
server to download
Var File.
Local Variable
File?
Y
N
Connect to PBX
Exit WFC due to
reboot or abnormal
termination
Exit WFC for Profile
change
X
B
WFC Builds Profile
section of config
Button File
variable
declared?
Local Button File
Location?
WFC reaches web
server to download
Button File.
Complete
Configuration file
built.
Dynamic Configuration Start-Up - Client Side
The following diagram describes the steps WFC Voice Client follows on the client side to download dynamic
configuration during initialization.
Figure 34 Dynamic Configuration Start-Up Process - Continued
47

XML File Examples
Standard Config
(Legacy Mode)
<WFConnect>
<Profile>
<profile_type>Wy</profile_type>
<sip_mac>aaaabbbbccc1sip_mac</sip_mac>
<sip_remhost>192.168.10.50</sip_remhost>
</Profile>
Variable File
Wfcvariable.xml
<Users>
<Entry>
<display>false</display>
<profname>1001</profname>
<password>abc123</password>
<prof_descriptiont>boss</prof_description>
<sip_mac>aaaabbbbccc1</sip_mac>
<sip_remhost>192.168.10.50<sip_remhost>
<layout_location>http://192.168.10.10/WFConnect/buttons_1001.xml
</ůĂLJŽƵƚͺůŽĐĂƚŝŽŶх
</Entry>
</Users>
192.168.10.10
WFC Service Start-up:
- Request Var File
Var File sent to device.
At WFC UI Activation user prompted for Prof_Names
User scrolls through Profile Names and makes
selecttion.
192.168.10.10
Button File external reference for profile.
- Request Button File
Button File sent to device.
Var file and Button file has all information needed to
build WFConfig.xml file.
Buttons_1001.xml
<Footer>
<Button>
<title>History</title>
<action>HISTORY</action>
<value></value>
<enabled>true</enabled>
<confirm>false</confirm>
<description></description>
<fg_color>#FFFFFFFF</fg_color>
<icon></icon>
</Button>
<&ŽŽƚĞƌ>
….
<WFConnect>
<Profile>
<var_location>http://192.168.10.10/WFConnect/wfcvariable.xml<var_location>
</Profile>
Dynamic Mode
<WFConnect>
<Profile>
<var_location>http://(Option 186)(Option 188)<var_location>
</Profile>
Network Services – Option 60 Support in Sunrise products
MDM or Side loaded config file
WFConnect.xml file
The following example displays the standard profile and different ways the voice client is able to retrieve a Dynamic
Workforce Configuration XML file. Options include local XML and TFTP downloaded XML configuration.
Figure 35 XML Files Example
Dynamic Configuration
48

Dynamic Configuration
Testing Remote Dynamic Configuration
A test environment can use any remote server supporting web services.
To set up a lab system:
1. Ensure the server is running IIS to support Web services.
2. Establish a WFC Voice Client website.
3. Create the website and add a virtual folder.
4. Open the Default Documents properties.
Figure 36 Server Manager
5. Set the folder for the WFC Voice Client XML file repository.
49

Dynamic Configuration
Figure 37 Edit Virtual Directory
6. Test the settings to verify the system and default user can access the files.
NOTE: To test accessibility of the files, point your browser to the web site.
7. After determining access to the files, modify the XML files accordingly:
• An example of remote access in WFConnect.xml is:
<Profile>
<var_location>http://192.168.10.45/var/wfcvariable.xml</var_location>
</Profile>
• An example of remote access in the wfcvariable.xml is:
<layout_location>http://192.168.10.45/var/buttons_5002.xml</layout_location>
A remote server allows consistency of delivery to the remote device. Logging on and off the device synchronizes
changes to the device. Each login retrieves the existing XML file targeted for that device.
50

Settings
Introduction
This chapter contains information on settings used to configure and customize the WFC Voice Client.
The following sections provide detailed information on:
• Profile Settings - creating, editing, loading and saving a settings profile.
• Connection Parameters - configuring up to four PBX types.
• Audio Settings - configuring advanced audio settings.
• UI Settings - controlling the appearance and functionality of WFC Voice Client.
• Call Settings - configuring advanced call settings.
• Ringtones - configuring WFC Voice Client ringtones.
• Miscellaneous Settings - locating help files and editing the settings password.
Exiting WFC Voice Client:
1. Touch the menu button, then Settings. The password dialog box appears.
2. Enter password (default: zamboni).
3. Touch Enter.
4. Touch Stop Service > Yes.
This action can also be initiated using ADB, an MDM, or a third party app. For example, in ADB you can use the
following command:
$ adb shell am broadcast -a wfc.voice.STOP_APP
Reloading WFC Voice Client:
1. Touch the menu button.
2. Touch Reload.
This action can also be initiated using ADB, an MDM, or a third party app. For example, in ADB you can use the
following command:
$ adb shell am broadcast -a wfc.voice.SIGN_OUT
51

Profile Settings
The WFC Voice Client profile is an XML file that contains all the settings for the current WFC Voice Client session.
Create Profile
Create a new profile. A new XML file is created in the WFConnect folder.
To create a new profile:
1. Touch the menu button, then Settings. The password dialog box appears.
2. Enter password (default: zamboni).
3. Touch Enter.
4. Touch the menu button, then Create new profile.
5. Touch Save current profile.
6. Enter a file name for the new profile.
7. Touch Save. The file is saved in the WFConnect folder.
8. Touch the Back button to return to the WFC Voice Client home screen.
Settings
Change Profile Name
To change the name of the current profile:
1. Touch the menu button, then Settings. The password dialog box appears.
2. Enter password (default: zamboni).
3. Touch Enter.
4. Touch Profile name.
5. Enter a file name for the new profile.
6. Touch OK. The file name in the WFConnect folder is updated.
7. Touch the Back button to return to the WFC Voice Client home screen.
Shared Profiles URI
Set the URI of shared profile located on a remote or local server.
To set the URI of a shared profile:
1. Copy the profile from the WFConnect folder using a USB tether.
2. Move the profile to a remote or local server.
Supported protocols are file, http, https, and tftp.
3. From the WFC Voice Client, touch the menu button, then Settings. The password dialog box appears.
4. Enter password (default: zamboni).
5. Touch Enter.
6. Touch Shared Profiles URI.
7. Enter the URI of the shared profile.
8. Touch OK.
9. Touch the Back button to return to the WFC Voice Client home screen.
52
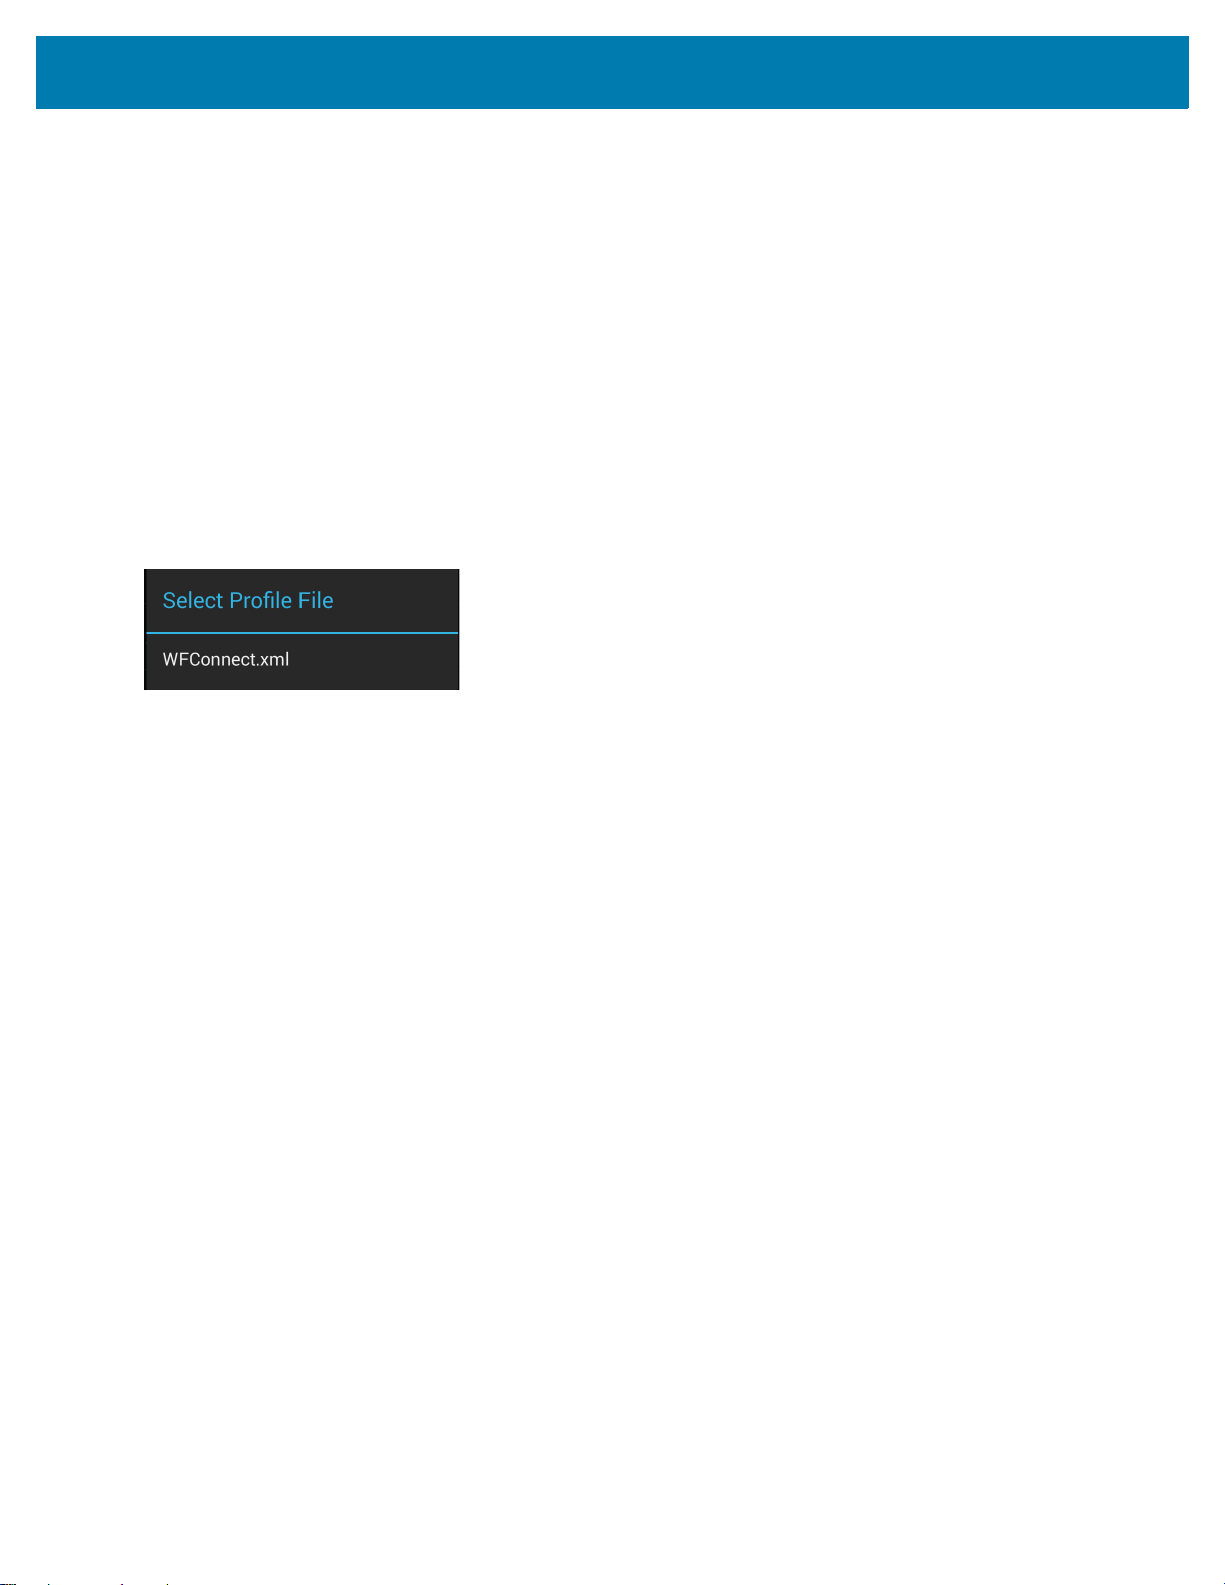
Settings
Load New Profile
Load profiles previously saved to the:
• WFConnect folder
• SD Card
Loading a New Profile Using the GUI
1. Touch the menu button, then Settings. The password dialog box appears.
2. Enter password (default: zamboni).
3. Touch Enter.
4. Scroll to the bottom of the screen.
5. Touch Load new profile. The Select Profile File dialog box appears.
Figure 38 Select Profile Popup
6. Select a profile file name.
7. Touch the Back button or Refresh button to load new profile.
Loading a New Profile Using XML
<WFConnect>
<Profile>
<profname>WFConnect.xml</profname>
</Profile>
Installing the APK Using ADB Commands
To install the APK using an Android Debug Bridge (ADB) connection, open a command prompt and send the
following ADB command to the device:
$ adb shell am start -a wfc.voi ce.ACTION_NEW _CONFIG --es profile_uri < configuration_fi le>
Where
<configuration_file> is the URI of the new XML configuration file.
Save Current Profile
Using the same file name, save the current profile to replace an existing XML file.
To save an existing profile:
1. Touch the menu button, then Settings. The password dialog box appears.
2. Enter password (default: zamboni).
3. Touch Enter.
4. Scroll the bottom of the screen.
5. Touch Save current profile. The current profile name appears.
53

Settings
6. Touch Save. The file is saved in the WFConnect folder.
7. Touch the Back button to return to the WFC Voice Client home screen.
Edit a Profile Using XML
To edit a saved profile using XML, copy the new profile from the WFConnect folder using a USB tether.
54

Connection Parameters
Users can make and receive a call using any configured PBX type. This section describes how to configure up to
three additional PBX types using the WFC Voice Client GUI or WFConnect.xml file.
To configure the default PBX (PBX#1 Configuration) see Configure Workforce Connect Voice Client on page 35.
Figure 39 Connection Parameters
Settings
55

Settings
Configuring Multiple PBX Types
Set the configuration parameters for additional PBX types:
IMPORTANT: When configuring multiple PBXs, ensure the server IP address and credentials are pointing to the
correct PBX call server as indicated by the profile type. For example, the CUCM_BASIC profile must be
configured with the IP address and credentials of a CUCM call manager.
Using the GUI
1. Touch the menu button, then Settings. The
password dialog box appears.
2. Enter the password (default: zamboni).
3. Touch Enter.
4. Touch Advanced Settings > Connection
Parameters.
5. Touch PBX#2 Configuration.
6. Touch PBX#2 Type.
7. Select the PBX type that is the same as the
target PBX call server.
8. Enter the configuration information.
Refer to the Getting Started chapter of the
WFC Voice Client Administrator Guide for
the desired PBX type.
9. Touch the Back button to return to the
Connection Parameters screen.
10. Repeat steps 5 through 7 for up to two
more PBX types (optional).
11. Touch the Back button to return to the
WFC Voice Client home screen.
Using XML
<WFConnect>
<Profile>
<profile_type>Licensed PBX One
</profile_type>
<sip_userid>1001</sip_userid>
<sip_userpass>1234</sip_userpass>
<sip_localport>5060</sip_localport>
<sip_remhost>10.5.97.99</sip_remhost>
<sip_remport>5060</sip_remport>
<sip_transport>UDP</sip_transport>
<sip_realm>10.16.2.111</sip_realm>
<profile2_type>Licensed PBX Two
</profile2_type>
<sip2_userid>1002</sip2_userid>
<sip2_userpass>1234</sip2_userpass>
<sip2_device_type>9971</sip_device_type>
<sip2_mac>00-11-22-33-44-55</sip2_mac>
<sip2_localport>5060</sip2_localport>
<sip2_remhost>10.5.97.99</sip2_remhost>
<sip2_remport>5060</sip2_remport>
<sip2_transport>UDP</sip2_transport>
<sip2_realm>10.16.2.111</sip2_realm>
</Profile>
...
</WFConnect>
56

Audio Settings
CAUTION: Changing the default audio settings may have adverse results.
Do not modify these settings unless directed to so by Zebra Technical Support.
This section provides detailed information on configuring advanced audio settings. Use the WFC Voice Client GUI
or WFConnect.xml file to customize the Profile section. Both methods are discussed with each Function
description.
To configure audio settings:
1. Touch the menu button, then Settings. The password dialog box appears.
Figure 40 WFC Voice Client Menu
Settings
2. Enter password (default: zamboni).
3. Touch Enter.
Figure 41 WFC Voice Client Settings Menu
4. Touch Advanced Settings > Audio Settings.
57

Figure 42 Advanced Settings / Audio Settings
Settings
58

Audio Codecs Priorities
Set the audio Codecs preferences.
NOTE: Only select audio Codecs available in the PBX.
Settings
Using the GUI
1. In Advanced Settings select Audio
Settings.
2. Select Audio Codecs Priorities.
3. Select the Codec preference (default order
preferred). See Table 1 for descriptions.
4. Touch Back button to return to the WFC
Voice Client home screen.
Table 1 Codecs Priorities
Field Type Description XML
G.711 u-Law When selected, assigns preference priority for
G.711 u-LAW Voice codec negotiations
between PBX and Client.
G.711 A-Law When selected, assigns preference priority for
G.711 A-Law Voice codec negotiations between
PBX and Client.
G.729 When selected assigns preference priority for
G.729 Voice codec negotiations between PBX
and Client.
Using XML
<WFConnect>
<Profile>
<codec_ulaw_priority>1</codec_ulaw_p
riority>
</Profile>
...
</WFConnect>
<codec_ulaw_priority>1
</codec_ulaw_priority>
<codec_alaw_priority>2
</codec_alaw_priority>
<codec_g729_priority>3
</codec_g729_priority>
G.722 When selected assigns preference priority for
G.722 Voice codec negotiations between PBX
and Client.
GSM When selected assigns preference priority for
GSM Voice codec negotiations between PBX
and Client.
59
<codec_g722_priority>4
</codec_g722_priority>
<codec_gsm_priority>5
</codec_gsm_priority>

Jitter Buffer
Jitter Initial Delay
Set the Jitter Buffer initial delay settings.
Settings
Using the GUI
1. In Advanced Settings select Audio Settings.
2. Slide the Jitter Initial Delay slider (default 60
msec).
3. Touch Back button to return to the WFC Voice
Client home screen.
Jitter Buffer Max Buffer Size
Set the maximum Jitter Buffer size.
Using the GUI
1. In Advanced Settings select Audio Settings.
2. Slide the Jitter Buffer Size slider (default 250
msec).
3. Touch Back button to return to the WFC Voice
Client home screen.
Using XML
<WFConnect>
<Profile>
<jitter_min>60</jitter_min>
</Profile>
...
</WFConnect>
Using XML
<WFConnect>
<Profile>
<jitter_max>250</jitter_max>
</Profile>
...
</WFConnect>
60

Settings
RTP Parameters
Real-Time Transport Protocol (RTP) Parameters - Payload Size
Set the RTP Payload size.
Using the GUI
1. In Advanced Settings select Audio
Settings.
2. Select RTP payload size.
3. Select the RTP payload size from the dialog
box (default 20 ms).
4. Touch the Back button to return to the WFC
Voice Client home screen.
First Real-Time Transport Protocol (RTP) Port
Set the First RTP Port.
Using the GUI
1. In Advanced Settings select Audio
Settings.
2. Select First RTP port.
3. Enter the First RTP port number (default
50000).
4. Select OK.
5. Touch the Back button to return to the WFC
Voice Client home screen.
Using XML
<WFConnect>
<Profile>
<sip_rtp_ptime>20</sip_rtp_ptime>
</Profile>
...
</WFConnect>
Using XML
<WFConnect>
<Profile>
<sip_rtp_port1>50000</sip_rtp_port1>
</Profile>
...
</WFConnect>
Last Real-Time Transport Protocol (RTP) Port
Select the Last RTP Port.
Using the GUI
1. In Advanced Settings select Audio
Settings.
2. Select Last RTP Port.
3. Enter the Last RTP port number (default
50025).
4. Select OK.
5. Touch the Back button to return to the WFC
Voice Client home screen.
61
Using XML
<WFConnect>
<Profile>
<sip_rtp_port2>50025</sip_rtp_port2>
</Profile>
...
</WFConnect>

Settings
Audio Enhancements
This section describes how to enable and disable audio enhancements.
Configuring Audio Enhancements
Set the following audio enhancements:
• Echo Cancellation
• Noise Reduction
• AGC on speaker
• AGC on earpiece
Using the GUI
1. In Advanced Settings select Audio
Settings.
2. Scroll down to Audio Enhancements.
3. Tap the check boxes next to the items to
enable (default: disabled).
4. Touch the Back button to return to the WFC
Voice Client home screen.
Input / Output Audio
Set the input / output volume.
Using the GUI
1. In Advanced Settings select Audio
Settings.
2. Scroll down to Input Audio Volume and
Output Audio Volume under Audio
Enhancements.
3. Use the slider to select the volume levels for
Input and Output Audio (default 1).
4. Touch the Back button to return to the WFC
Voice Client home screen.
Using XML
<WFConnect>
<Profile>
<use_aec>false</use_aec>
<use_noise>false</use_noise>
<use_agc_speaker>false</use_agc_speake
r>
<use_agc_ear>false</use_agc_ear>
</Profile>
...
</WFConnect>
Using XML
<WFConnect>
<Profile>
<audio_gain_in>1</audio_gain_in>
<audio_gain_out>1</audio_gain_out>
</Profile>
...
</WFConnect>
Audio Debugging Tools
Set the following debugging tools:
• Show jitter stats
• Save incoming voice
62

• Native Sample Rate
Settings
Using the GUI
1. In Advanced Settings select Audio
Settings.
2. Scroll down to Audio Debugging Tools.
3. Tap the check boxes next to the items to
enable (default: disabled).
4. Touch the Back button to return to the WFC
Voice Client home screen.
Using XML
<WFConnect>
<Profile>
<show_jitter_stats>false</show_jitter_
stats>
<save_incoming_voice_to_file>false</sa
ve_incoming_voice_to_file>
<use_native_sample_rate>false</use_nat
ive_sample_rate>
</Profile>
...
</WFConnect>
63

UI Settings
Use the GUI to configure the User Interface. Settings made in the GUI are saved to the XML file. The GUI settings
and the XML file drives the WFC Voice Client look and functionality. Alternatively edit the XML file,
WFConnect.xml, to make the same GUI settings. The saved WFConnect.xml file can be modified and use to
configure other devices.
The WFConnect.xml file must be stored on the device in the WFCconnect folder. If this file does not exist, the
application uses the default parameter values. The WFC Voice Client XML configuration file has the following
sections which must be present in the file and in the following order:
• Profile section
• Footer section
• Dashboard section
• Call buttons section.
Settings
IMPORTANT: All these sections must be present in the XML file and they must be in the order listed above.
Configuration File Sections
Profile Section
The Profile section contains all the global settings and only requires a few basic items to begin using the WFC
Voice Client on a PBX.
• SIP (Literal or Pseudo) MAC Address <sip_mac>
• SIP Remote Host (PBX Server Address) <sip_remhost>
Unless specified, the Profile section of the WFC Voice Client uses the default settings for Audio Settings, Call
Settings, Miscellaneous Settings, Logging and Optional Services (This is a suggested best practice). Use the WFC
Voice Client GUI or WFConnect.xml file to customize the Profile section. Both methods are discussed with each
Function description.
See XML Example - Profile for a profile section example.
Footer Section
The Footer section defines the buttons, or soft keys, on the WFC Voice Client home screen. The buttons are listed
in the order they appear on the screen. A maximum of six buttons can be added. The Footer always displays until
a call is initiated. While additional items can be defined in the Footer, the following items are strongly
recommended:
• History
• Redial
• Dial
• Contacts
• Voicemail.
Use the WFC Voice Client GUI or WFConnect.xml file to customize the Footer. Both methods are discussed with
each Function description.
64

Settings
NOTE: The footer area does not require a <columns> element as it is always one row of buttons.
IMPORTANT: If a footer section is not required, do not define any buttons between the <Footer> and the
</Footer> tags.
See XML Example - Footer for a footer section example.
Dashboard Section
The Home Screen Dashboard section defines the buttons in the dashboard area of the screen and their layout on
the WFC Voice Client screen. The Dashboard displays functions and features specific to the end user. A maximum
of 12 buttons can be displayed on the screen; additional buttons are accessed by scrolling up and down. Use the
WFC Voice Client GUI or WFConnect.xml file to customize the Footer. Both methods are discussed with each
Function description.
See XML Example - Dashboard for a dashboard section example.
Call Buttons Section
The Call Buttons section defines the buttons in the call buttons area of the screen and their layout on the WFC
Voice Client screen. In-Call displays the available function and action of call buttons that can be accessed during a
call. While on a call the user may wish to perform one of the following:
• Add Call
• Home
• Hold
• Resume
• Park
• Transfer
• Conference
• Complete
• End Call.
See XML Example - Call Buttons for a call button section example.
Headless Mode
For detailed information on Headless Mode see Headless Mode and WFCVoice Service.
65

Background Logo
Icon Library
To choose a background from the icon library:
Settings
Using the GUI
1. In Advanced Settings select UI Settings >
Background Logo.
2. From the LIBRARY tab, select the new
background. A yellow box appears around
the selected background.
3. Touch the Back button to return to the WFC
Voice Client home screen.
Using XML
<WFConnect>
<Profile>
<background_logo>logo</background_lo
go>
</Profile>
...
</WFConnect>
Custom Background Configuration
The user can create a custom background. To select a custom background:
1. Connect the device to a host computer using a USB cable.
2. From the host computer, copy the icon file to the WFConnect folder on device.
Custom Background Configuration
Using the GUI
1. In Advanced Settings select UI Settings >
Background Logo.
2. From the SDCARD tab, select the new
background. A yellow box appears around
the selected background.
3. Touch the Back button to return to the WFC
Voice Client home screen.
Using XML
<WFConnect>
<Profile>
<background_logo>custom_logo.png</ba
ckground_logo>
</Profile>
...
</WFConnect>
Buttons Padding
Set the horizontal spacing between in-call buttons from 0 pixels to 50 pixels, in 10 pixel increments.
Using the GUI
1. In Advanced Settings select UI Settings >
Background Logo.
2. Slide the Buttons padding slider (default 0).
3. Touch Back to return to the WFC Voice
Client home screen.
66
Using XML
<WFConnect>
<Profile>
<buttons_padding>50</buttons_padding
</Profile>
...
</WFConnect>

Settings
Dialer Padding
Set vertical padding at the bottom of the contacts and history screens from 0 pixels to 200 pixels, in 1 pixel
increments.
Using the GUI
1. In Advanced Settings select UI Settings >
Background Logo.
2. Slide the Dialer padding slider (default 0).
3. Touch Back to return to the WFC Voice
Client home screen.
Using XML
<WFConnect>
<Profile>
<dialer_padding>78</dialer_padding
</Profile>
...
</WFConnect>
Graphical User Interface Design Tool
Use the GUI Design Tool to customize the Footer, Dashboard and In-Call screen from within the WFC Voice Client.
Configure each to fit the specific needs of the customer. The appearance of the WFC Voice Client is configured
using the GUI or by directly modifying the WFConnect.xml file. Details on specific XML settings and the construct
of the XML configuration file are discussed in more detail later in this guide.
To begin using the GUI Design Tool, follow the steps below to configure the Footer, Dashboard or In-Call screens:
1. Launch WFC Voice Client.
2. Touch the menu button, then Settings. The password dialog box appears.
Figure 43 WFC Voice Client Menu
3. Enter password (default: zamboni).
4. Touch Enter.
67

Figure 44 WFC Voice Client Settings Menu
5. Touch Advanced Settings > UI Settings.
Figure 45 Advanced Settings / UI Settings
Settings
6. Select Edit Dashboard, Edit Footer or Edit In-Call Button.
Using the UI Settings GUI Design Tool
The following diagram describes the buttons available for each area.
68

Figure 46 GUI Design Tool - Footer
Buttons that will be
available for use in the
selected area:
• Footer
• Dashboard
• In-Call
Touch Add to add a button.
Touch a button to edit. A yellow boarder
appears indicating the button to be
configured.
Touch Up to move the button to the
left in the list.
Touch Delete to remove selected
button.
Touch Down to move the button right in the
list.
Touch Edit to edit the button
configuration
Header Label will change based on
the selected area to configure:
• Footer Design
• Dashboard Design
• In-Call Designer
Touch 3 Columns or 4 Columns
to change the number of
columns.
Settings
The Footer and In-Call views use the layout displayed in Figure 46. The Dashboard view has an additional toggle
button in the bottom center of the screen to change the number of columns on the dashboard (3 or 4).
Figure 47 GUI Design Tool - Dashboard
69

Home Screen Dashboard
Dashboard Buttons
Footer
In-Call Dashboard Buttons (Configurable)
In-Call Footer (Not Configurable)
Figure 48 Home Screen Dashboard
Settings
In-Call Dashboard
Figure 49 In-Call Dashboard
70

Settings
Button Configuration
The following sections describes each button that can be placed on the UI. Each section lists the Designer Tool
procedure and corresponding XML configuration.
Call
Call is the ability to make a telephone call to a specific number or location using a prefix. The administrator
identifies a target by its extension (phone number) and enters this into the Value field along with the prefix. The
user can then use this function to initiate a call to the preset destination.
Figure 50 Sample Button Edit Screen
71

Configuring the Call Button
Settings
Using the GUI
1. In UI Settings select Edit Footer, Edit
Dashboard or Edit In-Call > Add.
2. Select the new button. A yellow box appears
around the selected button.
3. Touch Edit.
4. Select the check box next to Confirm On
Click to enable this (the default is Disabled).
5. Touch Action and select CALL from the
Select Action menu.
6. If the dialed number has a prefix, in the Value
field, enter the prefix number.
7. In the Title field, enter Call.
8. In the Description field, enter a short
description of the button function.
9. Touch Icon and select an icon from the
Select Icon menu. See Icons on page 100.
10. Touch BG to set the background color. See
Button Background Color on page 103.
11. Touch FG to set the foreground text color.
See Button Text Color on page 104.
12. Touch the Back button to return to the WFC
Voice Client home screen.
Using XML
<Footer> or <Dashboard> or <Call Buttons>
...
<Button>
<title>Call</title>
<action>CALL</action>
<value>9</value>
<enabled>true</enabled>
<confirm>false</confirm>
<description>Make a
call</description>
<bg_color>#FF001425</bg_color>
<fg_color>#FFFFFFFF</fg_color>
<icon>Default</icon>
</Button>
...
</Footer> or </Dashboard> or
</CallButtons>
72

Settings
Dial
Dial is the ability to dial a specified extension or number to initiate a telephone call. A caller identifies a target by its
extension (phone number) and originates the call.
Configuring the Dial Button
Using the GUI
1. In Advanced Settings select UI Settings >
Edit Footer, Edit Dashboard or Edit In-Call
> Add.
2. Select the new button. A yellow box appears
around the selected button.
3. Touch Edit.
4. Select the check box next to Confirm On
Click to enable this (the default is Disabled).
5. Touch Action and select DIAL from the
Select Action menu.
6. In the Title field, enter Dial.
7. In the Description field, enter a short
description of the button function.
8. Touch Icon and select an icon from the
Select Icon menu. See Icons on page 100.
9. Touch BG to set the background color. See
Button Background Color on page 103.
10. Touch FG to set the foreground text color.
See Button Text Color on page 104.
11. Touch the Back button to return to the WFC
Voice Client home screen.
Using XML
<Footer> or <Dashboard> or <Call Buttons>
...
<Button>
<title>Dial</title>
<action>DIAL</action>
<value></value>
<enabled>true</enabled>
<confirm>false</confirm>
<description>Dial a number or
extension</description>
<bg_color>#FF001425</bg_color>
<fg_color>#FFFFFFFF</fg_color>
<icon>Default</icon>
</Button>
...
</Footer> or </Dashboard> or
</CallButtons>
73

Settings
Start App
Start Application defines a button to launch another application on the device. When the button is pressed WFC
Voice Client minimizes to run in the background and the defined application launches. For example, a button can
be placed in the Footer to open an email application.
Configuring the Start App
Using the GUI
1. In Advanced Settings select UI Settings >
Edit Footer, Edit Dashboard or Edit
In-Call > Add.
2. Select the new button. A yellow box
appears around the selected button.
3. Touch Edit.
4. Select the check box next to Confirm On
Click to enable this (the default is
Disabled).
5. Touch Action and select START_APP.
6. Touch Select App Package and select the
application from the Select App Package
menu.
7. In the Title field, enter the application
name.
8. In the Description field, enter a short
description of the button function.
9. Touch Icon and select an icon from the
Select Icon menu. See Icons on page 100.
10. Touch BG to set the background color. See
Button Background Color on page 103.
11. Touch FG to set the foreground text color.
See Button Text Color on page 104.
12. Touch the Back button to return to the
WFC Voice Client home screen.
Using XML
Opening the music application example is shown in
the following XML.
<Footer> or <Dashboard> or <CallButtons>
...
<Button>
<title>Email</title>
<action>START_APP</action>
<value>com.android.email</value>
<enabled>true</enabled>
<confirm>false</confirm>
<description>Open email
application</description>
<icon>email.png</icon>
</Button>
...
</Footer> or </Dashboard> or
</CallButtons>
74

Settings
Log Marker
Log Marker creates a time stamp in the logs. If you experience any issues with WFC Voice Client functionality, the
time stamp focuses troubleshooting of the device to the time the issue occurred for more rapid resolution.
Configuring the Log Marker
Using the GUI
1. In Advanced Settings select UI Settings >
Edit Footer, Edit Dashboard or Edit In-Call
> Add.
2. Select the new button. A yellow box appears
around the selected button.
3. Touch Edit.
4. Select the check box next to Confirm On
Click to enable this (the default is Disabled).
5. Touch Action and select LOG_MARKER
from the Select Action menu.
6. In the Title field, enter Log Marker.
7. In the Description field, enter a short
description of the button function.
8. Touch Icon and select an icon from the
Select Icon menu. See Icons on page 100.
9. Touch BG to set the background color. See
Button Background Color on page 103.
10. Touch FG to set the foreground text color.
See Button Text Color on page 104.
11. Touch the Back button to return to the WFC
Voice Client home screen.
Using XML
<Footer> or <Dashboard> or <Call Buttons>
...
<Button>
<title>Log Marker</title>
<action>LOG_MARKER</action>
<value></value>
<enabled>true</enabled>
<confirm>false</confirm>
<description>Create time
stamp</description>
<bg_color>#FF001425</bg_color>
<fg_color>#FFFFFFFF</fg_color>
<icon>Default</icon>
</Button>
...
</Footer> or </Dashboard> or
</CallButtons>
75

Settings
Speed Dial 0-9
Speed Dial places a telephone call to a preset number/extension. Set up to 10 speed dial buttons on the
dashboard through the GUI interface.
Configuring the Speed Dial Button
Using the GUI
1. In Advanced Settings select UI Settings >
Edit Footer, Edit Dashboard or Edit In-Call
> Add.
2. Select the new button. A yellow box appears
around the selected button.
3. Touch Edit.
4. Select the check box next to Confirm On
Click to enable this (the default is Disabled).
5. Touch Action and select SPEED_DIALx
from the Select Action menu.
6. In the Value field, enter the extension.
7. In the Title field, enter Speed Dial (#).
8. In the Description field, enter a short
description of the button function.
9. Touch Icon and select an icon from the
Select Icon menu. See Icons on page 100.
10. Touch BG to set the background color. See
Button Background Color on page 103.
11. Touch FG to set the foreground text color.
See Button Text Color on page 104.
12. Touch the Back button to return to the WFC
Voice Client home screen.
Using XML
<Footer> or <Dashboard> or <Call Buttons>
...
<Button>
<title>Speed Dial #1</title>
<action>SPEED_DIAL1</action>
<value>5133</value>
<enabled>true</enabled>
<confirm>false</confirm>
<description>Speed dial
#1</description>
<bg_color>#FF001425</bg_color>
<fg_color>#FFFFFFFF</fg_color>
<icon>Default</icon>
</Button>
...
</Footer> or </Dashboard> or
</CallButtons>
76

Settings
Redial
Redial places a telephone call to the most recently call location. It is highly recommended that the redial button
resides only in the Footer.
Configuring the Redial Button
Using the GUI
1. In Advanced Settings select UI Settings >
Edit Footer > Add.
2. Select the new button. A yellow box appears
around the selected button.
3. Touch Edit.
4. Select the check box next to Confirm On
Click to enable this (the default is Disabled).
5. Touch Action and select REDIAL.
6. In the Title field, enter Redial.
7. In the Description field, enter a short
description of the button function.
8. Touch Icon and select an icon from the
Select Icon menu. See Icons on page 100.
9. Touch BG to set the background color. See
Button Background Color on page 103.
10. Touch FG to set the foreground text color.
See Button Text Color on page 104.
11. Touch the Back button to return to the WFC
Voice Client home screen.
Using XML
<Footer>
...
<Button>
<title>Redial</title>
<action>REDIAL</action>
<value></value>
<enabled>true</enabled>
<confirm>false</confirm>
<description>Dial the last number
called</description>
<bg_color>#FF001425</bg_color>
<fg_color>#FFFFFFFF</fg_color>
<icon>Default</icon>
</Button>
...
</Footer>
77

Settings
Suspend Mode
Suspend Mode blocks all incoming or outgoing calls.
Configuring the Suspend Mode Button
Using the GUI
1. In Advanced Settings select UI Settings >
Edit Footer, Edit Dashboard or Edit In-Call
> Add.
2. Select the new button. A yellow box appears
around the selected button.
3. Touch Edit.
4. Select the check box next to Confirm On
Click to enable this (the default is Disabled).
5. Touch Action and select SUSPEND_MODE.
6. In the Title field, enter Suspend Mode.
7. In the Description field, enter a short
description of the button function.
8. Touch Icon and select an icon from the
Select Icon menu. See Icons on page 100.
9. Touch BG to set the background color. See
Button Background Color on page 103.
10. Touch FG to set the foreground text color.
See Button Text Color on page 104.
11. Touch the Back button to return to the WFC
Voice Client home screen.
Using XML
<Footer> or <Dashboard> or <Call Buttons>
...
<Button>
<title>Suspend Mode</title>
<action>SUSPEND_MODE</action>
<value></value>
<enabled>true</enabled>
<confirm>false</confirm>
<description>Block all incoming
calls</description>
<bg_color>#FF001425</bg_color>
<fg_color>#FFFFFFFF</fg_color>
<icon>Default</icon>
</Button>
...
</Footer> or <Dashboard> or
<CallButtons>
78

Settings
History
History lists recently called numbers and incoming calls, including missed calls.
Configuring the History Button
Using the GUI
1. In Advanced Settings select UI Settings >
Edit Footer, Edit Dashboard or Edit In-Call
> Add.
2. Select the new button. A yellow box appears
around the selected button.
3. Touch Edit.
4. Select the check box next to Confirm On
Click to enable this (the default is Disabled).
5. Touch Action and select HISTORY.
6. In the Title field, enter History.
7. In the Description field, enter a short
description of the button function.
8. Touch Icon and select an icon from the
Select Icon menu. See Icons on page 100.
9. Touch BG to set the background color. See
Button Background Color on page 103.
10. Touch FG to set the foreground text color.
See Button Text Color on page 104.
11. Touch the Back button to return to the WFC
Voice Client home screen.
Using XML
<Footer> or <Dashboard> or <Call Buttons>
...
<Button>
<title>History</title>
<action>HISTORY</action>
<value></value>
<enabled>true</enabled>
<confirm>false</confirm>
<description>Display recently
called numbers and incoming
calls</description>
<bg_color>#FF001425</bg_color>
<fg_color>#FFFFFFFF</fg_color>
<icon>Default</icon>
</Button>
...
</Footer> or </Dashboard> or
</CallButtons>
79

Settings
Contacts
The Contacts button dials a new number by selecting an existing contact. Add and store contacts locally on the
device.
Configuring the Contacts Button
Using the GUI
1. In Advanced Settings select UI Settings >
Edit Footer, Edit Dashboard or Edit In-Call
> Add.
2. Select the new button. A yellow box appears
around the selected button.
3. Touch Edit.
4. Select the check box next to Confirm On
Click to enable this (the default is Disabled).
5. Touch Action and select CONTACTS.
6. In the Title field, enter Contacts.
7. In the Description field, enter a short
description of the button function.
8. Touch Icon and select an icon from the
Select Icon menu. See Icons on page 100.
9. Touch BG to set the background color. See
Button Background Color on page 103.
10. Touch FG to set the foreground text color.
See Button Text Color on page 104.
11. Touch the Back button to return to the WFC
Voice Client home screen.
Using XML
<Footer> or <Dashboard> or <Call Buttons>
...
<Button>
<title>Contacts</title>
<action>CONTACTS</action>
<value></value>
<enabled>true</enabled>
<confirm>false</confirm>
<description>Display contacts
</description>
<bg_color>#FF001425</bg_color>
<fg_color>#FFFFFFFF</fg_color>
<icon>Default</icon>
</Button>
...
</Footer> or </Dashboard> or
</CallButtons>
80

Settings
Favorites
The Favorites button dials a new number by selecting a contact that is set as a favorite. Set contacts as favorites
locally on the device.
Configuring the Favorites Button
Using the GUI
1. In Advanced Settings select UI Settings >
Edit Footer, Edit Dashboard or Edit In-Call
> Add.
2. Select the new button. A yellow box appears
around the selected button.
3. Touch Edit.
4. Select the check box next to Confirm On
Click to enable this (the default is Disabled).
5. Touch Action and select FAVORITES.
6. In the Title field, enter Favorites.
7. In the Description field, enter a short
description of the button function.
8. Touch Icon and select an icon from the
Select Icon menu. See Icons on page 100.
9. Touch BG to set the background color. See
Button Background Color on page 103.
10. Touch FG to set the foreground text color.
See Button Text Color on page 104.
11. Touch the Back button to return to the WFC
Voice Client home screen.
Using XML
<Footer> or <Dashboard> or <Call Buttons>
...
<Button>
<title>Favorites</title>
<action>FAVORITES</action>
<value></value>
<enabled>true</enabled>
<confirm>false</confirm>
<description>Display favorites
</description>
<bg_color>#FF001425</bg_color>
<fg_color>#FFFFFFFF</fg_color>
<icon>Default</icon>
</Button>
...
</Footer> or </Dashboard> or
</CallButtons>
81

Settings
Voicemail
The Voicemail button dials a number configured on the PBX to access Voicemail messages.
Configuring the Voicemail Button
Using the GUI
1. In Advanced Settings select UI Settings >
Edit Footer, Edit Dashboard or Edit In-Call
> Add.
2. Select the new button. A yellow box appears
around the selected button.
3. Touch Edit.
4. Select the check box next to Confirm On
Click to enable this (the default is Disabled).
5. Touch Action and select VOICEMAIL.
6. In the Value field, enter the Voicemail Pilot
number.
7. In the Title field, enter Voicemail.
8. In the Description field, enter a short
description of the button function.
9. Touch Icon and select an icon from the
Select Icon menu. See Icons on page 100.
10. Touch BG to set the background color. See
Button Background Color on page 103.
11. Touch FG to set the foreground text color.
See Button Text Color on page 104.
12. Touch the Back button to return to the WFC
Voice Client home screen.
Using XML
<Footer> or <Dashboard> or <Call Buttons>
...
<Button>
<title>Voicemail</title>
<action>VOICEMAIL</action>
<value>9999</value>
<enabled>true</enabled>
<confirm>false</confirm>
<description>Voicemail
messages</description>
<bg_color>#FF001425</bg_color>
<fg_color>#FFFFFFFF</fg_color>
<icon>Default</icon>
</Button>
...
</Footer> or </Dashboard> or
</CallButtons>
82

Settings
Do Not Disturb
Access the Do Not Disturb (DND) feature directly on the phone. Use a Feature Access Code (FAC) to enable or
disable this feature. Enabling DND suspends all personal calls targeted to the extension, and sends the call
immediately to the defined Coverage Path. DND also removes the extension from consideration during any
Coverage Answer Group, Simultaneous Ringing, and Hunt Group call. This feature is the PBX-based
implementation of an endpoint device Call Ignore feature.
Configuring the DND Button
Using the GUI
1. In Advanced Settings select UI Settings >
Edit Footer, Edit Dashboard or Edit In-Call
> Add.
2. Select the new button. A yellow box appears
around the selected button.
3. Touch Edit.
4. Select the check box next to Confirm On
Click to enable this (the default is Disabled).
5. Touch Action and select
DO_NOT_DISTURB.
6. In the Value field, enter the FAC for the Do
Not Disturb feature.
7. In the Title field, enter DND.
8. In the Description field, enter a short
description of the button function.
9. Touch Icon and select an icon from the
Select Icon menu. See Icons on page 100.
10. Touch BG to set the background color. See
Button Background Color on page 103.
11. Touch FG to set the foreground text color.
See Button Text Color on page 104.
12. Touch the Back button to return to the WFC
Voice Client home screen.
Using XML
<Footer> or <Dashboard> or <CallButtons>
...
<Button>
<title>DND</title>
<action>DO_NOT_DISTURB</action>
<value></value>
<enabled>true</enabled>
<confirm>false</confirm>
<description>Ignore incoming
calls</description>
<bg_color>#FF001425</bg_color>
<fg_color>#FFFFFFFF</fg_color>
<icon>Default</icon>
</Button>
...
</Footer> or </Dashboard> or
</CallButtons>
Note: DND is enabled/disabled using Feature
Access Code (FAC).
Directory
Directory accesses corporate contact information on the PBX.
83

Configuring the Directory Button
Settings
Using the GUI
1. Open Settings.
2. In Advanced Settings select UI Settings >
Edit Footer, Edit Dashboard or Edit In-Call
> Add.
3. Select the new button. A yellow box appears
around the selected button.
4. Touch Edit.
5. Select the check box next to Confirm On
Click to enable this (the default is Disabled).
6. Touch Action and select DIRECTORY.
7. In the Value field, enter an address.
8. In the Title field, enter Directory.
9. In the Description field, enter a short
description of the button function.
10. Touch Icon and select an icon from the
Select Icon menu. See Icons on page 100.
11. Touch BG to set the background color. See
Button Background Color on page 103.
12. Touch FG to set the foreground text color.
See Button Text Color on page 104.
13. Touch the Back button to return to the WFC
Voice Client home screen.
Using XML
<Footer> or <Dashboard> or <Call Buttons>
...
<Button>
<title>Directory</title>
<action>DIRECTORY</action>
<value>http://X.X.X.X/
system/dir/complete_dir_list
</value>
<enabled>true</enabled>
<confirm>false</confirm>
<description>Display company
directory</description>
<bg_color>#FF001425</bg_color>
<fg_color>#FFFFFFFF</fg_color>
<icon>Default</icon>
</Button>
...
</Footer> or </Dashboard> or
</CallButtons>
84

Settings
Add Call
During an active call the Add Call button can dial a preset number. If there is no number in the Value field, it opens
the dialer. The current call is placed on hold while the new call is initiated. When the new call connects, you can
Transfer, Conference, or End the second call and resume the first call.
IMPORTANT: Only available on the In-Call screen only.
Configuring the Add Call Button
Using the GUI
1. In Advanced Settings select UI Settings >
Edit In-Call > Add.
2. Select the new button. A yellow box appears
around the selected button.
3. Touch Edit.
4. Select the check box next to Confirm On
Click to enable this (the default is Disabled).
5. Touch Action and select ADD_CALL.
6. In the Title field, enter Add Call.
7. In the Description field, enter a short
description of the button function.
8. Touch Icon and select an icon from the
Select Icon menu. See Icons on page 100.
9. Touch BG to set the background color. See
Button Background Color on page 103.
10. Touch FG to set the foreground text color.
See Button Text Color on page 104.
11. Touch the Back button to return to the WFC
Voice Client home screen.
Using XML
<CallButtons>
...
<Button>
<title>Add Call</title>
<action>ADD_CALL</action>
<value></value>
<enabled>true</enabled>
<confirm>false</confirm>
<description>Add a call by
opening the dialer </description>
<bg_color>#FF001425</bg_color>
<fg_color>#FFFFFFFF</fg_color>
<icon>Default</icon>
</Button>
...
</CallButtons>
85

Settings
Home
During an active call the Home button invokes the Dashboard to provide access to Dashboard functions.
IMPORTANT: Only available on the In-Call screen.
Configuring the Home Button
Using the GUI
1. In Advanced Settings select UI Settings >
Edit In-Call > Add.
2. Select the new button. A yellow box appears
around the selected button.
3. Touch Edit.
4. Select the check box next to Confirm On
Click to enable this (the default is Disabled).
5. Touch Action and select HOME.
6. In the Title field, enter Home.
7. In the Description field, enter a short
description of the button function.
8. Touch Icon and select an icon from the
Select Icon menu. See Icons on page 100.
9. Touch BG to set the background color. See
Button Background Color on page 103.
10. Touch FG to set the foreground text color.
See Button Text Color on page 104.
11. Touch the Back button to return to the WFC
Voice Client home screen.
Using XML
<CallButtons>
...
<Button>
<title>Home</title>
<action>HOME</action>
<value></value>
<enabled>true</enabled>
<confirm>false</confirm>
<description>Return to the Home
Dashboard</description>
<bg_color>#FF001425</bg_color>
<fg_color>#FFFFFFFF</fg_color>
<icon>Default</icon>
</Button>
...
</CallButtons>
86

Settings
Hold
Call Hold politely suspends an active call while you tend to other business or place an additional call using an
additional Call Appearance. During call hold, you can switch between the active and held calls at any time.
IMPORTANT: Only available on the In-Call screen.
Configuring the Hold Button
Using the GUI
1. In Advanced Settings select UI Settings >
Edit In-Call > Add.
2. Select the new button. A yellow box appears
around the selected button.
3. Touch Edit.
4. Select the check box next to Confirm On
Click to enable this (the default is Disabled).
5. Touch Action and select HOLD.
6. In the Title field, enter Hold.
7. In the Description field, enter a short
description of the button function.
8. Touch Icon and select an icon from the
Select Icon menu. See Icons on page 100.
9. Touch BG to set the background color. See
Button Background Color on page 103.
10. Touch FG to set the foreground text color.
See Button Text Color on page 104.
11. Touch the Back button to return to the WFC
Voice Client home screen.
Using XML
<CallButtons>
...
<Button>
<title>Hold</title>
<action>HOLD</action>
<value></value>
<enabled>false</enabled>
<confirm>false</confirm>
<description>Place call on
hold</description>
<bg_color>#FF001425</bg_color>
<fg_color>#FFFFFFFF</fg_color>
<icon>Default</icon>
</Button>
...
</CallButtons>
87

Settings
Resume
During an active call touch the Resume button to access the current call on hold.
IMPORTANT: Only available on the In-Call screen.
Configuring the Resume Button
Using the GUI
1. In Advanced Settings select UI Settings >
Edit In-Call > Add.
2. Select the new button. A yellow box appears
around the selected button.
3. Touch Edit.
4. Select the check box next to Confirm On
Click to enable this (the default is Disabled).
5. Touch Action and select RESUME.
6. In the Title field, enter Resume.
7. In the Description field, enter a short
description of the button function.
8. Touch Icon and select an icon from the
Select Icon menu. See Icons on page 100.
9. Touch BG to set the background color. See
Button Background Color on page 103.
10. Touch FG to set the foreground text color.
See Button Text Color on page 104.
11. Touch the Back button to return to the WFC
Voice Client home screen.
Using XML
<CallButtons>
...
<Button>
<title>Resume</title>
<action>RESUME</action>
<value></value>
<enabled>false</enabled>
<confirm>false</confirm>
<description>Resume an active
call</description>
<bg_color>#FF001425</bg_color>
<fg_color>#FFFFFFFF</fg_color>
<icon>Default</icon>
</Button>
...
</CallButtons>
88

Settings
Transfer
Transfer transfers an active call to a third party. While Call Forwarding must be preconfigured, Call Transfer allows
making such call exchanges in real-time with an active call.
IMPORTANT: Only available on the In-Call screen.
Configuring the Transfer Button
Using the GUI
1. In Advanced Settings select UI Settings >
Edit In-Call > Add.
2. Select the new button. A yellow box appears
around the selected button.
3. Touch Edit.
4. Select the check box next to Confirm On
Click to enable this (the default is Disabled).
5. Touch Action and select TRANSFER.
6. In the Title field, enter Transfer.
7. In the Description field, enter a short
description of the button function.
8. Touch Icon and select an icon from the
Select Icon menu. See Icons on page 100.
9. Touch BG to set the background color. See
Button Background Color on page 103.
10. Touch FG to set the foreground text color.
See Button Text Color on page 104.
11. Touch the Back button to return to the WFC
Voice Client home screen.
Using XML
<CallButtons>
...
<Button>
<title>Transfer</title>
<action>TRANSFER</action>
<value></value>
<enabled>false</enabled>
<confirm>false</confirm>
<description>Transfer a call
</description>
<bg_color>#FF001425</bg_color>
<fg_color>#FFFFFFFF</fg_color>
<icon>Default</icon>
</Button>
...
</CallButtons>
89

Settings
Conference
Conference joins two separate calls for collaboration between each party on the line at the same time. Use a
Feature Access Code (FAC) to enable or disable this feature. See System Feature Settings on page 27.
IMPORTANT: Only available on the In-Call screen.
Configuring the Conference Button
Using the GUI
1. In Advanced Settings select UI Settings >
Edit In-Call > Add.
2. Select the new button. A yellow box appears
around the selected button.
3. Touch Edit.
4. Select the check box next to Confirm On
Click to enable this (the default is Disabled).
5. Touch Action and select CONFERENCE.
6. In the Title field, select Conference.
7. In the Description field, enter a short
description of the button function.
8. Touch Icon and select an icon from the
Select Icon menu. See Icons on page 100.
9. Touch BG to set the background color. See
Button Background Color on page 103.
10. Touch FG to set the foreground text color.
See Button Text Color on page 104.
11. Touch the Back button to return to the WFC
Voice Client home screen.
Using XML
<CallButtons>
...
<Button>
<title>Conf</title>
<action>CONFERENCE</action>
<value></value>
<enabled>false</enabled>
<confirm>false</confirm>
<description>Start a conference
call</description>
<bg_color>#FF001425</bg_color>
<fg_color>#FFFFFFFF</fg_color>
<icon>Default</icon>
</Button>
...
</CallButtons>
90

Settings
Complete
This internal type is used for call transfer or conference scenarios.
IMPORTANT: Only available on the In-Call screen.
Configuring the Complete Button
Using the GUI
1. In Advanced Settings select UI Settings
> Edit In-Call > Add.
2. Select the new button. A yellow box
appears around the selected button.
3. Touch Edit.
4. Select the check box next to Confirm On
Click to enable this (the default is
Disabled).
5. Touch Action and select COMPLETE.
6. In the Title field, enter Complete.
7. In the Description field, enter a short
description of the button function.
8. Touch Icon and select an icon from the
Select Icon menu. See Icons on page 100.
9. Touch BG to set the background color.
See Button Background Color on page
103.
10. Touch FG to set the foreground text color.
See Button Text Color on page 104.
11. Touch the Back button to return to the
WFC Voice Client home screen.
Using XML
<CallButtons>
...
<Button>
<title>Complete</title>
<action>COMPLETE</action>
<value></value>
<enabled>true</enabled>
<confirm>false</confirm>
<description>End a call transfer or
conference call</description>
<bg_color>#FF001425</bg_color>
<fg_color>#FFFFFFFF</fg_color>
<icon>Default</icon>
</Button>
...
</CallButtons>
91

Settings
End Call
This function ends a call in any state. It is pushed back from the Workforce Connect client to the PBX.
IMPORTANT: Only available on the In-Call screen.
NOTE: Placing the End Call button on the in-call dashboard replaces the default End Call button.
Configuring the End Call Button
Using the GUI
1. In Advanced Settings select UI Settings >
Edit In-Call > Add.
2. Select the new button. A yellow box appears
around the selected button.
3. Touch Edit.
4. Select the check box next to Confirm On
Click to enable this (the default is Disabled).
5. Touch Action and select END_CALL.
6. In the Title field, enter End Call.
7. In the Description field, enter a short
description of the button function.
8. Touch Icon and select an icon from the
Select Icon menu. See Icons on page 100.
9. Touch BG to set the background color. See
Button Background Color on page 103.
10. Touch FG to set the foreground text color.
See Button Text Color on page 104.
11. Touch the Back button to return to the WFC
Voice Client home screen.
Using XML
<CallButtons>
...
<Button>
<title>End Call</title>
<action>END_CALL</action>
<value></value>
<enabled>true</enabled>
<confirm>false</confirm>
<description>End a call
</description>
<bg_color>#FF001425</bg_color>
<fg_color>#FFFFFFFF</fg_color>
<icon>Default</icon>
</Button>
...
</CallButtons>
92

Settings
List
By default, List displays the speed dial list 0-9. Alternatively, configure the List button to open a menu built from
other WFC Voice Client buttons.
IMPORTANT: Only available on the In-Call screen.
Configuring the Default List Button
NOTE: This only creates a button. Edit XML file to customize the list.
The List button description appears at the top of the List popup dialog.
Using the GUI
1. In Advanced Settings select UI Settings >
Edit Footer or Edit Dashboard > Add.
2. Select the new button. A yellow box appears
around the selected button.
3. Touch Edit.
4. Select the check box next to Confirm On
Click to enable this (the default is Disabled).
5. Touch Action and select LIST.
6. In the Title field, enter List.
7. In the Description field, enter a short
description of the button function.
8. Touch Icon and select an icon from the
Select Icon menu. See Icons on page 100.
9. Touch BG to set the background color. See
Button Background Color on page 103.
10. Touch FG to set the foreground text color.
See Button Text Color on page 104.
11. Touch the Back button to return to the WFC
Voice Client home screen.
Using XML
<Footer> or <Dashboard>
...
<Button>
<title>List</title>
<action>LIST</action>
<value></value>
<enabled>true</enabled>
<confirm>false</confirm>
<description>Department
extensions </description>
<bg_color>#FF001425</bg_color>
<fg_color>#FFFFFFFF</fg_color>
<icon>Default</icon>
</Button>
...
</Footer> or </Dashboard>
Configuring List Buttons Using XML
List buttons are configured using XML. The List button contains each sub button before the closing </Button>
element. The List button description appears at the top of the List popup dialog. The sub button description
appears as a comment under the button title, identifying which action is performed.
For example, to create a list with three custom buttons (Bedding, Electronics and Toys):
93
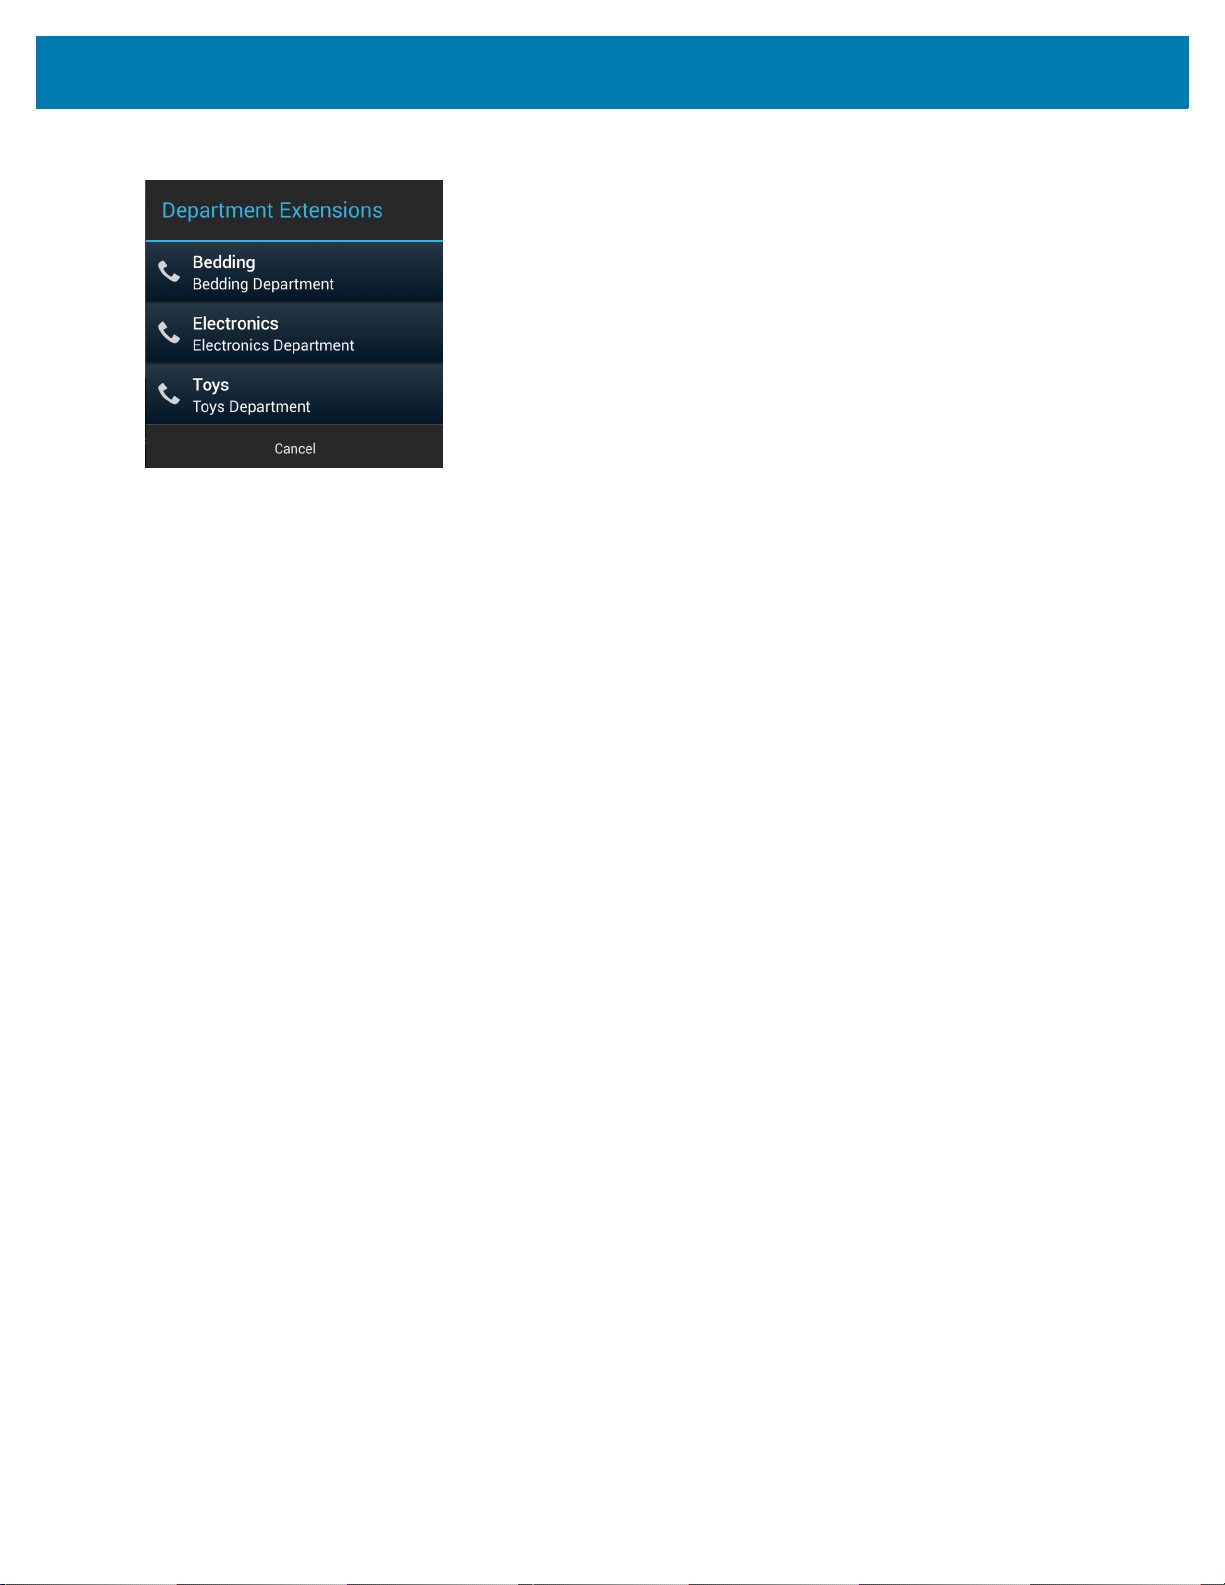
Figure 51 List Button Example
<Footer> or <Dashboard> or <CallButtons>
...
<Button>
<title>List</title>
<action>LIST</action>
<value></value>
<enabled>true</enabled>
<confirm>false</confirm>
<description>Department Extensions </description>
<bg_color>#FF001425</bg_color>
<fg_color>#FFFFFFFF</fg_color>
<icon>Default</icon>
<Button>
<title>Bedding</title>
<action>CALL</action>
<value>1111</value>
<enabled>true</enabled>
<confirm>false</confirm>
<description>Bedding Department</description>
<bg_color>#FF001425</bg_color>
<fg_color>#FFFFFFFF</fg_color>
<icon></icon>
</Button>
<Button>
<title>Electronics</title>
<action>CALL</action>
<value>1122</value>
<enabled>true</enabled>
<confirm>false</confirm>
<description>Electronics Department</description
<bg_color>#FF001425</bg_color>
Settings
94

</Button>
...
Settings
<fg_color>#FFFFFFFF</fg_color>
<icon></icon>
</Button>
<Button>
<title>Toys</title>
<action>CALL</action>
<value>1133</value>
<enabled>true</enabled>
<confirm>false</confirm>
<description>Toys Department</description
<bg_color>#FF001425</bg_color>
<fg_color>#FFFFFFFF</fg_color>
<icon></icon>
</Button>
</Footer> or </Dashboard> or </CallButtons>
95

Settings
Blank
Blank provides an empty space between buttons for a more customized look and feel. If touched, the Blank button
does not perform an action.
Configuring the Blank Button
Using the GUI
1. In Advanced Settings select UI Settings >
Edit Footer, Edit Dashboard or Edit In-Call
> Add.
2. Select the new button. A yellow box appears
around the selected button.
3. Touch Edit.
4. Select the check box next to Confirm On
Click to enable this (the default is Disabled).
5. Touch Action and select BLANK.
6. In the Title field, enter Blank.
7. Touch the Back button to return to the WFC
Voice Client home screen.
Using XML
<Footer> or <Dashboard> or <Call Buttons>
...
<Button>
<title>Blank</title>
<action>BLANK</action>
<value></value>
<enabled>true</enabled>
<confirm>false</confirm>
<description>Empty
space</description>
<icon></icon>
</Button>
...
</Footer> or </Dashboard> or
</CallButtons>
96

Settings
Reload
Reload allows a user to sign out and then automatically sign back in to the WFC Voice Client.
Configuring the Reload Button
Using the GUI
1. In Advanced Settings select UI Settings >
Edit Dashboard or Edit In-Call > Add.
2. Select the new button. A yellow box appears
around the selected button.
3. Touch Edit.
4. Select the check box next to Confirm On
Click to enable this (the default is Disabled).
5. Touch Action and select
SIGNOUT_CHANGE.
6. Ensure the Value field is empty.
7. In the Title field, enter Sign Out.
8. Touch the Back button to return to the WFC
Voice Client home screen.
Using XML
<Dashboard> or <CallButtons>
...
<Button>
<title>Sign Out</title>
<action>SIGNOUT_CHANGE</action>
<value></value>
<enabled>true</enabled>
<confirm>false</confirm>
<description></description>
<icon></icon>
<scale>CENTER_INSIDE</scale>
</Button>
...
</Dashboard> or </CallButtons>
This action can also be initiated using ADB, an MDM, or a third party app. For example, in ADB you can use the
following command:
$ adb shell am broadcast -a wfc.voice.SIGN_OUT
97

Settings
Sign Out
Sign Out allows a user to sign out of the WFC Voice Client.
Configuring the Sign Out Button
Using the GUI
1. In Advanced Settings select UI Settings >
Edit Dashboard or Edit In-Call > Add.
2. Select the new button. A yellow box appears
around the selected button.
3. Touch Edit.
4. Select the check box next to Confirm On
Click to enable this (the default is Disabled).
5. Touch Action and select
SIGNOUT_CHANGE.
6. In the Value field, enter 0.
7. In the Title field, enter Sign Out.
8. Touch the Back button to return to the WFC
Voice Client home screen.
Using XML
<Dashboard> or <CallButtons>
...
<Button>
<title>Sign Out</title>
<action>SIGNOUT_CHANGE</action>
<value>0</value>
<enabled>true</enabled>
<confirm>false</confirm>
<description></description>
<icon></icon>
<scale>CENTER_INSIDE</scale>
</Button>
...
</Dashboard> or </CallButtons>
This action can also be initiated using ADB, an MDM, or a third party app. For example, in ADB you can use the
following command:
$ adb shell am broadcast -a wfc.voice.SIGN_OUT --es change 0
98

Settings
Ringtone
Sign Out allows a user to sign out of the WFC Voice Client.
Configuring the Blank Button
Using the GUI
1. In Advanced Settings select UI Settings >
Edit Dashboard or Edit In-Call > Add.
2. Select the new button. A yellow box appears
around the selected button.
3. Touch Edit.
4. Select the check box next to Confirm On
Click to enable this (the default is Disabled).
5. Touch Action and select RINGTONE.
6. In the Title field, enter Ringtone.
7. Touch the Back button to return to the WFC
Voice Client home screen.
Using XML
<Dashboard> or <CallButtons>
...
<Button>
<title>Ringtone</title>
<action>RINGTONE</action>
<value></value>
<enabled>true</enabled>
<confirm>false</confirm>
<description></description>
<icon></icon>
<scale>CENTER_INSIDE</scale>
</Button>
...
</Dashboard> or </CallButtons>
99

Icons
Icon Library
To choose a button from the icon library:
Settings
Using the GUI
1. In Advanced Settings select UI Settings >
Edit Footer, Edit Dashboard or Edit In-Call
> Add.
2. Select the new button. A yellow box appears
around the selected button.
3. Touch Edit.
4. Select the check box next to Confirm On
Click to enable this (the default is Disabled).
5. In the Description field, enter a short
description of the button function.
6. Touch Icon. The Select Icon menu is
displayed.
7. From the Library tab, select an icon.
8. Touch BG to set the background color. See
Button Background Color on page 103.
9. Touch FG to set the foreground text color.
See Button Text Color on page 104.
10. Touch the Back button to return to the WFC
Voice Client home screen.
Using XML
<Footer> or <Dashboard> or <Call Buttons>
...
<Button>
<title>Dial</title>
<action>DIAL</action>
<value></value>
<enabled>true</enabled>
<confirm>false</confirm>
<description>Dial button from
library</description>
<bg_color>#FF001425</bg_color>
<fg_color>#FFFFFFFF</fg_color>
<icon>ic_dialpad</icon>
</Button>
...
<Footer> or <Dashboard> or <Call Buttons>
Custom Icon Configuration
NOTE: Icons must be 128 pixels by 128 pixels and in PNG format.
The user can create custom icons. To select a custom icon:
1. Connect the device to a host computer using a USB cable.
2. From the host computer, copy the icon file to the WFConnect folder on device.
100
 Loading...