

Page 1

54Mbps 802.11g
Wir eless Access Point
Version 1.0 -- September 2003
FEB/25th/2002
1
Page 2

Table of Contents
Quick Start Guide Version 1.0 3
1. Package Content 3
2. Installing the 54Mbps 802.11g W ireless Access Point 3
3. Configuring the 54bps 802.11g Wireless Access Point 4
3.1 How to access the Web-based configuration Utility 4
3.2 Configuration: 4
3.2.1 Local Area Network settings: 5
3.2.2 Wireless settings 5
3.2.3 WDS links 6
3.2.4 Wireless Security 7
3.2.4.1 ACL 7
3.2.4.2 WEP 7
3.2.4.3 RADIUS 8
3.2.4.4 802.1x 8
3.2.4.5 WPA 9
3.3 Install Wizard 9
3.4 Status: 10
Technical Support 10
FCC Information 11
FEB/25th/2002
2
Page 3
Introduction
The next-generation wireless LAN device – 54Mbps 802.11g Wireless Access Point,
brings an extremely high performance to the wireless realm. Fully compliant with
IEEE802.11g standard, the 54Mbps 802.11g Wireless Access Point also provides powerful
features such as the WDS, WPA security, SNMP and more. Maximize network
efficiency while minimizing your network investment and maintenance costs.
1. Package Content
54Mbps Wireless LAN Access Point x 1 DC Power Adapter x 1
Quick Start Guide x 1
Note: If any of the above items are missing or damaged, contact your local
dealer for support.
2. Installing the 54Mbps 802.11g Wireless Access Point
Connect the 54Mbps 802.11g Wireless Access Point to a hub (in Bridge mode) or a
PC with its UTP Ethernet cable. Please note that, use the cross-over cable when you
directly connect the Access Point to a PC.
Connect the power adapter to the power socket on the 54Mbps 802.11g Wireless
Access Point, and plug the other end of the power pack into an electrical outlet.
Note 1: ONLY use the power adapter supplied with the 54Mbps 802.11g
Wireless Access Point. Otherwise, the product may be damaged.
Note 2: The button labeled “DEFAULT” enables you to restore the 54Mbps
Wireless LAN Access Point’s default setting. This is used when you forget
the password. Please press the “DEFAULT” button on the side panel of the
Wireless Access Point at least for 10 seconds then release the button and wait
for a reboot. Usually it will take you another 30 seconds. Afterward, you will
have the 54Mbps 802.11g Wireless Access Point’s default settings and can
configure the Access Point via Web again.
FEB/25th/2002
3
Page 4
3. Configuring the 54bps 802.11g Wireless Access Point
The 54Mbps 802.11g Wireless Access Point allows configuration only via Web.
3.1 How to access the Web-based configuration Utility
The following gives instructions guiding you through the installations of the Wireless
Access Point.
1. Connect your computer to the Access Point either through wireless or wired connection.
Please set a fixed IP address, within the range of 192.168.1.X (X can’t be 254), to your
computer. If you attempt to use a wireless connection, you must also set a configuration
in your computer in advance as below.
SSID: default
WEP: disable
2. Activate your web browser and type in the IP address of your AP in the Address or
location field and press Enter. The default value of Access Point is 192.168.1.254.
3. Follow the on-screen instructions to enter the system password then press Enter. The
default value of password is “private”.
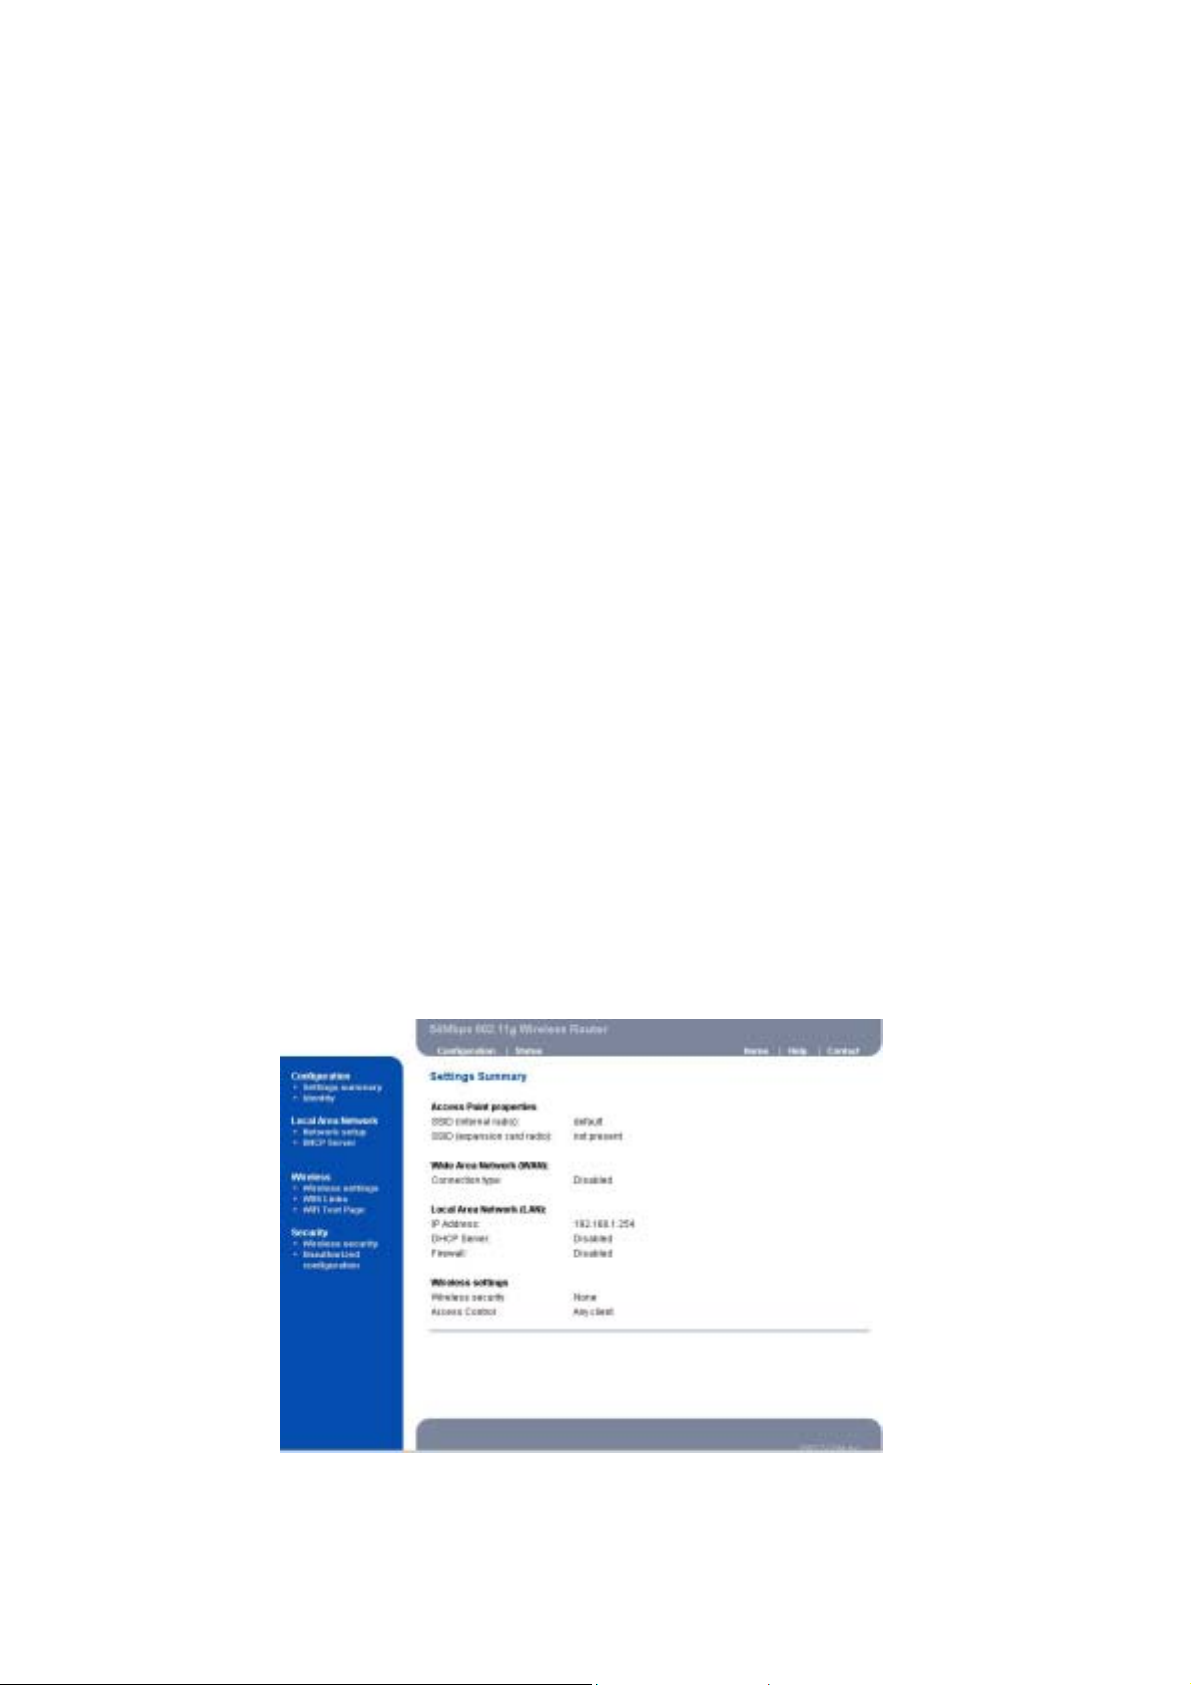
The Web-based configuration Utility provides 3 items for you to monitor and configure the
Wireless Access Point: Configuration, Install Wizard and Status.
3.2 Configuration:
These core options are essential to enable the AP to work properly.
FEB/25th/2002
4
Page 5

3.2.1 Local Area Network settings:
Three selections are provided. If you plan to use any external DHCP server, select
Dynamic. Otherwise set the LAN address to Static. Under the Static IP, you have the
third choice to turn on the internal DHCP server . First enter the setting on the DHCP server
page and enable the default DHCP server. Once DHCP is enabled, you have to make sure
the IP address at the Static IP settings is in the range of the DHCP server in which the
default DHCP server is usually enabled.
3.2.2 Wireless settings
Your wireless settings will impact the coverage and the performance of your wireless LAN.
AP can be operated in three different bandwidth scenarios: high rate 54Mbps, low rate
11Mbps and a mix of both below 54M and 11Mbps. To deliver the throughput
FEB/25th/2002
5
Page 6

enhancement in both mixed and g-only networks, you can also enable Prism Nitro mode by
using Intersil’s packet bursting technology. The burst size is adjustable, usually the bigger
burst packet, the more sharing of 11g transmission while a mixed network is introduced.
You can also do something to logically hide the Access Point. By unclicking the broadcase
SSID, your Access Point will refuse the connection request from whom is not aware the
Network ID. But certainly the Access Point can be easily connected well when you realize
the Network ID.
3.2.3 WDS links
Extend the range of your network without having to use cables to link the Access Points by
using the Wireless Distribution System (WDS): Put simply, you can link the Access Points
wirelessly. Under WDS, your Access Points are still functioning as a regular Access Point,
which can provide the link services to wireless clients.
Enter the MAC address of another AP you wirelessly want to connect to into the
appropriate field either by clicking Add WDS link or selecting the peer Access Point that
your Access Point finds out. The implementation can be done as below.
FEB/25th/2002
6
Page 7

3.2.4 Wireless Security
To protect your wireless intellectual property, it is important to secure your wireless
connection. This Access Point is equipped a sophisticated security algorithm to protect
against intruders entering your system or listening to the conversation over your network.
3.2.4.1 ACL
You can assign different access rules for different users by adding the MAC address and
the access rights which is to either accept or reject the connection.
3.2.4.2 WEP
The basic security settings is to enable WEP algorithm by assigning 64 or 128 bits
encryption key. You have to enter a specific length of hexadecimal key in the appropriate
field:
Example 64 bits: ABCDEA01234567899876543210 26 digits
Example 128 bits: ABCDA012345 10 digits
FEB/25th/2002
7
Page 8

3.2.4.3 RADIUS
RADIUS performs the authentication function required to check the credentials of users
and intermediate Access Points and indicates whether the users are authorized to access the
Access Points. Enabling RADIUS is therefore the first step toward building up an
802.1x-capable environment. Even more, it is also a must-do to accommodate the recently
introduced Wi-Fi protected access (WPA-EAP) to wireless networks.
Adding RADIUS information in your Access Points is quite simple. Just input the IP
address of RADIUS and the specific port number, UDP 1812, as well as a secret key which
is identical to the given key in RADIUS.
3.2.4.4 802.1x
IEEE 802.1x will perform a standardized network access control to keep out unauthorized
users, verify the credentials of users with RADIUS and distribute the encryption key.
For this Acc ess Point, it is required to provide RADIUS information in prior to setup
802.1x. Two lengths of encryption key are provided, 64 or 128 bits.
FEB/25th/2002
8
Page 9

3.2.4.5 WP A
The Wi-Fi Protected Access (WPA) is currently the highest levels of security a wireless
network can achieve. It is a subset of the security specification and has been introduced as
an interim solution for most known security weaknesses in comparison to the plain WEP.
TKIP, the successor to WEP, enhances the ability to eliminate the known vulnerabilities of
WEP. It also introduced that enterprises that already have RADIUS in place can use WPA
with 802.1x or RADIUS (so called WPA-EAP) and small business and home wireless LAN
can use WPA without 802.1x (so called WPA-PreShared key).
Technically, a WLAN client with WPA capabilities is needed to acquire a digital certificate
to be successfully authenticated by RADIUS via a specific EAP channel, TLS. It is usually
called supplicant, sometimes, it is more associated with a software application. Vendors,
including Microsoft, nowadays offer upgrades for their cards. The most popular software
application run on WLAN client in the market is the Windows XP SP2. (SP1 with WPA
hotfix) provided by Microsoft.
3.3 Install Wizard
This wizard will guide you through the main settings for your Access Point in an easy way.
You will be prompted to select in which country you will use the product. This is the
organization that certifies the Access Point for use in your country. Cautiously choose your
FEB/25th/2002
9
Page 10

country in order to comply with the regulation. Then select a specific SSID as your
network identification. Client stations can roam freely using this product and other Access
Point that have the same SSID. Also select a number for radio channel which determines
the channel can be used to transmit and receive signals. Then setup your security policy by
simply enabling the legacy WEP or the latest introduced WPA or just use the default setting
that allow any client to associate with.
3.4 Status:
The Status item shows current information on the 54Mbps Wireless LAN Access Point as
Interfaces statistics, wireless statistics (including association, WDS statistics), DHCP
statistics, and event report.
Technical Support
You can find the most recent software and updated user documentation will be updated
periodically on the supplier Web site. If you have difficulty resolving the problem while
installing or using the 11Mbps Wireless LAN Micro Access Point, please contact the
supplier for support.
FEB/25th/2002
10
Page 11

FCC Information
This device complies with Part 15 of the FCC Rules. Operation is subject to the following
two conditions: (1) this device may not cause harmful interference, and (2) this device
must accept any interference received; including interference that may cause undesired
operation.
Federal Communications Commission (FCC) Statement
This Equipment has been tested and found to comply with the limits for a Class B and C
digital device, pursuant to Part 15 of the FCC rules. These limits are designed to provide
reasonable protection against harmful interference in a residential installation. This
equipment generates, uses and can radiate radio frequency energy and, if not installed and
used in accordance with the instructions, may cause harmful interference to radio
communications. However, there is no guarantee that interference will not occur in a
particular installation. If this equipment does cause harmful interference to radio or
television reception, which can be determined by turning the equipment off and on, the
user is encouraged to try to correct the interference by one or more of the following
measures:
- Reorient or relocate the receiving antenna.
- Increase the separation between the equipment and receiver.
- Connect the equipment into an outlet on a circuit different from that to which the receiver
is connected.
- Consult the dealer or an experienced radio/TV technician for help.
FCC RF Radiation Exposure Statement:
1. This Transmitter must not be co-located or operating in conjunction with any other
antenna or transmitter.
2. This equipment complies with FCC RF radiation exposure limits set forth for an
uncontrolled environment. This equipment should be installed and operated with a
minimum distance of 20 centimeters between the radiator and your body.
FEB/25th/2002
11
Page 12

Limited Warranty
This Warranty constitutes the sole and exclusive remedy of any buyer or reseller’s
equipment and the sole and exclusive liability of the supplier in connection with the
products and is in lieu of all other warranties, express, implied or statutory, including, but
not limited to, any implied warranty of merchantability of fitness for a particular use and
all other obligations or liabilities of the supplier.
In no even will the supplier or any other party or person be liable to your or anyone else for
any damages, including lost profits, lost savings or other incidental or consequential
damages, or inability to use the software provided on the software media even if the
supplier or the other party person has been advised of the possibility of such damages.
The following are special terms applicable to your hardware warranty as well as services
you may use during part of the warranty period. Your formal Warranty Statement,
including the warranty applicable to our Wireless LAN products, appears in the Quick
Installation Guide which accompanies your products.
Duration of Hardware Warranty: One Year
Replacement, Repair or Refund Procedure for Hardware:
If your unit needs a repair or replacement, return it to your dealer/distributor in its original
packaging. When returning a defective product for Warranty, always include the
following documents:
The Warranty Repair Card
A copy of the invoice/proof of purchase, and
The RMA Report Form (To receive a Return Materials Authorization form (RMA),
please contact the party from whom you purchased the product).
Upon proof-of-purchase we shall, at its option, repair or replace the defective item at no
cost to the buyer.
This warranty is contingent upon proper use in the application for which the products are
intended and does not cover products which have been modified without the reseller’s
approval or which have been subjected to unusual physical or electrical demands or
damaged in any way.
FEB/25th/2002
12
Page 13

Please complete the information below and include it along with your products.
Name:
Title:
Company:
Telephone:
Fax:
Email:
City/State/Zipcode:
Country:
Product Name:
Serial Number:
MAC Address:
Invoice Date:
Product Description:
If you have any further questions, please contact your local authorized reseller for support.
FEB/25th/2002
13
 Loading...