

Page 1

IEEE 802.11b/g/n Wireless
Media Adapter
User Manual
V1.1.0
Page 2

Copyright
This user manual and the software described in it are copyrighted with all rights reserved. No part of
this publication may be reproduced, transmitted, transcribed, stored in a retrieval system, or
translated into any language in any form by any means without the written permission of Z-Com
Corporation.
About This Manual
This manual explains Z-Com VUS-100 IEEE 802.11n Wireless Virtual USB Storage (hereafter called
“USB”), how to build the infrastructure based on the VUS-100 and proposals when using this USB
storage.
For your attention on important parts, special characters and patterns are used in this manual:
Note:
Bold: Indicates the function, important words, and so on.
This indicates an important note.
I
Page 3

CONTENT
CHAPTER 1 INTRODUCTION ............................................................................................................................... 7
INTRODUCTION .......................................................................................................................................................... 7
APPEARANCE ............................................................................................................................................................. 7
KEY FEATURES .......................................................................................................................................................... 7
TYPICAL APPLICATIONS ............................................................................................................................................. 8
CHAPTER 2 BASIC INSTALLATION .................................................................................................................. 10
SYSTEM REQUIREMENTS .......................................................................................................................................... 10
PACKAGE CONTENTS ............................................................................................................................................... 10
HARDWARE INSTALLATION ...................................................................................................................................... 10
LED DEFINITION ..................................................................................................................................................... 11
CHAPTER 3 BASIC SETTINGS ............................................................................................................................ 12
FACTORY DEFAULT SETTINGS .................................................................................................................................. 12
UTILITY & WEB - DOUBLE MANAGEMENT TOOLS ................................................................................................... 12
BASIC SETTINGS ...................................................................................................................................................... 13
IP SETTINGS ............................................................................................................................................................. 14
WIRELESS BASIC SETTINGS ..................................................................................................................................... 16
WIRELESS SECURITY SETTINGS ............................................................................................................................... 17
SITE SURVEY............................................................................................................................................................ 18
WIRELESS CONNECTION SCENARIO ......................................................................................................................... 19
CHAPTER 4 BROWSE LOCAL SHARED FOLDERS ........................................................................................ 20
AUTO-SEARCH SHARED FOLDERS IN LAN ............................................................................................................... 20
BROWSE SEVERAL LOCAL SHARED FOLDERS SIMULTANEOUSLY ............................................................................. 20
CHAPTER 5 BROWSE FLICKR NETWORK ALBUM ...................................................................................... 22
II
Page 4

ADD/DELETE FLICKR ACCOUNT .............................................................................................................................. 22
MAXIMUM PHOTOS TO RETURN ............................................................................................................................... 24
BROWSE PRIVATE FLICKR NETWORK ALBUM .......................................................................................................... 24
CHAPTER 6 MANAGEMENT ............................................................................................................................... 31
VIEW THE VUS-100 BASIC INFORMATION ............................................................................................................... 31
VIEW STATISTICS INFORMATION .............................................................................................................................. 31
FIRMWARE UPGRADE ............................................................................................................................................... 32
BACKUP/RESTORE SETTINGS ................................................................................................................................... 34
RESTORE FACTORY DEFAULT SETTINGS ................................................................................................................... 36
REBOOT ................................................................................................................................................................... 37
CHAPTER 7 TROUBLESHOOTING .................................................................................................................... 39
FAQ (FREQUENTLY ASKED QUESTIONS) .................................................................................................................. 39
TECHNICAL SUPPORT ............................................................................................................................................... 40
APPENDIX A. SPECIFICATIONS ......................................................................................................................... 41
APPENDIX B. TECHNICAL TERMS .................................................................................................................... 44
APPENDIX C. ASCII ............................................................................................................................................... 45
III
Page 5

FIGURE
FIGURE 1 VUS-100 ........................................................................................................................................................ 7
FIGURE 2 APPLICATION – LOCAL SHARED FOLDER ........................................................................................................ 8
FIGURE 3 APPLICATION – NETWORK ALBUM.................................................................................................................. 8
FIGURE 4 APPLICATION – COMPATIBLE HISENSE LED TV ............................................................................................. 8
FIGURE 5 APPLICATION – PS3 ........................................................................................................................................ 9
FIGURE 6 DEFAULT INTERFACE OF UTILITY .................................................................................................................. 13
FIGURE 7 BASIC SETTINGS ........................................................................................................................................... 14
FIGURE 8 IP ADDRESS ASSIGNMENT ............................................................................................................................ 15
FIGURE 9 WIRELESS BASIC SETTINGS .......................................................................................................................... 16
FIGURE 10 WIRELESS SECURITY SETTINGS .................................................................................................................. 17
FIGURE 11 SITE SURVEY .............................................................................................................................................. 18
FIGURE 12 WIRELESS CONNECTION SCENARIO ............................................................................................................ 19
FIGURE 13 FOLDERS .................................................................................................................................................... 20
FIGURE 14 BROWSE SEVERAL SHARED FOLDERS ......................................................................................................... 21
FIGURE 15 FLICKR ACCOUNT ....................................................................................................................................... 22
FIGURE 16 ADD FLICKR ACCOUNT ............................................................................................................................... 23
FIGURE 17 MAXIMUM PHOTOS TO RETURN ................................................................................................................. 24
FIGURE 18 BROWSE PRIVATE FLICKR NETWORK ALBUM ............................................................................................. 25
FIGURE 19 AUTHENTICATION ....................................................................................................................................... 26
FIGURE 20 LOGIN ......................................................................................................................................................... 27
FIGURE 21 CONFIRMATION ........................................................................................................................................... 28
FIGURE 22 CODE .......................................................................................................................................................... 29
FIGURE 23 INPUT THE CODE ......................................................................................................................................... 30
FIGURE 24 BASIC INFORMATION .................................................................................................................................. 31
FIGURE 25 STATI ST IC S .................................................................................................................................................. 32
FIGURE 26 UPGRADE FIRMWARE VIA UTILITY ............................................................................................................. 33
IV
Page 6

FIGURE 27 UPGRADE FIRMWARE VIA WEB ................................................................................................................... 33
FIGURE 28 BACKUP/RESTORE SETTINGS VIA UTILITY .................................................................................................. 34
FIGURE 29 BACKUP/RESTORE SETTINGS VIA WEB ....................................................................................................... 35
FIGURE 30 RESTORE FACTORY DEFAULT SETTINGS VIA UTILITY ................................................................................. 36
FIGURE 31 RESTORE FACTORY DEFAULT SETTINGS VIA WEB ....................................................................................... 37
FIGURE 32 REBOOT VIA UTILITY .................................................................................................................................. 38
FIGURE 33 REBOOT VIA WEB ....................................................................................................................................... 38
V
Page 7

TABLE
TABLE 1 VUS-100 LED DEFINITION ............................................................................................................................ 11
TABLE 2 VUS-100 FACTORY DEFAULT SETTINGS......................................................................................................... 12
TABLE 3 PRODUCT SPECIFICATIONS ............................................................................................................................. 41
TABLE 4 TECHNICAL TERMS ........................................................................................................................................ 44
TABLE 5 ASCII ............................................................................................................................................................ 45
VI
Page 8
Chapter 1 Introduction
Introduction
Thank you for choosing Z-Com VUS-100 IEEE 802.11n Wireless Virtual USB Storage! Compliant with
IEEE 802.11b/g/n, this VUS-100 brings you with ideal transmission data rate and wider compatibility
as well. As a concept of virtual USB storage, the USB host support is a must for connecting device.
While highlighting its feature by replacing the traditional use of digital frame, VUS-100 transmits
shared albums in LAN and Flickr network album via wireless, enabling you to conveniently browse
your photos at anytime and anywhere!
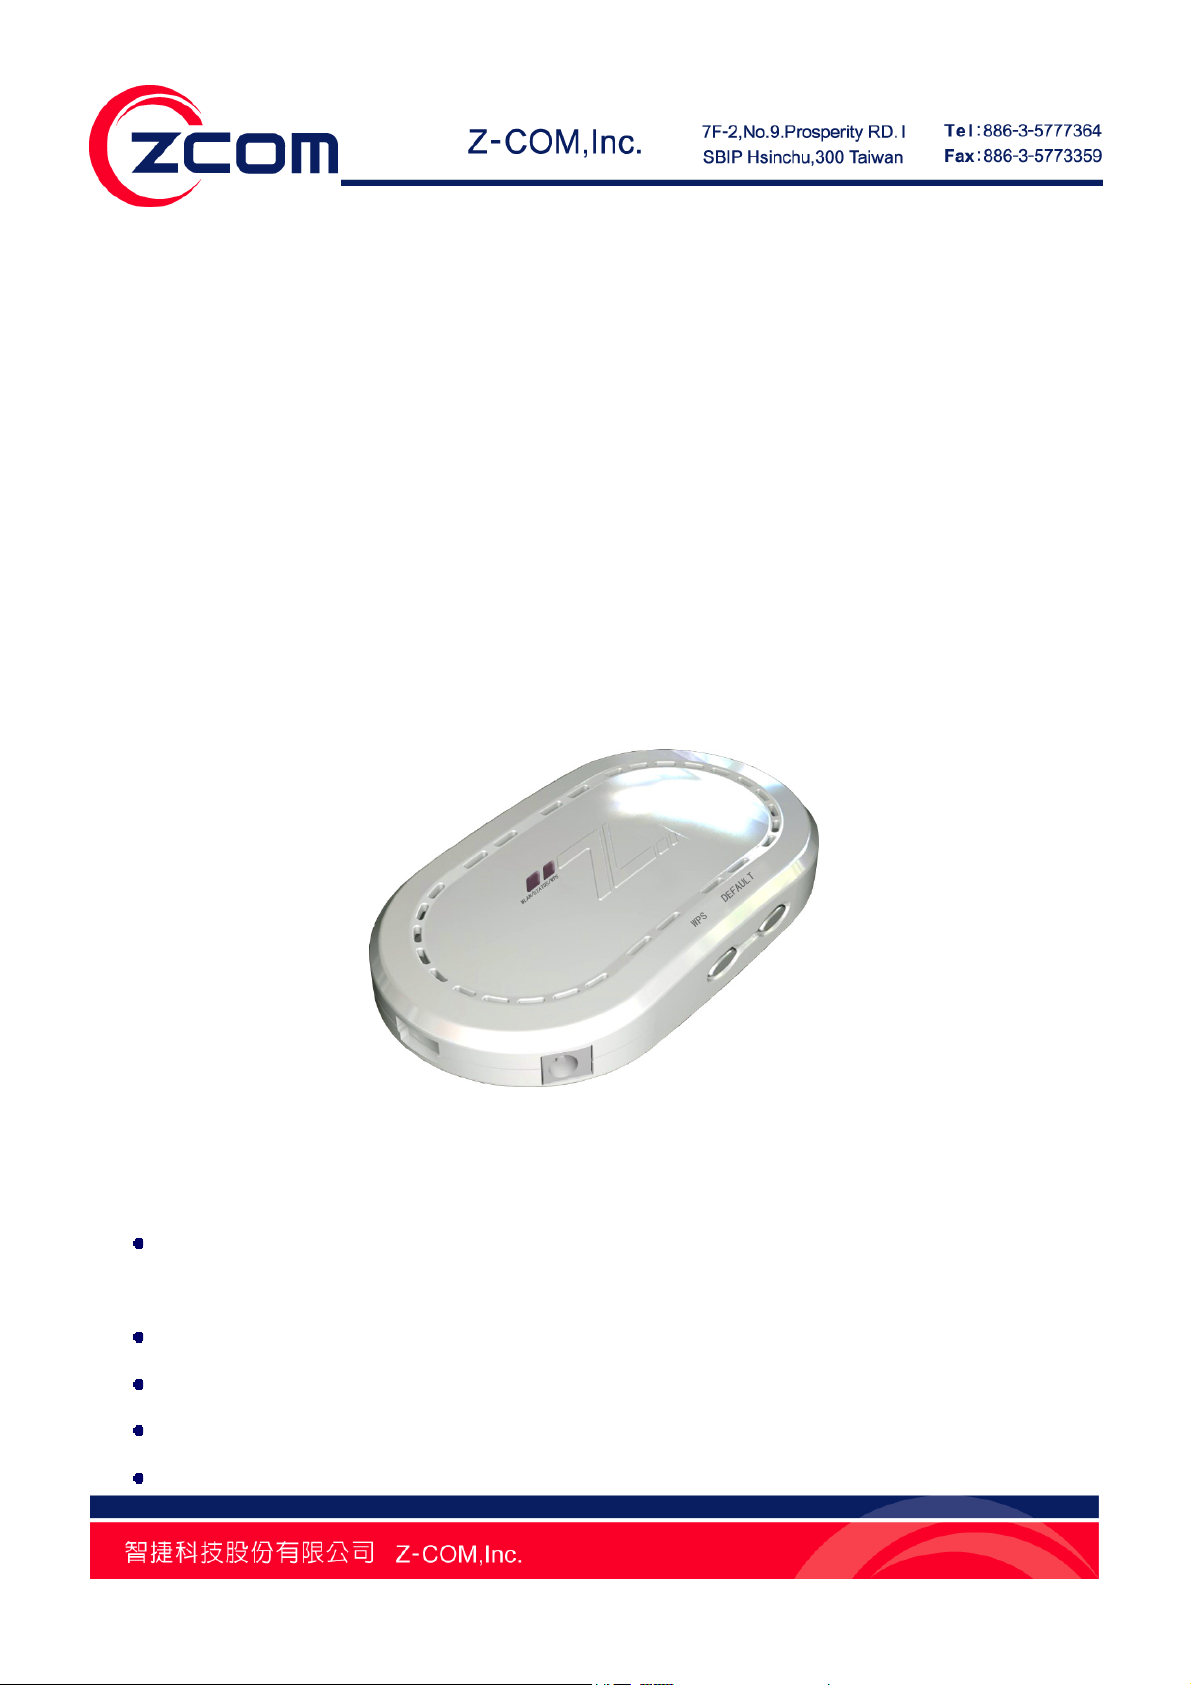
Appearance
Figure 1 VUS-100
Key Features
Transmit on-line photos to the digital photo frame, compatible Hisense LED TV and PS3
constantly via wireless
Support local shared photo album transmission
Support Flickr network album transmission (only can support Flickr currently)
User-friendly Windows and Web-based management interfaces
Support WPS enabled through hardware PBC
Chapter 1 Introduction 7
Page 9
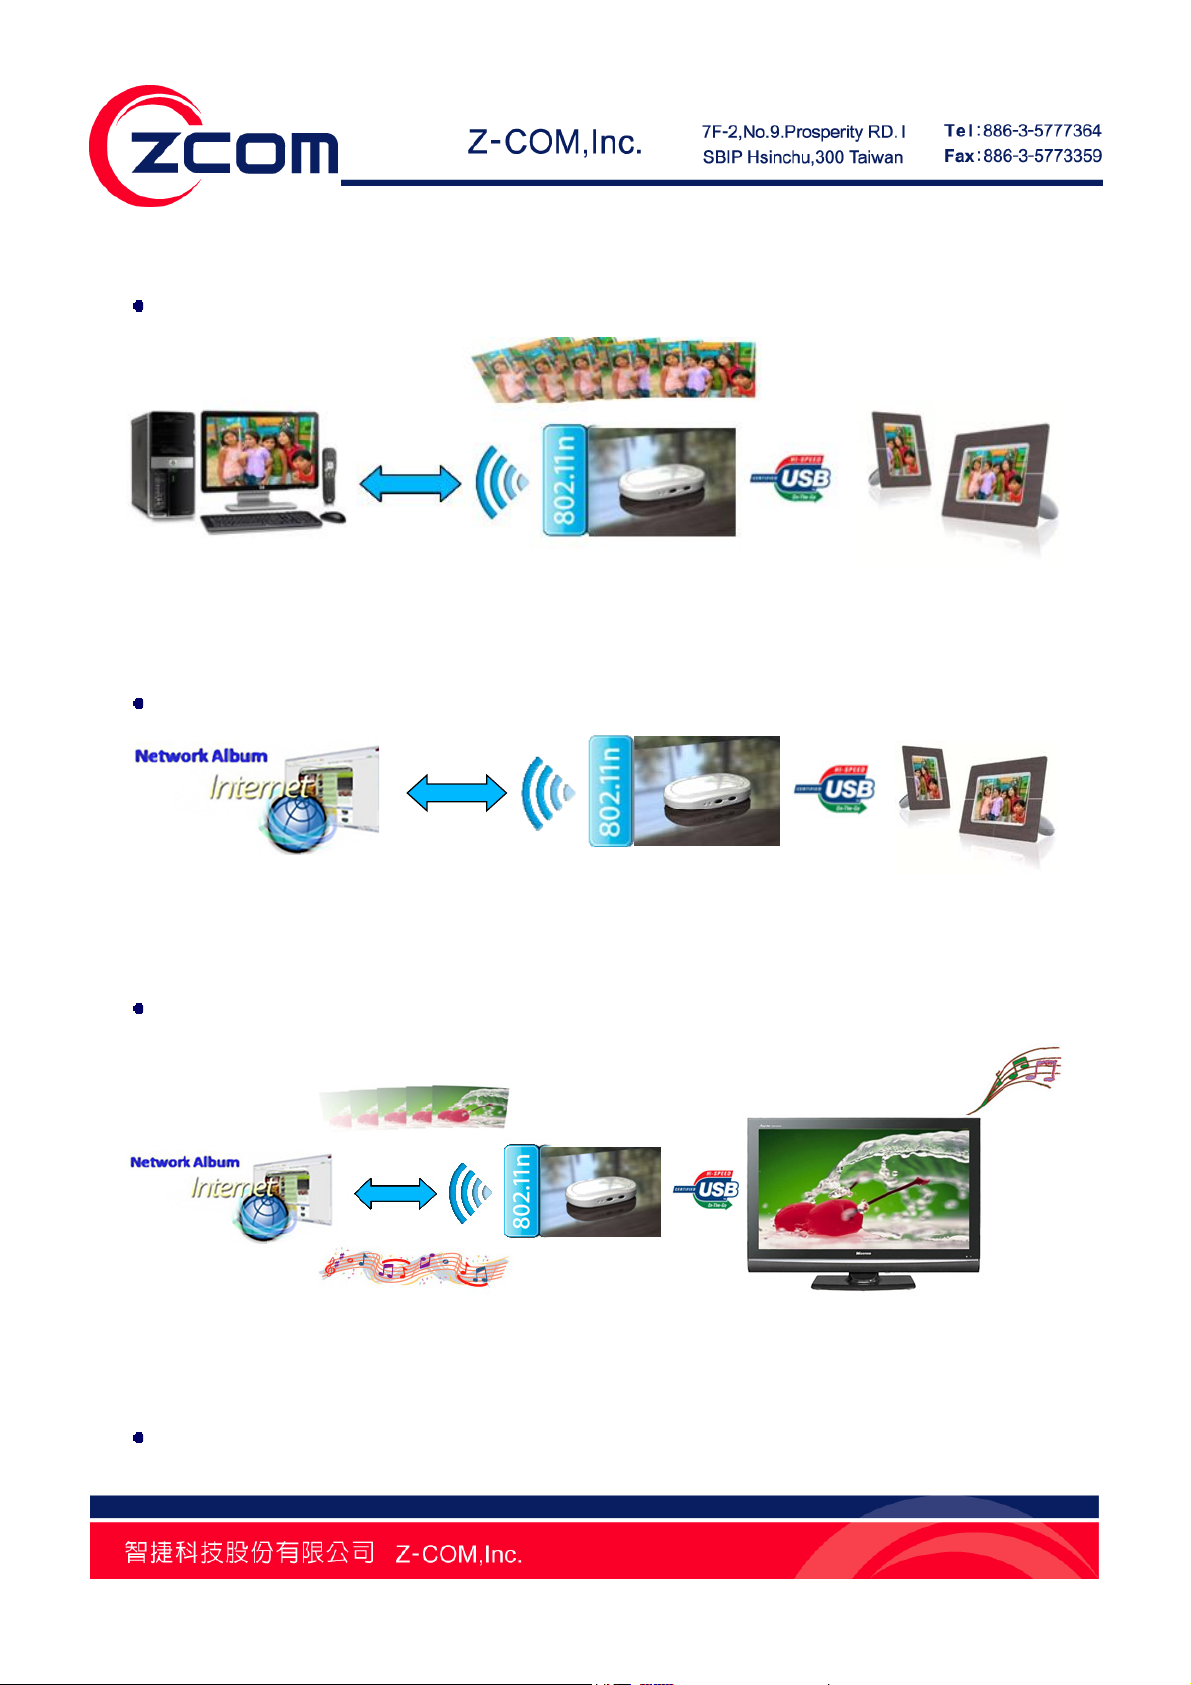
Typical Applications
Play photos in local shared folders via digital photo frame
Figure 2 Application – Local Shared Folder
Play photos in Flickr network album via digital photo frame
Figure 3 Application – Network Album
Play photos in local shared folders or Flickr network album via compatible Hisense LED TV
Figure 4 Application – Compatible Hisense LED TV
Play photos in local shared folders or Flickr network album via Play Station 3
Chapter 1 Introduction 8
Page 10

Figure 5 Application – PS3
Chapter 1 Introduction 9
Page 11

Chapter 2 Basic Installation
System Requirements
Before installing and using your VUS-100, make sure your system meets the following requirements:
One set of access point compliant with IEEE 802.11b/g/n
One set of PC installed with 10/100 Base-TX network adapter
Keep the IP address of PC, access point and VUS-100 in the same network segment. By default,
VUS-100 is set to 192.168.1.1, configure the IP address of PC to 192.168.1.X (X can not be 0, 1
or 255)
A Web browser on PC for configuration such as Microsoft Internet Explorer 6.0 or above
Package Contents
The package you have received should contain the following items, if any of them are not included or
damaged, please contact your local vendor for support:
VUS-100 Virtual USB Storage × 1
5V Power Adapter × 1
USB Converter × 1
Product CD × 1
Hardware Installation
Please follow the steps below to install your VUS-100:
Power on VUS-100, and connect it to your computer with an USB converter after the
WLAN(green) lights up;
Wait for the VUS-100 driver auto installation. Insert the attached product CD and copy the
Utility.exe in it to your PC. Double-click to open this utility and make configuration for your
Chapter 2 Basic Installation 10
Page 12

VUS-100 (Please refer to Chapter 3 & 4 for configuration details.)
Plug VUS-100 out from your computer after configuration, and connect it to the digital photo
frame, compatible Hisense LED TV or PS3 to complete installation.
LED Definition
The following table demonstrates the definition of LED which indicates the network activity of
VUS-100.
Table 1 VUS-100 LED Definition
LED Status Definition
On Device powered on
Status Red
WLAN Green
WPS Blue Blink Once WPS enabled or disabled
Status & WPS Red/Blue Blink Concurrently Firmware upgrading
Note:
The LED of WLAN and Status share the same LED.
Off WLAN is up
Blinking Fast Device resetting
Blinking Find a WLAN network and ready to connect
Solid Connect to a WLAN network – Tx/Rx Data
Chapter 2 Basic Installation 11
Page 13

Chapter 3 Basic Settings
Factory Default Settings
The VUS-100 is set to default values when you first use it. The following table demonstrates the
default settings of VUS-100, you can re-acquire these parameters by resetting the device. If
necessary, please refer to Restore Factory Default Settings.
Table 2 VUS-100 Factory Default Settings
Item Default Value
Device Name VUS-100
UPnP Disable
IP Address 192.168.1.1
Gateway IP 192.168.1.254
Subnet mask 255.255.255.0
Primary DNS 0.0.0.0
Second DNS 0.0.0.0
SSID any
Encryption Disabled
Output Power Full
Security Auth-type Open System
Note:
Please reboot your VUS-100 after modifying its configuration, refer to Reboot for
how to reboot your device.
Utility & Web - Double Management Tools
VUS-100 provides you with two ways for management: Utility and Web. You can use either of them
to check and configure your USB storage settings.
Follow the steps below to start them:
Utility Management Tool
Chapter 3 Basic Settings 12
Page 14
Copy the Utility.exe from the attached product CD into your PC, and double-click to run this utility, as
shown below:
Figure 6 Default Interface of Utility
Web-based Management Interface
Alternatively, after accessing the wireless network, you can input the IP address (By default it is set to
192.168.1.1) of VUS-100 in the IE address field to login VUS-100 Web-based management interface
or use UPnP to login VUS-100 and make configuration.
As the information and configuration options in Web-based management interface are identical to the
ones in Utility, we mainly take Utility as an example in this manual.
Basic Settings
From the Utility, click to open System → General in the left menu bar to modify basic parameters for
your VUS-100.
Chapter 3 Basic Settings 13
Page 15
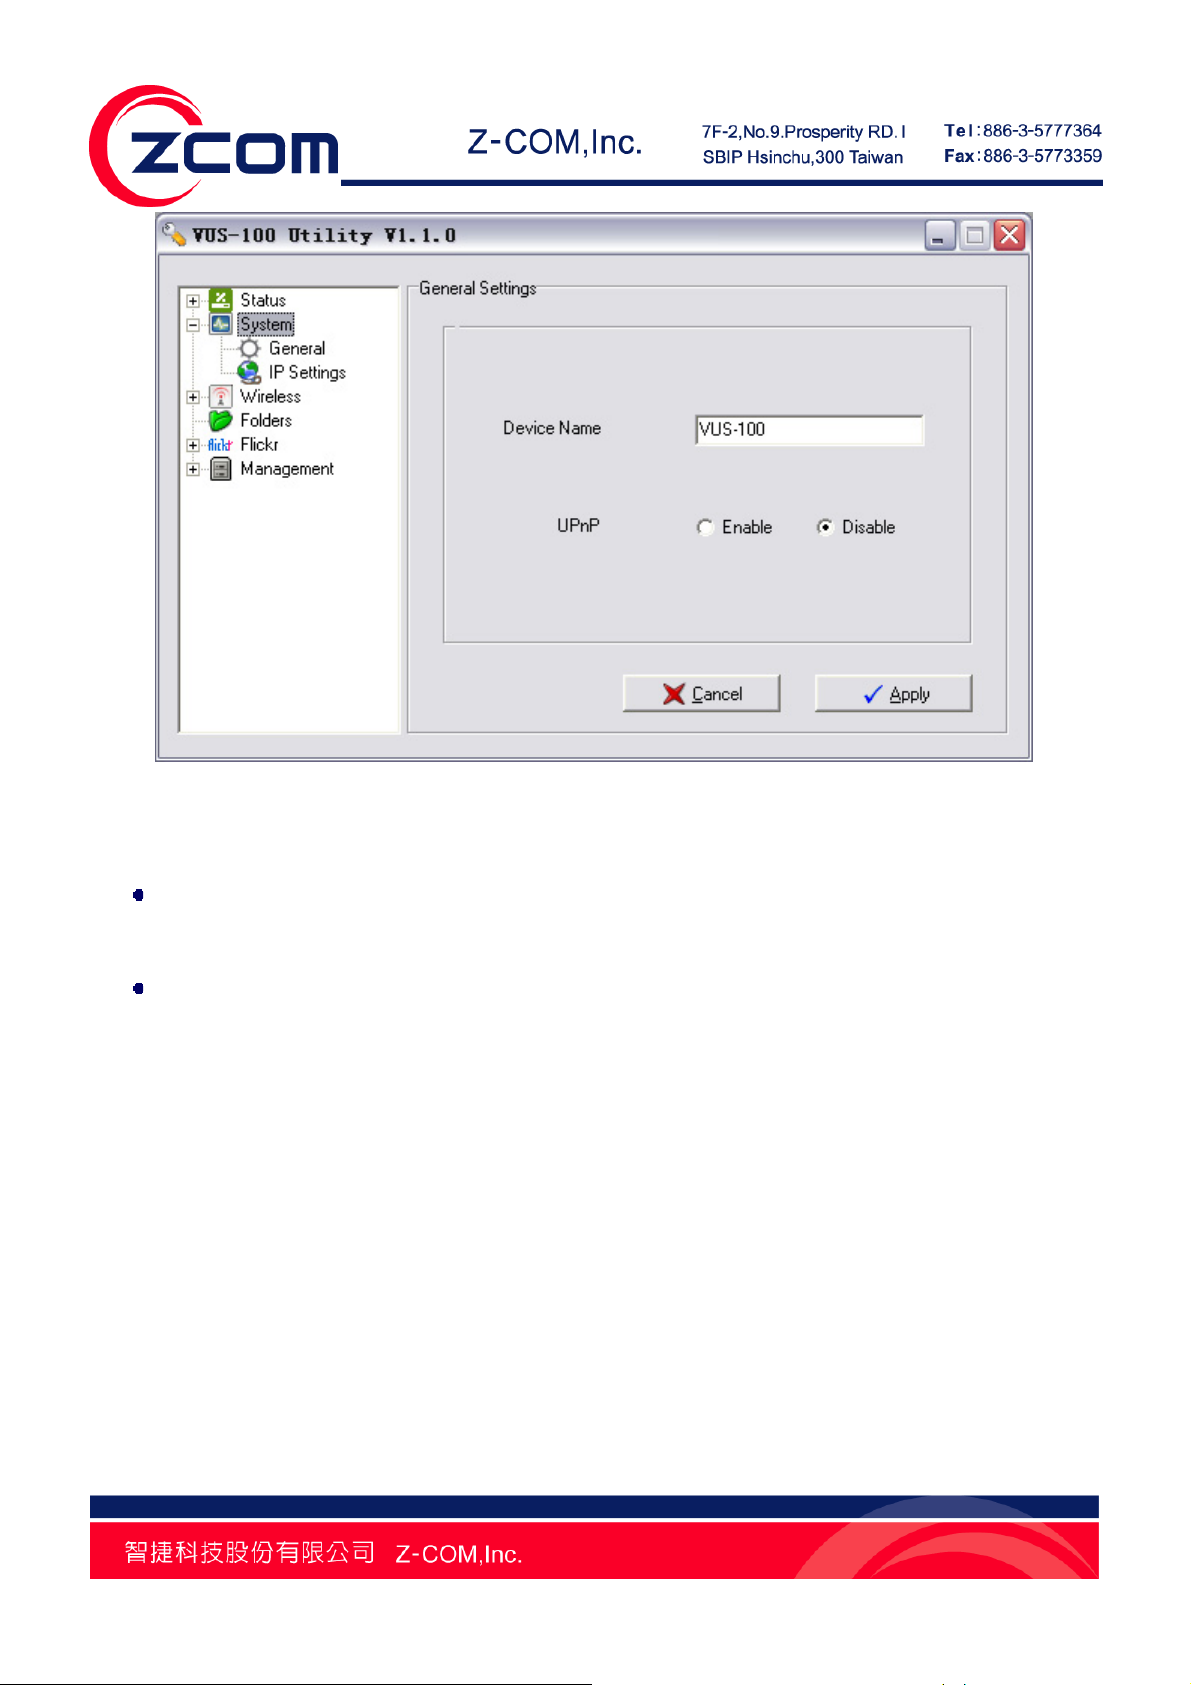
Figure 7 Basic Settings
Device Name
You can specify the name of VUS-100 at will. Note that it is 15 characters at most and case-sensitive.
UPnP
By enabling UPnP, VUS-100 is able to search for available network devices automatically, so as to
establish connection with other network devices much faster.
IP Settings
You can specify and manage the IP address of VUS-100 in this page.
Chapter 3 Basic Settings 14
Page 16

Figure 8 IP Address Assignment
Obtain IP Address Automatically
By checking this option, VUS-100 will request for an IP address from the network if being connected
to the wireless network, then the DHCP server will select an idle IP from its IP pool and allocate it to
VUS-100 after receiving this request.
Use Fixed IP Address
You have to manually specify the IP address, subnet mask, gateway IP, primary DNS and secondary
DNS if check this option.
Note:
When browsing the shared folders in LAN with VUS-100, the IP address of
VUS-100 and the PC in LAN should be in the same network segment.
When browsing Flickr network album with VUS-100, set an IP address for your
VUS-100 to access the Internet.
Chapter 3 Basic Settings 15
Page 17

Wireless Basic Settings
From the Utility, click Wireless → Basic Settings in the left menu bar to make basic wireless
configuration for your VUS-100.
Figure 9 Wireless Basic Settings
SSID
For AP and STA to identify a wireless network, SSID is composed of 32 ASCII characters at most and
is case-sensitive. Keep the SSID on VUS-100 and AP identical for connection. By default, it is set to
any which means VUS-100 will search and establish connection with the available AP of strongest
signal strength.
Output Power
Specify the transmission power for VUS-100. The higher the output power is, the wider the wireless
signal covers, whereas the power consumption grows accordingly. Usually, it is set to Full.
Chapter 3 Basic Settings 16
Page 18

Wireless Security Settings
Figure 10 Wireless Security Settings
Auth-Type (Authentication Type)
- Open System: Allows connection with any AP.
- Shared Key: Encryption and key are required.
- WPA-PSK: As a simplified WPA mode, there is no need for special authentication server. This
WPA Pre-shared Key mode only requires to input a key in each WLAN nodes (AP, wireless router,
adapter, etc) beforehand.
- WPA2-PSK: This is a new version of WPA. If it is enabled, AES encryption and passphrase are
required.
Encryption
Select a data encryption way. If it is enabled, key is required. And only share the same key with other
wireless devices (AP), can the connection be established.
- None: Available only under open system.
Chapter 3 Basic Settings 17
Page 19

- 64 bits: It is composed of 10 hex digits.
- 128 bits: It is composed of 26 hex digits.
- 152 bits: it is composed of 32 hex digits.
- TKIP: Short for Temporary Key Integrity Protocol, it is a dynamic encryption way co-used with
WPA-PSK.
- AES: Short for Advanced Encryption Standard, it is usually co-used with WPA, WPA2,
WPA2-PSK.
Note:
Keep the Auth-Type, Encryption and Key in VUS-100 and its associated AP
identical, otherwise the connection may fail!
Site Survey
Figure 11 Site Survey
Chapter 3 Basic Settings 18
Page 20

The VUS-100 will search for available APs in LAN and establish connection automatically after being
powered on. You can view the information of available APs in Site Survey from Wireless. Select the
AP you would like to connect and click Join to establish connection.
Clicking Refresh allows you to view the real-time site survey list.
Wireless Connection Scenario
The following picture illustrates typical applications on VUS-100. It can be co-used with the digital
photo frame, compatible Hisense LED TV or play station 3 as you wish.
Figure 12 Wireless Connection Scenario
Chapter 3 Basic Settings 19
Page 21

Chapter 4 Browse Local Shared Folders
Auto-search Shared Folders in LAN
Figure 13 Folders
Open Folders in the left menu bar;
By clicking Scan the VUS-100 will search all the available shared folders in LAN automatically.
The scan result will be listed in the dialog box.
Browse Several Local Shared Folders Simultaneously
VUS-100 allows you to browse more than one shared folder simultaneously if there are several
shared folders available in LAN.
Chapter 4 Browse Local Shared Folders 20
Page 22

Figure 14 Browse Several Shared Folders
Chapter 4 Browse Local Shared Folders 21
Page 23

Chapter 5 Browse Flickr Network Album
Add/Delete Flickr Account
Click Flickr in the left menu bar to add or delete the account of Flickr network album.
Figure 15 Flickr Account
Chapter 5 Browse Flickr Network Album 22
Page 24

Figure 16 Add Flickr Account
After adding an account, you can browse the shared albums under this account; as to the private
albums, please refer to Browse Private Flickr Network Album.
Note:
The length of Flickr user name can not exceed 50 characters.
Click “Apply” to save settings after adding or deleting, and reboot the device.
Chapter 5 Browse Flickr Network Album 23
Page 25

Maximum Photos to Return
Figure 17 Maximum Photos to Return
Maximum Photos to Return
You can specify the number of photos to be browsed in this field, ranging from 1 to 500.
Besides from setting the maximum number, you can also specify the size of photos to be browsed.
The available size options are:
75×75, 100×100, 240×240, 500×500, 1024×1024, and Original Photo.
Note:
Original Photo: You have to apply an authority from Flickr if you would like to view
the original photo. Usually this is a charge service.
Browse Private Flickr Network Album
You have to perform an authentication process on Flickr before browsing private Flickr network
Chapter 5 Browse Flickr Network Album 24
Page 26

album.
Step 1. Add a Flickr account that you will use to browse the private album in Account Name
field;
Figure 18 Browse Private Flickr Network Album
Step 2. Click Authentication to continue;
Chapter 5 Browse Flickr Network Album 25
Page 27

Figure 19 Authentication
Step 3. Click the link as shown above: http://www.flickr.com/auth-72157604050924779 to
open Flickr website;
Chapter 5 Browse Flickr Network Album 26
Page 28

Figure 20 Login
Step 4. Input the Username and Password of account that you would like to browse. By clicking
Sign In, you are entering into the confirm webpage as shown below:
Chapter 5 Browse Flickr Network Album 27
Page 29

Step 5. Click OK, I’LL ALLOW IT.
Figure 21 Confirmation
Chapter 5 Browse Flickr Network Album 28
Page 30

Figure 22 Code
Step 6. Type the code that you get into the corresponding field of your Utility, and click Complete
Authentication to finish the process. Now you can browse that private Flickr Network Album.
Chapter 5 Browse Flickr Network Album 29
Page 31

Figure 23 Input the Code
Chapter 5 Browse Flickr Network Album 30
Page 32

Chapter 6 Management
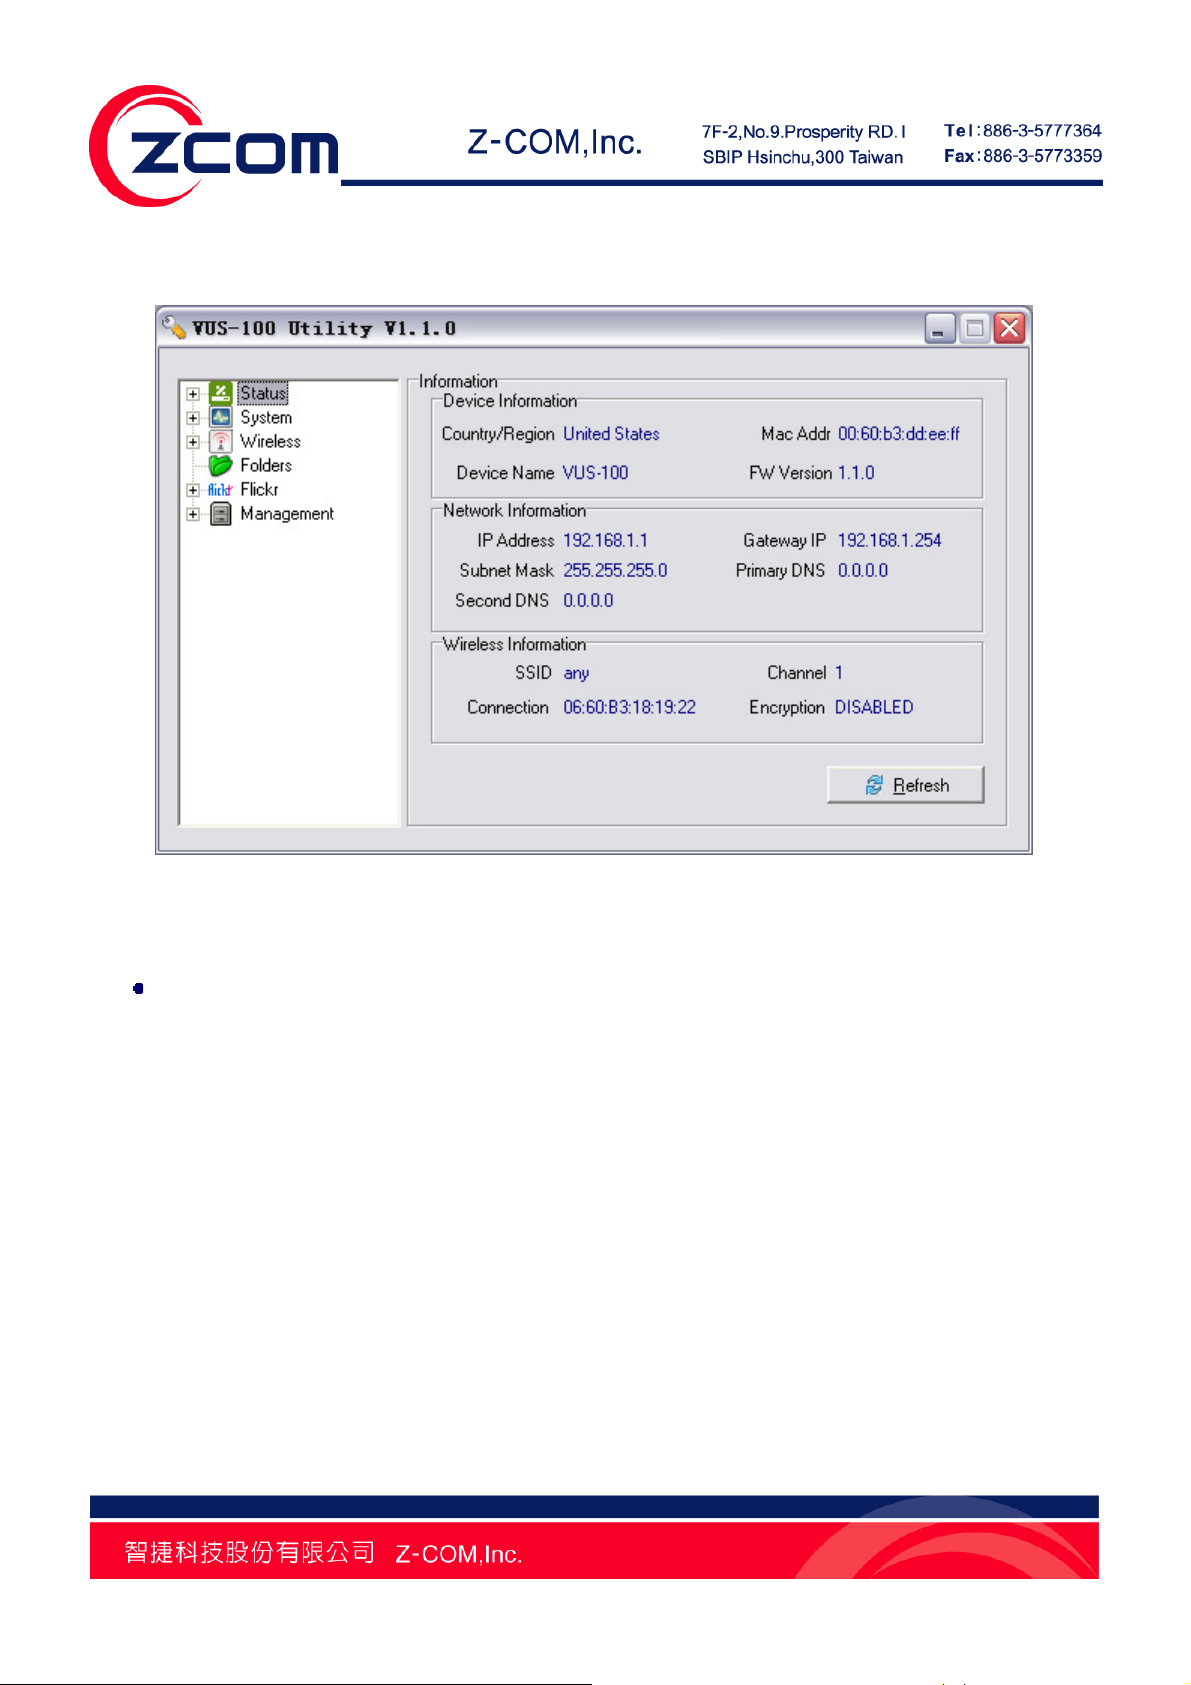
View the VUS-100 Basic Information
In the Utility, click Status in the left menu bar to view the basic information of your VUS-100. Click
Refresh to view the real-time information. All is read-only.
Figure 24 Basic Information
View Statistics Information
In the Utility, click Statistics under Status in the left menu bar to view the data statistics of VUS-100.
Click Refresh to view the real-time information. All is read-only.
Chapter 6 Management 31
Page 33

Figure 25 Statistics
Wireless: It illustrates the communication statistics with AP.
Folders: It illustrates the communication statistics when browsing the shared folders in LAN.
Flickr: It illustrates the communication statistics when browsing the Flickr network album.
Firmware Upgrade
VUS-100 provides you with multiple options for firmware upgrade.
Upgrade Firmware via Utility
Chapter 6 Management 32
Page 34

Figure 26 Upgrade Firmware via Utility
- Click to open Management → Upgrade in the left menu bar;
- Click Select Firmware File and select the file you would like to upgrade;
- Start upgrade by clicking Upgrade;
- A prompt indicating successful upgrade will pop up after the firmware has been upgraded;
- Reboot VUS-100 to let the new firmware be applied.
Upgrade Firmware via Web
Figure 27 Upgrade Firmware via Web
- Click to open Management → Upgrade;
Chapter 6 Management 33
Page 35

- Click Browse to select the file you would like to upgrade;
- Click Upload to start firmware upgrade;
- Reboot VUS-100 to let the new firmware be applied.
Backup/Restore Settings
It is strongly recommended backing up configuration information in case of something unexpected. If
tragedy hits the VUS-100, you may have an access to restore the important files by the backup.
VUS-100 provides two ways to backup and restore settings.
Backup/Restore Settings via Utility
Figure 28 Backup/Restore Settings via Utility
Backup Settings:
- Click to open Management → Config in the left menu bar;
- By clicking Save a dialog box will pop up, suggesting you select a save path and specify a file
name, such as C:\VUS-100.cfg.
Chapter 6 Management 34
Page 36

- After confirming, a VUS-100.cfg file will be saved in your local disk.
Restore Settings:
- A dialog box will pop up by clicking Open, suggesting you select the file that you want to restore,
such as C:\VUS-100.cfg;
- Click Retrieve, that configuration file will be loaded to your VUS-100;
- A window suggesting reboot your VUS-100 will appear. After reboot, new settings will be applied
into your device.
Backup/Restore Settings via Web
Figure 29 Backup/Restore Settings via Web
Backup Settings:
- Click to open Management → Configuration;
- A dialog box will pop up by clicking Save, specify the path and file name, like vus-100.cfg;
- This vus-100.cfg file will be saved into your local disk by clicking Yes.
Restore Settings:
- A dialog box will pop up by clicking Browse;
- Select the file you would like to restore, like vus-100.cfg;
- This vus-100.cfg file will be restored into VUS-100 by clicking Upload;
- After automatic reboot, the new settings will be applied.
Chapter 6 Management 35
Page 37

Restore Factory Default Settings
The VUS-100 provides three ways to restore factory default settings.
Restore Factory Default Settings via Utility
Figure 30 Restore Factory Default Settings via Utility
- Click to open Management → Config in the left menu bar;
- By clicking Reset a window will pop up, suggesting you whether to restore factory default settings.
Click Yes to start the process. It will take about 120 seconds.
Restore Factory Default Settings via Web
Chapter 6 Management 36
Page 38

Figure 31 Restore Factory Default Settings via Web
- Click to open Management → Configuration;
- By clicking Reset a window will pop up, suggesting you whether to restore factory default settings.
Click Yes to start the process.
Restore Factory Default Settings via Default Button
When the VUS-100 is working with power switched on, press the default button for about 3 seconds,
then the device will reboot and default settings will be applied.
Reboot
The VUS-100 provides two ways to reboot.
Reboot via Utility
Chapter 6 Management 37
Page 39

Figure 32 Reboot via Utility
- Click to open Management → Reboot in the left menu bar;
- Please wait for about 120 seconds after clicking Reboot, till the reboot process is completed.
Reboot via Web
Figure 33 Reboot via Web
- Click to open Management → Configuration;
- By clicking Reboot a window will pop up, click Yes to start the process.
Chapter 6 Management 38
Page 40

Chapter 7 Troubleshooting
FAQ (Frequently Asked Questions)
Q 1. How to know the MAC address of my VUS-100?
MAC address distinguishes itself by the unique identity among network devices. There are
three ways available to know it:
• At the bottom of each VUS-100 posted a label with the MAC address, as shown below:
• From the VUS-100 utility, open Information in Status to view the MAC address;
• From the VUS-100 Web-based management, open Basic Information to view the MAC
address.
Q 2. Why my VUS-100 fails to access the AP?
Please check the following settings on both your VUS-100 and the AP:
• Whether Country/Region is identical on both devices;
• Whether SSID is identical on both devices;
• Whether Encryption is identical on both devices;
• Whether you have rebooted your VUS-100 after configuration.
Q 3. Why can’t I browse the shared folders in LAN?
• Whether the IP address of VUS-100 and PC in LAN are in the same network segment;
• Whether the folder name and path are correct;
• Whether the properties of shared folder is “Shared” and “Writable”;
• Whether you have reboot your VUS-100 after configuration?
Q 4. Why can’t I browse photos in Flickr network album?
• Whether the IP address of VUS-100 is a valid one that can connect to the Internet;
• Whether the Filckr account of the album that you are going to browse is correct;
Chapter 7 Troubleshooting 39
Page 41

• Whether the Filckr album that you are going to browse is a private one? If so, please apply
for an authority;
• Whether you have reboot your VUS-100 after configuration?
Technical Support
Please go to http://www.zcom.com.tw for the latest firmware. If there is any problem or difficulty
during installation and usage, please contact local vendor for support.
Website: http://www.zcom.com.tw
Support E-mail: supportBwa@zcom.com.tw
Tel : +886-3-5777364
Fax : +886-3-5773359
Chapter 7 Troubleshooting 40
Page 42

Appendix A. Specifications
Table 3 Product Specifications
SPECIFICATION
Model VUS-100
Standards - IEEE 802.11b (Wi-Fi Compatible)
- IEEE802.11g (Wi-Fi Compatible)
- IEEE802.11n (Wi-Fi Compatible)
- IEEE802.3af (Power over Ethernet)
- IEEE802.1x (Security Authentication)
- TCP/IP
- UDP
- ARP
- UPnP
- USB
Ports - 1× USB Port
- 1× Power
LED - WLAN (Green)
- Status (Orange)
- WPS (Blue)
Button - 1× Default button
- 1× WPS Button
System Flash/RAM 8M Flash; 32M DDR
FEATURE
Operating Mode Client
DHCP DHCP Client
Power Save Manual Adjustment:
Full, Half(50%), Quarter(25%), Eighth(12.5%), Min
SECURITY
Administrator Logon Administrator Logon with SSL/SSH Encryption
Authentication - Open System
- Shared Key
- WPA with Pre-Shared Key
- WPA2 with Pre-Shared Key
- WPS(PBC)
Appendix A. Specifications 41
Page 43

Data Encryption - WEP (40, 128, 152-bit) with Passphrase WEP Key Generation
- TKIP
- AES
SSID Broadcast Yes
MANAGEMENT
Web-based Management Yes. Secure SSL
Windows-based Utility Yes
Firmware Upgrade Utility/ HTTP
Save & Load Configuration Utility /HTTP The Configuration File is human-editable.
Adjacent AP/STA Scan Yes (SSID, BSSID channel, mode(11b/11g/n), security mode)
RADIUS Accounting Yes
WIRELESS
Antenna PCB Antenna *1
Output Power (average) 11b: 16dBm @ 11Mbps
11g: 15dBm @ 54Mbps
11n: 11dBm @ HT20
11n: 11dBm @ HT40
Operating Frequency 2.412-2.462GHz
Modulation IEEE 802.11g (OFDM/DSSS)
48/54 Mbps (QAM-64)
24/36 Mbps (QAM-16)
12/18 Mbps (QPSK)
6/9 Mbps (BPSK)
5.5/11 Mbps (CCK)
2 Mbps (DQPSK)
1 Mbps (DBPSK)
IEEE 802.11b (DSSS)
5.5/11 Mbps (CCK)
2 Mbps (DPQSK)
1 Mbps (DBPSK)
Sensitivity
IEEE 802.11b: 11Mbps ≦ -80dBm
IEEE 802.11g: 54Mbps ≦-68dBm
IEEE 802.11n: 2.4GHz
HT20 ≦ -62dBm
HT40 ≦ -59dBm
Wireless Auto Speed Option IEEE 802.11b
Best,11, 5.5, 2, 1 Mbps
Appendix A. Specifications 42
Page 44

IEEE 802.11g
Best,54, 48, 36, 24, 18, 12, 9, 6 Mbps
IEEE 802.11n Draft 2.0
ENVIRONMENT
Dimensions 40(L)mmx70(W)mmx10(H)mm
Weight <400g
Power Supply DC Adapter : +5V DC@1A
Operating Temperature
0 ~ 55 ℃
Operating Humidity 10 ~ 95% Non-Condensing
Storage Temperature
-10 ~ 65 ℃
Storage Humidity 5 ~ 95% Non-Condensing
Green policy RoHS Compliant
Warranty 12 months
Appendix A. Specifications 43
Page 45

Appendix B. Technical Terms
Table 4 Technical Terms
Terms Description
IEEE 802.11n An extension to 802.11 specification developed by the IEEE for wireless LAN
(WLAN) technology. 802.11n builds upon previous 802.11 standards by adding
multiple-input multiple-output (MIMO). The additional transmitter and receiver
antennas allow for increased data throughput through spatial multiplexing and
increased range by exploiting the spatial diversity through coding schemes. The
speed is 100 Mbit/s, and so up to 4-5 times faster than 802.11g. 802.11n also
offers a better operating distance than current networks.
Access Point A base station in a wireless LAN, which is typically a wireless Ethernet (Wi-Fi)
LAN. It is typically a stand-alone device that plugs into an Ethernet switch or
hub. If more than one access point is used, like a cellular phone system, users
can roam with their mobile devices and be handed off from one cell to another.
WEP Wired Equivalent Protection, is a kind of data encryption. WEP 40bits/128bits is
the standard of IEEE 802.11. this encryption method enhances the security of
wireless network.
DHCP, DHCP
Client, DHCP
Server
Encryption To secure the communication between the wireless device and other devices,
IP Address and
Network Mask
MAC The Media Access Control address is a unique 48-bit hardware address
Router A device that forwards data between networks. An IP router forwards data
DHCP, Dynamic Host Configuration Protocol. An Ethernet protocol specifying
how a centralized DHCP server can assign network configuration information to
multiple DHCP clients. The assigned information includes IP addresses, DNS
addresses, and gateway (router) addresses.
encryption is implemented to protect secret against attack.
IP Address is a four-byte number uniquely defining each host on the Internet,
usually written in dotted-decimal notation with periods separating the bytes (for
example, 134.177.244.57). Ranges of addresses are assigned by Internet, an
organization formed for this purpose. Combined with the IP address, the IP
Subnet Mask allows a device to know which other addresses are local to it, and
which must be reached through a gateway or router.
assigned to every network interface card.
based on IP source and destination addresses.
Appendix B. Technical Terms 44
Page 46

Appendix C. ASCII
WEP can be configured with a 64-bit or 128-bit Shared Key (hexadecimal number or ACSII). As
defined, hexadecimal number is represented by 0-9, A-F or a-f; ACSII is represented by 0-9, A-F, a-f
and punctuation. Each consists of two-digit hexadecimal.
Table 5 ASCII
ASCII
Characte
r
! 21 9 39 Q 51 i 69
" 22 : 3A R 52 j 6A
# 23 ; 3B S 53 k 6B
$ 24 < 3C T 54 l 6C
% 25 = 3D U 55 m 6D
& 26 > 3E V 56 n 6E
‘ 27 ? 3F W 57 o 6F
( 28 @ 40 X 58 p 70
) 29 A 41 Y 59 q 71
* 2A B 42 Z 5A r 72
+ 2B C 43 [ 5B s 73
, 2C D 44 \ 5C t 74
- 2D E 45 ] 5D u 75
. 2E F 46 ^ 5E v 76
/ 2F G 47 _ 5F w 77
0 30 H 48 ` 60 x 78
1 31 I 49 a 61 y 79
2 32 J 4A b 62 z 7A
3 33 K 4B c 63 { 7B
4 34 L 4C d 64 | 7C
5 35 M 4D e 65 } 7D
6 36 N 4E f 66 ~ 7E
7 37 O 4F g 67
8 38 P 50 h 68
Hex
Equivalen
t
ASCII
Characte
r
Hex
Equivalen
t
ASCII
Characte
r
Hex
Equivalen
t
ASCII
Characte
r
Hex
Equivalen
t
Appendix C. ASCII 45
Page 47

Federal Communications Commission (FCC) Interference Statement
This device, IEEE 802.11b/g/n Wireless Media Adapter, complies with Part 15 of the FCC Rules. Operation
is subject to the following two conditions:
This device may not cause harmful interference.
This device must accept any interference received; including interference that may cause undesired
operation.
This Equipment has been tested and found to comply with the limits for a Class B digital device, pursuant
to Part 15 of the FCC rules. These limits are designed to provide reasonable protection against harmful
interference in a residential installation. This equipment generates, uses and can radiate radio frequency
energy and, if not installed and used in accordance with the instructions, may cause harmful interference
to radio communications. However, there is no guarantee that interference will not occur in a particular
installation.
If this equipment does cause harmful interference to radio or television reception, which can be determined
by turning the equipment off and on, the user is encouraged to try to correct the interference by one or
more of the following measures:
1. Reorient or relocate the receiving antenna.
2. Increase the separation between the equipment and receiver.
3. Connect the equipment into an outlet on a circuit different from that to which the receiver is
connected.
4. Consult the dealer or an experienced radio/TV technician for help.
“This device complies with Part 15 of the FCC Rules.
Operation is subject to the following two conditions: (1) this device may not cause harmful interference,
and (2) this device must accept any interference received, including interference that may cause undesired
operation.”
Warning: Changes or modifications to this unit not expressly approved by the party responsible
for compliance could void the user authority to operate the equipment.
Caution:
1. This equipment complies with FCC RF radiation exposure limits set forth for an uncontrolled
environment, under 47 CFR 2.1093 paragraph (d)(2).
2. This Transmitter must not be co-located or operating in conjunction with any other antenna or
transmitter.
The IEEE 802.11b/g/n Wireless Media Adapter has been tested to the FCC exposure requirements
(Specific Absorption Rate)
2
 Loading...