

Page 1

CONGELADOR
FREEZER
ZV280
ZV280R
ZV320
ZV320R
INSTRUCCIONES DE USO
INSTRUCTION BOOKLET
818 14 97--01/0
Page 2
Safety instructions
Your new freezer may have other functions compared to your previous one.
Carefully read these instructions to learn how the appliance works and how to care for it. Keep the
booklet. It will come in handy if you later sell the cabinet or give it to somebody else.
These warnings are provided in the interests of your safety. Ensure that you understand them all before
installing or using the appliance. Your safety is of paramount importance. If you are insure about any of the
meanings or warnings contact the Customer Care Department.
For the User
· The cabinet is intended for keeping foodstuff in a
normal household as explained in this instruction
booklet.
· Do not keep explosive gases or liquids in the
refrigerator or freezer compartment. They may
explode and cause injury and material damage.
· Do not let sharp objects come into contact with
the refrigerating system on the back of and i nside
the cabinet. If the refrigerating system is
punctured, the cabinet will be damaged and
foodstuff inside may spoil.
freezer compartment. The glass bottles may
break.
· The cabinet is heavy. The edges and projecting
parts of the cabinet may be sharp. Be careful
when moving the cabinet and always use gloves.
Child Safety
· Pay attention so that small children do not gain
access to the operating controls or the inside of
the cabinet.
GB
instruction
· Do not keep carbonised drinks or bottles in the
Contents
Safety instructions 12.................
Contents 12..........................
Description of the Appliance 13........
Control Panel 13..............................
Before use 14.........................
Using the freezer 14...................
To start the freezer and set the correct temperature 14
Switching off 14..............................
Alarms and other features 14....................
Temperature inside the freezer 14................
Freezing 15..................................
Suitable storage periods 15......................
Thawing 15..................................
Cabinet interior 15............................
Hints and Tips 16.....................
Saving energy 16.............................
Food Storage 16..............................
GB
Protect the environment 16......................
Maintenance and Cleaning 17..........
Removing the ventilation grille 17................
Defrosting the freezer 17.......................
Cleaning 17..................................
To Change the Light Bulb 18....................
When the appliance is not in use 18...............
Something Not Working 18............
Guarantee Conditions 19.......................
Technical specification 19.............
Installation 20........................
Unpacking 20................................
Before installing the cabinet 20..................
Cleaning 20..................................
Installing the cabinet 20........................
Door Reversal 21.............................
Electrical connection 21........................
12
Zanussi 8181497-01/0
Page 3
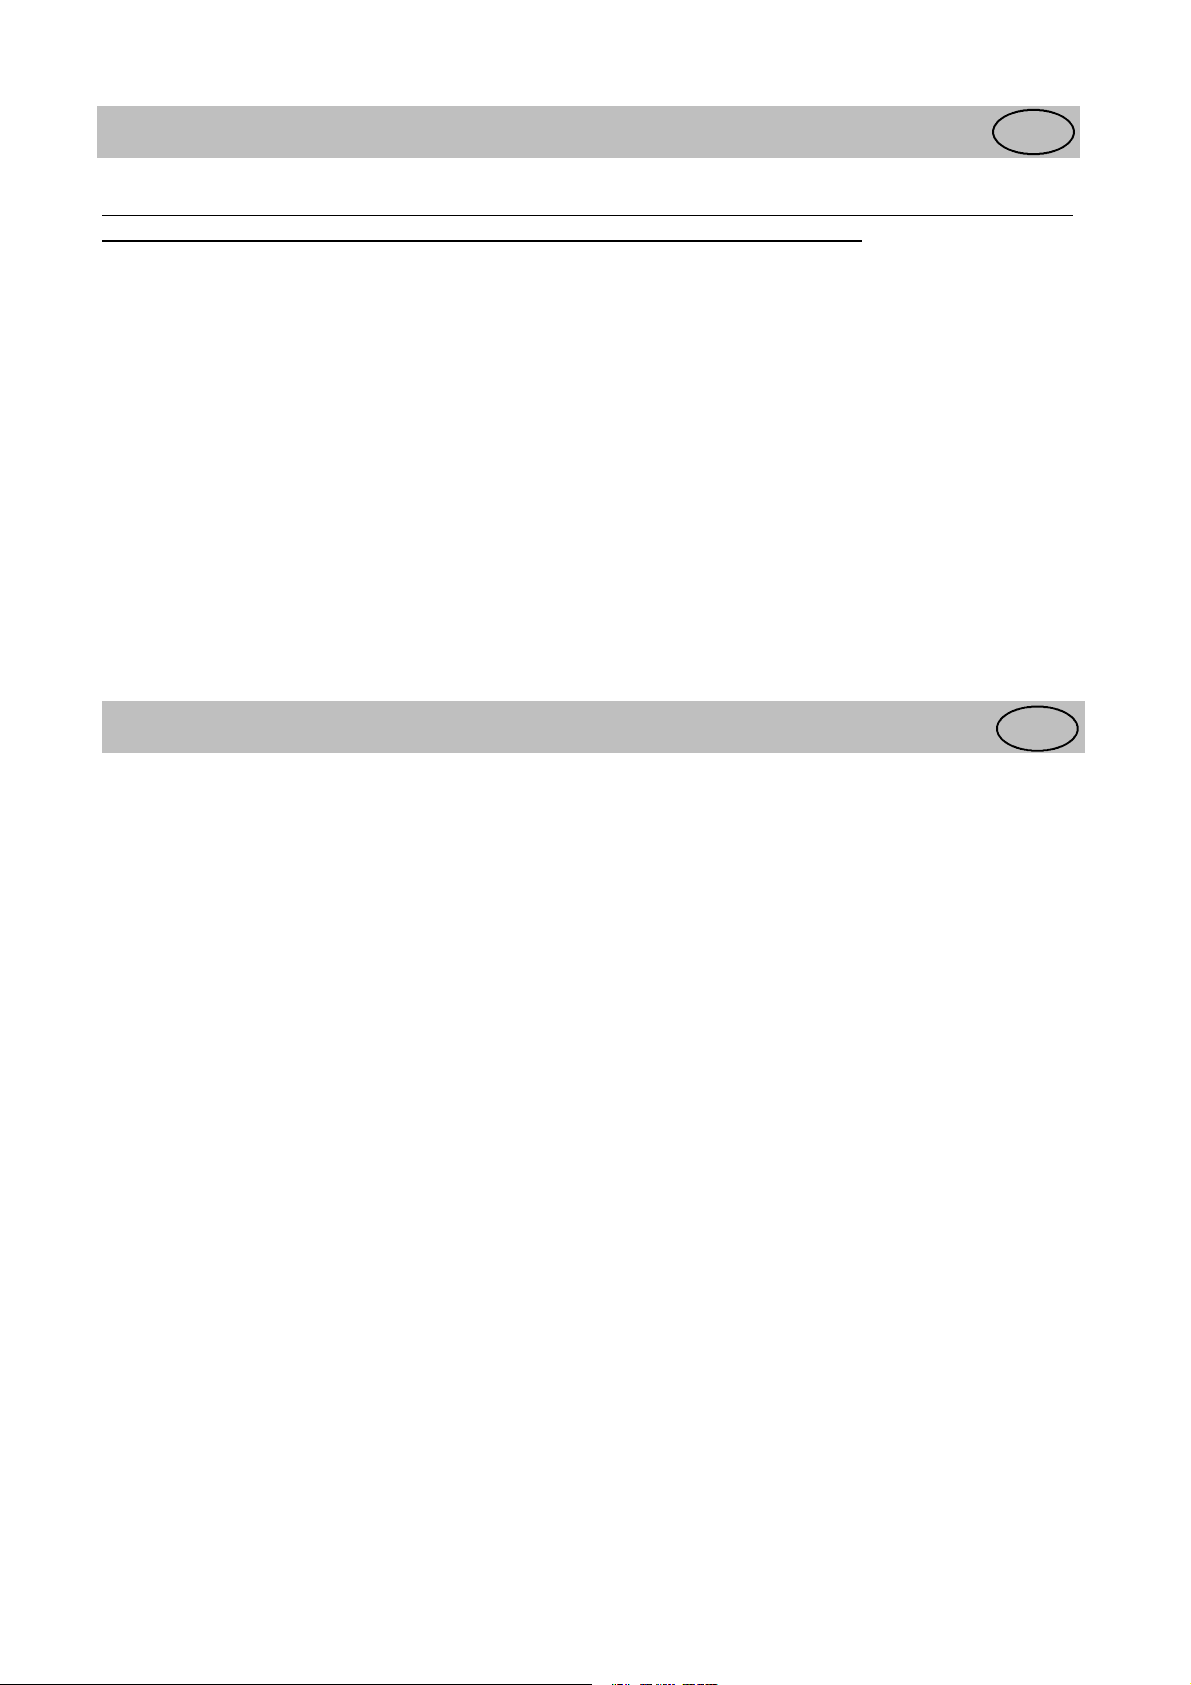
Description of the Appliance
1
2
5
Model ZV280, ZV280R
GB
3
3
3
3
3
4
1
2
2
3
3
5
1. freezing tray
2. shelf with flap
3. freezer vasket
4. ventilation grill
5. freezer calender
Model ZV320, ZV320R
1. freezing tray
2. shelf with flap
3. freezer vasket
4. ventilation grill
5. freezer calender
3
3
3
4
Control Panel
A. Red warning lamp
Flashes when one of the alarms in the cabinet has
been triggered.
B. Yellow indicator lamp
Lights when fast Freeze is operating.
C. FAST FREEZE button
Used to switch the fast Freeze feature on and off.
A
s
B C
D
D. Green indicator lamp
Lights when the freezer is operating.
E. Thermostat control
Usetoswitchonandsetthedesiredtemperaturein
the freezer.
E
13
Zanussi 8181497-01/0
Page 4
Before use
Position and clean the cabinet as explained in the
section "Installation".
Before inserting the power plug into the
outlet and switching on the cabinet for
the first time, leave it standing upright
for about 30 minutes, or for 4 hours if it
was transported horizontally. Otherwise
the compressor may sustain damage.
This time will allow the oil sufficient
time to return to the compressor.
GB
Using the freezer
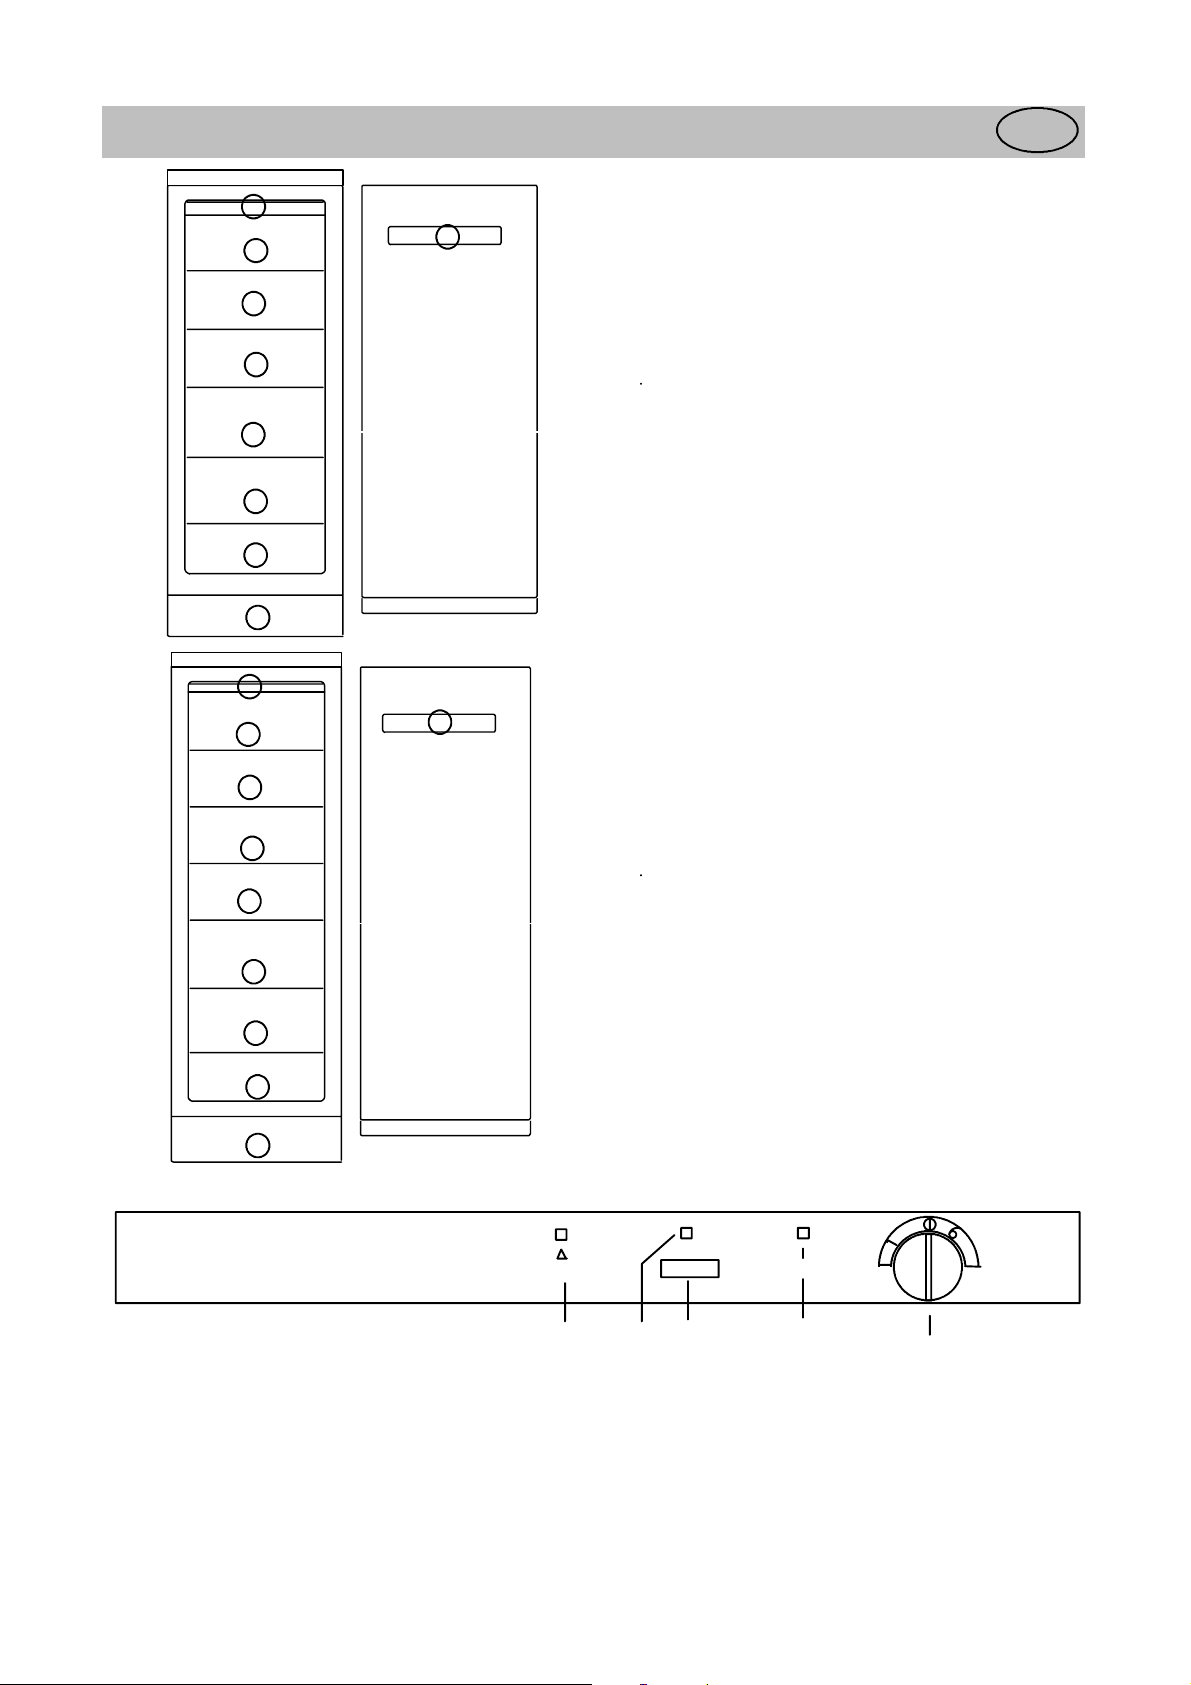
To start the freezer and set the
correct temperature
Turn the thermostat control to the desired position.
1 :
The lowest position of the thermostat control results
in the highest temperature inside the cabinet.
6 :
The highest position of the thermostat control results
in the lowest temperature inside the cabinet.
0 :
Switched off.
Allow the cabinet to run for a period of 24 hours
whenever the temperature setting is changed. This
will allow the temperature to stabilise inside the
cabinet.
Switching off
Set the thermostat control to the "0" position.
Unplug the power supply plug from the wall socket
or, alternatively, remove the fuse.
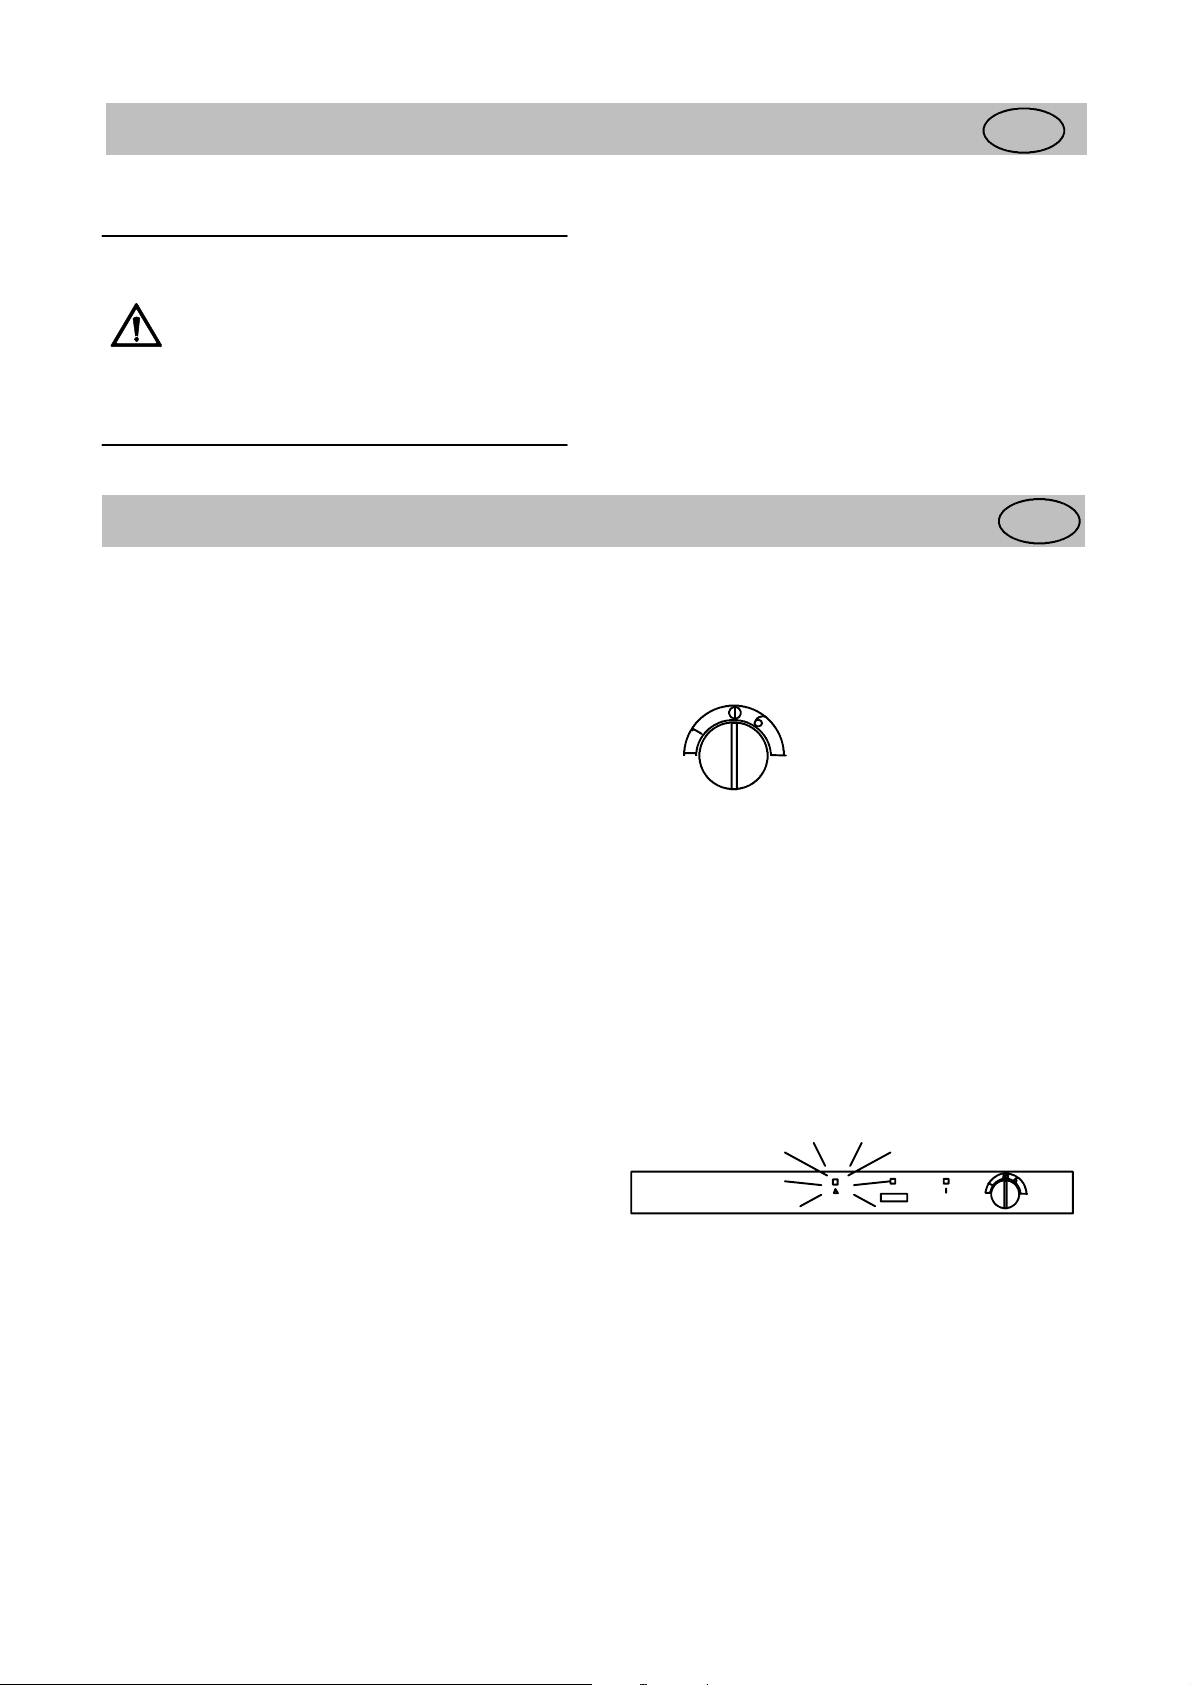
Alarms and other features
Temperature alarm
A red warning lamp lights if it gets warmer than
-12°C. Find out what caused the alarm and correct
the situation. The lamp goes out when it becomes
colder than -13°C.
GB
Temperature inside the freezer
To ensure that foodstuff will keep for a long time, be
sure that the temperature inside the freezer is -18°C
or below. Please note, however, that the energy
consumption increases as the temperature decreases.
14
Zanussi 8181497-01/0
Page 5

Freezing
You need not press the fast-freezing button when
freezing smaller quantities of food during any
24-hour period.
In all other cases, press the fast-freezing button
approx. 24 hours prior to placing the food in the
freezer .
Press the fast-freezing button to switch off
fast-freezing again about 24 hours after placing the
food in the freezer.
The yellow fast-freezing lamp remains lit as long as
the fast-freezing button is engaged.
Practical advice on freezing
· When freezing products, use the top shelf, and if
necessary the shelf beneth that.
· Place the foods directly on the freezer shelves.
· Spread out the products as much as possible to
allow air to circulate between them.
· Do not place food products which are to be
frozen directly against other frozen food.
· The heat from the unfrozen food may cause
the frozen food to thaw on the surface.
· Once frozen, re-arrange the products and put
them as close as possible to each other.
· The food will then stay cold longer i n t he
event of a power failure.
· When freezing large amounts of food/provisions,
the accumulator moves to the tray/space nearest
to the lower freezing shelf.
· Do not freeze too much food at the same time.
· The freezing capacity of the unit is indicated in
the specifications section.
Check that the cabinet is operating and
keeps the set temperature one day after
switching it on for the first time. Only
after then should the freezer be used to
freeze fresh foodstuff.
Suitable storage periods
Food purchased in frozen condition: Follow the
advice on the maximum storage period indicated on
the packaging.
Food frozen at home:
Fatty and salty food should not be kept frozen for
more than three months. Cooked food and low-fat
food may be kept up to about six months. Lean food
and berries can be kept for approximately one year.
Cabinet interior
Freezer drawers
The freezer drawers make it easy to quickly and
easily find the food package you want. To gain
space, the drawers can be removed and the products
can be put directly on the shelves. On all shelves,
except the top shelf, it is possible to place products
that protrude 20 mm from the front edge. This
allows maximum use of the available space.
Do not remove the bottom drawer. It is required to
assure proper air circulation.
Thawing
It is best to use the fridge to thaw food. P l ace the
foodstuff on a plate with a raised edge to prevent
liquids from running out. To quickly thaw food, put
it in room temperature or in cold water. When using
a microwave oven to thaw foodstuff, follow the
manufacturer's instructions.
15
Zanussi 8181497-01/0
Page 6

Freezer tray
Use the freezer tray to freeze berries and vegetables.
After about 4 hours the food will be thoroughly
frozen and can then be packaged normally. Food
that is frozen in this way will not stick together,
enabling you to use only the amount required.
Ice cubes
Fill the ice tray to max. 3/4 since water expands as it
freezes. Release the ice cubes by twisting the ice
tray.
If ice cubes are kept for a long time, they will dry
out and t he taste is affected. Thus, throw away old
ice cubes and prepare new ones when needed.
Hints and Tips
Saving energy
· Pay careful attention to where the cabinet is
placed. See the section "Installation". When
installed correctly, the cabinet will consume less
energy.
· Try to avoid keeping the door open for long
periods, or opening the door to frequently as
warm air will enter the cabinet, and cause the
compressor to switch on unnecessarily often.
· Ensure there are no obstructions prevending the
door from cloosing properly.
· Thaw frozen food in the fridge. This will ensure
safer defrosting of foods and reduce the work of
the refridgeration unit
· It is advisable to periodically clean the
refrigeration systemat the back of the appliance
with a duster or vacuum cleaner.
· Food which is to be frozen (when cool) should
be placed in the fridge before being transfered to
the freezer.
· Avoid unnecessary frosting in the cabinet by
packing all foodstuffs into airtight packages
before placing them in the freezer.
· Do not set the temperature too low in the freezer.
A suitable temperature is in the range of -18°C
to -20°C .
· Defrost the freezer when the frost layer reaches a
thickness of 3-5 mm.
· Make sure the door gasket is complete and
always clean.
GB
Food Storage
· To obtain the best results from your appliance,
neither hot foods nor liquids which may evaporate,
should be placed in the larder compartment.
· Avoid buying frozen food if you can not store it
straight away. The use of an isulated container is
advisable. When you arrive home place the frozen
food in the freezer immediately.
· Ensure that food placed in the freezer is dated and
labelled and used in date order to ensure t hat food is
consumed at its best.
Remove suspect food from you refrigerator and
clean, refer to cleaning and maintenance.
Protect the environment
· Hand over the cabinet packaging and discarded
fridges and freezers to a recycling station.
Contact your local city office or your closest
dealer for more information.
· Keep foodstuff in re-usable containers. Cut down
on disposable material as much as possible.
· When cleaning the cabinet, use a mild
washing-up detergent.
· Follow the advice in the section "S aving energy"
· The door gasket and coolant used in this
cabinet will not harm the ozone layer.
· All parts in the packaging can be recycled.
· The cabinet has been designed for easy
dismantling and subsequent recycling.
16
Zanussi 8181497-01/0
Page 7

Maintenance and Cleaning
Removing the ventilation grille
The ventilation grille can be removed, e.g. to wash
the grille.
Make sure the door is open when removing the
ventilation grille. Unsnap the upper edge of the grille
by pulling outward/downward. Then pull the grille
straight out to completely remove it.
Model ZV280, ZV320
Unsnap the ventilation grille by pulling it toward
you.
Defrosting the freezer
A certain amount of frost will always form on the
freezer shelves and around the top compartment.
Defrost the freezer when the frost layer reaches a
thickness of about 3-5 mm.
Remove the freezer drawers and place them on top
of each other by turning every other drawer one half
turn. Put insulating material around the drawers, e.g.
blankets or newspapers.
The frozen products can also be packed closely
together and be kept in a cold location, e.g. in the
fridge.
Defrosting can be accelerated by placing bowls with
hot water (not boiling) inside the freezer.
Take out the drain spout and place it in the bottom
freezer drawer where water can collect.
Loosen the ventilation grille to enable the bowl to fit
under the drain spout.
Carefully scrape off the ice when it starts to thaw.
Use a wood or plastic scraper. Do not use sharp
objects as these may damage the interior.
When all the ice has melted, clean and wipe the
cabinet dry, then push the drain spout back in place.
Switch on the cabinet and replace the frozen
foodstuff.
Cleaning
Clean the cabinet at regular intervals.
Do nt use detergents, abrasive powers,
high perfumed cleaning products, wax
polishes or cleaning products
containing bleach or alcohol when
cleaning the product
Never use a hair drier or other heating
appliances to speed up defrosting. Excessive
heat may damage the plastic interior, and
humidity could enter the electric appliance
making it live.
GB
Internal Cleaning
Clean the inside and accossories with warm wather
and bicarbonate of soda (5ml to 0,5 liter water) Rise
and dry thoroughly.
Regularly check the door seals and wipe clean to
ensur they are clean and free from debris.
17
Zanussi 8181497-01/0
Page 8

External Cleaning
Wash the outer cabinet with warm sopy water.
Remove the ventilation grille (see the section
"Removing the ventilation grille") and vacuum-clean
under the cabinet. Twice a year pull out the cabinet
from the wall and vacuum-clean the backside of the
cabinet, the refrigerating system and the compressor.
When moving the cabinet, lift it by
the front edge to avoid scratching the
floor.
To Change the Light Bulb
The light is switched on automatically when the
door is opened. Before replacing the light bulb,
disconnect the power plug from t he outlet.
To replace the lamp in the chiller compartment (only
cabinets with two doors), first unscrew the lamp
grille with a screwdriver.
Use a bulb of the same type, E14 socket, maximum
ratingof25W.
When the appliance is not in use
Disconnect the appliance from electricity supply.
Empty all foods and clean the appliance, leaving the
doors ajar to prevent unpleasant smells.
Something Not Working
Before contacting your local Service Force Center check the following point:
Problem Possible cause / Remedy
It is too warm inside the freezer. Set a lower temperature.
Make sure that the door is completely closed and that the
insulating strip is complete and clean.
If warm food products have been put inside the freezer, wait for
a couple of hours and then check the temperature again.
Distribute the food products to allow cold air to circulate
around them.
It is too cold inside the freezer. Set a higher temperature.
Action Freeze could have been switched on.
Too much frost and ice are produced. Make sure that the door is completely closed and that the
insulating strip is complete and clean.
Set a higher temperature.
The compressor operates continuously. Set a higher temperature.
Make sure that the door is completely closed and that the
insulating strip is complete and clean.
The temperature where the cabinet is placed is above normal
room temperature.
GB
18
Zanussi 8181497-01/0
Page 9

The cabinet does not operate at all.
Cooling or interior light does not
operate. No indicator lamps light.
Sound level in cabinet is too high. The refrigerating system will always produce some sounds. A
Power failure Some food products could have been placed causing the water
The power plug is not properly connected.
The fuse has blown.
The cabinet is not switched on.
Power does not reach the cabinet. (Try connecting another
electrical device to the power outlet.)
pulsing sound is heard when coolant is pumped inside the
cooling pipes. A ticking sound from the thermostat can be
heard when the compressor switches on and off. The sound
level varies depending on the operation of the cabinet.
If you feel the sound level is incorrect:
Make sure the pipes at the back of the cabinet not touch each
other. Carefully bend them if they do.
If the cushion spacers (between the cabinet wall and pipes)
come loose, put them back in place again.
Carefully follow the instructions in the chapter "Installing the
cabinet".
from running into the drain.
Do not unnecessarily open the cabinet, except when the power
outage seems to be long, in which case the food products
should be moved to another cabinet that works. In case the
frozen products are still hard following the power outage, they
may be immediately refrozen. If the food products have thawed
but still are fresh and smells alright, they may be used,
however they should be prepared before re-freezing or eating
them.
Guarantee Conditions
See Guarantee Conditions on the R egistration Card.
Technical specification
Model ZV280 ZV280R ZV320 ZV320R
Net volume 252 l 252 l 292 l 292 l
Width 595 mm 595 mm 595 mm 595 mm
Height 1600 mm 1600 mm 1800 mm 1800 mm
Depth 600 mm 600 mm 600 mm 600 mm
Energy consumption 398 kWh/year 398 kWh/year 431 kWh/year 431 kWh/year
Energy class B B B B
Rated power 120 W 120 W 120 W 120 W
Weight 68 kg 66 kg 77 kg 75 kg
Freezing capacity 25 kg/24 hours 25 kg/24 hours 28 kg/24 hours 28 kg/24 hours
Number of compressors 1 1 1 1
GB
19
Zanussi 8181497-01/0
Page 10

Installation
Unpacking
Unpack the cabinet and check that it is in good
condition and free of any transport damage. Notify
the dealer immediately of any damage. Hand the
packaging over for recycling. For more information,
contact your local city office or the dealer.
Do not allow children to play with the
packaging. The plastic film can cause
suffocation.
Before installing the cabinet
Affix the supplied plastic peaces at the rear of the
cabinet.
It is possible to have the door decorated with a
panel.
The panel and the frames for assembling can be
ordered separately from Y our dealer.
Cleaning
Wash the inside of the cabinet using lukewarm
water, a mild washing-up detergent and a soft cloth.
GB
Installing the cabinet
To otain the best performance from the cabinet, ensure
:
· the cabinet is placed in a dry, cool place and
is not exposed to direct sunlight.
· the cabinet is not placed close to a source of
heat, e.g. a cooker or dishwasher.
· the room in which the cabinet is placed
has a temperature of +16Cto+32C.
· the cabinet is level.The cabinet should not lean
against any wall. If necessary adjust the
feet using the supplied adjustment spanner.
· there is good air circulation around the cabinet
and that the air channels below and behind
the cabinet are not blocked. The ventilation
space above the cabinet and any
grocery/top cabinet must be at least 200 cm@.
The ventilation space can either be
a) directly above the cabinet, or
b) behind and above the top cabinet. In this case,
the space behind the cabinet must be at least
50 mm deep.
If the cabinet is placed in a corner and the side with
the hinges faces the wall, the distance between the
wall and the cabinet must be at least 10 mm to allow
the door to open enough so that the shelves can be
removed.
a)
b)
50mm
20
Zanussi 8181497-01/0
Page 11

Door Reversal
)
1. Close the cabinet and pull out the plug from the
electrical outlet.
2. Remove the ventilation grille. There is a part on
the grille that can be removed. Remove it and put it
on the other side.
3. Put the cabinet on a wooden board when it is laid
down. Later, when raising the cabinet, it will be
easier to grip under the cabinet thanks to the board.
4. On the upper part of the cabinet. Move the hinge
pin and cover washer.
On the l ower part of the cabinet. Unscrew the hinge.
Move the hinge pin and plastic cover. Secure the
hinge on the other side.
5. Raise the cabinet and replace the ventilation grille.
6. Unscrew the handle. Carefully press in the plastic
plugs on the opposite side using a drift. Secure the
handle in the plug holes. Then press the supplied
plastic plugs into the holes to which the handle was
previously fitted.
7. Put the cabinet in position. Check that it stands
straight. See the section "Positioning the cabinet".
1
2
3
4
8
Electrical connection
Connect the cabinet to a grounded electrical outlet.
Voltage: 230 V.
Fuse: 10 A.
Refer to the rating plate on the left inside the
cabinet.
21
Zanussi 8181497-01/0
Page 12

MARIESTAD DD--AV
 Loading...