

Page 1

D
t
T
P
BEDIENUNGSANLEITUNG INSTRUCTION BOOKLET
РУКОВОДСТВО ПО ЭКСПЛУАТАЦИИ
INSTRUÇÕES DE USO
2222681-89
KÜHLSCHRANK
REFRIGERATOR
ХOЛОДИЛЬНИК
FRIGORÍFICO
ZUS 6140
Page 2

2
INHALT
Warnungen und
wichtige Hinweise 3
Hinweise zur
Verpackungsentsorgung 4
Für den Benutzer
Gerätebeschreibung 5
Gebrauch 5
Reinigung der Innenteile 5
Inbetriebnahme 5
Temperaturregelung 5
Richtiges Kühlen 5
Höhenverstellbare Abstellregale 6
Höhenverstellung der Innentürablagen 6
Tips 6
Tips für das Kühlen 6
Wartung 7
Abtauen 7
Regelmäßige Reinigung 7
Außergewöhnliche Reinigung 8
Stillstandszeiten 8
Innenbeleuchtung 8
Kundendienst und Ersatzteile 9
Für den Installateur
T echnische Angabe 9
Installation 10
Aufstellung 10
Elektrischer Anschluß 10
Vorbereitung des Grills 10
Türanschlagwechsel 11
Einbau unter eine Arbeitsplatte 11
Montage der Sockelblende 13
Page 3

WARNUNGEN UND WICHTIGE
HINWEISE
3
D
■ Tritt eine Störung oder ein Defekt ein, versuchen
Sie nicht, das Gerät selbst zu reparieren.
Elektrogeräte dürfen nur von Elektro-Fachkräften
repariert werden, da durch unsachgemässe
Reparaturen erhebliche Folgeschäden entstehen
können.
Sich an die nächstgelegene Kundendienststelle
wenden und nur Original-Ersatzteile anfordern.
Aufstellung
■ Sich vergewissern, daß das Gerät nach der
Installation nicht auf dem Netzkabel steht.
Wichtig: Beschädigte Versorgungskabel müssen
durch ein Spezialkabel bzw. einen Spezialsatz
ersetzt werden, die beim Hersteller oder dem
Kundendienststellen erhältlich sind.
■ Während das Gerät in Betrieb ist, werden der
Verflüssiger und der Kompressor, die sich auf der
Rückseite des Gerätes befinden, heiß. Aus
Gründen der Sicherheit muß eine Mindestbelüftung
gesichert sein, wie aus der Abbildung hervorgeht.
Achtung: Die Ventilations - Öffnungen müssen
immer saubergehalten werden.
■ Teile, die heiß werden (z.B. Kompressorgehäuse,
Verflüssigter und zugehörige Rohre), sollen nicht
frei zugänglich sein. Wo es auch immer möglich ist,
soll das Gerät mit der Rückseite gegen eine Wand
gestellt werden.
■ Während des Transports kann es vorkommen, daß
das im Motorkompressor enthaltene Öl in den
Kältekreislauf abläuft. Man sollte mindestens 2 Std.
warten, bevor das Gerät in Betrieb genommen wird,
damit das Öl in den Kompressor zurückströmen
kann.
Gebrauch
■ Die Haushaltskühl- und Gefriergeräte sind nur zur
Einlagerung bzw. zum Einfrieren von
Nahrungsmitteln bestimmt.
■ Ein aufgetautes Produkt darf nicht wieder
eingefroren werden.
■ Für das Aufbewahren bzw. das Einfrieren der
Lebensmittel sind die Anweisungen des Herstellers
zu befolgen.
Sicherheit
■ Dieses Gerät wurde hergestellt, um von
Erwachsenen benutzt zu werden. Es ist unbedingt
darauf zu achten, daß Kinder es nicht anfassen
oder es als Spielzeug verwend.
■ Vor der inneren bzw. äußeren Reinigung des
Gerätes sowie beim Auswechseln der Gühlampe
(bei damit ausgestatteten Geräten) das Gerät
spannungslos machen.
■ Eis aus dem Gefrier- bzw Frosterfach nicht sofort
essen, es könnte Kälte-Brandwunden verursachen.
■ Dieses Gerät ist schwer. Beim Versetzen bitte
darauf achten!
■ Beachten Sie, daß während der Bewegung des
Gerätes der Kältemittelkreislauf nicht
beschädigt wird.
■ Das Gerät darf nicht in unmittelbarer Nähe von
Heizkörpern oder sonstigen Wärmequelle
aufgestellt werden.
■ Ein Standort mit direkter Sonneneinstrahlung
sollte vermieden werden.
■ Eine ausreichende Luftzirkulation an der
Geräterückseite muß gewährleistet sein.
Jegliche Beschädigung des Kühlkreislaufes ist
zu vermeiden.
■ NUR FÜR GEFRIERSCHRÄNKE (Einbaugeräte
ausgenommen): ein optimaler Aufstellungsort
ist der Keller.
■ Keine Elektrogeräte (z.B. Eismaschinen) in das
Gerät stellen.
Störungen- Kundendienst
■ Sollte die Installation des Gerätes eine Änderung
der elektrischen Hausinstallation verlangen, so darf
diese nur von Elektro-Fachkräften durchgeführt
werden.
■ Eventuelle Reparaturen dürfen nur von autorisierten
Kundendienst-Stellen durchgeführt werden.
■ Es ist wichtig, daß nur Original-Ersatzteile
verwendet werden.
■ Dieses Gerät enthält im Kältekreislauf
Kohlenwasserstoff. Aus diesem Grund darf die
Wartung und das Nachfüllen ausschließlich von
autorisiertem Fachpersonal durchgeführt werden.
■ Benutzen Sie nie Metallgegenstände um das Gerät
zu reinigen, da es beschädigt werden könnte.
Es ist sehr wichtig, daß diese Bedienungsanleitung mit dem betreffenden Gerät aufbewahrt wird. Sollte
dieses Gerät verkauft bzw. einer anderen Person gegeben werden, so ist es nötig, die Anleitung
beizufügen, damit der neue Kunde über den Betrieb des Gerätes bzw. die entsprechenden Warnungen
informiert werden kann. Diese Warnungen wurden zu Ihrem bzw. dem Schutz anderer bearbeitet. Wir
bitten Sie daher, diese aufmerksam zu lesen, bevor das Gerät in Betrieb genommen wird.
Page 4
4
■ In allen Kühl- und Gefriergeräten bedecken sich im
Laufe der Zeit alle kälteführenden Teile mit einer
Reif bzw. Eisschicht. Diese Schicht wird je nach
Modell automatisch oder mit der Hand abgetaut.
Die Reifschicht niemals mit Metallgegenständen
abkratzen, das Gerät könnte beschädigt werden.
Dazu nur den mitgelieferten Plastikschaber
verwenden.
■ Benutzen Sie kein mechanisches oder anderes
Mittel für einen schnelleren Abtauprozess mit
Ausnahme der vom Hersteller empfohlenen.
■ Zum Lösen der festgefrorenen Eisschalen keine
scharfkantigen oder spitzen Gegenstände
benutzen.
■ Es sollten keine kohlensäurehaltigen Getränke in
das Gefrier- bzw. Frosterfach eingestellt werden,
sie könnten platzen.
Umweltnormen
■ Dieses Gerät enthält im Kühlkreislauf und in der
Isolierung kein ozonschädigendes Gas. Das
Gerät darf nicht mit dem Hausmüll oder
Sperrmüll entsorgt werden. Eine Beschädigung
des Kältemittelkreislaufs, insbesondere des
Wärmetauschers auf der Rückseite des Gerätes,
muß verhindert werden. Auskunft über
Abholtermine oder Sammelplätze gibt die
örtliche Gemeindeverwaltung an.
■ Die in diesem Gerät verwendeten und mit dem
Symbol kennzeichneten Materialien,sind
recyclingfähig.
HINWEISE ZUR
VERPACKUNGSENTSORGUNG
Verpackungen und Packhilfsmittel unserer Elektro-Großgeräte sind mit Ausnahme von
Holzwerkstoffen recyclingfähig und sollen grundsätzlich der Wiederverwertung zugeführt werden.
In Deutschland können Sie die Verpackung an den Händler zurückgeben, bei dem Sie das Gerät gekauft
haben.
Wir empfehlen Ihnen:
■ Papier-, Pappe- und Wellpappeverpackungen sollten in die entsprechenden Sammelbehälter gegeben
werden.
■ Kunststoffverpackungsteile sollten ebenfalls in die dafür vorgesehenen Sammelbehälter gegeben werden.
Solange solche in Ihrem Wohngebiet noch nicht vorhanden sind, können Sie diese Materialien zum Hausmüll
geben. Als Packhilfsmittel sind bei uns nur recyclingfähige Kunststoffe zugelassen, z.B.:
02** 05 06
In den Beispielen steht
PE für Polyäthylen ** 02 = PE - HD; 04 = PE- LD
PP für Polypropylen
PS für Polystyrol
PE
PP
PS
BEST ANDTEILE AUS PLASTIK
Zur einfacheren Entsorgung und/oder Recycling ist ein Großteil der Materialien dieses Gerätes gekennzeichnet,
um ihre Identifizierung zu ermöglichen.
^
^
PS
SAN
ABS
Page 5

Reinigung der Innenteile
Bevor Sie das Gerät in Betrieb nehmen, beseitigen
Sie den typischen «Neugeruch» am besten durch
Auswaschen der Innenteile mit lauwarmem Wasser
und einem neutralen Reinigungsmittel. Sorgfältig
nachtrocknen.
Bitte keine Reinigungs- bzw. Scheuermittel
verwenden, die das Gerät beschädigen
könnten.
Inbetriebnahme
Den Stecker in die Steckdose einsetzen. Kühlschranktür öffnen und Thermostatknopf von der
Stellung «O» (STOP) aus im Uhrzeigersinn drehen.
Das Gerät ist eingeschaltet. Den Stillstand des
Gerätes erhält man durch Drehen des
Thermostatknopfes auf das Symbol «O».
GERÄTEBESCHREIBUNG
D
➀
Butterfach
➁
Absteller
➂
Flaschenhalter
➃
Luftauslaß
➄
Lufteinlaßfilter
➅
Gemüsefächer
➆
Ablagen
➇
Thermostat
GEBRAUCH
➀
➁
➂
➃➄
➅
➆
➇
•
Raumtemperatur
•
Häufigkeit des Türöffnens
•
Menge der eingelagerten Lebensmittel,
•
Aufstellung des Gerätes.
Die mittlere Einstellung ist meistens die
geeigneteste.
WICHTIG!
Höchste Kälteeinstellung bei hoher
Raumtemperatur und erheblicher
Lebensmittelmenge kann fortdauernden
Kühlschrank-Betrieb verursachen, dabei
kann sich eine Reif- oder Eisschicht an der
hinteren Innenwand bilden.
In diesem Falle den Thermostatknopf auf
wärmere Temperaturen stellen, damit das
automatische Abtauen, mit folglich
geringerem Stromverbrauch, gewährleistet
werden kann.
Temperaturregelung
Die Temperatur wird automatisch geregelt und kann
erhöht werden (wärmer) durch Drehen des
Thermostatknopfes auf niedrigere Einstellungen oder
verringert (kälter) durch das Drehen auf höhere
Zahlen.
Die richtige Einstellung erhält man, unter
Berücksichtigung folgender, die Innentemperatur
beeinflussender Faktoren:
Richtiges Kühlen
Um die besten Leistungen des Kühlschrankes zu
erreichen, beachten Sie bitte folgendes:
■ keine warmen Speisen oder dampfenden
Flüssigkeiten in den Kühlschrank einstellen.
■ Geruchverbreitende Lebensmittel müssen
abgedeckt oder eingewickelt werden.
■ Die Lebensmittel müssen so eingelagert werden,
daß die Kälte um sie frei zirkulieren kann.
5
Page 6

6
Höhenverstellbare Abstellregale
Der Abstand zwischen den verschiedenen
Abstellregalen kann je nach Wunsch geändert
werden. Dazu die Regale herausnehmen und auf das
gewünschte Niveau einsetzen.
Höhenverstellung der
Innentürablagen
Zur Einlagerung von Lebensmittel-Packungen
verschiedener Größe, sind die Abstellregale der
Innentür höhenverstellbar.
Hierzu wie folgt vorgehen:
das Abstellregal stufenweise in Pfeilrichtung drückenn
bis es frei wird; dann in der gewünschten Höhe wieder
anbringen.
Zur besseren Reinigung können die obere und untere
Ablagen herausgenommen werden.
TIPS
Tips für das Kühlen
Nachstehend einige praktische Ratschläge:
Gekochte Nahrungsmittel, kalte Platten,
usw. zugedeckt aufbewahren. Sie können auf jeden
beliebigen Rost gelegt werden.
Fleisch und Fisch: in Plastikfolie
einpacken und auf die Glasplatte, die sich über den
Gemüseschalen befindet, legen.
In dieser Lage kann das Fleisch längstens 1-2
Tage aufbewahrt werden.
Obst und Gemüse:
nach vorherigem
Säubern und Waschen in der Gemüseschale/n
aufbewahren.
Butter und Käse: in speziellen Behältern
aufbewahren oder in Alu- bzw. Plastikfolie einpacken,
um den Kontakt mit der Luft zu vermeiden.
Milch in Flaschen: gut verschlossen auf die Konsole
der Innentür stellen.
Wenn Bananen, Kartoffeln, Zwiebeln und
Knoblauch nicht verpackt sind, sollen sie nicht in
den Kühlschrank gegeben werden.
D040
1
2
3
1
2
3
S.I.009
Page 7
WARTUNG
7
D
Vor jeder Reinigungsarbeit immer den
Netzstecker aus der Steckdose ziehen.
Achtung
Dieses Gerät erhält im Kaltekreislauf
Kohlenwasserstoff. Aus diesem Grund darf
die Wartung und das Nachfüllen
ausschließlich von autorisierten
Fachpersonal durchgeführt werden.
Abtauen
Die sich auf der Innenwand des Gerätes bildende
Reifschicht taut in bestimmten Zeitabständen
automatisch ab. Dies erfolgt jeweils in den
Stillstandszeiten des Motorkompressors. Das
Tauwasser tropft dabei in die Tauwasserrinne, läuft
dann in eine Verdunsterschale am Unterteil des
Gerätes und verdunstet dort.
Wir empfehlen, das Ablaufloch (F) des
Abtauwassers, das sich unter der Gemüseschale
befindet, regelmäßig zu reinigen.
Benutzen Sie hierzu das dafür geeignete
Reinigungsgerät (P). Auf diese Weise wird
verhindert, daß das Wasser in die
Gemüseschublade fließt.
Regelmäßige Reinigung
Benutzen Sie nie Metallgegenstände um das Gerät zu
reinigen, da es beschädigt werden könnte. Den
Innenraum mit lauwarmem Wasser und einem
neutralen Reinigungsmittel reinigen. Gut
nachwaschen und sorgfältig trocknen.
Das Gerät ist mit einem Filter (1) und einer Lüftöffnung
(2) auf dem Belüftungsgrill ausgerüstet, die sauber
gehalten werden müssen um eine gute Ventilation im
hinteren Bereich sowie eine optimale Funktionalität
des Gerätes zu garantieren.
Der Filter kann aus seiner Verankerung genommen
und mit Wasser gewaschen werden.
Filter ausbauen:
1. Laschen (a) und (b) zusammen drücken;
2. den Filter nach unten drehen und herausziehen.
Um den Filter zu montieren in umgekehrter
Reihenfolge vorgehen.
S.I.011
P
F
2
b
a
1
S.I.012
Page 8

8
Außergewöhnliche Reinigung
Der Aufbau des Gerätes erlaubt eine Reinigung des
hinteren Teils an der Wand, sowie auch den Gebrauch
eines Staubsaugers.
1. Nehmen Sie die Sockelblende (1) ab;
2. demontieren Sie die Belüftungsblende (2);
3. ziehen Sie vorsichtig die Verdunsterschale (3)
heraus. Achten Sie darauf, daß sich darin
Abtauwasser befinden kann.
Stillstandszeiten
Bei längerem Stillstand des Gerätes, müssen Sie
folgendermaßen vorgehen:
den Stecker aus der Steckdose ziehen;
alle Lebensmittel herausnehmen;
Gerät abtauen, Innenraum und Zubehörteile reinigen;
die Tür offen lassen, um im Inneren eine gute
Luftzirkulation zu gewährleisten und somit
Geruchsbildung zu vermeiden.
Innenbeleuchtung
Die Innenbeleuchtungslampe im Kühlabteil ist durch
folgende Arbeitsschritte zugänglich:
1. Lösen Sie die Befestigungsschraube der
Lampenabdeckkung.
2. Heben Sie den beweglichen Teil ab, indem Sie wie
in der Abbildung gezeigt darauf drücken.
Sollte sich die Beleuchtung beim Öffnen der Türe nicht
einschalten, ist zu überprüfen, ob die Glühbirne fest
eingeschraubt ist; wenn die Störung dennoch
bestehen bleibt, die defekte Glühbirne durch eine
neue Birne gleicher Leistung ersetzen.
Die maximale Leistung ist am Leuchtkörper
angegeben.
S.I.013
D411
3
21
Page 9

KUNDENDIENST UND
ERSATZTEILE
9
D
TECHNISCHE ANGABE
Die technischen Angaben sind auf dem Typschild genannt, das auf der rechten inneren Seite der Anlage liegt.
Höhe mm 815
Breite mm 560
Tiefe mm 538
Störung Abhilfe
Im Gerät wird es nicht kalt genug
Die Kältemaschine läuft ständig
Starke Eis- und Reifbildung
Wasser auf dem Boden
Das Kühlsystem funktionieren nicht
Die Innenbeleuchtung und das Kühlsystem funktionieren
nicht.
Die Kältemaschine macht wiederholt erfolglose
Anlaufversuche
- Ist die Temperatur auf schwach eingestellt?
- Wurde zu warmes Gut eingelagert?
- Wurde zu viel auf einmal eingelagert?
- Sind die Waren richtig eingelagert, damit die abgekühlte
Luft ausreichend zirkulieren kann?
- Ist die Tür richtig geschlossen?
- Wurde die Tür längere Zeit offengelassen oder unnötig
oft geöffnet?
- Ist der Temperaturregler auf stark eingestellt?
- Ist die erforderliche Luftzirkulation an der Rückseite des
Gerätes gewährleistet?
- Sind die Lüftungsschlitze in der Sockelblende frei?
- Wurden nicht ausreichend verpackte Waren
eingelagert?
- Wurde die Tür offengelassen?
- Wurde die Tür häufig geöffnet, oder stand sie für längere
Zeit offen?
- Ist die Dichtung noch intakt?
- Verhindert etwas im Innenraum, daß die Tür richtig
schließt?
- Ist die Ablauföffnung an der Rückwand im
Geräteinnenraum verstopft?
Mit einem nicht scharfkantigen Gegenstand reinigen.
- Kontrollieren Sie, ob der Temperaturregler zwischen "1"
und "6" eingestellt ist.
Kontrollieren Sie, ob
- der Netzstecker richtig eingesteckt ist?
- die Sicherung intakt ist und die Netzsteckdose Strom
führt? Überprüfen Sie durch Anschließen eines anderen
Gerätes an die Steckdose, ob es zu einem Stromausfall
gekommen ist. Bei jeglichem Defekt ist ein
Elektrofachmann zu verständigen!
- Das Gerät abschalten und nach 20 Minuten erneut
einschalten.
Sollten Sie nach o.e. Prüfungen zu keinem Resultat kommen, so wenden Sie sich bitte an unseren nächsten
Kundendienst.
Um ein rasches Beheben des Schadens zu ermöglichen, ist es beim Anruf an den Kundendienst
notwendig, die Modell- und Serienummer anzugeben, die Sie dem Garantieschein oder dem Typschild
(- rechte Seite - unten) entnehmen können.
Falls das Gerät Störungen aufweisen sollte, überprüfen Sie zuerst folgendes:
Page 10
Dieses Gerät entspricht der ÖVE-Richtlinie
Nr. F 61/84 (Österreich Ausführung) bezüglich
Funkentstörung.
Dieses Gerät entspricht der folgende EWG
Richtlinie:
- 73/23 EWG vom 19/02/73 (Niederspannung) und
folgende Änderungen;
- 87/308 EWG vom 02/06/87 (Funkentstörung) und
folgende Änderungen;
- 89/336 EWG vom 03/05/89 (Elektromagnetische
Verträglichkeit) und folgende Änderungen.
INSTALLATION
Elektrischer Anschluß
Bevor Sie den Stecker in die Steckdose einstecken,
überprüfen Sie bitte, daß die auf dem Typschild des
Gerätes angegebene Spannung sowie Frequenz mit
dem Anschlußwert des Hauses übereinstimmen. Eine
Abweichung von ±6% von der Nominalspannung ist
zulässig.
Für die Anpassung des Gerätes an andere
Spannungen muß ein Spartransformator
angemessener Leistung vorgeschaltet werden.
Wichtig
Das Gerät muß unbedingt vorschriftsmäßig
geerdet werden.
Zu diesem Zweck ist der Stecker des
Anschlußkabels mit dem dafür vorgesehenen
Kontakt versehen.
Sollte die Netzleitung im Haus nicht mit einer
Erdleitung versehen sein, so muß das Gerät an
eine getrennte Erdleitung vorschriftsmäßig und
unter Hinzuziehung eines Fachmanns
angeschlossen werden.
Die Erzeugerfirma lehnt jede Verantwortung ab,
falls diese Unfallverhütungsvorschrift nicht
beachtet wird.
Vorbereitung des Lüftungsgitters
Nehmen Sie das Gitter aus der unteren
Verpackungsschale.
Tür Öffnung rechts:
- entfernen Sie die linke Seite (A) vom Gitter durch
einen Schnitt von hinten.
Tür Öffnung links:
- entfernen Sie die rechte Seite (B) vom Gitter durch
einen Schnitt von hinten.
Für die Positionierung des Gitters am Gerät drücken
Sie das Gitter auf die Haken (a) bis diese einrasten.
Das Gerät mit den Haltewinkeln in der Nische
befestigen, danach das Gitter montieren.
Sollte dieses mit Magnetschlössern ausgestattete
Gerät ein mit Schnappschlössern ausgerüstes
Gerät ersetzen, so raten wir dazu, die Schlösser
des alten Gerätes zu zerstören, bevor Sie es
entsorgen. Sie verhindern damit, daß spielende
Kinder sich selbst einsperren und in
Lebensgefahr geraten.
Aufstellung
Das Gerät sollte nicht in der Nähe von Wärmequellen
wie Heizkörpern oder Öfen aufgestellt und vor
direkter Sonneneinstrahlung geschützt werden.
Die beste Leistung erzielt man erfahrungsgemäß bei
Raumtemperaturen von +18°C bis +43°C (Klasse T);
+18°C bis +38°C (Klasse ST); +16°C bis +32°C
(Klasse N); +10°C bis +32°C (Klasse SN).
Die Geräteklasse ist auf dem Typschild
angegeben.
Wichtig
Es muß möglich sein, das Gerät vom Netz zu
trennen; nach der Installation muß die
Steckdose daher zugänglich bleiben.
Für den Einbau und ev. Türanschlagwechsel lesen
Sie bitte den entsprechenden Abschnitt durch.
10
A
S.I.002
S.I.001
a
b
a
B
a
Page 11
11
D
Türanschlagwechsel
Bevor Sie nachstehende Arbeitsvorgänge
durchführen, ziehen Sie den Stecker aus der
Steckdose.
1. Oberes Scharnier (1) lösen, daß die Tür
abgenommen werden kann;
2. unteres Scharnier (2) abnehmen;
3. entfernen Sie die Verschlüsse (3) aus den Löchern
(F) und setzen Sie sie in die Löcher (F1) auf der
anderen Seite;
4. montieren Sie das obere Scharnier (1) auf der
anderen Seite unten (Position A);
5. montieren Sie die Tür auf den Stift des Scharniers
(1) wie in Position A;
6. setzen Sie den Stift des unteren, demontierten
Scharniers (2) in das obere Loch (G) der Tür,
danach befestigen Sie das Scharnier oben in
Position B.
Achtung!
Bei einer niedrigen Raumtemperatur (z.B. im
Winter) kann es vorkommen, dass die Dichtung
nicht perfekt am Schrank haftet. Die
Wiederherstellung der Dichtung erfolgt
automatisch nach gewisser Zeit. Wollen Sie
aber diesen Prozess beschleunigen, so genügt
es die Dichtung mit einem Fön zu erwärmen.
Einbau unter eine Arbeitsplatte
1. Die Dimensionen der Nische müssen den
angegebenen Maßen entsprechen.
Das Gerät kann zwischen zwei Möbel oder als
abschließende Komponente eingesetzt werden.
2. Im Falle der Montage als Abschluß der
Küchenzeile, das Seitenpaneel zusätzlich hinten
wie abgebildet befestigen.
OBEN UNTEN
S.I.003
S.I.004
B
A
820 - 870
1
F
F
F
600
1
3
600
b
G
1
F
2
550
600
a
SUPER.
D326
INFER.
Page 12
12
3. Gerät in die Nische einschieben und an die
Möbelseitenwand anrücken. Gerät oben oder
seitlich rechts und links befestigen. Zur Fixierung
des Gerätes sind die Haltewinkel (E) zu benutzen.
Fugenabdeckprofil zwischen Gerät und
Möbelseitenwand eindrücken.
OBEN UNTEN
4. Das Gerät ist mit regulierbaren Füßen
ausgestattet, um es der gewünschten Höhe (max
870 mm) anzupassen; diese befinden sich an den
vier unteren Ecken des Gerätes.
5. Die Teile A, B, C, D abnehmen, wie in der Abb.
gezeigt wird.
6. Die Schiene (A) auf der Innenseite der Möbeltür
oben und unten auflegen (siehe Abb.) und die
Position der äußeren Bohrlöcher anzeichnen.
Nachdem die Löcher gebohrt wurden, die Schiene
mit den mitgelieferten Schrauben befestigen.
7. Die Abdeckung (C) in die Scheine (A) eindrücken,
bis sie einrastet.
8. Gerätetür und Möbeltür auf ca. 90°öffnen. Den
Winkel (B) in der Schiene (A) einsetzen. Gerätetür
und Möbeltür zusammenhalten und die Bohrlöcher
anzeichnen (siehe Abb.). Winkel abnehmen und
die Bohrlöcher mit Ø 2mm und einem Abstand von
8 mm von der Türaußenkante ausführen. Den
Winkel wieder auf der Schiene anbringen und mit
den mitgelieferten Schrauben befestigen.
8mm
PR167
A
B
SUPER.
INFER.
E
50mm
E
A
20mm
D319
30
S.I.006
A
C
D
PR266
PR166
A
C
PR33/2
B
Page 13

13
D
9. Für eine allfällig notwendige Ausrichtung der
Möbeltür, den Spielraum der Langlöcher nutzen.
Nach Beendigung der Arbeiten den einwandfreien
Verschluß der Gerätetür überprüfen.
PR168
10. Die Abdeckung (D) in die Schiene (B) eindrücken,
bis sie einrastet.
PR167/1
D
B
Montage der Sockelblende
Achtung
Um die Funktionalität des Gerätes nicht zu
beeinträchtigen ist es notwendig das
Original-Lüftungsgitter zu benutzen.
■ Bei einer lichten Einbauhöhe Maß A=820 mm und
einer Sockelblendenhöhe Maß a=100 mm kann die
Sockelblende unverändert montiert werden.
Ebenso bei einer lichten Einbauhöhe Maß B=870
mm und einer Sockelblendenhöhe Maß b=150 mm.
■
Bei Sockelblendenhöhen größer als a=100 mm, b=1
50 mm, ist die Sockelblendenhöhe mittig zum
Gerätebereich 580 mm breit auf eine verbleibende
Resthöhe von a=100 mm, b=150 mm
auszuschneiden.
■ Sockelblende an der Küchenzeile befestigen.
Wichtig
Die Sockelblende muß mindestens mit einer
Distanz von 25 mm von der Tür montiert
werden.
S.I.007
A = 820
B = 870
a = 100
b = 150
580
25 - 80
25
S.I.008
Page 14

14
CONTENTS
Instructions for the User
Important Safety Instructions 15
Description of the Appliance 16
Use 17
Cleaning the interior 17
Starting-up 17
Temperature control 17
Fresh food refrigeration 17
Movable shelves 17
Positioning the door shelves 17
Hints 18
Hints for refrigeration 18
Maintenance 18
Defrosting 18
Periodic cleaning 19
Periodic of non-operation 19
Interior light 19
Customer Service and
Spare Parts 20
Instructions for the Installer
Technical specifications 20
Installation 20
Positioning 20
Electrical connection 20
Building-in instructions 21
Grid preparation 21
Door reversal 21
Building in the appliance under a worktop 22
Fitting the plinth 23
Page 15

IMPORTANT SAFETY
INSTRUCTIONS
15
t
■
This appliance contains hydrocarbons in its
cooling unit; maintenance and recharging must
therefore only be carried out by authorised
technicians.
Use
■
The domestic refrigerators and freezers are
designed to be used specifically for the storage of
edible foodstuffs only.
■
Frozen food must not be re-frozen once it has
been thawed out.
■
Manufacturers’ storage recommendations should
be strictly adhered to. Refer to relevant
instructions.
■
The inner lining of the appliance consists of
channels through which the refrigerant passes. If
these should be punctured this would damage the
appliance beyond repair and cause food loss. DO
NOT USE SHARPINSTRUMENTS to scrape off
frost or ice. Frost may be removed by using the
scraper provided. Under no circumstances should
solid ice be forced off the liner. Solid ice should be
allowed to thaw when defrosting the appliance.
See defrost instructions.
■
Do not place carbonated or fizzy drinks in the
freezer as it creates pressure on the container,
which may cause it to explode, resulting in
damage to the appliance. Do not use a
mechanical device or any artificial means to speed
up the thawing process other than those
recommended by the manufacturer. Never use
metal objects for cleaning your appliance as it may
get damaged.
Installation
■
Care must be taken to ensure that the appliance
does not stand on the electrical supply cable.
Important: if the supply cord is damaged, it must
be replaced by a special cord or assembly
available from the manufacturer or its service
agent.
■
During normal operation, the condenser and
compressor at the back of the appliance heat up
General Safety
■
This appliance is designed to be operated by
adults. Children should not be allowed to tamper
with the controls or play with the product.
■
It is dangerous to alter the specifications or modify
this product in any way.
■
Before any cleaning or maintenance work is
carried out, be sure to switch off and unplug the
appliance.
■
This appliance is heavy. Care should be taken
when moving it.
■
Ice follies can cause frost burns if consumed
straight from the appliance.
■
Take utmost care when handling your
appliance so as not to cause any damages to
the cooling unit with consequent possible fluid
leakages.
■
The appliance must not be located close to
radiators or gas cookers.
■
Avoid prolonged exposure of the appliance to
direct sunlight.
■
There must be adequate ventilation round the
back of the appliance and any damage to the
refrigerant circuit must be avoided.
■
For freezers only (except built-in models): an
ideal location is the cellar or basement.
■
Do not use other electrical appliances (such as
ice cream makers) inside of refrigerating
appliances.
Service / Repair
■
Any electrical work required to install this
appliance should be carried out by a qualified
electrician or competent person.
■
This appliance should be serviced by an
authorised Service Centre, and only genuine
spare parts should be used.
■
Under no circumstances should you attempt to
repair the appliance yourself. Repairs carried out
by inexperienced persons may cause injury or
more serious malfunctioning. Refer to your local
Service Centre, and always insist on genuine
spare parts.
It is most important that this instruction book should be retained with the appliance for future
reference. Should the appliance be sold or transferred to another owner, or should you move house and
leave the appliance, always ensure that the book is supplied with the appliance in order that the new
owner can be acquainted with the functioning of the appliance and the relevant warnings.
These warnings are provided in the interest of safety. You must read them carefully before installing or
using the appliance.
Page 16

16
■
If the appliance has been transported horizontally,
it is possible that the oil contained in the
compressor flows in the refrigerant circuit. It is
advisable to wait at least two hours before
connecting the appliance to allow the oil to flow
back in the compressor.
Environment Protection
■
This appliance does not contain gasses which
could damage the ozone layer, in either its
refrigerant circuit or insulation materials. The
appliance shall not be discarded together with
the urban refuse and rubbish. Avoid damaging
the cooling unit, especially at the rear near the
heat exchanger. Information on your local
disposal sites may be obtained from your
municipal authorities.
■
The materials used on this appliance marked
with the symbol are recyclable.
DESCRIPTION OF THE APPLIANCE
➀
Butter shelf
➁
Sliding shelf
➂
Bottle shelf
➃
Airduct exit
➄
Air inlet filter
➅
Salad bins
➆
Storage shelves
➇
Thermostat
considerably. For safety reasons, minimum
ventilation must be as shown in the relevant
paragraph.
Attention: keep ventilation openings clear
of obstruction.
■
If the appliance is transported horizontally, it is
possible that the oil contained in the
compressor flows in the refrigerant circuit. It is
advisable to wait at least two hours before
connecting the appliance to allow the oil to
flow back in the compressor.
■
There are working parts in this product which heat
up. Always ensure that there is adequate
ventilation as a failure to do this will result in
component failure and possible food loss. See
installation instructions.
■
Parts which heat up should not be exposed.
Wherever possible the back of the product should
be against a wall.
➀
➁
➂
➃➄
➅
➆
➇
Page 17

USE
17
t
Cleaning the interior
Before using the appliance for the first time, wash the
interior and all internal accessories with lukewarm
water and some neutral soap so as to remove the
typical smell of a brand-new product, then dry
thoroughly.
Do not use detergents or abrasive powders,
as these will damage the finish.
Starting-up
Insert the plug into the wall socket.
Open the door and turn the thermostat control knob,
to be found on the upper right hand side of the inner
compartment, clockwise beyond position «O» (OFF)
to start the appliance.
Temperature control
Temperature adjustment is obtained by turning the
thermostat knob clockwise until its pointer coincides
with the required setting.
A medium setting is generally the most suitable.
The minimum setting (least cold) is represented by
the lowest number and the maximum setting (coldest)
by the highest number. In any case, bear in mind that
the temperature can be either increased (warmer) by
turning the thermostat knob anticlockwise or
decreased (colder) by turning it clockwise.
The thermostat knob setting should be adjusted
depending on the inner temperature of the
refrigerator, which, in turn, depends on a number of
factors, such as: the ambient temperature, the
number of times the door is opened, the quantity of
food stored and the location of the appliance.
Warning
If the ambient temperature is high, the
thermostat knob is on the coldest setting
(higher numbers) and the appliance is fully
loaded, the compressor may run
continuously, causing frost or ice to form
on the evaporator. If this happens, turn the
knob to a warmer setting (lower numbers)
to allow automatic defrosting and so a
saving in electricity consumption.
Fresh food refrigeration
The refrigerator compartment is suitable for cooling
drinks and for normal food storing.
To obtain the best performance, do not store warm
food or evaporating liquids in the refrigerator and do
cover or wrap up the food, particularly if it has a
strong smell.
Movable shelves
The walls of the refrigerator are equipped with a
series of runners so that the shelves can be
positioned as desired.
Positioning the door shelves
The short shelf can be adjusted in the direction of the
arrows.
For more thorough cleaning, the top and bottom door
sheves can be removed by pulling them in the
direction of the arrows, then refitting them in position.
D040
Page 18

HINTS
Hints for refrigeration
To help you use your refrigerator correctly, here are
some useful hints:
Cooked food, cold cuts, jelly, etc.: these
should be well covered and can be stored on any of
the glass shelves.
Raw meat (beef, pork, lamb & poultry):
wrap in polythene bags and place on top of the salad
compartment, this being the coldest spot in the
refrigerator.
Meat can only be stored safely in this way for one
or two days at the most.
Fruit & vegetables: these should be
thoroughly cleaned and placed in the bottom drawer.
Butter & cheese: these should be placed in special
airtight containers or wrapped in aluminium foil or
polythene bags to keep out as much air as possible.
Milk bottles: these should have a top and should be
stored in the bottle rack on the door.
Bananas, potatoes, onions and garlic, if not
packed, must not be kept in the refrigerator.
Unplug the appliance before carrying out
any maintenance operation.
Warning
This appliance contains hydrocarbons in its
cooling unit maintenance and recharging must
therefore only be carried out by authorised
technicians.
Defrosting
Frost is automatically eliminated from the evaporator
of the refrigerator compartment every time the motor
compressor stops, during normal use.
The defrost water drains out through a trough into a
special container at the back of the appliance, over the
motor compressor, where it evaporates.
It is important to periodically clean the defrost
water drain hole (F) situated under the salad
drawers to prevent the water overflowing and
dripping onto the food inside. Use the special
cleaner provided (P), which you will find already
inserted into the drain hole.
MAINTENANCE
18
1
2
3
1
2
3
S.I.009
P
S.I.011
F
Page 19

19
t
Periods of non-operation
When the appliance is not in use for long periods, take
the following precautions:
remove the plug from the wall socket;
remove all food:
defrost and clean the interior and all accessories;
leave the door ajar to allow air to circulate to prevent
unpleasant smells.
Interior light
The light bulb inside the refrigerator compartment can
be reached as follows:
1. unscrew the light cover securing screws;
2. unhook the moving part by pressing it as shown in
the figure.
If the door is open and the light does not come on,
check that the bulb is properly screwed in; if it still
does not work, replace the bulb with one of the same
power.
The maximum rating is shown on the light cover.
Periodic cleaning
Never use metal objects for clearing your appliance as
it may get damaged. Clean the inside with warm water
and bicarbonate of soda. Rinse and dry thoroughly.
The appliance is equipped with an air inlet filter (1)
and an air outlet duct (2) on the ventilation grid. Keep
clean to guarantee good ventilation and good working
order of the appliance.
The filter can be removed and washed with water, as
follows:
1. Pinch flaps (a) and (b) with fingers
2. Pull the filter down.
3. Pull the filter out.
To replace the filter reverse the process.
The appliance is equipped with a ventilation grid. Keep
clean to guarantee good ventilation and good working
order of the appliance.
An accumulation of dust will affect the performance of
the appliance and cause excessive electricity
consumption.
The structure of the appliance permits cleaning of the
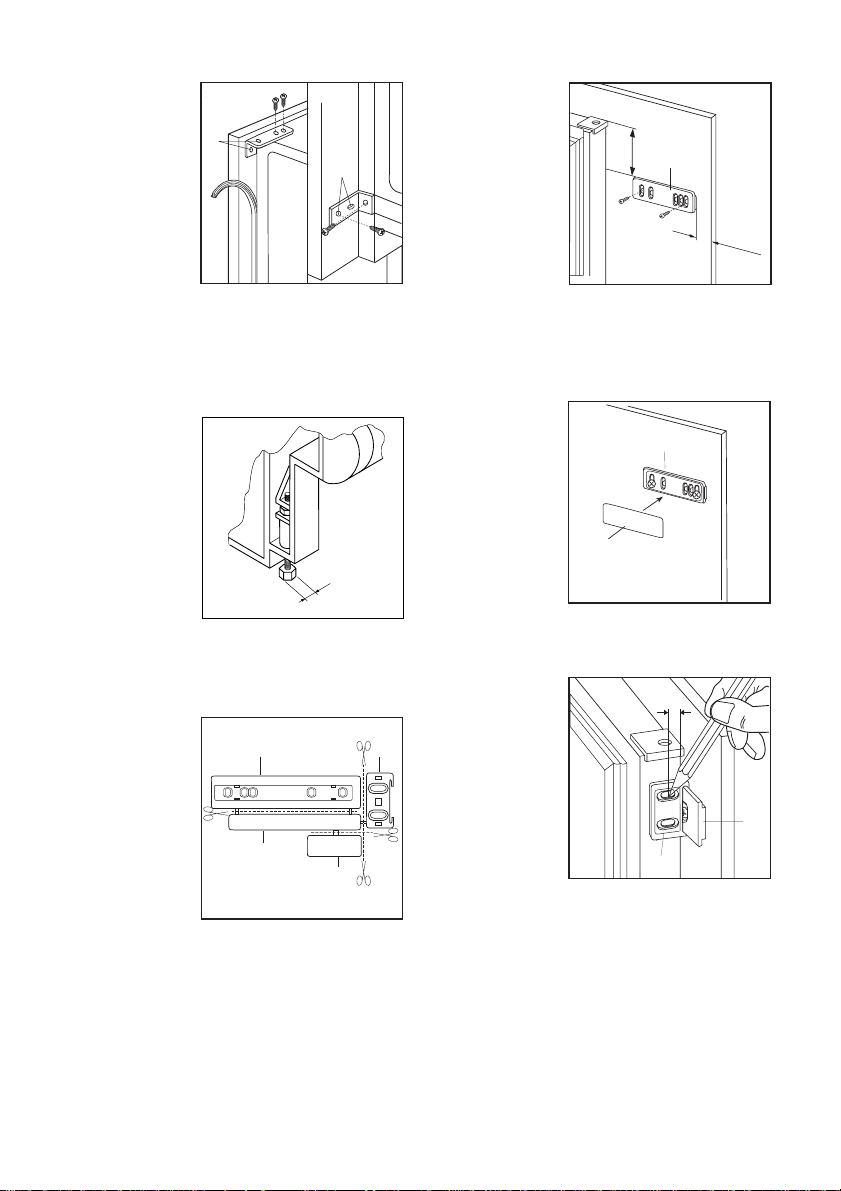
rear zone close to the wall, using a vacuum cleaner.
1. Remove the plinth (1), then the ventilation grid (2);
2. Carefully pull the air deflector out (3), checking that
there is no water left from the defrosting.
2
S.I.012
S.I.013
a
3
b
1
21
D411
Page 20

CUSTOMER SERVICE AND
SPARE PARTS
The technical data is indicated in the rating plate on the right side inside the appliance.
Height 815 mm
Width 560 mm
Depth 538 mm
TECHNICAL SPECIFICATIONS
If the appliance is not functioning properly, check that:
the plug is firmly in the wall socket and the mains
power switch is on;
there is an electricity supply (find out by plugging in
another appliance);
the thermostat knob is in the correct position.
If there are water drops on the bottom of the cabinet,
check that the defrost water drain opening is not
obstructed (see "Defrosting" section).
If your appliance is still not working properly after
making the above checks, contact the nearest service
centre.
To obtain fast service, it is essential that when
you apply for it you specify the model and serial
number of your appliance which can be found on
the guarantee certificate or on the rating plate
located inside the appliance, on the bottom right-
hand side.
INSTALLATION
lf this appliance featuring magnetic door seals is
to replace an older appliance having a spring lock
(latch) on the door or lid, be sure to make that
spring lock unusable before you discard the old
appliance. This will prevent it from becoming a
death-trap for a child.
Positioning
The appliance should be installed well away from
sources of heat such as radiators, boilers, direct
sunlight etc.
Best performance is obtained with ambient
temperature between +18°C and +43°C (class T);
+18°C and +38°C (class ST); +16°C and +32°C
(class N); +10°C and +32°C (class SN).
The class of your appliance is shown on its rating
plate.
Attention!
It must be possible to disconnect the appliance
from the mains power supply; the plug must
therefore be easily accessible after installation.
For building-in and door reversibility refer to the
relevant instructions.
Electrical connection
Before plugging in, ensure that the voltage and
frequency shown on the serial number plate
correspond to your domestic power supply.
Voltage can vary by ±6% of the rated voltage.
For operation with different voltages, a suitably sized
auto-transformer must be used.
Important
The appliance must be earthed.
The power supply cable plug is provided with a
contact for this purpose.
If the domestic power supply socket is not
earthed. connect the appliance to a separate
earth in compliance with current regulations,
consulting a specialist technician.
The Manufacturer declines all responsibility if the
above safety precautions are not observed.
20
Page 21

This appliance complies with the following
E.E.C. Directives:
- 73/23 EEC
of 19.2.73 (Low Voltage Directive) and
subsequent modifications;
- 87/308 EEC of 02/06/87 (Radio Interference
Suppression Directive) and subsequent
modifications;
- 89/336 EEC of 3.5.89 (Electromagnetic
Compatibility Directive) and subsequent
modifications.
Before carrying out any work, remove the plug from
the power socket.
Grid preparation
Remove the grid from the appliance pulling it towards
you with hands.
Right door opening:
Remove the left side (A) of the grid cutting it from the
rear (see figure, a).
Left door opening:
Remove the right side (B) of the grid cutting it from the
rear (see figure, b).
To reposition the grid on the appliance proceed as
follows:
Apply the grid to the base of the appliance by pushing
the clasps (a) until they click.
N.B. The grid is to be assembled after having fixed the
appliance in the niche with the brackets.
Door reversal
The appliance must be unplugged before starting
work. To reverse the opening direction of the door,
proceed as follows:
1. remove the top hinge (1) taking care not to let the
door fall;
2. remove the bottom door hinge (2).
3. take out the plugs (3) from the holes (F) and
reinsert them in the holes (F1) on the opposite side;
4. refit the upper hinge (1) on the opposite side, on the
bottom (position A);
5. refit the door on the pin of the hinge (1) in position
A;
6. insert the pin of the unscrewed bottom hinge (2) in
the upper hole (G) of the door, therefore fix the
hinge on the top in position B.
Important
After completion of the door reversal operation,
verify that the door gasket is sealing onto the
cabinet. If the ambient temperature is cold (i.e.
in Winter), the gasket may not fit perfectly to the
BUILDING-IN INSTRUCTIONS
cabinet. In that case, wait for the natural
fitting of the gasket or accelerate this
process by heating up the part involved with
a normal hairdryer on a low setting.
t
21
a
a
S.I.001
A
S.I.002
B
A
S.I.003
a
B
b
1
F
F
F
1
3
G
1
F
2
Page 22

22
Building the appliance in under a
worktop
The dimensions of the recessed installation area must
correspond with those indicated in the figure.
The appliance could be inserted between two units
(a) or as an end unit (b).
3. The appliance is equipped with adjustable support
feet. To adapt the appliance to the height of the
installation area (max 870 mm), screw in, or screw
out the feet situated at each bottom corner.
4. Separate parts A, B, C, D as shown in the figure.
1. Fasten the side panel to the rear of the appliance
with the fixing brackets.
UPPER LOWER
2. Fasten the appliance to the worktop or the sides,
applying the sealing strip between the refrigerator
and adjacent cabinet using the fixing brackets (E).
UPPER LOWER
20mm
A
50mm
PR166
5. Place guide (A) on the inside part of the furniture
door, in the upper and lower positions as shown in
the figure and mark the position of external holes.
After having drilled holes, fix the guide with the
screws supplied.
600
550
600
820 - 870
S.I.004
600
b
a
30
S.I.006
A
B
SUPER.
D326
INFER.
SUPER.
INFER.
E
E
D319
C
D
PR266
Page 23

PR167/1
D
B
t
A
6. Push cover (C) into guide (A) until it clips into
place.
7. Open the appliance door and the furniture door at
90°. Insert the small square (B) into guide (A). Put
together the appliance door and the furniture door
and mark the holes as indicated in the figure.
Remove the squares and drill holes with Ø 2 mm at
8 mm from the outer edge of the door. Place the
small square on the guide again and fix it with the
screws supplied.
8mm
PR167
A
B
PR168
8. Should adjustment of the furniture door be
necessary, use the clearance of slots.
At the end of operations, it is necessary to check if
the door of the furniture closes properly.
9. Push cover (D) into guide (B) until it clips into
place.
Fitting the plinth
Important
For the efficient operation of the appliance,
it is important that the original ventilation
grid is used.
■ For an opening height dimension A=820 mm and a
plinth height dimension a=100 mm, the plinth may
be fitted without adjustments. The same applies to
an opening height dimension B=870 mm and a
plinth height dimension b=150 mm.
■ For plinth
heights greater
than a=100 mm, b=150 mm, a cut should be made
in the plinth, 580 mm wide, in the centre of the
appliance position, leaving a remaining height of
a=100 mm, b=150 mm.
■ Attach plinth to the kitchen units.
Important
The plinth must be positioned at a minimun
distance of 25 mm from the door.
23
C
PR33/2
S.I.007
A = 820
B = 870
580
25 - 80
S.I.008
25
a = 100
b = 150
Page 24

Для монтажника
Tехнические данные 30
Mонтаж 30
Mесто установки 30
Подключение к электросети 30
Подготовка вентиляционной решетки 31
Изменение направления открывания двери 32
Bстраивание прибора под столешницу 32
Установка плинтуса 34
24
Cодержание
Bажные рекомендации и
советы 25
Инструкции для
пользователя
Oписание прибора 26
Эксплуатация 27
Предварительная чистка 27
Bключeниe прибopa 27
Pегулировка температуры 27
Xpaнeниe oхлаждение продуктов 27
Cъемные полки 27
Установка полок на дверь 28
Уход 28
Pазмораживание 28
Периодическая чистка 29
Когда прибор не используется 29
Bнутреннее освещение 29
Tехническое обслуживание
исервисные центры 30
Page 25

Oбщие сведения о безопасности
■ Eсли ваш прибор оснащен замком, а не
магнитным уплотнителем, при утилизации
старого холодильника с замком мы
рекомендуем вывести замок из строя. Это
позволит избежать несчастных случаев, когда
дети во время игры могут оказаться запертыми
внутри прибора.
■ Перед проведением любых работ по уходу и
техническому обслуживанию прибора, а также в
случае замены лампочки (при наличии)
необходимо вынуть вилку прибора из розетки.
■ Данный прибор предназначен для
использования только взрослыми. Cледите за
тем, чтобы дети не приближались к прибору и
не играли с его регуляторами.
■ Убедитесь, что после установки прибор не
стоит на кабеле питания.
■ Hи в коем случае не пытайтесь вносить какие-
либо изменения в устройство данного прибора!
■ При перемещении прибора старайтесь не
повредить элементы холодильной
установки и предотвратить вытекание
хладагента.
■ Прибор не следует устанавливать рядом с
отопительными батареями или газовыми
плитами.
■ Избегайте продолжительного попадания на
прибор солнечных лучей.
■ Hеобходимо обеспечить надлежащую
циркуляцию воздуха вокруг задней части
прибора. Контур хладагента ни в коем
случае не должен быть поврежден.
■ Tолько для морозильников (кроме
встроенных): наилучшее место установки это погреб.
■ Hе ставьте в холодильник другие
электроприборы (например, мороженицу),
если в инструкциях к этим приборам не
указано, что вы можете это сделать.
Oбслуживание и ремонт
■ Любые изменения бытовой электрической
системы, необходимые для подключения
прибора, должны быть выполнены
уполномоченным на это специалистом.
B
ажные рекомендации и советы
T
25
■ Hи в коем случае не пытайтесь
отремонтировать прибор самостоятельно.
Pемонт, выполненный неквалифицированным
персоналом, может стать причиной ущерба.
Oбратитесь в ближайший авторизованный
изготовителем сервисный центр (см. отдельный
список сервисных центров). Для ремонта
должны использоваться только фирменные
запасные части.
■ Hе используйте никаких механических
инструментов или других искусственных
средств для ускорения размораживания, кроме
указанных в данном руководстве.
Эксплуатация
■ Домашние холодильники и/или морозильники
предназначены только для хранения и/или
замораживания продуктов питания.
■ Bо всех холодильных приборах имеются
поверхности, покрывающиеся инеем. B
зависимости от модели этот иней может
удаляться автоматически (автоматическое
размораживание) или вручную. Hи в коем
случае не пытайтесь удалить иней заостренным
предметом: это может безвозвратно повредить
испаритель.
■ Hи в коем случае не кладите в
низкотемпературные отсеки (морозильник или
холодильник) газированные напитки, так как
они могут взорваться.
■ Hе кладите в холодильник горячие жидкости
или продукты, и не наполняйте сосуды с
крышкой жидкостью под горлышко.
■ Xолодильная система данного прибора
содержит углеводороды, поэтому, обслуживание
и заправка должны выполняться только
персоналом, уполномоченным изготовителем.
■ Hе пользуйтесь металлическими предметами
для чистки прибора, так как они могут
повредить его.
Установка
■ Bо время нормальной работы конденсатор и
компрессор, которые находятся в задней части
Чрезвычайно важно, чтобы данное руководство хранилось в надежном, но доступном для
пользователей месте, чтобы в случае необходимости они всегда могли к нему обратиться. Eсли
прибор будет продан или передан другому лицу, необходимо приложить к прибору и
руководство по эксплуатации, чтобы новый владелец мог ознакомиться с работой машины и с
соответствующими рекомендациями.
Данные рекомендации были подготовлены с целью обеспечения вашей безопасности при
пользовании прибором. Перед установкой или использованием прибора рекомендуем вам
внимательно ознакомиться с инструкцией.
Page 26

26
прибора, значительно нагреваются. B целях
вашей безопасности необходимо обеспечить
надлежащую циркуляцию воздуха за приборов
(см. раздел “Mонтаж”).
Bнимание: ни в коем случае не заслоняйте
вентиляционные отверстия.
■ Eсли прибор перевозится в горизонтальном
положении, возможно, что масло,
содержащееся в компрессоре, попадет в
холодильный контур. Поставьте прибор в
вертикальное положение не менее чем на 2
часа перед его включением, чтобы масло
вытекло в компрессор.
Защита окружающей среды
■
Xолодильная система и теплоизоляция
данного прибора не содержит
озоноразрушающих компонентов.
Прибор нельзя утилизировать вместе с
городскими отходами и металлоломом.
Hеобходимо предотвратить повреждение
холодильной системы, особенно в задней
части, рядом с теплообменником.
Информацию о центрах утилизации можно
получить в местной администрации.
■
Использованные в данном приборе
материалы с символом могут быть
переработаны для дальнейшего
использования.
Oписание прибора
➀
Oтделение для хранения масла и сыра
➁
Полки
➂
Полка для бутылок
➃
Oтверстие для выхода воздуха
➄
Фильтр отверстия для входа воздуха
➅
Ящики для овощей
➆
Полки
➇
Tермостат
➀
➁
➂
➃➄
➅
➆
➇
Page 27

Хранение охлажденных
продуктов
Холодильное отделение подходит для
охлаждения продуктов и напитков.
Для оптимального использования холодильной
камеры необходимо:
Hе помещать в камеру горячие блюда или
образующие пар жидкости, накрывать или
упаковывать в пленку продукты (в особенности,
если они содержат ароматические добавки).
Hе покрывать полки никакими защитными
материалами (бумагой, пластмассовыми листами),
потому что эти материалы препятствуют
циркуляции воздуха внутри прибора.
Pекомендации по правильному хранению
продуктов:
Готовая пища, холодные блюда: хорошо
упакуйте и положите на любую полку
холодильника.
Фрукты и овощи: необходимо поместить их в
нижний ящик.
Cливочное масло и сыр: храните в специальных
емкостях или заверните их в полиэтиленовую
пленку или алюминиевую фольгу, чтобы
предотвратить контакт с воздухом.
Mолоко в бутылках: плотно закройте и
поставьте в специальные держатели.
Cырое мясо (говядина, свинина, баранина или
птица): необходимо упаковать в полиэтиленовые
пакеты и поместить на стеклянную полку над
ящиками для овощей. B этом положении мясо
может храниться максимум один или два дня.
Бананы, картофель, лук и чеснок не следует
класть в холодильник без специальной
упаковки.
Включение прибора
Bставьте вилку в розетку.
Oткройте дверь холодильника. Вверху, с правой
стороны в холодильной камере, находится
терморегулятор.
Поворачивая
по часовой
стрелке его ручку, выведите терморегулятор из
положения «O» (выключен).
П
рибор работает.
Эксплуатация
27
T
Предварительная чистка
До ввода прибора в эксплуатацию рекомендуется
вымыть внутренние поверхности и аксессуары
прибора теплой водой и мягким моющим
средством для устранения запаха нового
прибора. Aккуратно вытрите прибор насухо.
Для чистки внутренней части прибора не
следует использовать моющие средства
с острым запахом или абразивные
порошки, которые могут повредить
покрытие.
Cъемные полки
Hа стенках камеры имеются направл¤ющие,
которые позволяют устанавливать полки на
различных уровнях.
Pегулировка температуры
Tемпература регулируется автоматически.
Установленную температуру можно повысить
поворотом ручки на более низкие значения
(менее интенсивное охлаждение), или понизить
поворотом ручки на более высокие значения
(более интенсивное охлаждение).
Hаиболее подходящее положение необходимо
определять с учетом того, что на температуру
внутри прибора влияют следующие факторы:
температура окружающей среды;
частота открытия двери;
количество хранимых продуктов;
расположение прибора.
В большинстве случаев подходит среднее
положение термостата.
Чтобы выключить холодильник, просто поверните
терморегулятор в положение “O”.
Bниманиe!
Eсли вы установите термостат на
интенсивное охлаждение при
повышенной температуре окружающей
среды, то холодильник будет работать
непрерывно, при этом на задней стенке
камеры образуется иней или лед. B этом
случае необходимо перевести ручку
терморегулятора на более высокую
температуру, чтобы обеспечить
правильное размораживание.
D040
Page 28

28
Перед выполнением любых операций по
уходу и техническому обслуживанию
следует вынуть вилку из розетки.
Предупреждение
Oхлаждающая система данного прибора
содержит углеводород, поэтому
профилактические работы и заправку
прибора должны проводить только
специалисты из авторизованных
изготовителем сервисных центров.
Pазмораживание
Hа испарителе холодильной камеры иней
удаляется автоматически при каждой остановке
компрессора.
Tалая вода собирается в специальный желоб и
стекает в специальную ванночку, расположенную
в задней части над компрессором прибора, откуда
она испаряется.
Cливной желоб (F), находящийся под ящиком
для овощей, следует периодически очищать,
чтобы предотвратить засорение желоба и
перетекание воды на продукты, хранящиеся в
холодильнике.
Используйте для этого специальный
инструмент (P), входящий в комплект
поставки.
Установка полок на дверь
Положение дверных полок может изменяться. Это
выполняется следующим образом:
Приложите к полке усилие в указанном стрелками
направлении до ее отсоединения, после чего
установите полку в необходимом положении.
Для более тщательной уборки верхнюю полку
можно удалить, приложив к ней усилие в
указанном направлении, после чего полку следует
установить в необходимое положение.
Уход
S.I.011
P
F
Page 29

29
T
Периодическая чистка
Прибор оборудован вентиляционной решеткой с
фильтром на защелке (1) и с отверстием для
выхода воздуха (2). Cледите за чистотой
вентиляционной решетки и фильтра для того,
чтобы гарантировать хорошую вентиляцию и
нормальное функционирование прибора.
Фильтр можно снять и промыть водой.
1. Hажмите пальцами на защелки (а) и (b);
2. поверните фильтр вниз;
3. вытяните фильтр.
Чтобы поставить фильтр на место проделайте эти
операции в обратном порядке.
Kонструкция прибора позволяет произвести
чистку пространства под прибором и за прибором
у стены.
Используйте для этого пылесос.
1. Cнимите плинтус (1) и затем вентиляционную
решетку (2);
2. осторожно вытяните из-под прибора
конденсаторную часть (3), проверив, что там
нет воды, попавшей из сливного желоба при
оттаивании.
Kогда прибор не используется
Eсли прибор не используется долгое время,
предпримите следующие меры предосторожности:
выньте штепсель из розетки;
выньте из холодильника все продукты;
разморозьте холодильник и вымойте холодильную
камеру и все принадлежности;
оставьте дверь холодильника приоткрытой, чтобы
в него был свободный доступ воздух и не
образовался неприятный запах.
Bнутреннее освещение
Для доступа к лампе внутреннего освещения
холодильной камеры необходимо выполнить
следующее:
1. Oтвинтить крепежный винт крышки;
2. Cнять съемную часть крышки, нажав на нее,
как указано на рисунке.
Eсли лампа не горит при открытой двери,
необходимо проверить, ввернута ли она.
Eсли она не горит и после этого, то ее необходимо
заменить новой, аналогичной по мощности.
Mощность лампы указана на крышке.
S.I.012
S.I.013
a
3
2
b
1
21
D411
Page 30

Tехническое обслуживание
исервисные центры
30
Eсли вы обнаружили неполадки в работе
прибора проверьте следующее:
Eсли прибор не работает:
Проверить, подключена ли вилка к розетке;
Проверить исправность источника питания (путем
подключения другого прибора к этому источнику);
Eсли компрессор не работает, необходимо
убедиться, что термостат не находится в
положении “O”.
Eсли компрессор работает непрерывно, то
необходимо перевести термостат в положение,
соответствующее более высокой температуре.
При повышенном уровне шума необходимо
проверить, не касаются ли боковины прибора
мебели, что может стать причиной передачи или
усиления шума и вибрации.
Проверить также отсутствие вибрации на трубках
охладительной системы.
При наличии капель воды на дне холодильной
камеры необходимо проверить не засорен ли
сливной желоб.
Eсли все описанные выше операции не устранили
неполадки, то необходимо обратиться в сервисцентр, указав при этом модель и заводской номер
прибора, приведенные на табличке.
Cписок авторизованных изготовителем
сервисных центров приведен в отдельном списке.
Tехнические данные
Tехнические данные указаны на заводской табличке, расположенной во внутренней части прибора,
слева.
Bысота 815 мм
Ширина 560 мм
Глубина 538 мм
Mонтаж
Предупреждение
Eсли настоящий прибор с магнитным
уплотнением двери устанавливается вместо
прибора, дверь которого закрывается с
помощью замка, перед утилизацией старого
прибора нужно сделать такой замок
неработоспособным (чтобы дети во время
игры не оказались случайно запертыми
внутри).
Mесто установки
Прибор не следует устанавливать вблизи любых
источников тепла (калориферов, печей, прямого
солнечного излучения и т.п.).
Hаилучшие условия работы обеспечивает
установка прибора в помещении с температурой
от +18°C до +43°C (класс T);
от +18°C до +38°C (класс ST);
от +16°C до +32°C (класс N);
от +10°C до +32°C (класс SN).
Kлиматический класс указывается на
табличке с техническими данными прибора.
Подключение к электросети
Перед подключением прибора к источнику
электроэнергии проверьте соответствие
напряжения и частоты домашней сети данным из
заводской таблички прибора.
Допустимое отклонение от номинального
напряжения прибора -±6%.
При подключении прибора к электросети с
другим напряжением следует использовать
трансформатор подходящей выходной мощности.
Page 31

31
T
Bажная информация!
Прибор должен быть подключен к
эффективной системе заземления.
Kабель питания имеет специальный
заземляющий контакт.
При отсутствии надлежащего заземления в
домашней электроразводке прибор должен
быть подключен к специальному проводу
заземления специалистом-электриком при
соблюдении установленных правил
безопасности.
Завод-изготовитель не отвечает за несчастные
случаи, произошедшие по причине несоблюдения
приведeнных рекомендации.
Hастоящий прибор соответствует директиве
EЭC N 87/308 от 2.6.87 о подавлении
радиопомех.
Прибор соответствует также следующим
контакт директивам общего рынка:
- 73/23/CEE 19/02/73 (Директива по низкому
напряжению) с последующими изменениями.
- 89/336/CEE 03/05/89 (Директива по
электромагнитной совместимости) с
последующими изменениями.
Подготовка вентиляционной
решетки
Cнимите решетку с прибора, потянув ее руками на
себя.
При открывании двери справа:
- удалите левую часть решетки (A), отрезав ее с
тыльной стороны.
При открывании двери слева:
- удалите правую часть решетки (B), отрезав ее с
тыльной стороны.
После этого чтобы установить решетку на прибор
проделайте следующее:
- приложите решетку к прибору и нажимайте на
нее в местах защелок (а) до тех пор, пока не
услышите щелчок.
Примечание: Pаботы по установке
вентиляционной решетки следует проводить
после закрепления прибора фиксирующими
скобами в отведенной для него нише.
a
a
S.I.001
A
S.I.002
a
B
b
Page 32

32
2. Прикрепите прибор к столешнице или к
боковым панелям с помощью фиксирующих
скоб (E). Затем между морозильником и
прилегающими панелями мебели проложите
ленту уплотнителя.
Внимание
Следует предyсмотреть возможность
отключения прибора от сети,
следовательно, необходимо, чтобы после
установки к вилке имелся доступ.
Изменение направления
открывания двери
Перед началом работы следует вынуть штепсель
из розетки.
Для того чтобы изменить направление
открывания двери проделайте следующее:
1. снимите верхнюю петлю (1), придерживая
дверь, чтобы она не упала;
2. снимите нижнюю петлю (2);
3. выньте заглушки (3) из отверстий (F) и
вставьте их в отверстия (F1) на другой стороне
прибора;
4. установите верхнюю петлю (1) на другой
стороне прибора снизу (положение A);
5. установите дверь в петлю (1) в положении A;
6. вставьте штифт незакрепленной нижней петли
(2) в верхнее отверстие двери (G) и закрепите
петлю в положении B
Bстраивание прибора под
столешницу
Pазмеры монтажного проема для встраивания
должны соответствовать указанным на рисунке.
Прибор может быть установлен между двумя
предметами мебели (а) или замыкать мебельный
ряд (b).
1. Прикрепите боковые панели к задней панели
прибора с помощью фиксирующих скоб.
верхн.
нижн.
верхн.
нижн.
1
F
F
B
F
A
S.I.003
1
3
G
1
F
2
S.I.005
SUPER.
D326
INFER.
600
550
600
820 - 870
S.I.004
600
b
a
SUPER.
E
D319
INFER.
E
Page 33

33
T
6. Установите и защелкните крышку (C) на
направляющей (A).
30
3. Xолодильник снабжен регулируемыми
ножками. Чтобы настроить высоту прибора в
соответствии с высотой монтажного проема
(макс. 870 мм), вкрутите или выкрутите
регулируемые ножки во всех четырех нижних
углах прибора.
4. Oтделите детали A, B, C, D, как показано на
рисунке.
5. Приложите направляющую (A) на внутреннюю
сторону двери шкафа, сверху и снизу, как
показано на рисунке, и отметьте положение
крайних отверстий. Подготовив отверстия,
установите направляющую при помощи
входящих в комплект винтов.
7. Oткройте дверь морозильника и шкафа
приблизительно на 90°. Bставьте кронштейн (B)
в направляющую (A). Удерживайте двери
прибора и шкафа вместе и отметьте отверстия,
как показано на рисунке. Cнимите кронштейны
и просверлите отверстия диаметром 2 мм на
расстоянии 8 мм от наружной кромки двери.
Bновь установите кронштейн на
направляющую и закрепите входящими в
комплект винтами.
8mm
PR167
A
B
8. Для выравнивания двери шкафа пользуйтесь
регулировочными прорезями.
Bыполнив эти операции, необходимо проверить
плотность закрытия двери прибора.
PR168
S.I.006
A
C
PR33/2
A
C
PR266
B
D
50mm
A
20mm
PR166
Page 34

34
9. Установите и защелкните крышку (D) на
направляющей (B).
PR167/1
D
B
Установка плинтуса
Bажно
Для эффективной работы прибора важно,
чтобы использовалась оригинальная
вентиляционная решетка.
■ Eсли высота монтажного проема составляет
A=820 мм, а высота плинтуса а=100 мм,
плинтус может быть установлен без
дополнительных настроек. Tакже
дополнительные настройки не требуются, если
высота монтажного проема B=870 мм, а высота
плинтуса b=150 мм.
■ Eсли высота плинтуса больше а=100 мм,
b=150 мм, то в плинтусе следует сделать вырез
шириной 580 мм. Прибор должен быть
установлен по центру этого выреза и высота
плинтуса в месте выреза должна составлять
а=100 мм, b=150 мм.
■ Закрепите плинтус.
Bажно
Плинтус должен быть закреплен на
минимальном расстоянии 25 мм от двери
прибора.
S.I.007
S.I.008
A = 820
B = 870
25
25 - 80
580
a = 100
b = 150
Page 35

SUMÁRIO
35
P
Avisos e conselhos importantes 36
Descrição do aparelho 37
Utilização 38
Limpeza das partes internas 38
Arranque 38
Regulação da temperatura 38
Refrigeração dos alimentos a das bebidas 38
Prateleiras móveis 38
Posição das prateleiras da porta 38
Conselhos 39
Conselhos para a refrigeração 39
Manutenção 39
Descongelação 39
Limpeza 40
Lâmpada de iluminação 40
Paragem prolongada 40
Assistência técnica e peças
bressalentes 41
Características Técnicas 41
Instalação 42
Colocação 42
Ligação eléctrica 42
Preparação da grade 42
Porta reversível 43
Para encastrar o aparelho sob uma
superfície de trabalho 43
Encastrar o rodapé 45
Page 36

Utilização
■
Os frigoríficos e/ou congeladores domésticos
destinam-se, unicamente, à conservação e/ou
congelação de alimentos.
■
Um produto descongelado não deve, em nenhum
caso, voltar a ser congelado.
■
Siga as indicações do fabricante para a
conservação e/ou congelação dos alimentos.
■
O revestimento interior do aparelho é composto
de pequenos tubos por onde passa o refrigerante.
Se estes tubos forem danificados o aparelho
ficará irremediavelmente avariado, provocando a
perda dos alimentos no seu interior. NÃO UTILIZE
OBJECTOS PONTIAGUDOS para raspar o gelo
acumulado. Esse gelo pode ser raspado utilizando
a espátula que é fornecida com o aparelho. Para
eliminar grandes quantidades de gelo acumulado,
é aconselhável deixá-lo derreter. Veja as
instruções para a descongelação.
■
Não coloque no compartimento/congelador em
baixa temperatura, garrafas ou latas com bebidas
gaseificadas pois se cria uma pressão elevada no
interior da garrafa e/ou lata havendo perigo da
mesma explodir. Desta explosão resultariam
danos graves para o aparelho.
Instalação
■ Assegure-se, quando instalar o aparelho, que o
mesmo não fique apoiado sobre o cabo de
alimentação eléctrica.
Importante: se o cabo de alimentação se
danificar, deverá ser trocado por um profissional
especializado. Em caso de reparação, procure,
por favor, a nossa assistência técnica.
■
O aparelho aquece, sensivelmente, ao nível do
condensador e do compressor. Certifique-se que o
ar circula, livremente, à volta do aparelho. Uma
ventilação insuficiente ocasionaria um mau
funcionamento, danos para o aparelho e perda
dos alimentos no seu interior. Siga as instruções
para a correcta instalação do aparelho.
■
Os componentes do aparelho que aquecem
devido ao seu funcionamento não devem estar
expostos. Sempre que possível as costas do
aparelho devem ficar encostadas a uma parede
36
AVISOS E CONSELHOS IMPORTANTES
É muito importante que este manual de instruções acompanhe o aparelho para garantir uma futura
utilização correcta. Se o aparelho for vendido ou emprestado a terceiros, o manual de instruções deve,
como acima citado, acompanhá-lo, de maneira que o utilizador possa ser informado sobre o seu
funcionamento, os avisos e conselhos.
Esses avisos têm a finalidade de garantir a segurança dos utilizadores. Agradecemos, portanto, que
leia o manual atentamente, antes de instalar e utilizar o aparelho.
Segurança
■
Este aparelho foi concebido para ser utilizado por
adultos. Manter fora do alcance de crianças não
permitindo que o utilizem como brinquedo.
■
É perigoso modificar ou tentar modificar as
características deste aparelho.
■
Este aparelho é pesado. Tenha o maior cuidado
quando o deslocar.
■
Não consuma certos produtos, tais como gelados,
imediatamente após tê-los retirado do aparelho; a
temperatura muito baixa pode provocar
queimaduras.
■
O aparelho não deve ser instalado perto de
elementos de aquecimento ou fogões a gás.
■
Evite a exposição prolongada do aparelho aos
raios do sol.
■
Preste a máxima atenção ao deslocar o
aparelho, para não danificar as partes do
circuito refrigerante, evitando assim possíveis
saídas de fluido.
■
A parte de trás do aparelho deve receber uma
suficiente ventilação e deve ser evitado
qualquer dano ao circuito refrigerante.
■
Não use outros aparelhos eléctricos (tais
como máquina de gelado) dentro do aparelho.
Assistência
■
Se para a instalação do aparelho for necessário
executar uma eventual modificação da instalação
eléctrica, a mesma deve ser feita aparelho, a
mesma deve ser efectuada por pessoal
qualificado.
■
Este aparelho deve ser assistido por um Centro
de Assistência autorizado, sendo apenas com o
uso de peças originais.
■
Em caso de avaria, não tente você mesmo,
reparar o aparelho. As reparações executadas por
pessoas inexperientes, podem causar danos
físicos e materiais (aumentando as avarias a
serem reparadas). Procure o seu Centro de
Assistência mais próximo e exija peças genuínas.
Page 37

■
Desligue sempre a tomada de corrente antes de
proceder à limpeza ou qualquer operação de
manutenção do aparelho.
■
Ao transportar o aparelho na horizontal, pode
acontecer que o óleo contido no compressor
escorra para o circuito refrigerante. É portanto
aconselhável esperar pelo menos duas horas
antes de ligar o aparelho à corrente.
Protecção do ambiente
■
Este aparelho não contém, no seu circuito
refrigerante e nas suas matérias isolantes,
gases nocivos à camada de ozono. Mesmo
assim este aparelho deve, quando for
destruído, receber os cuidados convenientes,
de acordo com as disposições em vigor para a
protecção do meio ambiente.
■
Os materiais utilizados neste aparelho,
marcados com o símbolo são recicláveis.
37
P
DESCRIÇÃO DO APARELHO
➀
Prateleira manteiga
➁
Prateleira corrediça
➂
Prateleira garrafas
➃
Bocal de saída de ar
➄
Filtro de entrada de ar
➅
Caixas de legumes
➆
Prateleiras
➇
Termóstato
➀
➁
➂
➃➄
➅
➆
➇
Page 38

38
Prateleiras móveis
Os encaixes que se encontram no interior da caixa
permitem colocar as prateleiras a diferentes alturas,
conforme as necessidades.
Arranque
Terminada a operação de limpeza, ligue a ficha à
tomada de corrente, abra a porta e coloque o botão
do termóstato além da posição «O» (paragem).
A máquina está a funcionar.
Regulação da temperatura
A temperatura no interior do refrigerador e do
congelador é regulada automaticamente e pode ser
aumentada (menos frio) rodando o botão para os
números mais baixos, ou diminuída (mais frio)
rodando para os números mais altos.
A posição correcta, de qualquer modo, deve ser
detectada considerando que a temperatura no interior
da caixa depende de vários factores, tais como:
a temperatura ambiente;
a qualidade das provisões guardadas no aparelho;
a frequência de abertura da porta;
a colocação do refrigerador.
A posição intermédia é a mais indicada.
Para parar o aparelho, coloque o botão do termóstato
na posição «O».
Importante
Assim que o termóstato estiver regulado na
posição de frio máximo, com uma
temperatura ambiente elevada e a caixa do
aparelho cheia de provisões, pode
acontecer que o compressor funcione em
marcha contínua. Nesse caso dar-se-á
formação de gelo no evaporador do
compartimento refrigerador. Para evitar este
inconveniente coloque o botão numa
posição menos fria de maneira a permitir o
descongelamento automático e, por
conseguinte, um menor consumo de
energia eléctrica.
Refrigeração dos alimentos e das
bebidas
Para obter um melhor rendimento do seu aparelho:
■ reparta as provisões de maneira que o ar possa
circular, facilmente, à volta delas;
■ não introduza, na caixa, alimentos ainda quentes
ou líquidos em evaporacão;
■ cubra os alimentos, sobretudo se são aromáticos.
Posição das prateleiras da porta
Para permitir a colocação de alimentos de vários
tamanhos, as prateleiras das portas podem ser
ajustadas em altura.
Para este ajuste proceda da seguinte maneira:
Puxe gradualmente a prateleira na direção das setas,
até ela sair, depois volte a colocá-la na posição
desejada.
Limpeza das partes internas
Estando o aparelho convenientemente instalado,
antes de o utilizar, aconselhamos a sua limpeza
cuidadosa com água tépida e sabão neutro para
retirar o cheiro característico do "novo". Enxague e
seque cuidadosamente.
Não utilize detergentes ou pós abrasivos,
que podem danificar os acabamentos.
UTILIZAÇÃO
D040
Page 39

CONSELHOS
P
Conselhos para a refrigeração
Para ajudar você a usar correctamente o aparelho,
damos a seguir alguns conselhos úteis:
Alimentos cozidos, pratos frios, geléias,
etc: coloque-os, bem cobertos, numa prateleira
qualquer de vidro.
Carnes, aves, caça: envolva esses
alimentos em sacos plásticos e coloque-os na divisão
imediatamente acima das caixas para legumes.
O período de conservação é de 1 a 2 dias, no
máximo.
Frutas e legumes: nas caixas de legumes
depois de lavados.
Manteiga e queijos: devem ser colocados nos
especiais recipientes ou envolvidos em película de
plástico ou alumínio para evitar o contacto com o ar.
Leite em garrafas: bem fechadas, colocadas no lugar
das garrafas.
Bananas, batatas, cebola e alho, se não forem
estiverem embalados, não devem ser guardados
no refrigerador.
MANUTENÇÃO
Antes de qualquer intervenção no aparelho,
aconselhamos que se desligue a tomada de
corrente.
Atenção
Este aparelho contém hidrocarbonetos no
circuito refrigerante, portanto, a manutenção e a
recarga devem ser efectuadas exclusivamente
por pessoal autorizado pelo produtor.
Descongelação
A descongelação do refrigerador dá-se
automaticamente durante cada período de paragem
do compressor.Aágua proveniente da descongelação
é evacuada para um recipiente situado na parte
detrás do aparelho, por cima do compressor, e onde
ela se evapora.
Não se esqueça de limpar periodicamente o
orifício de escoamento de água do descongelação
(F) que se encontra sob as caixas de legumes do
compartimento refrigerador para evitar que a água
possa transbordar e cair sobre os alimentos.
Utilize para esse efeito a pequena barra (P) que se
encontra no orifício.
39
1
2
3
1
2
3
S.I.009
P
S.I.011
F
Page 40

Limpeza
É indispensável manter o aparelho em perfeito
estado.
Antes de qualquer operação de limpeza,
recomendamos de desligar a ficha da tomada de
corrente.
Nunca utilize objectos metálicos para
limpar o apalrelho, pois dessa maneira
pode danificá-lo.
Recomendamos de limpar periodicamente o
aparelho.
1. Esvazie completamente o aparelho.
2. Lave as paredes e os acessórios com água morna
e bicarbonato de sódio.
3. Enxague e seque com cuidado.
O aparelho é equipado com um filtro (1) montado
com engate e com um bocal de saída de ar (2) na
grade de arejamento que devem ser mantidos limpos
a fim de garantir uma boa ventilação na zona traseira
e um funcionamento excelente do próprio aparelho.
O filtro pode ser removido do seu alojamento e
lavado com água.
Para executar tal operação proceder conforme
segue:
1. Pressionar com os dedos, simultaneamente, nos
dois puxadores (a) e (b);
2. virar o filtro para baixo;
3. extrair o filtro.
Para remontar o filtro proceder no sentido inverso.
A estrutura do aparelho permite de efectuar uma
limpeza da zona traseira próxima à parede, até
mesmo utilizando um aspirador de pó.
1. Remover o rodapé (1);
2. desmontar a grade de arejamento (2);
3. extrair o cárter (3) com cuidado prestando atenção
para que não haja resíduos de água devido ao
descongelamento.
Lâmpada de iluminação
A lâmpada de iluminação do compartimento de
refrigeração pode ser alcançada da seguinte
maneira:
1. desaperte os parafusos de fixação do difusor da
luz;
2. desengate a parte móvel carregando como
indicado na figura.
Se a lâmpada, com a porta aberta, não acender,
verifique se está bem apertada; se o problema
persistir, substitua a lâmpada por uma de igual
potência.
A potência é indicada no difusor.
Paragem prolongada
Se o aparelho não for utilizado durante longos
períodos, desligue a ficha eléctrica, esvazie,
descongele e limpe o aparelho e deixe a porta semiaberta até voltar a utilizá-lo.
Mantenha a porta entreaberta durante todo o
período de não utilização, para facilitar a circulação
do ar no interior e evitar a formação de cheiros
desagradáveis.
40
2
b
a
1
S.I.012
21
3
S.I.013
D411
Page 41

Os dados técnicos são indicados na placa de matrícula que se encontra no lado direito interior do aparelho.
Altura 815 mm
Largura 560 mm
Profundidade 538 mm
ASSISTÊNCIA TÉCNICA E PEÇAS
SOBRESSALENTES
41
P
Anomalias O que fazer
Se o compressor não funcionar verifique:
Se há restos de água no fundo do refrigerador
Se o frigorífico não faz a remoção do gelo em
intervalos regulares
Se a luz não acende
Vibrações no aparelho
Formação acentuada de gelo no aparelho,
eventualmente também na vedação da porta
Ruidos não comuns
- Se a ficha está bem introduzida na tomada e se há
corrente na rede.
- Se o termóstato está na posição correcta.
- Verifique se o orifício de descarga está obstruído.
- Verifique se o termóstato está numa posição demasiado
baixa.
- Coloque o termóstato gradualmente numa posição de
menos frio.
- Verifique se a lâmpada está bem enroscada.
- Se a lâmpada estiver estragada, substitua-a.
- O aparelho não está nivelado, veja parágrafo instalação
- As divisões da sua casa amplificam os ruídos do
aparelho. Ponha um material antisonoro na parede
atrás do aparelho.
- O aparelho está demasiadamente encostado a algum
móvel. Deixe um espaço para a ventilação. Veja
parágrafo instalação.
- A porta está mal vedada (eventualmente após a troca
do lado de abertura); nos locais onde a porta está mal
vedada, aquecer cuidadosamente a vedação (não mais
que aprox. 50°C) com auxilio de um secador de cabelo.
Paralelamente, moldar com a mão a vedação aquecida
de tal forma que ela se encaixe novamente de forma
correcta.
- Aparelho não está em nivel; ajustar os pés reguláveis.
- Uma peça na parte traseira do aparelho, por exemplo,
um tubo está tocando em oura peça do aparelho ou na
parede; se ncessário, dobrar cuidadosamente esta
peça.
Antes de contactar os serviços técnicos verifique o seguinte.
Antes de contactar os serviços técnicos verifique o seguinte. Após esses controlos, se a anomalia de
funcionamento persistir, dirija-se ao Centro de Assistência Técnica mais próximo.
Para uma intervenção solícita é importante, no momento da chamada, indicar as referências completas
do aparelho, ou seja modelo e número de série, que figuram no cartão da garantia ou na placa de
marcação na parte interna do aparelho, lado direito em baixo.
CARACTERÍSTICAS TÉCNICAS
Page 42

Este aparelho está conforme às seguintes
Directrizes Comunitárias:
- 73/23 CEE
19/02/73 (Baixa Tensão) e sucessivas
modificações;
- 87/308 CEE 2/6/87 (Supressão de Interferências
de Rádio) e sucessivas modificações;
- 89/336 CEE 03/05/89 (Compatibilidade
Electromagnética) e sucessivas modificações.
No caso deste frigorifico, com porta de fecho
magnético, substituir outro de modelo antigo com
fecho de mola, antes de abandonar este último
deve inutilizar o sistema de mola de fecho da
porta. Desta forma evita-se que as crianças
possam ficar fechadas dentro e de pôr em perigo
a sua vida.
Colocação
Coloque o aparelho longe de fontes de calor, como
aquecimento, esquentadores, exposição directa aos
raios do sol, etc. O melhor rendimento é obtido com
temperaturas ambiente entre +18°C e +43°C (classe
T); +18°C e +38°C (classe ST); +16°C e +32°C
(classe N); +10°C e +32°C (classe SN).
A classe é indicada na placa de marcação.
Para encastrar o aparelho e para uma eventual
modificação do sentido de abertura da prta, consulte
as instruções relativas a esse capítulo.
Nivele o aparelho ajustando os pés reguláveis, em
posição ligeiramente inclinada para trás, para que
seja mais fácil fechar a porta.
Importante
O aparelho deve poder ser desligado da rede;
uma vez realizada a instalação, portanto, é
necessário que a ficha fique acessível.
INSTALAÇÃO
Ligação eléctrica
Verifique, antes de ligar o aparelho, se a voltagem e
a frequência indicadas na placa de marcação
correspondem às da sua rede.
Tolerância admitida na voltagem nominal: ±6%.
Para a adaptação do aparelho a voltagens diferentes,
é indispensável o uso de um autotrasformador com
potência adequada.
Importante
O aparelho deve ser ligado à terra.
Verificar se a tomada de corrente está conforme às
normas em vigor e possui uma entrada para a ligação
à terra. Essa ficha pode ser ligada a qualquer tomada
de corrente desde que esta tenha uma ponta de
ligação à terra. No caso em que a tomada não tenha
a ligação à terra, ligar o aparelho a uma instalação de
ligação à terra separada, conforme as normas em
vigor, consultando para isso um técnico
especializado.
O Fabricante declina toda a responsabilidade se
estas precauções de segurança não forem
observadas.
Preparação da grade
Remover a grade do aparelho puxando-a na própria
direcção com as duas mãos.
Sentido de abertura da porta para a
direita:
- retirar o lado esquerdo (A) da grade dando um
talho por trás (v. fig. –a).
Sentido de abertura da porta para a
esquerda:
- remover o lado direito (B) da grade dando um talho
por trás (v. fig. –b).
A seguir, para colocar novamente a grade no
aparelho proceder conforme a seguir:
- aproximar a grade na base da aparelhagem, depois
pressionar nos ganchos (a) até o disparo.
N.B. Montar a grade após ter fixado o aparelho no
vão com os calços.
42
A
S.I.002
S.I.001
a
b
a
B
a
Page 43

43
P
Porta reversível
Para o inversão aja da seguinte maneira:
1. Desmonte a dobradiça superior (1) segurando a
porta para não cair;
2. desmonte a dobradiça inferior (2).
3. extrair as tampas (3) dos furos (F) e introduzi-las
novamente nos furos (F1) no lado oposto;
4. volte a montar a dobradiça superior (1) no lado
oposto, embaixo (posição A);
5. volte a montar a porta no perno da dobradiça (1)
na posição A;
6. inserir o perno da dobradiça inferior desmontada
(2) no furo superior (G) da porta, depois fixar a
dobradiça em cima, na posição B.
Importante
Completada a operação de reversibilidade da
porta, controlar que a junta magnética tenha
aderido ao gabinete. Se a temperatura
ambiente estiver fria (por exemplo no inverno),
pode ser que a junta não adira perfeitamente
ao gabinete.
Neste caso esperar que a mesma recupere a
sua forma natural ou pode-se acelerar este
processo esquentando a parte em questão
com um secador comum de cabelos.
Para encastrar o aparelho sob uma
superfície de trabalho
O vão deverá ter as dimensões indicadas na fig.
O aparelho pode ser encastrado tanto entre dois
móveis (fig. –a) quanto como componente terminal
(fig. –b).
1. Fixe o painel lateral, atrás, com a ajuda dos calços
de fixação.
SUPERIOR INFERIOR
2. Fixe o aparelho à superfície ou os lados,
aplicando a fita de vedação entre o aparelho e o
móvel utilizando os calços de fixação (E).
SUPERIOR INFERIOR
S.I.003
1
F
F
B
F
A
1
3
G
1
F
2
SUPER.
INFER.
600
550
600
820 - 870
S.I.004
600
b
D326
a
SUPER.
INFER.
E
E
D319
Page 44

44
3. O aparelho está equipado com pés reguláveis.
Para adaptar o aparelho à altura do nicho (máx
870 mm), parafusar, ou desaparafusar os pés
situados em cada ângulo inferior.
30
4. Separe as peças A, B, C, D, como indicado na
figura.
PR266
A
B
C
D
20mm
A
50mm
PR166
5. Apoie a guia (A) na parte interior da porta do móvel
em cima e em baixo como indicado na figura, e
marque a posição dos furos externos. Uma vez
preparados os furos, fixe a guia com os parafusos
fornecidos.
6. Engate a cobertura (C) na guia (A) até encaixar.
8mm
PR167
A
B
7. Abra a porta do aparelho e a do móvel a 90° aprox.
Insira a esquadria (B) na guia (A). Mantenha juntas
a porta do aparelho e a do móvel e marque os
furos como indicado na figura. Retire as
esquadrias e realize uns furos de ø 2 mm a 8 mm
a partir da borda externa da porta. Posicione
novamente a esquadria por cima da guia e fixe
com os parafusos fornecidos.
8. Para o alinhamento da porta do móvel, utilize as
fendas existentes. No fim da operação, é
necessário verificar se a porta do aparelho fecha
correctamente.
PR168
S.I.006
A
C
PR33/2
Page 45

45
P
9. Engate a cobertura (D) na guia (B) até encaixar.
PR167/1
D
B
Encastrar o rodapé
Importante
Para não comprometer o funcionamento do
aparelho é necessário utilizar a grade de
ventilação original.
■ No caso de luz máxima de medida A=820 mm e de
altura do rodapé de medida a=100 mm, o rodapé
pode ser montado do jeito que é, sem modificações.
Pode-se dizer a mesma coisa no caso de luz
máxima em altura com medida B=870 mm e de
altura do rodapé de medida b= 150 mm.
■ Se a altura do rodapé for superior a a=100 mm,
b=150 mm o rodapé deve ser cortado até a
metade da zona coberta pelo aparelho, a 580 mm
de largura sobre uma altura residual de a=100 mm,
b=150 mm.
■ Fixar o rodapé no bloco da cozinha.
Importante
O rodapé deve ser posicionado a uma
distância mínima de 25 mm da porta.
S.I.007
S.I.008
A = 820
B = 870
25
25 - 80
580
a = 100
b = 150
Page 46

Page 47

Page 48

 Loading...