

GETTING
STARTED?
EASY.
User Manual
ZOB2031XMU
EN User Manual 2
Oven
FR Notice d'utilisation 21
Four

SAFETY INFORMATION
Before the installation and use of the appliance, carefully read the
supplied instructions. The manufacturer is not responsible for any
injuries or damage that are the result of incorrect installation or
usage. Always keep the instructions in a safe and accessible
location for future reference.
CHILDREN AND VULNERABLE PEOPLE SAFETY
• This appliance can be used by children aged from 8 years and
above and persons with reduced physical, sensory or mental
capabilities or lack of experience and knowledge if they have
been given supervision or instruction concerning the use of the
appliance in a safe way and understand the hazards involved.
• Children between 3 and 8 years of age and persons with very
extensive and complex disabilities shall be kept away unless
continuously supervised.
• Children of less than 3 years of age should be kept away
unless continuously supervised.
• Do not let children play with the appliance.
• Keep all packaging away from children and dispose of it
appropriately.
• Keep children and pets away from the appliance when it
operates or when it cools down. Accessible parts are hot.
• If the appliance has a child safety device, it should be activated.
• Children shall not carry out cleaning and user maintenance of
the appliance without supervision.
GENERAL SAFETY
• Only a qualified person must install this appliance and replace
the cable.
• WARNING: The appliance and its accessible parts become hot
during use. Care should be taken to avoid touching heating
elements.
• Always use oven gloves to remove or put in accessories or
ovenware.
2
• Before carrying out any maintenance, disconnect the appliance
from the power supply.
• WARNING: Ensure that the appliance is switched off before
replacing the lamp to avoid the possibility of electric shock.
• Do not use the appliance before installing it in the built-in
structure.
• Do not use a steam cleaner to clean the appliance.
• Do not use harsh abrasive cleaners or sharp metal scrapers to
clean the glass door since they can scratch the surface, which
may result in shattering of the glass.
• If the mains power supply cable is damaged, it must be
replaced by the manufacturer, its Authorised Service Centre or
similarly qualified persons to avoid an electrical hazard.
SAFETY INSTRUCTIONS
INSTALLATION
WARNING! Only a qualified person
must install this appliance.
• Remove all the packaging.
• Do not install or use a damaged appliance.
• Follow the installation instructions supplied with
the appliance.
• Always take care when moving the appliance as
it is heavy. Always use safety gloves and
enclosed footwear.
• Do not pull the appliance by the handle.
• Keep the minimum distance from other
appliances and units.
• Install the appliance in a safe and suitable place
that meets installation requirements.
• The appliance is equipped with an electric
cooling system. It must be operated with the
electric power supply.
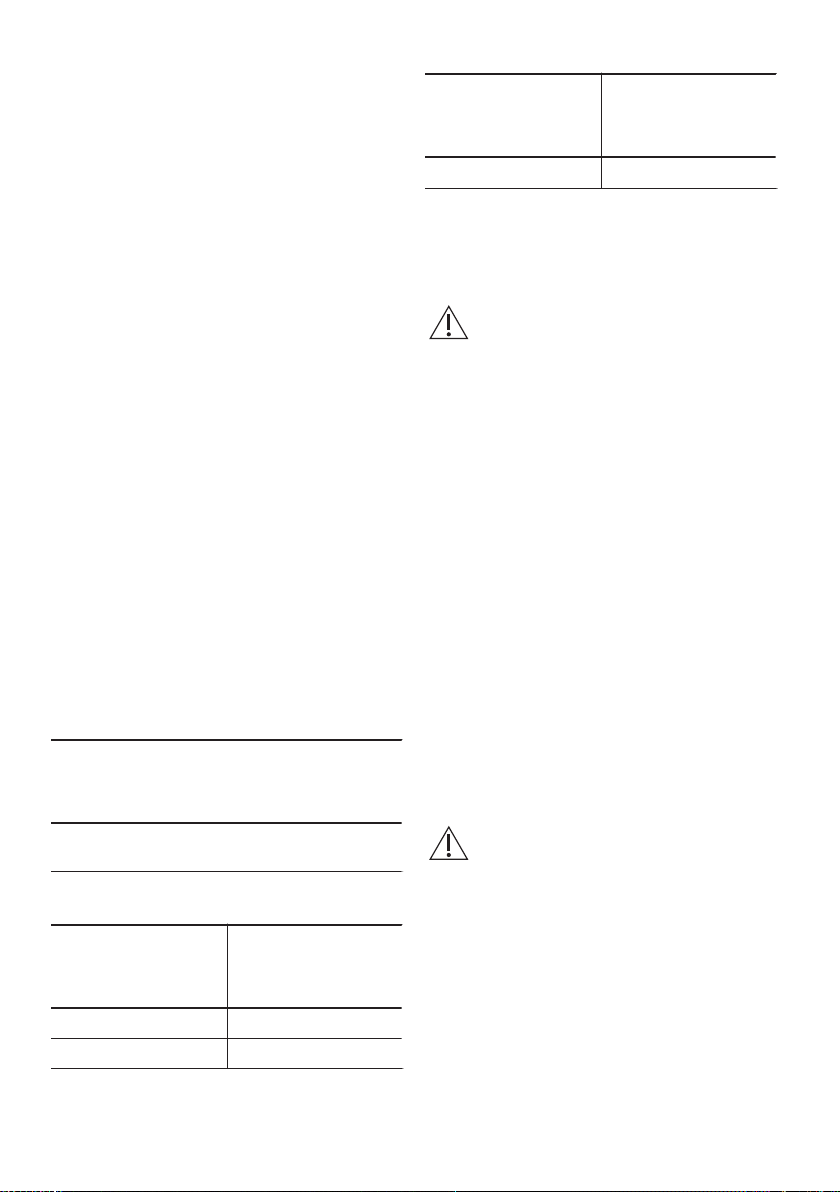
Cabinet minimum
height (Cabinet under
the worktop minimum
height)
Cabinet width 560 mm
Cabinet depth 550 (550) mm
Height of the front of
the appliance
Height of the back of
the appliance
590 (600) mm
598 mm
579 mm
Width of the front of
the appliance
Width of the back of
the appliance
Depth of the appliance 561 mm
Built in depth of the
appliance
Depth with open door 1007 mm
Ventilation opening
minimum size. Opening
placed on the bottom
rear side
Mains supply cable
length. Cable is placed
in the right corner of
the back side
Mounting screws 4x25 mm
ELECTRICAL CONNECTION
WARNING! Risk of fire and electric
shock.
• All electrical connections should be made by a
qualified electrician.
• The appliance must be earthed.
594 mm
558 mm
540 mm
560x20 mm
1100 mm
3
• Make sure that the parameters on the rating
plate are compatible with the electrical ratings
of the mains power supply.
• Always use a correctly installed shockproof
socket.
• Do not use multi-plug adapters and extension
cables.
• Make sure not to cause damage to the mains
plug and to the mains cable. Should the mains
cable need to be replaced, this must be carried
out by our Authorised Service Centre.
• Do not let mains cables touch or come near the
appliance door or the niche below the
appliance, especially when it operates or the
door is hot.
• The shock protection of live and insulated parts
must be fastened in such a way that it cannot be
removed without tools.
• Connect the mains plug to the mains socket
only at the end of the installation. Make sure that
there is access to the mains plug after the
installation.
• If the mains socket is loose, do not connect the
mains plug.
• Do not pull the mains cable to disconnect the
appliance. Always pull the mains plug.
• Use only correct isolation devices: line
protecting cut-outs, fuses (screw type fuses
removed from the holder), earth leakage trips
and contactors.
• The electrical installation must have an isolation
device which lets you disconnect the appliance
from the mains at all poles. The isolation device
must have a contact opening width of minimum
3 mm.
• This appliance is supplied only with a main
cable.
Cable types applicable for installation or re-
H07 RN-F, H05 RN-F, H05 RRF, H05 VV-F,
H05 V2V2-F (T90), H05 BB-F
For the section of the cable refer to the total power
on the rating plate. You can also refer to the table:
Total power (W)
maximum 1380 3 x 0.75
maximum 2300 3 x 1
placement for Europe:
Section of the cable
(mm²)
Total power (W)
maximum 3680 3 x 1.5
The earth cord (green / yellow cable) must be 2 cm
longer than phase and neutral cables (blue and
brown cables).
USE
WARNING! Risk of injury, burns and
electric shock or explosion.
• This appliance is for household use only.
• Do not change the specification of this
appliance.
• Make sure that the ventilation openings are not
blocked.
• Do not let the appliance stay unattended during
operation.
• Deactivate the appliance after each use.
• Be careful when you open the appliance door
while the appliance is in operation. Hot air can
release.
• Do not operate the appliance with wet hands or
when it has contact with water.
• Do not apply pressure on the open door.
• Do not use the appliance as a work surface or
as a storage surface.
• Open the appliance door carefully. The use of
ingredients with alcohol can cause a mixture of
alcohol and air.
• Do not let sparks or open flames to come in
contact with the appliance when you open the
door.
• Do not put flammable products or items that are
wet with flammable products in, near or on the
appliance.
WARNING! Risk of damage to the
appliance.
• To prevent damage or discoloration to the
enamel:
– do not put ovenware or other objects in the
appliance directly on the bottom.
– do not put aluminium foil directly on the
bottom of cavity of the appliance.
– do not put water directly into the hot
appliance.
– do not keep moist dishes and food in the
appliance after you finish the cooking.
– be careful when you remove or install the
accessories.
Section of the cable
(mm²)
4

• Discoloration of the enamel or stainless steel
has no effect on the performance of the
appliance.
• Use a deep pan for moist cakes. Fruit juices
cause stains that can be permanent.
• This appliance is for cooking purposes only. It
must not be used for other purposes, for
example room heating.
• Always cook with the oven door closed.
• If the appliance is installed behind a furniture
panel (e.g. a door) make sure the door is never
closed when the appliance is in operation. Heat
and moisture can build up behind a closed
furniture panel and cause subsequent damage
to the appliance, the housing unit or the floor.
Do not close the furniture panel until the
appliance has cooled down completely after
use.
CARE AND CLEANING
WARNING! Risk of injury, fire, or
damage to the appliance.
• Before maintenance, deactivate the appliance
and disconnect the mains plug from the mains
socket.
• Make sure the appliance is cold. There is the
risk that the glass panels can break.
• Replace immediately the door glass panels
when they are damaged. Contact the
Authorised Service Centre.
• Be careful when you remove the door from the
appliance. The door is heavy!
• Clean regularly the appliance to prevent the
deterioration of the surface material.
• Clean the appliance with a moist soft cloth. Only
use neutral detergents. Do not use any abrasive
products, abrasive cleaning pads, solvents or
metal objects.
• If you use an oven spray, follow the safety
instruction on it's packaging.
• Do not clean the catalytic enamel (if applicable)
with any kind of detergent.
INTERNAL LIGHTING
WARNING! Risk of electric shock.
• The type of light bulb or halogen lamp used for
this appliance is for household appliances only.
Do not use it for house lighting.
• Before replacing the lamp, disconnect the
appliance from the power supply.
• Only use lamps with the same specifications.
SERVICE
• To repair the appliance contact the Authorised
Service Centre.
• Use original spare parts only.
DISPOSAL
WARNING! Risk of injury or
suffocation.
• Disconnect the appliance from the mains
supply.
• Cut off the mains electrical cable close to the
appliance and dispose of it.
• Remove the door catch to prevent children or
pets from becoming trapped in the appliance.
INSTALLATION
WARNING! Refer to Safety chapters.
5

BUILDING IN
589
598
594
114
19
21540
570
558
min. 550
20
min. 560
3
9
600
min. 550
20
590
min. 560
589
598
594
114
19
21540
570
558
3
9
SECURING THE OVEN TO THE CABINET
6

PRODUCT DESCRIPTION
5
6
7
8
4
3
2
1
9
1 2 3 4
GENERAL OVERVIEW
Control panel
1
Knob for the heating functions
2
Control knob (for the temperature)
3
Temperature indicator / symbol
4
Air vents for the cooling fan
5
Heating element
6
Lamp
7
Fan
8
Shelf positions
9
ACCESSORIES
• Wire shelf
For cookware, cake tins, roasts.
BEFORE FIRST USE
WARNING! Refer to Safety chapters.
INITIAL CLEANING
Remove all accessories from the oven.
Refer to "Care and cleaning" chapter.
Clean the oven and the accessories before the first
use.
Put the accessories back to their initial position.
PREHEATING
Preheat the empty oven before first use.
DAILY USE
WARNING! Refer to Safety chapters.
• Baking tray
For cakes and biscuits.
1. Set the function .Set the maximum
temperature.
2. Let the oven operate for 1 hour.
3. Set the function . Set the maximum
temperature.
4. Let the oven operate for 15 minutes.
5. Turn off the oven and let it cool down.
Accessories can become hotter than usual. The
oven can emit an odour and smoke. Make sure that
the airflow in the room is sufficient.
7

OVEN FUNCTIONS
Oven func-
tion
Off posi-
tion
Light
Fan Cook-
ing
Conven-
tional
Cooking
(Top / Bot-
tom Heat)
Grilling
Application
The oven is off.
To turn on the lamp without a
cooking function.
To roast or roast and bake
food with the same cooking
temperature on more than one
shelf position, without flavour
transference.
To bake and roast food on one
shelf position.
To grill flat food and to toast
bread.
Oven func-
tion
Moist Fan
Baking
SETTING A HEATING FUNCTION
1. Turn the knob for the heating functions to
select a heating function.
2. Turn the control knob to select the
temperature.
The lamp turns on when the oven operates.
3. To turn off the oven, turn the knob for the
heating functions to the off position.
Application
This function is designed to
save energy during cooking.
For the cooking instructions refer to "Hints and tips" chapter,
Moist Fan Baking. The oven
door should be closed during
cooking so that the function is
not interrupted and to ensure
that the oven operates with the
highest energy efficiency possible. When you use this function, the temperature in the
cavity may differ from the set
temperature. The heating power may be reduced. For general
energy saving recommendations refer to "Energy Efficiency" chapter, Energy Saving.This function was used to
comply with the energy efficiency class according to EN
60350-1.
USING THE ACCESSORIES
WARNING! Refer to Safety chapters.
INSERTING THE ACCESSORIES
Wire shelf:
Push the shelf between the guide bars of the shelf
support and make sure that the feet point down.
8
Baking tray:
Push the baking tray between the guide bars of the
shelf support.

ADDITIONAL FUNCTIONS
COOLING FAN
When the oven operates, the cooling fan turns on
automatically to keep the surfaces of the oven cool.
If you turn off the oven, the cooling fan stops.
SAFETY THERMOSTAT
Incorrect operation of the oven or defective
components can cause dangerous overheating. To
HINTS AND TIPS
WARNING! Refer to Safety chapters.
The temperature and baking times in
the tables are guidelines only. They
depend on the recipes and the quality
and quantity of the ingredients used.
COOKING RECOMMENDATIONS
The oven has four shelf positions.
Count the shelf positions from the bottom of the
oven floor.
Your oven may bake or roast differently to the oven
you had before. The below tables provide you with
the standard settings for temperature, cooking time
and shelf position.
If you cannot find the settings for a special recipe,
look for the similar one.
The oven has a special system which circulates the
air and constantly recycles the steam. With this
system you can cook in a steamy environment and
keep the food soft inside and crusty outside. It
prevent this, the oven has a safety thermostat which
interrupts the power supply. The oven turns on
again automatically when the temperature drops.
decreases the cooking time and energy
consumption.
Baking cakes
Do not open the oven door before 3/4 of the set
cooking time is up.
If you use two baking trays at the same time, keep
one empty level between them.
Cooking meat and fish
Leave the meat for approximately 15 minutes before
carving so that the juice does not seep out.
To prevent too much smoke in the oven during
roasting, add some water into the deep pan. To
prevent the smoke condensation, add water each
time after it dries up.
Cooking times
Cooking times depend on the type of food, its
consistency, and volume.
Initially, monitor the performance when you cook.
Find the best settings (heat setting, cooking time,
etc.) for your cookware, recipes and quantities
when you use this appliance.
9

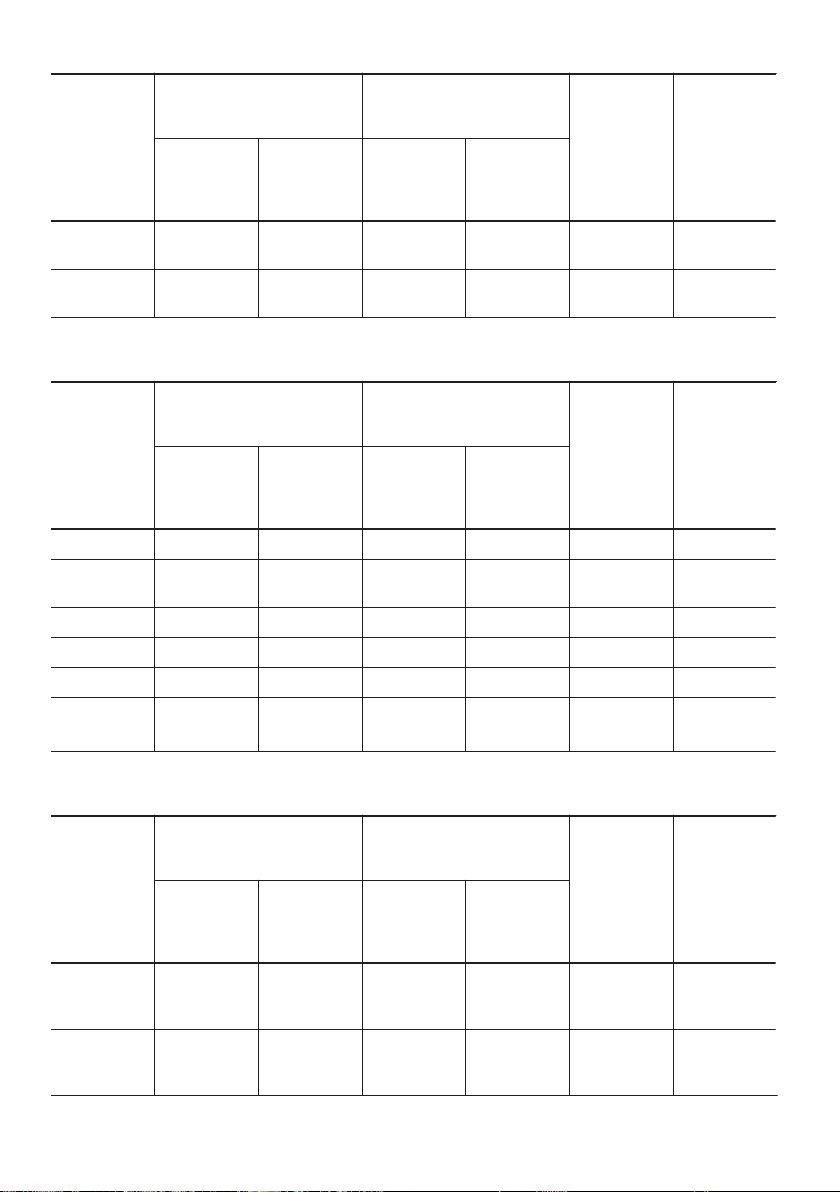
BAKING AND ROASTING TABLE
Cakes
Top / Bottom Heat Fan Cooking
Food
Whisked
recipes
Shortbread
Temperature
(°C)
Shelf posi-
tion
Temperature
(°C)
Shelf posi-
170 2 165 2 (1 and
3)
170 2 160 2 (1 and
3)
tion
Time (min) Comments
45 - 60 In a cake
mould
20 - 30 In a cake
mould
dough
Butter-milk
cheese
cake
Apple
cake (Apple pie)
170 1 165 2 70 - 80 In a 26 cm
cake
mould
170 1 160 2 (1 and
3)
80 - 100 In two 20
cm cake
moulds on
a wire
shelf
Strudel 175 2 150 2 60 - 80 In a baking
tray
Jam-tart 170 2 160 2 (1 and
3)
30 - 40 In a 26 cm
cake
mould
Fruit cake 170 2 155 2 50 - 60 In a 26 cm
cake
mould
Sponge
cake (Fatless
170 2 160 2 90 - 120 In a 26 cm
cake
mould
sponge
cake)
Christmas
cake /
Rich fruit
170 2 160 2 50 - 60 In a 20 cm
cake
mould
cake
Plum
1)
cake
Small
cakes
Biscuits
170 2 165 2 20 - 30 In a bread
170 3 166 3 (1 and
25 - 35 In a baking
3)
1) 150 3 140 3 (1 and
30 - 35 In a baking
3)
tin
tray
tray
10

Top / Bottom Heat Fan Cooking
Food
Temperature
(°C)
Shelf posi-
tion
Temperature
(°C)
Shelf posi-
tion
Time (min) Comments
Meringues 100 3 115 3 35 - 40 In a baking
tray
1) 190 3 180 3 80 - 100 In a baking
Buns
1) 190 3 180 3 (1 and
Choux
3)
15 - 20 In a baking
tray
tray
Plate tarts 180 3 170 2 25 - 35 In a 20 cm
cake
mould
Victoria
sandwich
180 1 or 2 170 2 45 - 70 Left +
right in a
20 cm
cake
mould
Rich fruit
cake
160 1 150 2 110 - 120 In a 24 cm
cake
mould
Victoria
sand-
1)
wich
170 1 160 1 50 - 60 In a 20 cm
cake
mould
1) Preheat the oven for 10 minutes.
Bread and pizza
Top / Bottom Heat Fan Cooking
Food
White
bread
1)
Temperature
(°C)
Shelf posi-
tion
Temperature
(°C)
Shelf posi-
tion
190 1 195 1 60 - 70 1 - 2
Time (min) Comments
pieces,
500 gr per
piece
Rye bread 190 1 190 1 30 - 45 In a bread
tin
Bread
rolls
1)
190 2 180 2 (1 and
3)
25 - 40 6 - 8 rolls
in a baking
tray
11
Top / Bottom Heat Fan Cooking
Food
Temperature
(°C)
1) 190 1 190 1 20 - 30 On a deep
Pizza
1) 200 3 190 2 10 – 20 In a baking
Scones
Shelf posi-
tion
Temperature
(°C)
Shelf posi-
tion
Time (min) Comments
pan
tray
1) Preheat the oven for 10 minutes.
Flans
Top / Bottom Heat Fan Cooking
Food
Temperature
(°C)
Shelf posi-
tion
Temperature
(°C)
Shelf posi-
tion
Time (min) Comments
Pasta flan 180 2 180 2 40 - 50 In a mould
Vegetable
200 2 200 2 45 - 60 In a mould
flan
Quiches 190 1 190 1 40 - 50 In a mould
Lasagne 200 2 200 2 25 - 40 In a mould
Cannelloni 200 2 200 2 25 - 40 In a mould
Yorkshire
pudding
220 2 210 2 20 - 30 6 pudding
1)
mould
1) Preheat the oven for 10 minutes.
Meat
Top / Bottom Heat Fan Cooking
Food
Temperature
(°C)
Shelf posi-
tion
Temperature
(°C)
Shelf posi-
tion
Time (min) Comments
Beef 200 2 190 2 50 - 70 On a wire
shelf and a
deep pan
Pork 180 2 180 2 90 - 120 On a wire
shelf and a
deep pan
12

Top / Bottom Heat Fan Cooking
Food
Temperature
(°C)
Veal 190 2 175 2 90 - 120 On a wire
English
roast beef
rare
English
roast beef
medium
English
roast beef
well done
Shoulder
of pork
Shin of
pork
Lamb 190 2 190 2 110 - 130 Leg
Chicken 200 2 200 2 70 - 85 Whole
Turkey 180 1 160 1 210 - 240 Whole
Duck 175 2 160 2 120 - 150 Whole
Goose 175 1 160 1 150 - 200 Whole
Rabbit 190 2 175 2 60 - 80 Cut in
Hare 190 2 175 2 150 - 200 Cut in
Pheasant 190 2 175 2 90 - 120 Whole
210 2 200 2 44 - 50 On a wire
210 2 200 2 51 - 55 On a wire
210 2 200 2 55 - 60 On a wire
180 2 170 2 120 - 150 On a deep
180 2 160 2 100 - 120 2 pieces
Shelf posi-
tion
Temperature
(°C)
Shelf posi-
tion
Time (min) Comments
shelf and a
deep pan
shelf and a
deep pan
shelf and a
deep pan
shelf and a
deep pan
pan
on a deep
pan
pieces
pieces
13

Fish
Top / Bottom Heat Fan Cooking
Food
Temperature
(°C)
Trout /
Sea bream
Tuna fish /
Salmon
GRILLING
Preheat the oven for 10 minutes.
Use the third position.
Fillet steaks 4 0.8 12 - 15 12 - 14
Beef steaks 4 0.6 10 - 12 6 - 8
Sausages 8 - 12 - 15 10 - 12
Pork chops 4 0.6 12 - 16 12 - 14
Chicken (cut in 2) 2 1 30 - 35 25 - 30
Kebabs 4 - 10 - 15 10 - 12
Breast of chicken 4 0.4 12 - 15 12 - 14
Hamburger 6 0.6 20 - 30 Fish fillet 4 0.4 12 - 14 10 - 12
Toasted sandwiches 4 - 6 - 5 - 7 Toast 4 - 6 - 2 - 4 2 - 3
190 2 175 2 (1 and
190 2 175 2 (1 and
Food
Shelf posi-
tion
Temperature
(°C)
Quantity Time (min)
Pieces Quantity (kg) 1st side 2nd side
Shelf posi-
tion
3)
3)
Set the temperature to 250 °C.
Time (min) Comments
40 - 55 3 - 4
35 - 60 4 - 6 fillets
fishes
MOIST FAN BAKING
For the best results follow suggestions listed in the
table below.
14

Food Accessories
Temperature
(°C)
Shelf posi-
tion
Time (min)
Sweet rolls, 12
pieces
Rolls, 9 pieces baking tray or dripping pan 180 2 35 - 40
Pizza, frozen,
0.35 kg
Swiss roll baking tray or dripping pan 170 2 30 - 40
Brownie baking tray or dripping pan 180 2 30 - 40
Soufflè, 6 pieces ceramic ramekins on wire
Sponge flan
base
Victoria Sandwich
Poached fish,
0.3 kg
Whole fish, 0.2
kg
Fish fillet, 0.3 kg pizza pan on wire shelf 180 3 35 - 45
Poached meat,
0.25 kg
Shashlik, 0.5 kg baking tray or dripping pan 200 3 25 - 35
Cookies, 16
pieces
Macaroons, 20
pieces
Muffins, 12
pieces
Savory pastry,
16 pieces
Short crust bis-
cuits, 20 pieces
Tartlets, 8
pieces
Poached vege-
tables, 0.4 kg
Vegetarian ome-
lette
baking tray or dripping pan 180 2 35 - 40
wire shelf 220 2 35 - 40
200 3 30 - 40
shelf
flan base tin on wire shelf 170 2 20 - 30
baking dish on wire shelf 170 2 35 - 45
baking tray or dripping pan 180 3 35 - 45
baking tray or dripping pan 180 3 35 - 45
baking tray or dripping pan 200 3 40 - 50
baking tray or dripping pan 180 2 20 - 30
baking tray or dripping pan 180 2 40 - 45
baking tray or dripping pan 170 2 30 - 40
baking tray or dripping pan 170 2 35 - 45
baking tray or dripping pan 150 2 40 - 50
baking tray or dripping pan 170 2 20 - 30
baking tray or dripping pan 180 3 35 - 40
pizza pan on wire shelf 200 3 30 - 45
15

Food Accessories
Temperature
(°C)
Shelf posi-
tion
Time (min)
Vegetables,
mediterrean 0.7
kg
INFORMATION FOR TEST INSTITUTES
Tests according to IEC 60350-1.
Food Function
Small
cake
Apple pie Conven-
Sponge
cake
Short
bread
Toast
4 - 6
pieces
Beef burger
6 pieces,
0.6 kg
baking tray or dripping pan 180 4 35 - 40
Accesso-
ries
Conventional
Cooking
tional
Cooking
Conventional
Cooking
Conventional
Cooking
Grilling Wire
Grilling Wire
Baking
tray
Wire
shelf
Wire
shelf
Baking
tray
shelf
shelf and
dripping
pan
Shelf
position
Tempera-
ture (°C)
3 170 20 - 30 Put 20 small
1 170 80 - 120 Use 2 tins (20 cm
2 170 35 - 45 Use a cake mould
3 150 20 - 35 Preheat the oven
3 max. 2 - 4 minutes
3 max. 20 - 30 Put the wire shelf
Time (min) Comments
cakes per one
baking tray.
diameter), diagonally shifted.
(26 cm diameter).
for 10 minutes.
first side; 2 - 3
minutes second side
Preheat the oven
for 3 minutes.
on the third level
and the dripping
pan on the second level of the
oven. Turn the
food halfway
through the cooking time.
Preheat the oven
for 3 minutes.
CARE AND CLEANING
WARNING! Refer to Safety chapters.
16
NOTES ON CLEANING
Clean the front of the oven with a soft cloth with
warm water and a mild cleaning agent.

To clean metal surfaces, use a dedicated cleaning
agent.
Clean the oven interior after each use. Fat
accumulation or other food remains may result in a
fire.
Clean all accessories after each use and let them
dry. Use a soft cloth with warm water and a
cleaning agent. Do not clean the accessories in the
dishwasher.
Clean stubborn dirt with a special oven cleaner.
If you have nonstick accessories, do not clean them
using aggressive agents, sharp-edged objects or a
dishwasher. It can cause damage to the nonstick
coating.
Moisture can condense in the oven or on the door
glass panels. To decrease the condensation,
operate the oven for 10 minutes before cooking.
Clean the moisture from the cavity after each use.
STAINLESS STEEL OR ALUMINIUM OVENS
Clean the oven door with a damp cloth or sponge
only. Dry it with a soft cloth.
Do not use steel wool, acids or abrasive materials
as they can damage the oven surface. Clean the
oven control panel with the same precautions.
CLEANING THE DOOR GASKET
Regularly do a check of the door gasket. The door
gasket is around the frame of the oven cavity. Do
not use the oven if the door gasket is damaged.
Contact an Authorised Service Centre.
To clean the door gasket, refer to the general
information about cleaning.
REMOVING AND INSTALLING DOOR
The oven door has two glass panels. You can
remove the oven door and the internal glass panel
to clean it. Read the whole "Removing and
installing door" instruction before you remove the
glass panels.
The oven door may close if you try to
remove the internal glass panel before
you remove the oven door.
2.
Lift and turn the levers fully on both hinges.
3. Close the oven door halfway to the first
opening position. Then lift and pull forward and
remove the door from its seat.
CAUTION! Do not use the oven
without the internal glass panel.
1. Open the door fully and hold both hinges.
4. Put the door on a soft cloth on a stable surface.
17

5. Release the locking system to remove the
90°
1
2
A
internal glass panel.
6. Turn the two fasteners by 90° and remove them
from their seats.
8. Clean the glass panels with water and soap.
Dry the glass panels carefully. Do not clean the
glass panels in the dishwasher.
When the cleaning is completed, install the glass
panel and the oven door.
When installed correctly the door trim clicks.
Make sure that you install the internal glass panel in
the seats correctly.
REPLACING THE LAMP
WARNING! Risk of electric shock.
The lamp can be hot.
1. Turn off the oven.
Wait until the oven is cooled down.
2. Disconnect the oven from the mains.
3. Put a cloth on the bottom of the cavity.
The back lamp
1. Turn the lamp glass cover to remove it.
2. Clean the glass cover.
3. Replace the lamp with a suitable 300 °C heat-
resistant lamp.
4. Install the glass cover.
7. First lift carefully and then remove the glass
panel.
18

TROUBLESHOOTING
WARNING! Refer to Safety chapters.
WHAT TO DO IF...
Problem Possible cause Remedy
The oven does not heat up. The oven is deactivated. Activate the oven.
The oven does not heat up. The fuse is blown. Make sure that the fuse is the
The lamp does not operate. The lamp is defective. Replace the lamp.
Steam and condensation settle
on the food and in the cavity of
the oven.
You left the dish in the oven for
too long.
cause of the malfunction. If the
fuse is blown again and again,
contact a qualified electrician.
Do not leave the dishes in the
oven for longer than 15 - 20
minutes after the cooking
process ends.
SERVICE DATA
If you cannot find a solution to the problem yourself,
contact your dealer or an Authorised Service
Centre.
The necessary data for the service centre is on the
rating plate. The rating plate is on the front frame of
We recommend that you write the data here:
Model (MOD.) .........................................
Product number (PNC) .........................................
Serial number (S.N.) .........................................
the oven cavity. Do not remove the rating plate from
the oven cavity.
ENERGY EFFICIENCY
ENERGY SAVING
The oven contains features which help
you save energy during everyday
cooking.
General hints
Make sure that the oven door is closed properly
when the oven operates. Do not open the door too
often during cooking. Keep the door gasket clean
and make sure it is well fixed in its position.
Use metal dishes to improve energy saving.
When possible, do not preheat the oven before you
put the food inside.
When the cooking duration is longer than 30
minutes, reduce the oven temperature to minimum
3 - 10 minutes before the end of the cooking time,
depending on the duration of the cooking. The
residual heat inside the oven will continue to cook.
Use the residual heat to warm up other dishes.
Keep breaks between baking as short as possible
when you prepare few dishes at one time.
19

Cooking with fan
When possible, use the cooking functions with fan
to save energy.
Keep food warm
Choose the lowest possible temperature setting to
use residual heat and keep a meal warm.
ENVIRONMENTAL CONCERNS
Moist Fan Baking
Function designed to save energy during cooking.
Recycle materials with the symbol . Put the
packaging in relevant containers to recycle it. Help
protect the environment and human health by
recycling waste of electrical and electronic
appliances. Do not dispose of appliances marked
with the symbol with the household waste.
Return the product to your local recycling facility or
contact your municipal office.
20

INFORMATION SUR LA SÉCURITÉ
Avant d'installer et d'utiliser cet appareil, lisez soigneusement les
instructions fournies. Le fabricant ne pourra être tenu pour
responsable des blessures et dégâts résultant d'une mauvaise
installation ou utilisation. Conservez toujours les instructions dans
un lieu sûr et accessible pour vous y référer ultérieurement.
SÉCURITÉ DES ENFANTS ET DES PERSONNES VULNÉRABLES
• Cet appareil peut être utilisé par des enfants de plus de 8 ans,
ainsi que des personnes dont les capacités physiques,
sensorielles et mentales sont réduites ou dont les
connaissances et l'expérience sont insuffisantes, à condition
d'être surveillés ou d'avoir reçu des instructions concernant
l'utilisation sécurisée de l'appareil et de comprendre les risques
encourus.
• Les enfants entre 3 et 8 ans et les personnes ayant un
handicap très important et complexe doivent être tenus à
l'écart, à moins d'être surveillés en permanence.
• Les enfants de moins de 3 ans doivent être tenus à l'écart, à
moins d'être surveillés en permanence.
• Ne laissez pas les enfants jouer avec l'appareil .
• Ne laissez pas les emballages à la portée des enfants et jetez-
les convenablement.
• Tenez les enfants et les animaux éloignés de l'appareil lorsqu'il
est en cours de fonctionnement ou lorsqu'il refroidit. Les parties
accessibles sont chaudes.
• Si l'appareil est équipé d'un dispositif de sécurité enfants, nous
vous recommandons de l'activer.
• Les enfants ne doivent pas nettoyer ni entreprendre une
opération de maintenance sur l'appareil sans surveillance.
SÉCURITÉ GÉNÉRALE
• L'appareil doit être installé et le câble remplacé uniquement par
un professionnel qualifié .
21

• AVERTISSEMENT : L'appareil et ses parties accessibles
deviennent chauds pendant son fonctionnement. Veillez à ne
pas toucher les éléments chauffants.
• Utilisez toujours des gants de cuisine pour retirer ou enfourner
des accessoires ou des plats allant au four.
• Avant d'effectuer une opération de maintenance, débranchez
l'appareil de la prise secteur.
• AVERTISSEMENT : Assurez-vous que l'appareil est éteint et
débranché avant de remplacer l'éclairage afin d'éviter tout
risque de choc électrique.
• N'utilisez pas l'appareil avant de l'avoir installé dans la structure
encastrée.
• N'utilisez pas de nettoyeur vapeur pour nettoyer l'appareil.
• N'utilisez pas de produits abrasifs ni de racloirs pointus en
métal pour nettoyer la porte en verre car ils peuvent rayer sa
surface, ce qui peut briser le verre.
• Si le câble d'alimentation est endommagé, il doit être remplacé
par le fabricant, un service de maintenance agréé ou un
technicien qualifié afin d'éviter tout danger lié à l'électricité.
CONSIGNES DE SÉCURITÉ
INSTALLATION
AVERTISSEMENT! L'appareil doit
être installé uniquement par un
professionnel qualifié.
• Retirez l'intégralité de l'emballage.
• N'installez pas et ne branchez pas un appareil
endommagé.
• Suivez scrupuleusement les instructions
d'installation fournies avec l'appareil.
• Soyez toujours vigilants lorsque vous déplacez
l'appareil car il est lourd. Utilisez toujours des
gants de sécurité et des chaussures fermées.
• Ne tirez jamais l'appareil par la poignée.
• Respectez l'espacement minimal requis par
rapport aux autres appareils et éléments.
• Installez l'appareil dans un lieu sûr et adapté
répondant aux exigences d'installation.
• Cet appareil est équipé d'un système de
refroidissement électrique. Il doit être utilisé
lorsque l'appareil est raccordé à une prise
secteur.
22
Hauteur minimale du
meuble (Hauteur minimale du meuble sous
le plan de travail)
Largeur du meuble 560 mm
Profondeur du meuble 550 (550) mm
Hauteur de l’avant de
l’appareil
Hauteur de l’arrière de
l’appareil
Largeur de l’avant de
l’appareil
Largeur de l’arrière de
l’appareil
Profondeur de l'appa-
reil
590 (600) mm
598 mm
579 mm
594 mm
558 mm
561 mm

Profondeur d’encastrement de l’appareil
Profondeur avec porte
ouverte
Dimensions minimales
de l’ouverture de ventilation. Ouverture placée sur la partie inférieure de la face arrière
Longueur du câble
d’alimentation secteur.
Le câble est placé
dans le coin droit de la
face arrière
Vis de montage 4x25 mm
BRANCHEMENT ÉLECTRIQUE
AVERTISSEMENT! Risque
d'incendie ou d'électrocution.
• L’ensemble des branchements électriques doit
être effectué par un technicien qualifié.
• L’appareil doit être relié à la terre.
• Vérifiez que les paramètres figurant sur la
plaque signalétique correspondent aux données
électriques de votre réseau.
• Utilisez une prise correctement installée et
protégée contre les chocs.
• L’appareil ne doit pas être raccordé à l’aide
d'une prise multiple ou d'un prolongateur.
• Veillez à ne pas endommager la fiche secteur ni
le câble d’alimentation. Le remplacement du
câble d’alimentation de l’appareil doit être
effectué par notre service après-vente agréé.
• Ne laissez pas les câbles d'alimentation entrer
en contact ou s'approcher de la porte de
l'appareil ou de la niche d'encastrement sous
l'appareil, particulièrement lorsqu'il est en
marche ou que la porte est chaude.
• La protection contre les chocs des parties sous
tension et isolées doit être fixée de telle manière
qu’elle ne puisse pas être enlevée sans outils.
• Ne branchez la fiche d’alimentation à la prise de
courant qu’à la fin de l’installation. Assurez-vous
que la prise principale est accessible une fois
l’appareil installé.
• Si la prise de courant est lâche, ne branchez
pas la fiche d'alimentation secteur.
• Ne tirez jamais sur le câble d’alimentation
électrique pour débrancher l’appareil. Tirez
toujours sur la fiche de la prise secteur.
• N’utiliser que des dispositifs d’isolation
corrects : coupe-circuits de protection de ligne,
540 mm
1007 mm
560x20 mm
1100 mm
fusibles. (les fusibles à visser doivent être retirés
du support), un disjoncteur différentiel et des
contacteurs.
• L'installation électrique doit être équipée d'un
dispositif d'isolement à coupure omnipolaire. Le
dispositif d'isolement doit présenter une
distance d'ouverture des contacts d'au moins
3 mm.
• Cet appareil n'est fourni qu'avec un câble
d'alimentation.
Types de câbles compatibles pour l'installa-
tion ou le remplacement pour l’Europe :
H07 RN-F, H05 RN-F, H05 RRF, H05 VV-F,
H05 V2V2-F (T90), H05 BB-F
Pour la section du câble, consultez la puissance
totale sur la plaque signalétique. Vous pouvez
également consulter le tableau :
Puissance totale (W)
maximum 1380 3 x 0.75
maximum 2300 3 x 1
maximum 3680 3 x 1.5
Le fil de masse (fil jaune/vert) doit faire 2 cm de
plus que les fils de phase et neutre (fils bleu et
marron).
UTILISATION
AVERTISSEMENT! Risque de
blessures, de brûlures, d'électrocution
ou d'explosion.
• Cet appareil est exclusivement destiné à une
utilisation domestique.
• Ne modifiez pas les caractéristiques de cet
appareil.
• Assurez-vous que les orifices de ventilation ne
sont pas bouchés.
• Ne laissez jamais l'appareil sans surveillance
pendant son fonctionnement.
• Éteignez l'appareil après chaque utilisation.
• Soyez prudent lors de l'ouverture de la porte de
l'appareil lorsque celui-ci est en fonctionnement.
De l'air brûlant peut s'en échapper.
• N'utilisez jamais cet appareil avec les mains
mouillées ou lorsqu'il est en contact avec de
l'eau.
Section du câble
(mm²)
23

• N'exercez jamais de pression sur la porte
ouverte.
• N'utilisez jamais l'appareil comme plan de travail
ou comme plan de stockage.
• Ouvrez prudemment la porte de l'appareil. Si
vous utilisez des ingrédients contenant de
l'alcool, un mélange d'alcool et d'air facilement
inflammable peut éventuellement se former.
• Ne laissez pas des étincelles ou des flammes
nues entrer en contact avec l'appareil lorsque
vous ouvrez la porte.
• Ne placez pas de produits inflammables ou
d'éléments imbibés de produits inflammables à
l'intérieur ou à proximité de l'appareil, ni sur
celui-ci.
AVERTISSEMENT! Risque
d'endommagement de l'appareil.
• Pour éviter tout endommagement ou
décoloration de l'émail :
– ne posez pas de plats allant au four ni
aucun autre objet directement sur le fond
de l'appareil.
– ne placez jamais de feuilles d'aluminium
directement sur le fond de la cavité de
l'appareil.
– ne versez jamais d'eau directement dans
l'appareil lorsqu'il est chaud.
– une fois la cuisson terminée, ne laissez
jamais d'aliments ou de plats humides à
l'intérieur de l'appareil.
– faites attention lorsque vous retirez ou
remettez en place les accessoires.
• La décoloration de l'émail ou de l'acier
inoxydable est sans effet sur les performances
de l'appareil.
• Utilisez un plat à rôtir pour obtenir des gâteaux
moelleux. Les jus de fruits causent des taches
qui peuvent être permanentes.
• Cet appareil est exclusivement destiné à un
usage culinaire. Ne l'utilisez pas pour des
usages autres que celui pour lequel il a été
conçu, à des fins de chauffage par exemple.
• La porte du four doit toujours être fermée
pendant la cuisson.
• Si l'appareil est installé derrière la paroi d'un
meuble (par ex. une porte), veuillez à ce que la
porte ne soit jamais fermée lorsque l'appareil est
en marche. La chaleur et l'humidité peuvent
s'accumuler derrière la porte fermée du meuble
et provoquer d'importants dégâts sur l'appareil,
le meuble ou le sol. Ne fermez pas la paroi du
meuble tant que l'appareil n'a pas complètement
refroidi.
ENTRETIEN ET NETTOYAGE
AVERTISSEMENT! Risque de
blessure, d'incendie ou de dommages
matériels sur l'appareil.
• Avant toute opération d'entretien, éteignez
l'appareil et débranchez la fiche de la prise
secteur.
• Vérifiez que l'appareil est froid. Les panneaux de
verre risquent de se briser.
• Remplacez immédiatement les vitres de la porte
si elles sont endommagées. Contactez le
service après-vente agréé.
• Soyez prudent lorsque vous démontez la porte
de l'appareil. La porte est lourde !
• Nettoyez régulièrement l'appareil afin de
maintenir le revêtement en bon état.
• Nettoyez l'appareil avec un chiffon doux humide.
Utilisez uniquement des produits de lavage
neutres. N'utilisez pas de produits abrasifs, de
tampons à récurer, de solvants ni d'objets
métalliques.
• Si vous utilisez un spray pour four, suivez les
consignes de sécurité figurant sur l'emballage.
• N'utilisez aucun produit détergent pour nettoyer
l'émail catalytique (le cas échéant).
ÉCLAIRAGE INTÉRIEUR
AVERTISSEMENT! Risque
d'électrocution !
• Les ampoules classiques ou halogènes utilisées
dans cet appareil sont destinées uniquement à
un usage avec des appareils ménagers. Ne les
utilisez pas pour éclairer votre logement.
• Avant de changer l'ampoule, débranchez
l'appareil de la prise secteur.
• N'utilisez que des ampoules ayant les mêmes
spécifications .
MAINTENANCE
• Pour réparer l'appareil, contactez un service
après-vente agréé.
• Utilisez exclusivement des pièces d'origine.
MISE AU REBUT
AVERTISSEMENT! Risque de
blessure ou d'asphyxie.
• Débranchez l'appareil de l'alimentation
électrique.
• Coupez le câble d'alimentation au ras de
l'appareil et mettez-le au rebut.
24

• Retirez le dispositif de verrouillage du hublot
589
598
594
114
19
21540
570
558
min. 550
20
min. 560
3
9
600
min. 550
20
590
min. 560
589
598
594
114
19
21540
570
558
3
9
pour empêcher les enfants et les animaux de
s'enfermer dans l'appareil.
INSTALLATION
AVERTISSEMENT! Reportez-vous
aux chapitres concernant la sécurité.
ENCASTREMENT
FIXATION DU FOUR AU MEUBLE
25

DESCRIPTION DE L'APPAREIL
5
6
7
8
4
3
2
1
9
1 2 3 4
VUE D'ENSEMBLE
Bandeau de commande
1
Manette de sélection des modes de cuisson
2
Thermostat
3
Indicateur / symbole de température
4
Orifices d'aération du ventilateur de
5
refroidissement
Résistance
6
Éclairage
7
Ventilateur
8
Position des grilles
9
ACCESSOIRES
• Grille métallique
Permet de poser des plats à rôti, à gratin et des
moules à gâteau/pâtisserie.
AVANT LA PREMIÈRE UTILISATION
AVERTISSEMENT! Reportez-vous
aux chapitres concernant la sécurité.
PREMIER NETTOYAGE
Retirez tous les accessoires du four.
Reportez-vous au chapitre « Entretien et
nettoyage ».
Nettoyez le four et les accessoires avant de les
utiliser pour la première fois.
Remettez les accessoires en place.
PRÉCHAUFFAGE
Préchauffez le four à vide avant de l'utiliser pour la
première fois.
UTILISATION QUOTIDIENNE
AVERTISSEMENT! Reportez-vous
aux chapitres concernant la sécurité.
• Plateau de cuisson
Pour la cuisson de gâteaux et de biscuits/
gâteaux secs.
1. Sélectionnez la fonction .Réglez la
température maximale.
2. Laissez le four en fonctionnement pendant
1 heure.
3. Réglez la fonction . Réglez la température
maximale.
4. Laissez le four en fonctionnement pendant
15 minutes.
5. Éteignez le four puis laissez-le refroidir.
Les accessoires peuvent chauffer plus que
d'habitude. Une odeur et de la fumée peuvent
s'échapper du four. Assurez-vous que la ventilation
dans la pièce est suffisante.
26

FONCTIONS DU FOUR
Fonction du
four
Le four est éteint.
Position
Arrêt
Pour allumer l'éclairage même
si aucune fonction de cuisson
Eclairage
Four
Chaleur
tournante
Convection
naturelle
(Voûte)
Gril
n'est sélectionnée.
Pour cuire ou rôtir simultanément sur plusieurs niveaux des
aliments nécessitant une température de cuisson identique,
sans que les saveurs ne se
mélangent.
Pour cuire et rôtir des aliments
sur un seul niveau.
Pour faire griller des aliments
peu épais et du pain.
Utilisation
Fonction du
four
Chaleur
Tournante
Humide
RÉGLAGE D'UN MODE DE CUISSON
1. Tournez la manette des modes de cuisson pour
sélectionner un mode de cuisson.
2. Tournez la manette pour sélectionner la
température.
L'éclairage s'allume lorsque l'appareil est en
marche.
3. Pour éteindre le four, tournez la manette des
modes de cuisson sur la position Arrêt.
Utilisation
Cette fonction est conçue pour
économiser de l'énergie en
cours de cuisson. Pour obtenir
des instructions de cuisson, reportez-vous au chapitre « Conseils », paragraphe Chaleur
Tournante Humide. Durant cette cuisson, la porte du four doit
rester fermée pour éviter d'interrompre la fonction, et pour
garantir une consommation
d'énergie optimale. Lorsque
vous utilisez cette fonction, la
température à l'intérieur de la
cavité peut différer de la température sélectionnée. Le niveau de cuisson peut être réduit. Pour obtenir des recommandations générales sur
l'économie d'énergie, consultez
le chapitre « Économies d'énergie », paragraphe « Efficacité
énergétique ».Cette fonction
est utilisée pour définir la classe d'efficacité énergétique selon la norme EN 60350-1.
UTILISATION DES ACCESSOIRES
AVERTISSEMENT! Reportez-vous
aux chapitres concernant la sécurité.
INSTALLATION DES ACCESSOIRES
Grille métallique :
Poussez la grille entre les barres de guidage des
supports de grille et assurez-vous que les pieds
sont orientés vers le bas.
Plateau de cuisson:
27

Poussez le plateau de cuisson entre les rails du
support de grille.
FONCTIONS SUPPLÉMENTAIRES
VENTILATEUR DE REFROIDISSEMENT
Lorsque le four fonctionne, le ventilateur de
refroidissement se met automatiquement en
marche pour refroidir les surfaces du four. Lorsque
vous éteignez le four, le ventilateur de
refroidissement s'arrête.
THERMOSTAT DE SÉCURITÉ
Un mauvais fonctionnement du four ou des
composants défectueux peuvent causer une
CONSEILS
AVERTISSEMENT! Reportez-vous
aux chapitres concernant la sécurité.
La température et les temps de
cuisson indiqués sont fournis
uniquement à titre indicatif. Ils varient
en fonction des recettes ainsi que de
la qualité et de la quantité des
ingrédients utilisés.
CONSEILS DE CUISSON
Le four dispose de quatre niveaux de grille.
Comptez les niveaux de grille à partir du bas du
four.
Votre four peut cuire les aliments d'une manière
complètement différente de celle de votre ancien
four. Les tableaux ci-dessous vous indiquent les
réglages standard pour la température, le temps de
cuisson et le niveau du four.
Si vous ne trouvez pas les réglages appropriés
pour une recette spécifique, cherchez-en une qui
s'en rapproche.
Le four est doté d'un système spécial qui permet à
l'air de circuler et qui recycle perpétuellement la
vapeur. Dans cet environnement, ce système
permet de cuisiner des plats tout en maintenant
surchauffe dangereuse. Pour éviter cela, le four
dispose d'un thermostat de sécurité interrompant
l'alimentation électrique. Le four se remet
automatiquement en fonctionnement lorsque la
température baisse.
ceux-ci tendres à l'intérieur et croquants à
l'extérieur. Le temps de cuisson et la consommation
énergétique sont donc réduits.
Cuisson de gâteaux
N'ouvrez la porte du four qu'aux 3/4 du temps de
cuisson.
Si vous utilisez deux plateaux de cuisson en même
temps, laissez un niveau libre entre les deux.
Cuisson de viande et de poisson
Avant de couper la viande, laissez-la reposer
pendant environ 15 minutes afin d'éviter que le jus
ne s'écoule.
Pour éviter qu'une trop grande quantité de fumée
ne se forme dans le four, ajoutez de l'eau dans le
plat à rôtir. Pour éviter que la fumée ne se
condense, ajoutez à nouveau de l'eau dans le plat à
rôtir à chaque fois qu'il n'en contient plus.
Temps de cuisson
Le temps de cuisson varie selon le type d'aliment,
sa consistance et son volume.
Au départ, surveillez la cuisson lorsque vous
cuisinez. Ainsi, vous trouverez les meilleurs
réglages (fonction, temps de cuisson, etc.) pour
vos ustensiles, vos recettes et les quantités lorsque
vous utiliserez l'appareil.
28

TABLEAU DE RÔTISSAGE ET DE CUISSON DES GÂTEAUX
Gâteaux
Voûte Chaleur tournante
Plat
Pâtes à
gâteaux
Température
(°C)
Positions
des grilles
Température
(°C)
Positions
des grilles
170 2 165 2 (1 et 3) 45 - 60 Dans un
Durée (min) Remarques
moule à
gâteau
Pâte sablée
170 2 160 2 (1 et 3) 20 - 30 Dans un
moule à
gâteau
Gâteau au
fromage
(au babeurre)
Tarte aux
pommes
170 1 165 2 70 - 80 Dans un
moule à
gâteau de
26 cm
170 1 160 2 (1 et 3) 80 - 100 Dans deux
moules à
gâteau de
20 cm sur
une grille
métallique
Strudel 175 2 150 2 60 - 80 Sur un
plateau de
cuisson
Tarte à la
confiture
170 2 160 2 (1 et 3) 30 - 40 Dans un
moule à
gâteau de
26 cm
Cake aux
fruits
170 2 155 2 50 - 60 Dans un
moule à
gâteau de
26 cm
Génoise/
Gâteau
Savoie
(version al-
170 2 160 2 90 - 120 Dans un
moule à
gâteau de
26 cm
légée)
Gâteau de
Noël/Cake
aux fruits
170 2 160 2 50 - 60 Dans un
moule à
gâteau de
20 cm
Gâteau
aux pru-
1)
nes
170 2 165 2 20 - 30 Dans un
moule à
pain
29

Voûte Chaleur tournante
Plat
Petits gâ-
Température
(°C)
Positions
des grilles
Température
(°C)
Positions
des grilles
170 3 166 3 (1 et 3) 25 - 35 Sur un
Durée (min) Remarques
teaux
Biscuits/
150 3 140 3 (1 et 3) 30 - 35 Sur un
Gâteaux
1)
secs
Meringues 100 3 115 3 35 - 40 Sur un
Petits
1)
pains
1) 190 3 180 3 (1 et 3) 15 - 20 Sur un
Choux
190 3 180 3 80 - 100 Sur un
Tourtes 180 3 170 2 25 - 35 Dans un
Gâteau à
180 1 ou 2 170 2 45 - 70 Gauche +
étages
Cake aux
160 1 150 2 110 - 120 Dans un
fruits
Gâteau à
étages
170 1 160 1 50 - 60 Dans un
1)
1) Préchauffez le four pendant 10 minutes.
plateau de
cuisson
plateau de
cuisson
plateau de
cuisson
plateau de
cuisson
plateau de
cuisson
moule à
gâteau de
20 cm
droit dans
un moule
à gâteau
de 20 cm
moule à
gâteau de
24 cm
moule à
gâteau de
20 cm
30

Pain et pizza
Voûte Chaleur tournante
Plat
Pain
blanc
Pain de
1)
Température
(°C)
Positions
des grilles
Température
(°C)
Positions
des grilles
190 1 195 1 60 - 70 1 à 2 piè-
190 1 190 1 30 - 45 Dans un
Durée (min) Remarques
seigle
Petits
1)
pains
1) 190 1 190 1 20 - 30 Dans un
Pizza
Scones
190 2 180 2 (1 et 3) 25 - 40 6 à 8 pe-
1) 200 3 190 2 10 – 20 Sur un
1) Préchauffez le four pendant 10 minutes.
Préparations à base d'œufs
Voûte Chaleur tournante
Plat
Température
(°C)
Positions
des grilles
Température
(°C)
Positions
des grilles
Durée (min) Remarques
ces, 500 g
par pièce
moule à
pain
tits pains
sur un plateau de
cuisson
plat à rôtir
plateau de
cuisson
Gratin de
pâtes
Gratin aux
légumes
180 2 180 2 40 - 50 Dans un
moule
200 2 200 2 45 - 60 Dans un
moule
Quiches 190 1 190 1 40 - 50 Dans un
moule
Lasagnes 200 2 200 2 25 - 40 Dans un
moule
Cannelloni 200 2 200 2 25 - 40 Dans un
moule
31

Voûte Chaleur tournante
Plat
« Yorkshire
pud-
1)
dings »
Température
(°C)
Positions
des grilles
Température
(°C)
Positions
des grilles
220 2 210 2 20 - 30 Moule
Durée (min) Remarques
pour
6 puddings
1) Préchauffez le four pendant 10 minutes.
Viande
Voûte Chaleur tournante
Plat
Température
(°C)
Positions
des grilles
Température
(°C)
Positions
des grilles
Durée (min) Remarques
Bœuf 200 2 190 2 50 - 70 Sur la gril-
le métallique et
dans un
plat à rôtir
Porc 180 2 180 2 90 - 120 Sur la gril-
le métallique et
dans un
plat à rôtir
Veau 190 2 175 2 90 - 120 Sur la gril-
le métallique et
dans un
plat à rôtir
Rôti de
bœuf, saignant
210 2 200 2 44 - 50 Sur la gril-
le métallique et
dans un
plat à rôtir
Rôti de
bœuf, à
point
210 2 200 2 51 - 55 Sur la gril-
le métallique et
dans un
plat à rôtir
32

Voûte Chaleur tournante
Plat
Température
(°C)
Rôti de
bœuf, bien
cuit
Épaule de
porc
Jarret de
porc
Agneau 190 2 190 2 110 - 130 Gigot
Poulet 200 2 200 2 70 - 85 Entier
Dinde 180 1 160 1 210 - 240 Entière
Canard 175 2 160 2 120 - 150 Entier
Oie 175 1 160 1 150 - 200 Entière
Lapin 190 2 175 2 60 - 80 En mor-
Lièvre 190 2 175 2 150 - 200 En mor-
Faisan 190 2 175 2 90 - 120 Entier
210 2 200 2 55 - 60 Sur la gril-
180 2 170 2 120 - 150 Dans un
180 2 160 2 100 - 120 2 pièces
Positions
des grilles
Température
(°C)
Positions
des grilles
Durée (min) Remarques
le métallique et
dans un
plat à rôtir
plat à rôtir
dans un
plat à rôtir
ceaux
ceaux
Poisson
Voûte Chaleur tournante
Plat
Température
(°C)
Truite/
daurade
Thon/
saumon
GRIL
Préchauffez le four pendant 10 minutes.
Utilisez le troisième niveau.
190 2 175 2 (1 et 3) 40 - 55 3 - 4 pois-
190 2 175 2 (1 et 3) 35 - 60 4 - 6 filets
Positions
des grilles
Température
(°C)
Réglez la température sur 250 °C.
Durée (min) Remarques
Positions
des grilles
sons
33

Quantité Durée (min)
Plat
Morceaux Quantité (kg) 1re face 2e face
Filet de bœuf 4 0.8 12 - 15 12 - 14
Steaks de bœuf 4 0.6 10 - 12 6 - 8
Saucisses 8 - 12 - 15 10 - 12
Côtelettes de porc 4 0.6 12 - 16 12 - 14
Poulet (coupé en deux) 2 1 30 - 35 25 - 30
Brochettes 4 - 10 - 15 10 - 12
Escalope de poulet 4 0.4 12 - 15 12 - 14
Steak haché 6 0.6 20 - 30 Filet de poisson 4 0.4 12 - 14 10 - 12
Sandwiches toastés 4 - 6 - 5 - 7 Toasts 4 - 6 - 2 - 4 2 - 3
CHALEUR TOURNANTE HUMIDE
Pour de meilleurs résultats, suivez les suggestions
indiquées dans le tableau ci-dessous.
Plat Accessoires
Petits pains
(12 morceaux)
Petits pains,
9 morceaux
Pizza surgelée,
0,35 kg
Gâteau roulé Plateau de cuisson ou plat
Brownie Plateau de cuisson ou plat
Soufflé, 6 pièces ramequins en céramique
Fond de tarte en
génoise
34
Plateau de cuisson ou plat
à rôtir
Plateau de cuisson ou plat
à rôtir
grille métallique 220 2 35 - 40
à rôtir
à rôtir
sur une grille métallique
moule à tarte sur une grille
métallique
Température
(°C)
180 2 35 - 40
180 2 35 - 40
170 2 30 - 40
180 2 30 - 40
200 3 30 - 40
170 2 20 - 30
Positions des
grilles
Durée (min)

Plat Accessoires
Température
(°C)
Positions des
grilles
Durée (min)
Gâteau à étages Plat de cuisson sur la grille
Poisson poché,
0,3 kg
Poisson entier
(0,2 kg)
Filets de poisson, 0,3 kg
Viande pochée,
0,25 kg
Chachlyk, 0,5 kg Plateau de cuisson ou plat
Cookies, 16 biscuits
Macarons,
20 biscuits
Muffins, 12 gâteaux
Petits fours,
16 morceaux
Biscuits sablés,
20 biscuits
Tartelettes,
8 gâteaux
Légumes pochés, 0,4 kg
Omelette végétarienne
Légumes méditerranéens,
0,7 kg
métallique
Plateau de cuisson ou plat
à rôtir
Plateau de cuisson ou plat
à rôtir
plaque à pizza sur la grille
métallique
Plateau de cuisson ou plat
à rôtir
à rôtir
Plateau de cuisson ou plat
à rôtir
Plateau de cuisson ou plat
à rôtir
Plateau de cuisson ou plat
à rôtir
Plateau de cuisson ou plat
à rôtir
Plateau de cuisson ou plat
à rôtir
Plateau de cuisson ou plat
à rôtir
Plateau de cuisson ou plat
à rôtir
plaque à pizza sur la grille
métallique
Plateau de cuisson ou plat
à rôtir
170 2 35 - 45
180 3 35 - 45
180 3 35 - 45
180 3 35 - 45
200 3 40 - 50
200 3 25 - 35
180 2 20 - 30
180 2 40 - 45
170 2 30 - 40
170 2 35 - 45
150 2 40 - 50
170 2 20 - 30
180 3 35 - 40
200 3 30 - 45
180 4 35 - 40
INFORMATIONS POUR LES INSTITUTS DE TEST
Tests conformément à la norme IEC 60350-1.
35

Plat Fonction
Accessoi-
res
Positions
des gril-
les
Tempéra-
ture (°C)
Durée (min) Remarques
Petit gâteau
Tourte
aux pommes
Génoise/
Gâteau
Savoie
Biscuits
sablés
Toasts
4 - 6 pièces
Steak haché
6 pièces,
0,6 kg
Convection
naturelle
Convection
naturelle
Convection
naturelle
Convection
naturelle
Gril Grille
Gril Grille
Plateau
de cuisson
Grille
métallique
Grille
métallique
Plateau
de cuisson
métallique
métallique et
lèchefrite
3 170 20 - 30 Déposez 20 petits
1 170 80 - 120 Utilisez 2 moules
2 170 35 - 45 Utilisez un moule
3 150 20 - 35 Préchauffez le four
3 max. 2 à 4 minutes
sur la première
face ; 2 à 3 minutes sur la
seconde face.
3 max. 20 - 30 Placez la grille
gâteaux sur un
plateau de cuisson.
(20 cm de diamètre) placés en diagonale.
à gâteau (26 cm
de diamètre).
pendant 10 minutes.
Préchauffez le four
pendant 3 minutes.
métallique sur le
troisième niveau et
la lèchefrite sur le
deuxième niveau
du four. Tournez
les aliments à micuisson.
Préchauffez le four
pendant 3 minutes.
ENTRETIEN ET NETTOYAGE
AVERTISSEMENT! Reportez-vous
aux chapitres concernant la sécurité.
REMARQUES CONCERNANT L'ENTRETIEN
Nettoyez la façade du four à l'aide d'une éponge
humide additionnée d'eau savonneuse tiède.
Utilisez un produit courant destiné au nettoyage
des surfaces en métal.
Nettoyez l'intérieur du four après chaque utilisation.
L'accumulation de graisses ou d'autres résidus
alimentaires peut provoquer un incendie.
36
Après chaque utilisation, lavez tous les accessoires
et séchez-les. Utilisez un chiffon doux additionné
d'eau chaude savonneuse. Ne lavez pas les
accessoires au lave-vaisselle.
En cas de salissures importantes, nettoyez à l'aide
de produits spécifiques pour four.
Si vous avez des accessoires anti-adhérents, ne les
nettoyez pas avec des produits agressifs, des
objets pointus ni au lave-vaisselle. Cela risque
d'endommager le revêtement anti-adhésif.
De l'humidité peut se déposer dans l'enceinte du
four ou sur les vitres de la porte. Pour réduire la

condensation, faites fonctionner le four pendant
10 minutes avant la cuisson.Éliminez l'humidité
dans la cavité après chaque utilisation.
FOURS EN ACIER INOXYDABLE OU EN ALUMINIUM
Nettoyez la porte uniquement avec une éponge ou
un chiffon humides. Séchez-la avec un chiffon
doux.
N'utilisez jamais de produits abrasifs ou acides ni
d'éponges métalliques car ils peuvent endommager
la surface du four. Nettoyez le bandeau de
commande du four en observant ces mêmes
recommandations.
NETTOYEZ LE JOINT D'ÉTANCHÉITÉ DE LA PORTE
Vérifiez régulièrement le joint d'étanchéité de la
porte. Le joint d'étanchéité de la porte est posé sur
l'encadrement de la cavité du four. N'utilisez pas le
four si le joint d'étanchéité de la porte est
endommagé. Faites appel à un service après-vente
agréé.
Pour le nettoyage du joint d'étanchéité de la porte,
consultez les informations générales concernant le
nettoyage.
RETRAIT ET INSTALLATION DE LA PORTE
La porte du four est dotée de deux panneaux de
verre. Vous pouvez retirer la porte du four ainsi que
le panneau de verre intérieur afin de le nettoyer.
Lisez toutes les instructions du chapitre « Retrait et
installation de la porte » avant de retirer les
panneaux de verre.
Si vous tentez d'extraire le panneau de
verre intérieur sans avoir au préalable
retiré la porte du four, celle-ci peut se
refermer brusquement.
ATTENTION! N'utilisez pas le four
sans le panneau de verre intérieur.
1. Ouvrez la porte entièrement et maintenez les
deux charnières.
Soulevez et tournez entièrement les leviers des
2.
deux charnières.
3. Fermez la porte du four à la première position
d'ouverture (mi-parcours). Puis soulevez et tirez
la porte vers l'avant et retirez-la de son
logement.
37

4. Déposez la porte sur une surface stable
90°
1
2
A
recouverte d'un tissu doux.
5. Désengagez le système de verrouillage pour
retirer le panneau de verre intérieur.
6. Faites pivoter les deux fixations de 90° et
retirez-les de leurs logements.
8. Nettoyez les panneaux de verre avec de l'eau
savonneuse. Séchez soigneusement les
panneaux de verre. Les rails télescopiques ne
passent pas au lave-vaisselle.
Une fois le nettoyage terminé, remettez le panneau
de verre et la porte du four en place.
Lorsque le cadre de la porte est installé
correctement, il émet un clic.
Veillez à installer correctement le panneau de verre
intérieur dans son logement.
REMPLACEMENT DE L'ÉCLAIRAGE
AVERTISSEMENT! Risque
d'électrocution !
L'ampoule peut être chaude.
1. Éteignez le four.
Attendez que le four ait refroidi.
2. Débranchez le four de l'alimentation secteur.
3. Placez un chiffon au fond de la cavité.
Éclairage arrière
1. Retirez le diffuseur en verre de l'ampoule en le
tournant.
2. Nettoyez le diffuseur en verre.
3. Remplacez l'ampoule par une ampoule
adéquate résistant à une température de
300 °C .
4. Replacez le diffuseur en verre.
7. Soulevez doucement puis sortez le panneau de
verre.
38

DÉPANNAGE
AVERTISSEMENT! Reportez-vous
aux chapitres concernant la sécurité.
EN CAS D'ANOMALIE DE FONCTIONNEMENT
Problème Cause probable Solution
Le four ne chauffe pas. Le four est éteint. Allumez le four.
Le four ne chauffe pas. Le fusible a disjoncté. Vérifiez que le fusible est bien
L'éclairage ne fonctionne pas. L'éclairage est défectueux. Remplacez l'ampoule.
De la vapeur et de la conden-
sation se forment sur les aliments et dans la cavité du four.
Le plat est resté trop longtemps dans le four.
la cause de l'anomalie. Si les
fusibles disjonctent de manière
répétée, faites appel à un électricien qualifié.
Ne laissez pas les plats dans le
four pendant plus de 15 à
20 minutes après la fin de la
cuisson.
DONNÉES DE MAINTENANCE
Si vous ne trouvez pas de solution au problème,
veuillez contacter votre revendeur ou un service
après-vente agréé.
Les informations à fournir au service après-vente
figurent sur la plaque signalétique. La plaque
Nous vous recommandons de noter ces informations ici :
Modèle (MOD.) .........................................
Référence du produit (PNC) .........................................
Numéro de série (S.N.) .........................................
signalétique se trouve sur l'encadrement avant de la
cavité du four. Ne retirez pas la plaque signalétique
de la cavité du four.
RENDEMENT ÉNERGÉTIQUE
ÉCONOMIE D'ÉNERGIE
Ce four est doté de caractéristiques
qui vous permettent d'économiser de
l'énergie lors de votre cuisine au
quotidien.
Conseils généraux
Assurez-vous que la porte du four est correctement
fermée lorsque le four est en marche. En cours de
la cuisson, n'ouvrez pas la porte. Nettoyez
régulièrement le joint de la porte pour qu'il reste
propre et assurez-vous qu'il est toujours bien fixé,
dans la bonne position.
Utilisez des plats en métal pour augmenter les
économies d'énergie .
Si possible, ne préchauffez pas le four avant d'y
introduire vos aliments.
Si la cuisson doit durer plus de 30 minutes,
réduisez la température du four au minimum 3 à
10 minutes avant la fin de la cuisson, en fonction
39

de la durée de la cuisson. La chaleur résiduelle à
l'intérieur du four poursuivra la cuisson.
Utilisez la chaleur résiduelle pour réchauffer
d'autres plats.
Lorsque vous cuisez plusieurs plats les uns après
les autres, veillez à ne pas trop espacer les
cuissons.
Maintien des aliments au chaud
Sélectionnez la température la plus basse possible
pour utiliser la chaleur résiduelle et maintenir le
repas au chaud.
Chaleur Tournante Humide
Fonction conçue pour économiser de l'énergie en
cours de cuisson.
Cuisson avec ventilation
Si possible, utilisez les fonctions de cuisson avec la
ventilation pour économiser de l'énergie.
EN MATIÈRE DE PROTECTION DE L'ENVIRONNEMENT
Recyclez les matériaux portant le symbole .
Déposez les emballages dans les conteneurs
prévus à cet effet. Contribuez à la protection de
l'environnement et à votre sécurité, recyclez vos
produits électriques et électroniques. Ne jetez pas
les appareils portant le symbole avec les ordures
ménagères. Emmenez un tel produit dans votre
centre local de recyclage ou contactez vos services
municipaux.
40
*

414243


WWW.ZANUSSI.COM/SHOP
867348973-B-172019
 Loading...