

Zanussi ZFC26400WA INSTRUCTION BOOKLET
GETTING
STARTED?
EASY.
User Manual
ZFC26400WA
EN User Manual 2
Chest Freezer
FR Notice d'utilisation 13
Congélateur coffre
DE Benutzerinformation 25
Gefriertruhe

SAFETY INFORMATION
Before the installation and use of the appliance, carefully read the
supplied instructions. The manufacturer is not responsible for any
injuries or damages that are the result of incorrect installation or
usage. Always keep the instructions in a safe and accessible
location for future reference.
CHILDREN AND VULNERABLE PEOPLE SAFETY
• This appliance can be used by children aged from 8 years and
above and persons with reduced physical, sensory or mental
capabilities or lack of experience and knowledge if they have
been given supervision or instruction concerning the use of the
appliance in a safe way and understand the hazards involved.
• Children between 3 and 8 years of age and persons with very
extensive and complex disabilities shall be kept away from the
appliance unless continuously supervised.
• Children of less than 3 years of age should be kept away from
the appliance unless continuously supervised.
• Do not let children play with the appliance.
• Children shall not carry out cleaning and user maintenance of
the appliance without supervision.
• Keep all packaging away from children and dispose of it
appropriately.
GENERAL SAFETY
• This appliance is intended to be used in household and similar
applications such as:
– Farm houses; staff kitchen areas in shops, offices and other
working environments
– By clients in hotels, motels, bed and breakfast and other
residential type environments
• WARNING: Keep ventilation openings, in the appliance
enclosure or in the built-in structure, clear of obstruction.
• WARNING: Do not use mechanical devices or other means to
accelerate the defrosting process, other than those
recommended by the manufacturer.
2
• WARNING: Do not damage the refrigerant circuit.
• WARNING: Do not use electrical appliances inside the food
storage compartments of the appliance, unless they are of the
type recommended by the manufacturer.
• Do not use water spray and steam to clean the appliance.
• Clean the appliance with a moist soft cloth. Only use neutral
detergents. Do not use abrasive products, abrasive cleaning
pads, solvents or metal objects.
• Do not store explosive substances such as aerosol cans with a
flammable propellant in this appliance.
• If the supply cord is damaged, it must be replaced by the
manufacturer, its Authorised Service Centre or similarly
qualified persons in order to avoid a hazard.
SAFETY INSTRUCTIONS
INSTALLATION
WARNING! Only a qualified person
must install this appliance.
• Remove all the packaging.
• Do not install or use a damaged appliance.
• Follow the installation instructions supplied with
the appliance.
• Always take care when moving the appliance as
it is heavy. Always use safety gloves and
enclosed footwear.
• Make sure the air can circulate around the
appliance.
• At first installation or after reversing the door
wait at least 4 hours before connecting the
appliance to the power supply. This is to allow
the oil to flow back in the compressor.
• Before carrying out any operations on the
appliance (e.g. reversing the door), remove the
plug from the power socket.
• Do not install the appliance close to radiators or
cookers, ovens or hobs.
• Do not expose the appliance to the rain.
• Do not install the appliance where there is direct
sunlight.
• Do not install this appliance in areas that are too
humid or too cold.
• When you move the appliance, lift it by the front
edge to avoid scratching the floor.
ELECTRICAL CONNECTION
WARNING! Risk of fire and electric
shock.
WARNING! When positioning the
appliance, ensure the supply cord is
not trapped or damaged.
WARNING! Do not use multi-plug
adapters and extension cables.
• The appliance must be earthed.
• Make sure that the parameters on the rating
plate are compatible with the electrical ratings
of the mains power supply.
• Always use a correctly installed shockproof
socket.
• Make sure not to cause damage to the electrical
components (e.g. mains plug, mains cable,
compressor). Contact the Authorised Service
Centre or an electrician to change the electrical
components.
• The mains cable must stay below the level of the
mains plug.
• Connect the mains plug to the mains socket
only at the end of the installation. Make sure that
there is access to the mains plug after the
installation.
• Do not pull the mains cable to disconnect the
appliance. Always pull the mains plug.
3
USE
WARNING! Risk of injury, burns,
electric shock or fire.
The appliance contains flammable gas,
isobutane (R600a), a natural gas with a high level
of environmental compatibility. Be careful not to
cause damage to the refrigerant circuit containing
isobutane.
• Do not change the specification of this
appliance.
• Do not put electrical appliances (e.g. ice cream
makers) in the appliance unless they are stated
applicable by the manufacturer.
• If damage occurs to the refrigerant circuit, make
sure that there are no flames and sources of
ignition in the room. Ventilate the room.
• Do not let hot items to touch the plastic parts of
the appliance.
• Do not put soft drinks in the freezer
compartment. This will create pressure on the
drink container.
• Do not store flammable gas and liquid in the
appliance.
• Do not put flammable products or items that are
wet with flammable products in, near or on the
appliance.
• Do not touch the compressor or the condenser.
They are hot.
• Do not remove or touch items from the freezer
compartment if your hands are wet or damp.
• Do not freeze again food that has been thawed.
• Follow the storage instructions on the
packaging of frozen food.
• Wrap the food in any food contact material
before putting it in the freezer compartment.
INTERNAL LIGHTING
WARNING! Risk of electric shock.
• The type of lamp used for this appliance is for
household appliances only. Do not use it for
house lighting.
CARE AND CLEANING
WARNING! Risk of injury or damage
to the appliance.
• Before maintenance, deactivate the appliance
and disconnect the mains plug from the mains
socket.
• This appliance contains hydrocarbons in the
cooling unit. Only a qualified person must do the
maintenance and the recharging of the unit.
• Regularly examine the drain of the appliance and
if necessary, clean it. If the drain is blocked,
defrosted water collects in the bottom of the
appliance.
SERVICE
• To repair the appliance contact the Authorised
Service Centre.
• Use original spare parts only.
DISPOSAL
WARNING! Risk of injury or
suffocation.
• Disconnect the appliance from the mains
supply.
• Cut off the mains cable and discard it.
• Remove the door to prevent children and pets
to be closed inside of the appliance.
• The refrigerant circuit and the insulation
materials of this appliance are ozone-friendly.
• The insulation foam contains flammable gas.
Contact your municipal authority for information
on how to discard the appliance correctly.
• Do not cause damage to the part of the cooling
unit that is near the heat exchanger.
INSTALLATION
WARNING! Refer to Safety chapters.
POSITIONING
This appliance can be installed in a dry, well
ventilated indoor where the ambient temperature
corresponds to the climate class indicated on the
rating plate of the appliance:
4
Climate
class
SN +10°C to + 32°C
N +16°C to + 32°C
Ambient temperature
Climate
21 3
2
3
4
5
6
7
1
0
B
C
A
20
3
4
5
6
7
1
class
Ambient temperature
ST +16°C to + 38°C
T +16°C to + 43°C
Some functional problems might occur
for some types of models when
operating outside of that range. The
correct operation can only be
guaranteed within the specified
temperature range. If you have any
doubts regarding where to install the
appliance, please turn to the vendor,
to our customer service or to the
nearest Authorised Service Centre.
The plug should be accessible after
installation.
ELECTRICAL CONNECTION
• Before plugging in, ensure that the voltage and
frequency shown on the rating plate correspond
to your domestic power supply.
OPERATION
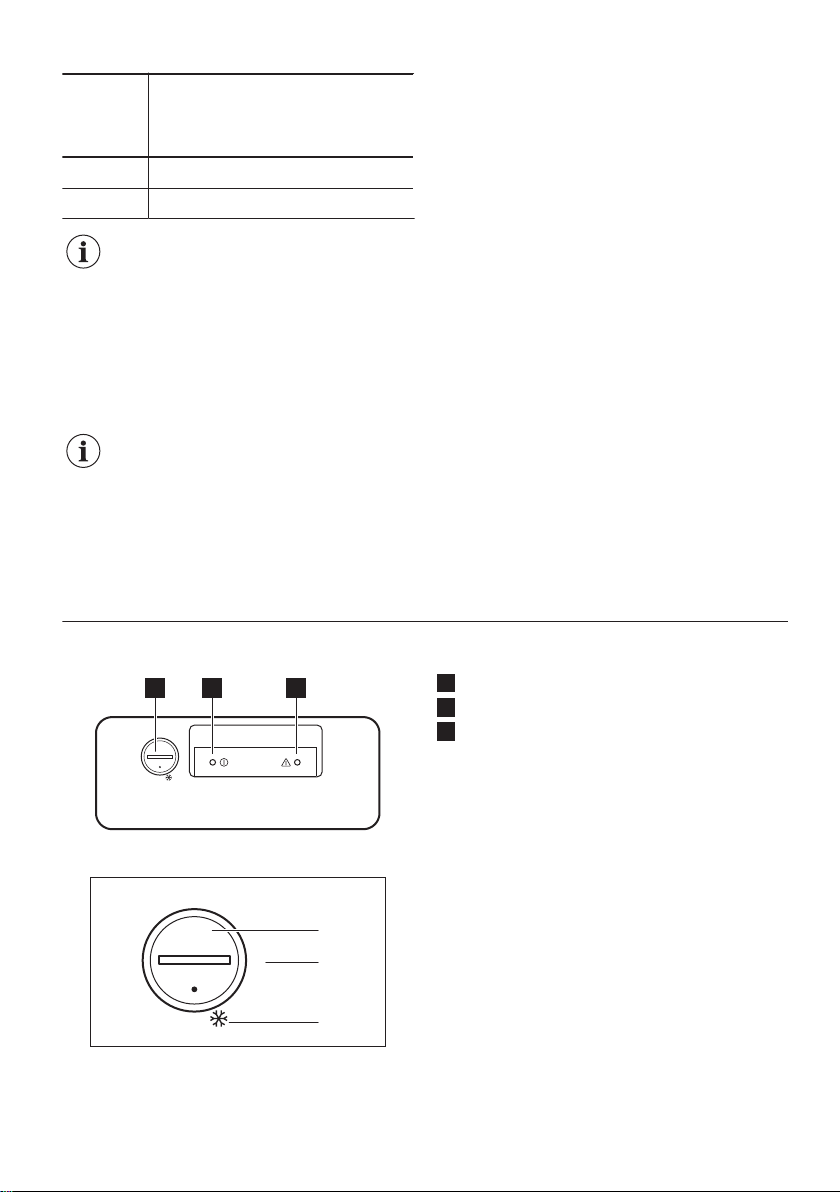
CONTROL PANEL
• The appliance must be earthed. The power
supply cable plug is provided with a contact for
this purpose. If the domestic power supply
socket is not earthed, connect the appliance to
a separate earth in compliance with current
regulations, consulting a qualified electrician.
• The manufacturer declines all responsibility if
the above safety precautions are not observed.
• This appliance complies with the E.E.C.
Directives.
VENTILATION REQUIREMENTS
The airflow behind the appliance must be sufficient.
1. Put the freezer in horizontal position on a firm
surface. The cabinet must be on all four feet.
2. Make sure that the clearance between the
appliance and rear wall is 5 cm.
3. Make sure that the clearance between the
appliance and the sides is 5 cm.
Temperature regulator
1
Power indicator light
2
High temperature alarm light
3
A. Temperature Regulator
B. Half Loaded position
C. Full Loaded position
5
SWITCHING ON
1. Insert the plug into the wall socket.
2. Turn the Temperature Regulator to the Full
Loaded position and let the appliance run for
24 hours to allow the correct temperature to be
reached before placing food inside. The power
indicator light will light up.
3. Adjust the Temperature Regulator according to
the quantity of the stored foods.
SWITCHING OFF
Turn the Temperature regulator to the "0" position.
TEMPERATURE REGULATION
The temperature within the appliance is controlled
by the Temperature Regulator situated on the
control panel.
To operate the appliance, proceed as follows:
• to obtain a lower temperature inside the
appliance, turn the Temperature Regulator
clockwise.
• to obtain a higher temperature inside the
appliance, turn the Temperature Regulator
counterclockwise .
DAILY USE
In case of freezing less food volumes,
the Half Loaded setting is the most
suitable. In case of freezing large
amounts of food, the Full Loaded
setting is the most suitable (refer to
"Switching on").
However, the exact setting should be
chosen keeping in mind that the
temperature inside the appliance
depends on:
• room temperature
• how often the lid is opened
• the quantity of food stored
• the location of the appliance.
HIGH TEMPERATURE ALARM
An increase in the temperature in the freezer (for
example due to a power failure) is indicated by
switching on of the Alarm light .
During the alarm phase, do not place food inside
the freezer.
When normal conditions are restored, the Alarm
light will switch off automatically.
WARNING! Refer to Safety chapters.
FREEZING FRESH FOOD
The freezer compartment is suitable for freezing
fresh food and storing frozen and deep-frozen food
for a long time.
The maximum amount of food that can be frozen in
24 hours is specified on the rating plate (refer to
"Technical data").
The freezing process lasts 24 hours: during this
period do not add other food to be frozen.
STORAGE OF FROZEN FOOD
When first starting-up or after a period out of use,
before putting the products in the compartment let
the appliance run at least 24 hours Temperature
Regulator to the Full Loaded position.
6
CAUTION! In the event of accidental
defrosting, for example due to a power
failure, if the power has been off for
longer than the value shown in the
technical characteristics chart under
"rising time", the defrosted food must
be consumed quickly or cooked
immediately and then re-frozen (after
cooling).
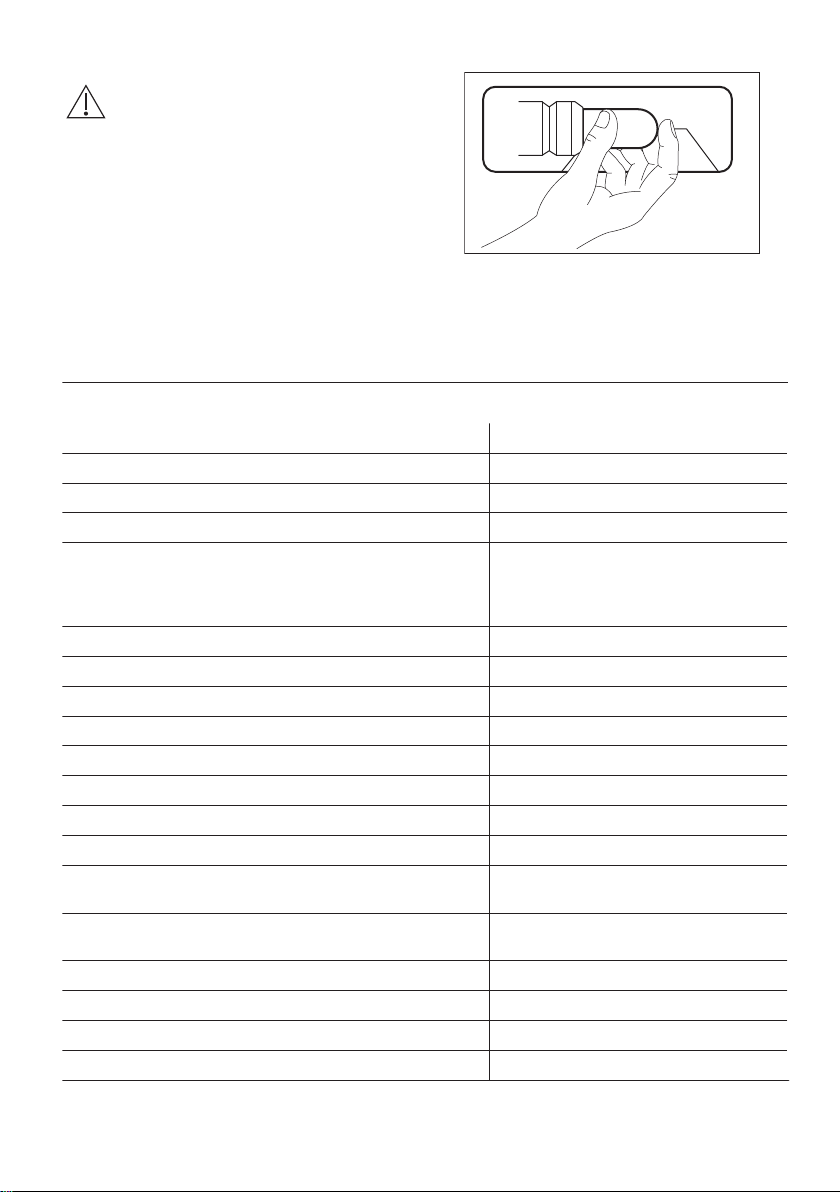
OPENING AND CLOSING THE LID
CAUTION! Never pull the handle with
immense force.
As the lid is equipped with a tightly closing seal, it
is not easy to reopen it shortly after closing (due to
the vacuum formed inside). Wait for few minutes
before reopening the appliance.
The vacuum valve will help you to open the lid.
FREEZING CALENDAR
The symbols show different types of frozen goods.
The numbers indicate storage times in months for
the appropriate types of frozen goods. Whether the
upper or lower value of the indicated storage time
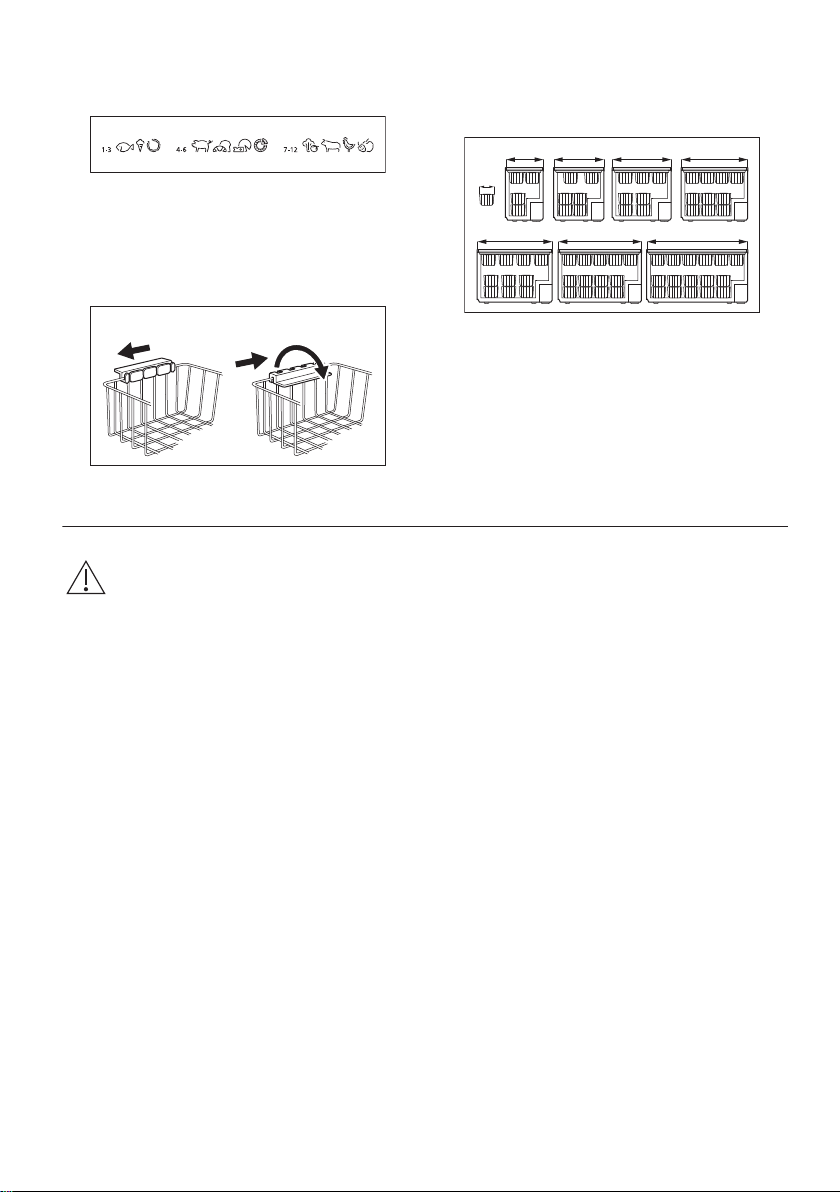
is valid depends on the quality of the foods and
A B
230
806606 946 1061
1201 1336 1611
treating before freezing.
STORAGE BASKETS
Hang the baskets on the upper edge of the freezer
(A) or place them inside the freezer (B). Turn and fix
the handles for these two positions as shown in the
picture.
HINTS AND TIPS
The following pictures show how many baskets can
be placed inside the various freezer models.
The baskets will slide into each other.
You can purchase additional baskets from your
local Authorised Service Centre.
WARNING! Refer to Safety chapters.
HINTS FOR FREEZING
To help you make the most of the freezing process,
here are some hints:
• The maximum quantity of food which can be
frozen in 24 hours is shown on the rating plate.
• The freezing process takes 24 hours. No further
food to be frozen should be added during this
period.
• Freeze only top quality, fresh and thoroughly
cleaned foodstuffs.
• Prepare food in small portions to enable it to be
rapidly and completely frozen and to make it
possible subsequently to thaw only the quantity
required.
• Wrap up the food in aluminium foil or polythene
and make sure that the packages are airtight.
• Do not allow fresh, unfrozen food to touch food
which is already frozen, thus avoiding a rise in
temperature of the latter.
• Lean foods store better and longer than fatty
ones; salt reduces the storage life of food.
• Water ices, if consumed immediately after
removal from the freezer compartment, can
possibly cause the skin to be freeze burnt.
• It is advisable to show the freezing in date on
each individual pack to enable you to keep tab
of the storage time.
HINTS FOR STORAGE OF FROZEN FOOD
To obtain the best performance from this appliance,
you should:
• make sure that the commercially frozen
foodstuffs were adequately stored by the
retailer;
• be sure that frozen foodstuffs are transferred
from the store to the freezer in the shortest
possible time;
• not open the lid frequently or leave it open
longer than absolutely necessary.
• Once defrosted, food deteriorates rapidly and
cannot be refrozen.
• Do not exceed the storage period indicated by
the food manufacturer.
7
CARE AND CLEANING
WARNING! Refer to Safety chapters.
CLEANING THE INTERIOR
Before using the appliance for the first time, the
interior and all internal accessories should be
washed with lukewarm water and some neutral
soap to remove the typical smell of a brand-new
product, then dried thoroughly.
CAUTION! Do not use detergents,
abrasive powders, chlorine or oilbased cleaners as they will damage
the finish.
PERIODIC CLEANING
CAUTION! Unplug the appliance
before carrying out any maintenance
operation.
Do not use detergents, abrasive
products, highly perfumed cleaning
products or wax polishes to clean the
inner side of the appliance.
Prevent damage to the cooling system.
There is no need to clean the
compressor area.
1. Switch off the appliance.
2. Regularly clean the appliance and the
accessories with warm water and neutral soap.
Clean the lid seal carefully.
3. Fully dry the appliance.
4. Connect the mains plug to the mains socket.
5. Switch on the appliance.
DEFROSTING THE FREEZER
CAUTION! Never use sharp metal
tools to scrape off frost as you could
damage the appliance. Do not use a
mechanical device or any artificial
means to speed up the thawing
process (other than those
recommended by the manufacturer). A
temperature rise of the frozen food
packs, during defrosting, may shorten
their safe storage life.
The amount of frost on the walls of the
appliance will be increased by the high
level of the outer environment humidity
and if the frozen food is not wrapped
properly.
Defrost the freezer when the frost layer reaches a
thickness of about 10-15 mm.
1. Switch off the appliance.
2. Remove any stored food, wrap it in several
layers of newspaper and put it in a cool place.
3. Leave the lid open, remove the plug from the
defrost water drain and collect all defrost water
on a tray.
4. When defrosting is completed, dry the interior
thoroughly and refit the plug.
5. Switch on the appliance.
6. Set the temperature regulator to obtain the
maximum coldness and run the appliance for
two or three hours using this setting.
7. Reload the previously removed food into the
compartment.
PERIODS OF NON-OPERATION
When the appliance is not in use for long periods,
take the following precautions:
1. Switch off the appliance and disconnect the
appliance from electricity supply.
2. Remove all food
3. Defrost and clean the appliance and all
accessories.
4. Leave the lid open to prevent unpleasant
smells.
If the cabinet will be kept on, ask
somebody to check it once in a while
to prevent the food inside from
spoiling in case of a power failure.
8
TROUBLESHOOTING
WARNING! Refer to Safety chapters.
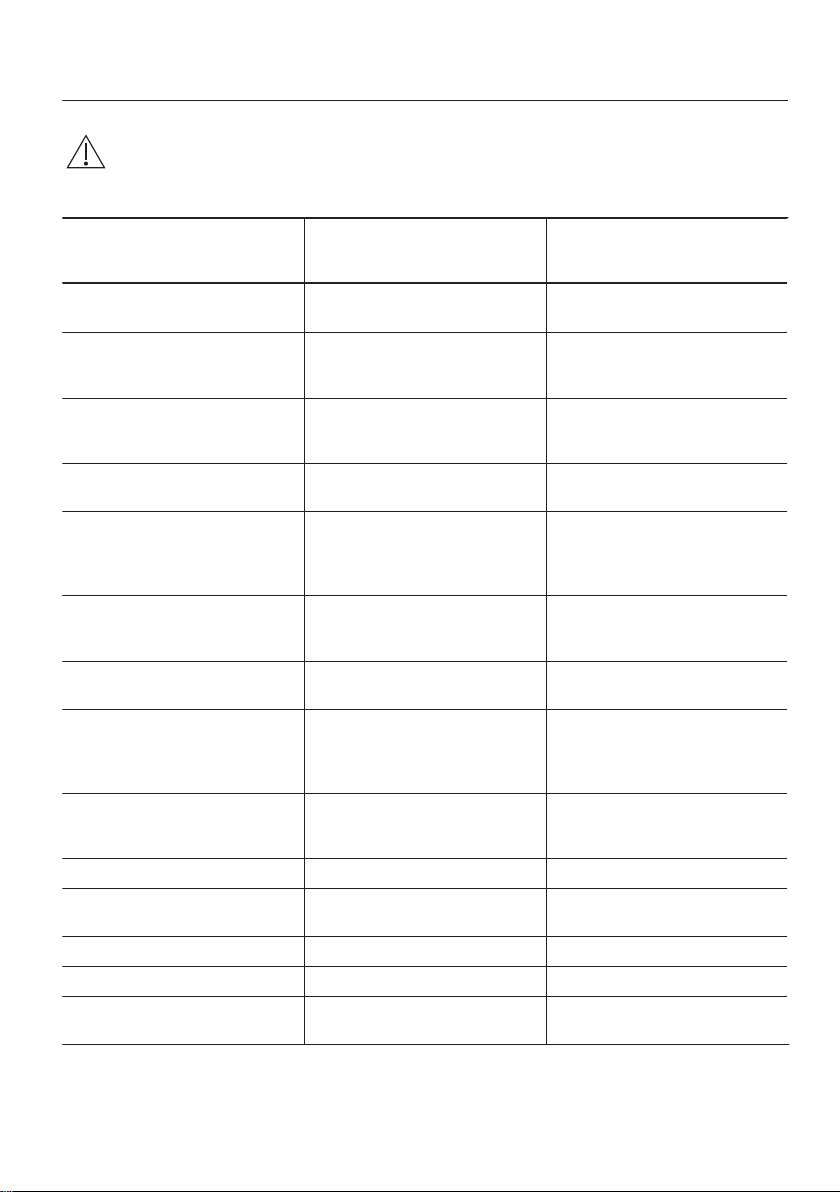
WHAT TO DO IF...
Problem Possible cause Solution
The appliance does not operate.
The mains plug is not connec-
There is no voltage in the
The appliance is noisy. The appliance is not supported
Audible or visual alarm is on. The cabinet has been recently
Large quantities of food to be
The lid has been left open for a
Power indicator light is flashing.
The lid doesn't close completely.
The lid is difficult to open. The lid gaskets are dirty or
The lamp does not work. The lamp is defective. Refer to "Replacing the lamp".
The compressor operates con-
tinually.
The appliance is switched off. Switch on the appliance.
ted to the mains socket correctly.
mains socket.
properly.
switched on or the temperature
in the appliance is too high.
frozen were inserted at the
same time.
long time.
An error has occurred in meas-
uring the temperature or the
appliance is not working properly.
Food packages are blocking
the lid.
There is excessive frost. Eliminate excess frost.
sticky.
The valve is blocked. Check the valve.
Temperature is set incorrectly. Refer to "Operation" chapter.
Connect the mains plug to the
mains socket correctly.
Connect to a different electrical mains socket. Contact a
qualified electrician.
Check if the appliance stands
stable.
Refer to "High Temperature
Alarm" and if the problem still
occurs contact the nearest Authorized Service Centre.
Wait a few hours and then
check the temperature again.
Open the lid only if necessary.
Contact the nearest Authorized Service Centre.
Arrange the packages in the
right way, see the sticker in the
appliance.
Clean the lid gaskets.
9
Problem Possible cause Solution
Large quantities of food to be
The room temperature is too
Food placed in the appliance
The lid is not closed properly. Check if the lid closes well and
There is too much frost and
ice.
The temperature in the appliance is too low/too high.
The lid is not closed correctly. Refer to "Opening and closing
The products' temperature is
Many products are stored at
The lid has been opened often. Open the lid only if necessary.
Products to be frozen are
frozen were inserted at the
same time.
high.
was too warm.
The lid is not closed correctly
or the gasket is deformed/dirty.
The water drainage plug is not
correctly positioned.
Temperature is set incorrectly. Refer to "Operation" chapter.
The temperature regulator is
not set correctly.
too high.
the same time.
The thickness of the frost is
greater than 4-5 mm.
placed too closely to each other.
Wait a few hours and then
check the temperature again.
Refer to climate class chart on
the rating plate.
Allow food to cool to room
temperature before storing.
the gaskets are undamaged
and clean.
Refer to "Opening and closing
the lid".
Position the water drainage
plug in the correct way.
Set a higher/lower temperature.
the lid".
Let the product temperature
decrease to room temperature
before storage.
Store less products at the
same time.
Defrost the appliance.
Make sure that there is cold air
circulation in the appliance.
CUSTOMER SERVICE
If your appliance is still not working properly after
making the above checks, contact the nearest
Authorised Service Centre.
To obtain fast service, it is essential that when you
apply for it you specify the model and serial number
of your appliance which can be found either on the
guarantee certificate or on the rating plate located
on the external right side of the appliance.
10
REPLACING THE LAMP
The appliance is equipped with a
longlife LED interior light.
It is strongly recommended to use
original spare parts only.
Use LED bulbs (E14 base) only. The
maximum power is shown on the lamp
unit.
WARNING! Do not remove the lamp
cover at the time of replacement. Do
not operate the freezer if the lamp
cover is damaged or missing.
1. Disconnect the mains plug from the mains
socket.
2. Replace the used lamp with a new lamp of the
same power and specifically designed for
household appliances (the maximum power is
shown on the lamp cover).
3. Connect the mains plug to the mains socket.
4. Open the lid. Make sure that the lamp comes
on.
TECHNICAL DATA
PRODUCT INFORMATION SHEET
Trade Mark Zanussi
Model ZFC26400WA PNC920524573
Category 9. Chest freezer
Energy efficiency class A+
Energy consumption in kWh per year, based on standard
test results for 24 hours. The actual energy consumption
will depend on how the appliance is used and where it is
located
Storage volume in litres, Fridge Storage volume in litres, Star Storage volume in litres, Cellar zone Storage volume in litres, Wine Storage volume in litres, Total 260
Storage volume in litres, Freezer 260
Storage volume in litres, Chiller Storage volume in litres, Other compartments Star rating of freezer compartment with highest storage
volume (l)
Design temperature of other compartments > 14 °C (°C),
if any
Frost free (Y/N), Fridge Frost free (Y/N), Freezer No
Power cut safe in h 32
Freezing capacity in kg/24h 16
252
****
-
11
Climate class SN-N-ST-T
Lowest ambient temperature at which this appliance is in-
tended to be used, in °C
Highest ambient temperature at which this appliance is in-
tended to be used, in °C
Acoustical noise emissions dB(A) re1 pW 45
Built in appliance Y/N No
This appliance is intended to be used exclusively for the
storage of wine Y/N
10
43
No
ADDITIONAL TECHNICAL DATA
Height 868 mm
Width 946 mm
Depth 667,5 mm
ENVIRONMENTAL CONCERNS
Recycle materials with the symbol . Put the
packaging in relevant containers to recycle it. Help
protect the environment and human health by
recycling waste of electrical and electronic
appliances. Do not dispose of appliances marked
Voltage 230 - 240 V
Frequency 50 Hz
The technical information is situated in the rating
plate, on the external or internal side of the
appliance and on the energy label.
with the symbol with the household waste.
Return the product to your local recycling facility or
contact your municipal office.
12
 Loading...