

Zanussi ZF711W User Manual

FREEZER
ZF711W
INSTRUCTION BOOKLET
818 15 02--03/3

Important Safety Instructions
GB
These warnings are provided in the interests of your safety. Ensure that you understand them all
before installing or using the appliance. Your safety is of paramount importance. If you are unsure
about any of the meanings or warnings contact the Customer Care Department.
Keep the instruction booklet. It will come in handy if you later sell the cabinet or give it to somebody
else.
Prior to Installation
· Check the appliance for transport damage. Under
no circumstances should a damaged appliance be
installed. In the event of damage please contact
your retailer.
Installation
· This appliance is heavy. Care should be taken
when moving it.
· It is dangerous to alter the specifications or
attempt to modify this product in any way.
· Ensure that the appliance does not stand on the
electrical supply cable. If the supply cable is
damaged, it must be replaced by a cable
avaliable from your local Service Force Centre.
· Any electrical work required to install this
appliance should be carried out by a qualified
electrician or competent person.
· Parts which heat up should not be exposed.
Whenever possible, the back of the appliance
should be close to a wall, but leaving the
required distance for ventilation, as stated in the
installation instructions.
The appliance should be left for 2 hours after
installation before it is turned on, in order to
allow the refrigerant to settle.
Child Safety
· Do not allow children to tamper with the controls
or play with the product.
· There is a risk of suffocation! Keep packaging
material away from children.
During Use
· This appliance is designed for domestic use only,
specifically for the storage of edible foodstuffs.
It is not intended for commercial or industrial
use.
· Containers with flammable gases or liquids can
leak at low temperatures. Do not store any
containers with flammable materials, such as
spray cans, fire extinguisher refill cartridges etc.
in the refrigerator or freezer.
Maintenance and Cleaning
· Before cleaning, always switch off the apppliance
and disconnect from the electrical supply
· When unplugging always pull the plug from the
mains socket, do not pull on the cable
.
Servicing
· This product should be serviced by an
authorised engineer and only genuine spare
parts should be used.
· Under no circumstances should you attempt to
repair the appliance yourself. Repairs carried out
by inexperienced persons may cause injury or
serious malfunctioning. Contact your local
Service Force Centre.
At the end of the Appliance Life
· When disposing of your appliance use an
authorised disposal site.
· Remove the plug and ensure that any locks or
catches are removed, to prevent young children
being t rapped inside.
· Do not let sharp objects come into contact with
the refrigerating system on the back of and inside
the cabinet. If the refrigerating system is
punctured, the cabinet will be damaged and
foodstuff inside may spoil.
If the refrigerant circuit should become
damaged:
avoid open flames and sources of ignition
thoroughly ventillate the room in which the
appliance is placed
The refrigerant isobutane (R600a) is contained
within the refrigerant circuit of the appliance, a
natural gas with a high level of environmental
compatibility, which is nevertheless flammable.
· Do not place carbonated or fizzy drinks in the
freezer compartment. Bottles and cans must not
be placed in the frezeer compartment as they can
burst when the content freeze.
Zanussi 818 15 02--03/3
2
Contents
GB
Instructions for the User
Important Safety Instructions 2.......
Contents 3..........................
Description of the Appliance 4........
Control Panel 4..............................
Use 4...............................
To start the freezer and thermostat control 5.......
Switching off 5..............................
Freezing 5..................................
Alarms and other features 6....................
Suitable storage periods 6......................
Temperature inside the freezer 6................
Thawing 6..................................
Cabinet interior 7............................
Hints and Tips 7.....................
Energy Saving Advice 7.......................
Food Storage 7..............................
Normal Operating Sounds 7....................
Maintenance and Cleaning 8..........
Removing the ventilation grille 8................
Internal Cleaning 8...........................
External Cleaning 8..........................
To Change the Li ght Bulb 8....................
Defrosting the freezer 9.......................
When the appliance is not in use 9...............
Something Not Working 9............
Service and Spare Parts 10............
Customer Care Department 10.........
Guarantee Conditions 13..............
Instructions for the Installer
Technical specification 14.............
Installation 14........................
Unpacking 14................................
Cleaning 14..................................
Installing the cabinet 14........................
Electrical connection 15........................
Door Reversal 16.............................
Guide to use the instruction book
The following Symbols will be found in the text to guide you through the instructions
Safety instructions
1, 2, 3 ...
Step by step instructions for an operation
Hints and tips
Zanussi 818 15 02--03/3
3

Description of the Appliance
p
p
r
r
1
GB
2
2
3
3
3
3
3
4
Control Panel
Model ZF711W
1. freezing tray
2. shelf with flap
3. freezer basket
4. ventilation grille
s
A. Red warning light
Flashes when one of the alarms in the cabinet has
been triggered.
B. Yellow indicator light
Illuminates when Fast Freeze is operating.
C. FAST FREEZE button
Used to switch the Fast Freeze feature on and off.
Using the fridge
Operation
This a
domestic use only, specifically for
the sto
This appliance is designed to operate in ambient
temperatures (surrounding air temperature) between
10_C and 32_C.
If these temperatures are exceeded i.e., colder or
warmer, the appliance will not operate correctly.
liance isdesignedfo
age of edible foodstuffs.
A
B C
D. Green indicator light
Illuminates when the freezer is operating.
E. Thermostat control
Usetoswitchonandsetthedesiredtemperaturein
the freezer.
D
E
GB
Zanussi 818 15 02--03/3
4
Before use
·Remove all securing tapes.
·Wash the inside of the appliance with lukewarm
water with a little bicarbonate of soda added (5ml to
0,5 litre of water). Do not use soap or detergent as
the smell may linger. Dry the appliance thoroughly.
Do not use detergents, abrasive powders,
highly perfumed cleaning products, wax,
polishes or products containing alcohol.
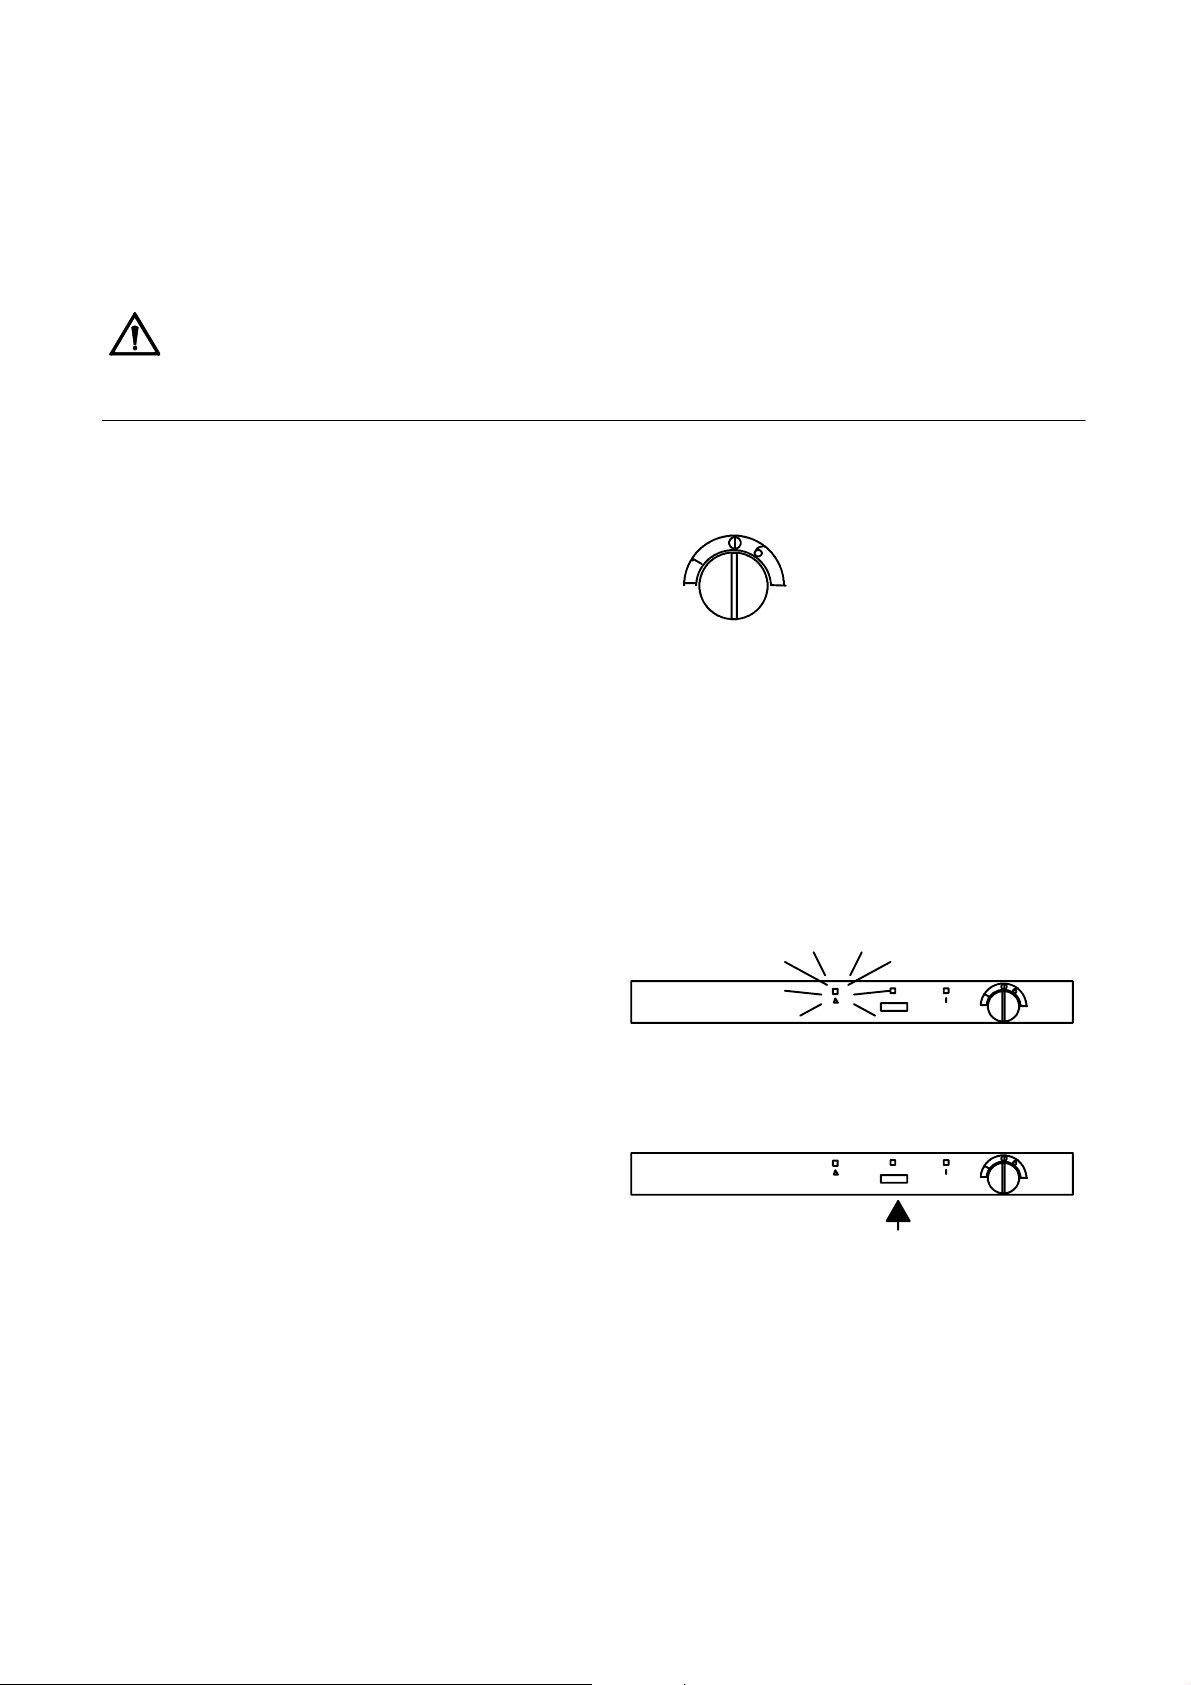
To start the freezer and thermostat
control
Plug in the appliance.
Turn the thermostat control to the desired position.
1 : The lowest position of the thermostat control
results in the highest temperature inside the cabinet.
6 : The highest position of the thermostat control
results in the lowest temperature inside the cabinet.
0 :Off.
Allow the cabinet to run for a period of 24 hours
whenever the temperature setting is changed. This
will allow the temperature to stabilise inside the
cabinet.
·Before inserting the power plug into the outlet and
switching on the cabinet for the first time, leave it
standing upright for about 30 minutes, or for 2 hours
if it was transported horizontally. Otherwise the compressor may sustain damage. This time will allow the
oil sufficient time to return to the compressor.
Temperature inside the freezer
To ensure that foodstuff will keep for a long time, be
sure that the temperature inside the freezer is -18°C
or below. Please note, however, that the energy
consumption increases as the temperature decreases.
Switching off
Set the thermostat control to the "0" position.
Unplug the power supply plug from the wall socket.
Alarms and other features
Temperature alarm
The red warning light illuminates when the
temperature inside the cabinet rises above -12°C.
The light goes out again when the temperature falls
below -13°C.
Freezing
You need not press the fast-freezing button when
freezing smaller quantities of food during any
24-hour period.
In all other cases, press the fast-freezing button
approx. 24 hours prior to placing the food in the
freezer .
Press the fast-freezing button to switch off
fast-freezing again about 24 hours after placing the
food in the freezer .
The yellow fast-freezing lamp remains lit as long as
the fast-freezing button is engaged.
Zanussi 818 15 02--03/3
5
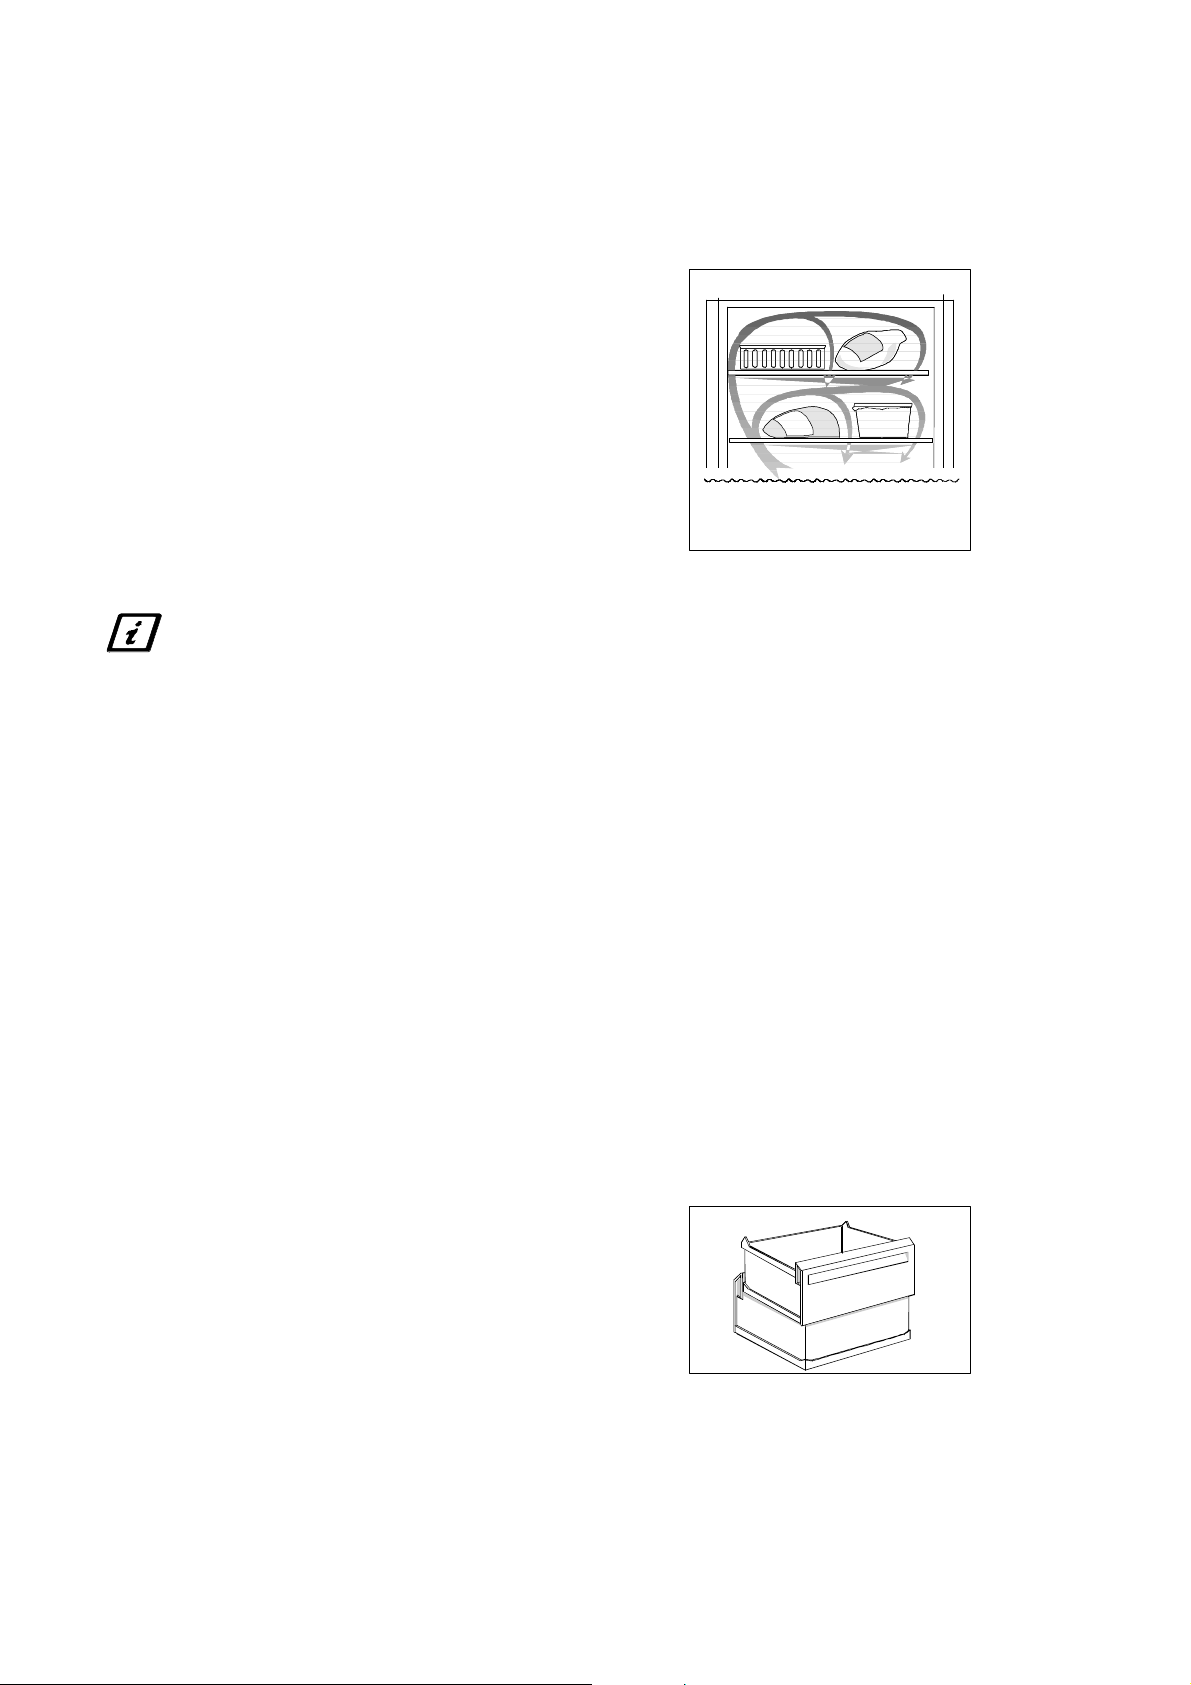
Practical advice on freezing
· When freezing products, use the top shelf, and if
necessary the shelf beneath as this is the coldest
part.
· Place the foods directly on the freezer shelves.
· Spread out the products as much as possible to
allow air to circulate between them.
· Do not place food products which are to be
frozen directly against other frozen food.
The heat from the unfrozen food may cause
the frozen food to thaw on the surface.
· Once frozen, re-arrange the products and put
them as close as possible to each other.
The food will then stay cold longer in the
event of a power failure.
· Do not freeze too much food at the same time.
The freezing capacity of the unit is indicated in
the specifications section.
Check that the cabinet is operating and
keeps the set temperature one day after
switching it on for the first time. Only
after then should the freezer be used to
freeze fresh foodstuff.
Suitable storage periods
Food purchased in frozen condition: Follow the
advice on the maximum storage period indicated on
the packaging.
Fresh food frozen at home:
Fatty and salty food should not be kept frozen for
more than three months. Cooked food and low-fat
food may be kept up to about six months. Lean food
and berries can be kept for approximately one year.
Thawing
It is best to use a fridge to thaw food. P l ace the
foodstuff on a plate with a raised edge to prevent
liquids from running out. To quickly thaw food, put
it in room temperature or i n cold water. When using
a microwave oven to thaw foodstuffs, follow the
manufacturer's instructions.
Cabinet interior
Freezer drawers
The freezer drawers make it easy to quickly and
easily find the food package you want. To gain
space, the drawers can be removed and the products
can be put directly on the shelves. On all shelves,
except the top shelf, it is possible to place products
that protrude 20 mm from the front edge. This
allows maximum use of the available space.
Do not remove the bottom drawer. It is required to
assure proper air circulation.
Zanussi 818 15 02--03/3
6
 Loading...