

ZSMARTLED
LED GRID DIMMER
TECHNICAL OVERVIEW
The ZSMART is a simple way to install up to three rotary controllers on a
single circuit. One ‘master’ switch and up to two ‘slave’ controllers can
be added to a single circuit. The kit connects direct to twin and earth
wiring, for an easy install with minimal disruption on site, and comes
with 9 grid adapters including Hager, Euro and Lisse.
The advanced technology used to control the load results in flicker-
free dimming of lamps and drivers. This technology also eliminates
the need to differentiate between leading and trailing edge lamps.
It works with either! All our LED dimmers have built-in thermal and over-
load protection, as well as smart settings. It is essential before making
connections to check the load against the table to ensure it meets the
specification of the dimmer switch. The ZSMART also comes with a Euro
module adaptor and a standard size dimmer knob.
SPECIFICATIONS
RANGE ZSMARTGRID
MODULE SIZE SINGLE GRID
LAMP TYPE LED
MAX WATT 120W / VA
MIN WATT 5W / VA
MIN BOX DEPTH 35 mm
2-WAY SWITCHING YES
MAXIMUM PLATE LOAD RECOMMENDATIONS
COVER PLATE SIZE (WXH) LED
SINGLE GANG 76MM x 76MM 250W/VA
DOUBLE GANG 137MM x 76MM 640W/VA
SETTING THE MINIMUM LEVEL
SETTING THE MINIMUM LEVEL PRESET :
1. Turn on the lights and turn control clockwise to full brightness.
2. Press to turn off.
3. While off, turn control knob fully anti clockwise.
4. Press again to turn on. The lights will flash to indicate that you
are now in programming mode.
5. Select the minimum light level required.
6. Wait for 5 seconds. The lights will flash again to indicate the
minimum level has been stored.
7. You now have the option to set the start level (see below)
or simply wait until the lamps flash once more indicating
that normal dimmer operation is resumed.
SETTING THE START LEVEL
After following points 1-6 above, you then have 5 seconds to begin.
Select the level needed for your lamps to turn on consistently, wait for
another 5 seconds. The lights will flash once more to indicate both
levels have been stored and normal dimmer operation is resumed.
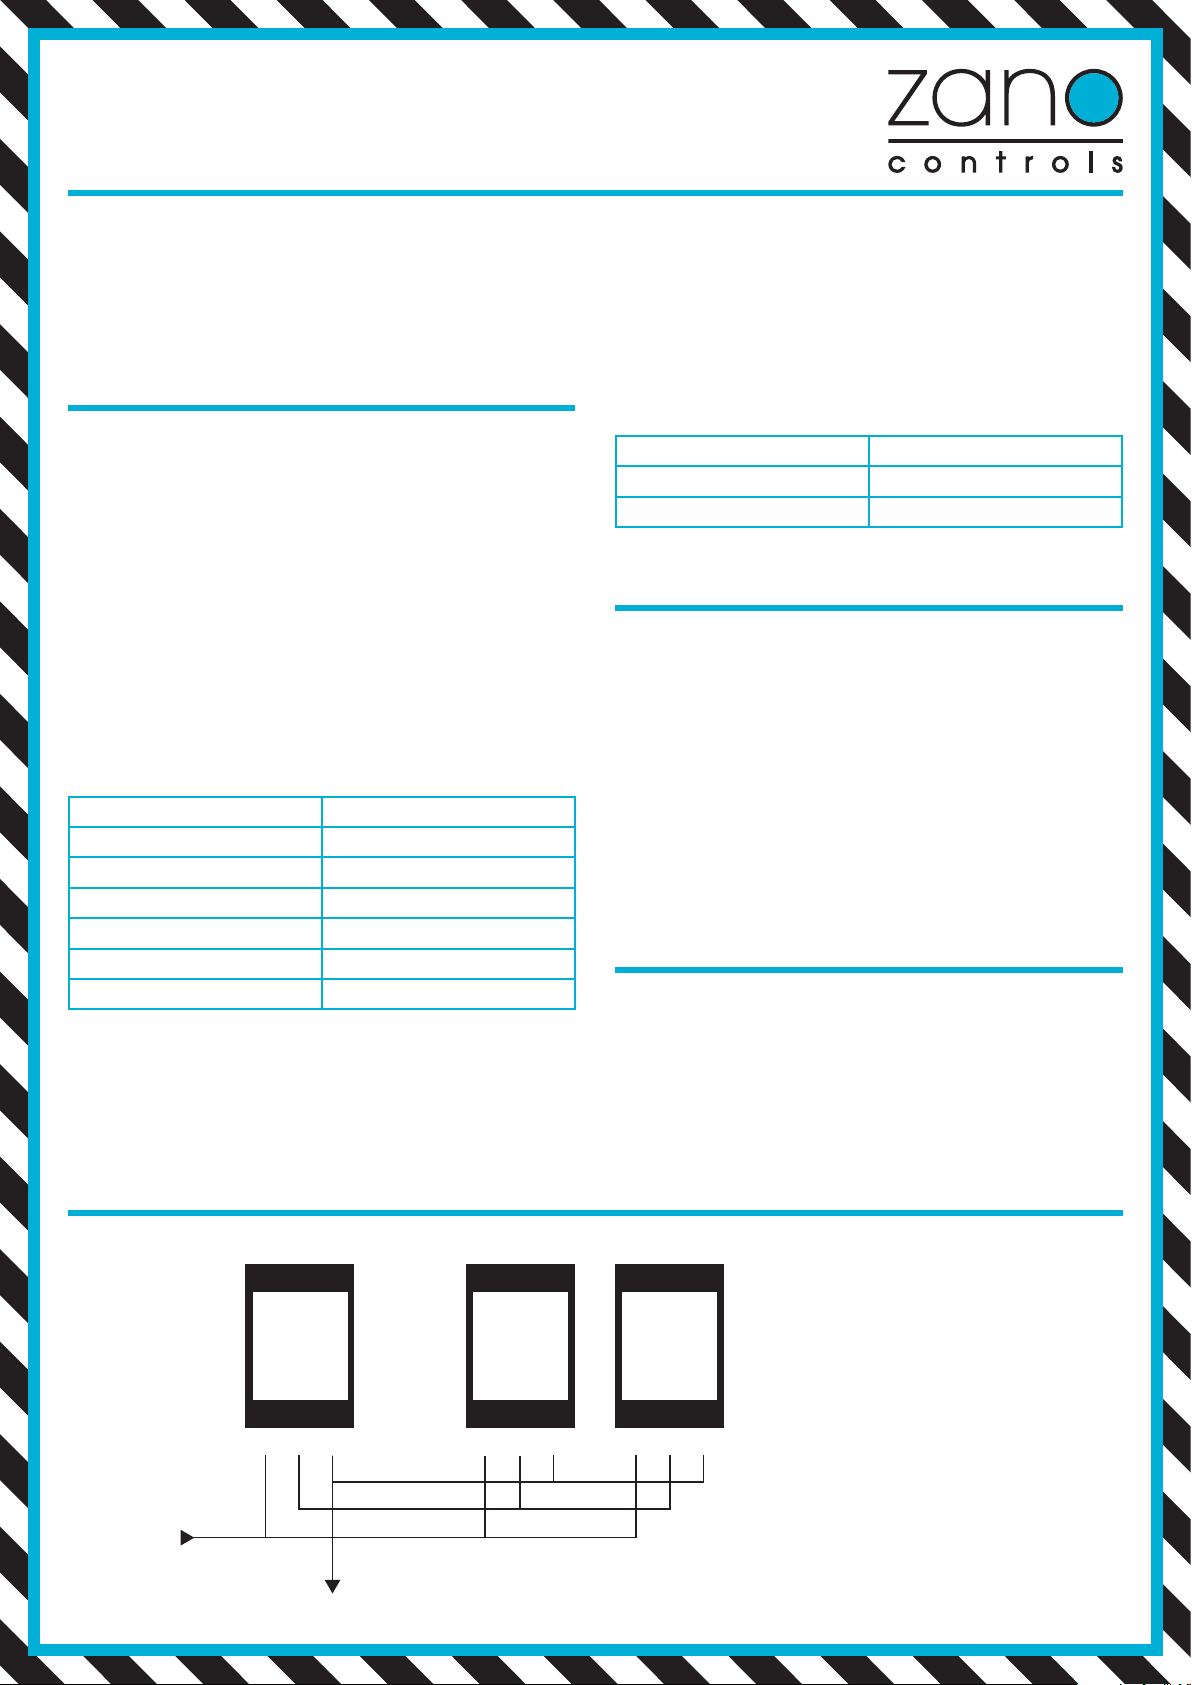
WIRING INSTRUCTIONS
1 OR 2
SLAVES CAN
BE CONNECTED
MASTER
L1 C L2 L1 C L2
LIVE IN
LAMP/LOAD
SLAVE SLAVE
L1 C L2

INSTALLATION MUST BE CARRIED OUT BY A QUALIFIED ELECTRICIAN
• Turn off the mains at distribution board
• Wire device using a suitable rated cable as in wiring diagrams.
• Terminals should be tightened to a maximum of 0.33Nm.
• Check polarity is correct throughout.
• Fit appropriate adaptor as in assembly diagrams.
• Fit device into wall box ensuring cables are not obstructed.
• Secure front plate.
• Product should be recycled at end of life where facilities exist.
DETA SCHNEIDER LISSE BG WANDSWORTH MK LOGIC HAMILTON HAGER CRABTREE EURO MODULE
1. Remove knob.
2. Choose the adaptor to fit your grid
3. Use tool to secure
adaptor with the ring.
4. Clip into grid,
replace knob.
CONTACT OUR FRIENDLY TEAM
Unit 1 Chantry Court,
Wrythe Lane,
Carshalton,
Surrey,
SM5 2DG
Call : 0330 058 0010
Fax : 0845 519 5757
sales@zanocontrols.co.uk
Great
British Design
ABOUT ZANO CONTROLS
We are award winning manufacturers of LED dimming solutions and
pride ourselves on providing fast, friendly, expert advice.
Call us now on 0330 058 0010 for the answer to LED dimming.
For our full range of products, technical advice & instructional films or
to find your nearest stockists please see our website.
GUARANTEE
For lamp test results and our full terms and conditions please
see our website: www.zanocontrols.co.uk.
For terms & conditions see www.zanocontrols.co.uk
For safety & certification info see www.zpatent.co.uk
 Loading...