


Instruction Manual
10GPROUDA-W-ABO
YS-TR-520FDS
-590FDS
(PROUD)
W-Cylinder UT
Ⅱ
Ⅱ
- Thank you very much for purchasing Yuyama Full Auto Tablet Packer
YS-TR-520FDS
-Read this manual carefully and use YS-TR-520FDS
-Store this manual at hand with the guarantee card.
/590FDS
Ⅱ
Read Pages 3 to 5 “Safety Precautions” carefully
Ⅱ
.
/590FDS
Ⅱ
before use.
properly.
Ⅱ

Table of Contents
Introduction
Safety instructions ......................................3
Accessories ................................................7
Names of Each Section..............................8
Machine appearance• .........................8
Inside the machine• .............................9
W-Cylinder Interior • ...........................10
Touch panel ..............................................11
Key button• ........................................12
Displaying the prescription •
Information and the status of the
packing machine ..............................13
How to use (Basic)
Turning on the power ................................14
Unlocking the upper door .........................16
•
Refilling tablets
[Refill information entry] 02................... •
When all tablets have been •
dispensed during dispensing ...........22
When all tablets have been •
dispensed during dispensing
[Call Cassette]• ..................................24
[Call Drug]• ........................................25
[Search]• ............................................26
Details of DTA filling• .........................27
Turning off the power ................................30
.................................17
Maintenance
DTA unit....................................................62
Last hopper...............................................68
Large hopper ............................................71
Revolver unit.............................................73
Sash unit...................................................78
Printer head ..............................................81
Heater roller ..............................................82
Tablet feed pipe........................................83
Box unit.....................................................90
Standby valve unit ...................................101
Procedure for replacing the prefilter........104
Others
Consumables ..........................................114
Troubleshooting ......................................115
Warning errors ........................................116
Speci fi cation ...........................................122
Inspection and
Maintenance Record Table .....................123
32. )ytpme si ettessac puorg eht nehw(
How to use (Speci
Pausing dispensing ..................................32
Aborting dispensing ..................................33
Emergency stop........................................34
Issuing using only packing machine .........35
Maintenance mode ...................................38
[Move cleaning position], [Complete •
Cleaning] .........................................39
[DTA collect]• .....................................40
[User Setting]• ...................................41
[Register Group Cassette] 44............... •
[Close Lock]• .....................................46
Turning the cylinder manually ...................47
fic)
Replacement of consumables
Packing paper...........................................48
Ink ribbon ..................................................57
はじめに
Safety instructions
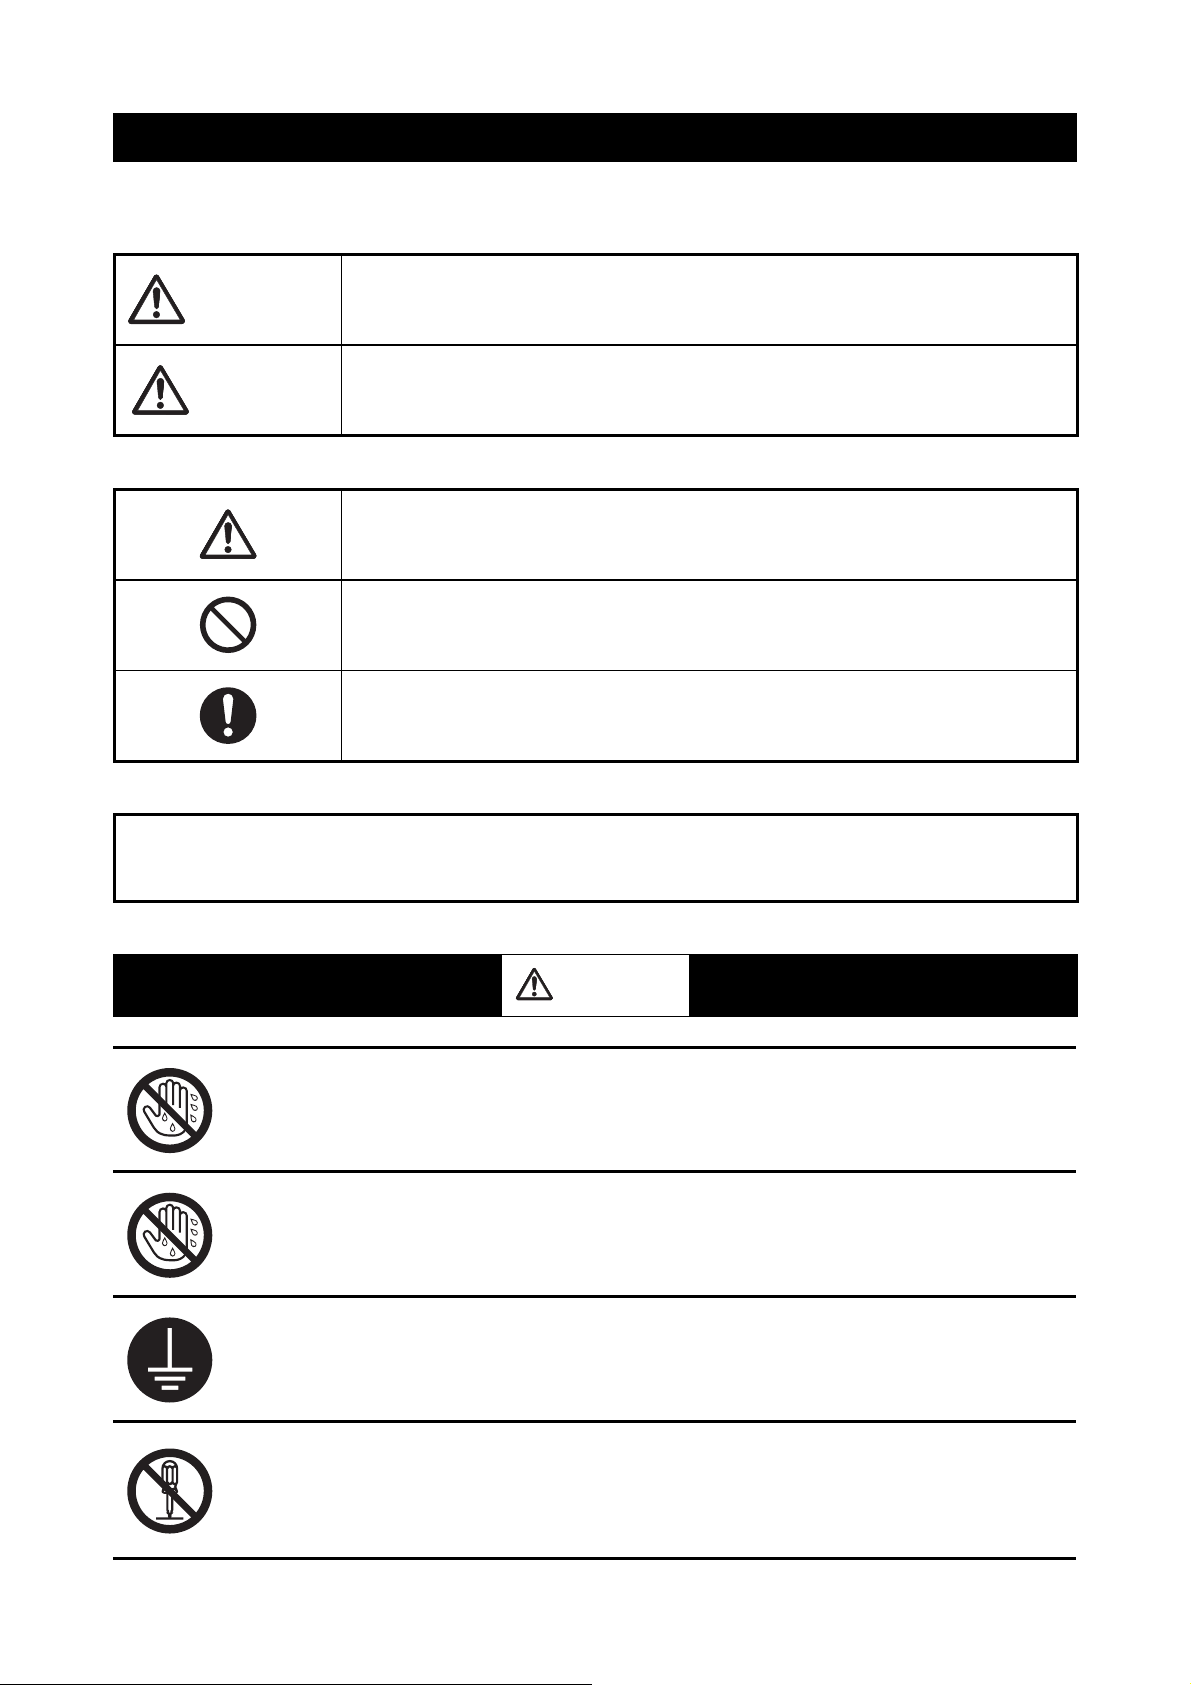
Degrees of dangers and damages caused by wrong usage ignoring ■
instructions are categorized and explained in the following symbols.
WARNING
CAUTION
Be sure to use the machine following the Instruction Manual and obey •
This symbol indicates that failure to obey this instruction
may result in serious injury or death.
This symbol indicates that failure to obey this instruction
may result in injury or only property damage.
This symbol is used to “promote awareness.”
This symbol is used to indicate “prohibited” actions.
This symbol is used to indicate “forced” actions.
instructions thereof for safe operation.
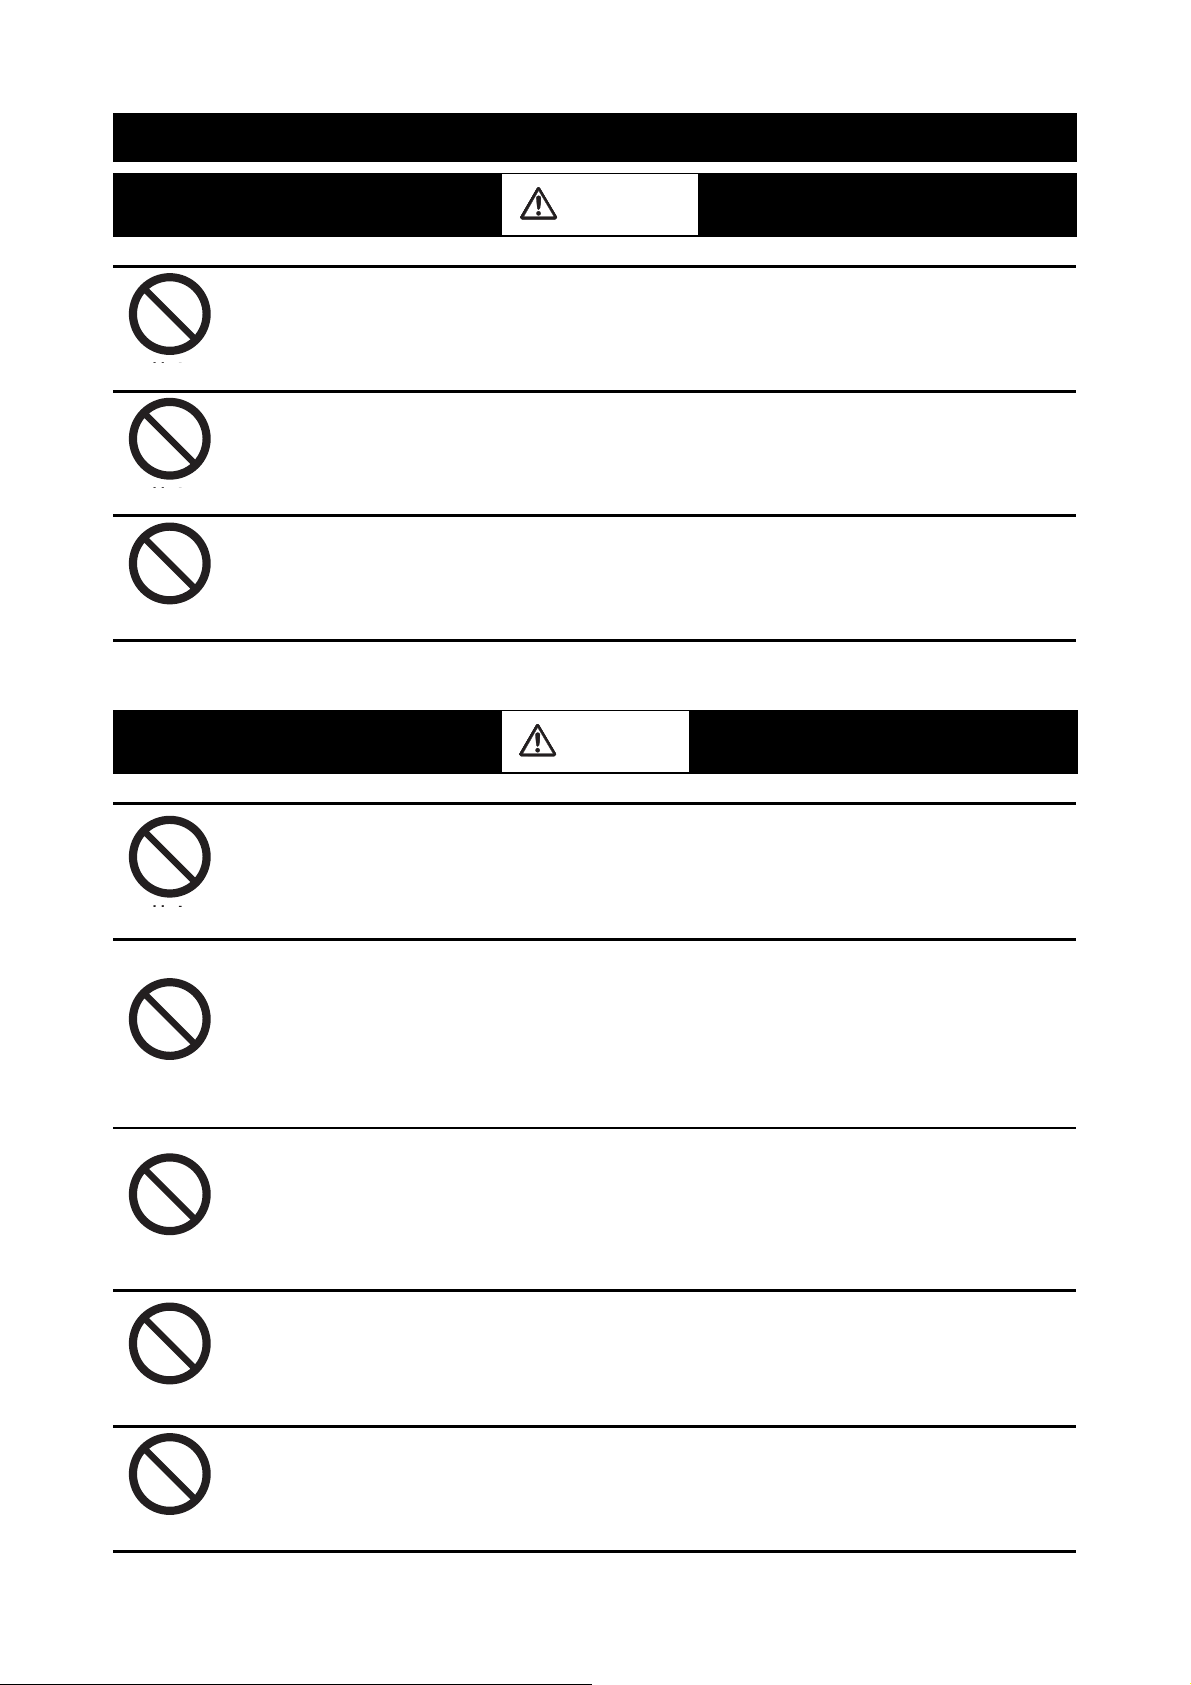
WARNING
Do not operate switches with
Fear of an electric shock or an injury
wet hands.
Do not plug or unplug the
Fear of an electric shock or an injury
power with wet hands.
Earth leakage due to problems such as a failure
Earth the machine securely.
Do not disassemble, repair
or modify the machine.
may result in an electric shock. Be sure to ask
specialists to earth the machine.
Failure to obey this instruction may cause a fi re
or a malfunction, resulting in injury. Personnel
other than service personnel are not allowed
to disassemble or repair the machine. Do not
modify the machine.
3
WARNING
ᅠഥ
Prohibited
Prohibited
ᅠഥ
ᅠഥ
Prohibited
ᅠഥ
Prohibited
ᅠഥ
Prohibited
Do not move your fi ngers
close to the cutter blade.
Do not move your fi ngers
close to the heater roller
during paper feed.
Do not touch the heater
roller during heating or right
after the power is turned off.
CAUTION
Do not apply strong
vibrations or impacts on the
body.
Do not place the machine in
places specifi ed in the right
column.
Sharp blades are used for the machine. Do not
move your fi ngers close to the cutter blades.
Failure to obey this instruction may result in injury.
Failure to obey this instruction may result in burn
injury or injury.
Failure to obey this may result in burn injury.
This machine contains refi ned electronic parts.
Therefore, strong vibrations and impacts on the
machine will result in malfunctions. Ensure that
the machine is not contaminated with pieces of
paper and metals.
Unstable places•
Places that cannot burden the weight of the •
machine
Humid or dusty places•
Places that are exposed to direct sunlight•
Failure to obey this instruction may result in
machine failures.
ᅠഥ
Prohibited
ᅠഥ
Prohibited
ᅠഥ
Prohibited
4
Do not insert your hands and
fi ngers into the DTA cells
while the tablet set plate is
operating.
Do not touch the conveyor
or place anything near the
conveyor.
Do not use the machine
when it is wet.
Failure to obey this instruction may result in injury.
Do not touch the operating conveyor. Failure to
obey this instruction may result in injury.
Accumulated packed items or items near the
conveyor may be caught by the conveyor, resulting
in machine failures.
If the machine gets wet by fl ood damage or any
other reasons, do not use the machine but contact
with a nearby dealer immediately.
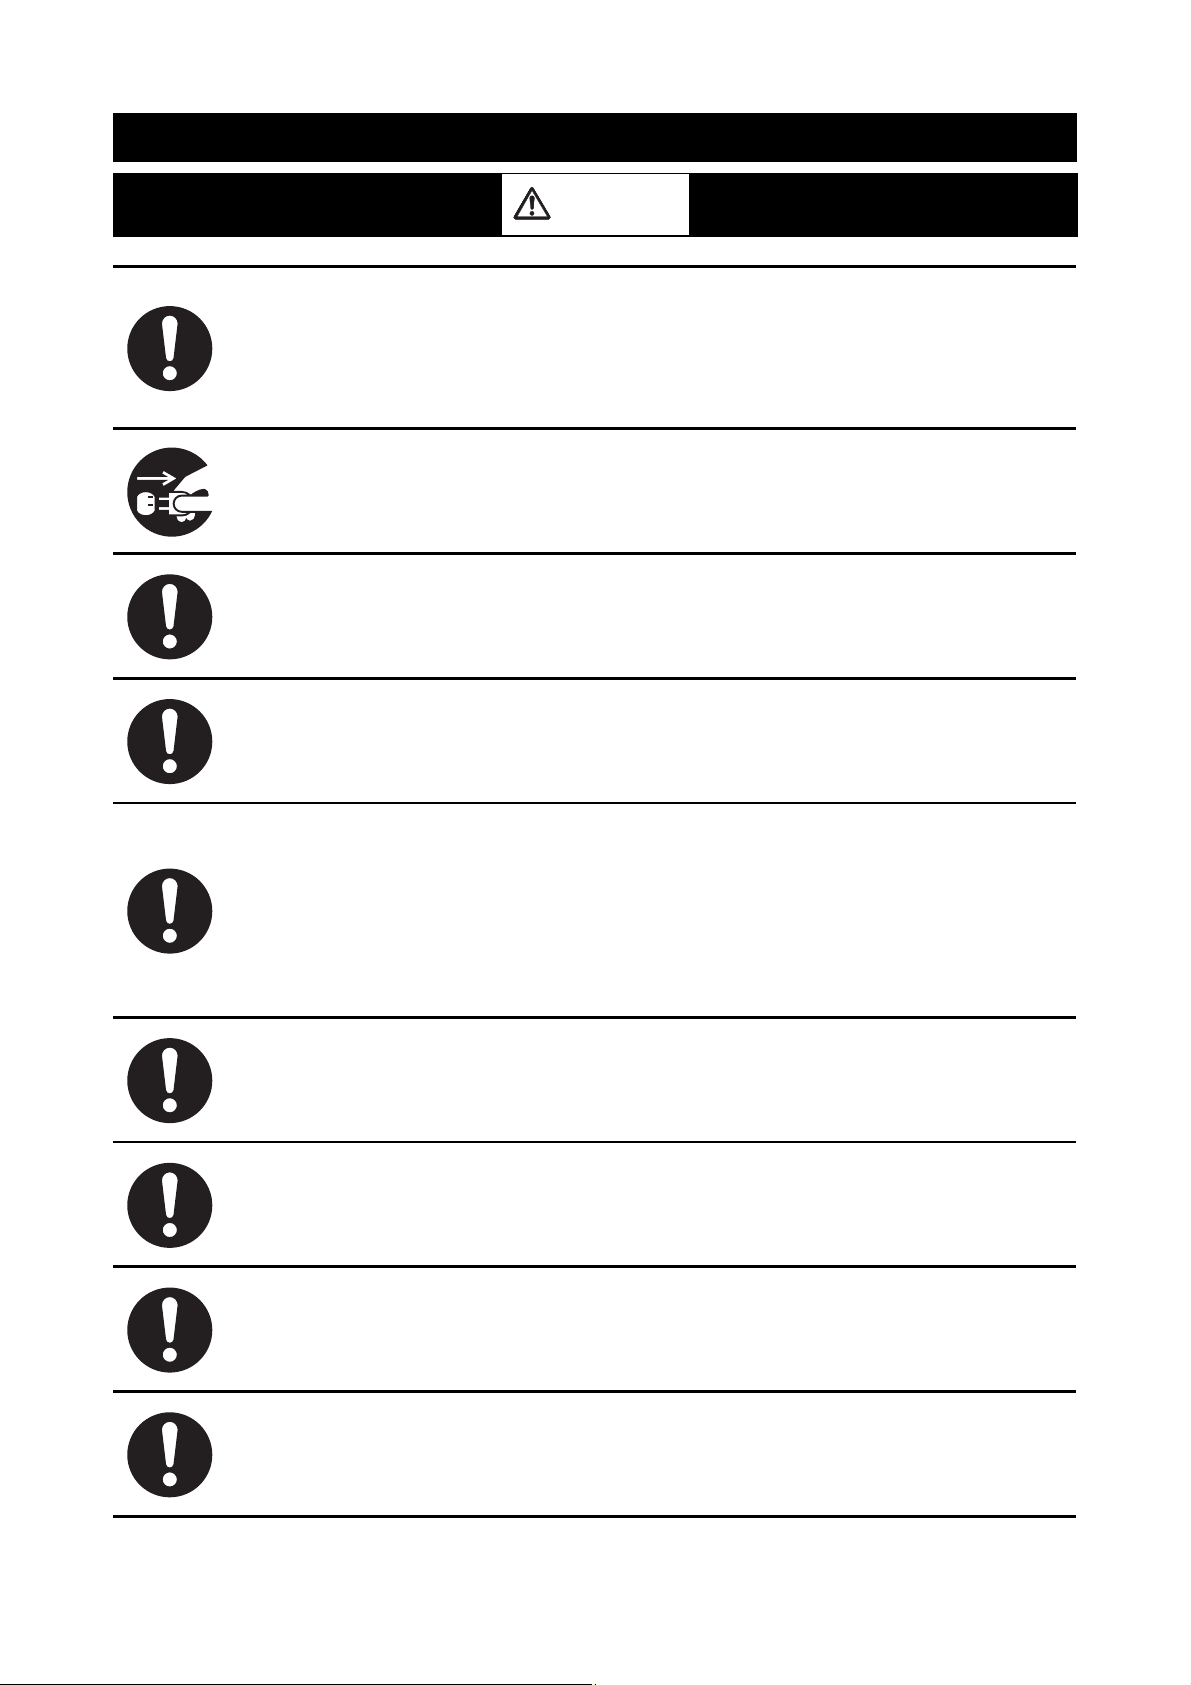
Be sure to use the genuine
power outlet.
CAUTION
Use of an outlet with an inapplicable voltage and
electric capacitance may result in heat generation
and fi re. In addition, lack of the power capacity
and rapid voltage fl uctuations may result in
malfunctions. Be sure to use the genuine power
outlet.
Disconnect the power cord
and plug in case of abnormal
conditions.
Clean the passage for drugs
securely.
Be sure to use YUYAMA’s
genuine paper.
Observe the temperature
and humidity ranges.
Damaged power cord/plug, loosen outlet or piled
dust may cause an electric shock, heat generation
and fi re. If any abnormality is detected, stop
operation and disconnect the power plug.
Clean the passage for drugs securely to prevent
remaining drugs from mixing with other drugs.
To avoid wrong drug dispensing, be sure to follow
the instructions in this Instruction Manual for
packing paper attachment and use YUYAMA’s
genuine paper.
Use the machine under the following environment.
Temperature range: 10 to 35 degrees C
Humidity range: 15% to 85% (No condensation is
allowed)
However, use the machine at humidity of 48% or
less when the temperature is 35 degrees C and
at temperature of 28 degrees C or less when the
humidity is 85% .
Stop the machine
immediately in case of
operational abnormality.
Perform a periodic inspection
once a year.
Before moving the machine,
be sure to unplug the power.
If the machine is not to be
used for a long time, turn the
breaker [OFF].
In case of abnormality such as malfunction, stop
the machine immediately.
To use the machine safely, it is recommended to
inspect all parts at least once a year besides daily
maintenance.
Moving the machine with the power plugged may
damage the power plug.
Turn the breaker OFF for safety.
5

FCC Part15.19
This device complies with Part 15 of the FCC Rules. Operation is subject to the following
two conditions: (1) this device may not cause harmful interference, and (2) this device
must accept any interference received, including interference that may cause undesired
operation.
FCC Part.15.105(b)
This equipment has been tested and found to comply with the limits for a Class B digital
device, pursuant to Part 15 of the FCC Rules. These limits are designed to provide reasonable
protection against harmful interference in a residential installation. This equipment
generates, uses and can radiate radio frequency energy and, if not installed and used in
accordance with the instructions, may cause harmful interference to radio communications.
However, there is no guarantee that interference will not occur in a particular installation.
If this equipment does cause harmful interference to radio or television reception, which
can be determined by turning the equipment o and on, the user is encouraged to try to
correct the interference by one or more of the following measures:
-- Reorient or relocate the receiving antenna.
-- Increase the separation between the equipment and receiver.
-- Connect the equipment into an outlet on a circuit di erent
from that to which the receiver is connected.
-- Consult the dealer or an experienced radio/TV technician for help.
FCC Part.15.21
You are cautioned that changes or modi cations not expressly approved by the party
responsible for compliance could void your authority to operate the equipment
This device complies with FCC RF radiation exposure limits set forth for an uncontrolled
environment. The antenna used for this transmitter must be installed to provide a
separation distance of at least 20 cm from all persons and must not be co-located or
operating in conjunction with any other antenna or transmitter
ICES-003
This Class B digital apparatus complies with Canadian ICES-003.
Cet appareil numèrique de la classe B est conforme à la norme NMB-003 du Canada.
RSS-Gen 7.1.5
Operation is subject to the following two conditions: (1) this device may not cause
interference, and (2) this device must accept any interference , including interference that
may cause undesired operation of the device.
6
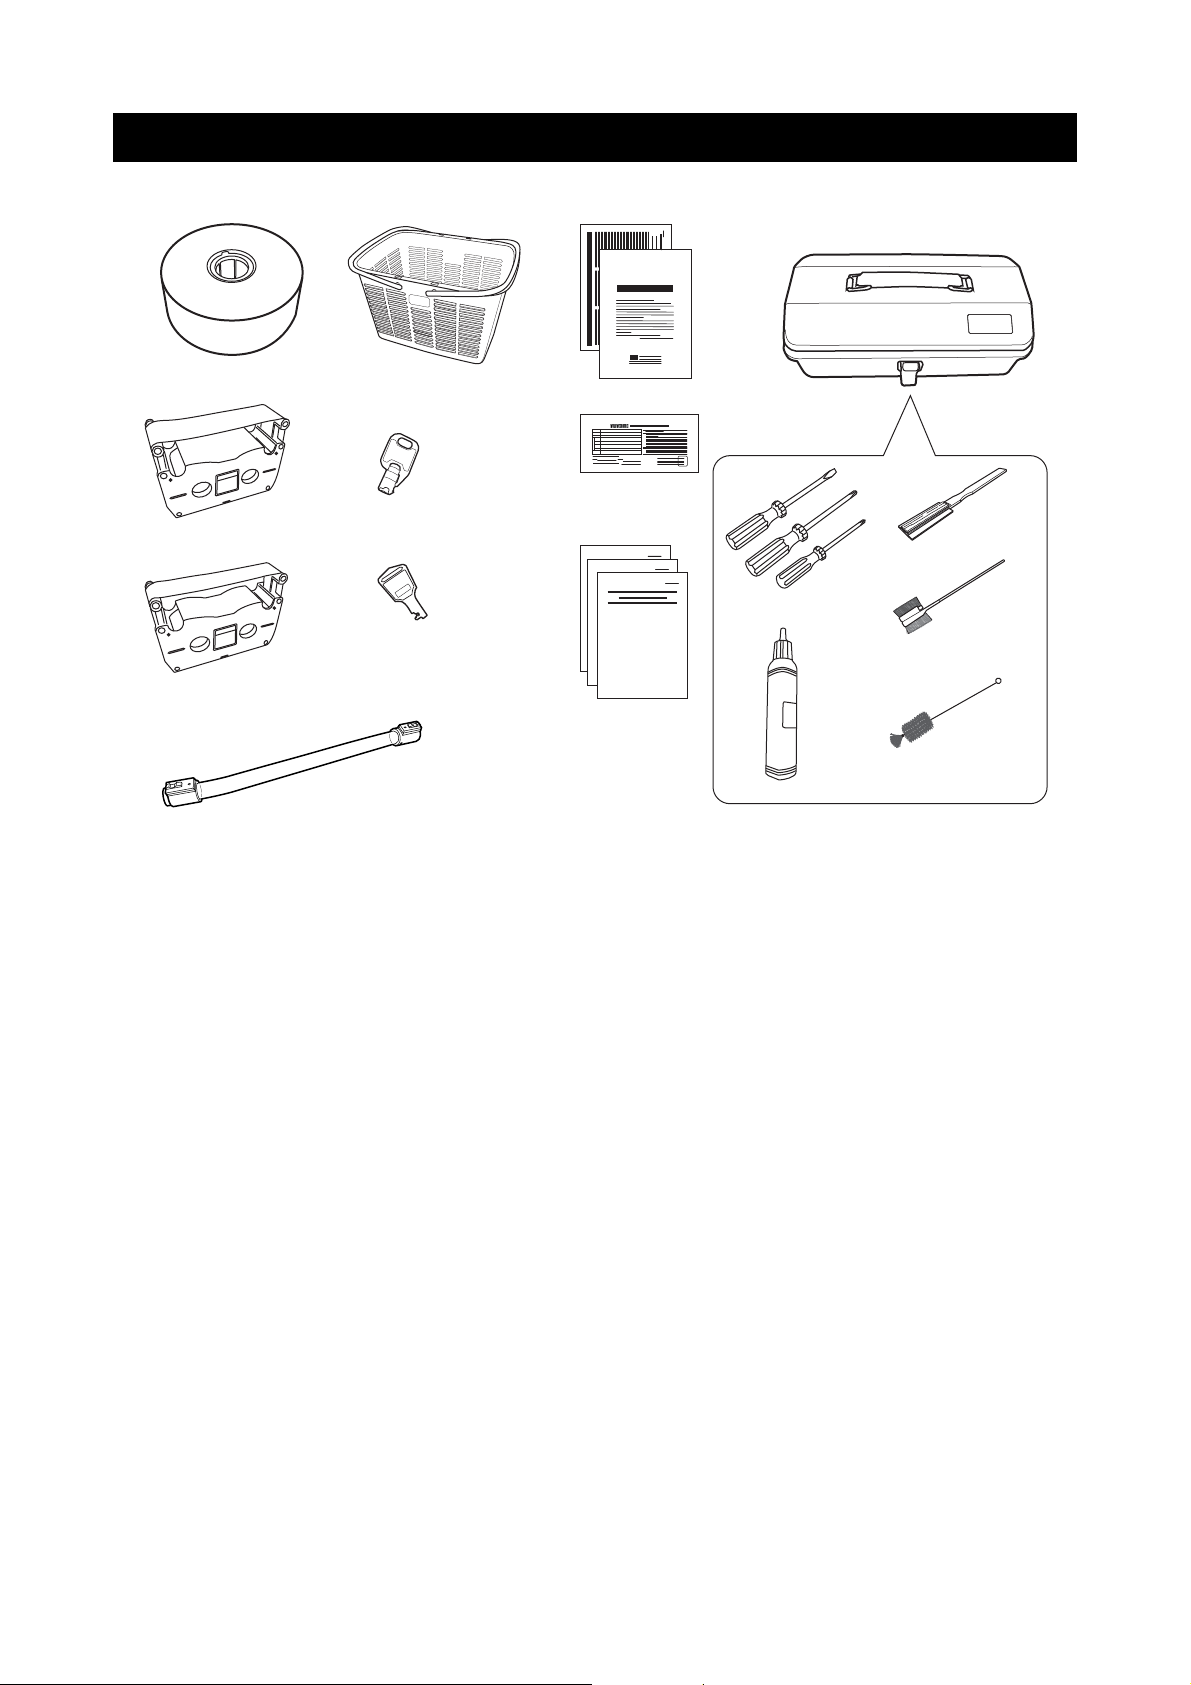
Accessories
(1)
ae k
bf
(16)
p
(4) (7) (10)
(5) )8()2(
(6) )
g
h
i
(11) (13)
ln
9
()3(
jc
(12)
m
(14)
o
(15)
p
(1) Packing paper (10) Tool box
(2) Ink ribbon (black or color) * (11) Phillips screwdriver (large and small)
(3) Half type ink ribbon (black) *
(4) Drug basket
(5) Key (for upper door) x 2
(6) Key (for the sides of the packing machine) x 2
(7) Request for packing paper and list of sales offi ces
(8) Warranty
(9) Instruction Manual (for each type)
*Any of the inks with a * mark will be provided.
- Do not store the packing paper in a place that is exposed to direct sunlight or with high humidity.
- Contact with your dealer or your nearest Yuyama’s sales offi ce (in the separate sheet) when you need to purchase
accessories.
and straight slot screwdriver
(12) Wax
(13) Printer head cleaner
(14) Heater roller cleaning brush
(15) Cleaning brush
(16) Tablet feed pipe
7
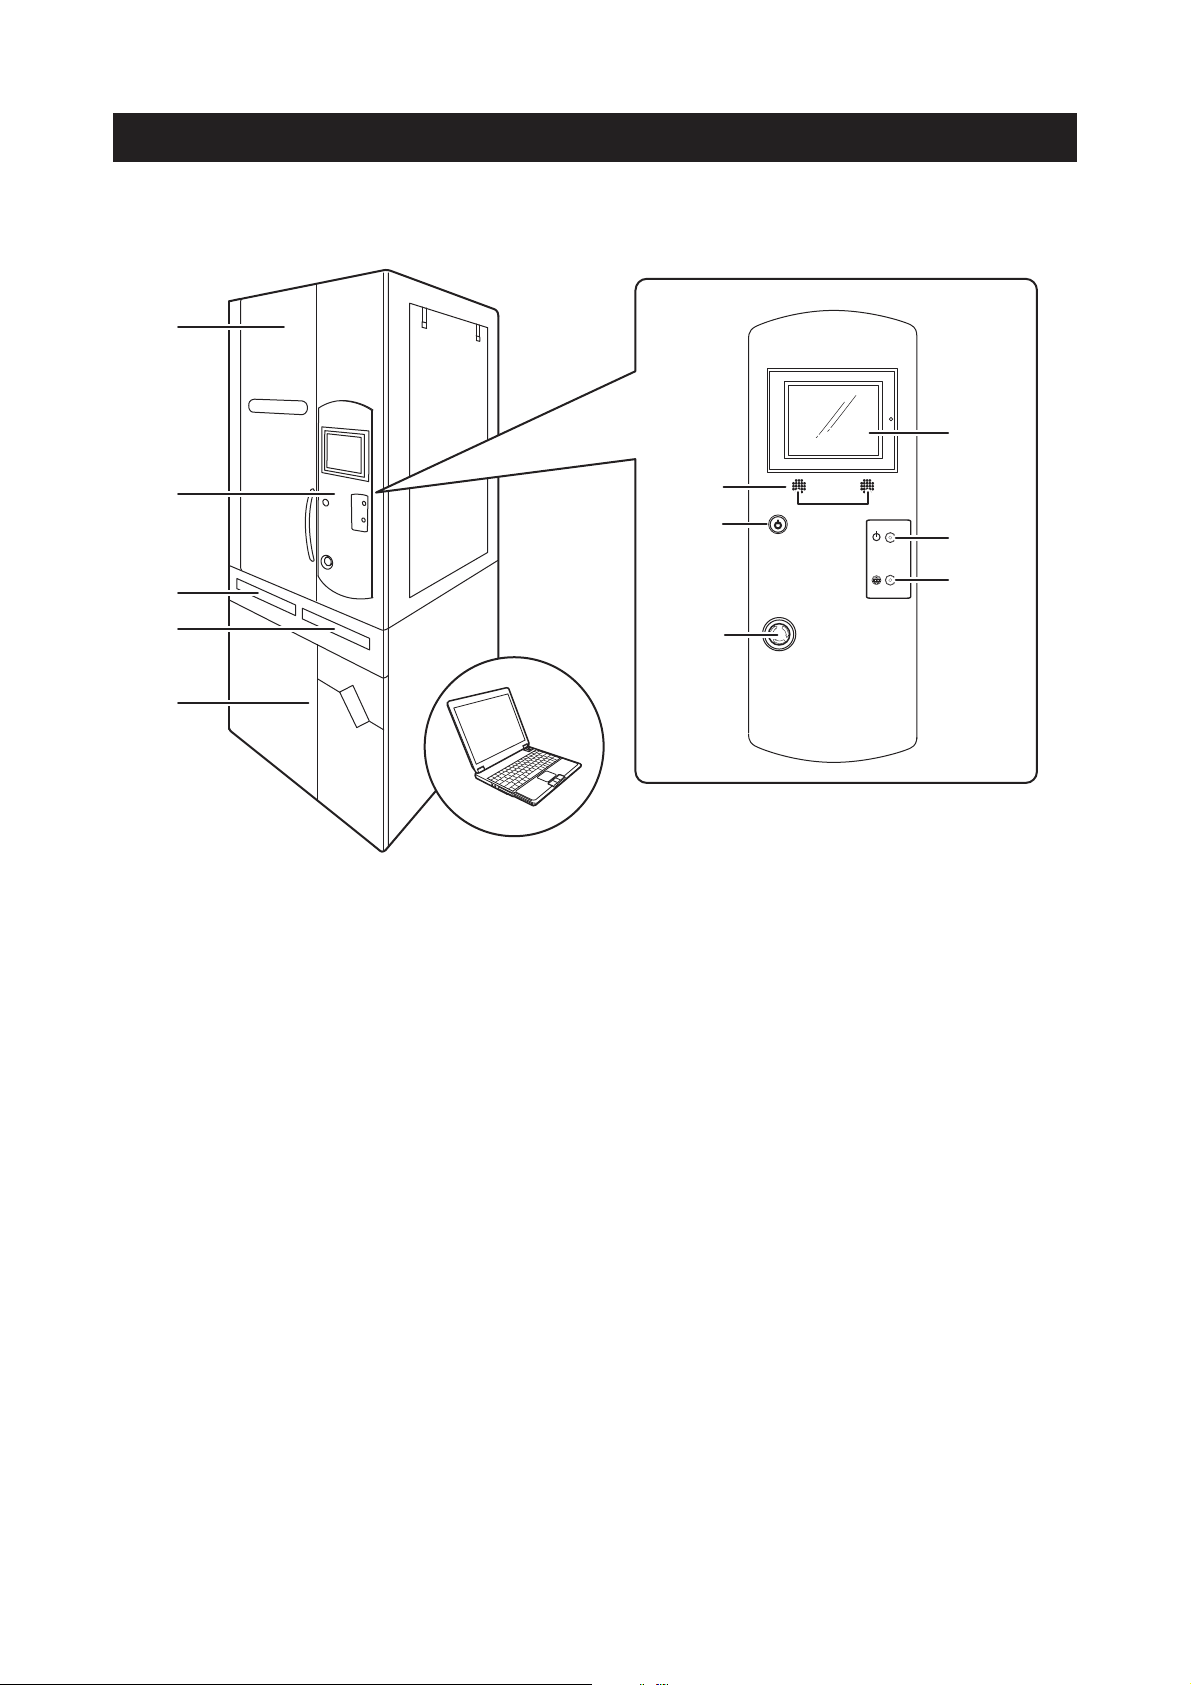
Names of Each Section
Machine Appearance
■
a
g
b
c
d
e
Upper door
①
Operation panel
②
DTA tray
③
Adaptive table
④
Lower doors
⑤
PC (notebook PC or desktop PC)
⑥
Touch panel
⑦
[Power] switch
⑧
[Cutter] switch
⑨
Loudspeaker
⑩
Door key
⑪
[Emergency] switch
⑫
f
j
k
l
POWER
CUTTER
h
i
8
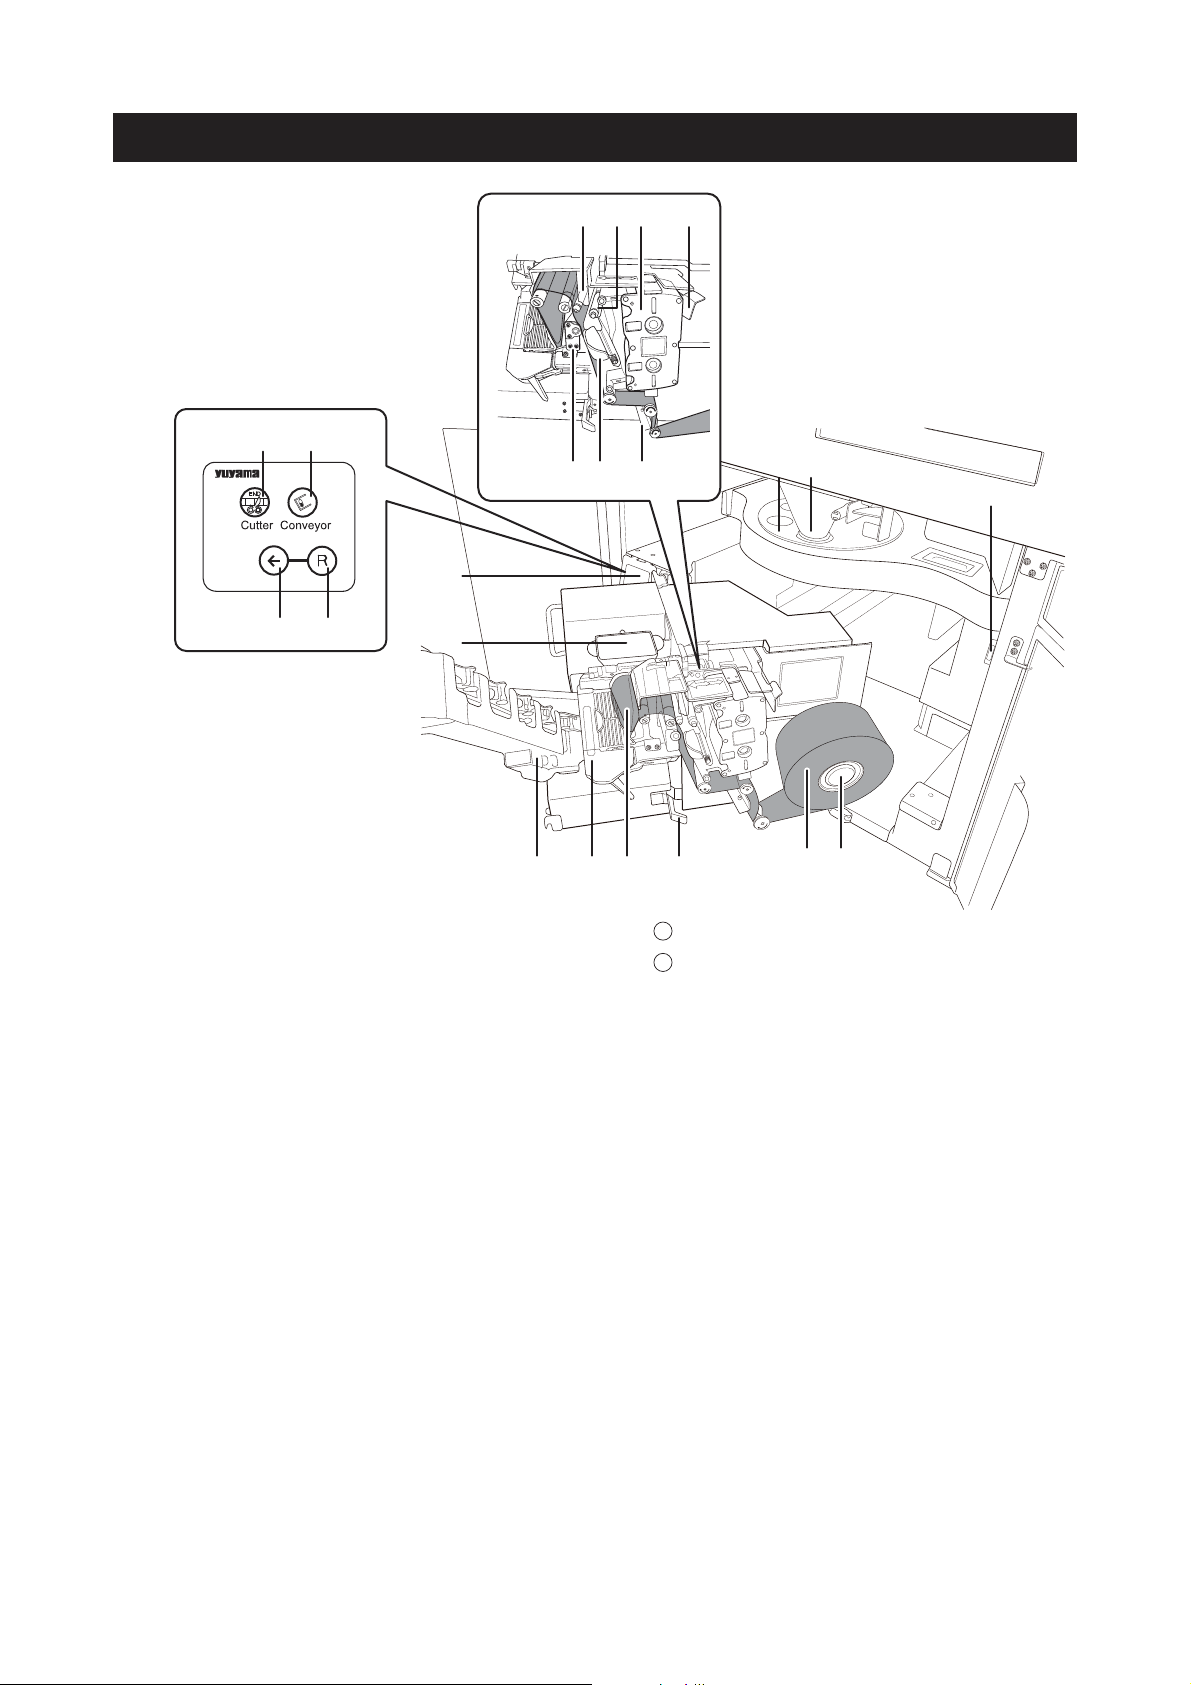
■
Inside the machine
o
n
lm
st
r
q
p
ab
c
Roller
uv
Revolver unit
①
Major hopper
②
Circuit breaker
③
Paper tube shaft
④
Packing paper
⑤
Packaging section opening/closing lever
⑥
Paper guide
⑦
Heater roller
⑧
Conveyor
⑨
Final hopper
⑩
Lower section operation panel
⑪
Paper guide pin
⑫
Ribbon tension bar
⑬
Ink ribbon
⑭
Printer head release lever
⑮
Paper end sensor
⑯
Ribbon guide
⑰
Platen roller
⑱
[Cutter] switch
⑲
[Conveyor] switch
⑳
k
j
i
e
f
gh
21
[Heater Roller Backward] switch
22
[Heater Roller Forward] switch
d
9

■
W-Cylinder Interior
ab
c
d
Upper door
①
Operation panel
②
Door key
③
Lower door
④
Tablet route unit
⑤
Standby unit
⑥
f
e
10

Touch panel
(1) (2)
POWER
CUTTER
(3) (4)
(1) Message display Displays the status and operation of the packing machine.
(2) Key button Used to operate the packing machine.
(3) Display of prescription information
and status of the packing machine
(4) Display and setting of details Displays the detail of prescription.
Displays the prescription information for the drug that is now being dispensed (or
is to be dispensed) and the status of the packing machine.
Also used to operate the packing machine such as to call a cassette.
(P12)
(P13)
11

Key button ■
(1) (2)
(3)
(4)
)7()6()5(
)9()8(
(10) (11) (12) (13)
(1) Switches the mode to the one where dispensing is issued only by the packing machine.
Restarts dispensing when the machine is temporarily stopped.
(2) Stops dispensing temporarily.
(3) Opens/closes the DTA tray.
(4) Sets the DTA.
(Cannot set the DTA when [Number of DTAs: 2].
(5) Switches the screen to the [Call Cassette] screen.
(6) Switches the screen to the [Call Drug] screen.
(7) Exits the maintenance mode or the special mode.
(8) Unlock the drug rack door.
(9) Returns to the previous page.
(10) Switches to screen to the [Maintenance] screen.
(11) Cancels the prescription.
(12) Displays the content of the next prescription.
(13) Goes to the next screen.
Displayed key buttons vary depending on the status of the packing machine.*
12

■
Displaying the prescription Information and the status of the packing machine
(1)
(2)
(3)
(4)
(12)
(11)
(5)
(6)
(7)
(8)
(9)
(10)
(1) Number of
pouches
(2) Patient ID Displays the patient ID during dispensing.
(3) Name of patient Displays the name of the patient during dispensing.
(4) Ticket number Displays the ticket number of the drug that is currently being dispensed.
(5) Number of days Displays the number of days for the drug to be dispensed.
(6) Pk. Order Displays the packing order (dispenses drug according to the usage [Continuation] or by the
(7) Form of tablet Displays the form of the drug to be used for dispensing (cassette or DTA).
(8) Paper Displays the remaining paper amount by 5 levels.
(9) DTA STATUS Displays the number of reserved DTA.
(10) Communication Displays the status of communication between the personal computer and the packing
(11) Temperature Displays the temperature of the heater roller.
(12) Number of
pouches
Displays the number of fi nished pouches and the number of the remaining pouches during
dispensing.
day [Repeat])
machine.
Displays the number of pouches (the number of doses for a day) for the dispensing data.
13

使いかた(基本)
Turning on the power
Press the power switch,turns on the power of packaging machine.
Even when the packing machine has been turned ON, do not start operation until the eating
of the heater roller is completed.
*Operate the breaker before installing the packing machine or cleaning the printer head.
1. Connect the power plug to the
outlet.
Be sure to use an AC100V outlet •
with the 3P earth.
Do not use a multi-outlet extension •
cord from a device such as a table tap.
CAUTION
Be sure to connect earth to avoid power-supply
noises and electric shocks. Lack of the power
capacity and rapid voltage fl uctuations may result
in malfunctions.
2. Open the lower door.
Push [PUSH] on the acrylic door •
and open it while folding it.
14
Unhook to open the door •
on the conveyor side.

POWER
CUTTER
3. Turn [ON] the breaker.
After the breaker has been turned •
on, close the lower door.
4. Packaging machine power switch on.
Wait for a while until packing is ready •
as the heater roller is heated.
You can start dispensing when •
[Ready to dispense] is displayed.
15

Unlocking the upper door
You are required to input a password to open the upper door. Open the door after entering the
password.
Once the password has been entered, you can set the machine so that you can open the door
without entering the password or you are required to enter the password every time you open
the door.
Once the power is turned off, you are required to enter the password again.
Entering a password is required only for the packing machine whose upper door has a *
lock.
1. Touch [RELEASE].
The screen is switched to the •
password entry screen.
Select [Operator].•
(When [Operator] is touched, the list of •
registered operators appears. Select a
desired operator’s name from the list.)
After the password has been •
entered, press [ENT].
The upper door is unlocked, so •
that you can open the door.
16

Refilling tablets
The following describes how to refilling tablets.
The cassette varies depending on the size and shape of the tablets. Be sure to refill the *
tablets speci fied on the cassette.
1. Touch [CAN FIND].
The screen is switched to the •
[Call Cassette] screen.
After touching a shelf number, •
please search for touch.
•
The
called cassette moves to
the front.
2. Open the upper door.
holding its handle.
elihw rood reppu eht nepO •
17

3. Remove the cassette.
Remove the cassette by pressing the lock •
of the cassette until it makes a click sound.
4. Put tablets in the cassette.
Replace the desiccant in the •
cassette periodically.
CAUTION
Note the following points when re filling tablets.
Note that foreign materials are not mixed.•
Do not put too many tablets.•
Make sure that tablets are not put in the backside of •
the cassette (the part where the tablets are ejected).
5. Touch [QTY].
Touch the frame of [QTY] to open •
the numeric keypad screen.
.]TNE[ hcuot ,ytitnauq eht gniretne retfA •
.]YTQ[ ni deyalpsid si rebmun deretne ehT •
18

.]LLIFER[ hcuoT •
er retfA filling, touch [RETURN] to •
return to the original screen.
[+] and [-] are alternatively displayed •
by touching the code next to [QTY].
by touching [REFILL] with [-].
tnuoma yrotnevni eht ecuder nac uoY •
6. Install the cassette.
Insert the cassette all the way.•
7. Close the upper door.
Close the upper door while •
holding its handle.
19

[Re fill information entry] ■
You can go to the re fill information entry screen by reading the drug name
by its barcode and clicking the displayed drug name while the re fill screen is
displayed.
1. Read the drug name using its
barcode and click the displayed
drug name.
2. Enter the manufacturing number
(up to 20 alphanumeric
characters).
Touch the manufacturing number •
display item and enter alphanumeric
characters using the numeric keypad.
1 Repeat of 1→@→1
2 Repeat of 2→A→B→C→2
3 Repeat of 3→D→E→F→3
4 Repeat of 4→G→H→I→4
5 Repeat of 5→J→K→L→5
6 Repeat of 6→M→N→O→6
7 Repeat of 7→P→Q→R→S→7
8 Repeat of 8→T→U→V→8
9 Repeat of 9→W→X→Y→Z→9
0 0
→ Enter
(Move the cursor in the right direction.)
Clear Backspace
20

3. The manufacturing number is
displayed. Enter the expiration
date (2-digit Christian era and
4-digit month and day or 2-digit
Christian era and 2-digit month).
Touch the expiration date display •
item and enter a numeric figure
using the numeric keypad.
Enter of either the manufacturing number •
or the expiration date is acceptable.
4. The expiration date is displayed.
Touch [ENTER].
5. You can return to the refill screen.
“ i ”
The mark is displayed next
to the drug name (barcode).
“ i ”
This mark is displayed when
the manufacturing number and
the expiration date have been
acquired from the RSS barcode or
when the manufacturing number
and the expiration date have been
entered in the re fill information
entry screen.
21

When all tablets have been dispensed during dispensing ■
Dispensing stops when all tablets have been dispensed.
After re fill of tablets is completed ([REFILL] is touched), dispensing
automatically resumes.
1. [Cassette empty warning] is
displayed on the touch panel and
an alarm is issued. (The detail of
the short drug is displayed.)
2. Touch [MUTE] to stop the alarm.
3. Re fill tablets in the cassette and
touch [REFILL].
[Cassette empty warning] is released •
and dispensing resumes.
22

When all tablets have been dispensed during dispensing (when the ■
group cassette is empty)
This page describes the case when tablets registered in the group cassette
are short during dispensing.
1. When the drug for the group
cassette is short, the [Next Cass]
button is displayed.
Touch [MUTE] to stop the alarm.•
Press the [Next Cass] button.•
The location number (MB#) of the •
displayed cassette is changed.
The next location number moves
to the front by cylinder rotation by
pressing the [SEARCH] button.
si nottub ]ssaC txeN[ eht emit yrevE •
pressed, the location number where empty
cassettes are attached is displayed in the
ascendant order. The displayed location
number is called by pressing [SEARCH].
When [Next Cass] is pressed *
when the largest location number
is displayed, the smallest
location number is displayed.
23

[Call Cassette] ■
You can call a desired cassette using its cassette number.
When the cassette is placed on the re filling table on the [Call Cassette]
screen, the location number where the cassette was attached to is
displayed.
1. Touch [CAN FIND].
Enter the cassette number and •
then touch [SEARCH].
The called cassette moves to •
the front of the tablet rack.
er nehT fill the drug. •
24

[Call Drug] ■
You can call a desired cassette using a drug name.
1. Touch [CAN FIND].
The screen is switched to the •
[Call Cassette] screen.
Then touch [Call Drug]. (The screen is •
switched to the [Call Drug] screen.)
eht fo rettel latipac eht hcuoT •
drug to be called. (1)
latipac detceles eht htiw sgurD •
letter are displayed in a list. Touch
a desired drug in the list. (2)
.]HCRAES[ hcuoT •
ot sevom ettessac dellac ehT •
the front of the tablet rack.
er nehT fill the drug. •
25

]hcraeS[■
You can search places where any cassette is not attached (used).
The cassette condition is displayed by placing the cassette on the re fill table
on the [Search] screen.
1. Touch [CAN FIND].
The screen is switched to the •
[Call Cassette] screen.
2. Touch [SEARCH].
The screen is switched to •
the [Search] screen.
3. Search
Select the condition of the cassette to •
be searched and then touch [SEARCH].
(The cassette size display varies
depending on the packing machine type.)
The place that fits the condition moves •
to the front of the tablet rack.
26

Details of DTA filling ■
Filling of the drug selected on the DTA drug list screen is displayed.
1. The DTA set wait screen is
displayed at the time of issuing
a DTA prescription or when the
second filling is to be performed
after the DTA set. (Up to 13 drugs
are displayed at one time.)
,erom ro sgurd 41 era ereht fI •
press [NEXT PAGE].
Other drugs are displayed. You can return •
to the previous screen displaying the 13
drugs by pressing [NEXT PAGE] again.
(The [NEXT PAGE] button is displayed
only when there are 14 drugs or more.)
27

2. Touch the drug name.
3. You go to the DTA drug list screen.
4. Touch the drug name you want
to display. Press the [DETAILS]
button while the drug name is
displayed within the black frame.
5. How to fill the drug selected in the
DTA drug list is displayed.
Press [NEXT PAGE].•
28

6. How to fill the unfilled drug that is
next to the currently displayed
drug is displayed.
When unequal tablets are to be set, •
a caution message is displayed.
Press [RETURN].•
7. If you return to this screen by
pressing [RETURN] on the DTA
details screen, you will notice that
the background color for the drug
name displaying the filling details
have been changed, indicating
that the drug has been already
browsed.
Set DTA and press [RETURN].•
8. Dispensing starts and DTA starts
delivering.
29
 Loading...