

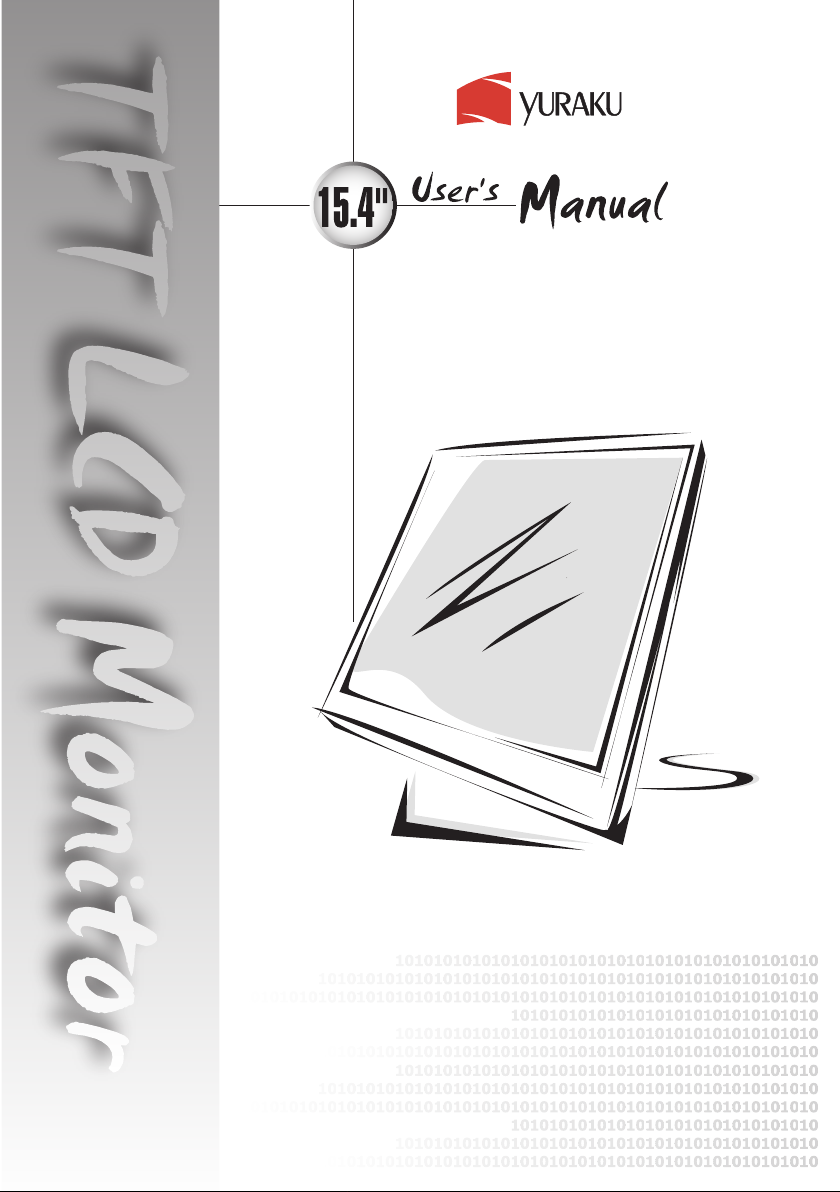
Page 1
Page 2

Contents
English
Notice................................................................................................................................................3
Safety Information.............................................................................................................................3
Precaution.........................................................................................................................................3
Package Contents.............................................................................................................................3
Hardware Installation
Input‧ ...............................................................................................................................................4
Control Buttons .................................................................................................................................4
OSD Menu Mode ..............................................................................................................................5
Troubleshooting.................................................................................................................................6
Supported Timing..............................................................................................................................6
Specification......................................................................................................................................7
Français
Avertissement....................................................................................................................................8
Information de sécurité ......................................................................................................................8
Précautions.......................................................................................................................................8
Contenu de l’emballage.....................................................................................................................8
Installation du matériel
Entrée‧ ............................................................................................................................................9
Boutons de configuration du menu....................................................................................................9
Mode de menu OSD........................................................................................................................10
Dépannage...................................................................................................................................... 11
Minutages acceptés ........................................................................................................................ 11
Caractéristiques ..............................................................................................................................12
Deutsch
Hinweise..........................................................................................................................................13
Sicherheitsvorkehrungen.................................................................................................................13
Zu beachten....................................................................................................................................13
Verpackungsinhalt...........................................................................................................................13
Hardware-Installation
Eingangsanschluß‧ .......................................................................................................................14
Reglertasten....................................................................................................................................14
OSD-Menü-Modus ..........................................................................................................................15
Fehlersuche ....................................................................................................................................16
Unterstütztes Timing........................................................................................................... .............16
Spezifikationen................................................................................................................................17
1
Page 3

Español
Noticia.............................................................................................................................................18
Información de Seguridad...............................................................................................................18
Precaución......................................................................................................................................18
Contenidos del Paquete..................................................................................................................18
Instalación de Hardware
‧Entrada........................................................................................................................................19
Botones de Control .........................................................................................................................19
Menú de Modo de OSD...................................................................................................................20
Solución de Problemas ...................................................................................................................21
Tiempo apoyado..............................................................................................................................21
Especificación.................................................................................................................................22
Italiano
Notifica............................................................................................................................................23
Informazioni per la sicurezza...........................................................................................................23
Avvertenze......................................................................................................................................23
Contenuto della Confezione............................................................................................................23
Installazione dello Hardware
‧Ingresso.......................................................................................................................................24
Tasti di Controllo..............................................................................................................................24
Modalità Menu OSD........................................................................................................................25
Ricerca guasti .................................................................................................................................26
Sincronizzazione Supportata...........................................................................................................26
Specifiche........................................................................................................................................27
Português
Aviso ...............................................................................................................................................28
Informação de segurança................................................................................................................28
Precaução.......................................................................................................................................28
Conteúdo do pacote........................................................................................................................28
Instalação do hardware
Input‧ .............................................................................................................................................29
Botões de contrôlo ..........................................................................................................................29
Modo de menu OSD........................................................................................................................30
Localizador e Reparador de Defeitos..............................................................................................31
Tempo apoiado................................................................................................................................31
Especificação..................................................................................................................................32
2
Page 4

English
◇ Notice
‧ All Information in this manual may change from time to time without prior notice.
‧ To ensure safety operation of this product, please read the following menu carefully before using
this product.
◇ Safety Information
‧ Do not place anything wet on the monitor or the power cord.
‧ Be sure to turn the monitor off before plugging the power cord into the socket.
‧ Be sure to check the power cord and the other cords are securely and rightly connected.
‧ Do not attempt to open the monitor. You may be hurt by electric shock. For service, call your place
of purchase.
◇ Precaution
‧ Do not expose the monitor to direct sunlight or heat.
‧ Do not spill liquid on the monitor.
‧ Do not use your monitor when magnets or electronic products are operating nearby.
‧ Do not use harsh chemicals or strong cleaning solvents to clean the monitor screen. Wipe it with
clean, soft clothes applied with mild solution.
‧ Do not place anything on your monitor. Bad ventilation may elevate temperature in the monitor.
‧ Do not use your fingers to touch the LCD Screen directly. Fingerprint that contains oil and may be
difficult to clean.
Package Contents
Our LCD monitor contains these following items. Make sure you get items listed below, otherwise
contact to your dealer or store.
1. 15.4”TFT LCD Monitor
2. Power Cord
3. VGA Cable
4. Audio Cable * The audio function is optional.
5. User’s Manual
3
Page 5
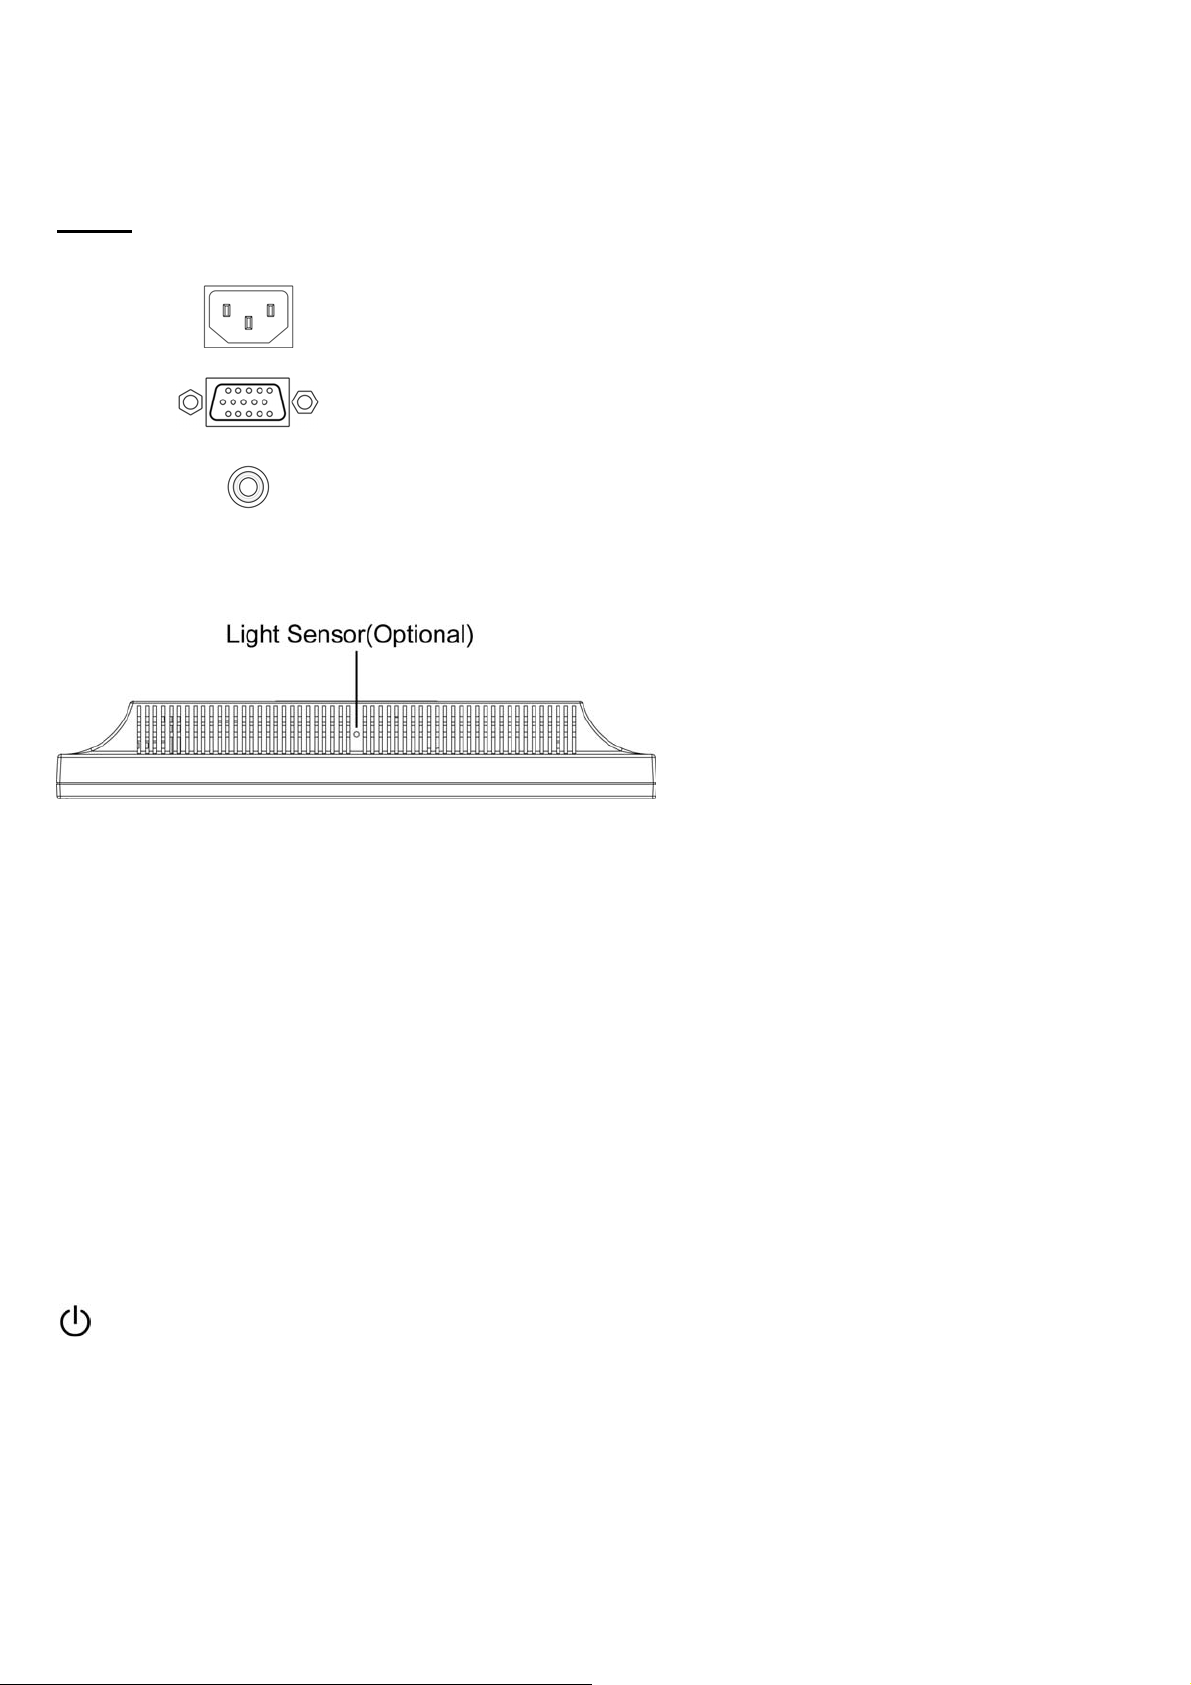
Hardware Installation
Be carefully to your LCD monitor, it’ s very exquisite but easy to broken. T urn of f LCD’ s and PC’s power
before you set it up. Follow our installation step by step.
Input
AC input:This is for connecting the power cable.
VGA port : This can be connected with the D-Sub 15 pin signal
Cable.
Audio in:This can be connected to the PC audio-out connector
*NOTICE: The audio function is optional feature.
of sound resource.
Control Buttons
There are 5 keys for user to set up the monitor, including "Auto Adjust", "OSD menu", "Power", "Adjust
<->", "Adjust <+>". The following descriptions are the introduction of these Keys.
Auto Adjust (Function)--
Function Select Button: This button allows you to select the control functions up in the OSD.
A
Hotkey: Press this button to apply the monitor setting automatically.
Menu (Function)--
Function Select Button: This button allows you to select the control functions down in the OSD.
M
Hotkey: Press this button to get a pop-up OSD menu.
Power: Turn the LCD power on and off. When the power is on, the light is showing green,
Stand by will be orange.
Adjust < - >: Decrease the option value in the OSD menu.
-
Adjust < + >: Increase the option value in the OSD menu.
+
4
Page 6

OSD (On-Screen Display) Menu Mode
Please adjust your Speaker Volume via your PC computer Speaker Volume control icon.
*
Please note that Sound will continue to play when your monitor is off, to turn off please turn off your
*
PC computer or mute the Speaker Volume control icon.
Press the OSD button to access menu, and press Increase / Decrease button for adjustment.
*
BRIGHTNESS
BRIGHTNESS
CONTRAST
Adjust the brightness of the display.
IBT (Light Sensor)-(Optional): This feature automatically adjust your
monitor brightness base on ambient light changes. To activate this feature
please select Auto icon within the main OSD Bri ghtness icon.
To deactivate please select Manual instead of Auto.
Adjust the difference between light and dark area.
PHASE
CLOCK
H-POSITION
V-POSITION
RESET
COLOR TEMPERATURE
RED
GREEN
BLUE
LANGUAGE
MISCELLANEOUS
EXIT OSD
MISCELLANEOUS
RETURN
OSD H-POSITION
The phase of the dot clock is adjusted.
The ratio of dividing frequency of the dot clock is adjusted.
Adjust the horizontal position of the display.
Adjust the vertical position of display.
Recall the default setting.
Adjust the color temperature.
Adjust the Red color temperature.
Adjust the Green color temperature.
Adjust the Blue color temperature.
Select the display language of the OSD Menu.
〝No〞will take you to the exit menu.〝Yes〞will bring you to the sub menus
of the Miscellaneous menu.
Saving and Leave.
Return to main menu.
Adjust the horizontal position of the OSD.
OSD V-POSITION
OSD DURATION
AUTO COLOR
Adjust the vertical position of the OSD.
Adjust the timing of the OSD menu.
Adjust the color automatically.
5
Page 7
Troubleshooting
Make sure that your monitor is properly installed if you have encountered any trouble using this
product.
˙ There is no picture on the screen.
Check: 1.Power saving mode. Press any key and move the mouse to deactivate the mode.
2.Signal cable connector pins. If there are bent or missing pins, consult your place of
purchase.
˙ Characters look too dark or too light
Check: Using OSD Menu to adjust the Brightness.
˙ When your monitor shall be adjusted?
Check: If the resolution of frequency is being changed.
. The text appears on the screen are unclear.
Check: Make sure the resolution or refresh rate match with the Display Mode.
Supported Timing
Resolution Vertical Frequency (Hz) Horizontal Frequency (KHz)
640x480 59.94 31.47
800x600 56.25 35.16
800x600 60.32 37.88
1024x768 60.00 48.36
1280x800 59.81 49.702
Display Mode
6
Page 8
Specification
Input Signals
VGA
VGA compatible analog RGB
Compatibility
Connector
Power
Internal Speaker
User Interface
Operating Condition
Dimensions
Net Weight
DDC
PC Up to 1280X800@60Hz(Non-interlaced)
VGA
Audio*
Power
Voltage
Consumption
Power saving mode
LED Indicator Active - Green
Temperature
Humidity
Physical 357.0mm(W) x 324.2mm(H) x 170mm(D)
DDC2B
Composite sync supported
D-sub 15-pins
Stereo Phone Jack
A/C Input
Built-in universal power supply: 100-240 VAC, 50/60 Hz
Active < 24 Watt Max.
Standby < 2 Watt
Speaker x 2
Standby - Orange
Operating:5℃ to 40℃
20% ~ 80% R.H.
2.5 Kg ± 0.5
*
Power Management
Regulation (Certifications)
Others
Notice: * Speaker and Light Sensor are optional.
VESA DPMS
UL, FCC , CE
Light Sensor *
7
Page 9

Français
◇ Avertissement
‧ L’information dans ce manuel est sujette à modification sans notification.
‧ Veuillez lire et suivre les informations et précautions suivantes avant d’utiliser l’appareil..
◇ Information de sécurité
‧ Ne placez aucun objet mouillé sur le moniteur ou le cordon d’alimentation.
‧ Eteignez votre moniteur avant de connecter le cordon d’alimentation sur une prise de courant.
‧ Vérifiez que le cordon d’alimentation et les autres câbles sont correctement connectés.
‧ N’essayez jamais d’ouvrir le moniteur, un incendie ou une électrocution pourrait se produire.
Contacter votre revendeur ou un centre de service pour la maintenance.
◇ Précautions
‧ Evitez d’exposer le moniteur aux rayons directs du soleil ou a toute autre source de chaleur.
‧ Evitez d’exposer le moniteur à des liquides.
‧ N’utilisez pas votre ordinateur à proximités des aimants ou des produits électroniques.
‧ N’utilisez jamais des solvants tels que le diluant, l’alcool ou le benzène pour nettoyer l’écran.
Nettoyez l’écran avec un chiffon sec et doux.
‧ Ne placez pas des objets sur votre moniteur. Une ventilation insuffisante peut causer
l’augmentation de la température dans le moniteur.
‧ Evitez de toucher l’écran LCD avec vos doigts. La graisse de la peau est difficile à enlever.
Contenu de l’emballage
L’emballage du moniteur LCD contient les éléments ci-dessous. Vérifiez le contenu et contactez
immédiatement votre revendeur, si quelque chose manque.
1. Moniteur LCD 15.4”TFT
2. Cordon d’alimentation
3. Câble VGA
4. Câble audio
5. Manuel de l’utilisateur
* Fonction audio est optionnelle.
8
Page 10

Installation du matériel
)
Prenez soin de votre moniteur LCD. Eteignez votre moniteur LCD et votre ordinateur avant de
commencer l’installation. Suivez les étapes ci-dessous pour compléter l’installation.
Entrée
Entrée en C.A:Pour connecter le câble d’alimentation
Port VGA : Peut être connecté avec le câble D-Sub 15
broches.
Entrée audio In:Pour connecter le câble de signal de ligne de
*REMARQUE: La fonction Audio est optionnelle.
Capteur optique (en option
sortie venant de l’ordinateur.
Boutons de configuration du menu
Il existe 5 touches utilisateur pour le réglage du moniteur "Réglage Auto ", " menu OSD ",
"Alimentation", "Réglage <->", "Réglage <+>". Vous trouverez ci-dessous une introduction à ces
touches.
Réglage Auto (Fonction)-Touche de sélection des fonctions: Cette touche vous permet de sélectionner les fonctions de
A
contrôle sur l’ODS (affichage écran).
Raccourci clavier: Appuyez sur cette touche pour appliquer automatiqquement le réglage.
Menu (Fonction)-Touche de sélection des fonctions: Cette touche vous permet de sélectionner les fonctions de
M
contrôle sous l’ODS (affichage écran).
Raccourci clavier: Appuyez sur cette touche pour obtenir un menu contextuel OSD.
Alimentation: Allumer et éteindre l’écran LCD. Quand l’app areil est allumé, la lumière s’allume en
vert, Et en orange en mode attente.
Réglage < - >: Baisser l’option valeur dans le menu OSD.
-
Réglage < + >: Augmenter l’option valeur dans le menu OSD
+
9
Page 11

Mode de menu OSD (On-Screen Display)
*Veuillez régler le volume haut parleur depuis l’icône de contrôle de volume de votre PC.
*Veuillez noter que le son continuera quand votre moniteur est éteint ; pour l’éteindre, veuillez éteindre votre
PC ou mettre l’icône de contrôle du volume en sourdine.
Appuyez sur la touche OSD pour accéder le menu, et appuyez sur les touches Augmenter/Diminuer pour
l’ajustement.
*
BRIGHTNESS
BRIGHTNESS
CONTRAST
PHASE
Ajuste la luminosité de l’image.
IBT (Capteur optique)-(en option): cette option règle automatiquement automatically la
base luminosité de votre moniteur en function des changements de lumière ambiante.
Pour activer cette option, veuillez sélectionner l’icone Auto à partir de l’icone
Luminosité OSD. Pour désactiver, veuillez sélectionner Manuel au lieu de Auto.
Ajuste la différence entre les régions claires et foncées.
La phase de l'horloge de point est ajustée.
CLOCK
Le rapport de diviser la fréquence de l'horloge de point est ajusté.
H-POSITION
V-POSITION
Ajuste la position horizontale de l’image
Ajuste la position verticale de l’image.
COLOR TEMPERATURE
RESET
Rappelle les paramètres par défaut.
Ajuste la température de couleur des pixels.
RED
Ajuste la couler du pixel rouge.
GREEN
BLUE
Ajuste la couler du pixel vert.
Ajuste la couler du pixel bleu.
LANGUAGE
MISCELLANEOUS
EXIT OSD
Sélectionne la langue du menu OSD.
‘No’ ouv rira le menu pour quitter (Exit). ‘Yes’ ouvrira les sous-menus du
menu ‘Miscellaneous’.
Quitter et enregistrer les paramètres.
MISCELLANEOUS (DIVERS)
RETURN
OSD H-POSITION
OSD V-POSITION
OSD DURATION
AUTO COLOR
Retourne au menu principale.
Ajuste la position horizontale de l’OSD.
Ajuste la position verticale de l’OSD.
Ajuste le délai du menu OSD.
Ajuste la couler automatiquement.
10
Page 12

Dépannage
Assurez-vous que le moniteur est installé correctement lorsque vous avez des problèmes avec ce
produit.
‧Il n’y a pas d’image sur l’écran.
Vérifie: 1. Mode Économie d'énergie. App uyez sur une touche et utilisez souris pour désactiver
ce mode.
2. Les broches du connecteur de câble de signal. Lorsqu’il y a des broches abîmées,
contactez votre revendeur.
‧Caractères sont trop foncés ou trop clairs
Vérifie: Utilisez le menu OSD pour ajuster la luminosité.
‧Quand est-ce que vous devez ajuster votre moniteur?
Vérifie: si la résolution ou la fréquence de rafraîchissement a été changée.
‧Le texte qui apparaît sur l’écran n’est pas très clair.
Vérifie : Assurez-vous que la résolution ou la fréquence de rafraîchissement correspond au
mode d’affichage.
Minutages acceptés
Résolution Fréquence verticale (Hz) Fréquence horizontale (KHz)
640x480 59.94 31.47
800x600 56.25 35.16
800x600 60.32 37.88
1024x768 60.00 48.36
1280x800 59.81 49.702
Mode d’affichage
11
Page 13

Caractéristiques
Signaux d’entrée
VGA
VGA compatible analogique RGB
Compatibilité
Connecteur
Alimentation
Internal Speaker
User Interface
Condition opératoire
Dimensions
Poids Net
PC Jusqu’à 1280X800@60Hz(sans entrelacement)
VGA
Audio*
Alimentation
Voltage
Consommation
Mode économie d’énergie
LED Indicator Active - Vert
Température
Humidité
Physique 357.0mm(L) x 324.2mm(H) x 170mm(P)
Composite sync accepté
D-sub 15-broches
Prise téléphone stéréo
Entrée A/C
Alimentation universelle intégrée:100-240 VAC, 50/60
Hz
Active < 24 Watt Max.
En attente< 2 Watt
Haut parleur x 2
En attente - Orange
Fonctionnement: 5 to 40℃℃
20% ~ 80% R.H.
2.5 Kg ± 0.5
*
DDC
Gestion Alimentation
Régulation (Certificats)
Autres
Note: * Les haut- parleurs et le capteur optique sont en option.
DDC2B
VESA DPMS
UL, FCC, CE
Capteur optique
*
12
Page 14

Deutsch
◇ Hinweise
‧ Eine jederzeitige Änderung aller Informationen in diesem Benutzerhandbuch ohne Vorbenachrichtigung ist
vorbehalten.
‧ Für einen sicheren Betrieb dieses Gerätes lesen Sie die folgende Anleitung bitte sorgfältig durch, bevor Sie
das Gerät in Betrieb nehmen.
◇ Sicherheitsvorkehrungen
‧ Keine feuchten oder nassen Gegenstände auf den Monitor oder auf das Stromkabel stellen.
‧ Vor dem Anschließen des Steckers an eine Netzsteckdose stellen Sie sicher, dass der Monitor
ausgeschaltet ist.
‧ Stellen Sie sicher, dass das Stromkabel und die anderen Kabel gut, fest und richtig angeschlossen sind.
‧ Versuchen Sie nicht, das Monitorgehäuse zu öffnen, da Sie sich so einem Risiko eines elektrischen
Schlages und somit einer Verletzungsgefahr aussetzen. Für Reparaturen und Wartungen wenen Sie sich
bitte an die Verkaufsstelle.
◇ Zu beachten
‧ Den Monitor jederzeit vor direkter Sonneneinstrahlung oder Hitze schützen.
‧ Keine Flüssigkeiten über dem Monitor verschütten.
‧ Den Monitor nicht in der Nähe von Magneten oder elektrischen Geräten, wenn diese in Betrieb sind,
benutzen.
‧ Zum Reinigen des Monitorbildschirmes verwenden Sie keine scharfen Chemikalien oder starke
Reinigungsmittel. Wischen Sie den Bildschirm mit einem sauberen und trockenen Tuch, welches leicht mit
einem milden Reinigungsmittel benetzt ist, sauber.
‧ Keine Gegenstände auf den Monitor stellen. Eine schlechte Belüftung führt zu einer Überhitzung im
Monitor.
‧ Den LCD-Bildschirm nicht direkt mit den Fingern berühren. Fingerabdrücke und Hautfett lassen sich nur
schwer entfernen.
Verpackungsinhalt
Im Lieferumfang dieses LCD-Monitors müssen die folgenden Artikel vorhanden sein. Stellen Sie sicher, dass
dieser Verpackungsinhalt vollständig ist. Wenn nicht, wenden Sie sich umgehend an Ihren Händler oder an das
Geschäft, von dem Sie dieses Produkt gekauft haben. Sie können auch mit uns Kontakt aufnehmen.
1. 15.4-Zoll-LCD-Monitor mit TFT
2. Netzkabel
3. VGA-Kabel
4. Audiokabel * Die Audiofunktion ist optional.
5. Benutzerhandbuch
13
Page 15

Hardware-Installation
Seien Sie vorsichtig beim Umgang mit diesem LCD-Monitor. Trotz seinem einzigarten Design kann er
aber auch leicht beschädigt werden. Schalten Sie die Stromzufuhr zum LCD-Bildschirm und zum PC
aus, bevor Sie das Gerät aufstellen. Befolgen Sie den Installationsvorgang Schritt für Schritt.
Eingangsanschluß
AC Eingang:Dient dem Anschluss des Netzkabels.
VGA port : Hier kann das D-Bub 15-Pin Signalkabel
angeschlossen werden.
Audio In: (Audio-Eingang) Zum Verbinden mit dem
*HINWEIS: Audiofunktion ist Zusatzeinrichtung.
Lichtsensor (Optional)
PC-Audio-Ausgangsanschluß (PC Audio Out) eines
Soundgerätes.
Befehlstasten
Es gibt 5 Tasten die der Benutzer zum Einszellen des Monitors benutzen kann, inklusive "Auto
Einstellen", "OSD-Menü", "Netz", "Regeln <->", "Regeln <+>". Die folgende Beschreibung stellt diese
Tasten vor.
Auto Einstellen (Funktion)--
Funktionsauswahltaste: Diese Taste dient der Wahl von Kontrollfunktionen oben im OSD.
A
Hotkey: Drücken Sie diese Taste, um die Monitoreinstellung automatisch zu aktivieren.
Menü (Funktion)--
Funktionsauswahltaste: Diese Taste dient der Wahl von Kontrollfunktionen unten im OSD
M
Hotkey: Drücken Sie diese Taste, um das Pop-up OSD-Menü aufzurufen..
Netz: Schaltet die LCD Netzversorgung ein und aus. Wenn eingeschaltet, leuchtet das Licht grün,
Standby wird orange angezeigt.
Regeln < - >: Verringert die Optionswerte des OSD-Menüs.
-
Regeln < + >: Erhöht die Optionswerte des OSD-Menüs.
+
14
Page 16

OSD-Menü-Modus (Anzeige auf dem Bildschirm)
Regeln Sie die Lautsprecherlautstärke über Ihr PC-Lautstärke-Kontrollesymbol.
*
Beachten Sie, dass der Sound auch bei ausgeschaltetem Monitor aktiv ist, schalten Sie zum
*
Beenden Ihren PC aus oder deaktivieren Sie das Lautstärke-Kontrollsymbol.
Drücken Sie die OSD-Taste. Um auf das Menü zuzugreifen, und drücken Sie die Erhöhen / Verringern
Taste zum Einstellen.
BRIGHTNESS
*
BRIGHTNESS
CONTRAST
(Helligkeit) Zum Einstellen der Helligkeit auf dem Bildschirm.
IBT (Lichtsensor)-(Optional): Diese Funktion passt die Monitorhelligkeit
automatisch der Umgebungsbeleuchtung an. Wählen Sie zum Aktivieren
dieser Funktion das Auto Symbol im Helligkeitssymbol des OSD
Hauptmenü. Wählen Sie zum Deaktivieren Manuell anstelle von Auto.
Reguliert die Differenz zwischen helle und dunkele Fläche.
PHASE
Die Phase des Punkttaktgebers wird justiert.
CLOCK
Das Verhältnis des Teilens der Frequenz des Punkttaktgebers wird justiert.
H-POSITION
(Horiz. Position) Zum Einstellen der horizontalen Positionen der Anzeige
auf dem Bildschirm.
V-POSITION
RESET
(Vertik. Position) Zum Einstellen der vertikalen Positionen der Anzeige auf
dem Bildschirm.
(Rücksetzen) Zum Wiederabrufen der Standardeinstellungen.
COLOR TEMPERATURE
RED
(Farbtemperatur) Zum Einstellen der Farbtemperatur.
(Rot) Zum Einstellen der roten Farbtemperatur.
GREEN
(Grün) Zum Einstellen der grünen Farbtemperatur.
BLUE
LANGUAGE
MISCELLANEOUS
(Blau) Zum Einstellen der blauen Farbtemperatur.
(Sprache) Zum Auswählen der Sprache, in der das OSD-Menü angezeigt
werden soll.
(Verschiedenes) Mit “Nein” gelangen Sie zum Menü zum Verlassen. Mit
“Ja” gelangen Sie zu den Untermenüs im Miscellaneous-Menü
(Verschiedenes).
EXIT OSD
(Verlassen ) Zum Speichern und Verlassen.
MISCELLANEOUS (VERSCHIEDENES)
RETURN
OSD H-POSITION
OSD V-POSITION
OSD DURATION
AUTO COLOR
(Zurück) Zum Zurückkehren zum Hauptmenü.
(Horiz. Position des OSD) Zum horizontalen Verschieben des OSD-Menüs
auf dem Bildschirm.
(Vertik. Position des OSD) Zum vertikalen Verschieben des OSD-Menüs auf
dem Bildschirm.
(OSD-Dauer) Zum Einstellen, wie lange das OSD-Menü auf dem Bildschirm
angezeigt werden soll.
(Autom. Farbauswahl) Zum automatischen Einstellen der Farbe.
15
Page 17

Fehlersuche
Falls Schwierigkeiten auftreten, stellen Sie wie nachstehend beschrieben sicher, dass der Monitor
richtig installiert wurde.
˙ Der Bildschirm bleibt leer.
Nachprüfen:
1. Energiesparmodus. Zum Deaktivieren dieses Modus drücken Sie auf eine beliebige Taste oder
bewegen Sie die Maus.
2. Anschlußpins des Steckers des Signalkabels. Falls Pins verbogen sind oder fehlen, wenden Sie
sich an die Verkaufsstelle.
˙ Die Zeichen erscheinen zu dunkel oder zu hell
Nachprüfen: Die Helligkeit im OSD-Menü einstellen.
˙ Wann muss der Monitor eingestellt werden?
Nachprüfen: Die Auflösung oder die Frequenz abändern.
. Der Text erscheint unklar auf dem Bildschirm.
Nachprüfen: Sicherstellen, dass die Auflösung oder Aktualisierungsrate mit dem
Anzeigemodus übereinstimmen.
Unterstütztes Timing
Auflösung Vertikalfrequenz (Hz) Horizontalfrequenz (kHz)
640x480 59.94 31.47
800x600 56.25 35.16
800x600 60.32 37.88
1024x768 60.00 48.36
1280x800 59.81 49.702
Anzeigemodus
16
Page 18

Spezifikationen
Eingangssignale
VGA
VGA kompatibles analog RGB
Kompatibilität
Anschlüsse
Netz
Integrierte Lautsprecher
Benutzeroberfläche
Betriebsbedingungen
Abmessungen
Nettogewicht
PC Bis zu 1280X800@60Hz (zeilensprungfrei)
VGA
Audio*
Power
Spannung
Verbrauch
Energiesparmodus
LED-Anzeige Aktiv - Grün
Temperatur
Luftfeuchtigkeit
Physisch 357.0mm(W) x 324.2mm(H) x 170mm(T)
Composite Sync unterstützt
D-Sub 15-Pin
Stereobuchse
A/C Eingang
Integrierter Universal-Netzversorgung:100-240 VAC,
50/60 Hz
Aktiv < 24 Watt Max.
Standby < 2 Watt
Lautsprecher x 2
Standby - Orange
Betrieb: 5 to 40℃℃
20% ~ 80% R.H.
2.5 Kg ± 0.5
*
DDC
Energieverwaltung
Zertifizierungen
Anderes
Hinweis: * Lautsprecher und Licht se nsor sind optional.
DDC2B
VESA DPMS
UL, FCC, CE
Lichtsensor
*
17
Page 19

Español
◇ Noticia
‧ Toda información del presente manual puede cambia rse por tiempo a tiempo sin pre aviso.
‧ Para asegurar la seguridad de operación del producto, por favor leer el siguiente menú con
cuidado antes usar el producto.
◇ Información de Seguridad
‧ Que no se colocar cosa mojada sobre el monitor o el cordón de corriente.
‧ Hace seguro que está apagado el monitor antes de enchufar el cordón de corriente al enchufe.
‧ Revise el cordón de corriente y otros cordones si están seguro y correctamente conectado.
‧ Que no se intentar de abrir el monitor, Ud. podría ser dañado por choque eléctrico. Para servicio,
llame al lugar de compra.
◇ Precaución
‧ Que no se exponer el monitor directamente a la luz de sol o calor.
‧ Que no se verter líquido sobre el monitor.
‧ Que no se usar su monitor cuando los productos magnéticos o electrónicos cercanos están
operando.
‧ Quse no se usar químicos severos o fuerte solventes de limpieza para limpiar la pantalla del
monitor. Limpiarlo con trapo limpio y suave aplicado con solución apacible.
‧ Que no se colocar cualquier cosa sobre el monitor. Mala ventilación se elevaría la temperatura del
monitor.
‧ Que no se tocar con sus dedos a la Pantalla de CD directamente. La huella digital contiene aceite
y podría ser difícil de limpiarse.
Contenidos del Paquete
Nuestro monitor de LCD debe contener con los siguientes artículos. Hace seguro que Ud. tiene todos
completos, sino comunique con su proveedor o la tienda donde Ud. hace la compra. Por favor siente
libre de comunicar con nosotros
1. 15.4”TFT Monitor de LCD
2. Cordón eléctrico
3. Cable de VGA
4. Cable del Audio * Es opcional la función del audio .
5. Manual del Usuario
18
Page 20

Instalación de Hardware
Cuidado con su monitor de LCD, es muy exquisito pero fácil de romperse. Ap agar el corriente de LCD
y de PC antes de colocarlo. Sigue nuestra instalación paso por paso.
Entrada
AC Input: Para la conexión del cabo eléctrico.
Puerto VGA: Para la conexión con el cabo de signal D-Sub de
15 pinzas.
Audio In : Este puede ser conectado con PC audio-out
*ATENCION: Funcione de Audio es de característica opcionale.
Sensor de luz (Opcional)
connectador de recurso de sonido.
Botones de control
Hay 5 teclas para que el usuario instale el monitor, incluyendo "Ajuste Auto", "Menú OSD ", "Energía
Eléctrica", "Ajuste <->", "Ajuste <+>". Las siguientes descripciones forman la introducción a estas
teclas.
Ajuste auto (Función)--
Función del Botón Seleccionar: Este botón lo permite a Ud. seleccionar las funciones de control
A
arriba en el OSD.
Tecla caliente: Oprimir este botón p a ra aplicar la programación del monitor en forma automática.
Menu (Función)--
Función Botón seleccionar: Este botón lo permite a Ud. seleccionar las funciones de control en
M
el OSD.
Tecla caliente: Oprimir este botón para tener un asomado menu OSD.
Prendido: Prende y apaga el LCD. Con el prendido, la luz se pone verde y el modo Standby
queda de color naranja.
Ajuste < - >: Disminuir de valor de opción en el menú OSD.
-
Ajuste < + >: Aumentar de valor de opción en el menú OSD.
+
19
Page 21

Menú de Modo de OSD (Exhibición sobre la Pantalla)
*Se le ruega ajustar el volumen de su altavoz con el icono de control de volumen del altavoz de su PC.
*Favor notar que el sonido continuará cuando su monitor está apagado. Para apagar, favor apagar su PC
o poner en mudo al icono de control de volumen del altavoz.
Oprimir el botón OSD para tener acceso al menu y oprimir el botón Aumento/Dis minución para ajustes.
BRIGHTNESS
*
BRIGHTNESS
CONTRAST
Modificar la iluminosidad de la exhibición
IBT (Sensor de luz)-(Opcional): Esta característica automáticamente ajusta
de brillo de su monitor a base de cambios de la luz ambiental. Para activar
esta característica, se le ruega seleccionar el icono Auto dentro del icono
Brillo del OSD principal. Para desactivar, favor seleccionar Manual y no
Auto.
Modificar la diferencia entre la luz y la área oscura
PHASE
La fase del reloj del punto se ajusta.
CLOCK
H-POSITION
El cociente de dividir la frecuencia del reloj del punto se ajusta.
Modificar la posición horizontal de la exhibición
V-POSITION
RESET
COLOR TEMPERATURE
Modificar la posición vertical de la exhibición
Hacer volver la organización por defecto
Modificar el color de temperatura
RED
GREEN
Modificar el color rojo de temperatura
Modificar el color verde de temperatura
BLUE
LANGUAGE
Modificar el color azul de temperatura
Seleccionar la exhibición de lenguajes del menú de OSD.
MISCELLANEOUS
EXIT OSD
El “No” se llevaría a Ud. a salir del menú. El “Yes” llevaría a Ud. al
submenú del menú de miscelaneos
Reservar y salir
MISCELANEOS
RETURN
OSD H-POSITION
OSD V-POSITION
OSD DURATION
AUTO COLOR
Volver al menú principal
Modificar la posición horizontal de OSD
Modificar la posición vertical de OSD
Modificar la regulación del menú de OSD
Modificar el color automaticamente
20
Page 22

Solución de Problemas
Hace seguro que su monitor está bien instalado, si Ud. ha encontrado cualquier problemas del uso
sobre este producto.
˙ Que no hay dibujo sobre la pantalla.
Revise:
1. Modo de reservación de energía. Apretar cualquier tecla y mover el ratón para
desactivar el modo.
2. Las pines del conectador de cable señal. Si tuviera pines doblados o perdidos, consultar
el lugar de compra.
˙ Característica de mira muy oscuro o muy brillante
Revise: Usando el Menú de OSD para modificar la iluminosidad.
˙ ¿Para cuándo su monitor debe ser modificado?
Revise: Si fuera cambiado la frecuencia de resolución.
. El Texto aparece sobre la pantalla no está claro.
Revise: Hace seguro que la resolución o el alcance de refrescar corresponder al Modo de
Exhibición.
Tiempo apoyado
Resolución Frecuencia Vertical (Hz) Frecuencia Horizontal (KHz)
640x480 59.94 31.47
800x600 56.25 35.16
800x600 60.32 37.88
1024x768 60.00 48.36
1280x800 59.81 49.702
Modo de Exhibición
21
Page 23

Especificación
Signos input
VGA VGA compatible análogo RGB
Compuesto sync apoyado
Compatibilidad
Conector
Energía eléctrica
Altavoz Interno
Entreface Usuario
Condición de operación
Dimensiones
Peso neto
DDC
PC
VGA
Audio*
Energía eléctrica
Voltage
Consumo
Modo de economía de
energía eléctrica
Indicador LED
Temperatura
Humedad
Físicas
DDC2B
Hasta 1280×800@60Hz (No-entreface)
D-sub 15-pinzas
Jaque de Fono S tereo
Input A/C
Incorporada fuente universal de energía eléctrica:
100-240 VAC, 50/60 Hz
Activo < 24 Watt Máx.
Standby < 32att
Altavoz × 2
Activo - Verde
Standby - Naranja
Operación: 5°C a 40°C
20% ~ 80% R.H.
357.0mm(A) × 324.2mm(A) × 170mm(F)
2.5 Kg ± 0.5
*
Administración de energía
eléctrica
Reglamento (Certificaciones)
Otros
Aviso: * Altavoz y Sensor de Luz son elementos opcionales.
VESA DPMS
UL, FCC, CE
Sensor de luz
*
22
Page 24

Italiano
◇ Notifica
‧ Le informazioni di questo manuale possono cambiare di tanto in tanto senza preavviso.
‧ Per garantire la sicurezza nell’operazione di questo prodotto, leggere attentamente il seguente
menu prima di usare il prodotto.
◇ Informazioni per la sicurezza
‧ Non mettete alcuna cosa bagnata sul monitor o sul cavo di alimentazione.
‧ Assicuratevi di spegnere il monitor prima di inserire il cavo di alimentazione nella presa.
‧ Assicuratevi di controllare che il cavo di alimentazione e gli altri cavi siano collegati saldamente e
in modo corretto.
‧ Non cercate di aprire il monitor. Potreste subire lesioni da scosse elettriche. Per l’assistenza
rivolgetevi al punto di acquisto.
◇ Avvertenze
‧ Non esporre il monitor alla luce diretta del sole o al calore.
‧ Non versare liquidi sul monitor.
‧ Non usare il monitor quando dei prodotti elettronici o dei magneti operano nelle vicinanze.
‧ Non usare delle sostanze chimiche forti o dei detersivi solventi forti per pulire lo schermo del
monitor. Passatevi sopra con un panno morbido e pulito con l’aggiunta di una soluzione dolce.
‧ Non mettete alcuna cosa sopra il monitor. Una cattiva ventilazione potrebbe elevare la
temperatura del monitor.
‧ Non usate le dita per toccare direttamente lo schermo LCD. Le impronte digitali contengolo olio e
possono risultare difficili da pulire.
Contenuto della Confezione
Il nostro monitor LCD viene fornito completo delle seguenti voci. Assicuratevi che avete ricevuto il set
completo pronto per l’uso. In caso contrario contattate il vostro fornitore o negozio dove avete fatto
l’acquisto. Infine ritenetevi liberi di contattarci.
1. Monitor LCD TFT da 15.4”
2. Cavo di Alimentazione
3. Cavo VGA
4. Cavo Audio * La funzione audio è opzionale.
5. Manuale d’Uso
23
Page 25

Installazione dello Hardware
Maneggiate il nostro monitor LCD con molta cura, è un prodotto molto fine, ma delicato e facile a
rompersi. Spegnete la corrente dell’LCD e del PC prima d’installarlo. Seguite i nostri passi per
l’installazione un passo per volta.
Ingresso
Ingresso CA:È per il collegamento del cavo di alimentazione.
Porta VGA : Serve per il collegamento del cavo segnale D-Sub
a 15 pin.
Audio In:Questo si può collegare al connettore della risorsa
*NOTA: Le funzione Audio è funzione opzionale.
Sensore di Luce (Opzionale)
del suono audio-out del PC.
Tasti di Controllo
Sono a disposizione 5 tasti che servono per la configurazione del monitor, incluso "Regolazione Auto",
"Menu OSD", "Alimentazione", "Modificazione <->", "Modificazione <+>". Le seguenti descrizioni
spiegano questi tasti.
Regolazione Auto (Funzione)--
Tasto Selezione Funzione: Questo tasto serve per la selezione delle funzioni di controllo in su
nell’OSD.
A
Tasto Rapido: Premere questo tasto per applicare le configurazioni del monitor
automaticamente.
Menu (Funzione)--
Tasto Selezione Funzione: Questo tasto serve per la selezione delle funzioni di controllo in giù
M
nell’OSD.
Tasto Rapido: Premere questo tasto per aprire il menu di scelta rapita OSD.
Alimentazione: Accendere e spegnere l’alimentazione LCD. Quando l’alimentazione è accesa, la
luce si illumina in verde, Standby è indicato in arancione.
Modificazione < - >: Diminuisce il valore dell’opzione nel menu OSD.
-
Modificazione < + >: Aumenta il valore dell’opzione nel menu OSD.
+
24
Page 26

Modalità Menu OSD (On-Screen Display)
*Regolare il volume degli altoparlanti via l’icona di controllo del volume PC.
*È da notare che l’Audio continuerà, quando si spegne il monitor, per spegnerlo è necessario
spegnere il PC oppure annullare l’icona del controllo volume.
Premere il tasto OSD per accedere menu, poi premere I tasti Aumentare / Diminuire per eseguire la
regolazione.
BRIGHTNESS
*
BRIGHTNESS
CONTRAST
PHASE
CLOCK
Regola la luminosità del display.
IBT (Light Sensor)-(Opzionale): Questa funzione regola automaticamen te
la luminosità del monitor secondo la luce dell’ambiente. Per attivare
questa funzione selezionare l’icona Auto nella icone luminosità del menu
OSD principale. Per disattivarlo, selezionare Manuale anziché Auto.
Regola la differenza fra le zone chiare e scure.
La fase dell'orologio del puntino è registrata.
Il rapporto di dividere di frequenza dell'orologio di puntino è aggiustata.
H-POSITION
Regola la posizione orizzontale del display.
V-POSITION
Regola la posizione verticale del display.
RESET
Richiama l’impostazione predefinita.
COLOR TEMPERATURE
Regola la Temperatura del colore.
RED
Regola la temperatura del colore Rosso.
GREEN
Regola la temperatura del colore Verde.
BLUE
Regola al temperatura del colore Blu.
LANGUAGE
Seleziona la lingua del display del Menu OSD.
MISCELLANEOUS
“No” vi porta al menu esci. “Sì” vi porta ai sottomenu del menu Varie.
EXIT OSD
Salva ed esce.
VARIE
RETURN
OSD H-POSITION
OSD V-POSITION
OSD DURATION
AUTO COLOR
Ritorna al menu principale.
Regola la posizione orizzontale dell’OSD.
Regola la posizione verticale dell’OSD.
Regola i tempi del menu OSD.
Regola il colore automaticamente.
25
Page 27

Ricerca Guasti
Se incontrate dei problemi nell’uso di quesdto prodotto, assicuratevi che il monitor sia stato installato
nel modo corretto.
˙ Sullo schermo non appare alcuna figura.
Controllare: 1. Modalità risparmio corrente. Premere un tasto qualsiasi e spostare il mouse per
disattivare questa modalità.
2. Pin del connettore del cavo segnali. Se qualche pin è piegato o manca,
consultate il punto dove avete fatto l’acquisto.
˙ Le parole appaiono troppo scure o troppo chiare
Controllare: Uso del Menu OSD per regolare la Luminosità.
˙ Quando si deve regolare il monitor?
Controllare: Se la risoluzione della frequenza è stata cambiata.
. Il Testo che appare sullo schermo non è chiaro.
Controllare: Assicurarsi che la risoluzione o il tasso di refresh si combinino con la Modalità del
Display.
Sincronizzazione Supportata
Modalità del Display
Risoluzione Frequenza Verticale (Hz) Frequenza Orizzontale (KHz)
640x480 59.94 31.47
800x600 56.25 35.16
800x600 60.32 37.88
1024x768 60.00 48.36
1280x800 59.81 49.702
26
Page 28

Specifiche
Segnali d’ingresso
VGA
RGB analogico VGA compatibile
Compatibilità
Connettori
Alimentazione
Altoparlanti Interni
Interfaccia Utente
Condizioni di Funzionamento
Dimensioni
Peso Netto
PC Fino a 1280X800@60Hz (Non-interallacciato)
VGA
Audio*
Alimentazione
Tensione
Consumo
Modo risparmio
energetico
Indicatore LED Attivo - Verde
Temperatura
Umidità
Fisiche 357.0mm(L) x 324.2mm (A) x 170mm (P)
Composite Sync supportato
D-Sub a 15-Pin
Presa Stereo
Ingresso CA
Alimentatore universale incorporato: 100-240 VAC,
50/60 Hz
Atttivo < 24 Watt Mass.
Standby < 2 Watt
Altoparlante x 2
Standby - Arancione
Operativa: 5 a 40℃℃
20% ~ 80% UR.
2.5 Kg ± 0.5
*
DDC
Risparmio Energetico
Certificazioni
Altro
Avviso: * Altoparlanti e Sensore di Luce sono opzionali.
DDC2B
VESA DPMS
UL, FCC, CE
Sensore di Luce
*
27
Page 29

Português
◇ Aviso
‧ Toda informação no este manual cambiará ocasionalmente sem aviso prévio.
‧ Para assegurar á operação de segurança do este produto, favor ler o seguinte menu
cuidadosamente antes de usar este produto.
◇ Informação de segurança
‧ No colocar artigos molhadas no ou cordão elétrico.
‧ Estar certo de desligar o monitor antes de cavilhar o cordão elétricono soquete.
‧ Estar certo de revisar que o cordão elétricono e os demais cordões estejam conetados firmemente
e devidamente.
‧ No tentar abrir o monitor. Você estará ferido pela eletrocuão. Pelo serviço, chama seu
concesionário de compra do seu lugar.
◇ Precaução
‧ No expor o monitor á luz do sol direito o calor.
‧ No deramar líquido no monitor.
‧ No usar seu monitor com magnetos ou produtos eletrónicos em função próximo.
‧ No usar químicas ásperas ou fortes solventes de limpeza para limpar a pantalha do monitor.
Limpar-o com roupa limpa e branda com suave solução .
‧ No colocar nada no seu monitor. Indesejável ventilação elevará a temperatura no monitor.
‧ No usar seus dedos para tocar a pantalha CD direitamente. A impressão digital com azeite
dificultará a limpeza.
Conteúdo do pacote
Nosso monitor LCD terá os seguintes artigos. Esteja certo que você tenha todo o jôgo, de outra
maneira, contata seu concesioário ou estabelecimentoonde você comprou o monitor. Pelo menos,
contata-os.
1. Monitor LCD TFT de 15.4”
2. Cordão elétrico
3. Cabo VGA
4. Cabo Audio * Função audio é opcional.
5. Manual do usuário
28
Page 30

Instalação do hardware
Tenha cuidado com o seu monitor LCD, é muito exquisito empero vulnerável. Desliga o LCD e o PC
antes de instalar-o. Siga nossa instalação passo a passo.
Input
AC Input: Para a conexão do cabo elétrico.
Porto VGA: Para a conexão com o cabo de sinal D-Sub de 15
pinos.
Audio In: Para a conexão com o o conector audio-out da PC
*AVISO: A função de áudio é característica opcional.
Sensor de luz (Opcional)
da fonte de som.
Botões de contrôlo
Há 5 teclas para a instalação do monitor pelo usuário, incluindo "Ajustamento Auto", "Menu OSD ",
"Energia Elétrica", "Ajustamento <->", "Ajustamento <+>". As seguintes descrições formam a
introdução as teclas.
Ajustamento auto (Função)--
Função do Botão Selecionar: Com este botão você seleciona as funções de contrôlo arriba no
A
OSD.
Tecla quente: Oprimir este botão para aplicar a programação do monitor em forma automática.
Menu (Função)--
Função Botão seleccionar: Com este botão você seleciona as funções de contrôlo no OSD.
M
Tecla quente: Oprimir este botão para ter um surgido menu OSD.
Ligado: Liga e desliga o LCD. Com o ligado, a luz queda verde e o modo Standby queda de cor
laranja.
Ajustamento < - >: Reduzir do valor de opção no menu OSD.
-
Ajustamento < + >: Aumentar do valor de opção no menu OSD.
+
29
Page 31

Modo do menu OSD (On-Screen Display)
*Favor ajustar o volume do seu alta falante com o icono de contrôlo de volume do alto falante do seu PC.
*Favor notar que o som continuará quando s eu monitor está desligado. Para desligar, favor desligar seu
PC ou por o icono de contrôlo do volume do alto falante em mudo.
Pressionar o botão OSD para ter acesso no menu e pressionar o botão Aument ar/Reduzir para
ajustamentos.
BRIGHTNESS
*
BRIGHTNESS
CONTRAST
PHASE
CLOCK
H-POSITION
V-POSITION
RESET
COLOR TEMPERATURE
RED
GREEN
BLUE
LANGUAGE
MISCELLANEOUS
EXIT OSD
MISCELãNEO
RETURN
Ajustamento de brilho da imagem.
IBT (Sensor de luz)-(Opcional): Esta caraterística automáticamente ajusta
de brilho do seu monitor a base de câmbios da luz ambiental. Para ativar
esta caraterística, favor selecionar o icono Auto do icono Brillo do OSD
principal. Para desmobilizar, favor selecionar Manual e não Auto.
Ajustamento de contraste entre as areas escura e clara.
A fase do relógio de ponto é ajustada.
A relação de freqüência divi sora do relógio de ponto é ajustada.
Ajustamento de posição horizontal da imagem.
Ajustamento de posição vertical da imagem.
Chamar a programação de falta.
Ajustamento do cor de temperatura.
Ajustamento do cor vermelho de temperatura.
Ajustamento do cor verde de temperatura.
Selecionar pantalha de idioma do menu OSD.
Ajustamento de posição vertical da imagem.
Não para sair do menu. Sim para menu de abaixo d menu misceãneo.
Gravar e sair.
Tornar ao menu principal.
OSD H-POSITION
OSD V-POSITION
OSD DURATION
AUTO COLOR
Ajustamento de posição horizontal do menu OSD.
Ajustamento de posição vertical do menu OSD.
Ajustamento do tempo do menu OSD.
Ajustamento automático de cor.
30
Page 32

Localizador e Reparador de Defeitos
Esteja certo que o seu monitor está bem instalado se você há encontrado problemas no uso deste
produto.
˙ Não há imagem na pantalha.
Revisar:
1. Modo de salvamento de energia. Pressionar qualquer tecla e mover o mouse para desmobilizar
o modo.
2. Pinos do conector do cabo de sinal. Se estão torcidos ou faltam pinos, consulte ao seu lugar de
compra.
˙ Caracteres muitos escuros ou claros
Revisar: Usar o Menu OSD para ajustar Brilho.
˙ Quando seu monitor será austado?
Revisar: Se a resolução de freqüência está cambiada.
. Texto não claro na pantalha.
Revisar: Esteja certo que a resolução ou tasa de refrescar cumpre com o Modo de Exibição.
Tempo apoiado
Resolução Freqüência Vertical (Hz) Freqüência Horizontal (KHz)
640x480 59.94 31.47
800x600 56.25 35.16
800x600 60.32 37.88
1024x768 60.00 48.36
1280x800 59.81 49.702
Modo de Exibição
31
Page 33

Especificação
Sinais input
VGA
VGA compatível análogo RGB
Compatibilidade
Conector
Energia elétrica
Alto falante Interno
Entreface Usuário
Condição de operação
Dimensões
Peso neto
PC
VGA
Audio*
Energia elétrica
Voltagem
Consumo
Modo de economia de
energia elétrica
Indicador LED
Temperatura
Umidade
Físicas
Composto sync apoiado
Até 1280×800@60Hz (Não-entreface)
D-sub 15-pinos
Jaque de Fone S tereo
Input A/C
Incorporada fonte universal de energia elétrica: 100-240
VAC, 50/60 Hz
Ativo < 24 Watt Máx.
Standby < 2 Watt
Alto falante × 2
Ativo - Verde
Standby - Laranja
Operação: 5°C a 40°C
20% ~ 80% R.H.
357.0mm(A) × 324.2mm(A) × 170mm(F)
2.5 Kg ± 0.5
*
DDC
Administração da energia
elétrica
Regulamento (Certificações)
Outros
Aviso: * Alto falante e Sensor de Luz são elementos opcionais.
DDC2B
VESA DPMS
UL, FCC, CE
Sensor de luz
*
32
 Loading...