

Page 1
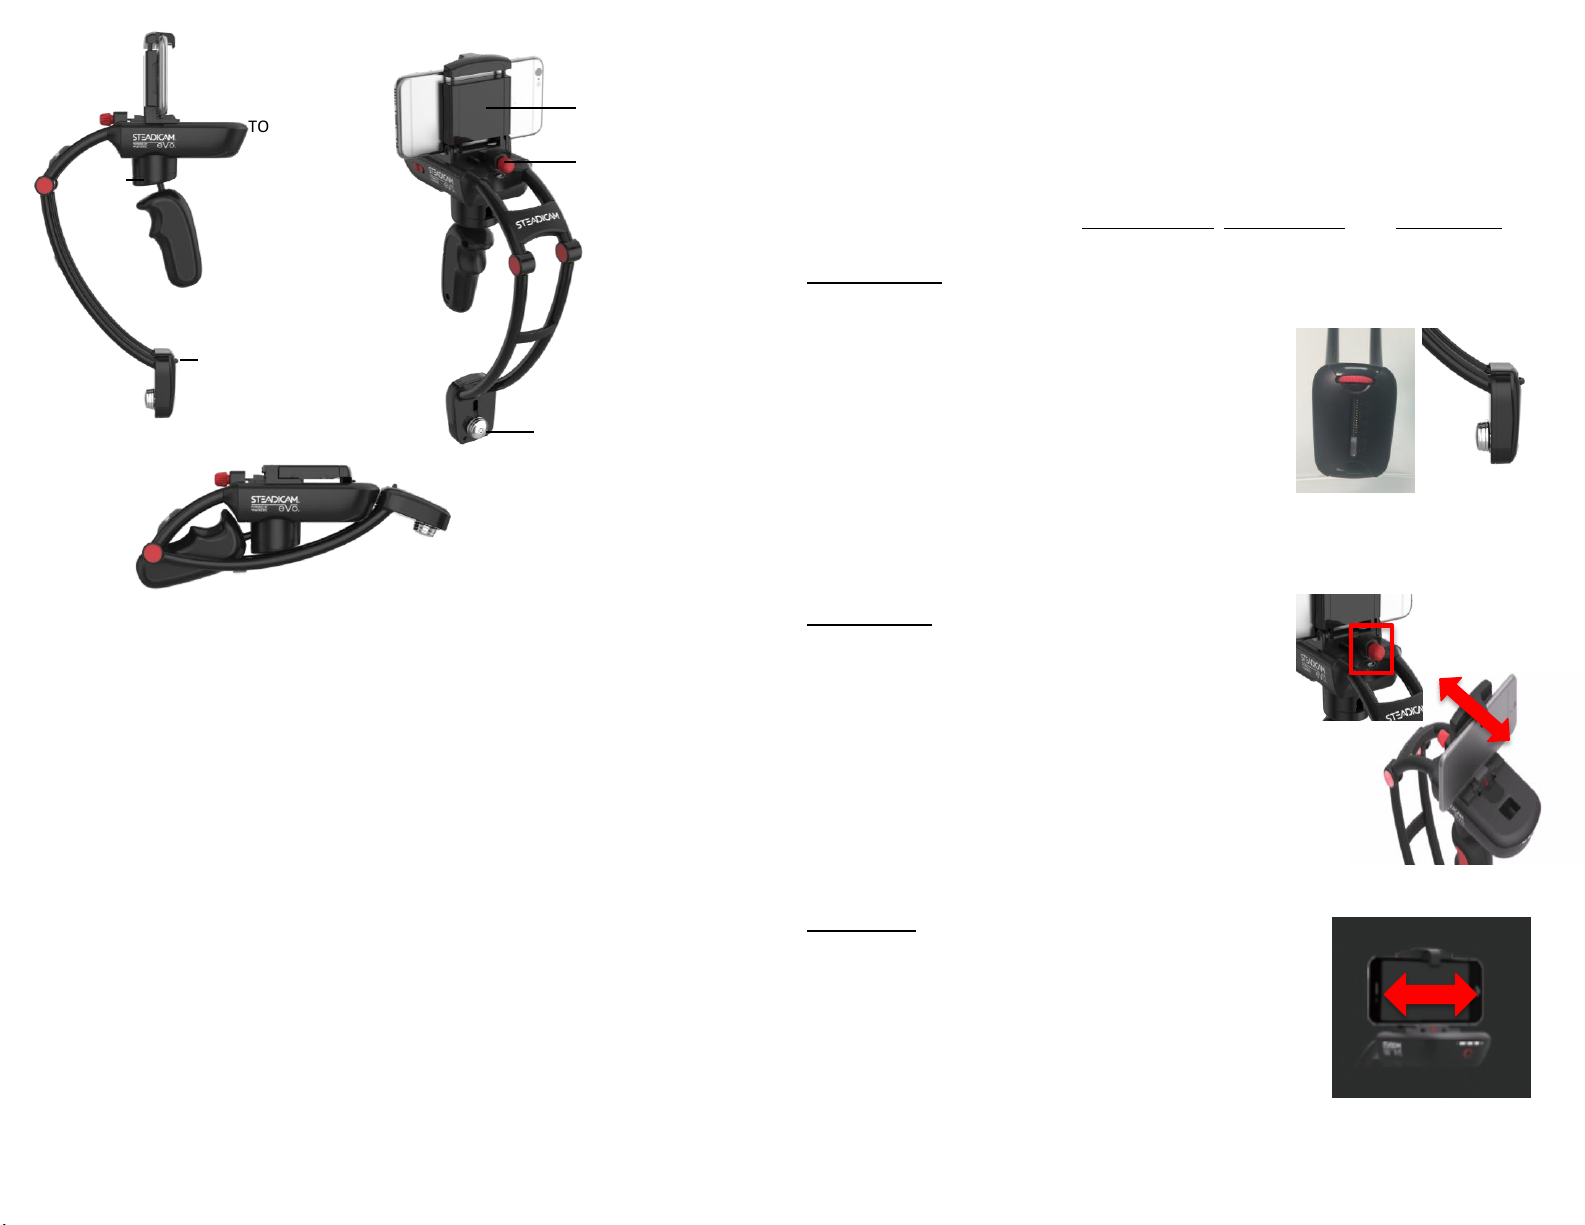
1. Open the eVo by holding the top stage and pulling
down on the base.
BALANCE WEIGHT
FRONT/BACK
KNOB
PHONE MOUNT
TOP STAGE
GIMBAL
HANDLE
GIMBAL
BASE
ADJUSTMENT
GIMBAL
GUIDE
2. Remove the rubber cap from the gimbal and pull
down on the gimbal handle to release it from its
stowed position.
3. Slide the battery cover off, install the batteries
that came in your eVo package, and then slide the
battery cover back on.
4. On the top stage, extend the spring-loaded,
top-most portion of the phone mount to
release it from its stowed position and then
lift up to open the phone mount.
5. Install your phone into the phone mount by
inserting your phone at an angle and straightening
it up into the spring-loaded mount.
SET UP
BALANCE
3. Side-to-Side: Your phone is the weight that will
balance your eVo side-to-side.
If the eVo is tilting to the left, slide your phone to the
right until the eVo stage levels horizontally. If the eVo
is tilting to the right, slide your phone to the left until
the eVo stage levels horizontally.
All Steadicam stabilizers work through a mass-based balancing setup. The eVo
is unique in that it’s the next evolution of Steadicam, where an electronic
motor assists the operator by maintaining the balance they achieved during set
up. Like all Steadicam stabilizers, the eVo has a 3-axis gimbal, so we will
balance the eVo along 3 axes: top-to-bottom, front-to-back, and side-to-side.
1. Top-to-Bottom: Your phone is the top weight and
must be counterbalanced at the bottom using the
adjustment wheel or adding balance weights at
the base of the eVo.
The bottom weight should begin at position 1.
Hold the eVo by the handle and observe how it
behaves: if the eVo is seeking a horizontal
orientation, install one of the included balance
weights on the bottom. If the eVo is still seeking a
horizontal orientation, install another one of the
included balance weights.
2. Front-to-Back: The adjustment knob on the stage
controls your front-to-back balance by moving the
position of your phone along the stage.
If the eVo is tilting forward, turn the adjustment
knob clockwise to tilt it backward. If the eVo is tilting
backward, turn the adjustment knob
counterclockwise to tilt it forward.
ADJUSTMENT
WHEEL
Page 2
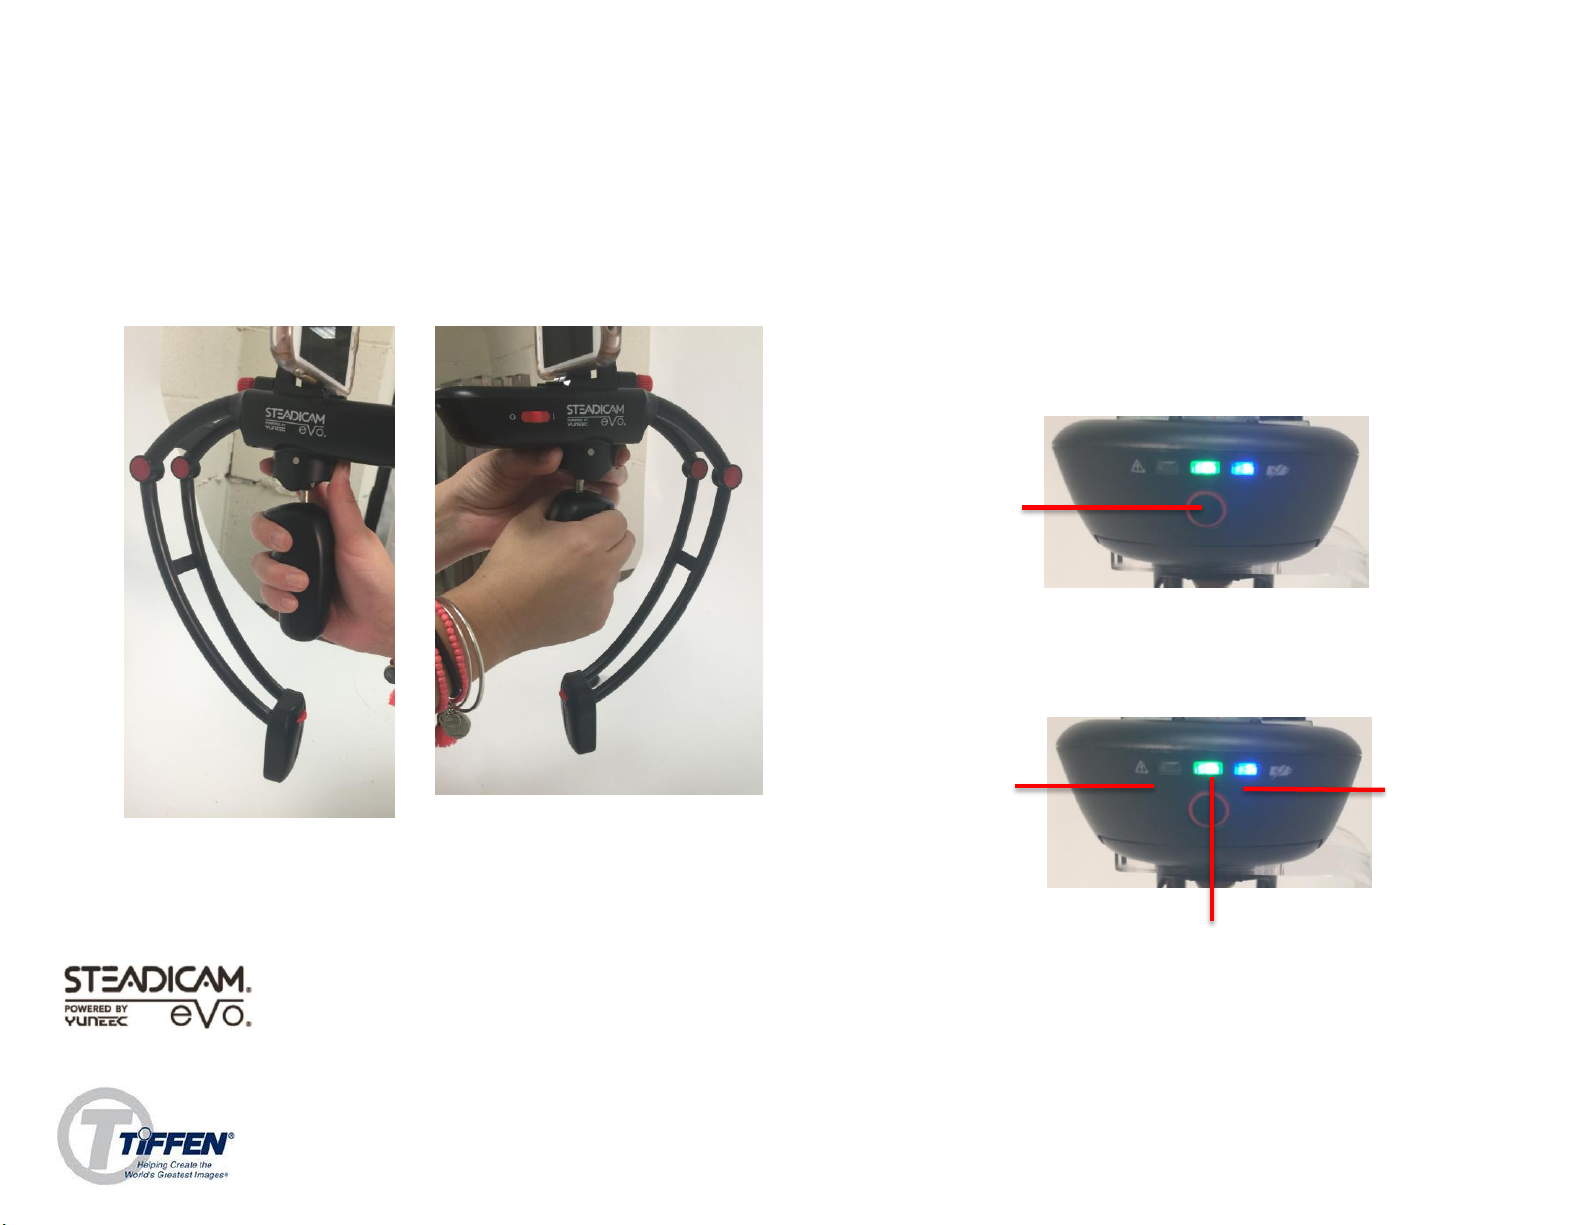
PRO MODE BUTTON
LED KEY
OPERATING
1. Hold the eVo by the gimbal handle to operate.
2. Power on the eVo with the power button on the side of the eVo stage.
Please note: the LED lights on the rear of the eVo stage will flash for 3-4
seconds on power up before the eVo is ready for use.
3. Using one hand or both, use the gimbal guide to control the pan and tilt
of the eVo while shooting.
ONE-HANDED OPERATION
TWO-HANDED OPERATION
OPERATING: PRO MODE –
Once you feel comfortable operating the eVo in it’s out of the box
Basic Mode, you can try operating in Pro Mode, which increases
the eVo’s sensitivity to the operator’s controlled movements.
1. Press the button on the rear of the stage twice to enter into
Pro Mode. You’ll know the eVo is in Pro Mode when the
middle LED is lit up green. To exit Pro Mode and go back into
Basic Mode, press the button once.
RED = ERROR
GREEN = PRO MODE ON
BLUE = BATTERY LIFE;
BLUE LED WILL BLINK
WHEN BATTERY IS
GETTING LOW
Quick Start Guide
Steadicam Evo is a registered trademark of The Tiffen Company. All other
batteries; (1x) Dual USB Charger; (1x) Micro USB Cable; (2x) Balance Weights.
Please see next page for certified terms of use.
trademarks are the property of their respective owners.
90 Oser Avenue, Hauppauge, NY 11788
1 800 645 2522
www.tiffen.com
Please see www.tiffen.com//warranty.html for details on Steadicam 1 year
limited warranty.
The eVo package contains: (1x) eVo stabilizer; (2x) 3.7V 900mAH li-ion
Page 3

FCC STATEMENT
This equipment has been tested and found to comply with the limits for Part 15 of the FCC
rules. These limits are designed to provide reasonable protection against harmful interference
in a residential installation. This equipment generates, uses and can radiate radio frequency
energy and, if not installed and used in accordance with the instructions, may cause harmful
interference to radio communications. However, there is no guarantee that interference will
not occur in a particular installation. If this equipment does cause harmful interference to radio
or television reception, which can be determined by turning the equipment off and on, the
user is encouraged to try to correct the interference by one or more of the following measures:
• Reorient or relocate the receiving antenna.
• Increase the separation between the equipment and receiver.
• Connect the equipment to an outlet on a circuit different from that to which the
receiver is connected.
• Consult the dealer or an experienced radio/TV technician for help.
This device complies with part 15 of the FCC rules. Operation is subject to the following two
conditions:
(1) This device may not cause harmful interference, and (2) this device must accept any
interference received, including interference that may cause undesired operation.
RF EXPOSURE WARNING
ISED RADIATION EXPOSURE STATEMENT FOR CANADA
This device complies with Industry Canada licence-exempt RSS standard(s). Operation is subject to the
following two conditions:
(1) this device may not cause interference, and (2) this device must accept any interference, including
interference that may cause undesired operation of the device.
Le présent appareil est conforme aux CNR d'Industrie Canada applicables aux appareils radio exempts
de licence. L'exploitation est autorisée aux deux conditions suivantes :
(1) l'appareil ne doit pas produire de brouillage, et (2) l'utilisateur de l'appareil doit accepter tout
brouillage radioélectrique subi, même si le brouillage est susceptible d'en compromettre le
fonctionnement.
This equipment complies with IC RSS-102 radiation exposure limit set forth for an uncontrolled
environment.Cet équipement respecte les limites d'exposition aux rayonnements IC définies pour un
environnement non contrôlé
FCC WARNING STATEMENT
Without permission, any company, firm or user shall not alter the frequency, increase the power, or
change the characteristics and functions of the original design of the certified lower power frequency
electric machinery. The application of low power frequency electric machineries shall not affect the
navigation safety nor interfere a legal communication, if an interference is found, the service will be
suspended until improvement is made and the interference no longer exists.
This equipment must be installed and operated in accordance with provided instructions and the
antenna(s) used for this transmitter must be installed to provide a separation distance of at least 20
cm from all persons and must not be co-located or operating in conjunction with any other antenna
or transmitter. End-users and installers must be provide with antenna installation instructions and
transmitter operating conditions for satisfying RF exposure compliance.
Any changes or modifications not expressly approved by the party responsible for
compliance could void the user’s authority to operate this equipment.
 Loading...