

Yukon Advanced Optics 28041 Operating Manual
OPERATING MANUAL
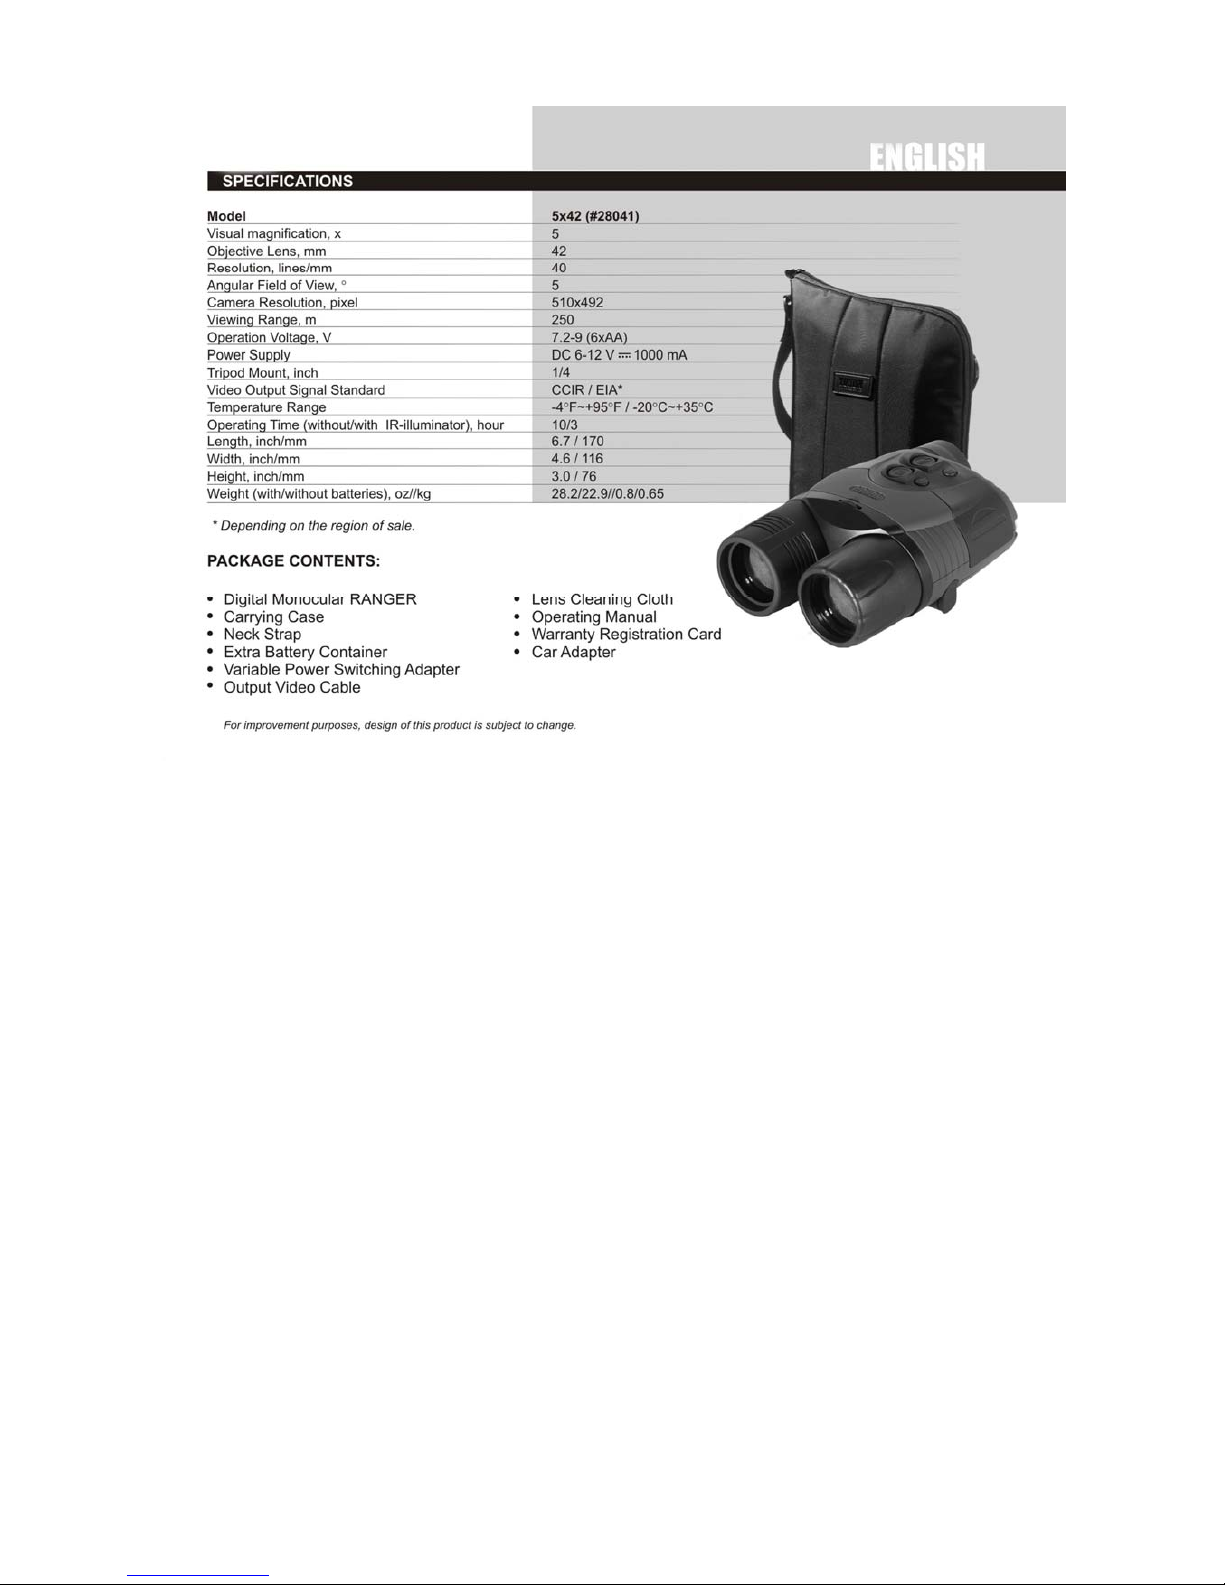
Please read this manual before using your RANGER.
RANGER is equipped with a built-in, high power IR-illuminator that has a gradual IR adjustment and
memory controller, which provides effective viewing in most night conditions. The unit can be
attached to a standard tripod that uses a 1/4 inch mounting thread. RANGER has a built-in video-out
connector which can be used to pair the device with a monitor or to record video via a recording
device (such as a video camera). For the best image quality, it is recommended to set up the unit on a
tripod before attaching the video cables and recording devices.
The unit is equipped with a special connector that allows RANGER to be powered by a 12 volt car
outlet. It operates for up to 10 hours using 6 AA batteries. The RANGER has an ergonomicallydesigned, water resistant, durable plastic body that helps protect the unit and creates versatility.
Yukon's RANGER is ideal for the following applications:
• Surveillance
• Hunting & camping
• Sports and night navigation and observation
• Commercial and personal fishing and boating
• Rescue, recovery, security and law enforcement
• Surveillance and video recording in continuously changing light conditions from dawn to
absolute darkness
BATTERY INSTALLATION
1. Remove the battery compartment cover (1).
2. Pull out the battery container (3) using the attached strap (2).
3. Slide batteries into the battery container (3). Pay attention to «+» (positive) and «-» (negative) symbols
marked on the walls of the container.
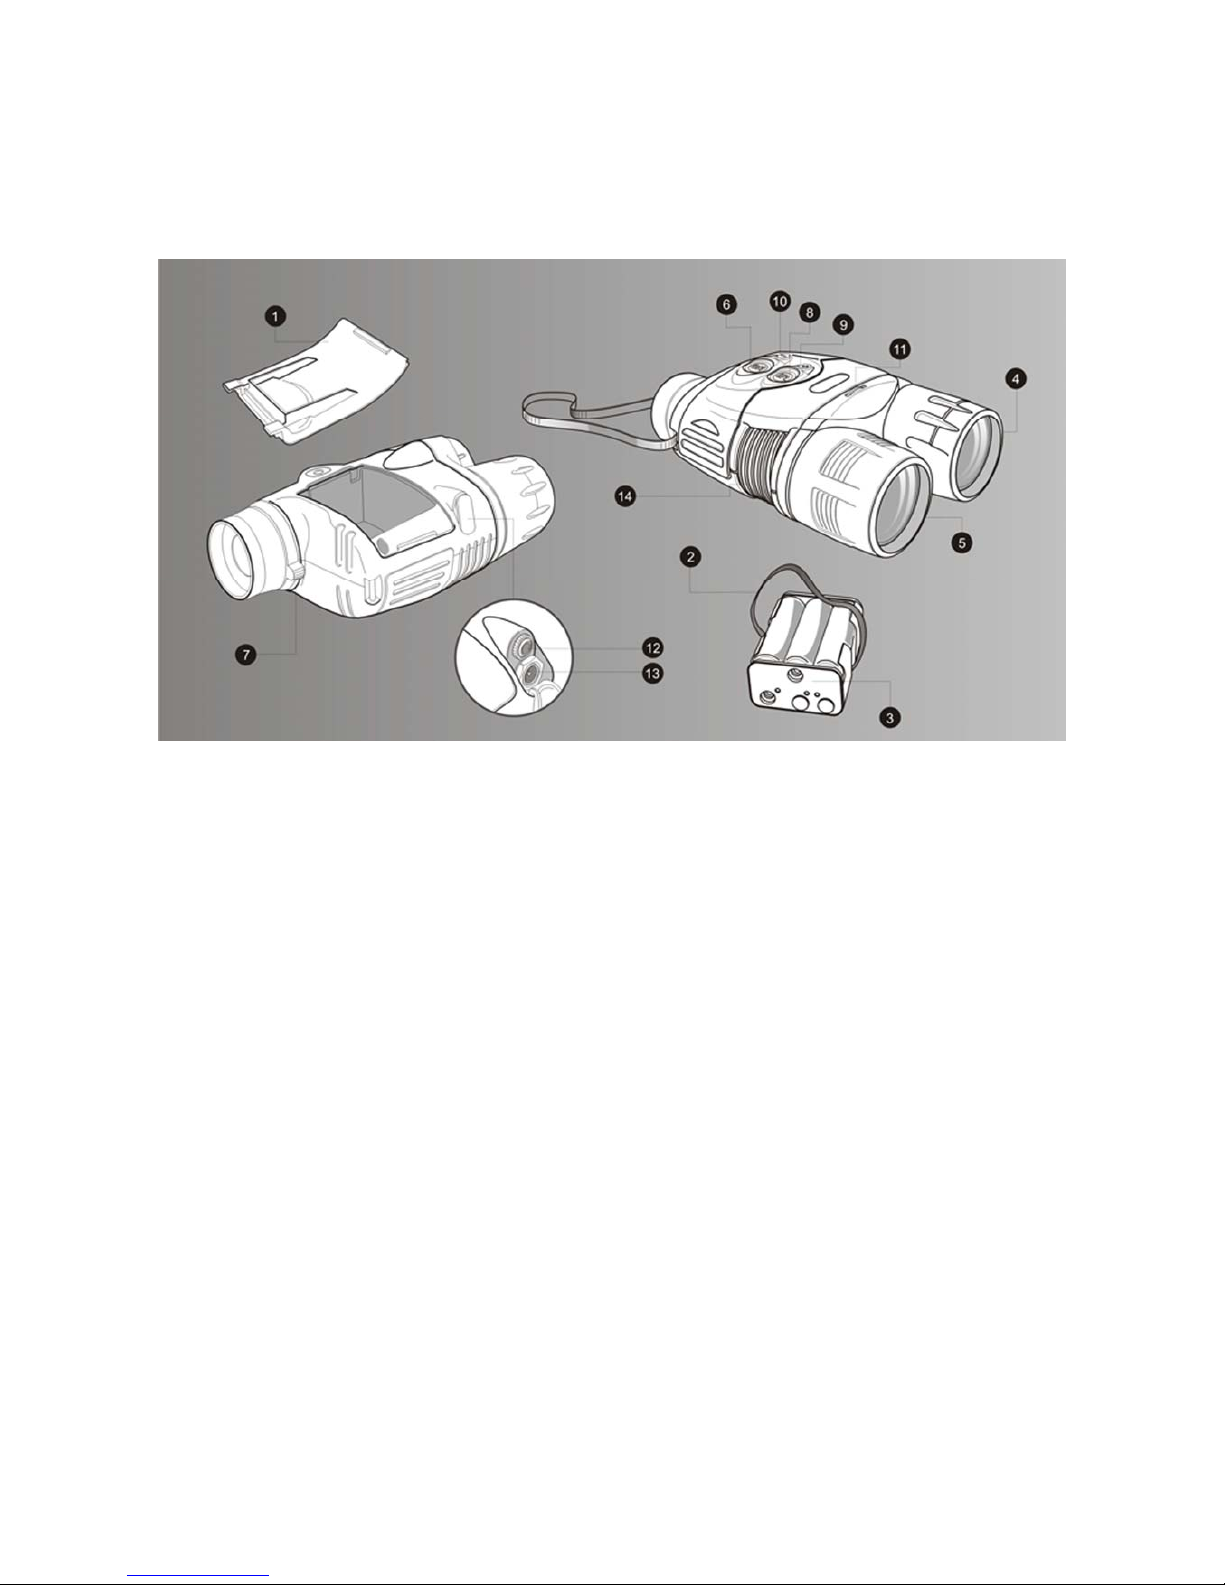
4. Insert the battery container (3) back into the battery compartment. Make sure the battery container is
re-inserted properly particularly watching for the orientation of the battery container contacts.
5. Return the battery compartment cover (1) to its original position.
Attention! It is strongly recommended to use only SINGLE-TYPE batteries otherwise the
device's operating time drastically decreases.
OPERATING INSTRUCTIONS
1. Remove the lens caps from the objective lens (4) and from the long-range IR-illuminator (5).
2. Press the button marked «ON» (6) to turn on the device. A stable green light indicates that the device
is ready for use. A flashing green light indicates that the battery power level is low. A flashing red light
indicates that the battery is empty.
3. Locate an object within 20 to 30 meters.
4. Adjust the sensitivity of the device (visually it is determined as image brightness) by turning the
adjustment wheel (11).
5. Rotate the eyepiece's lever (7) and the objective (4) until you see a sharp image. When you turn the
device on, the auxiliary short-range IR-illuminator is turned on automatically. Press the «IR» button (8)
to turn the main IR-illuminator on. Choose the operation modes of the IR-illuminator: press and hold
the «+» (9) or «-» (10) buttons to increase or decrease respectively the power of the IR-illuminator. The
use of the IR-illuminator in the optimal mode prolongs operating time. If the device is focused on an
object closer than 15 metres, the emission spot of the main IR-illuminator (bright light circle) will be
shifted to the right side of the display.
6. When changing the viewing distance, try to see a sharp and high-quality image by rotating the
objective (4) and the sensitivity adjustment wheel (11) and by changing the operating modes of the IRilluminator. Do not rotate the eyepiece's lever (7) the device is already individually adjusted.
7. Plug the output video cable into the RANGER's video-output jack (12) to transmit the observed
image to an external LCD monitor. When the RANGER is coupled with video equipment, the
observed image can be recorded.
8. To connect the RANGER to a vehicle's 12V auxiliary power port, plug the car adapter into the
RANGER's power input jack (13) and connect the other end of the cable to the vehicle's auxiliary
power port.
9. To connect the RANGER to a household outlet, use a variable power switching adapter.
 Loading...