

Yukon Advanced Optics 24095 User Manual
OVERVIEW
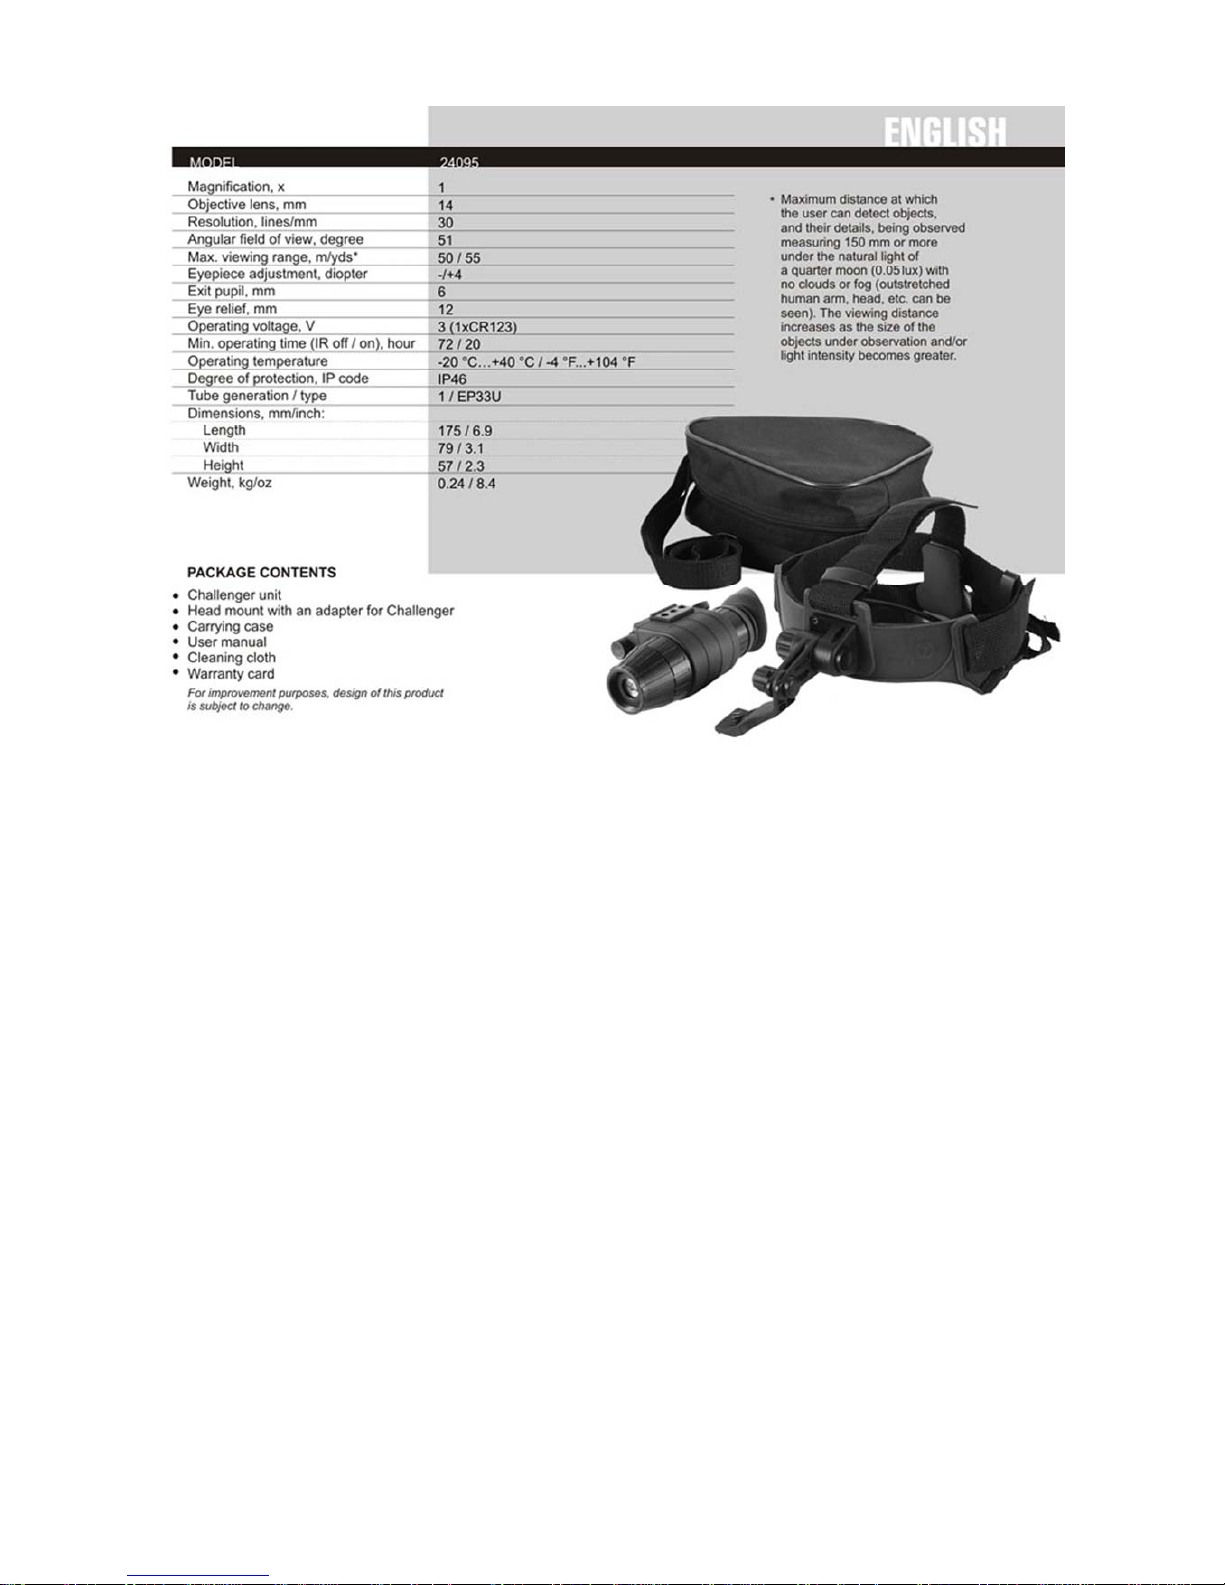
The Challenger Night Vision Device is a new tube Gen.1 based unit that has a state-of-the-art design
and a wide angular field of view. The device is outfitted with a new five-lens eyepiece that minimizes
distortion on the edges of the field of view and increases sharpness and contrast of the image. The soft
rubber eyecup conceals the light emission from the tube thus permitting a user to stay unnoticed. The
housing of metal and plastic ensures extra durability and reliability during usage. The Challenger has an
IP46 degree of protection (IEC 60529), i.e. this device is protected against water and dust which
increases the range of its usage.
The device is equipped with an IR illuminator necessary for normal observation in moonless cloudy
conditions in total darkness.
The Challenger is equipped with two 1/4'' sockets which allow it to be fixed on the head mount
(included) and used as goggles. Additional accessories such as IR flashlight, directional microphone can
also be mounted on the device. The device is fully self-contained and can work up to 72 hours on a
single CR123A at temperatures varying from -20 ºC to + 40 ºC.
Your Challenger is ideal for professional and amateur use, including:
• Night observation in natural environment
• Boating
• Repair and maintenance of equipment.
• Air-soft shooting
PECULIARITIES OF USE
Your night vision device Challenger is designed to provide many years of reliable service.
To ensure high performance you should adhere to the following rules:
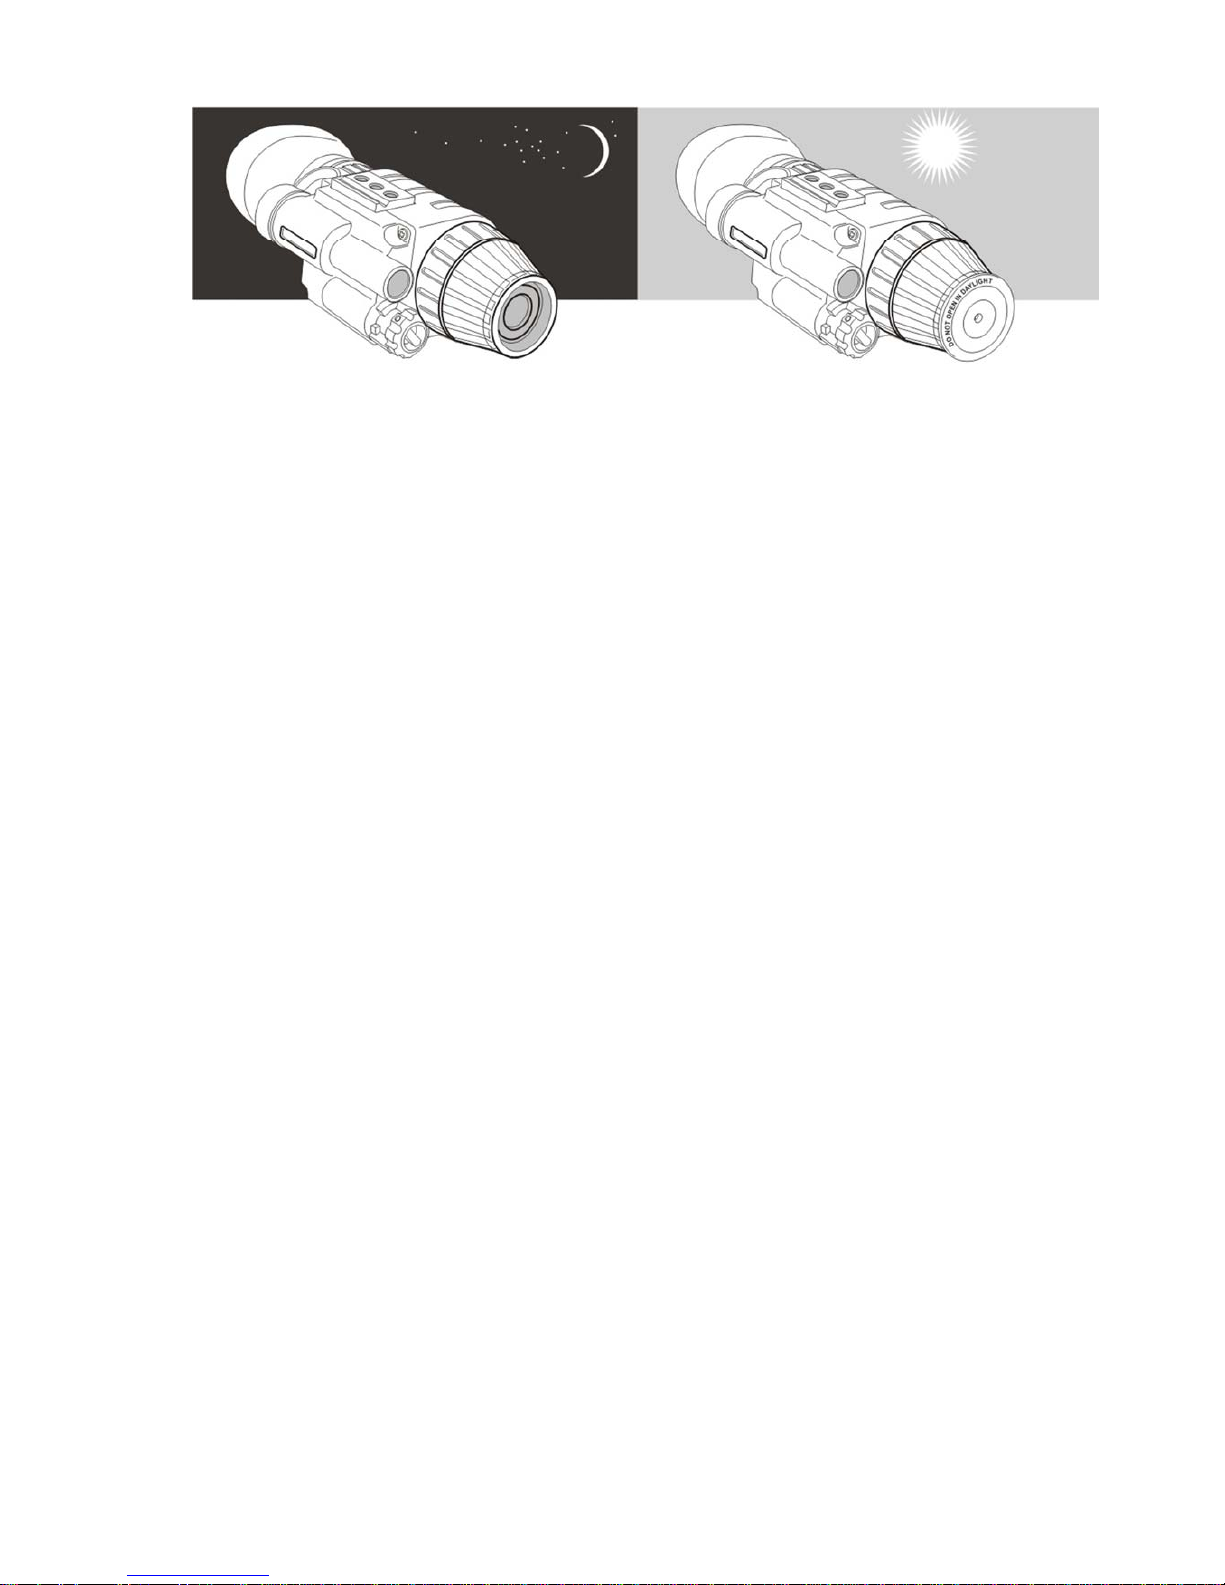
• Do not direct a unit in the “on” position at intense sources of light, such as car's headlights or
burning fire. This may disable the unit for an unknown length of time or cause a dark spot in
the center of the field of view. Do not turn the unit on in daylight without the protective cap
firmly secured over the objective lens, as this may damage the unit.
• Any such damage may void the warranty.
• Never leave the unit in the “on” position over an extended length of time in an area with a light
level exceeding 1-10 lux (twilight - 10 lux, deep twilight - 1 lux). Please keep the protective cap
on the objective under greater light level.
• Your Challenger was designed to be self-contained. Do not open the body of the scope or
otherwise attempt to service this device. If such need arises return the unit for replacement or
repair.
• Protect the device from exposure to direct sunlight and extreme temperatures.
• Avoid dropping or otherwise shocking the unit. The device incorporates a sophisticated optical
system which could be damaged in extreme cases of misuse.
• Clean optical parts (lenses) with professional lens cleaning supplies designed for use with
multicoated optics.
• Clean the exterior of your with petrolium jelly applied by a soft, clean cloth.
Damage to this device from failure to observe these warnings may void the device's warranty!
BATTERY INSTALLATION
Your Challenger runs on a single CR123A battery. To install it, unscrew the battery compartment
cover, insert the battery into the battery compartment so that the positive (+) and negative (-) terminals
of the battery match the markings on the compartment, replace the battery cover carefully.
Do not overtighten.
USE AND TESTING
• Make sure the CR123 battery has been installed according to the instructions found in the
battery installation section of this manual.
• Enter a dark area before turning on the device.
• Remove the objective cap (2).
• Activate the device by moving the rotary switch (3) to the “ON” position.
• You can test your device in a light area without removing the protective cap. This will not
damage your unit.
 Loading...