

Page 1

User Guide
YOYOCam G2
GSM Remote Surveillance Camera
1
Page 2

Important Information
Please read this information before using your YOYOCam.
General
YOYOCam G2 is a GSM (2G) product. Make sure your SIM card and subscription support
services over 2G for SMS, MMS and voice calls.
All GSM based functions, such as calls and SMS messaging, are dependent on network
performance and availability.
While YOYOCam G2 is on a voice call (Alarm call, Emergency call, dial-in to listen call), it is
unable to send SMS or MMS messages.
Test any Voice Call Alarm and Emergency Alarm calls to landlines to make sure that
YOYOCam does not block the landline user from making further calls. (This is a property of
the landline telephone network from some providers).
Photography in public places may be subject to restrictions – make sure YOYOCam is
operated according to all applicable laws.
Safety and Usage Guidelines
YOYOCam must be used according to the instructions in this User Guide.
When inserting or removing the SIM card, do not touch the gold connectors.
Use only the approved YOYOMotion AC power adaptor.
The AC Power adaptor is for indoor use only and must not be used in damp conditions.
Treat your YOYOCam carefully; store it safely and do not drop or throw it or otherwise subject
it to shock.
Do not expose your YOYOCam to dust, liquid, moisture or humidity.
Do not use or store your YOYOCam at extreme high or low temperatures.
Do not expose your YOYOCam to naked flames, lit tobacco products or other heat sources.
Do not use your YOYOCam in hospitals or near medical equipment.
If you have personal medical devices such as a pacemaker, consult your physician and the
manufacturer for advice.
Do not use your YOYOCam in aircraft or in any place where use of radio transmitters is
prohibited.
Do not use your YOYOCam in places where a potentially explosive atmosphere is present.
Do not use YOYOCam in proximity to car airbags.
Do not attempt to take your YOYOCam apart; there are no user-serviceable components
inside the product.
Do not allow children to play with your YOYOCam; small parts such as SIM cards could be
detached and represent a choking hazard.
For optimum performance do not cover your YOYOCam; position it with good access to the
mobile signal.
2
Page 3

GSM calls and GSM messages
Emergency calls, calls and messages via the GSM network cannot be guaranteed in all circumstances.
There is no guarantee that calls can be connected or messages can be sent in all areas or in all mobile
networks as the functionality of the GSM based functions are dependent on network performance and
availability.
You should not rely on any voice call capability that your YOYOCam provides for emergency
or essential communications.
Battery
Battery performance (device runtime) depends on signal strength, temperature, usage
pattern and other factors.
The battery may have temporarily reduced capacity when new or after a prolonged period
without use.
Charge the battery completely when using YOYOCam for the first time.
Turn of the device and disconnect the power adaptor before removing or inserting the battery.
Do not allow the battery contacts to touch any metal object.
The battery should not be exposed to temperatures above 60°C.
Use only the supplied battery or accessory/service replacement battery from YOYOMotion.
Dispose of any old battery in accordance with the disposal guidelines below.
WARNING: The battery can explode if the product is disposed of in fire.
Disposal and Recycling
Do not dispose of your YOYOCam with normal household waste.
Dispose of your YOYOCam at an appropriate collection point for electronic equipment.
For more information, contact your local authority, your household waste collection depot or
the retailer where you bought your YOYOCam.
About this Guide
© YOYOMotion AB, 2011, Revision 0.5
All trademarks and registered trademarks used in this document are the property of their respective
owners.
Improvements and changes to this text necessitated by typographical errors, inaccuracies of current
information or improvements to products, may be made by YOYOMotion AB at any time and without
notice. Product specifications are subject to change without prior notice.
3
Page 4

YOYOCam G2 Features
Insert a SIM card, perform a few simple configuration steps and YOYOCam is ready to guard your
property.
Infrared body detector and camera-based
movement detection
Alarm by SMS (text), MMS and Email (including
images)
Infrared LEDs enable the camera to capture
images in the dark
Dial YOYOCam and listen in
Receive images at pre-set intervals according to a
schedule
Remote control arms and disarms YOYOCam and
has programmable Emergency button
4
Simple configuration via SMS commands;
request images by SMS
Link up to 15 wireless detectors, for example
window, door, smoke
Page 5

Get to know your YOYOCam
YOYOCam unit
Status Indicator
Key
5
Page 6

Remote Control
When the Emergency button is pressed, YOYOCam calls the Master and any added Emergency
numbers up to three times in sequence until the call is answered, at which point the audio from
YOYOCam is heard.
SMS/MMS mode can be used as an alternative. When the Emergency button is pressed YOYOCam
acknowledges with a bleep, and sends an SMS alert followed by an MMS with an image to the
Master and each added Emergency number.
See Emergency Button for further information.
Note: The remote control needs to be paired with YOYOCam before use – see Pairing your
YOYOCam with a Remote Control.
6
Page 7

Getting started
STEP 1. Prepare YOYOCam G2
1. Slide thebatterycompartment coverdownwards.
2. Lift the battery cover away from the device.
3. Hold the SIM card in line with the slot (gold contacts on the underside) and slide it in to
position.
WARNING:Always be sure to switch off YOYOCam and disconnect the power before
inserting or removing the SIM card.
WARNING: Do not touch the gold contacts of the SIM Card.
Note: The SIM PIN must be disabled. Use an ordinary mobile phone to check and, if
necessary, turn off SIM Lock.
4. Replace the battery compartment cover
7
Page 8
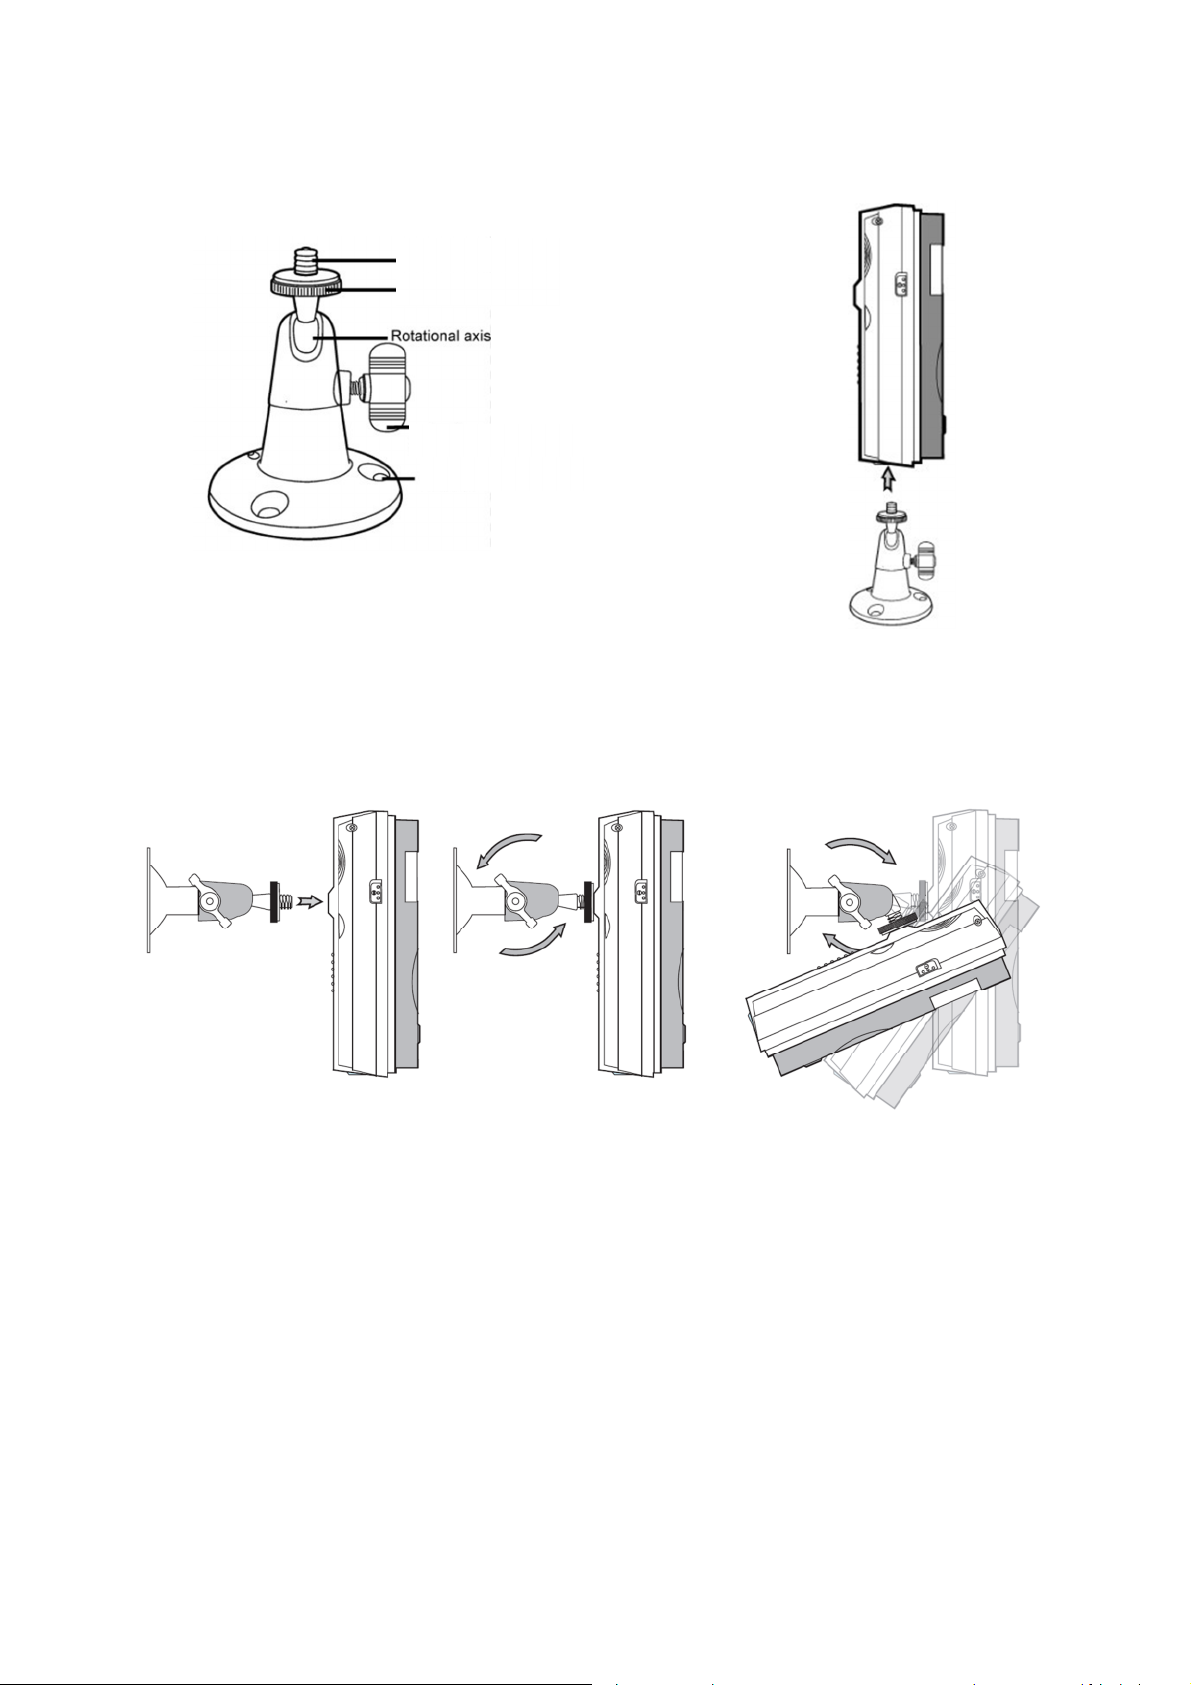
STEP 2. Mount YOYOCam G2
A mounting bracket is included with YOYOCam
Threaded tip
Round lock nut
Locking screw
Fixing hole
To mount YOYOCam:
1. Mount the bracket on the wall, ceiling or other surface as required.
2. Attach YOYOCam to the threaded tip of the bracket.
3. Screw the round lock-nut towards YOYOCam to secure YOYOCam on the mount.
4. Loosen the locking screw so that the angle can be adjusted.
5. Tighten the screw to fix YOYOCam in the desired position.
Note: There is a second mount position on the underside of YOYOCam. The mount screw-threads
are standard photographic size, so YOYOCam can, for example, be mounted on a camera tripod.
For best results:
Avoid pointing YOYOCam at bright lights or windows.
Position high up so that the camera is angled at least 30 degrees downwards.
Position in a location where there is adequate GSM signal strength.
Make test shots (e.g. using command #03#) to check image quality.Adjust angle and/or
position of YOYOCam until images are optimal.
Check that the infrared body detection and/or camera movement detection is working.
8
Page 9

STEP 3. Set Up YOYOCam
Network Operator
Command to send
1. Connect the cable from the power adaptor to the power inlet socket on the back panel, as
shown.
2. Plug the power adaptor in to a wall outlet or socket strip.
3. Slide the power switch to the UP position to turn on YOYOCam
4. After approximately 40 seconds, YOYOCam bleeps to indicate that the GSM network has
been found.
5. From your mobile phone send an SMS with text #00# to YOYOCam.
6. YOYOCam confirms your phone as
Master by SMS, Välkommen till
YOYOCam. Lösen är '1234', (Welcome
to YOYOCam. The default password is
1234.) You are now the Master and
have full control over YOYOCam.
7. The SMS responses are in Swedish by
default. Send #127#1# to switch to
English.
8. Network MMS settings are configured
automatically for the major
Scandinavian networks. If your network operator is in the table to the right, you must now
send the command indicated in order to configure MMS. See Mobile Network settings if you
need to manually check or configure MMS.
9. Arm YOYOCam
ACN #145#ACN#
Cell Mobile SE #145#CELLMOBILE#
Chess NO #145#CHESSNO#
Glocalnet #145#GLOCALNET#
Halebop #145#HALEBOP#
Parlino #145#PARLINO#
Superstar #145#SUPERSTAR#
TDC Song NO #145#TDCNO#
TDC Song SE #145#TDCSE#
Telmore DK #145#TELMORE#
Universal #145#UNIVERSAL#
Ventelo NO #145#VENTELONO#
Ventelo SE #145#VENTELOSE#
YOYOCam is now operational.
Send an SMS with text #01# to arm YOYOCam.
Send an SMS with text #02# to disarm YOYOCam.
9
Page 10

Default Sensor and Alarm Behaviour
When armed, YOYOCam will raise the alarm when a sensor is triggered. By default, the built-in
infrared body sensor is enabled and camera movement detection is disabled. See Sensor Settings for
more information.
When a sensor triggers the alarm, YOYOCam sends an SMS to the Master followed by an MMS with
images. Other options include voice call and E-Mail alarms.Detector, image and alarm settings can be
configured. For more information, see Alarm Settings.
STEP 4 – Refine YOYOCam Settings
Here are some of the settings that you may like to change in order to configure YOYOCam to your
needs.
Optimize image settings
By default, YOYOCam takes five images at an interval of 0.5 seconds between each shot. The image
size is 320 x 240 pixels. You may wish to have fewer images at higher resolution, e.g.2 images at 640
x 480 pixels. (2 images is the maximum at this resolution).
Command: #33#2#
Response: Number of Alarm images has been set to 2
Command: #32#3#
Response: Image size has been reset to 3 (Size 3 = 640 x 480 pixels)
For more information, see Image settings.
Configure the sensors which detect an alarm condition
By default, YOYOCam detects movement using the infrared body sensor. Camera movement
detection is also available.
Infrared Body Sensor:
Turn On: #118#1# (Default)
Response: Infrared sensor - enabled
Turn Off: #118#0#
Response: Infrared sensor – disabled
Camera Motion Detection:
Turn On: #22#1#
Response: Motion detection - enabled
Turn Off: #22#0# (Default)
Response: Motion detection – disabled
For more information, see Sensor Settings.
10
Page 11

Configure how YOYOCam signals alarms
By default, YOYOCam sends SMS and MMS to the Master when an alarm is triggered. You can also
send alarms by E-mail and voice calling. Additionally, YOYOCam can be set to bleep when the alarm
is triggered. For more information, see Alarm Settings.
Change the Password
For security, you must immediately change the Password from the default of 1234 to your own value.
Command: #04#OldPassword#NewPassword#
Example: #04#1234#6789#
Response: Password was successfully changed to 6789
For more information, see Guest Users & Password.
Add users
Add users so that other people can also control YOYOCam, request images and dial in to hear audio
from YOYOCam.
Command: #06#UserNumber#
Example: #06#+46702222222#
Response: +46702222222 USER phone number has been added
For more information, see Master, Users & Guests.
Add Remote Controls
Before the supplied Remote Controls work with YOYOCam, they must be paired. You can also
configure how YOYOCam responds when the Emergency button is pressed. See Using the Remote
Control for more information.
11
Page 12

Interacting with YOYOCam
General Command Format
Commands and Parameters
Master and Users interact with YOYOCam by sending SMS messages that contain specially
formatted textual commands. YOYOCam typically responds with confirmation text by SMS. Where the
command is a request for images, these are sent by MMS or E-mail.
Generic format of a simple command:
Command: #CommandCode#
Example: #01#
Response: YOYOCam is armed
Generic format of a command that needs extra information (a parameter):
Command: #CommandCode#Parameter#
Response: SMS confirmation or images by MMS or E-mail
Example: #06#+46702222222#
Response: +46702222222 USER phone number has been added
Note: There must never be any space characters in a command.
Generic format of a command taking multiple parameters:
Command: #CommandCode#Parameter1#Parameter2#Parameter3#Parameter4# …
Example: #106#+46704444444#+46705555555#+46706666666#
Response: +46704444444
+46705555555
+46706666666
Emergency phone number added
Note: Commands always begin and end with the # character, and a # separates each required
parameter.
Note: In some cases all parameters must be supplied; in others like the one above, as many
parameters as required can be supplied.
Telephone Numbers
Some commands require telephone numbers parameters, for example when adding a User or an
Emergency number. You can supply numbers in International format (recommended) or national
format.
12
Page 13
For example:
International format: +46702222222
National format: 0702222222
Note: Do not include spaces or any other character in phone numbers.
YOYOCam treats a number in International format as different from one in National format. For
example, if you send #06#+46702222222# and #06#+46702222222#, YOYOCam will not recognise
that they are both actually the same user, and will configure two users, one with the number in each
format.
Switch YOYOCam On and Off
Switching On YOYOCam
To switch on YOYOCam:
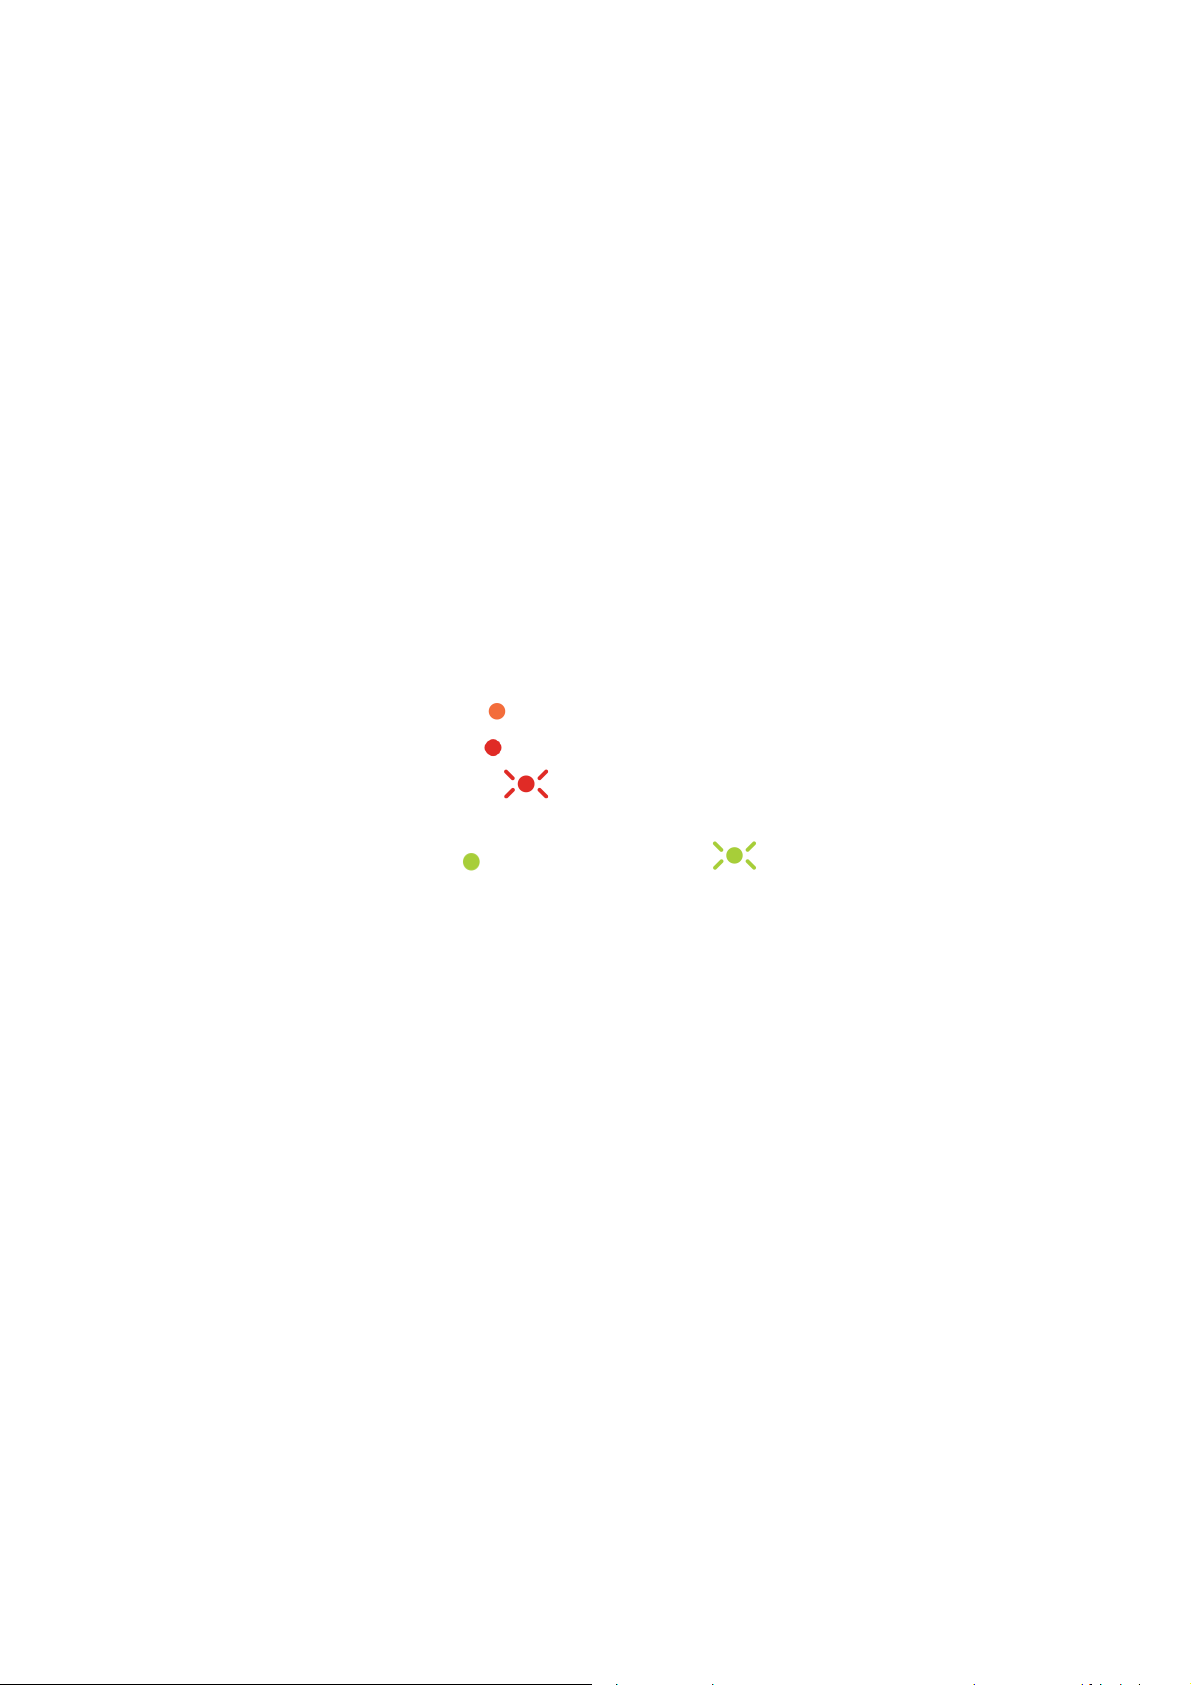
1. Slide the Power Switch to the UP position.
2. The Status Indicator is orange for a few seconds.
3. The Status Indicator turns red for approximately 3 seconds.
4. The Status Indicator flashes red while YOYOCam searches for the mobile network.
5. YOYOCam bleeps when the network has been found.
6. The Status Indicator shows if YOYOCam is armed or if disarmed.
Switching Off YOYOCAM
To switch off YOYOCam:
Slide the Power Switch to the DOWN position.
Battery and External Power Notifications
YOYOCam warns you by SMS when external power is connected and disconnected:
External power applied: External power – resumed
External power removed: External power lost. Running on battery.
For more information see SMS Notification when power supply changes.
Arm and Disarm YOYOCam
When YOYOCam is armed, it will raise the alarm when a sensor is triggered. When YOYOCam is
disarmed, it will not raise any alarms. YOYOCam is typically disarmed when the property is attended,
for example during working hours, when normal movements would cause only false alarms.
YOYOCam is armed when the property is unattended, for example outside office hours.
YOYOCam can be manually armed or disarmed. Alternatively YOYOCam can automatically arm and
disarm itself according to a schedule.
13
Page 14

Arming and Disarming YOYOCam by SMS
To arm YOYOCam by SMS:
Command: #01#
Response: YOYOCam is armed
Status Indicator:
To disarm YOYOCam by SMS
Command: #02#
Response: YOYOCam is disarmed
Status Indicator:
Arming and Disarming YOYOCam using the Remote Control
Note: The Remote Control must first be paired with YOYOCam. See Pairing your YOYOCam with a
Remote Control for more information.
To arm YOYOCam using the Remote Control:
1. Press the button on the Remote Control.
2. YOYOCam bleeps
3. Status Indicator shows
To disarm YOYOCam using the Remote Control:
1. Press the button on the Remote Control.
2. YOYOCam bleeps
3. Status Indicator shows
To receive SMS notification when YOYOCam is armed or disarmed using the Remote Control:
Turn On: #137#1#
Response: SMS upon status change by remote control - enabled
Turn Off: #137#0# (Default)
Response: SMS upon status change by remote control - disabled
Arming and Disarming YOYOCam by Schedule (Day and Time)
YOYOCam can be set to automatically arm and disarm itself according to a pre-set schedule. You
can set:
up to three armed periods per day
14
Page 15

a different schedule for each day, for example workdays and weekends
Day
Day(s) of the week
To set the armed periods
Command: #129#Day#ArmTime1#DisarmTime1#ArmTime2#DisarmTime2
#ArmTime3#DisarmTime3#
Example: #129#0000#0800#1700#2359# (armed outside working hours 0800-1700)
Response: Parameter is 0000#0800#1700#2359#
Note: Time is expressed as HHMM, for example 0000 is midnight, 1200 is mid-day, 1730 is 17:50
(5:30pm), 2359 is 23:59 (11:59PM).
0 Every day
1 Monday
2 Tuesday
3 Wednesday
4 Thursday
5 Friday
6 Saturday
7 Sunday
8 Monday to Friday
To enable/disable Arm/Disarm by schedule:
Turn On: #128#1#
Response: Scheduled arming and disarming - activated
Turn Off: #128#0# (Default)
Response: Scheduled arming and disarming – deactivated
Dial in and listen to audio
Master and Users can dial in to YOYOCam and listen to the audio picked up by the built-in
microphone. YOYOCam is silent throughout this operation – you cannot be heard.
1. Dial YOYOCam’s number (voice call)
2. Call rings at YOYOCam for approximately 10 seconds
3. YOYOCam answers and audio from YOYOCam can be heard.
4. Hang up the call to end listening.
Note: Only one person can dial in and listen at once.
Note: YOYOCam cannot send SMS or MMS while a call is connected.
Request Images from YOYOCam
Master, Users and Guests can request images from YOYOCam at any time. YOYOCam can also be
15
Page 16

set to automatically send images according to a timetable.
Request one image
To request a single image to be sent to your mobile by MMS:
Command: #03#
Response: MMS message containing the image
Note: The image size is the size set by the Image Size setting (default 320 x 240)
See Image settings for more information about the image format.
Request a sequence of images
You can request YOYOCam to take up to 8 images in a sequence. The interval between the images
is determined by the Image Interval setting (default 0.5 seconds). The images are sent to the
requesting Master or User by MMS.
To request a sequence of images:
Command: #03#Quantity#
Response: MMS message containing the images
Note: The image size is the size set by the Image Size setting (default 320 x 240)
Note: Quantity can be 1-8 for image sizes 160 x 120 and 320 x 240. Quantity must be 1-2 for image
size 640 x 480
See Image settings for more information about the image format.
Request a sequence of images (send to E-mail address)
You can request YOYOCam to take up to 8 images in a sequence. The interval between the images
is determined by the Image Interval setting (default 0.5 seconds). The images are sent to the
requesting Master or User by E-Mail.
To request a sequence of images to my E-mail address:
Command: #03#Quantity#1#
Response: SMS message: Sending to me@myemail.com with Quantity pictures.
E-mail message containing the images.
Note: The image size is the size set by the Image Size setting (default 320 x 240)
Note: Quantity can be 1-8 for image sizes 160 x 120 and 320 x 240. Quantity must be 1-2 for image
size 640 x 480.
Note: User’s E-mail address must have been configured
See Image settings for more information about the image format.
Request a sequence of images (send to any required mobile phone or E-mail
16
Page 17

address)
Day
Day(s) of the week
Master and users can request images to be sent to any mobile phone by providing the mobile phone
number, or to any E-mail address. You can request YOYOCam to take up to 8 images in a sequence.
The interval between the images is determined by the Image Interval setting (default 0.5 seconds).
The images are sent by MMS if a mobile number is provided, or E-mail (using the mobile operator’s
MMS service to send to the E-mail address) if an E-mail address is provided.
To request a sequence of images to another mobile number or E-Mail:
Command: #30#NumberOrEmail#Quantity#
Example1: #30#+46702222222#2#
Response1: MMS message containing the images is sent to +46702222222
Example2: #30#user@emailaddress.com#
Response2: E-mail containing the images is sent to user@emailaddress.com
Note: The image size is the size set by the Image Size setting (default 320 x 240).
Note: Quantity can be 1-8 for image sizes 160 x 120 and 320 x 240. Quantity must be 1-2 for image
size 640 x 480.
See Image settings for more information about the image format.
Request YOYOCam to automatically send images according to a schedule
YOYOCam can be set to automatically send images according to a pre-set schedule. You can set:
up to three active periods per day
a different schedule for each day, for example workdays and weekends
To set the time periods and intervals:
Command: #116#Day#StartTime1#EndTime1#IntervalTime1
#StartTime2#EndTime2#IntervalTime2
#StartTime3#EndTime3#IntervalTime3#
Example: #116#8#0000#0800#60#1700#2359#60#
Response: Periodic sending of images parameter is 8#0000#0800#60#1700#2359#60#
Note: Time is expressed as HHMM, for example 0000 is midnight, 1200 is mid-day, 1730 is 17:50
(5:30pm), 2359 is 23:59 (11:59PM).
Note: IntervalTime is in the range 10 to 480 minutes.
Note: The image size is the size set by the Image Size setting (default 320 x 240).
17
Page 18

0 Every day
1 Monday
2 Tuesday
3 Wednesday
4 Thursday
5 Friday
6 Saturday
7 Sunday
8 Monday to Friday
To enable/disable periodic image sending:
Turn On: #115#1#
Response: Periodic sending of images - enabled
Turn Off: #115#0# (Default)
Response: Periodic sending of images - disabled
YOYOCam Settings
Master, Users & Guests
YOYOCam has three levels of user:
Master: has complete control over YOYOCam, receives alarms & notifications, and can
request images.
User: has some control over YOYOCam and can request images.
Guest: can request images using the Password supplied by the Master.
Master
The Master has complete control over YOYOCam and can use any command. The Master sets up
Users and configures YOYOCam as required. There is one Master. If necessary, someone else can
be the initial Master and perform the configuration, then use the Change Master Number command to
hand YOYOCam to the person who will be Master.
YOYOCam leaves the factory with no Master user defined. Performing a Factory Reset operation
also clears the Master user, and it must be set again as if for the first time.
To set Master user for the first time:
From your mobile phone, either:
1. Send an SMS with text #00# to YOYOCam.
2. YOYOCam confirms your phone as Master by SMS, Välkommen till YOYOCam. Lösen är
'1234', (Welcome to YOYOCam. The default password is 1234.) You are now the Master and
have full control over YOYOCam.
18
Page 19

Error Responses
MASTER phone number
already exists
To change Master number:
Command: #14#NewMasterNumber#
Example: #14#+46702222222#
Response: New MASTER phone number is +46702222222
Note: response is sent to the old master number. No response is sent to the new Master number.
WARNING: Be very careful to send the correct NewMasterNumber. If you get it wrong you must
either send this command from the number you entered in error or perform a Factory Reset and
reconfigure YOYOCam from the beginning.
YOYOCam already has a Master number configured.
Note: YOYOCam gives this response if you send #00# from the
configured Master phone.
From the Master’s or a User’s mobile phone, you can send the #07#
Check Status & Settings command to get the Master number.If you
have lost the Master number, you must perform a Factory Reset and
reconfigure YOYOCam from the beginning.
User
The Master can add up to 10 users.
To add a user:
Command: #06#UserNumber#
Example: #06#+46702222222#
Response: +46702222222 USER phone number has been added
Error Responses
UserNumber USER phone
number already exists
USER phone number list is
full. Please delete old
numbers first.
To add several users in one command:
Command: #06#UserNumber1#UserNumber2#UserNumber3#UserNumber4# ….
Example: #06#+46702222222#+46703333333#+46704444444#
UserNumber has already been set up.
Note that YOYOCam treats the national and international format of
the same number as different and will not issue this error if both
formats are sent.
YOYOCam already has 10 User numbers set up. Use #07# to check
and then delete unwanted number(s) to make space for the new
number(s).
Response: +46702222222
+46703333333
+46704444444
USER phone number has been added
19
Page 20

Error Responses as above
To find out which User numbers are set:
Command: #07#
Response: MMS message including YOYOCam status and User number(s)
To delete a user:
Command: #113#UserNumber#
Example: #113#+46703333333#
Response: +46703333333 USER phone number has been deleted
To delete several Users in a single command:
Command: #113# UserNumber1#UserNumber2#UserNumber3#UserNumber4# ….
Example: #113#+46704444444#+46705555555#+46706666666#
Response: +46704444444
+46705555555
+46706666666
USER phone number has been deleted
Guest Users & Password
The Master can invite guests to access YOYOCam. Guests can request and view images from
YOYOCam. The Master does not need to pre-define Guests to YOYOCam. Instead, the Master gives
guests YOYOCam’s phone number and Password (default 1234). Guests have to include the
password in the commands they send to YOYOCam. To withdraw access from Guests, the Master
simply changes the Password.
To change the Guest Password:
Command: #04#OldPassword#NewPassword#
Example: #04#1234#6789#
Response: Password was successfully changed to 6789
Error Responses
Wrong password OldPassword is incorrect
You are not authorized to use this
command
Password should be a 4 digit number Password must be exactly 4 digits long
Note: You should change the default password when you first set up YOYOCam; do not leave it set
Only the Master can change the password
at the default 1234.
Note: If you have lost the Password, you must perform a Factory Reset and reconfigure YOYOCam
from the beginning.
20
Page 21

Sensor Settings
You can set up which sensors trigger the alarm when YOYOCam is armed.
Infrared Body Detector
The infrared body detector works by detecting the heat emitted from a body moving in front of it.
Turn On: #118#1# (Default)
Response: Infrared sensor - enabled
Turn Off: #118#0#
Response: Infrared sensor – disabled
Note: When YOYOCam is operating on low battery, the infrared body detector is automatically
disabled. It is not possible to re-enable it until the battery has been charged or external power is
connected.
Camera Motion Detection
YOYOCam takes images periodically and compares the latest image with the previous one. If there is
a significant difference, YOYOCam assumes something has moved, for example a person has
walked in front of the camera. YOYOCam raises the alarm.
Turn On: #22#1#
Response: Motion detection - enabled
Turn Off: #22#0# (Default)
Response: Motion detection – disabled
Note: When YOYOCam is operating on low battery, the camera movement detector is automatically
disabled. It is not possible to re-enable it until the battery has been charged or external power is
connected.
Note: Be careful to position YOYOCam so that there is no unwanted motion in view, for example a
tree shaking in the wind or a cat jumping in to the field of vision.
Wireless Sensors
You can also add external wireless sensors which trigger the alarm.
Alarm Settings
You can tell YOYOCam what to do when the alarm is triggered
21
Page 22

Warning Bleep from YOYOCam.
YOYOCam bleeps for approximately 5 seconds when the alarm is triggered.
Turn On: #130#1#
Response: Warning signal - enabled
Turn Off: #130#0# (Default)
Response: Warning signal - disabled
SMS Message
YOYOCam sends the Master an SMS when the alarm is triggered, for example:
Alarm from IR sensor received. Image quantity is 5
Turn On: #11#1# (Default)
Response: SMS notification upon Alarm - enabled
Turn Off: #11#0#
Response: SMS notification upon Alarm - disabled
MMS Message
YOYOCam sends the Master an MMS including the number and size of image configured in the
image settings (default: 5 images of 320 x 240 pixels).
The MMS includes text with a timestamp and the sensor which triggered the alarm, for example:
YOYOCam – 203849 Infrared
In this example the timestamp is 20:38:49 (8:38pm and 49 seconds) and the trigger sensor is the
infrared movement detector.
Turn On: #12#1# (Default)
Response: MMS notification upon Alarm - enabled
Turn Off: #12#0#
Response: MMS notification upon Alarm – disabled
See Image settings for more information about the image format.
Email Message
YOYOCam sends an Email to the configured Email address including as attachments the number
and size of images configured in the image settings (default: 5 images of 320 x 240 pixels).
Turn On: #110#1#
Response: E-mail notification upon Alarm - enabled
Turn Off: #110#0# (Default)
Response: E-mail notification upon Alarm - disabled
Note: if both Email and MMS are enabled, the MMS message is sent first, then the Email.
22
Page 23

See Image settings for more information about the image format.
To add or change the Email address:
Master and Each user can add their Email address by sending this command from their mobile
phone:
Command: #108#EmailAddress#
Example: #108#night.warden@yoyomotion.com#
Response: Current alarm notification Email address is: night.warden@yoyomotion.com
To delete all E-mail addresses:
Command: #109#
Response: E-mail address - deleted
Voice Call
YOYOCam calls the Master and each added User number in turn until someone answers, at which
point that person can hear the audio from YOYOCam. YOYOCam tries each number up to three
times in sequence before giving up. The call is allowed to ring for approximately 40 seconds before
YOYOCam hangs up and rings the next number in the sequence. The LED indicator displays
(ongoing voice call).
Turn On: #13#1#
Response: Call MASTER upon Alarm - enabled
Turn Off: #13#0# (Default)
Response: Call MASTER upon Alarm - disabled
WARNING: If Master or any User number is a landline, YOYOCam could block the landline and
prevent it from hanging up the call to dial other calls. Please read the description and perform the test
as described for emergency numbers.
Precedence
Where multiple alarm options are enabled, the precedence is
SMS first, MMS, Email, Voice Call (last)
To check Alarm settings
Command: #07#
Response: An MMS containing the status of these settings
Image settings
Image settings allow you to set up the built in camera and optimise picture quality.
23
Page 24

Image Size
Size
Width x Height
Image
Image
size
Application
Size
Minimum Quantity
Default Quantity
Maximum Quantity
This setting defines the size of images taken by the built-in camera.
Command: #32#Size#
Example: #32#3#
Response: Image size has been reset to 3
You can chose from three image sizes. Default is Size 2:
(Pixels)
1 160 x 128 5 / 8 4 kBytes
2 320 x 240
(QVGA)
3 640 x 480
(VGA)
Notes
Quantity
Default/Max
5 / 8 9 kBytes
2 / 2 33 kBytes
Transmit
time
25 sec
50 sec
75 sec
View images on small-screen mobile
phone
(not recommended)
View images on mobile phone (Default)
View images on smartphone or computer
(best resolution)
1. If you select size 3, image quantity is automatically changed to 2.
2. Image size and Transmit time are approximate.
3. MMS Transmit time is calculated as approximately 1.11 x Image Size x Image Quantity,
assuming default Quantity.
4. Additional time is taken for the MMS to be transmitted through the mobile network and
downloaded to the destination mobile phone.
5. This setting sets the size of image that YOYOCam sends in response to the #03# Capture
Image(s) command.
Image Quantity
This setting defines how many images are included in the MMS message that YOYOCam sends upon
alarm. YOYOCam defaults to 5 images at size 2 (320 x 240 pixels). The images are taken at the
interval selected via the Image Interval command. Default interval is 0.5 seconds.
Command: #33#Quantity#
Example: #33#2#
Response: Number of Alarm images has been set to 2
The Quantity of images you may include in the MMS depends upon the selected Image Size:
1 2 5 8
2 2 5 8
3 2 2 2
24
Page 25

Image Interval
ImageInterval
Value in seconds
Value in Milliseconds
This is the time delay between camera snapshots sent in an MMS. The default is 0.5 seconds.
Command: #103#ImageInterval#
Example: #103#10#
Response: Image capture interval has been set to 10
Image Interval may take values 3 to 10:
3 0.3 300
4 0.4 400
5 0.5 500
6 0.6 600
7 0.7 700
8 0.8 800
9 0.9 900
10 1.0 1000
Image Brightness
YOYOCam supports five brightness levels to adjust the camera to the ambient light level. Brightness
level 1 is darkest and 5 is lightest. Default is 4.
Command: #34#BrightnessLevel#
Example: #34#3#
Response: Brightness has been set to 3
Note: Check your image brightness setting in each different condition (e.g. daylight, night) to make
sure that the image is captured ok.
Image Contrast
YOYOCam supports five contrast levels to adjust the camera to the ambient conditions. Contrast
level 1 is softest and 5 is most contrasty. Default is 4.
Command: #38#ContrastLevel#
Example: #38#3#
Response: Image contrast has been set to 3
Note: Check your image contrast setting in each different condition (e.g. daylight, night) to make sure
that the image is captured ok.
Wireless Sensors
You can add up to 15 external wireless sensors which operate on the 433MHz standard. When
YOYOCam is armed and a sensor is triggered, YOYOCam will emit a warning bleep and raise an
25
Page 26

alarm by SMS only or SMS followed by MMS, according to the way the sensor is configured.
Adding Wireless Sensors
To add a Wireless Sensor
1. Make sure the wireless sensor is powered on.
2. Send the command to add the sensor to YOYOCam
Command: #05#SensorDescription# (SMS notification upon alarm)
Command: #05#*SensorDescription# (SMS and MMS notification upon alarm)
Example: #05#*FrontDoor#
Note: SensorDescription is a textual name (up to 15 numbers and letters) that you choose to
identify the sensor. If no name is supplied, YOYOCam names the sensors 1, 2, 3…
3. YOYOCam emits a bleep tone and the indicator flashes alternate red and green.
4. YOYOCam sends a notification SMS: YOYOCam is ready to connect a sensor. Please
activate the sensor now.
5. Activate the sensor. For example, open the door if you are adding a door sensor.
Note: You have approximately 60 seconds to activate the sensor before YOYOCam cancels
the add operation and reverts to normal state.
6. When YOYOCam receives the sensor activation signal, it will emit a bleep and sent a
notification message by SMS: SensorDescription has been successfully loaded
7. To exit sensor addition mode, press the SET key or wait approximately 60 seconds for the
mode to time out.
Error Responses
Sensor list is full. Please delete old
sensor first.
YOYOCam bleeps repeatedly Sensor is already added.
Indicator light flashes red/green for
approximately 60 seconds
YOYOCam already has 15 sensors added.
Delete one first to create a space to add the new one.
Sensor has not been detected
Check that you correctly activated the sensor
Checking wireless sensors
To check which wireless sensors are present:
Command: #07#
Response: MMS message including sensor list
Deleting Wireless Sensors
To delete a wireless sensor:
Command: #112#SensorDescription#
Example: #112#FrontDoor#
Response: Sensor deleted successfully FrontDoor
26
Page 27

To delete several wireless sensors in one command:
Command: #112#SensorDescription1#SensorDescription2#SensorDescription3# …
Example: #112#FrontDoor#BackDoor#SmokeAlarm#
Response: Sensor deleted successfully FrontDoor BackDoor SmokeAlarm
To Delete all sensors:
Command: #112#
Response: Sensor deleted successfully
Advanced Settings
Status Indicator on/off
You can disable the status indicator if you want YOYOCam to have no visual status indication.
Turn On: #143#1# (Default)
Response: Status LED - OFF
Turn Off: #143#0#
Response: Status LED - ON
SMS Notification when power supply changes
YOYOCam can notify you when the power supply switches between external power adaptor and
internal battery:
To switch SMS power notification on and off
Turn On: #144#1# (Default)
Response: SMS notification upon power source change - enabled
Turn Off: #144#0#
Response: SMS notification upon power source change - disabled
Notifications when enabled:
External power applied: External power – resumed
External power removed: External power lost. Running on battery.
Auto-Disarm YOYOCam
In some circumstances YOYOCam may be repeatedly triggered, for example by an employee at work
who does not know how to disarm YOYOCam. You can configure YOYOCam to stop sending alarm
messages after a given number of times by auto-disarming.
27
Page 28

To set number of alarms before auto-disarm:
Command: #139#Times#
Example: #139#3#
Response: Disarm the YOYOCam after 3 alarms
Note: Times must be at least 1.
Note: After the given number of alarms, YOYOCam auto-disarms and sends an SMS:
YOYOCam has auto-disarmed
Note: The counter is reset each time YOYOCam is manually disarmed or armed.
To enable or disable auto-disarm:
Turn On: #138#1#
Response: Disarm the YOYOCam after several alarms - enabled
Turn Off: #138#0# (Default)
Response: Disarm the YOYOCam after several alarms - disabled
Language
English: #127#1#
Response: Language set to English
Turn Off: #127#0# (Default)
Response: Svenska - installt
Check Settings & Status
View Current Settings
To view current settings:
Command: #07#
Example Response:
Disarmed
SMS upon alarm - disabled
MMS upon alarm - enabled
Motion detection - disabled
Infrared lights - on
Notification by e-mail upon motion detection alarm - disabled
Voice call to preset number upon emergency alarm - enabled
Voice call to preset number upon alarm - enabled
28
Page 29

Alarm image quantity: 5
Image size: 320*240
Image direction: 0
Image contrast: 4
Image interval: 5
Image brightness: 4
Image compression: 1
Sensitivity of motion detection: 4
Periodic sending of images - disabled
Day: Monday-Friday
Time:
0000-0800
Image capture interval:60
1700-2358
Image capture interval:60
Periodic arming and disarming - enabled
Parameters are:
Day: daily
Time:
0800-1700
Warning signal - enabled
Infrared sensor - enabled
MASTER phone number: +46701111111
USER phone number:
+46702222222
+46703333333
Sensor:
Emergency phone number:
+46701111111
+4670555555
Get help with commands
You can get a reminder of YOYOCam’s commands by sending #09#.
To get a command list:
29
Page 30

Command: #09#
Response:
#00# Set as Master
#01# Arm YOYOCam
#02# Disarm YOYOCam
#03#Password#Quantity# Request images
#04#OldPassword#NewPassword# Change 4-digit password
#05#SensorDescription# Load sensor
#06#number# Add USER phone number
#07# Report Status
#08#Password# Reset to default settings
#22#0# Disable motion detection
#22#1# Enable motion detection
Mobile Network settings
YOYOCam uses MMS (Multimedia Messaging Service) to send images and Email messages.
YOYOCam automatically configures the necessary MMS settings for the major Scandinavian
networks. If your SIM is issued by some ‘Mobile Virtual Network Operators’ (MVNO) then you may
need to enter the correct settings.
Checking MMS Configuration
To check presently-configured MMS parameters:
Command: #55#
Example: MMSC: http://mmsc.t-mobile.co.uk:8002
IP: 149.254.201.135
WAP Port: 8080
HTTP Port: 8002
APN: general.t-mobile.uk
APN User: user
APN Password: tm
To check if MMS is configured and working
Command: #03#
Response: Request Received. YOYOCam images are being sent by MMS
YOYOCam’s status indicator flashes while the MMS is sent.
Images are received (MMS is configured)
The network is busy. No image has been sent. (MMS not configured or
wrongly configured)
30
Page 31

Quick Settings for Scandinavian MVNOs
Network Operator
Command to send
Response
YOYOCam has quick settings for the major Scandinavian MVNOs – simply send the MVNO name to
YOYOCam.
To enter MMS settings for Scandinavian MVNOs:
Command: #145#Name#
Example: #145#ACN#
Response: ACN MMS settings configured
Error Response: YOYOCam returns a list of valid names.
ACN #145#ACN# ACN MMS settings configured
Cell Mobile SE #145#CELLMOBILE# CELLMOBILE MMS settings configured
Chess NO #145#CHESSNO# CHESSNO MMS settings configured
Glocalnet #145#GLOCALNET# GLOCALNET MMS settings configured
Halebop #145#HALEBOP# HALEBOP MMS settings configured
Parlino #145#PARLINO# PARLINO MMS settings configured
Superstar #145#SUPERSTAR# SUPERSTAR MMS settings configured
TDC Song NO #145#TDCNO# TDCNO MMS settings configured
TDC Song SE #145#TDCSE# TDCSE MMS settings configured
Telmore DK #145#TELMORE# TELMORE MMS settings configured
Universal #145#UNIVERSAL# UNIVERSAL MMS settings configured
Ventelo NO #145#VENTELONO# VENTELNO MMS settings configured
Ventelo SE #145#VENTELOSE# VENTELOSE MMS settings configured
Note: Some MVNOs such as TELE2 can be detected from the SIM card and do not require a quick
setting because they are automatically configured.
To view the list of settings for Scandinavian MVNOs
Command: #145#
Response: YOYOCam returns a list of valid names.
Manual MMS Configuration
To configure MMS manually, you need to find out the settings for your mobile operator. They are often
published in the support or help section of the operator’s website. YOYOCam requires two settings:
MMS Center, also known as MMS Homepage, Message Server
MMS Internet Access Point and WAP Gateway
Both must be configured in order for MMS to work. YOYOCam automatically selects between WAP or
HTTP configuration.
To configure MMS Center (MMSC) setting manually:
Command: #124#MMScenter#
31
Page 32

Example: #124#http://mmsc.t-mobile.co.uk:8002#
Response: MMS configuration successful. http://mmsc.t-mobile.co.uk:8002
To configure MMS Internet Access Point Settings manually:
Command: #125#GatewayIP#WAPGatewayPort#HTTPGatewayPort#APN#APNusername#
APNpassword#
Example: #125#149.254.201.135#8080#8002#general.t-mobile.uk#user#tm#
Response: Set MMS parameter successfully: 149.254.201.135#8080#8002#general.t-
mobile.uk#user#tm
Reset MMS Configuration
To clear out any manual settings and return to automatic MMS configuration:
Command: #54#
Response: MMS Settings removed. New MMS parameter is auto-changed to:
MMSC: http://mmsc.t-mobile.co.uk:8002
IP: 149.254.201.135
WAP Port: 9201
HTTP Port: 8080
APN: general.t-mobile.uk
APN User: user
APN Password: one2one
32
Page 33

Using the Remote Control
Pairing your YOYOCam with a Remote Control
Before use, each Remote must be paired with your YOYOCam. Up to five remotes can be paired; two
are supplied.
To pair a Remote Control with YOYOCam:
1. Press the SET button. YOYOCam bleeps and LED flashes orange indicating pairing
mode.
2. Press any button on the remote control. YOYOCam bleeps and LED turns green for 2
seconds then returns to orange flashing ready to pair another remote control.
3. Press SET to exit pairing mode. In any case pairing mode times out after 15 seconds.
Note: If the battery in the remote control is low, YOYOCam emits three bleeps and exits learning
mode. Replace the battery in the remote control and try again.
To un-pair all Remote Controls:
Command: #111#
Response: All remote controls have been deleted
Arming and Disarming YOYOCam
Press to arm YOYOCam. The Status indicator shows when armed.
Press to disarm YOYOCam. The Status indicator shows when disarmed.
Emergency Button
When the Emergency button is pressed, YOYOCam acknowledges with a bleep. By default,
YOYOCam calls the Master number. When the Master answers, the audio from YOYOCam can be
heard. If the Master does not answer, YOYOCam will call twice more (total three attempts) before
giving up.
YOYOCam can be configured to call additional numbers, called Emergency Numbers. Alternatively,
YOYOCam can be set to send MMS instead of making voice calls.
Note: YOYOCam responds to the Emergency button in both Armed and Unarmed states. If
YOYOCam is busy, for example sending images, the ongoing operation is cancelled in order to action
33
Page 34

the Emergency alarm.
Emergency Numbers
The Master can add up to 9 Emergency Numbers.
To add an Emergency number.
Use this command to add numbers one by one. Use international (recommended) or national format.
Command: #106#EmergencyNumber#
Example: #106#+46703333333#
Response: +46703333333 Emergency phone number added
To add several Emergency numbers in a single command (maximum 9):
Command: #106#EmergencyNumber1#EmergencyNumber2#EmergencyNumber3# …
Example: #106#+46704444444#+46705555555#+46706666666#
Response: +46704444444
+46705555555
+46706666666
Emergency phone number added
To delete an Emergency number:
Command: #107#EmergencyNumber#
Example: #107#+46703333333#
Response: +46703333333 Emergency phone number deleted
To delete several Emergency numbers in a single command:
Command: #107#EmergencyNumber1#EmergencyNumber2#EmergencyNumber3#
Example: #107#+46704444444#+46705555555#+46706666666#
Response: +46704444444
+46705555555
+46706666666
Emergency phone number - deleted
To delete all Emergency numbers:
Command: #107#
Response: Emergency phone number - deleted
To find out which Emergency numbers are set:
Command: #07#
34
Page 35

Response: MMS message including YOYOCam status and Emergency number(s)
Step
YOYOCam action
What happens next
User reaction
Error Responses
Emergency phone number already
exists
EmergencyNumber has already been set up.
Note that YOYOCam treats the national and international
format of the same number as different and will not issue
this error is both formats are sent.
Emergency phone number list is full.
Please delete old number(s)
YOYOCam already has 9 Emergency numbers set up. Use
#07# to check and then delete unwanted number(s) to make
space for the new number(s).
Voice Dialling Mode (Default option)
When the Emergency button is pressed, YOYOCam acknowledges with a bleep. By default,
YOYOCam calls the Master and each added Emergency number in turn until someone answers, at
which point that person can hear the audio from YOYOCam. YOYOCam tries each number up to
three times in sequence before giving up. The call is allowed to ring for approximately 40 seconds
before YOYOCam hangs up and rings the next number in the sequence.The LED indicator displays
(ongoing voice call).
For example, YOYOCam is configured with Master, EmergencyNumber1 and EmergencyNumber2.
The Emergency button is pressed:
1 YOYOCam dials Master Call rings 40 seconds at Master’s phone No answer
2 YOYOCam dials EmergencyNumber1 Call rings for 40 secondsat
EmergencyNumber1
3 YOYOCam dials EmergencyNumber2 Call rings for 40 secondsat
EmergencyNumber2
4 YOYOCam dials Master Call rings 40 seconds at Master’s phone No answer
5 YOYOCam dials EmergencyNumber1 Call rings at EmergencyNumber1 Call is answered inside 40
No answer
No answer
seconds
User hears audio from
YOYOCam
If YOYOCam is set to call a landline, check that hanging up the landline clears the call. Some
telephone networks do not clear the call when the called end hangs up, making it impossible to dial a
new call. You must make a test call to ensure that the Emergency Number is not blocked by the call
from YOYOCam:
1. Add the landline as an Emergency number.
2. Press the Emergency button.
3. Let the call ring at the Master phone but do not answer (or allow voicemail to take the call).
4. When the call rings at the landline, answer and check that you can hear audio from
YOYOCam.
35
Page 36

5. Hang up the call at the landline.
6. Wait 10 seconds.
7. Pick up the Landline:
If you hear dialling tone and can make another call, your line is not blocked.
If you still hear YOYOCam, the incoming call is blocking your landline. This is a property
of your telephone network.
8. Hang up the call again.
9. If your line was blocked, now wait 3 or 5 minutes to see if the landline network disconnects
the call.
10. Pick up the Landline:
If you hear dialling tone and can make another call, your line is now unblocked. You
should only dial this landline if the user has an alternative means of dialling a call, for
example, using a separate mobile phone.
If you still hear YOYOCam, the incoming call is still blocking your landline. You must not
program YOYOCam to dial this line.
Mobile phone networks normally allow the called party to end the call and are therefore emergency
calls to mobile phones should be able to end the call and immediately make a new call.
Note: YOYOCam cannot send MMS images while a voice call is in progress.
To set Voice Dialling mode:
Command: #39#0#
Response: Voice call to preset number upon emergency alarm - enabled
SMS/MMS Mode
When the Emergency button is pressed YOYOCam acknowledges with a bleep, and sends an
SMS alert followed by an MMS with an image to the Master and each added Emergency number.
SMS Alert: Alarm from remote control received
To set SMS/MMS mode:
Command: #39#1#
Response: SMS and MMS notification upon emergency alarm – enabled
36
Page 37

Remote Control Battery
The remote control uses one CR2032 type 3 Volt battery. When the battery runs low, YOYOCam
bleeps and a warning SMS is sent to the Master.
37
Page 38

Guest Commands
This page describes the commands that are available to Guests. The Master does not need to add
Guest users to YOYOCam. Instead the Master gives the Guest the Password, and the Password has
to be included in the commands that the Guest sends to YOYOCam.
Request one image
To request a single image to be sent to your mobile by MMS:
Command: #03#Password#
Response: MMS message containing the image
Note: The format of the image is controlled by the Master.
Request a sequence of images
You can request YOYOCam to take up to 8 images in a sequence. The interval between the images
is determined by the Image Interval setting (default 0.5 seconds). The images are sent to the
requesting Master or User by MMS.
To request a sequence of images:
Command: #03#Password#Quantity#
Response: MMS message containing the images
Note: The format of the image is controlled by the Master.
Note: Quantity can be 1-8 for image sizes 160 x 120 and 320 x 240. Quantity must be 1-2 for image
size 640 x 480
Request a sequence of images (send to any required mobile phone or E-mail
address)
Master and users can request images to be sent to any mobile phone by providing the mobile phone
number, or to any E-mail address. You can request YOYOCam to take up to 8 images in a sequence.
The interval between the images is determined by the Image Interval setting (default 0.5 seconds).
The images are sent by MMS if a mobile number is provided, or E-mail (using the mobile operator’s
MMS service to send to the E-mail address) if an E-mail address is provided.
To request a sequence of images to another mobile number or E-Mail:
Command: #30#Password#NumberOrEmail#Quantity#
Example1: #30#1234#+46702222222#2#
Response1: MMS message containing the images is sent to +46702222222
Example2: #30#Password#user@emailaddress.com#
Response2: E-mail containing the images is sent to user@emailaddress.com
Note: The format of the image is controlled by the Master.
Note: Quantity can be 1-8 for image sizes 160 x 120 and 320 x 240. Quantity must be 1-2 for image
size 640 x 480.
38
Page 39

Factory Reset
If the Master phone is lost or you want to set up YOYOCam again from the beginning, you can use
Factory Reset to set all settings and parameters back to the factory default. Following Factory Reset
you will need to re-pair the remote controls and any remote sensors, re-enter any mobile network
(MMS) settings and reconfigure all users etc.
To perform Factory Reset (Reset Key method):
1. Switch Off YOYOCam and wait at least 20 seconds.
2. Press and hold the Reset key.
3. Switch on YOYOCAM while the Reset key is still pressed.
4. After approx. 10 seconds, YOYOCam bleeps and the indicator LED goes green and
then flashes red
5. You may now release the Reset key.
To perform Factory Reset by SMS (Master only)
Command: #08#Password#
Response: YOYOCam has been reset to default settings
39
Page 40

Troubleshooting
Problem: YOYOCam cannot register a Master
Possible Causes: YOYOCare has already a registered Master
Possible Solution: Master Reset your YOYOCare and then register again
Problem: Master is not recognized
Possible Cause: The master number was presented to YOYOCam in national format when set up and
now the number is being presented in International format, or vice versa. YOYOCam treats national
and international format numbers as different.
Problem: Service Registration fails
Possible Causes: Temporary network problem
Possible Solution: Make sure your GSM subscription supports GPRS and that you have the right
network specific parameters.
Problem: Cannot receive SMS from YOYOCam
Possible Causes: Subscription can be out of credit, or there is a temporary network problem.
Possible Solution: Make sure your GSM subscription has sufficient credit. Wait for the network to
recover or contact your network service provider for assistance.
Problem: YOYOCam rejects my phone call
Possible Causes: The caller’s phone-number is not recognised as the Master or a User.
Possible Solution: Check and make sure you are calling from the correct phone number and that your
phone is sending the number (Calling Line Identification), and your phone number is added to
YOYOCare. Master can check the user list by sending SMS command “UL”.
Problem: Cannot receive MMS from YOYOCam
Possible Causes: The MMS service is not activated. The MMS profile has incorrect parameters.
There is a temporary network problem.
Possible Solution: Test the SIM in a regular cell phone to verify the MMS service is activated and that
correct MMS settings are used. Check the MMS settings in YOYOCare by sending the SMS
command #55#. MMS messages take normally longer time to deliver compared to SMS messages.
Problem: SIM Card requires a PIN
Possible Solution: Insert the SIM in to another Mobile Phone and access the Settings to disable the
SIM PIN.
Problem: Cannot dial in and listen
Possible Cause: The number was set up in national format and when the Master or User dials in, the
mobile network presents the number in International format or vice versa. YOYOCam treats national
and international format of the same number as two different numbers.
Possible Solution: Set up User number in national or international format and re-test. Set twice in both
formats.
The network is busy. No image has been sent.
ERR_IND 4_0.
Wrong parameters. Please check and try again. YOYOCam did not understand the parameters
Check that MMS settings are correct.
40
Page 41

included with the SMS command. For example, in
command #33#Quantity#, #33#1# will fail
because Quantity must be between 2 and 8.
41
Page 42

Command Summary
Text to send
What it does
Text to send
What it does
These tables summarise the most useful YOYOCam commands:
MASTER
There is one Master user who has complete control over YOYOCam. Master-only commands:
#00# (after factory reset) sender becomes Master
#14#NewMasterNumber# Change from present Master number to NewMasterNumber
#04#OldPassword#NewPassword# Change the Guest password (default is 1234)
#06#UserNumber# Add a User.
#113#UserNumber# Delete a User
#106#EmergencyNumber# Add Emergency Number (called when emergency button
pressed on remote)
#107#EmergencyNumber# Delete Emergency Number
#127#LanguageCode# Set Language. 0=Swedish (default); 1 = English
For example:
Send #04#1234#6789# to change password to 6789.
Send #06#0702222222# to add 0702222222 as a user.
MASTER & USER
Up to 10 Users set up by the Master can access YOYOCam. Master and Users can send these
commands:
#01#
#02#
#03#
#03#Quantity#
#07#
#09# or #09#1#
#32#Size#
#33#Quantity#
#118#0# or #118#1#
#22#0# or #22#1#
#39#0#
#39#1#
#143#0# or #143#1#
Master & Users can also call YOYOCam and listen in via the built-in microphone.
Arm YOYOCam (if an event is detected, alarm is triggered)
Disarm YOYOCam (events will be ignored)
Take one image and send it to the requesting user
Take a number (Quantity 1-8) of images and send to requestor
Check the settings and status
Get the command list (#09# for SMS, #09#1# for MMS response)
Set image size: 1: 160x128; 2: 320x240 (default); 3: 640x480
Set quantity of images to take when triggered: 1-8 (default 3; note 1)
Disable (0) infrared body detection; enable (1) (default)
Disable (0) camera based motion detection (default); enable (1)
Call mode – When Emergency button pressed, numbers are dialed
SMS/MMS mode – when Emergency button is pressed, YOYOCam
sends SMS and MMS.
Disable (0) indicator LED; enable (1) (default)
42
Page 43

GUEST
Text to send
What it
does
Guest users are people who do not normally need access, but might be asked to check the protected
area because they are nearby, for example. Guest users do not need to be pre-defined to YOYOCam,
but do require the PIN. Guest commands:
#03#Password#
#03#Password#Quantity#
#30#Password#To#Quantity#
Note 1: Maximum Quantity is limited to 2 when image size is set to 3.
Take one image and send it to the requesting guest
Take a number (Quantity 1-8) of images (note 1)
Take a number (Quantity 1-8) of images and send to a phone or Email address (To is the mobile number or E-Mail address; note 1)
43
Page 44

Specifications
GSM Frequency Bands 900 /1800 MHz
Working temperature -10 to 45 centigrade
Working Humidity 10% to 90%
Alarm detection Motion detection and IR body detection
Movement detection distance Up to 8 m
Alarm modes SMS, MMS, Email, Voice calls
Camera resolution 300.000 pixels (640 x 480)
Camera maximum distance 8 m
Camera capture angle 68 degrees
Picture file format JPEG
Built-in microphone distance up to 6 m
Night vision built-in infrared light
Remote control 2 units included (433 MHz)
External wireless 433 MHz sensors Up to 15 sensors; ASK protocol
Receiving distance sensors Up to 15m
Power adapter Input: 110V~240V Output: DC 5.5V/2A
Built-in battery Lithium 800mAh
Battery back-up Up to 12 hours
Low battery alarm by SMS
Size 75x125x43 mm
Weight 186 grams
© Copyright, 2010 YoyomotionAB. All rights reserved.
44
 Loading...