

Yoshimura RS-3 Installation Manual
RESEARCH&DEVELOPMENT OF AMERICA, INC.
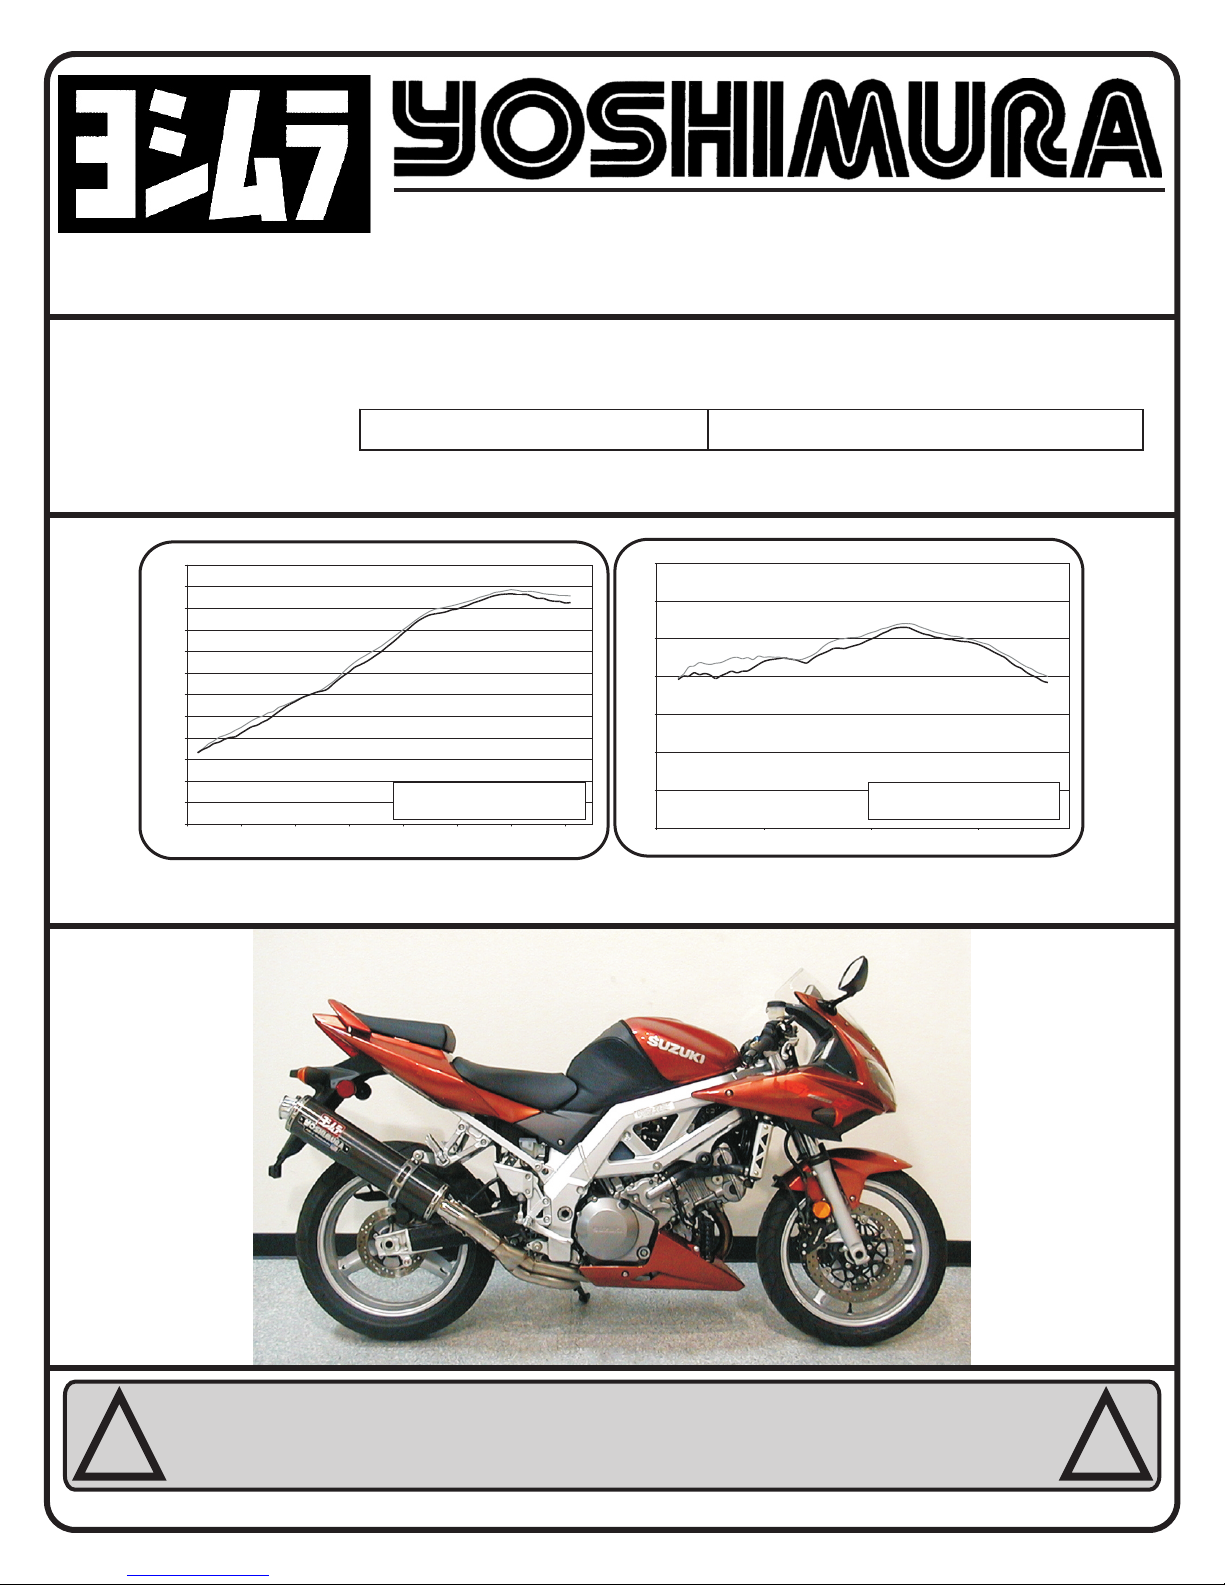
113 00 5(2,5,7) S TA INLE S S S TE E L RA CE 3/4 SYS T EM
113005 5
Stock
Yoshim ura R&D of America
2003 S UZUKI SV10 00S
11300 55 vs. Stock
11300 55
Stock
Yosh imura R& D of Ame rica
2003 SUZUKI SV1000S
1130 055 vs. S tock
5420 DANIELS STREET STE A, CHINO CA., 91710 · (800)634-9166 · (909)628-4722 · FACSIMILE (909)591-2198
www.yoshimura-rd.com
RS-3 OVAL PERFORMANCE EXHAUST SYSTEM
SUZUKI
2003-2007
SV1000S
120
110
100
90
80
70
60
50
40
SAE Corrected HP
30
20
10
0
3000 4000 5000 6000 7000 8000 9000 10000
RPM x1000
85
75
65
55
45
35
25
SAE Corrected Torque (lb-ft)
15
2800 4800 6800 8800
RPM x1000
Note: Dyno graphs are for comparison use only. Actual results may vary depending on operating and motorcycle condition.
THIS PRODUCT IS DESIGNED FOR USE IN CLOSED COURSE
! !
NOTE: IN THE STATE OF CALIFORNIA, IT IS ILLEGAL TO MODIFY THE EMISSION CONTROL SYSTEM. WHICH INCLUDES THE CARBURETORS OF ANY VEHICLE.
RACING AND IS NOT INTENDED FOR HIGHWAY USE.

Installation Procedures:
Caution: Exhaust system can be extremely hot. Let motorcycle cool down
before beginning installation.
Note: Read through all instructions before beginning installation.
Page 2
Tools Needed:
Socket and Wrench Set
Ratchet Wrench and long extension
6mm Allen wrench
Torque wrench
Installation Steps:
1 Remove lower cowling. (See Fig. 1)
2 Loosen exhaust collector clamp where stock front and
rear header connect. Unbolt exhaust flange bolts and
remove stock front header. (See Fig. 1)
3 Remove stock mufflers and stock rear header. Loosen
exhaust clamp on rear stock header tube. Unbolt
header chassis mounts (left and right sides) and
remove header.
Note: Removal of kickstand may help in increasing
clearance during disassembly. Please note to safely
secure the bike on a rear stand.
4 Replace old exhaust port gasket on front cylinder with
new exhaust port gasket. (Not supplied - Suzuki part
no. 14181-31D00)
5 Slip supplied collector clamp over rear exhaust port
tube on Yoshimura header .
6 Install Yoshimura header by slipping rear exhaust port
tube into stock rear header tube. Do not tighten
collector clamp at this time.
Note: Rear header can be difficult to install. Start
header on the stock rear header tube. Simultaneously
twist and push header until in position. Chassis
mount goes to the inside of stock chassis mount
location. Once chassis mount bolt hole is lined up
header is located properly.
Loosen Header Clamp
Fig. 1
Fig. 2
7 Install chassis mount bolt using stock bolt, washer
and nut. (See Fig. 2) Do not tighten at this point.
Note: For 2004-2007 models, install supplied bolt,
washer, and aluminum spacer as shown in Fig 5.
Rear Collector Clamp
Fig. 3
 Loading...