

Page 1
﹡
For detail instructions on how to use the Digital Pen, see the User Manual stored in the CD.
﹡
This manual may not reflect your actual device’s operation. All information is subject to change
without prior notification. Please follow your actual device’s operational procedures.
Step by Step to Get Started
STEP1
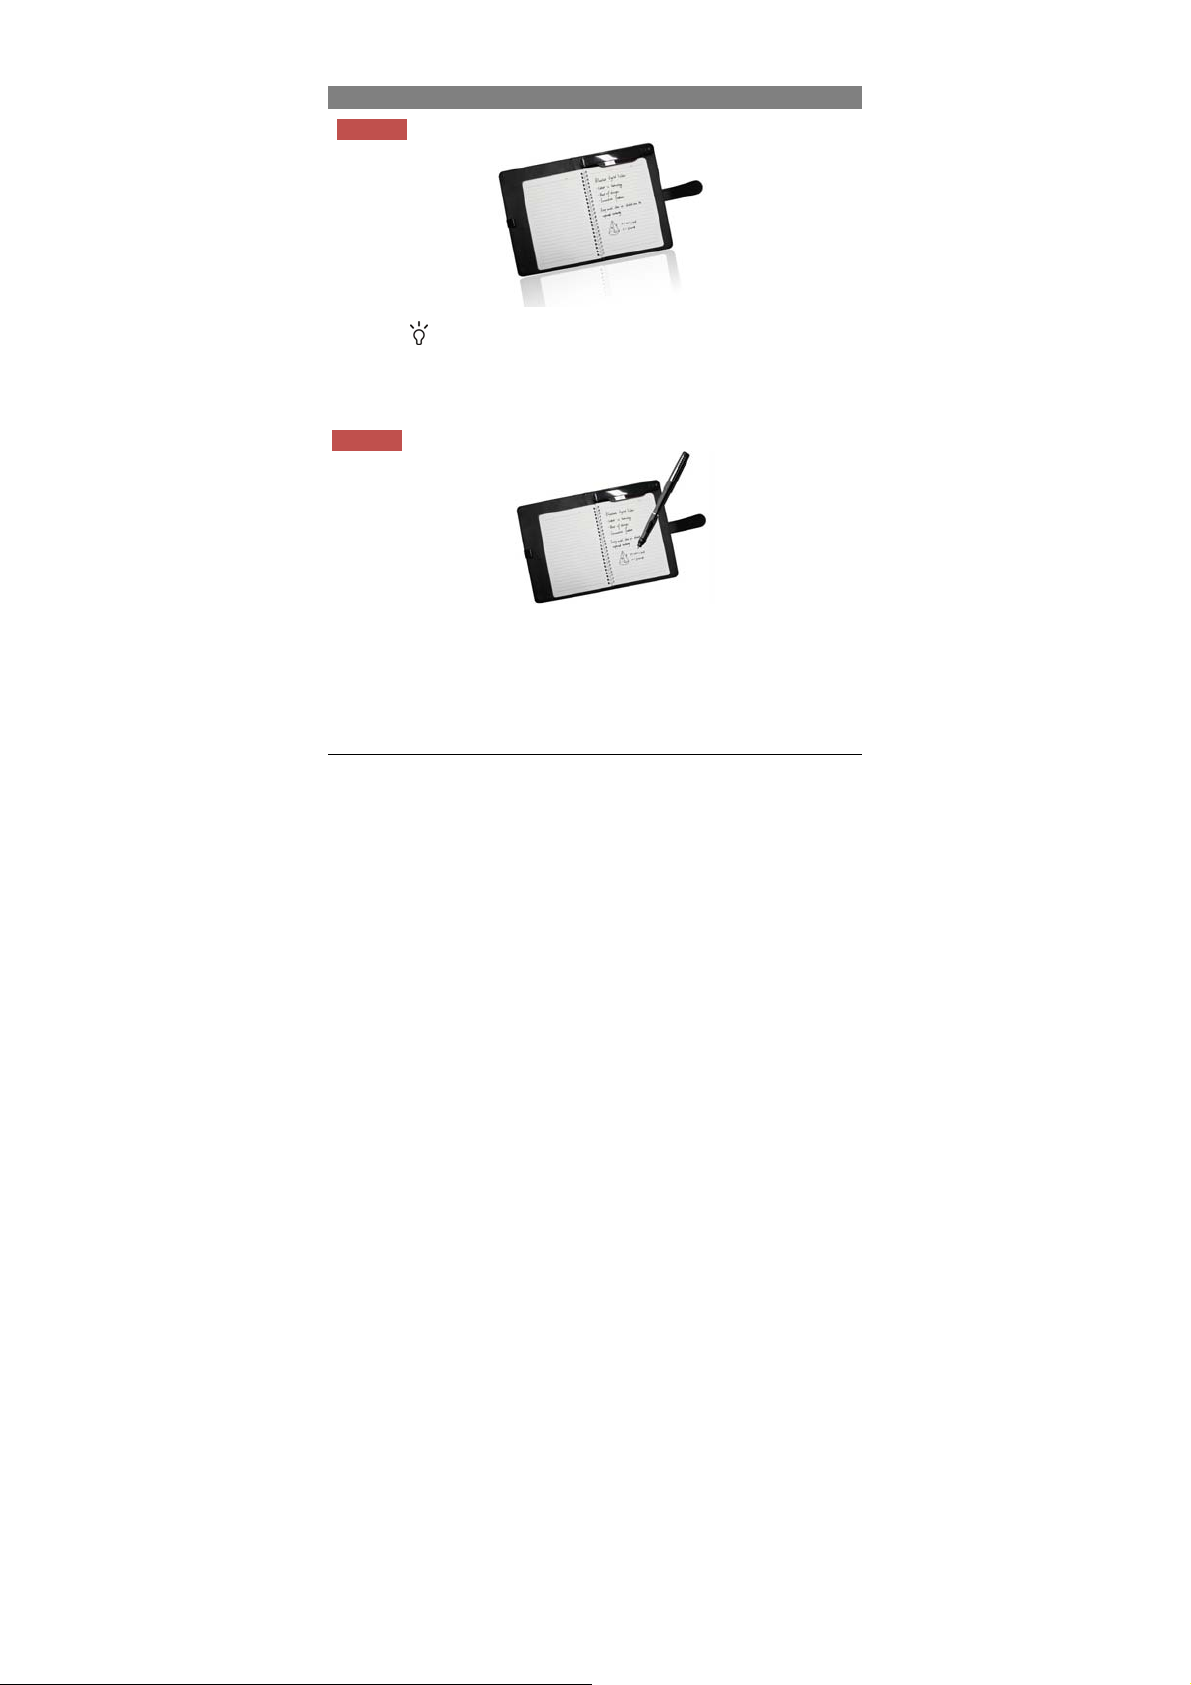
Layout your Note Pad on a flat surface
The base unit on top of the notepad should turn on automatically once you open the Note
Pad, with the
Note: For initial use, your base unit needs to be charged for about 3 hours. Connect your
base unit to your PC using the USB cable for charging.
STEP2
Pick up the Digital Pen attached on the Note Pad and write normally.
Note:
a. Be careful to hold the pen in a way that does not block the signals sent from the tip of
b. Make sure the pen point is 1.5cm away from the unit. Otherwise, the base unit may
indicator blinking. It is not necessary to press any button turn it on.
Write on the Note Pad
the pen to the base unit.
not capture your handwriting.
- 1 -
Page 2
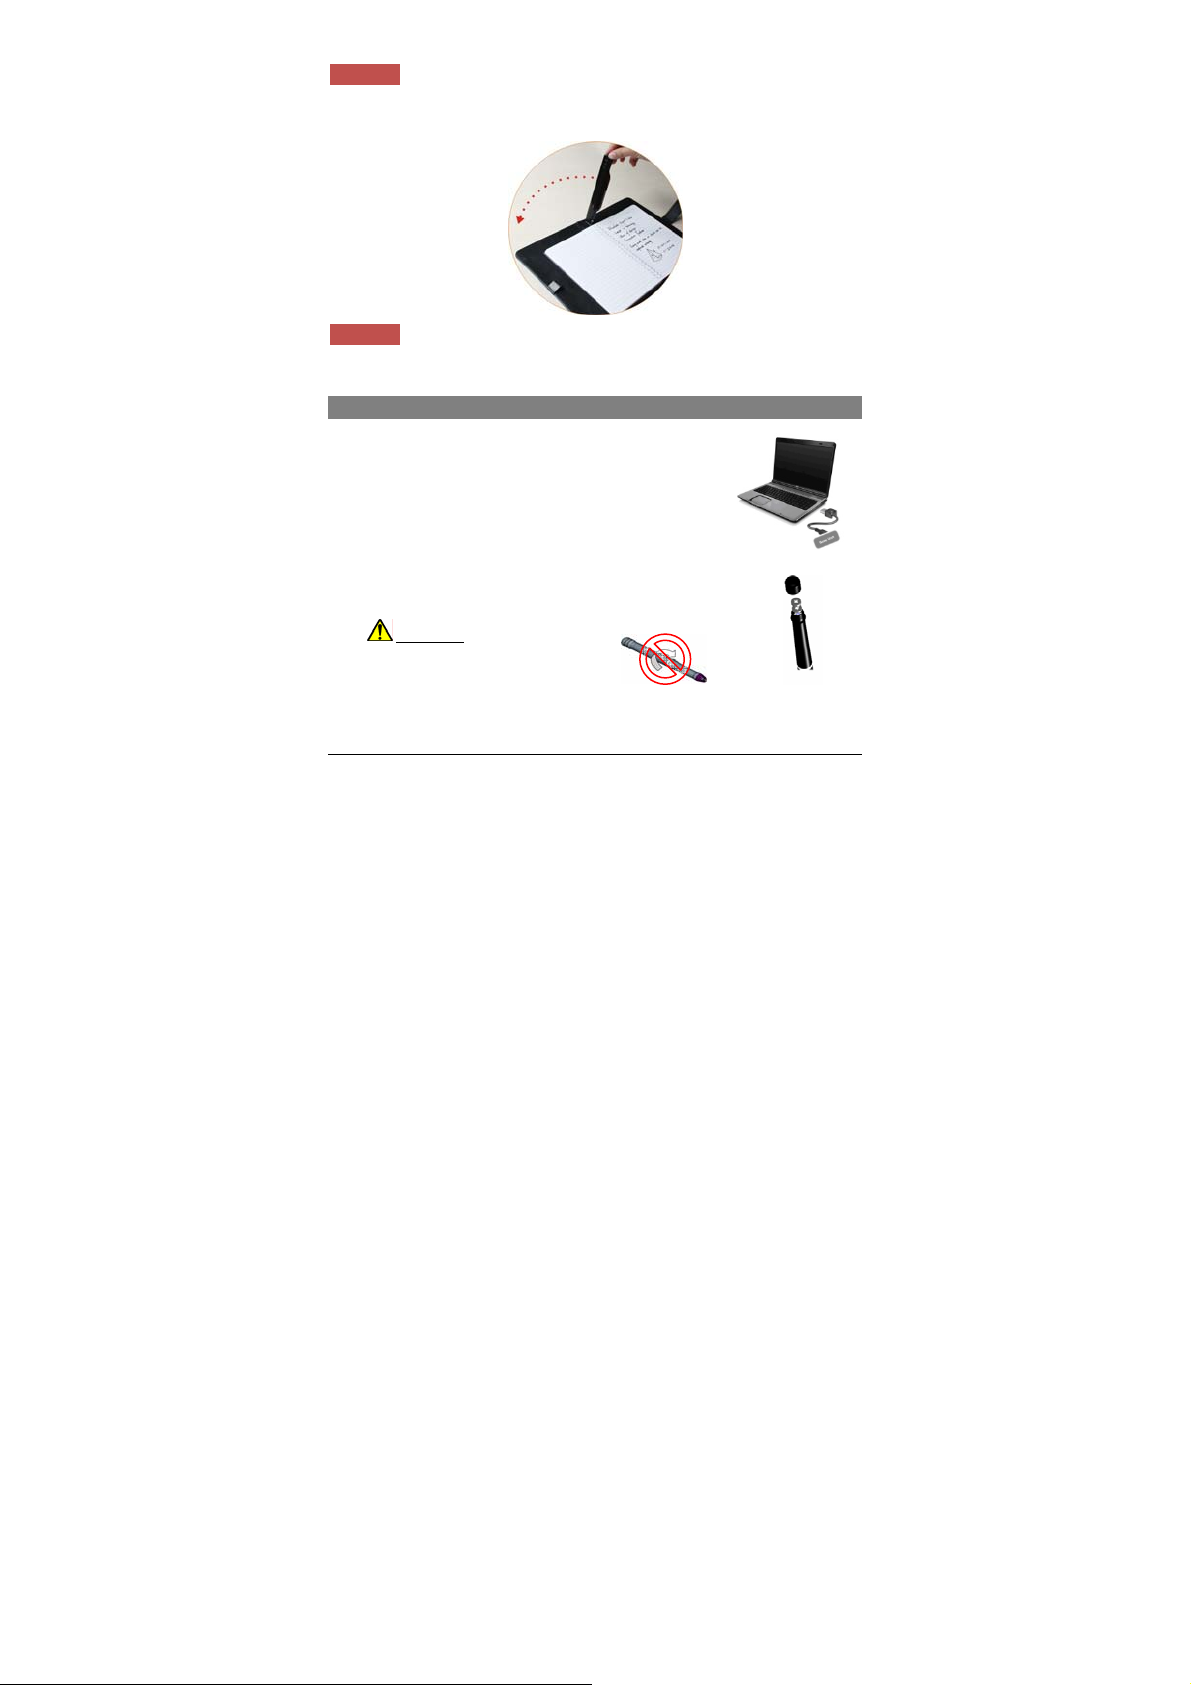
STEP3
You can start a new page once you’ve finished one. Just turn over the page and then lift the
base unit by its end to reverse.
Turn over the Page
STEP4
Close your Note Pad once you finished all pages. All of your handwritten notes should be
saved in your base unit.
Close your Note Pad
Before Using
Charge the Battery
For initial use, your base unit needs to be charged for about 3
hours.
Connect your base unit to your PC using the USB cable for
charging.
Install Pen Batteries
a. Remove the battery compartment cover.
b. Install two SR41 batteries, with the positive poles facing up as
shown (Use the enclosed SR41 batteries).
c. Replace battery compartment cover.
WARNING:
Do not attempt to open the pen. This
may cause the pen to malfunction.
- 2 -
Page 3
Installing Ink Refill
To insert a new refill,
1. Slide the new refill into the tip of the pen.
2. Gently press the new refill until it is lodged securely in place.
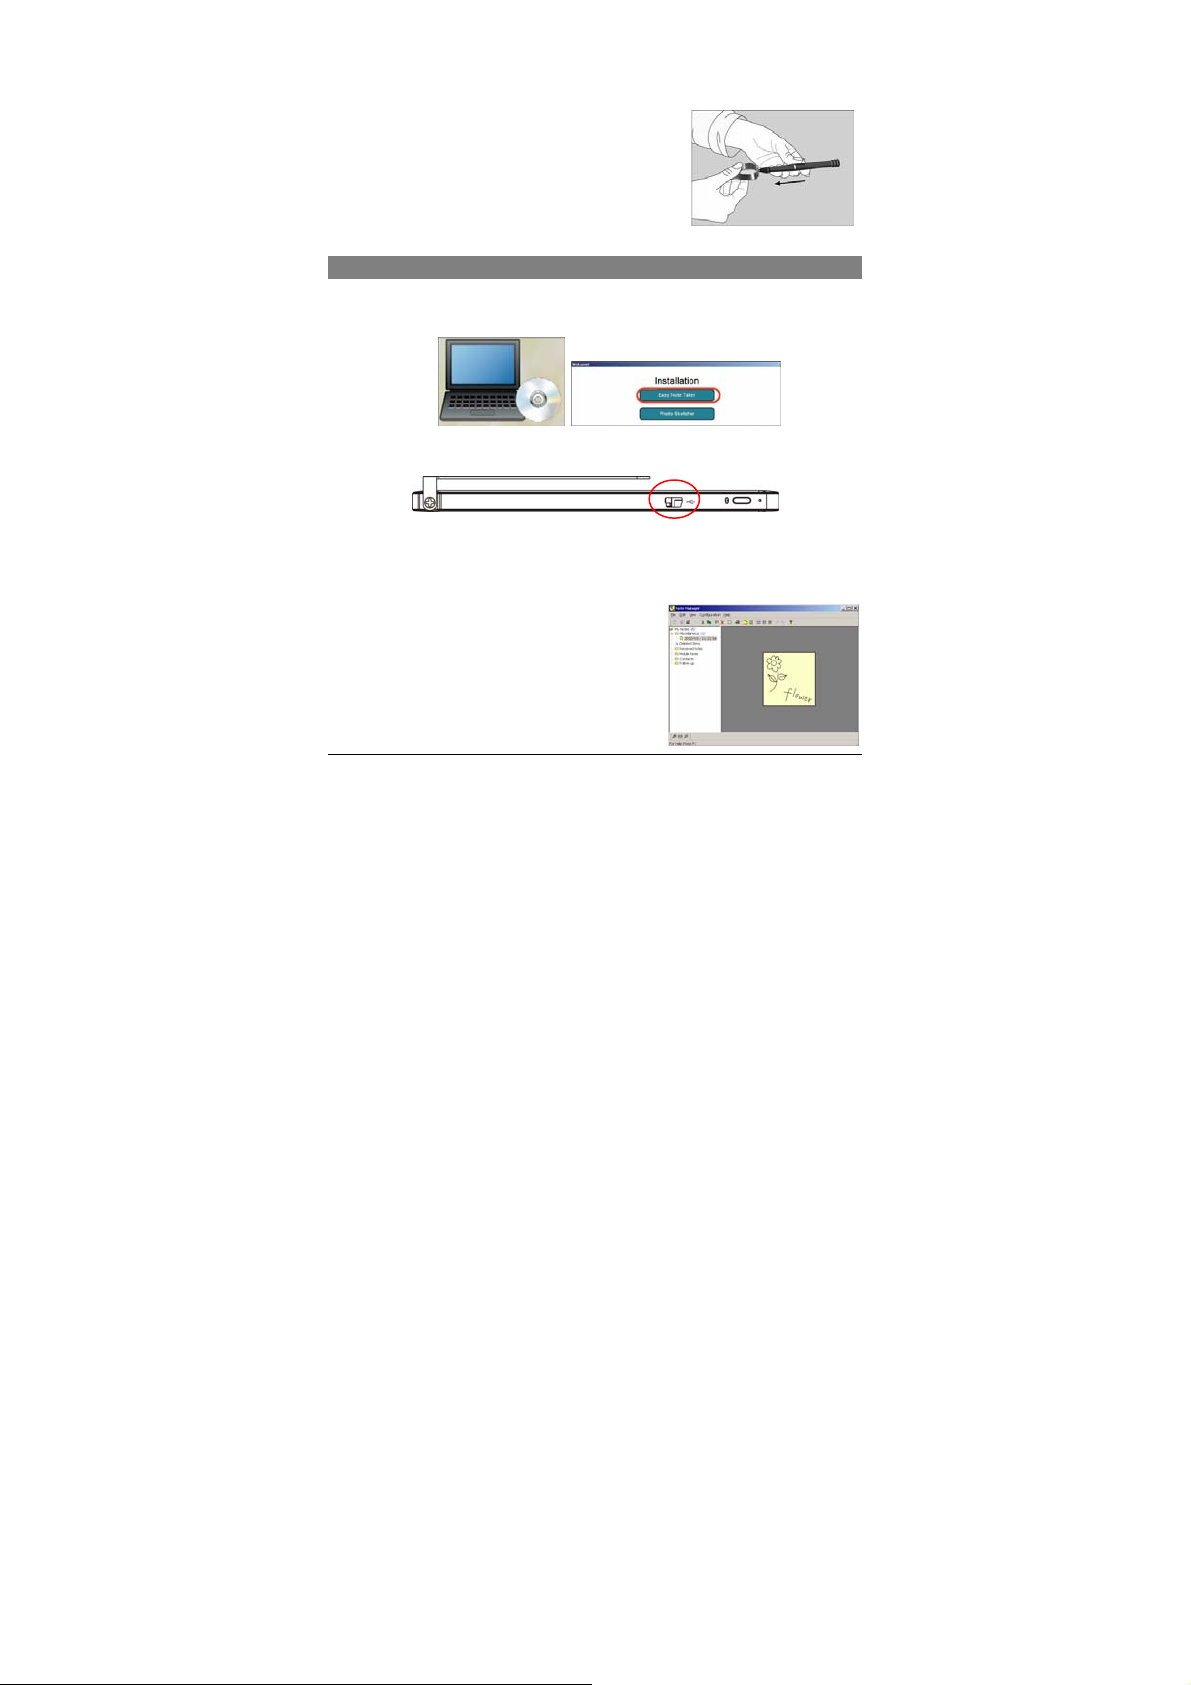
To replace the ink refill,
1. Detach the cap from the digital pen.
2. Clamp the ink refill with the refill extractor. Hold the pen
firmly, and apply pressure with the extractor against it.
3. Pull the used refill out.
View Notes on Computer
1. Installing the Note Manager
One of the provided CDs contains the Note Manager software which is required. Simply
insert the CD and then follow the wizard's instructions.
2. Connecting your Digital Pen to your Computer.
Plug the USB cable to the USB interface of the Note Pad and computer.
3. Uploading your Mobile Notes
First make sure your Note Manager is running. Now simply connect your base unit to your
USB port.
The Note Manager application will detect your unit and will prompt you to upload your notes.
Select “Yes” to start transferring your notes.
4. Using the Note Manager
The Note Manager can be used for storing, viewing,
searching, copying and exporting notes. It is set up in
Windows Explorer format, which allows you to browse
through your files in the left pane and view them in the
right pane.
- 3 -
Page 4

The Note Manager contains buttons that give you access to the most commonly used menu
commands.
The following table contains a list of each button in the toolbox together with a description
of its function.
Button Description
UPLOAD – When in Connected Mode, you can upload all your notes from
the mobile unit to your PC using the Digital Pen application
Note To Text - Convert handwritten note to texts. (only available in
Windows Vista or 7)
Convert your note to text using MyScript® Notes. (Only available if the
recognition software is installed.)
+
Joint multiple notes into one.
CUT – Cuts the selected note and saves it to the clipboard
COPY – Copies the selected note and saves it to the clipboard
PASTE – Pastes whatever was last copied or cut to the clipboard
DELETE – Deletes the selected note/notes
EDIT NOTE – Allows you to edit a selected note
PRINT -- Prints the selected note/notes
SHOW AS STICKY NOTE – Make your Note as Sticky Note
SHOW AS PAPER HOLDER – Make your Note as a paper holder
SMALL THUMB – Displays small thumbnails in the Note Manager view
MEDIUM THUMB - Displays medium sized of thumbnails in the Note
Manager view
LARGE THUMB - Displays large thumbnails in the Note Manager view
NOTE MODE
MOUSE MODE – TURNS YOUR PEN INTO A MOUSE
ABOUT – Provides you with your Digital Pen software version information
Using the Photo Sketcher
Photo Sketcher gives you the ability to sketch on top of any jpeg picture file. You can add
annotations on top of any picture. Then, you can save it and share it.
- 4 -
Page 5

Open a picture
Connection Indicator
Close
Save picture
Send picture
Redo Undo
Change pen
preference
Eraser/Pen
Installing Photo Sketcher
Insert the Note Manager application CD into your PC,
select “Photo Sketcher” and then install it following
the wizard’s instruction.
A desktop icon will be added once installation
complete.
Using Photo Sketcher
Run the Photo Sketcher by clicking the desktop icon.
1) Connect the Digital Pen
Before you can use the ‘Photo Sketcher’, your Digital Pen must be connected to your
computer properly. A connection icon will be Green
is properly connected.
(2) Load a picture file by clicking the application ‘File’ icon
would like to edit and select ‘Open’.
(3) Sketch on a picture file
Once a picture is loaded, use your Digital Pen to sketch anywhere you like on the picture.
Use the Pen, while hovering, to get to the point in which you’d like to sketch. Then, simply
use the Pen as you usually use a Pen, and sketch.
(4) Save a file
To save a picture, press the
select ‘Save’.
icon. Now select a path and a name for your file and
- 5 -
, indicating the Digital Pen
. Browse to the file you
Page 6

With the built-in bluetooth technology, your Digital Pen can write or make drawings on
Using your Digital Pen on Smart Phones
smart phones with Blackberry or Google Android system.
Turn on Bluetooth
Firstly turn on the Bluetooth by pressing the Bluetooth button on the base unit.
The Bluetooth indicator
Working with Blackberry Devices
1. Install the Application
In order to use the device on Blackberry devices, you first need to install the Note Manger
application on the blackberry. You have two methods of installing the application.
Method1 (on PC):
(1) Download the iNote firmware from AppWorld via Internet.
(2) Make sure the Blackberry “Desktop Manager” application is running.
(3) Connect your Blackberry device to the PC.
(4) In the Blackberry “Desktop Manager” application, click the “Application”.
should blink.
(5) Click “Import files” to import the iNote firmware.
(6) Click “Apply” to start installation.
(7) The application is installed to your Blackberry successfully.
- 6 -
Page 7

Method 2(on Blackberry Device):
Alternatively, you can install the application directly on your Blackberry.
(1) Connect to the Blackberry Device's supplied AppWorld and download the iNote SW;
(2) Run the iNote application from the Blackberry Device’s Download folder.
2. Turning the Digital Pen base unit on
To turn the Digital Pen base unit ON, press & hold the button on its top until you see the
number of notes stored in memory.
3. Pairing the Bluetooth
In order to use the Digital Pen, you first need to pair the Digital Pen base unit with your
Blackberry’s’ Bluetooth. This procedure should only be done once. Please do as follows:
(1) Make sure your BlackBerry is turned on.
(2) Make sure the Bluetooth is enabled on your BlackBerry.
(3) Make sure the Digital Pen base unit is turned on.
(4) Click the Bluetooth button on top of the Digital Pen base unit.
(5) In the home screen, click the
(6) Click the ‘Manage Connections’ icon.
(7) Select ‘Setup Bluetooth’.
(8) Click the ‘Search’.
(9) Your Blackberry should find a device named ‘mobile pen’. Select this device.
(10) A passkey is required: enter 0000 as the passkey.
(11) Click ‘Enter’.
(12) The LED on the Digital Pen base unit should be ON (Not flashing). Your Blackberry is
now successfully paired with the Digital Pen.
4. Running the application
Make sure you turn the Digital Pen base unit ON. To turn it on, press & hold the button on
its top.
To run the application,
‐ click the ‘Downloads’ icon in your Blackberry.
‐ click the ‘iNote’ application icon
Note: Make sure your Bluetooth is turned on.
button.
.
5. Using iNote application
Taking Notes in ‘Connected Mode’
To start a new note, freely use the Pen to write on your paper. Everything you write is
shown on your Blackberry screen.
Saving a note
Once you are done with your note, you can save it. To do so, do as follows:
‐ Click the
‐ Select ‘Save’.
Uploading Notes from Pen memory
To upload notes from the pen memory:
‐ Click the
‐ Select ‘Pen Memory’.
button.
button.
- 7 -
Page 8

‐ Select ‘Upload’.
Photo Sketcher
You can sketch on any jpeg using your digital pen. Sketches can be done on existing
images or pictures taken by the device camera.
To start sketching:
‐ Click the
‐ Select ‘PhotoSketcher’ .
To sketch on an existing photo:
‐ Select ‘Open’ .
‐ Select a file from the file list.
‐ Use the pen to sketch on the image.
To sketch on an existing photo:
‐ Select ‘Snapshot’ to open an existing photo.
‐ Take a snapshot using the Blackberry camera.
‐ Use the pen to sketch on the image.
Setting picture properties
Within a picture, you can change the pen color, width and picture scale.
‐ Click the
‐ Select ‘Properties’.
button.
button.
Change your selections.
‐ Click the
‐ To save the changes, select ‘Save’.
‐ To discard the changes, select ‘Discard’.
Load a note
You can load a new note or a note from the notes list.
To open a new note:
‐ Click the
‐ Select ‘Open New’.
To load a note from the notes list:
‐ Click the
‐ Select a note from the file list.
‐ Select ‘Open’.
In Touch screen device you can simply click the file from the list.
Note:
Send a note by eMail/MMS
You can send a note by eMail or by MMS.
‐ Click the
‐ Select ‘Send’ .
‐ Select ‘Send Mail’ or ‘Send MMS’.
‐ You can add recipients, change subject and body.
‐ Click the
‐ Select ‘Send’.
Setting note properties
You can change a note background color, Pen color and width
button.
button.
button.
button.
button.
- 8 -
Page 9

‐ Click the button.
‐ Select ‘Properties’.
‐ Change your selections.
‐ Click the
‐ To save the changes, select ‘Save’.
‐ To discard the changes, select ‘Discard’.
Deleting a note from list
To delete notes from the notes list:
‐ In the notes list, select a note.
‐ Click the
‐ Select ‘Delete’.
Deleting notes from Pen memory
To delete notes from the pen memory:
‐ Click the
‐ Select ‘Pen Memory’.
‐ Select ‘Erase memory’.
button.
button.
button.
- 9 -
Page 10

FCC Warning:
z This device complies with Part 15 of the FCC Rules. Operation is subject to the
following two conditions:
z (1) this device may not cause harmful interference, and
z (2) this device must accept any interference received, including interference th at
may cause undesired operation.
z Changes or modifications not expressly approved by the party responsible for
compliance could void the user's authority to operate the equipment.
z NOTE: This equipment has been tested and found to compl y with the limits for a
Class B digital device, pursuant to Part 15 of the FCC Rules. T hese limits are
designed to provide reasonable protection against harmful interference in a
residential installation. This equipment generates, uses and can radiate radio
frequency energy and, if not installed and used in accordance with the instructions,
may cause harmful interference to radio communications. However, there is no
guarantee that interference will not occur in a particular installation. If this
equipment does cause harmful interference to radio or television reception, which
can be determined by turning the equipment off and on, the user is encouraged to
try to correct the interference by one or more of the following measures:
z -- Reorient or relocate the receiving antenna.
z -- Increase the separation between the equipment and receiver.
z -- Connect the equipment into an outlet on a circuit different from that to which the
receiver is connected.
z -- Consult the dealer or an experienced radio/TV technician for help.
RF warning statement:
The device has been evaluated to meet general RF exposure requirement. The device can
be used in portable exposure condition without restriction.
- 10 -
 Loading...