


1
User Manual

2
Contents:
Safety and Regulatory Information
ⅠBasic Introduction
1. Overview
2. Accessory
2.1 Charging by AC adapter
2.2 Charging by Car Charger
2.3 USB Cable usage
2.4 Install the Car Mount System
Ⅱ Main function introduction
1. Starting up
2. Power saving
3. Main Functions
3.1 Navigation
3.2 Media
3.2.1 Music
3.2.2 Photo
3.2.3 Ebook
3.2.4 Video
3.3 Bluetooth
3.3.1 Phone keypad
3.3.2 Call Record
3.3.3 Pair
3.3.4 Dun Setting
3.3.5 Attribute
3.3.6 Pair Devices
3.3.7 IE Explorer
3.4 System setting
3.4.1 Backlight
3.4.2 System Info
3.4.3 Language
3.4.4 Power
3.4.5 Volume
3.4.6 Date Time
Federal Communications Commission (FCC) Statement
You are cautioned that changes or modifications not expressly approved by the part responsible for compliance
could void the user's authority to operate the equipment .
FCC- Class B
This equipment has been tested and found to comply with the limits for a Class B digital device, pursuant to part 15
of the FCC Rules. These limits are designed to provide reasonable protection against harmful interference in a communications.
However, there is no guarantee that interference will not occur in particul
ar installation. If this equipment does cause harmful
interference to radio or television reception, which can be determined by turning the equipment off and on, the user is
encouraged to try to correct the interference by one or more of the
following measures:
- Reorient or relocate the receiving antenna.
- Increase the separation between the equipment and receiver.
- Connect the equipment into an outlet on a circuit different from that to which the receiver is connected.
- Consult the dealer or an experienced radio/TV technician for help.

3
Precaution and Notice
¾ GPS is operated and controlled under the sole responsibility of the Government of the United
States of America, who are responsible for its availability and accuracy. Any changes in GPS
availability and accuracy, or in environmental conditions, may impact the operation of your
device .We can not accept any liability for the availability and accuracy of GPS.
¾ The PND is used only as a navigation aid. It is not for precise measurement of direction,
distance, location or topography. The user must follow all traffic signs and local regulations
along the roads.
¾ GPS satellite signals cannot pass through solid materials (except glass). When you are inside
a tunnel or building, GPS position is not available.
¾ A minimum of 4 GPS satellite signals are needed to determine current location. Signal
reception can be affected by situations such as bad weather or wireless devices or dense
overhead obstacles (e.g. tall buildings).
¾ When you get out of the car, do not leave your PND on the dashboard or subject to direct
sunlight. The overheating of the battery may cause malfunctions and/or dangerous
conditions.
¾ For your own safety, do not operate the controls of the PND while driving. Do not mount
where the driver’s field of vision is blocked

4
ⅠBasic Introduction
1. Overview
A
A:Power Switch
B:SD Card Slot
C:Earphone Jack
D:USB Connector
E:Reset Key
F:
Speaker
2. Accessory
2.1 Charging by AC adapter
Please use the AC adapter to charge the device for the first time. To maximize the life of the
battery, the device must be full of charge for the first time.
Plug the adapter’s DC port into the device’s USB port on its right-side panel
Plug the adapter into the main supply socket.
The charging indicator will light. When the unit is fully charged, the red indicator will turn blue.
2.2 Charging by Car Charger
The car charger supplies power to your device when you are using the device in a car.
Caution: To protect your device against sudden surges in current, connect the car charger only
after the car engine has been started. Connect one end of the car charger to the power connector of
your device. Connect the other end to the cigarette lighter in the car to power and charge your
device.
C
D
E
B
F

5
2.3 USB Cable usage
The USB cable is provided for system upgrades. This USB cable will work on the PC either with
Microsoft Active Sync® or as a mass storage media. You can select the mode in the “System-Sys
Info-USB” menu.
For upgrade and more information about Microsoft Active Sync, please visit Microsoft web.
2.4 Install the Car Mount System
Take off the protected film on the bottom of the suction. Then put the bracket onto a suitable
location of your windscreen or side window, make sure the window or the suction or windscreen
is clean and without water and some dirty th ings inside, fixing the stand on that position. Never
place the stand where the driver's field of vision is blocked.
If the car's windshield is tinted with a reflective coating, an external antenna (optional) may be
needed to route the roads. The external antenna is stick to the top of the car through a window.
When closing the car window, be careful not to pinch the antenna cable (Cars with an anti-jam
window design may automatically leave adequate space as needed.).
Install PND into the holder
Press 2 side button, pull left lightly and then take off the suction. If the bracket still doesn't detach
from your windscreen, tug gently on the clear plastic tab at the edge of the suction mount, to break
the vacuum seal.
Ⅱ Main function introduction
1. Starting up
Tap " Power Switch " key then enter into the main function operation screen as below.

6
2. Power saving
Press the power button on the top side of your device to turn off your device, the device
actually enters a suspend state and the system stops operation. Once you turn on the system again,
it resumes.
3. Main Functions
Press the POWER button to turn on the GPS unit. The Main Menu screen will be displayed as
below:
3.1 Navigation
Double tap the “Navigation” icon to start program.
Note: During navigation or other operations, quickly p ressing the MENU button, "Main Menu"
screen will be displayed.
3.2 Media
Tap the icon "Media" on the main menu and enter into following interface.
3.2.1 Music
1) Tap the icon “Music” on the media menu and enter into following interface.

7
2) Double tap your desired file and enter into the following interface.
A: return to the Media menu
B: volume control
C: return to previous menu
D: next
E: previous
F: stop
G: speed bar
H: pause/play
3.2.2 Photo
1) Tap the "Photo" icon on the media menu and enter into the following interface.
2) Double tap the file on the screen and enter into the following interface.

8
A: return to the Media menu
B: next
C: return to previous menu
D: current picture name
E: Zoom in
F: Zoom out
G: full screen
H: rotate
Tips:
Tap FULL SCREEN button, it will display in full screen size.
When playing in full screen, double press the screen again, it will return to original playing size.
3.2.3 Ebook
1) Tap the "Ebook" icon on the media menu and enter into the following interface.
2) Double tap the file and enter into the following interface.

9
A: Return to the Media menu
B: Previous
C: Next
D: Return to previous menu
E: Pages chose
F: Current page/total pages
G: Current file name
3.2.4 Video
1) Tap the icon "Video" on the media menu and enter the following interface.
2) Tap the file you desired and enter into the following interface.
A: Return to the Media menu
B: Pause/play
C: Stop
D: Speed up
E: Volum e control
F: Full screen
G: Return to previous menu
H: Speed bar
Tips:
Tap NEXT button to recycle the movie.
Tap full screen button or double press the screen, it will play in full screen.
When playing in full screen, double press the screen again, it will return to original playing size.

10
3.3 Bluetooth
Tap the icon “Bluetooth” on the main menu and enter into the following interface.
3.3.1 Phone keypad
1) Tap the icon
on the Bluetooth menu and enter into the following interface.
A Return to the Bluetooth menu
B Backspace
C Pair and connect with the mobile you want
D Call Record
3.3.2 Call Record
1) Tap the icon
on the Bluetooth menu and enter into the following interface.
B
A
C
D

11
A Return to the Bluetooth menu
B Previous
C Next
D Connect with the mobile you want
E Delete all the call records
F Delete the recorded number you chose
G Hang up the number you dial
H Incoming call record
I Outgoing call record
2) Connect with the mobile you want and enter into the following interface.
3) Connect successfully with the mobile you want and enter into the following interface.
A Turn down the volume
B
Mute or Volume c ontrol
C Answer the PND or Mobile
A
B
C
D
E
F
G
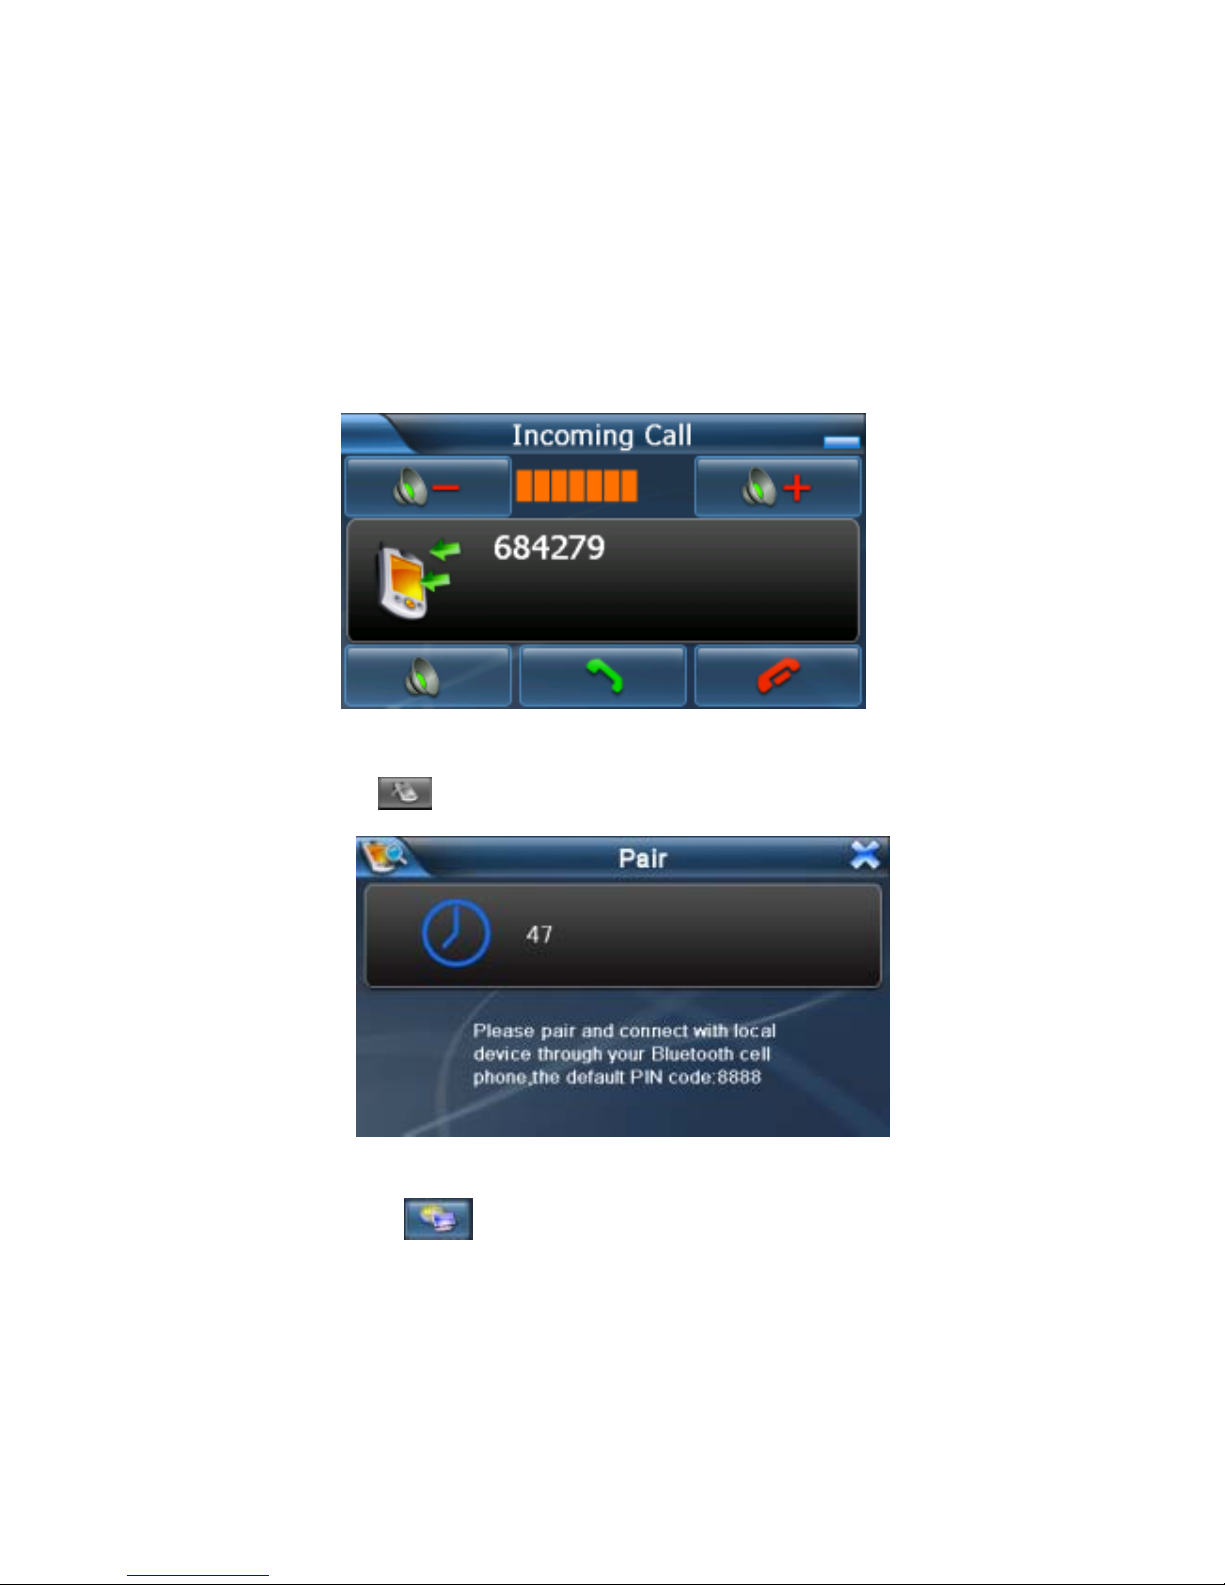
12
D Hang up the number you dial
E Show up the number keyboard or not
F Turn up the volume
G Minimize the interface
Tips:When there is incoming call., the following interface would appear.
3.3.3 Pair
Tap the icon
on the Bluetooth menu and enter into the following interface.
3.3.4 Dun Setting
1) Tap the icon
on the Bluetooth menu and enter into the following interface.

13
Tips: Tap the button
to disconnect the Dun that you selected.
2) Select the Dun device you want and enter into the following interface.
Tips: Tap the Connect button and when it connectes successfully,the word “Connect”would be
white and the word at bottom would be “Connected”.
3.3.5 Attribute
1) Tap the icon
on the Bluetooth menu and enter into the following interface.
A PIN Setting
B Music Setting
2) Tap PIN Setting button and enter into the following interface.
A
B

14
3) Tap Music Setting button and enter into the following interface.
Then tap the icon you desired and choose the music fi le as the ring of incoming call.
3.3.6 Pair Devices
1) Tap the icon
on the Bluetooth menu and enter into the following interface.
A Return to the Bluetooth menu
B Next
C Delete all the Devices information
D Disconnect the Devices you chose
E Connect the Devices you chose
3.3.7 IE Explorer

15
1) Tap the icon on the Bluetooth menu and enter into the following interface.
2) Tap the KeyShow ,input the website you want and
press the key “enter”.
For example:
Tips: Make sure PND connected with the Mobile before your using this function ,or it will
enter into the interface of Dun Setting.
3.4 System setting
Tap the icon "System" on the main menu and enter into the following interface.

16
3.4.1 Backlight
Tap the "Backlight" icon and enter into the following display.
A. Tap "-" to weaken the backlight, and tap "+" to stronger the backlight.
B. Under battery icon, tap “<” or “>” button to select the duration of auto power off the backlight.
C. Under AC power icon, tap “<” or “>” to select the duration of auto power off the backlight
when using AC adaptor.
3.4.2 System Info
Tap the "Sys Info" icon and enter into the following display.
A. Tap the icon “USB” to set the USB working mode.

17
B. Tap the icon "Calibration" to adjust the touch screen.
3.4.3 Language
A. Tap the icon "Language" and enter into the following interface:
3.4.4 Power
Tap the icon "Power" and enter into following interface:

18
3.4.5 Volume
A. Tap the icon "Volume" and enter into the following interface:
B. Tap"-" or "+" to adjust volume of speaker.
C. You can select "Enable sounds for taps" and "Use FM".
D. Tap "<"or ">" icon to increase or decrease the emissive frequency of FM.
Fix the transmission frequency first. Turn on the car radio and tune the radio at the same frequency.
Then you can hear the voice the navigation device coming from the car radio’s loudspeaker.
Note:When use the FM Transmitter function,the device must be connected to the charger.
3.4.6 Date Time
A. Tap the icon "Date Time" and enter into the following interface:
B. Tap "Date" icon and use "<" or ">" icon to adjust the date.

19
C. Tap "Time" icon and use "<" or ">" icon to adjust the time.
C. Tap "Time Zone" icon and use "<" or ">" icon to adjust the time zone.
This document is for guidance only and does not form part of any contract, and
may be subject to change without notice.
 Loading...