

Page 1
YELLOW JACKET
DIGITAL SLING PSYCHROMETER—69008
Operations Manual
This unique pocket-sized, battery operated, micro processor
based meter is designed to quickly measure humidity, dry bulb,
dew point and wet bulb. No need to whirl the meter or refer to a
chart for results. The micro processor based psychrometer
provides a digital reading on the LCD display. The sensor parts
are protected by a rotatable cap.
Close Open
Features :
Triple LCD digital display
•
• Data hold to capture readings
• Pocket sized
1 4
• Low battery indication
• Fast response
• Accurate reading
• Maximum and minimum record
functions
2
• Dew point and wet bulb calculated
in seconds
• Microprocessor circuitry for
eliability
r
• Disable power off
3
• Rotatable cap to protect sensor
SPECIFICATIONS
Temp. range: -20~ + 50°C(-4 ~ 122°F)
RH% range: 0~100% RH
Wet bulb range: -21.6~ + 49.9°C (-69~ 122°F)
Dew point range: -68~ + 49.9°C (-90.4~ 122°F)
Accuracy: RH%: ±3% at 25°C
Response time : 60 seconds typical
Pocket size : 24.7(H) x 48.4(W) x178.5mm(L)
Temperature: ±1 °F (0.6°C)
Control Module
This package contains 1psychrometer, 2 AAA
size batteries and an operation manual.
Visit us at www.TestEquipmentDepot.com
IMPORTANT NOTICE:
To ensure that an accurate
value appears on the
display, the sensor
protection cap must be in
the open position before
the measurement is taken.
Key
1) Power On/Off
2)oC/oF Select - Switch
bet
ween
3) MODE Select Sw
itch bet
display
(Db=Ai
4) HOLD
+ HOLD =
Disable auto-off mode
(default setting: auto-off
5
in 5 minutes.)
5) RESET
- Reset Min/M
memory
MX/MN
6)
- Displa
value of mem
6
from power on to
present.
99 Washington Street
Melrose, MA 02176
Phone 781-665-1400
Toll Free 1-800-517-8431
of Db &
r Temp
Display
y max/
®
o
C and oF
ween
)
a
min
ory
DP
x
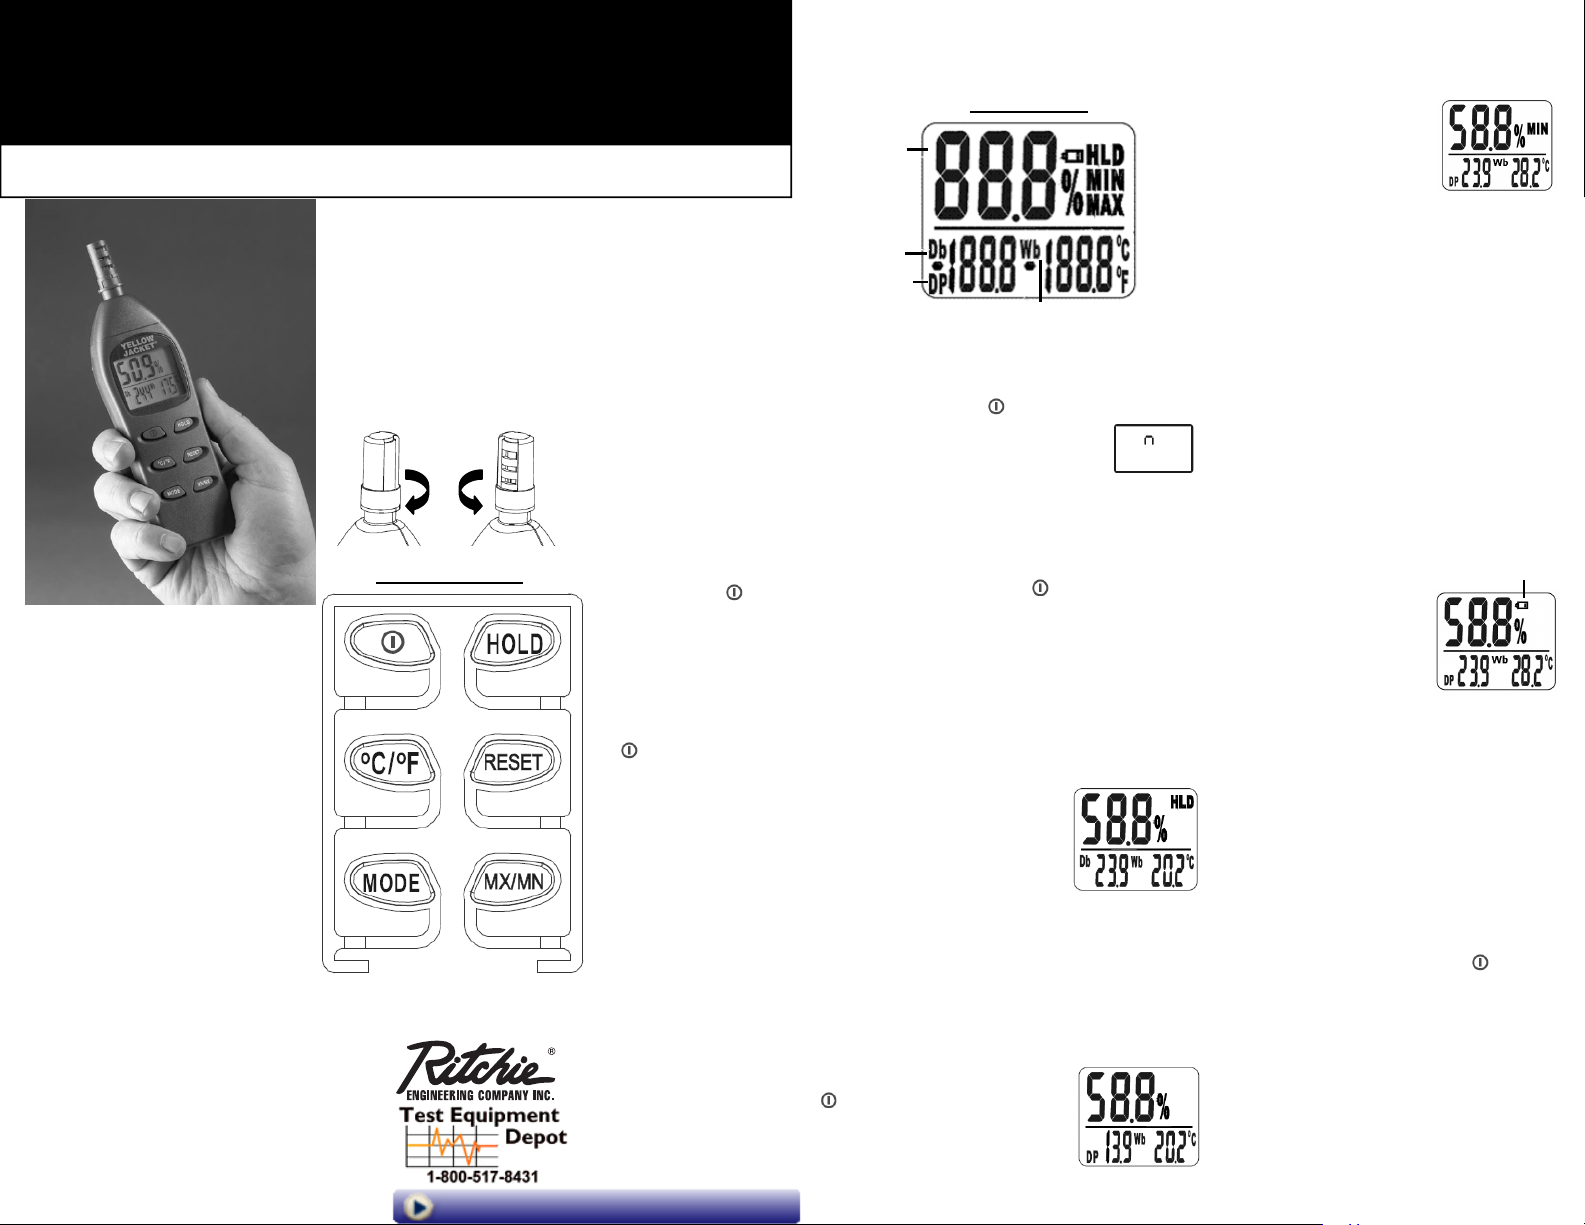
Controls and Indicators
LCD Display
RH%
Dry
Bulb
Dew Point
Wet Bulb
Auto Power Off
Unit will turn itself off after 5 minutes. To disable
Auto-off function, press and the HOLD buttons
simultaneously. When "n" appears
(See Fig. A), release HOLD button.
Auto-off is now disabled.
Fig. A
Temperature Units °C/°F
1. Rotate sensor cap to “open” position.
2. Turn meter on by
3.
Press C/F key more than 1 second
reading to desire
relative humidity
simultaneously
pressing
to convert
d unit. Both temperatur
measurement will display
.
e and
Data Hold Function
Press "HOLD" button until (HLD) appears in display.
The current reading is now held and will not change
until HOLD function is cancelled.
(See Fig.B). Press "HOLD" button
again to cancel HOLD function.
Hold function can be used for
humidity, dew point, dry
bulb and wet bulb.
Fig. B
Dew Point Function
Press MODE button until "DP" appears on display.
Select to display dew point or dry bulb (air temp.) in
any mode while internal temperature is active.
Wet Bulb Function
Turn the meter on by pressing the
button. Display will indicate
"Wb" temperature (See Fig. C).
Fig. C
Min./Max. Function
1. Press and hold MN/MX button until (MIN)
appears on displa
Fig. D). Display is now
showing minimu
humidity and tem
reading in memory.
Press and hold
2.
button again until
appears on display. Display is now showin
maximum humidi
ings in memory
To return back current temp. and
3.
readings, press a
until Min or Max
4. Press RESET bu
onds to clear current reading from memory
Note
: Check battery condition often as low
batteries may give inaccurate readings.
y (See
m
peratur
e
MN/MX
(MAX)
ty and temperature read-
.
nd hold MN/MX
disappear from display.
tton more than two sec-
Fig. D
humidity
button
Low Battery
Low battery symbol will appear on upper-right
corner of the display when the power is low.
Failure to replace batteries will have an affect
on the accuracy of the readings.
Open the battery cover on the rear
1.
Remove the ex
2.
batteries.
3.
Insert new AAA
making sure the batteries
inserted wi
are
polarit
4. Replace the cover.
y.
pired
batteries,
th correct
Low battery indicator
side.
Troubleshooting
Power on but no display.
1.
Be sure to depress ON/OFF key more
0.1 sec.
2.
Make sure batteri
making good contact w
Replace with new batteries and tr
3.
Remove the batteries for one min.
4.
install again.
No Dis
play.
If the low battery indicator was on
1.
w disappeared, replace the battery
no
2.
If auto-off m
D or ON/OFF+HOLD key to
HOL
wer off function.
auto po
If “Er4” appears on the display, the operating temperature is out of range. Any other
error codes - return the unit for repair.
Note: Dry bulb temperature means air
(internal) temperature. Dew point & wet bulb
are calculated from internal temperature.
es are in place and
ith correct polarity.
ode is active, press
than
y again.
then
and has
.
+
disable
g
.
 Loading...