

Page 1
®
Part #710306_B
Deluxe Flaring Tool 60278
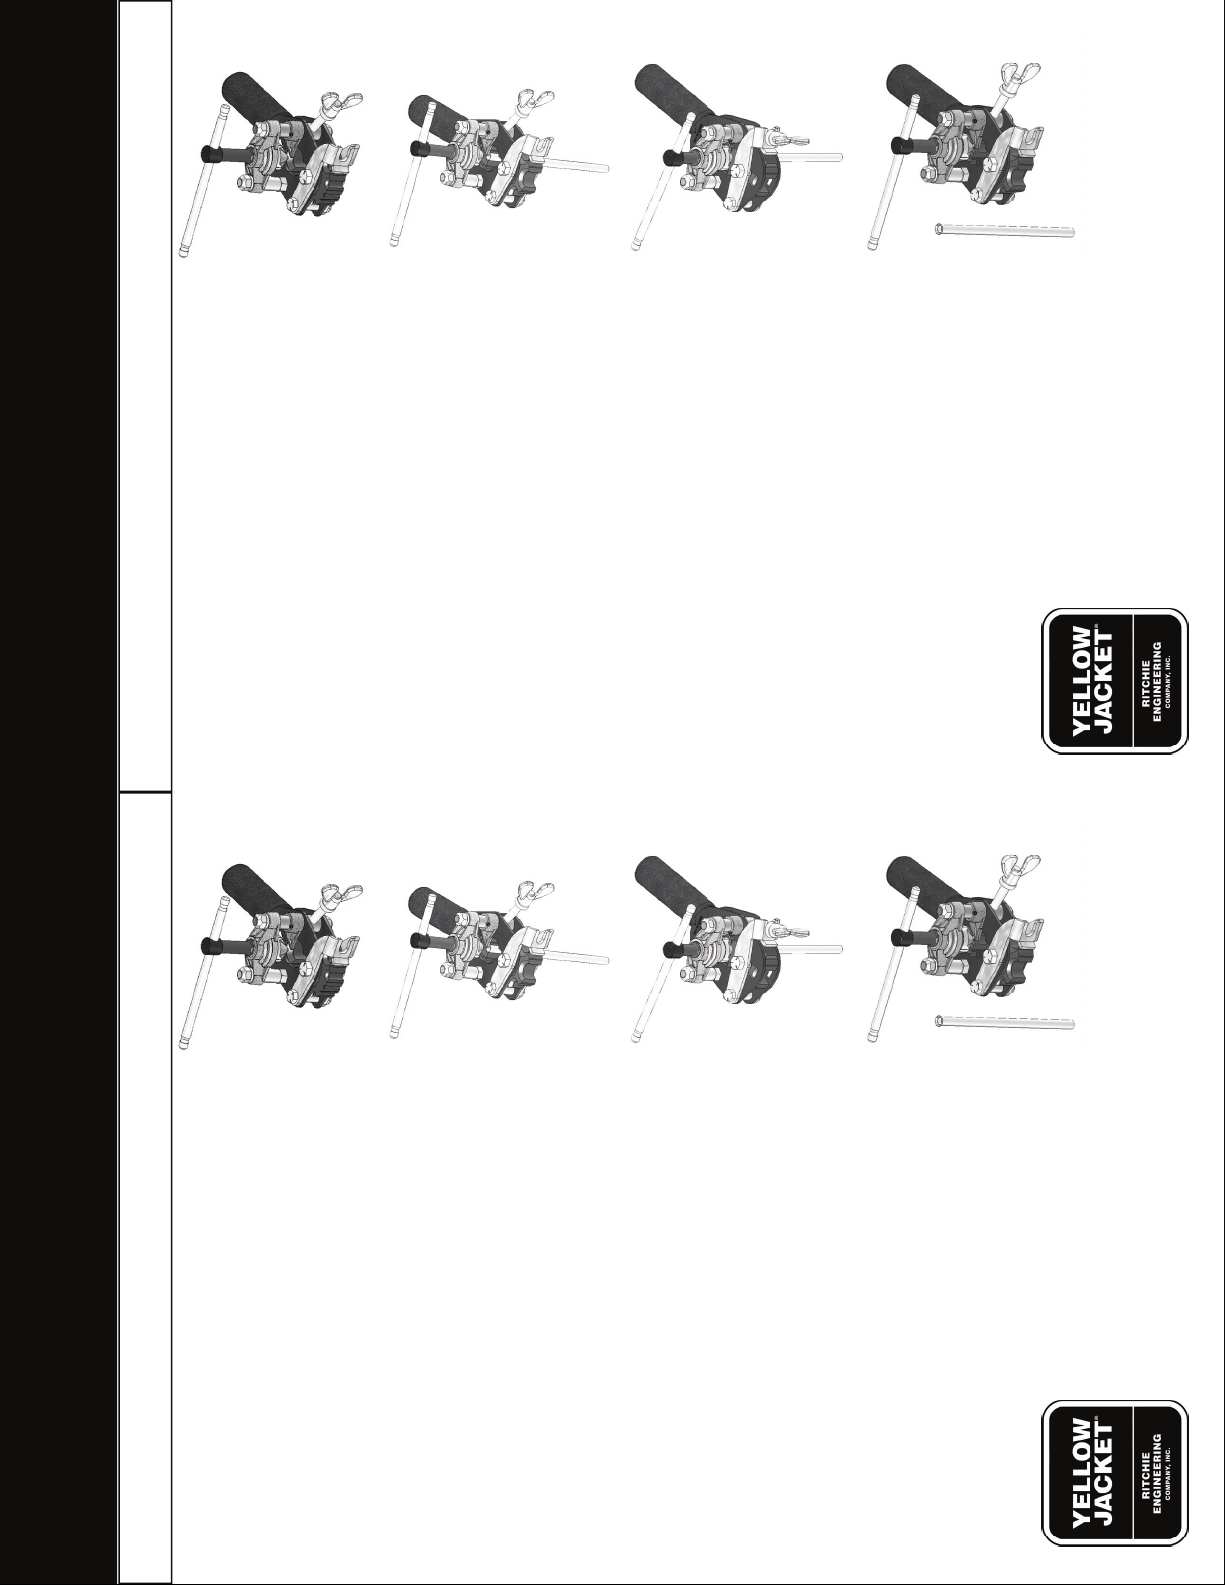
wing nut and swing clamp bolt out. Separate
YELLOW JACKET
1) Retract cone before wing nut is loosened. Loosen
®
clamping dies as shown. Read sizes from bottom
10950 Hampshire Avenue South
Bloomington, MN 55438-2623 USA
1-800-769-8370 or (952)943-1333
Fax: (952)943-1605
http://www.yellowjacket.com
of tool. Rotate clamp dies to the desired size.
over tube opening. Insert tubing to gauge. CLEAN
and OIL face of cone before each flare is made.
Note: Oil selection may require considerations such
as refrigerant compatibility.)
together, the automatic gauge has swung out of
position and tubing is ready to flare. A rather steady
resistance will be felt as the cone flares the tubing.
This force will suddenly increase as the tubing
reaches the outer mandrel. DO NOT advance the
cone further. Failure to comply can result in nicks
in the flaring cone. Reverse handle and tubing will
be burnished automatically.
unclamp and remove tubing. The automatic burnish-
ing mechanism will produce a perfect radius at neck
and highly polished flare face.
2) When tool is opened, the gauge automatically swings
3) With tubing set at proper height and dies clamped
4) After the flare has been made and the cone retracted,
Notes:
Keep tool well lubricated. It is particularly important
that the wing nut threads, the wing nut mating
threads, and the feed screw threads be lubricated
whenever they appear to be dry. Failure to lubricate
these areas may result in undersize flares and tool
damage. Although not as critical, all other moving
parts should be periodically lubricated to maximize
tool life.
intentional.
The looseness of the cone feed screw assembly is
Part #710306_B
Deluxe Flaring Tool 60278
wing nut and swing clamp bolt out. Separate
clamping dies as shown. Read sizes from bottom
YELLOW JACKET
1) Retract cone before wing nut is loosened. Loosen
10950 Hampshire Avenue South
Bloomington, MN 55438-2623 USA
1-800-769-8370 or (952)943-1333
Fax: (952)943-1605
http://www.yellowjacket.com
of tool. Rotate clamp dies to the desired size.
over tube opening. Insert tubing to gauge. CLEAN
and OIL face of cone before each flare is made.
Note: Oil selection may require considerations such
as refrigerant compatibility.)
together, the automatic gauge has swung out of
position and tubing is ready to flare. A rather steady
resistance will be felt as the cone flares the tubing.
This force will suddenly increase as the tubing
reaches the outer mandrel. DO NOT advance the
cone further. Failure to comply can result in nicks
in the flaring cone. Reverse handle and tubing will
be burnished automatically.
unclamp and remove tubing. The automatic burnish-
ing mechanism will produce a perfect radius at neck
and highly polished flare face.
2) When tool is opened, the gauge automatically swings
3) With tubing set at proper height and dies clamped
4) After the flare has been made and the cone retracted,
Notes:
Keep tool well lubricated. It is particularly important
that the wing nut threads, the wing nut mating
threads, and the feed screw threads be lubricated
whenever they appear to be dry. Failure to lubricate
these areas may result in undersize flares and tool
damage. Although not as critical, all other moving
parts should be periodically lubricated to maximize
tool life.
intentional.
The looseness of the cone feed screw assembly is
 Loading...