

Page 1
yedoo
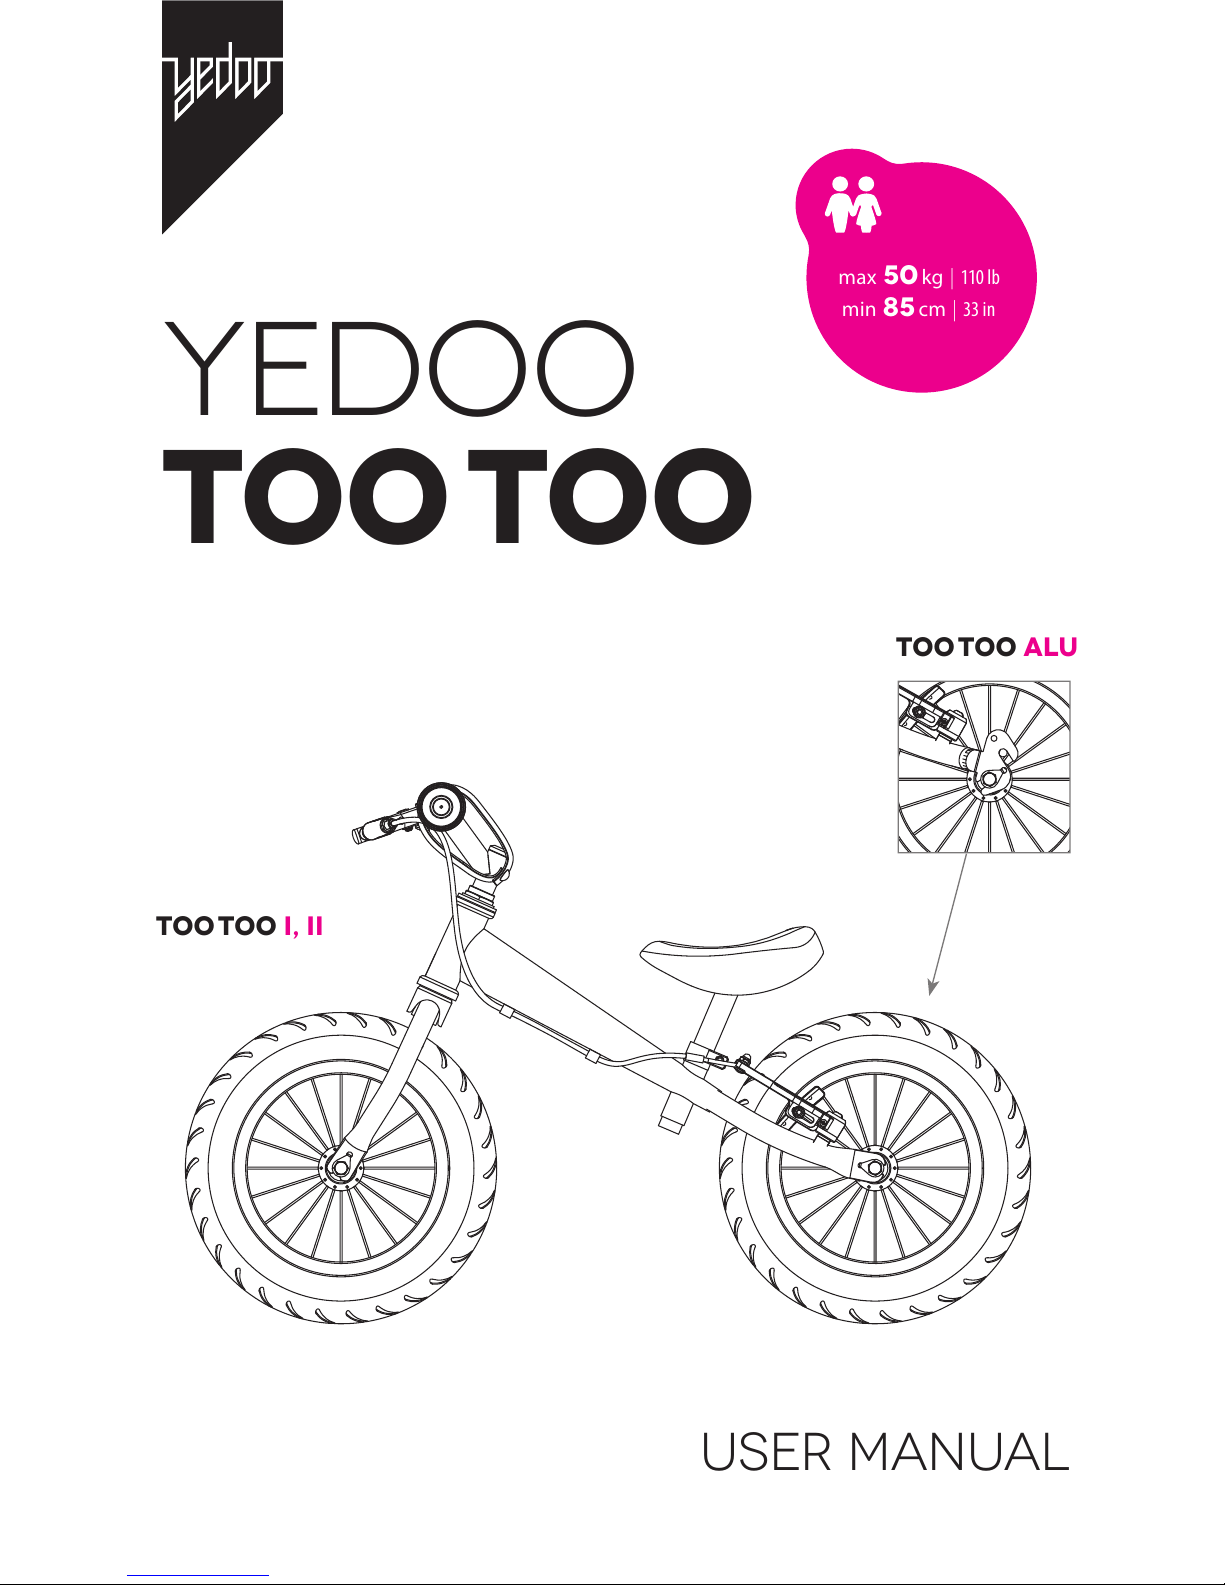
too too
too too alu
too too I, II
max 50 kg | 110 lb
min 85 cm | 33 in
user manual
Page 2
16 1716 17
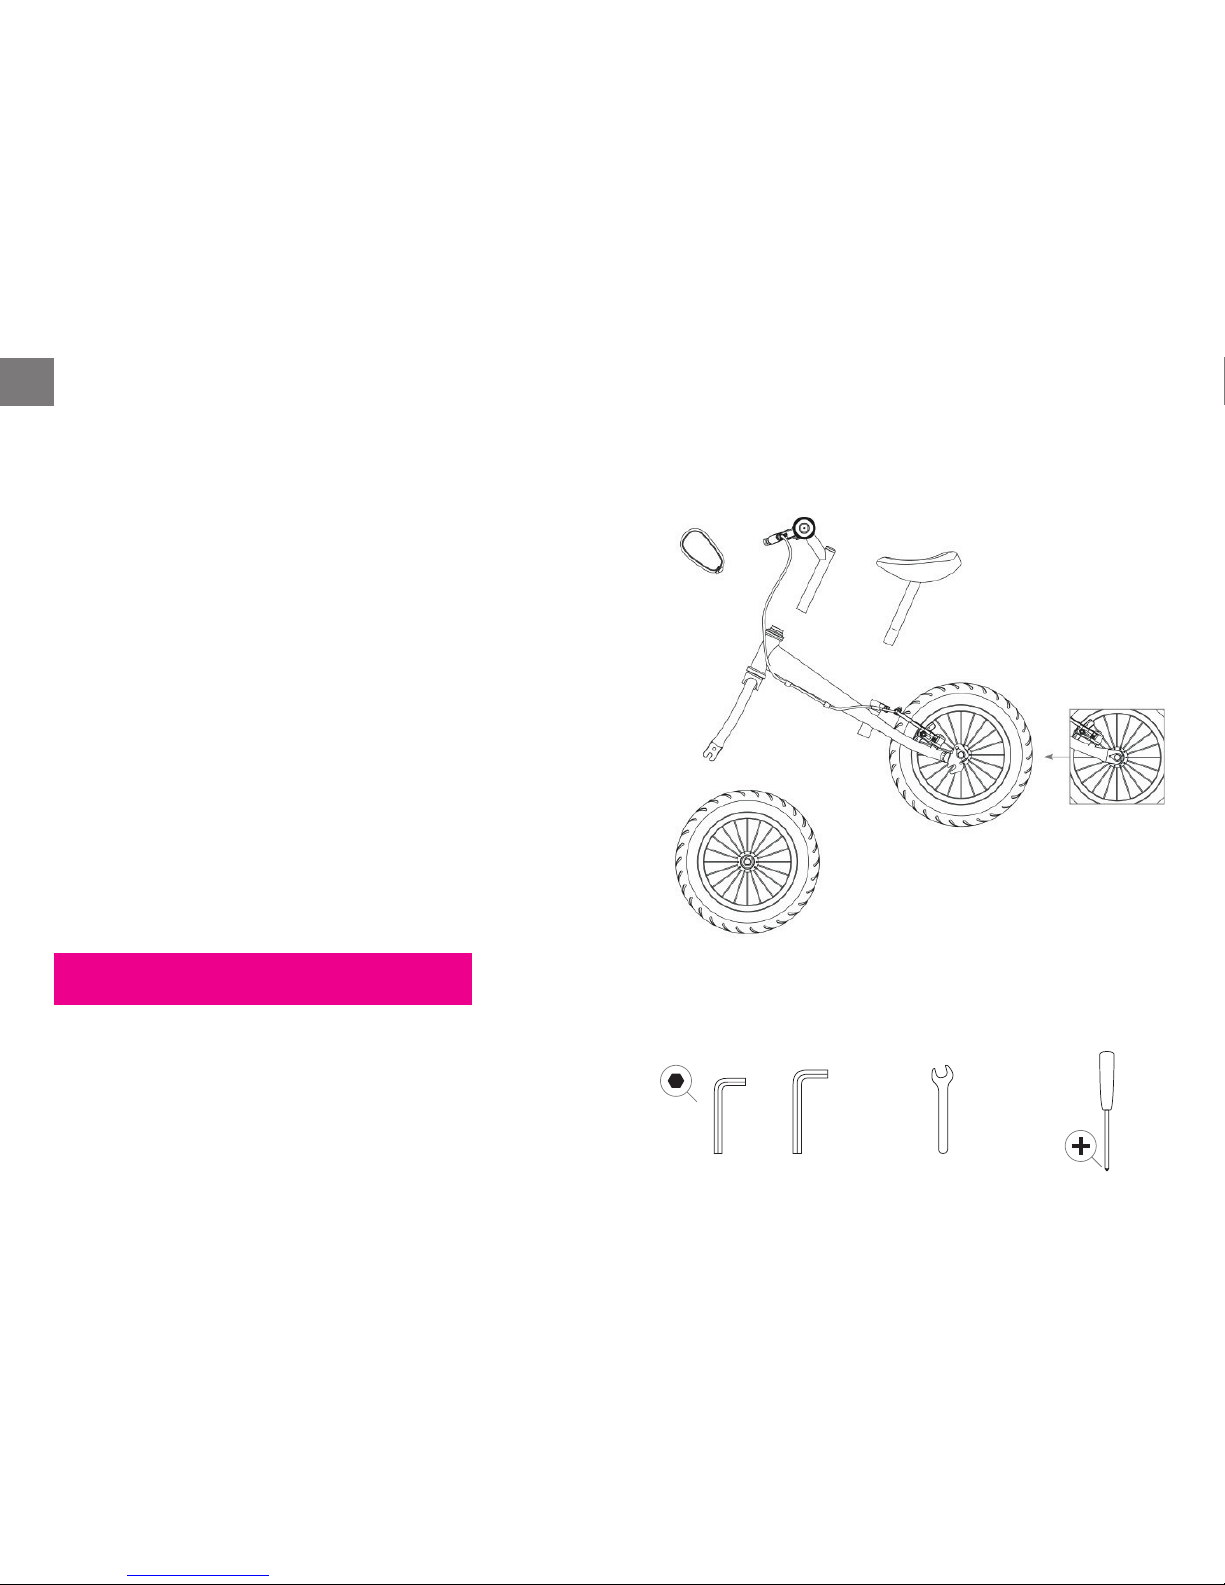
INTRODUCTION PACKAGING CONTENTS
NECESSARY TOOLS
EN
We highly recommend having the running
bike assembled and regularly inspected by
aprofessional bicycle technician. Incorrect
or decient assembly can lead to damaging
the running bike and can cause serious
injuries.
If you are askilled technician, you may
assemble the running bike without
professional assistance with our help.
If you have any ideas or comments, feedback or tips,
please donot hesitate to contact us at our email address:
info@yedoo.eu.
More information from the world of scooters and the list of sellers can
be found herewww.yedoo.eu.
6 mm5 mm 14 mm
too too I, IItoo too alu
Page 3

18 1918 19
ASSEMBLY INSTRUCTIONS
EN
Adjustme nt of brake levers:
incline the brake lever s correctly
by loosening the scr ew on the
sleeve (1).
The right inc lination: let the ch ild sit
on the runnin g bike, hold the hand les and
stretch out yo ur ngers in a way that h is/her
arm and the ng ers form a single s traight
line. This sho uld be the positi on of the
brake lever.
Seat insta llation: put the seat
tube into the frame (1) o f the
running bike, adjust th e desired
height (do not exceed the
maximum mark) and t ighten the
sleeve screw (2).
Before assembly, rem ove the plastic
covers from th e front and rear whe el axis.
Handleb ar installation : place
the handlebar into the m ain frame tube (1) of the runni ng bike,
adjust the desired h eight and
tighten the screw on the s tem (2).
Front w heel installat ion: make
sure the front fork of th e running
bike is well positione d (the bending of the fork faces f orward).
Place the wheel into the f ront
fork so that is well- centered and
tighten the nuts (1, 2). (For easier
installation you can t urn the
running bike upside dow n).
If the tire has a arrow-s haped tread
pattern, t he arrows should b e pointing to
the front.
Adjustme nt of brake: before
adjusting the brakes , inate the
tires according to the valu es on
their side (ideally b etween 1,3
and 1,8 bars). Check that the
brake pads t tightly on t he rim
sides. Their pos ition can be adjusted via the screws (1). Th e pads
shall not touch the tires .
Bend the ending of th e brake
cable so that it does n ot obstract
when the child is ridin g.
Protect ive pad installati on:
place the soft pr otective pad
from washable nylo n over the
handlebar stem.
Yedoo TOO TOO ALU is equipped with doubl e dropout at the
rear fork, which e nables a bigger
range of seat height . The upper
dropout is meant for l ower seat
position.
Check that the pads make e nough space (1–2 mm) after releasing
the brake levers. Th e distance
can be adjusted by tigh tening or
loosening the bra ke cable at the
anchor screw (2).
In case the brake pad is to uching
the wheel when tu rning, symmetrically adjust the d istance of brake
arms by the tightening scr ews (3).
The lower dropout , on the
contrary, enables the s eat to be
positioned high er than usual.
Warning: after each p osition
change, readjust the b rakes.
Page 4

20 21
WARRANTY LIST
EN
SAFETY MEASURES
The running bike in i ts basic equipment is design ed
for riding durin g daylight in areas meant for spor t and
recreation. For r oads with car trac or for rid ing in
the dark, you ne ed to provide your running bike w ith
safety feat ures (lights, reector s, etc.) in accordance
with the regulati ons valid in your country. Make sure
the children obe y general safety regul ations or trac
rules and that they u se use protective accessori es
(helmets, k nee and elbow pads, good s hoes, etc.)
Before each rid e, always check good func tion of the
brakes and the overa ll technical condition of the
running bike. Dono t exceed the maximum loadin g
capacity of t he running bike (as specied on th e
front side). The scoot er is designed for one rider o nly!
Donot overload th e scooter, it is not intended for
jumping or acrob atic riding.
Running bikes have headsets with integrated backstops, wh ich prevent t he handleba rs from turn ing
around . Therefore , do not turn the handleb ars by
force to avoid damage t o the backs tops. Always
have the b ackstops r epaired in a specialize d cycle
repair centre.
All the speed -limiting mechanisms (bra ke pads or
discs, rims, an d tires etc.) can become warm wh en
used. For this reas on, it is not recommendable to touch them b efore cooling o!
RIDING
INSTRUCTIONS
Children can use the running bike only under the
supervision of an adult. It is important that the child
always grips the handles with both hands at when
riding. While seated and balancing, the child pushes o
alternating the feet as when running or walking fast.
WARNING: Children can develop a considerable speed,
so they should be properly instructed about the
possible dangers and braking methods by the parent
or the responsible adult. For braking, the child should
squeeze the brake lever on the handlebar or should
use soles of his/her shoes to slow down by puting
them to the ground.
WARNING: sudden violent braking may cause injury.
MAINTENANCE
Correct and regular maintenance increases safety and
lengthens the life span of the running bike. Regularly
inspect screw connections, quick releases, pressure in
tires and lubricate the moveable parts (wheels, bearings,
handlebars bearings, cables, brake parts etc.).
Make sure that no lubricant gets on the rims or brake
pads. Grease reduces their eect! If this situation
occurs, it is nece ssary to remove the grease fr om all
the parts, u sing asolvent and/or degreaser.
Inspect the ti res for cuts, nicks and def ormities. Replace tires that show excessi ve wear and damage with an
equivalent tir e.
Inspect the s elf-locking nuts. If t hey get loose freely,
exchange them wi th new ones.
Check the spokes f or defects. Irregu lar strain or looseness in spokes c an cause their cracking or c an make
the wheel wobb le.
Keep the running bike clean, us e soft cloth moistened
with water. It should be s tored inside, on adry and
shaded place. Don ot expose the running bike to high
humidity or e xtreme temperatures ove r along period
of time. Before th e winter, prepare it against corrosi on
and inate the tires to i ts maximal value as specied
on the side of the tire . The producer does not cover
damage caused s olely by neglected ma intenance,
non-adequ ate adaptation, or inapprop riate treatment
and storage.
The produc t complies with the correspon ding EU
standards (ČSN EN 71-1, ČSN EN 71-3) and received
quality and sa fely certications fr om aleading Czech
testing lab - Engin eering Test Institute (Strojírensk ý
zkušební ústav, s.p.) as w ell as from the internationall y
recognized TÜ V SÜD Czech s.r.o.
Producer: Intrea -Piko, s. r. o., Sasanková 2657/2, 10600
Prague 10, Czech Rep ublic
General regulations: The content, extend and duration of the warranty conforms to the valid legal code in
the respective country of the purchase of the running bike.
Warranty period: The buye r of the new Yedoo running bike (product) can apply the warranty during the
period of 24 months from the purchase. The warranty commences on the day of the sale to the end user
and is automatically extended when the product is taken into repair during warranty period.
Warranty application: The warranty must be ll ed out with the retailer, where the produ ct was purchased
(see bellow). When applying the warranty, we recommend presenting the lled out sheet bellow, the receipt and acomplete and cleaned product. The seller will give awritten conrmation to the buyer regarding
the acceptance of the product into the warranty process.
Warranty conditions: The product must be assembled following the instructions of the manual. The
products shall only be used for the purposes, which it was designed for. The product must be stored and
maintained in the ways in accordance with the Instruction manual. The warranty does not cover damage
caused by common wear and tear is not covered by this warranty. The producer does not cover damage
caused by incorrect assembly or by use in contradiction with the Instruction manual.
Product model:
Serial number
of the frame:
Date of purchase:
Retailer:
Signature and s tamp:
Page 5

www.yedoo.eu
 Loading...