

Page 1
User Guide
Page 2
2
Welcome 3
Key features 4
Your camera 5
Lets get started 6
Shelf mounting 7-8
Wall or ceiling mounting 9-11
Power on your Y-cam 12
Y-cam app 13
Sign up 14
Add a camera 15-17
My home 18
Watch live 19
My videos 20-22
Camera settings 23-24
Location recording 25-28
Support 29
About 30
Account settings 31
Reset 32
Technical information 33
Safety information 34
Warranty information 35
Further support 36
Contents
Page 3
3
A quick and easy to setup HD security
camera, Y-cam Evo lets you see and
hear what’s happening at your home
or business from anywhere using your
smartphone or tablet.
It’s perfect for watching entrances,
pets and minding your loved ones
anytime of the day or night.
Welcome to Y-cam
It’s easy, it’s versatile, it’s seeing your stu – made simple.
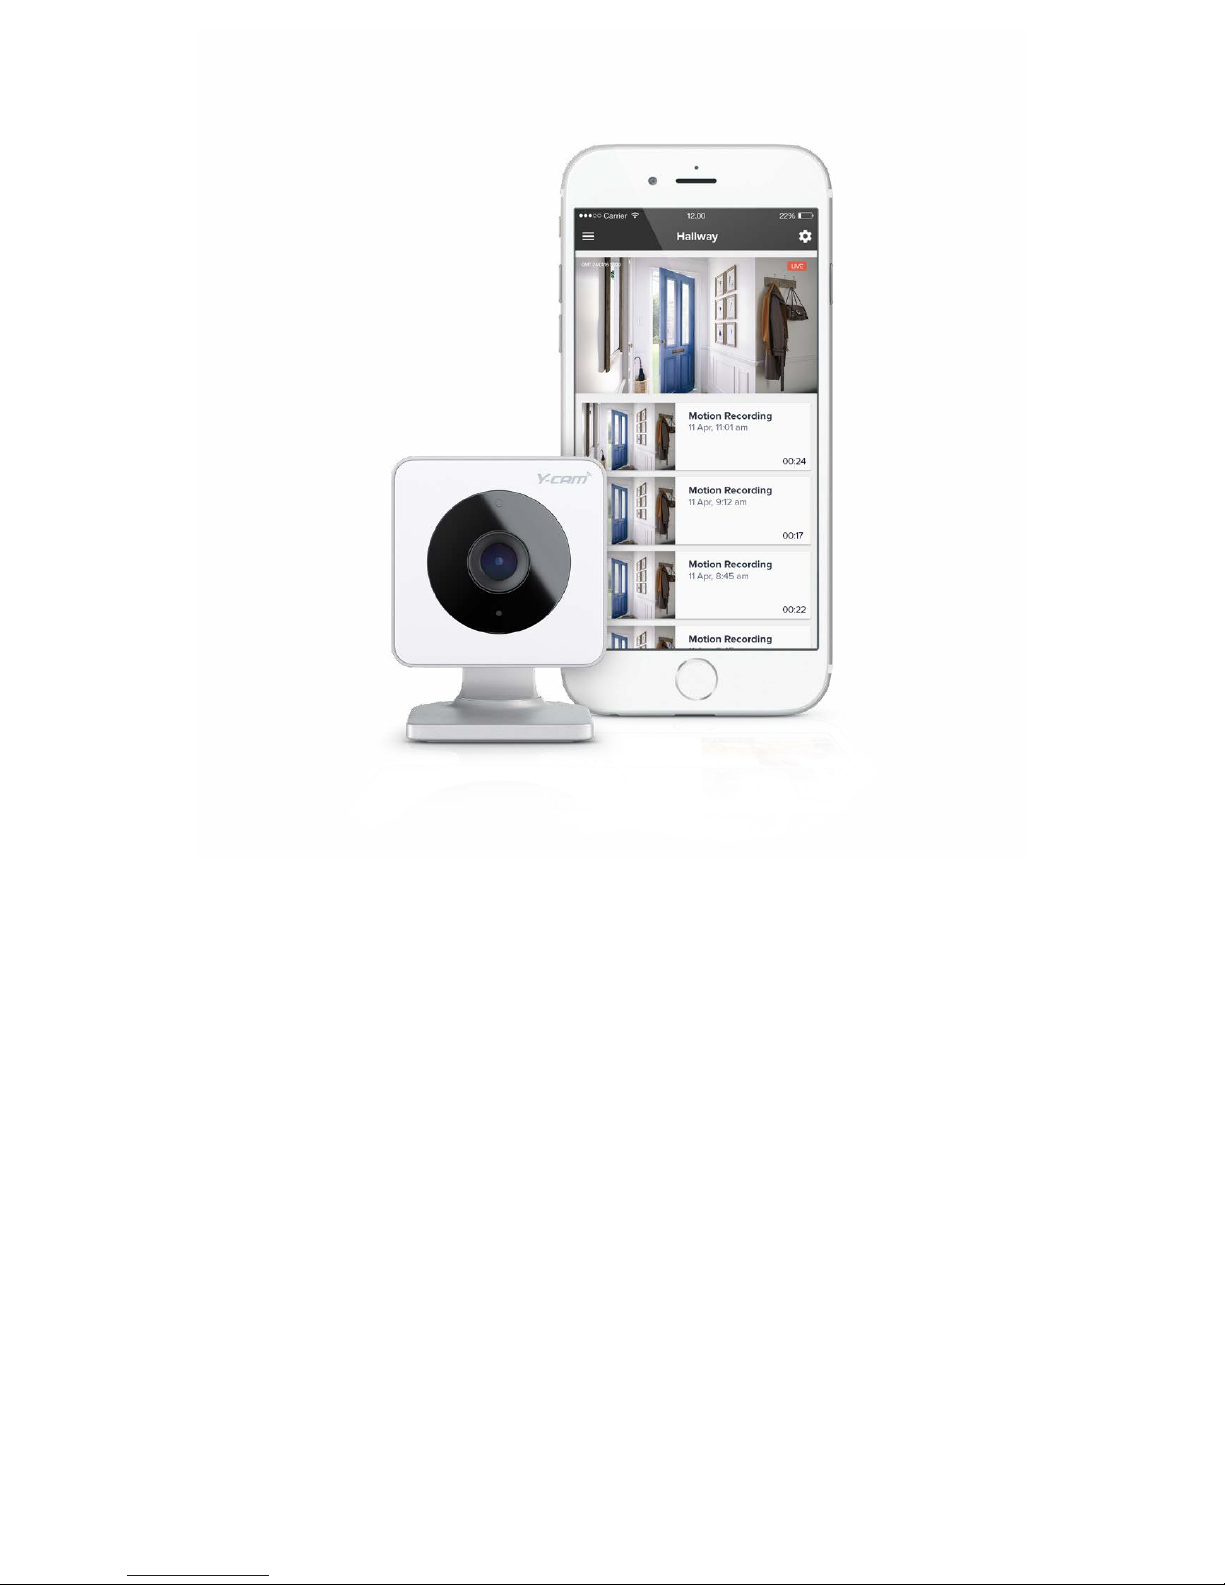
Y-cam Evo instantly alerts you when
motion is detected. Watch live or
review your last 7 days’ of recordings
which are securely stored in your cloud
account, safe from theft. Unlike other
cloud cameras, storage is FREE. Add
as many indoor and outdoor cameras
as you like and manage them from one
account.
Page 4
4
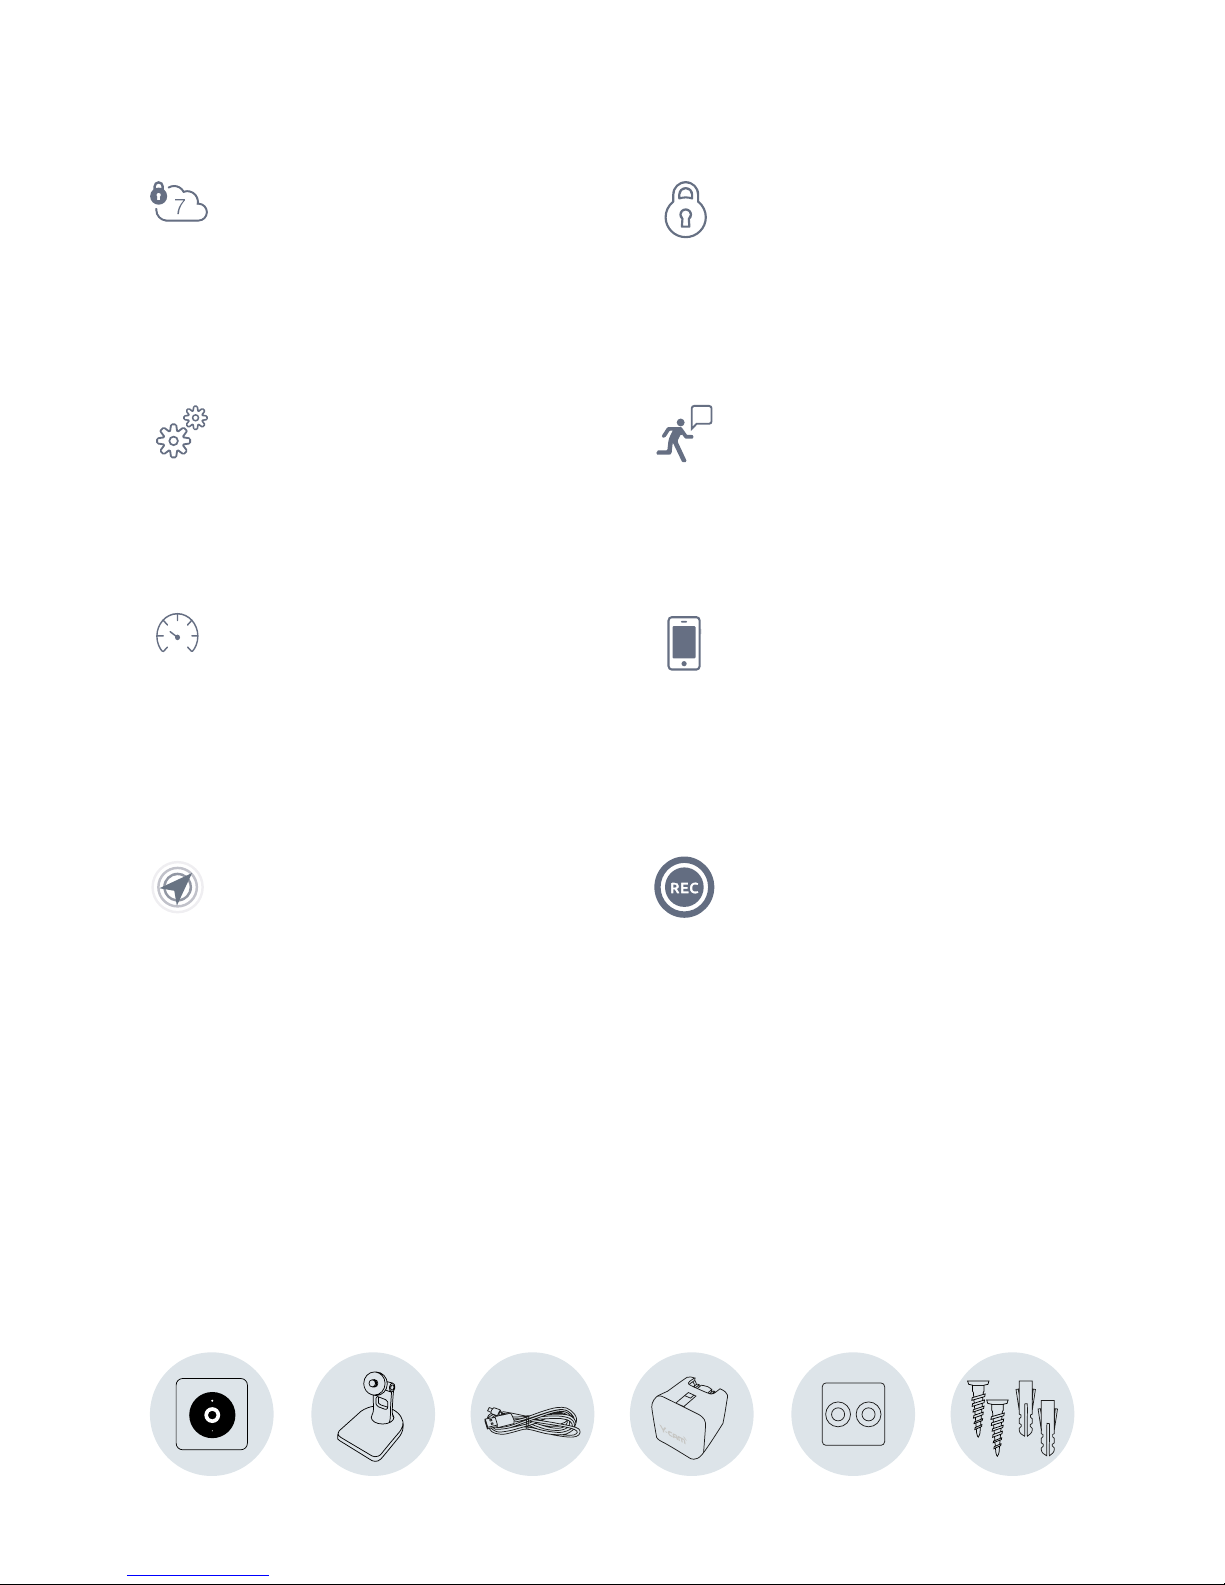
Key features:
!
FREE Unlimited
Cloud Recording
Every movement detected during the last 7
days is recorded and stored in your secure
online cloud, ready to view free of charge, no
monthly fees.
Safe and Secure
Even if your security camera is vandalised
or stolen, your clips are safe in the cloud
and fully protected using Industry Standard
Encryption. Save your clips for continous 30
days by upgrading to the Plus package.
Quick & Easy Set Up
No recording device required. No technical
skills necessary, just set up from your
smartphone and activate your online
account.
Relevant Notications
Y-cam Evo instantly alerts you on your
smartphone when motion has been detected.
Easily set up custom recording zones, on areas
such as doorways and windows; to ensure
you’re only alerted when it matters.
Requirements
• Android Smartphone 4.4 & above
• iPhone with IOS 8.1 & above
• Bluetooth: BT 4.1 - Bluetooth Low Energy (BLE)
• Wi-Fi: IEEE 802.11 b/g/n
• Frequency: 2.412 - 2.462 GHz
• Minimum upload speed 0.5 Mbps per camera
Internet Friendly
Y-cam Evo only records when something
happens so it doesn’t need to constantly
battle for the internet with other connected
devices in your home. Enjoy minimal impact on
your surng and download speeds
and stay within your data allowance.
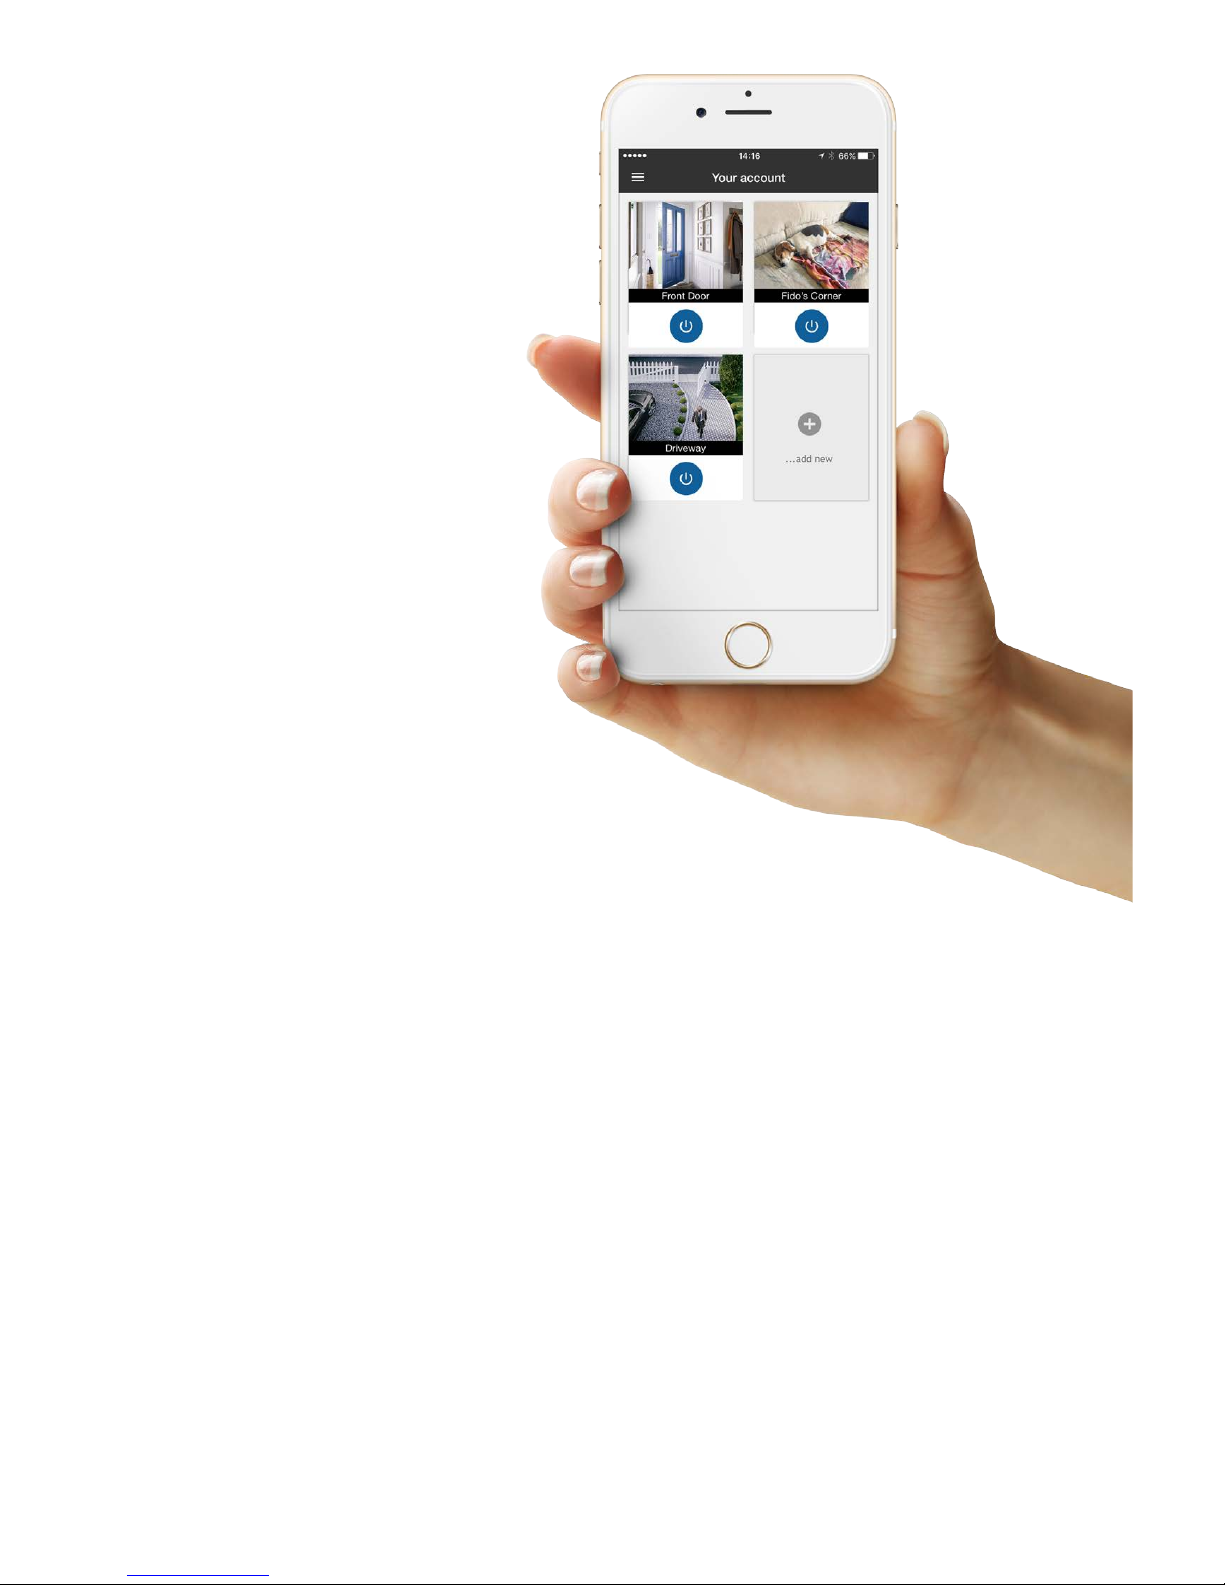
Access on the go
Download our FREE app from the App
Store or Google Play. View your recorded
videos and stream live from anywhere at any
time as long as you are connected to the
internet.
Location Recording
Automatically deactivates your camera’s
motion recording when you arrive home, and
activates recording when you leave, based on
the location of your smartphone.
On Demand Recording
Capture that moment; record what you want,
when you want at the touch of a button. Just
hit record when watching live to capture a
moment in time up to ve minutes long.
Y-cam Evo
Camera
Magnetic
Stand
3m Micro
USB cable
USB power
adapter
Wall mount Screws &
Wall plugs
What’s in the box:
Page 5
5
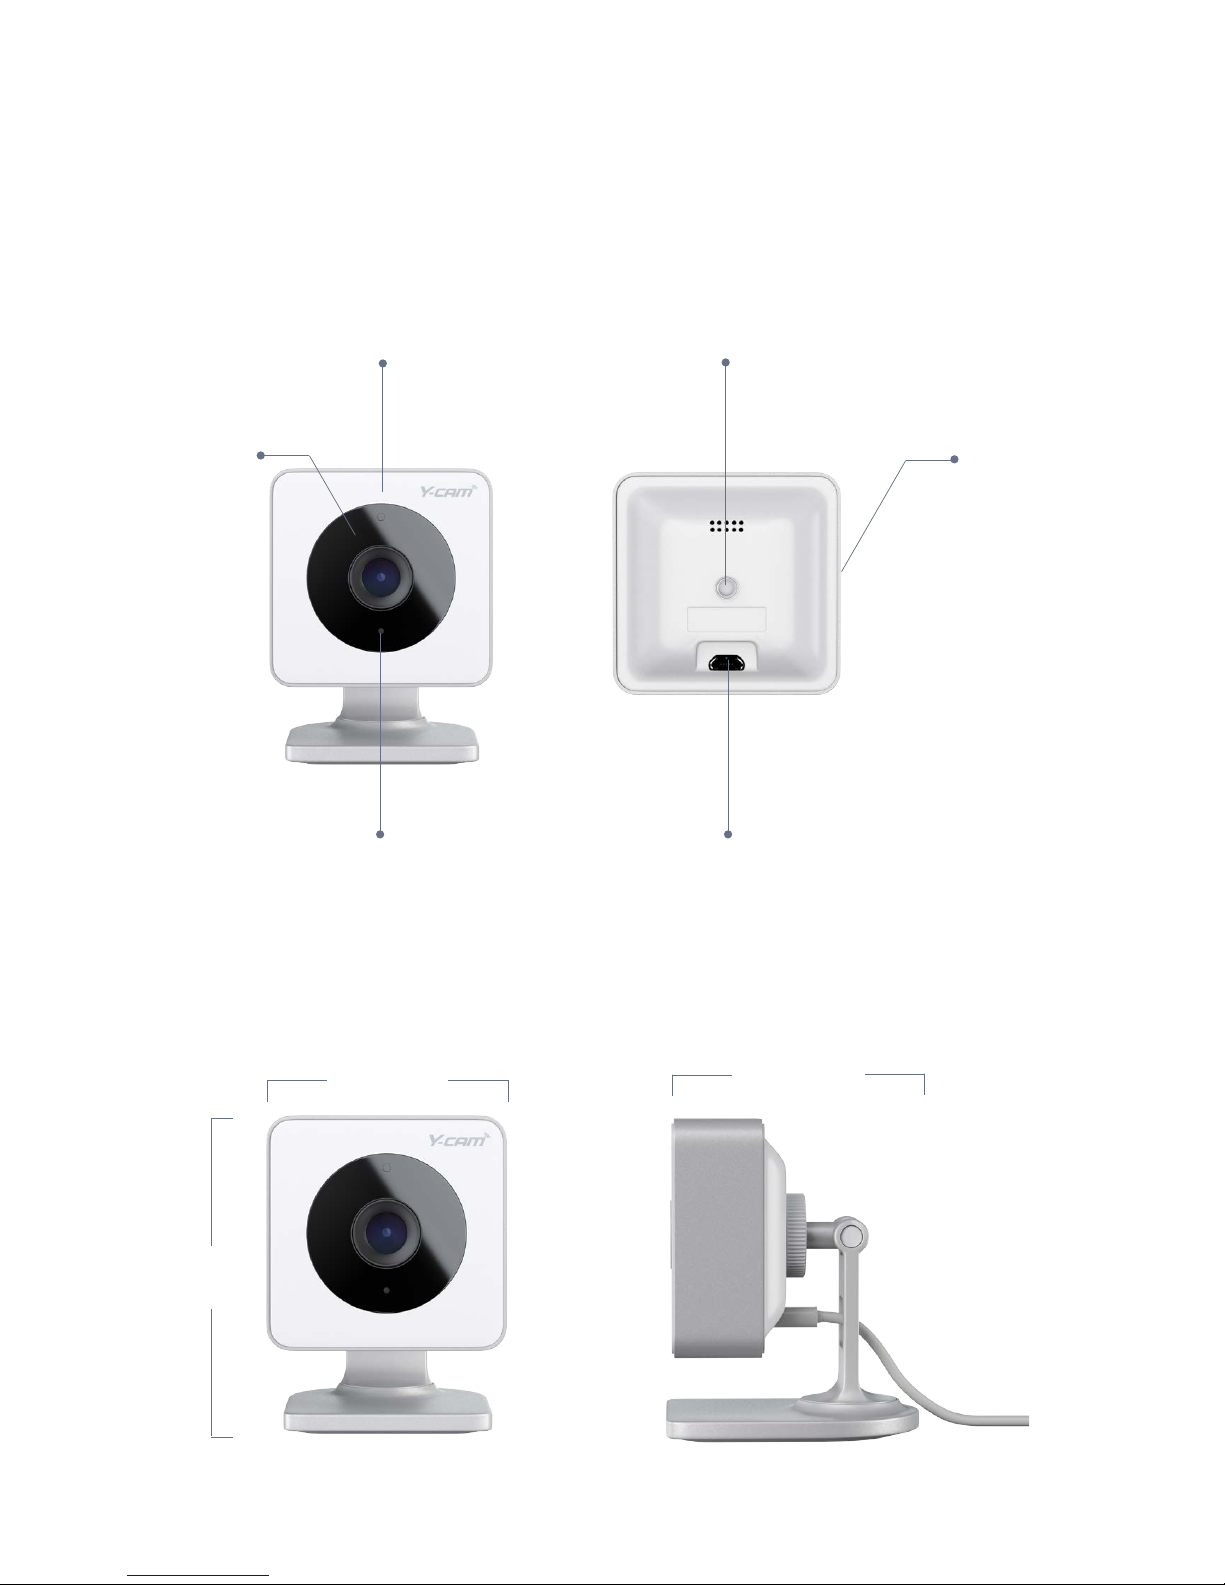
Your Camera
Status LED
Night vision
Microphone Micro USB port
Stand mount
Reset button
52.2mm
70.4mm
57.3mm
Page 6
6
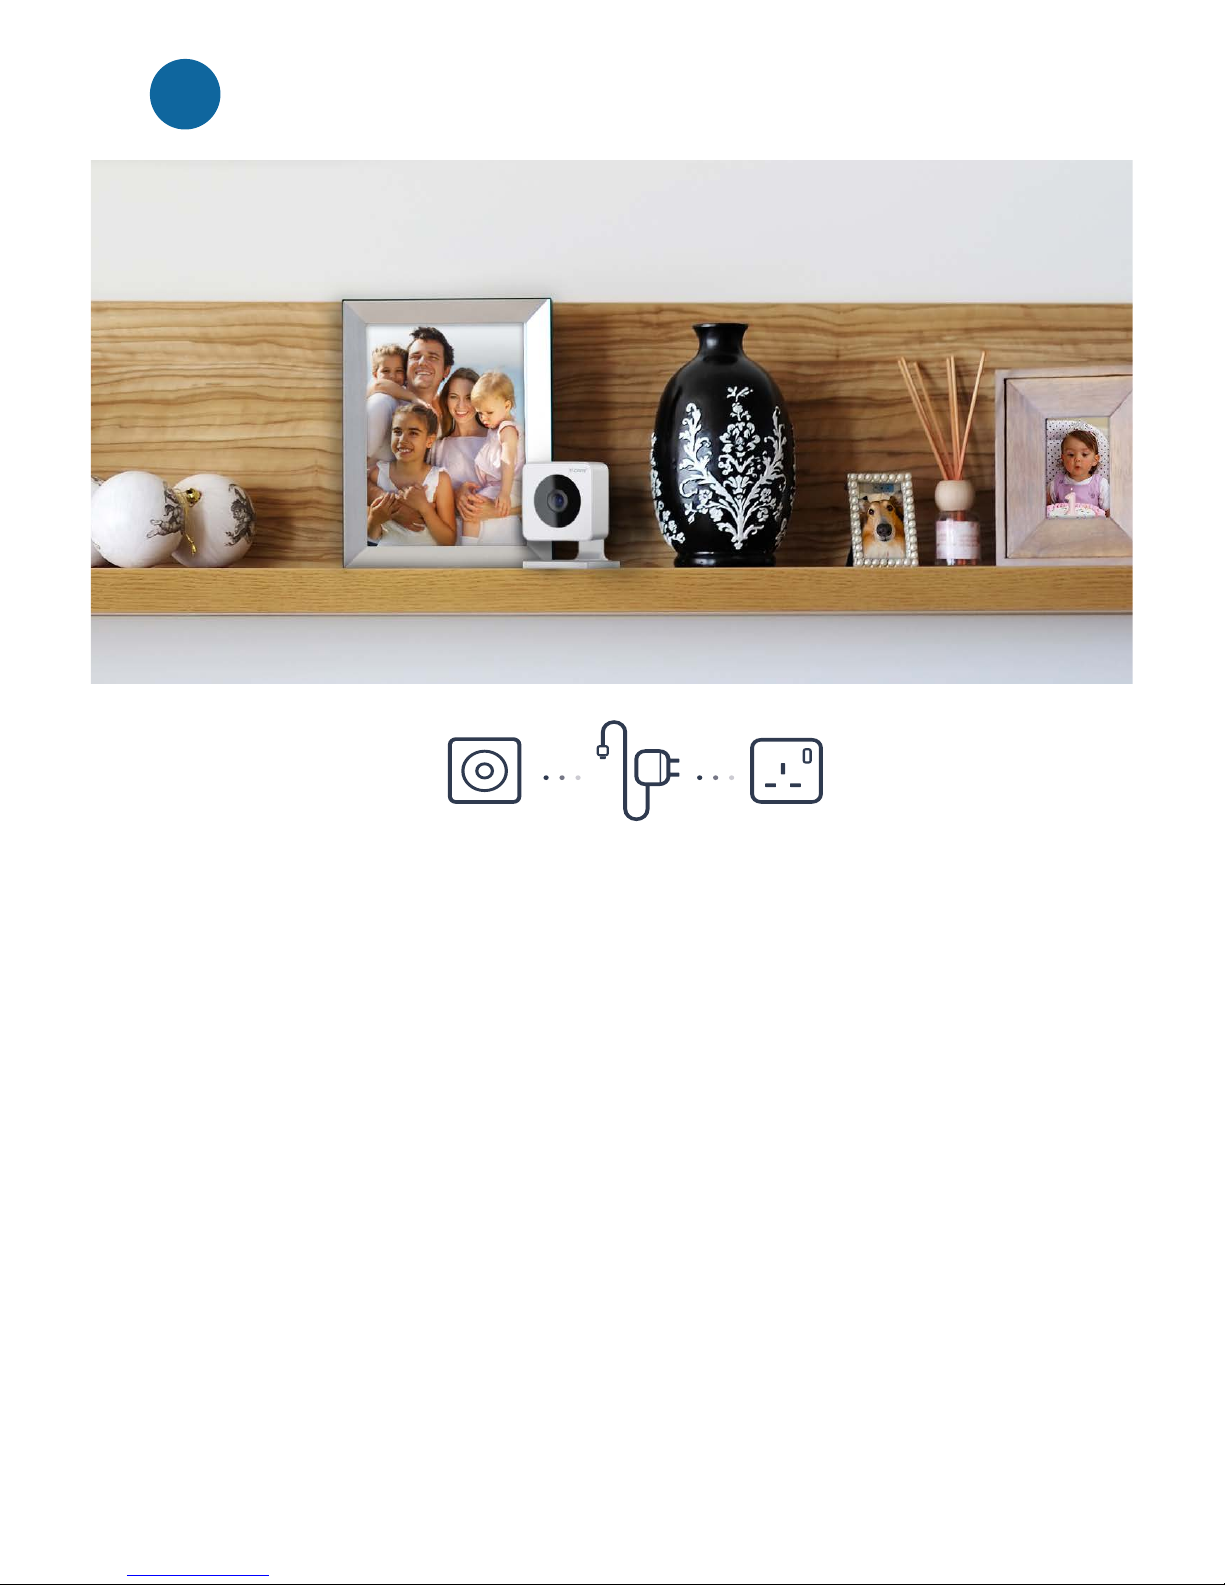
Lets get started
1
1. Ensure you have a power socket
within 3 metres from where you
would like the camera positioned
(5 metre* cable can be purchased
separately).
2. Decide what you want to see in the
eld of view.
3. Avoid placing the camera in a
position where the eld of view is
subject to multiple changes in light
conditions. Sunlight, reections
and shadows may cause motion
events to be missed or false motion
recordings to occur.
Pick your location and plug in your Y-cam
Things to consider before camera set up:
4. Moving cars or headlights
may cause unwanted motion
recordings.
5. Night vision IR LED will reect
and distort image and video if
the camera is pointed through a
window or glass.
6. Y-cam Evo is not waterproof,
therefore please do not use
outside or in damp or moist
environments.
* Please do not use a micro USB cable longer than 5 metres.
Page 7
7
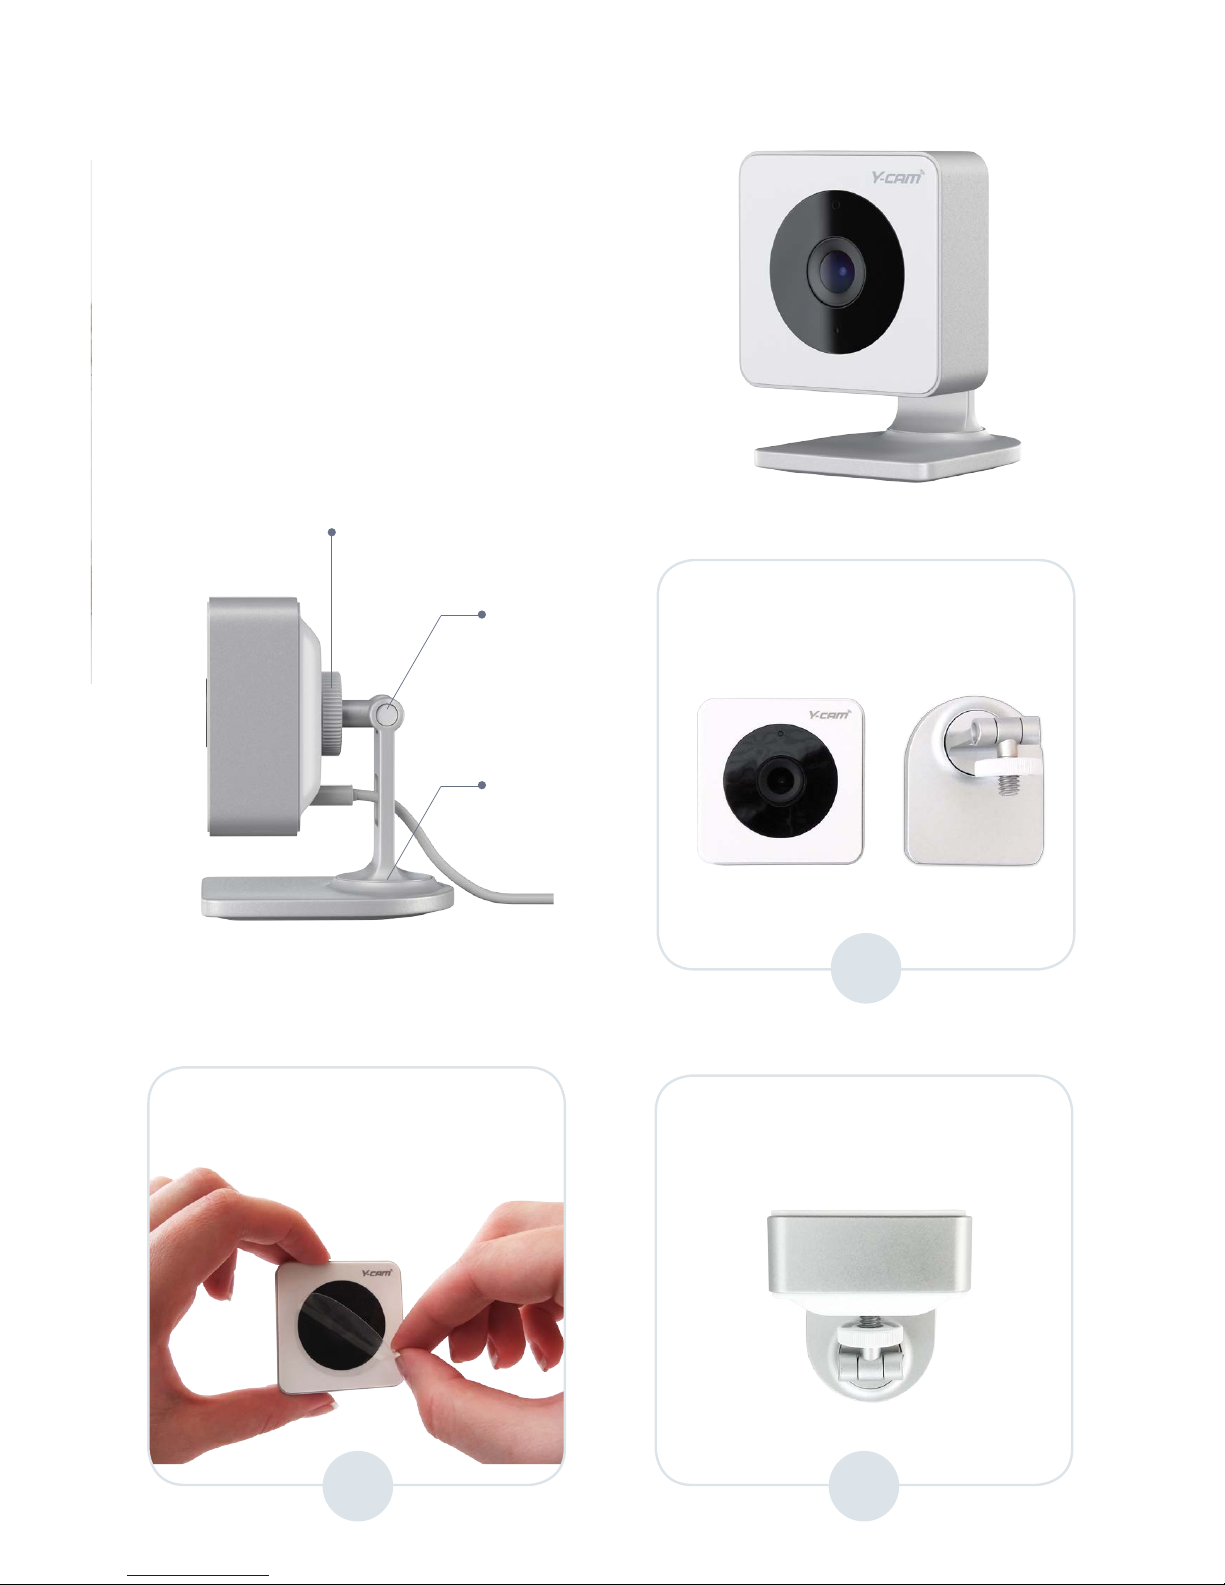
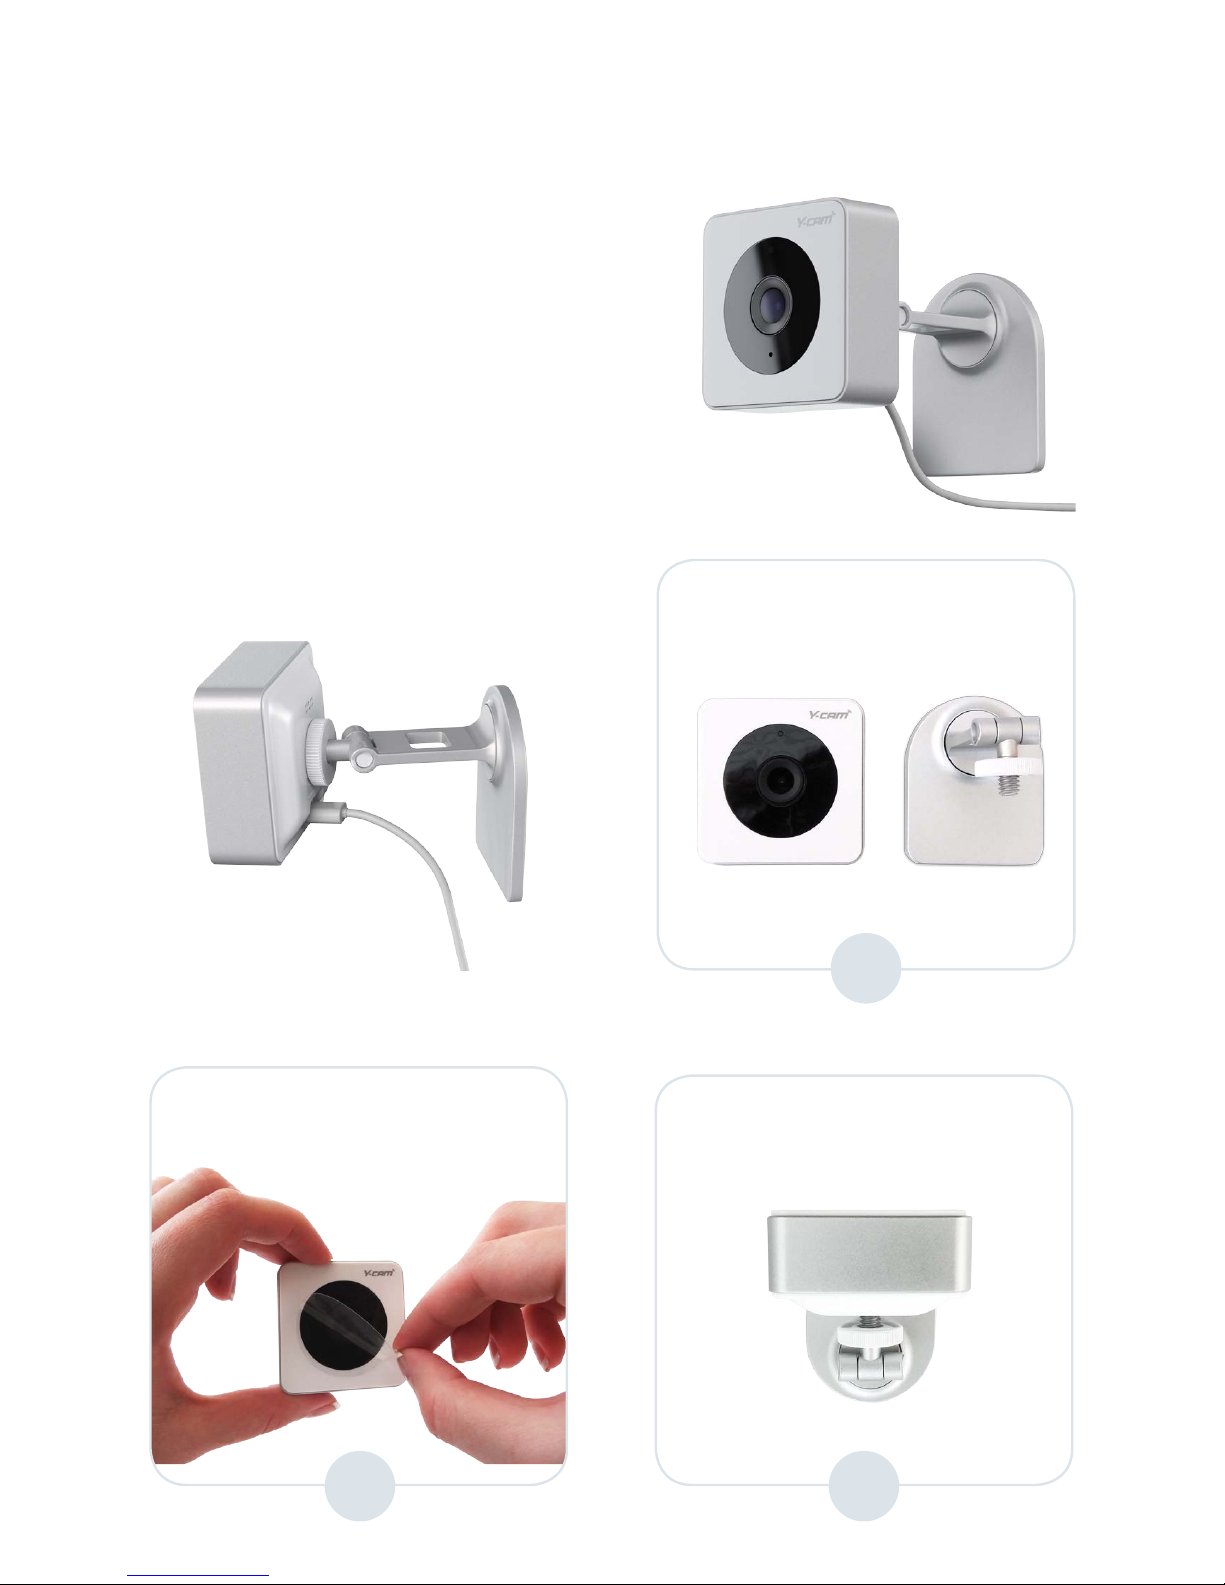
Shelf Mounting
Before placing camera on a shelf,
attach it to the stand provided.
1
3a
Remove camera and stand
from the packaging.
Screw the stand to the stand
mount located at the rear of the
camera until fully secure.
Stand disc
Pivot A
Pivot B
2
Remove the protective
transparent sticker from the
camera lense.
Page 8
8
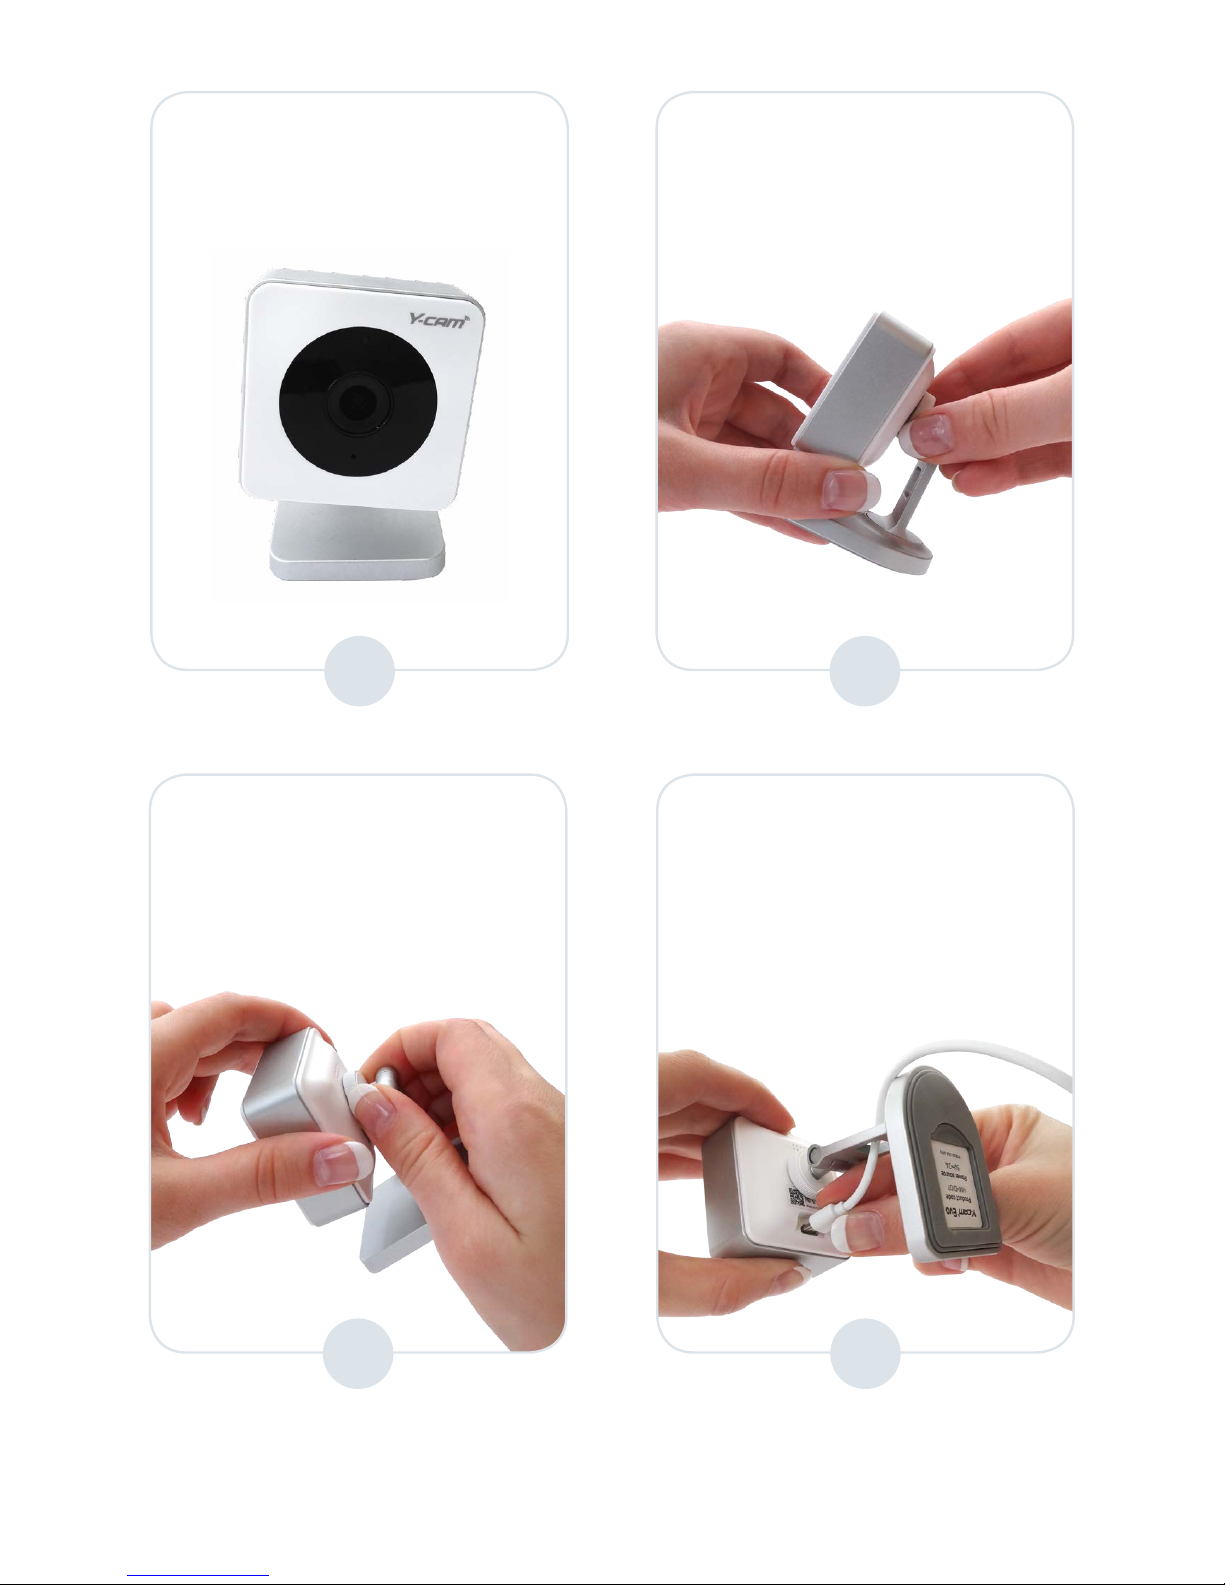
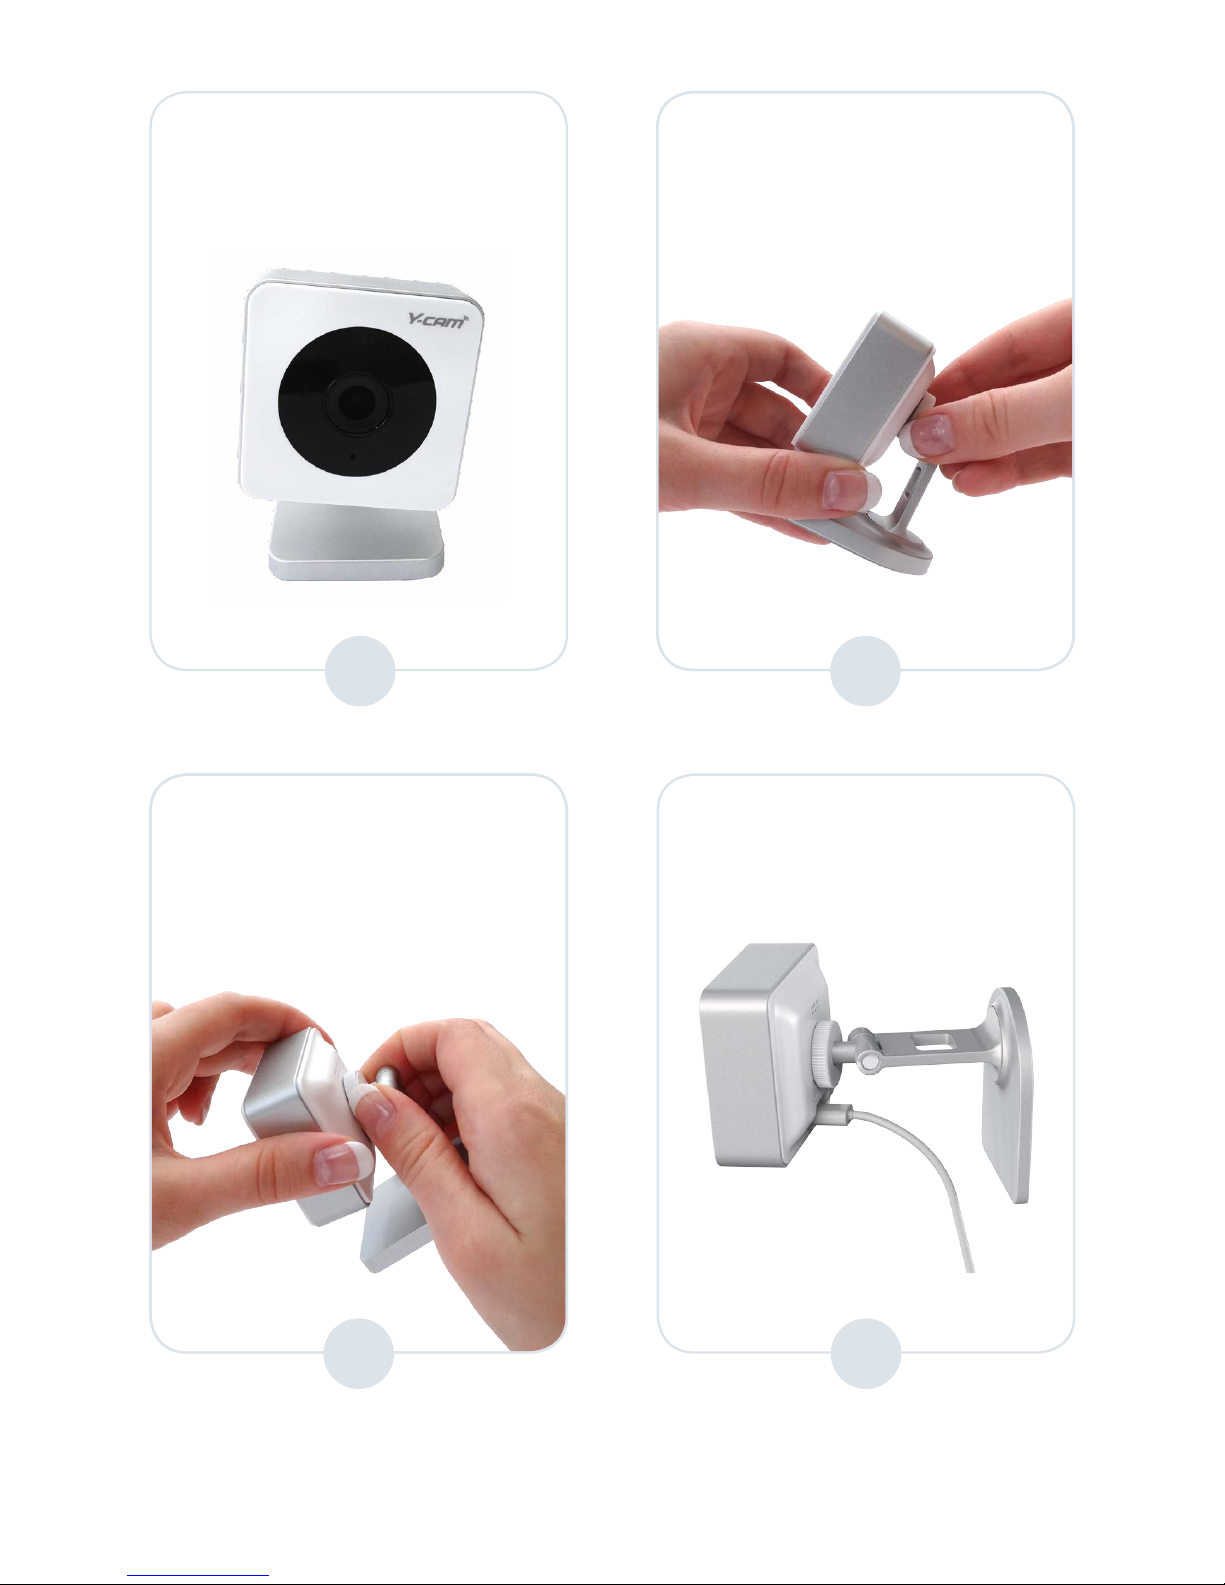
3b
If your camera is misaligned as
below:
Hold the camera in one hand
and loosen the camera slightly
from the disc until correctly
aligned.
5
6
Using pivot ‘A’ you can adjust the camera view up and down*
Using pivot ‘B’ you can adjust the camera view side to side *
Hold the camera in one hand
and tighten the stand disc until
secure.
4
Attach the supplied USB cable
to the camera as shown below,
passing the USB cable through
the hole at the rear of the stand
to ensure full movement of
stand.
* Please note: Pivot xings are intentionally tight in order to ensure the camera view is maintained.
Page 9
9
To mount your camera on the wall
or ceiling, please use the stand,
wall mount, screws and wall plugs
provided.
Please attach the stand before
mounting
.
1
3a
Remove camera and stand
from the packaging.
Screw the stand to the stand
mount located at the rear of the
camera until fully secure.
2
Remove the protective
transparent sticker from the
camera lense.
Wall or Ceiling Mounting
Page 10
10
If your camera is misaligned as
below:
Hold the camera in one hand
and loosen the camera slightly
from the disc until correctly
aligned.
5
6
Hold the camera in one hand
and tighten the white disc until
secure.
4
Attach the supplied USB cable
to the camera as below.
* Please note: Pivot xings are intentionally tight in order to ensure the camera view is maintained.
Using pivot ‘A’ you can adjust the camera view up and down*
Using pivot ‘B’ you can adjust the camera view side to side *
3b
Page 11
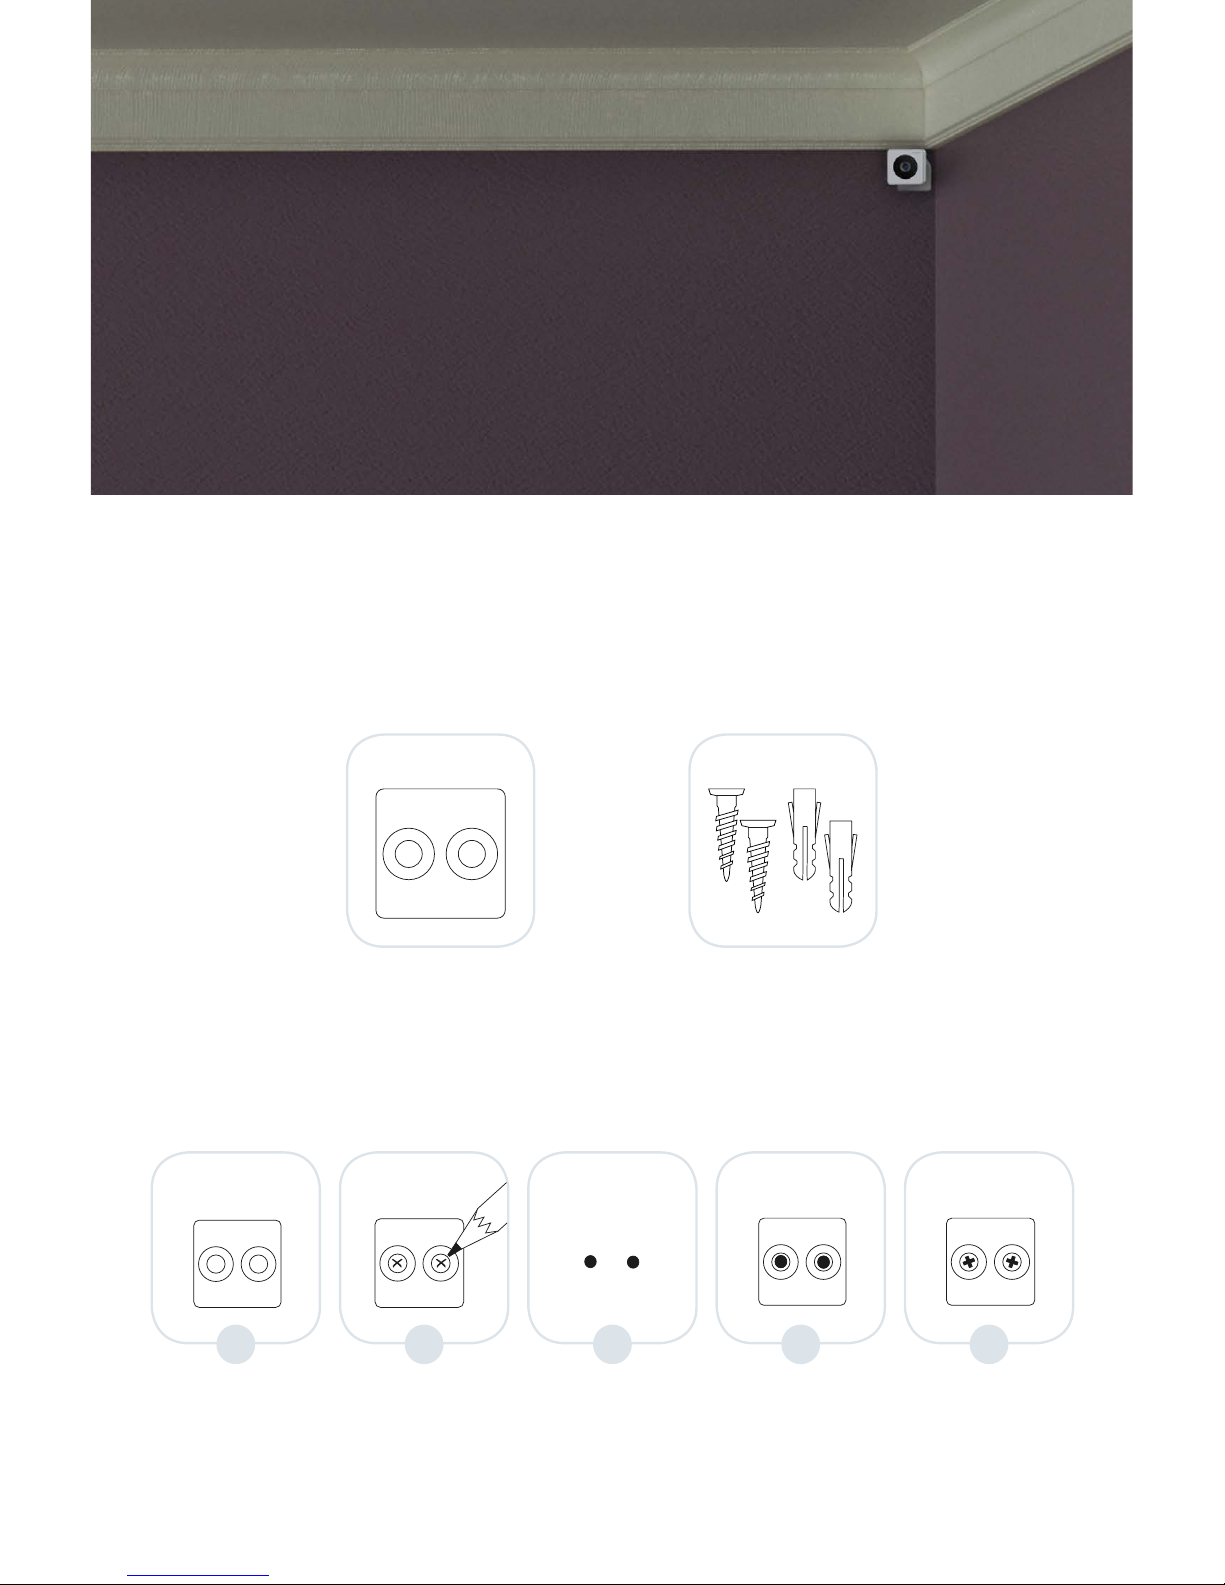
11
Decide where you would
like to place the wall
mount
Mark the two drill holes
using the mount
Drill two holes, use wall
plugs if required
Position wall mount
over holes and screw
into place
Screw until mount is
secured and screws sit
ush within their grooves
Wall mount plate Screw & wall plugs
+
1 2 3 4 5
Screws & wall plugs
To install the wall mount
please follow steps below:
Appropriate strength double-sided tape can also be used to x the wall plate. Tape not provided.
Page 12

12
Power on your Y-cam
Only use the supplied USB power adapter and cable provided.
Using unauthorised equipment will invalidate your warranty.
The maximum power output for the power adapter is 5V = 2A.
1a 1b 2 3
+
USB power adapter Screw & wall plugs
• Ensure the Micro USB cable is plugged into the rear of your Y-cam.
• Select your region.
USA
1 2 3
UK / EU
Pull pins down untill fully horizontal
UK / EU - choose appropriate tting Insert tting from the top
and push down
When fully inserted you
will hear a click
• Plug the other end of the USB cable into the power adapter.
• Plug the power adapter into socket and switch power on.
• You should now see a solid blue light on camera status LED.
Page 13

13
If you already have a
Y-cam account please
login and go to page 15
of this guide.
No account? Then
please select ‘sign up’.
Y-cam App
Search for Y-cam in the the relevant App store to download the Y-cam
app and follow the step by step instructions to get your camera up and
running.
2
Page 14

14
Sign Up
Please provide the details requested.
Note: Your password must contain a minimum of eight characters
including at least one number, one upper case and one lower case
letter.
Page 15

15
Add camera
Select Y-cam Evo(Note: If you already
have an account, you will rst need
to select ‘add new camera’ from your
home screen.
Plug in camera, please wait
for the status LED to turn solid
blue and select continue.
If your phones Bluetooth is not
enabled, the app will ask you for
permission to enable, (Android)
or show you how to enable (iOS).
Camera LED will still be solid blue.
Select your camera from the
Bluetooth list, your camera’s
unique ID is located on the
front of your Quick Start Guide.
Status LED will now be blinking
blue.
Page 16

16
Select the Wi-Fi network you
would like the camera to use.
Enter your Wi-Fi network password.
The camera will now connect to your
Wi-Fi. This may take a few minutes.
Once connected you will see the
message “Wi-Fi set up complete!”.
Select OK. Status LED will now be
solid blue.
Your camera will then connect
to Y-cam service. When
connected the Status LED will
turn solid green then press
continue.
Page 17

17
Name your camera and select
what the camera will be used
for. Then press continue.
Select the required time zone and
select continue.
Set up your motion zone. Position
the camera as required to capture the
area you wish to monitor. Use pivot
‘A’ and ‘B’ on the stand to position
your camera.
Press save to keep your
changes, you will receive a
message conrming your
zones are saved. You will
now be taken to your ‘Home
screen’.
Page 18

18
My Home
Displays images of all the cameras in your account. Choose which
camera to view.
App menu, provides
quick access to all main
features – available
in all main screens of
the app
Click on the
camera you want
to view live
Quick access to add
new cameras
Camera name
Thumbnail with latest
image captured by
camera
Stand by mode
on/o
Quick access to
Camera Settings
Note: Cameras displayed in alphabetical order.
Page 19

19
Watch Live
Watch Live and get quick access to the last 10 camera events.
Swipe right to left on live view to
quickly switch to other cameras in
your account
Camera name
Swipe event list down
to refresh events
Click on event to play
Snapshot icon – takes
a picture and saves it
to your phone’s gallery
Turn phone to landscape
mode to see full screen
Record on Demand,
clip saved in the cloud,
accessible via ‘My
Videos’
“LIVE” icon shows
when the stream
is live
Last 10 events
shown below live
feed
Page 20

20
My Videos
Watch your video history or take a look at clips you have saved to
your favourites.
Choose your view – List or calendar view.
Select which tab to view,
History or Favourites
Number of
videos recorded
that day
Switch to Calendar view –
for ‘Video History’ tab only
Select the date
to see videos for
that day
Page 21

21
My Videos – History tab
Filter menu:
Filter by Camera,
Favourites or
On Demand videos
Click on options icon to
choose what to do with the
video – save to favourites,
download or delete
Click on a video to play. Video
will open in a new screen. To
view in full screen, rotate device
to landscape mode
Day view:
• Select any video to play.
• Use the lter to access particular clips.
• Save, download or delete any clip you want.
Page 22

22
* As long as the subscription is active
My Videos – Favourites tab
• All videos saved as Favourites can be viewed in date order.
• Y-cam Plus subscribers favourite videos are saved in the cloud and
can be viewed for 7 days from recorded date.
• Y-cam Plus subscribers favourite videos are saved permanently
as long as you have an active plus membership. Please note this
feature replaces ClipSave. All favourite videos will now be saved
permanently.*
Click on options
icon to choose
what to do with the
video – Remove from
favourites, download
or delete
Click on a video to play.
The video will open in
a new screen. To view
in full screen, rotate
phone to landscape
mode
Page 23

23
Camera Settings
Select the camera you
would like to view
Turn audio and night
vision On / O
Camera name
Tailor your camera to your needs.
Manage recording
options
Manage notication
options
Enable Location
Recording
Page 24

24
Camera Settings
If you move the camera
to a new location, this is
where you can change the
Wi-Fi settings to connect
to a new Wi-Fi signal
Delete the camera from your
account (this will remove all videos
including favourites. Ensure you
download any videos you wish to
keep before deleting your camera)
Set and manage
motion zones
Select Video Quality:
High Denition or Standard
Denition
Set & manage camera
Time Zone
Page 25

25
Location Recording
Automatically disables your camera’s motion recording when you arrive
home and enables recording when you leave, based on the
location of your smartphone.
Set Location Recording:
Select Location Recording from the
recordings menu. As default this
is set to o. Please note if Motion
Recording is set to o, this option
will not be displayed.
Save your current location.
This will be the location used to
automatically enable and disable
Location Recording.
Page 26

26
Slide the toggle to the right ‘Enable
Location Recording’.
Location Recording is now enabled.
Page 27

27
Location Recording
When you want to take over Location Recording.
Select Location Recording from the
recordings menu, please note it will
already be switched On.
Save your current location.
Page 28

28
Once the location is saved, please
select your device from the device
list. The device used to set up
Location Recording originaly will
be ticked.
Please conrm you would like to
take over Location Recording on
your device.
Location recording is now
enabled.
You have now taken over
Location Recording.
The original user will get a notication
to tell them they no longer control
Location Recording on this camera.
Page 29

29
Support
Links directly to Y-cam
Support Centre
Opens up email with account
details required pre populated
Contact us directly, visit our support centre or download your camera’s
quick start guide.
View your camera’s Quick
Start Guide
Page 30

30
About
Read Y-cam’s Terms of
Service
Discover what’s new in the
latest version of the app
All about the app.
Read Y-cam’s Privacy
Policy
Page 31

31
Account Settings
Change your email address
Manage your First Name
Manage your Y-cam account.
Add additional email
addresses that you would like
to receive notications from
your camera
Manage your Surname
Change your password
Page 32

32
Reset
If your camera is already connested to an account, rst delete it from
your account via the app. Please ensure you have saved all videos
required as these will also be deleted.
1
To reset the camera, place
a pin or similar object in the
reset hole on the side of the
camera as shown and hold for
5 seconds.
After 5 seconds the camera
LED will ash red for a few
seconds and then go o. The
camera will restart itself and a
solid blue light will be shown.
The camera is now reset to
factory settings.
Now add the camera to your
account in the normal way.
Please refer to pages 15 - 17
for help on adding a camera.
2
Page 33

33
Technical Information
Camera
Image resolution: 1 megapixel (1280 x 720), HD 720p
Field of view (Diagonal): 100
o
Focal length: 2.78
Night vision: High Power IR, up to 8m illumination
Maximum frame rate: 15 FPS
Audio: Built-in microphone
Infrared LEDs: Yes
Operating temperature: 0 - 40
o
c
Interfaces
Bluetooth: BT 4.1 - Bluetooth Low Energy (BLE)
Ethernet: No
Wi-Fi: IEEE 802.11 b/g/n
Frequency: 2.412 - 2.462 GHz
Dimensions & Weight
Camera only (W x H x D): 52.2 x 52.2 x 28mm, 49g
Camera & stand (W x H x D): 52.2 x 70.4 x 57.3mm, 95.8g
Power
Power requirements: 5V / 2A, Micro USB
LED Status Light
Camera
Booting up:
BLUE
Camera
connecting to
Bluetooth and
Wi-Fi:
Blinking BLUE
Camera
connected to
Y-cam servers:
GREEN
Camera
recording:
Blinking
GREEN
Camera
disconnected
from Y-cam
servers or
Wi-Fi:
Blinking RED
Please note the infrared night vision LED is separate to the status
LED. Both LED are both next to each other but should not be
confused.
Page 34

34
Safety Information
• Do not try to disassemble the camera or power supply
• Keep the power supply dry and avoid contact with liquid
• Small parts may be a choking hazard, keep away from children
• Only use approved accessories and power supplies
• Do not cover the camera, infrared lights produce heat, which may create
a re hazard
• Ensure the camera is properly attached to the supplied stand before nal
installation and positioning
• Compliance is only assured by using the included power supply
CAUTION
When the infrared night vision LED is on, or has recently been on for a period of time, the camera will
be hot to touch. This is normal. Please keep the camera out of reach of young children and infants.
Page 35

35
Warranty Information
Hardware Limited Warranty
Y-cam Solutions Ltd warrants to the original
purchaser, with this limited hardware warranty,
that the enclosed Y-cam security camera, will
be free from defects in material, workmanship
and design for 12 months (1 year) from the
date of purchase.
This warranty does not cover any damage
attributable to normal wear and tear,
deterioration, faulty maintenance, erroneous
installation or faulty repair. This warranty
does not cover damage caused by wilful or
accidental mishandling, improper installation
or environmental conditions. This warranty is
void if the product is tampered with or altered
in any way.
Except for the exclusive remedy set forth above,
in no event shall Y-cam Solutions Ltd have any
liability to the purchaser or any third party for
any claim, loss or damage of any kind. In no
event shall Y-cam Solutions Ltd´s liability for
damages, whether arising out of contract,
negligence, warranty or infringement of any
intellectual property right, exceed the purchase
price paid by purchaser for the products.
Y-cam Solutions Ltd specically disclaims any
liability whatsoever for loss of data or loss of
information cased by the product. This warranty
does not cover Y-cam Solutions Ltd’s products
if purchased from an unauthorized auction
house.
Recycling and disposal
www.y-cam.com/recycle
Dispose in accordance with applicable
legislation. The WEEE symbol means that
your Y-cam must be disposed of separately
from general household waste. When the
Y-cam reaches its end of life, take it to a
designated waste collection point in your
area for safe disposal or recycling.
EU Declaration of Conformity
Y-cam Solutions Ltd hereby declares that
this device is in compliance with the essential
requirements and other relevant provisions
of RTTE Directive 1999/5/EC. A copy of the
EU Declaration of Conformity is available at
www.y-cam.com/eu-declarations
© 2016 Y-cam Limited. All rights reserved.
All trade names are registered trademarks
of respective manufacturers listed. App
Store is a service mark of Apple Inc. Android
and the “Google Play” logo are trademarks
of Google Inc. Phone not included.
This device is restricted to indoor use only.
Created by Y-cam. Made in China.
* Warranty terms & conditions. Subject to change. Latest version on website.
Page 36

36
Need support?
Your Y-cam should be up and running in minutes.
You can contact us for assistance or support.
Visit www.y-cam.com or phone us:
+44 (0)20 8334 7373
+1 727 474 1068
V1-2016-01-EVO
 Loading...