


Contact-free Reel Mower
model number 060-1526-0 | contact us: 1 866 523-5218
Instruction
Manual
IMPORTANT:
Read and understand all safety rules and operating
instructions before using this product.
model number 060-1526-0 | contact us: 1 866 523-5218 model number 060-1526-0 | contact us: 1 866 523-5218
2 3
Table of Contents
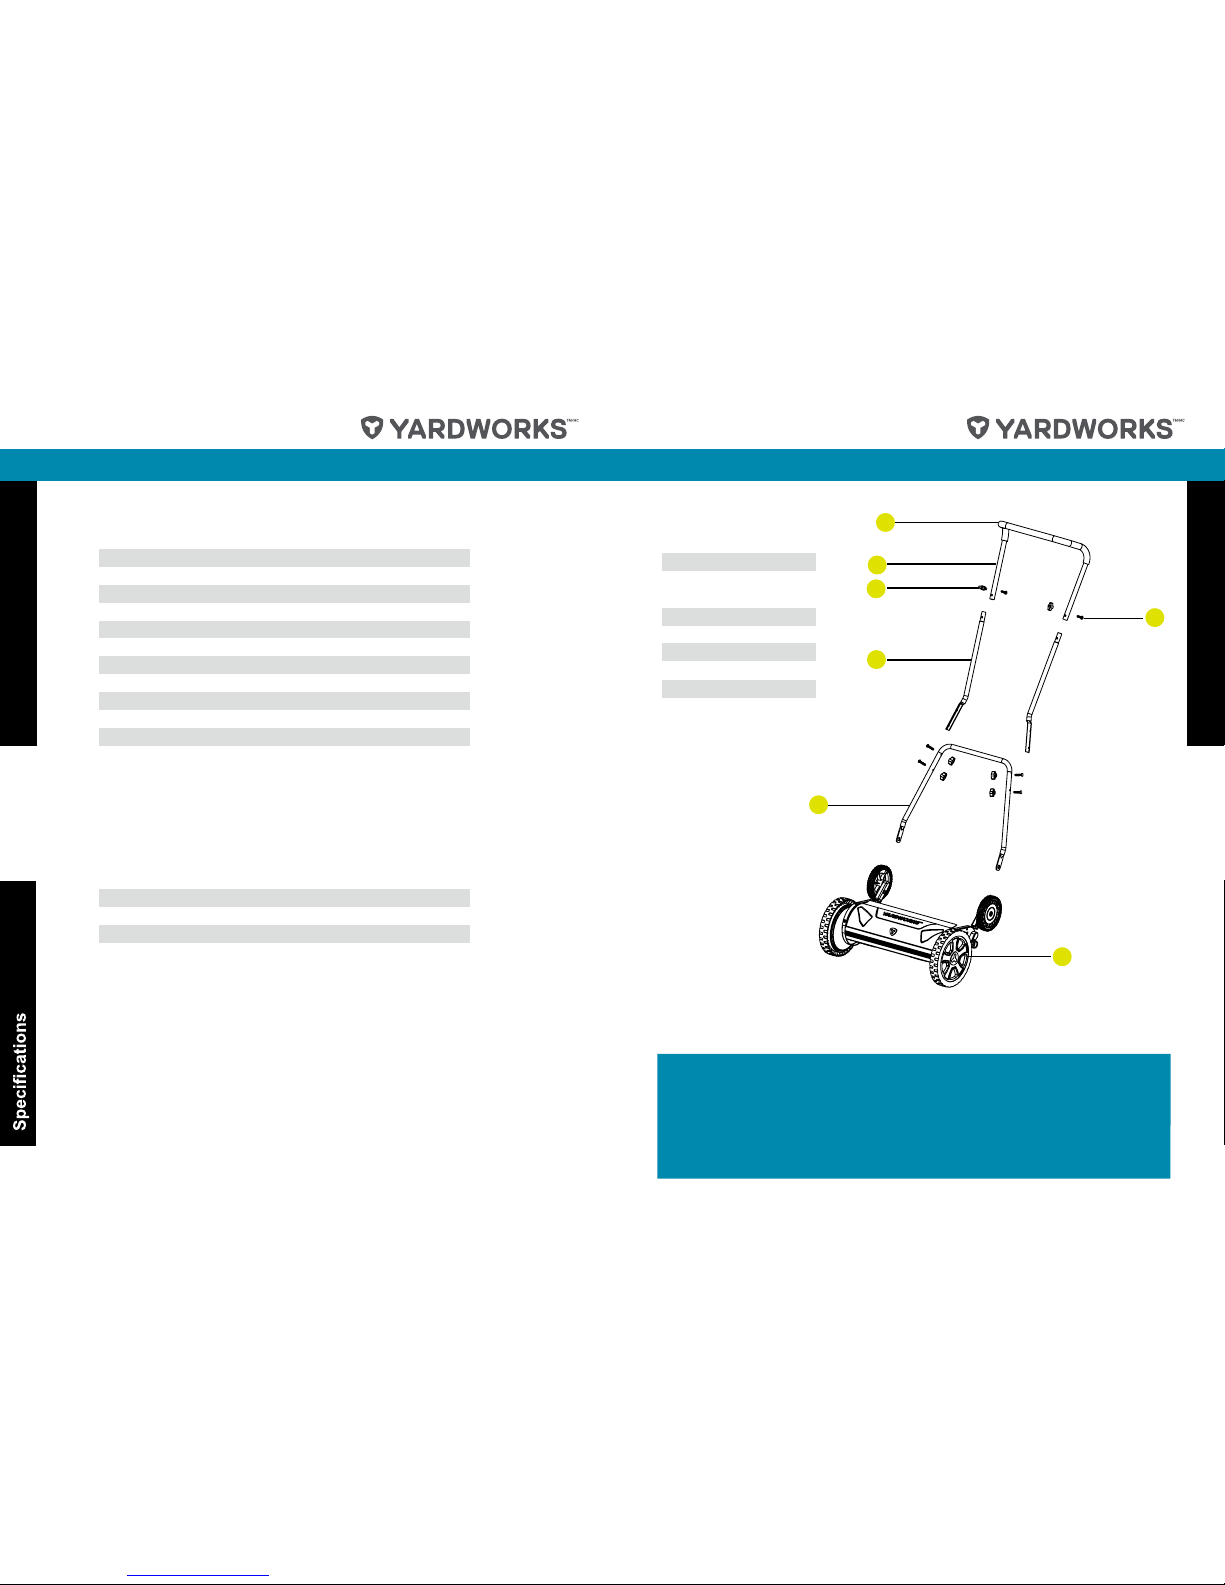
Know Your Mower
SPECIFICATIONS 2
KNOW YOUR MOWER 3
EXPLODED VIEW 4
PARTS LIST 5
ASSEMBLY 6
ATTACHING THE HANDLE 8
CUTTING HEIGHT ADJUSTMENTS 9
OPERATION 9
CHECKING THE ADJUSTMENT 10
SAFETY AND MAINTANCE 11
WARRANTY 12
Cutting path: 18" (45.7 cm)
Height adjustments: 1-3 1/8" (25-79 mm)
Weight: 26 Ib 7 oz (12 kg)
1.Top handle
2.Centre handle
pieces
3. Lower handle
4. Foam grip
5. Carriage bolts
6. Knobs
7. Reel mower
4
3
2
KNOW YOUR REEL MOWER
Before attempting to assemble, empty carton and compare parts with parts list above.
• Carefully remove the parts from the box.
• Inspect the parts to make sure no breakage or damage occured during shipping.
• Do not discard the packing material until all parts are examined.
• If any parts are damaged or missing, please call 1-866-523-5218 for assistance.
• Be sure to tighten the knobs when assembled to prevent the handle from rocking.
6
1
5
7

model number 060-1526-0 | contact us: 1 866 523-5218 model number 060-1526-0 | contact us: 1 866 523-5218
4 5
Item Description Qty Item Description Qty
Exploded View
Part List
1 Foam grip 1
2 Top handle 1
3 Knob 6
4 6
6 Lower handle 1
7 Bolt M6*8 6
8 Washer 6*12 4
5 Centre handle pieces 2
9 Bracket 2
10 Nut M8 2
11 Washer 8*17 4
12
Rear wheel bracket assembly
2
14 Bolt M8*20 2
15 Adjusting knob assembly 2
16 Rear wheel 2
13 Adjusting bracket 2
2 21Ø gnir pilC 71
18 Washer 12*20 2
19 Bearing stiffener 1
20 Bolt M8*15 2
22 Cover 2
23 Clip ring Ø19 2
21 Spring washer Ø8 2
2 53*02 rehsaW 42
25 Front wheel 2
26 Supporting plate 2
27 Bearing 2
29 Pin 2
30 Wheel shaft 2
31 Left supporting assembly 1
28 Gear (L) 1
1 revoC 23
33 Self-tapping screw bolt 4
34 Cover 1
37 Nut M10 2
38 Gear (R) 1
39 Washer 15*35 2
36 Cylinder blade assy. 1
40 Right supporting assembly 1
41 Adjusting nut 2
42 Adjusting spring 2
43 Adjusting bolt 2
45 Cutting bar pivot rod 1
44 Blade assembly 1
35 Bolt M6*12 2
14
13
12
5
11
10
9
8
7
4
3
1
6
2
28 27 26 25 24 23
21
19
20
18
17
16
15
223032 31 29
33
34
35
36
37
38
41
40
42
43
7
44
7 8
11
39
45
Carriage bolt

model number 060-1526-0 | contact us: 1 866 523-5218 model number 060-1526-0 | contact us: 1 866 523-5218
6 7
Assembly
Assembly
NOTE: Do not completely tighten knobs until
assembly is complete.
!
ASSEMBLE THE HANDLE
1. Insert the two centre handle pieces (4)
into the left and right side of the top
handle (2) and secure with two carriage
bolts (5) and knobs (3) provided.
1
2
3
4
5
2. Attach the top handle sub-assembly
previously assembled, to the lower
handle (6) sub-assembly using four
carriage bolts (5), and knobs (3)
provided.
3. Tighten all the knobs on the joints of
the handle assembly.
1
2
3
4
5
6

model number 060-1526-0 | contact us: 1 866 523-5218 model number 060-1526-0 | contact us: 1 866 523-5218
8 9
Assembly
Operation
ATTACHING THE HANDLE TO THE MOWER BASE
Align holes (1) at the lower end of each handle arm with posts (2) extending
from the mower base side plates. Mount the holes onto the posts, one at a
time, and press inward on handle to secure the fitting.
CUTTING HEIGHT ADJUSTMENTS
The cutting height of the mower adjusts from 25mm – 80mm with 5 positions for
adjustment height by moving the height adjustment levers to the required position.
To achieve the lowest cutting position, one at a time, move the adjustment levers
on both sides, located next to the smaller wheels, up to the highest position.
To achieve the highest cutting position, move the adjustment levers on both sides
to their lowest position.
Other cutting heights are achieved by moving the adjustment levers to any stop
between the highest and lowest positions.
•
•
•
•
2
1
The highest cutting position
The lowest cutting position
The height adjustment knob

model number 060-1526-0 | contact us: 1 866 523-5218 model number 060-1526-0 | contact us: 1 866 523-5218
10 11
Operation
Safety and Maintenance
CHECKING THE ADJUSTMENT
The cutting mechanism is preset. After a long period of use it may need to be
readjusted. Check cutting performance and adjust if necessary.
1. Adjust the space between reel blades and cutter bar.
2. Turn the screw clockwise to move the lower blade towards the spindle blade.
Turn the screw counter-clockwise to move the lower blade away from the
spindle blade.
3. When the space equals the thickness of paper (0.12 mm), insert a piece of
paper between the blades and the cutter bar, and quickly turn the wheel by
hand.
4. All blades should slice the paper evenly.
WARNING: Clean any grinding compound or debris from
cutter bar blade, reel blade, pinions and pawls.
NOTE:Use industrial or value tapping compound between 100
wheel bearing grease.
such as dandelions and may bend the weeds instead of cutting
them. Cut often to prevent long weeds from growing. When
lengths are long weeds and tall grass will fold before contacting
the cutting bar.
!
!
IMPORTANT SAFETY INFORMATION
•
reel. Although a motor does not power this
mower, when the wheels turn the reel spins
and poses a cutting risk.
• Never mow when grass is wet as it can be
slippery.
• Do not use the reel mower while barefoot or
while wearing sandals.
• Walk behind and never run while using reel
mower. Always make sure of your footing
when using this reel mower.
• Never intentionally strike or hit trees, fences,
etc. This can cause injuries or severely
damage the reel mower mechanisms.
• Make sure your reel mower is in a safe
operating condition.
or have the
provider before using.
CARE AND MAINTENANCE
1. A minimum amount of care is required to
ensure smooth operation of your mower.
2.To avoid damage to mower or cutting
blades, keep area to be mowed free of
debris.
3. For best results, regularly apply lubricant
to mower’s cutting surfaces, cutting reel
axle shaft and wheels.
SHARPENING THE CUTTING BLADES:
1. Spread a thin layer of lapping compound
on the front edge of the reel blades.
2. Adjust the cutter bar so that the blade has
the cutter bar.
Caution: Do not overtighten the adjusting
screws, as this could damage the cutter bar.
3.Turn the reel blades until the front edge of the
cutter bar blade is polished.
CLEANING AND STORAGE:
1.Clean the exterior of the machine thoroughly
using a soft brush and cloth before storing.
Do not use water, solvents or polishes.
2.Turn the mower on its side to clean the
blade area.
WARNING:
Do not place hands in the mower
near blades. If grass cuttings are compacted in
the blade area, remove using a wood or plastic
cleaning tool appropriate for the cleaning of the
blades.
3. Store the mower in a dry place. Do not place
other objects on top of the mower during storage.
CARE AND MAINTENANCE
Maintenance tip:
Reel mowers are relatively low maintenance.
For consistent cutting follow these below
instructions:
• Always keep the cutting bar properly
adjusted. Refer to the instruction manual for
further directions.
• Regularly clean and lube cutting edges with
light spray oil.
Made in China. Imported by YardWorks Canada Toronto,
Canada M4S 2B8
!
d
d
=
=
0,12mm
1
2
3
4
• Do not attempt to operate this reel mower if
damaged. Contact customer service
reel

model number 060-1526-0 | contact us: 1 866 523-5218
12
Warranty
YARDWORKS CANADA will not be liable for incidental
or consequential loss or damage.
2-YEAR LIMITED WARRANTY
For TWO YEARS from the date of purchase
within Canada, YARDWORKS CANADA will,
at its option, repair or replace for the original
purchaser, free of charge, any part or parts
found to be defective in materials
or workmanship.
THIS WARRANTY DOES NOT COVER:
1. Any part that has become inoperative
due to misuse, commercial use, abuse,
neglect, accident, improper maintenance,
or alteration; or
2. The unit, if it has not been operated
and/or maintained in accordance with the
owner’s manual; or
3. Normal wear, except as noted below;
4. Routine maintenance items such as
lubricants, blade sharpening;
5. Normal deterioration of the exterior
FULL 120-DAY WARRANTY ON
NORMAL WEAR PARTS:
adaptors, blades, grass bags and tires.
These parts are warranted to the original
purchaser to be free from defects in materials
and workmanship for a period of one
hundred twenty (120) days from the date of
retail purchase.
HOW TO OBTAIN SERVICE:
Warranty service is available by calling
the toll-free helpline, at 1-866-523-5218.
The factory will not accept the return
of a complete unit unless prior written
permission has been extended by
YARDWORKS CANADA.
TRANSPORTATION CHARGES:
Transportation charges for the
movement of any power equipment
unit or attachment are the responsibility
of the purchaser. The purchaser must
pay transportation charges for any part
submitted for replacement under this
warranty unless such return is requested
in writing by YARDWORKS CANADA.
OTHER WARRANTIES:
All other warranties, express or implied,
including any implied warranty of
merchantability is limited in its duration
to that set forth in this express limited
warranty. The provisions as set forth in
this warranty provide the sole and
exclusive remedy of YARDWORKS
CANADA obligations arising from the
sale of its products.
 Loading...