

Yardistry R003 Installation Manual
Installation Manual -R003
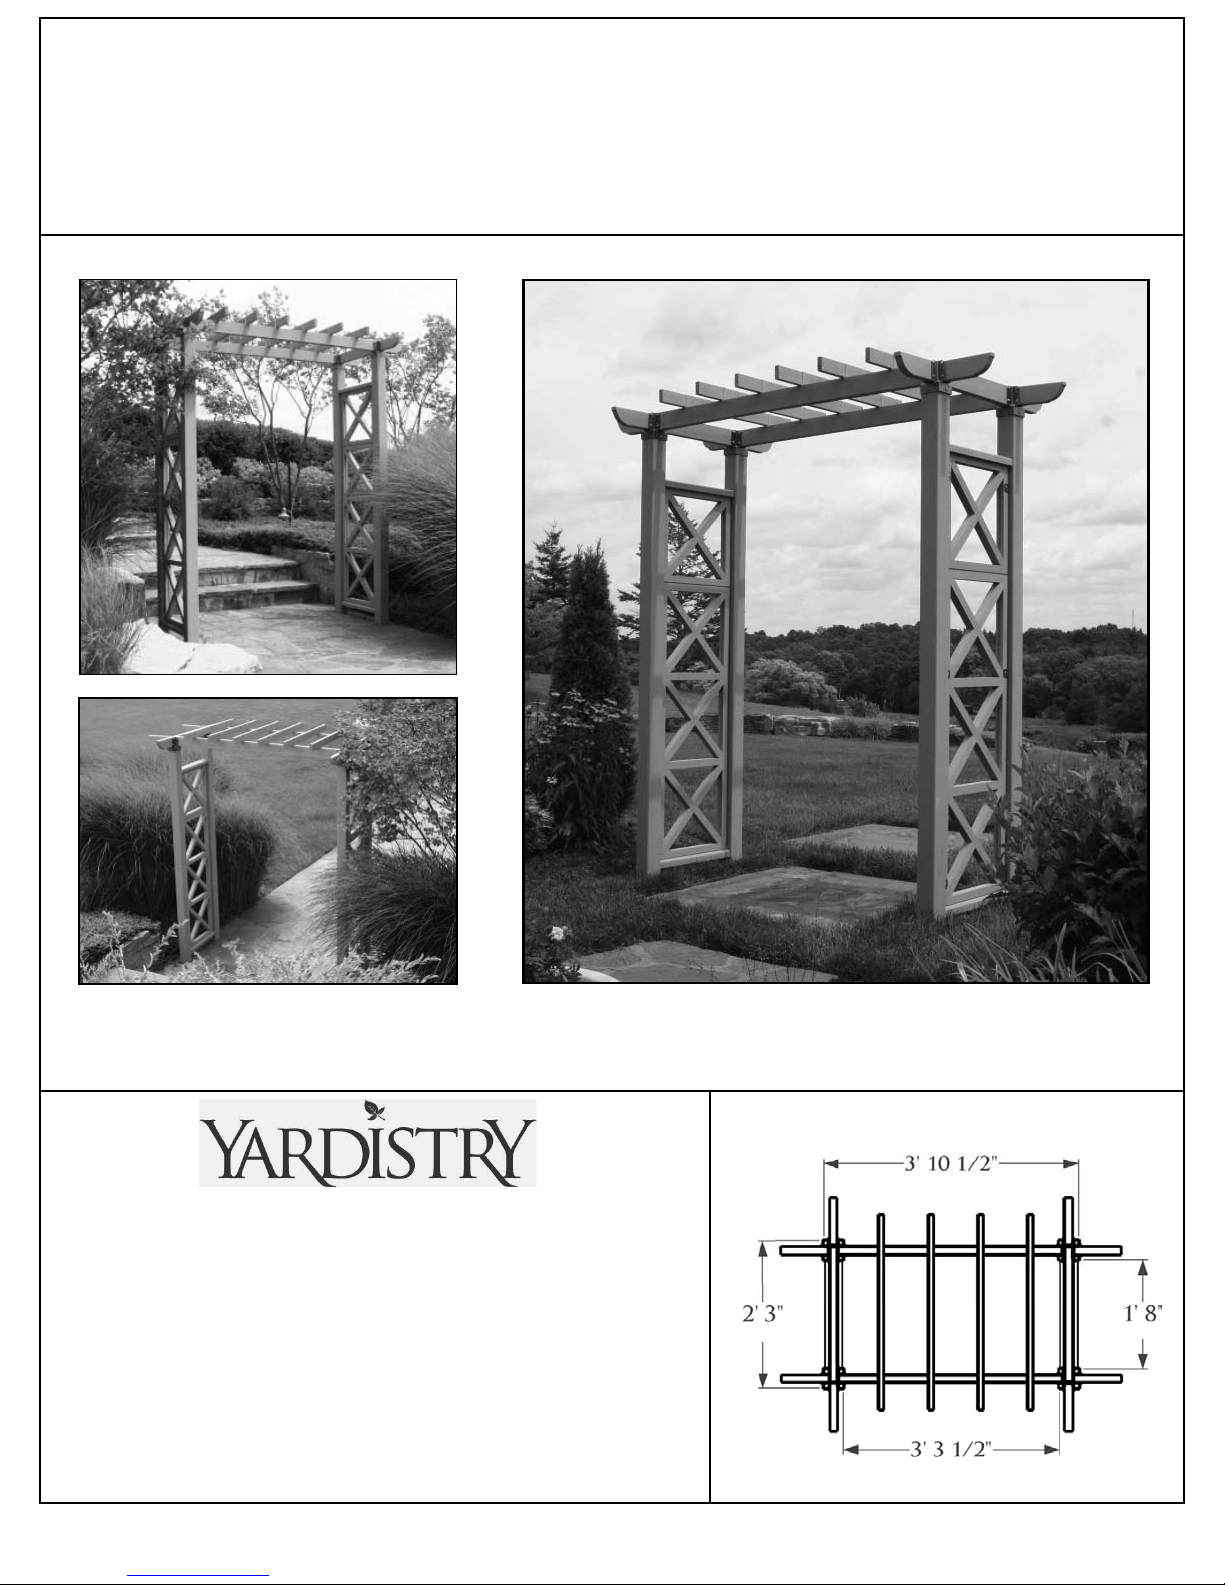
Entryway Kit
Yardistry Ltd. - North America
Toll Free Customer Support: 1.888.509.4382
info@yardistrystructures.com
www.yardistrystructures.com
Yardistry / Selwood Products - Europe
Customer Support: +44 1284 852569
parts@selwoodproducts.com
www.selwoodproducts.com
Revised 02/08/2011
1
(0.69m)
(1.18m)
(0.51m)
(1.00m)
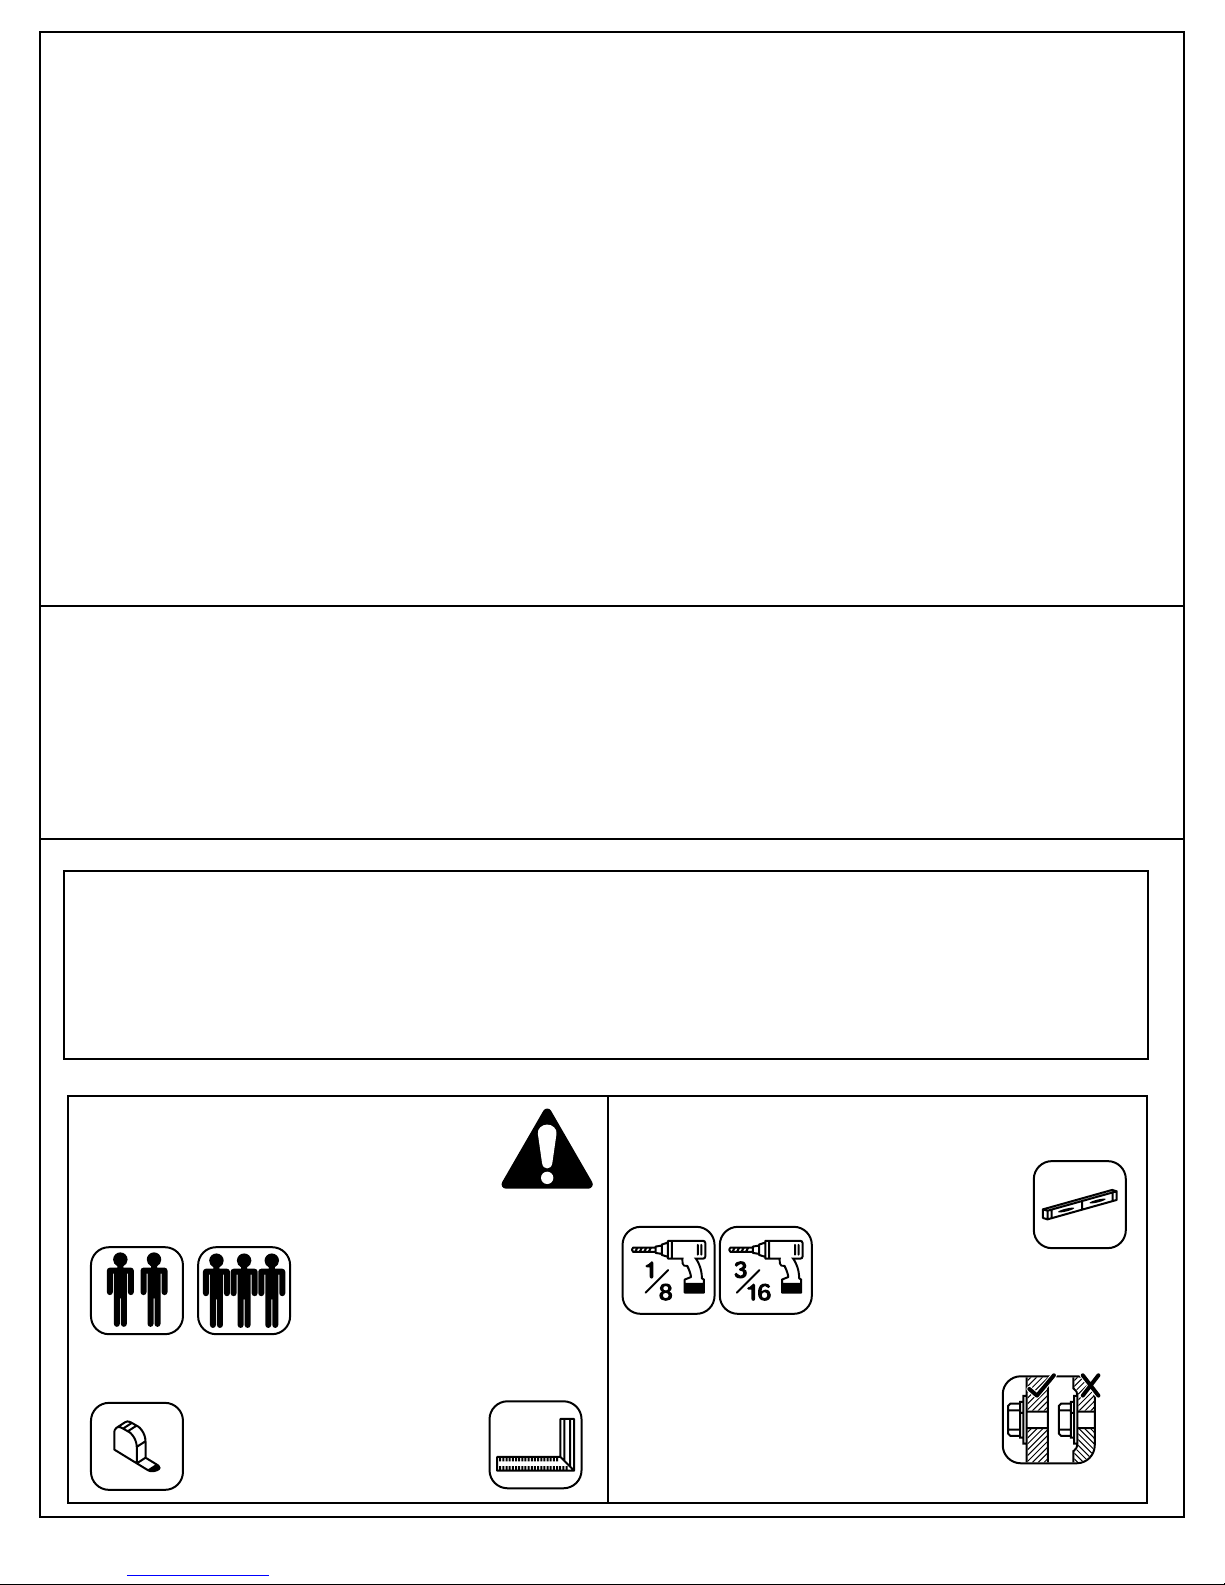
!Important Safety Notice!
• Yardistry components are intended for privacy, decorative and ornamental use only. Product is NOT
INTENDED for the following:
- A safety barrier to prevent unsupervised access to pools, hot tubs, spas, or ponds.
- Safety railings for elevated platforms or decks.
- As load bearing support for a building, structure, heavy objects or swings. - Used in structures that trap
wind, rain or snow that would create extra load on the product.
• Permanent structures may require a building permit. As the purchaser and or installer of this product you
are advised to consult local planning, zoning, and building inspection departments for guidance on applicable
building codes and or zoning requirements.
• Wood is NOT fl ame retardant and will burn. Grills, fi re pits and chimneys are a fi re hazard if placed too
close to a Yardistry structure. Consult user’s manual of the grill, fi re pit or chimney for safe distances from
combustible materials.
• During installation, follow all safety warnings provided with your tools and use OHSA approved safety
glasses.
• Some structures may require two or more people to install safely. Check for underground utilities
before digging or driving stakes into the ground!
General Information: Wood components are manufactured with Cedar (C. Lanceolata) which is protected with
factory applied water-based stain. Knots, small checks (cracks) and weathering are naturally occurring and do
not affect the strength of the product. Annual application of a water-based water repellent sealant or stain will help
reduce weathering and checks.
Warranty: Yardistry Limited products are backed by a 5 year limited lifetime warranty from the date of original
retail purchase for manufacturing defects and if installed as per manufacturer’s installation instructions.
Patents Pending
Tools Required
• Tape Measure
• Carpenters Level
• Carpenters Square
• Standard or Cordless
Drill
• #2 Phillips or Robertson
Bits or Screwdriver
• Ratchet with extension
(7/16” sockets)
• Open End Wrench
(7/16”)
• Adjustable Wrench
• 1/8” Drill Bit
• Pencil
• 1/4” Drill Bit
• 8’ Step Ladder
• Safety Glasses
• Adult Helpers
Keys To Assemble Success
This identifies information that requires special
attention. Improper assembly could lead to an
unsafe or dangerous condition.
Use
Help
Measure
Distance
Use
Help
Check that assembly is square
before tightening bolts.
Use a measuring tape to assure
proper location.
Where this is shown, 2 or 3
people are required to safely
complete the step. To avoid
injury or damage to the
assembly make sure to get help!
Check that set or assembly is properly level
before proceeding.
Pre-drill 1/8” & 3/16” Bit
Pre-drill a pilot hole
before fastening screw
or lag to prevent
splitting of wood.
Square
Assembly
This indicates time to tighten bolts, but
not too tight! Do not crush the wood.
This may create splinters and cause
structural damage.
Use
Level
Tighten
Bolts
2
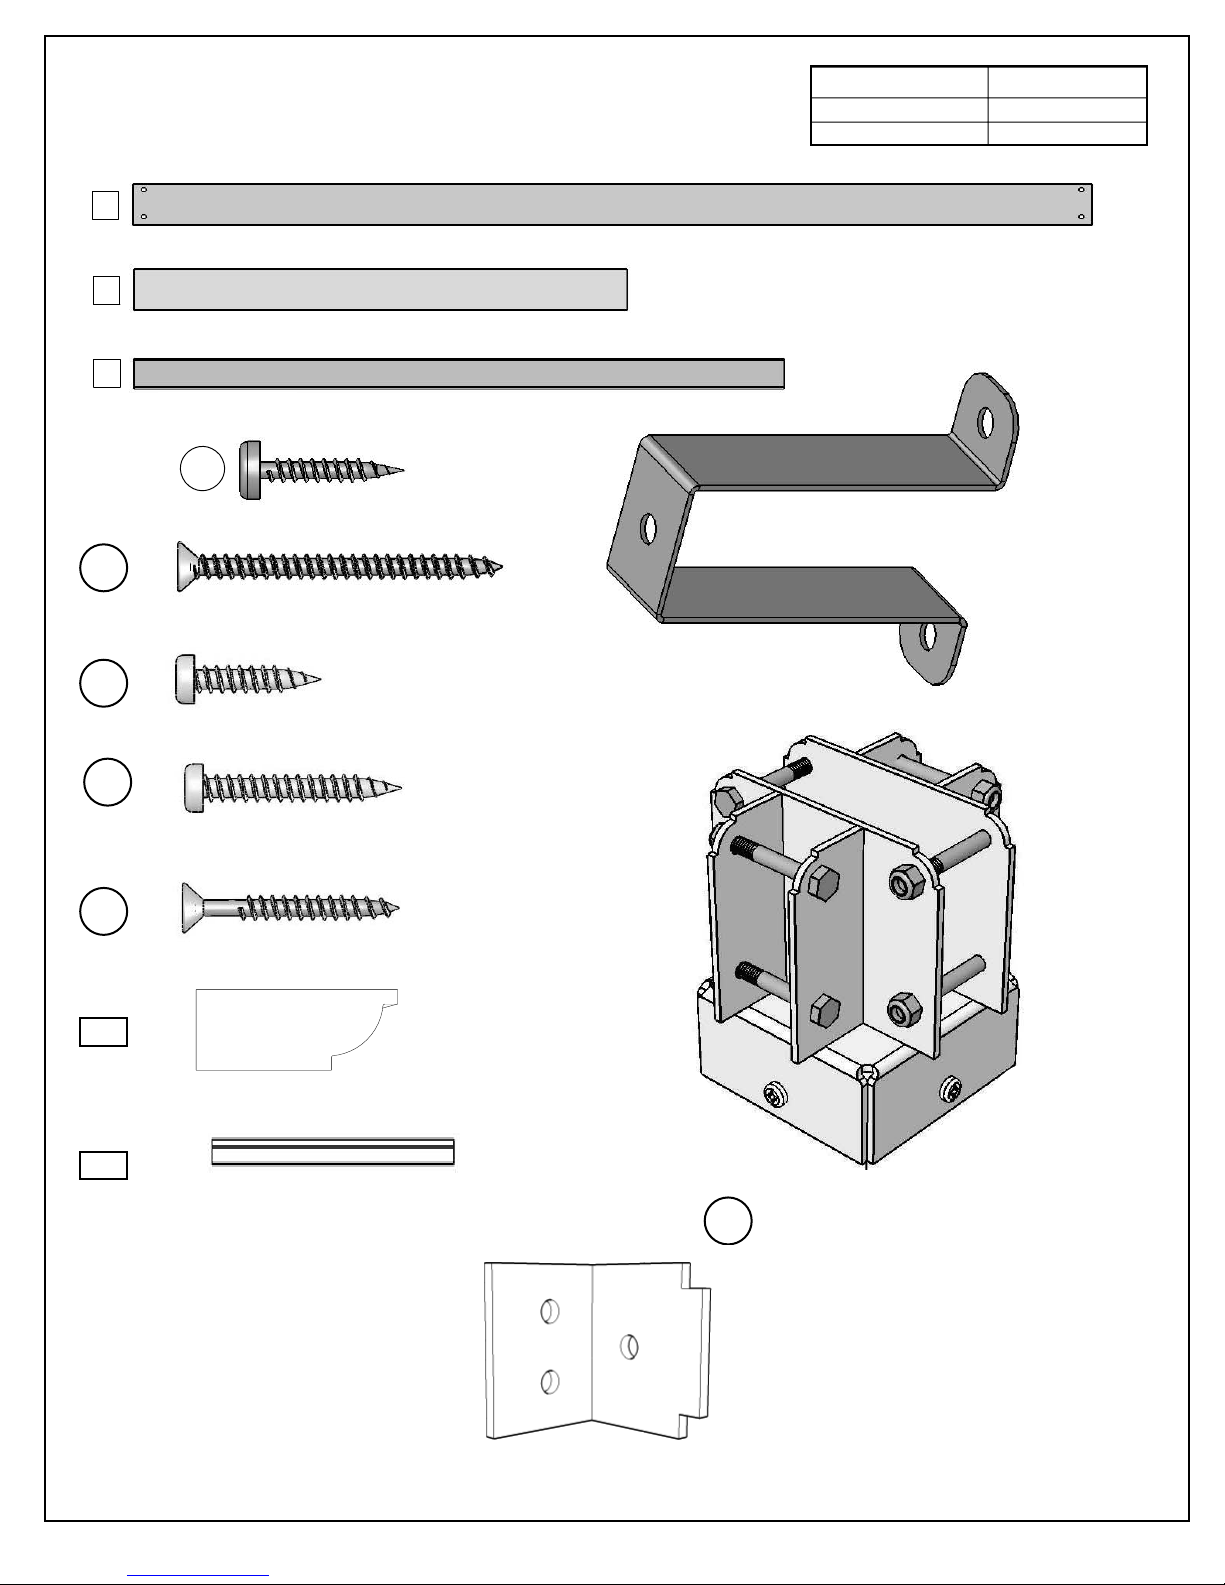
Y50113-029
A
(2) 2 x 4 x 80"
2 x 4 x 41”
Y50113-031
B
(2) 2 x 4 x 41ǩ"
2 x 4 x 25”
Y50113-030
C
5/4 x 3 x 35 3/4”
(6) 5/4 x 3 x 54¼"
S1
S4
(36) #10 x 1"
#8 x 2 1/4” Wood Screw
Material List
(12) 5/4 x 3 (Y70813-000)
NRPLQDOH
2" x 4"
5/4" x 3"
AFWXHO
1½" x 3½"
1" x 2½"
S5
S6
S7
BE
R
#10 x 1” Pan Head Screw
#10 x 1 1/2” Pan Head Screw
#8 x 1 1/2” Wood Screw
(8) 2x4 Beam Ends
(3) Top and Bottom Rail - 20”
(4) Post Top Connector With
WH
7/16” Hex Bolt Assembly
(18) Panel Clips
3
 Loading...