


7x7 Edgemont Garden Shed
Assembly Instructions
866-210-9273
info@yardcraft.com

Thank you for the purchase of this Edgemont Garden Shed. This manual is designed to simplify the as-
sembly process; however we recommend having an experienced carpenter involved in the project. Please
read through the entire manual before starting!
The building put together for this manual was a 7’x7’ Edgemont Garden Shed. It took 2 men approximately 4 hours using the tools shown. However; it may take you longer, since it will probably be a new project for you.
Take a deep breath and get at it; the satisfaction and enjoyment of this building awaits! Have Fun!
You have purchased a product that consists of heavy, bulky pieces. With your purchase, you assume
full responsibility to have the necessary manpower and/or equipment to unload the items. You also
agree that any damage that happens to the equipment, product, or individuals during the entire construction process, is your responsibility, and neither the seller, nor the manufacturer, will be held liable
for any such damage.
In addition to the materials provided you will need approximately 3 bundles of shingles, 1/2 bundle
cappers, 2 gallons of paint for the siding, 2 quarts paint for the trim, and one tube of caulk.
Tools Required For Job
-Hammer
-Screw Gun
-Tape Measure
-Tin Snips
-Carpenter Square
-(2) Step Ladders
-5/32 Allen Wrench
-Carpenter Pencil
(866) 210-9273 - info@yardcraft.com
2
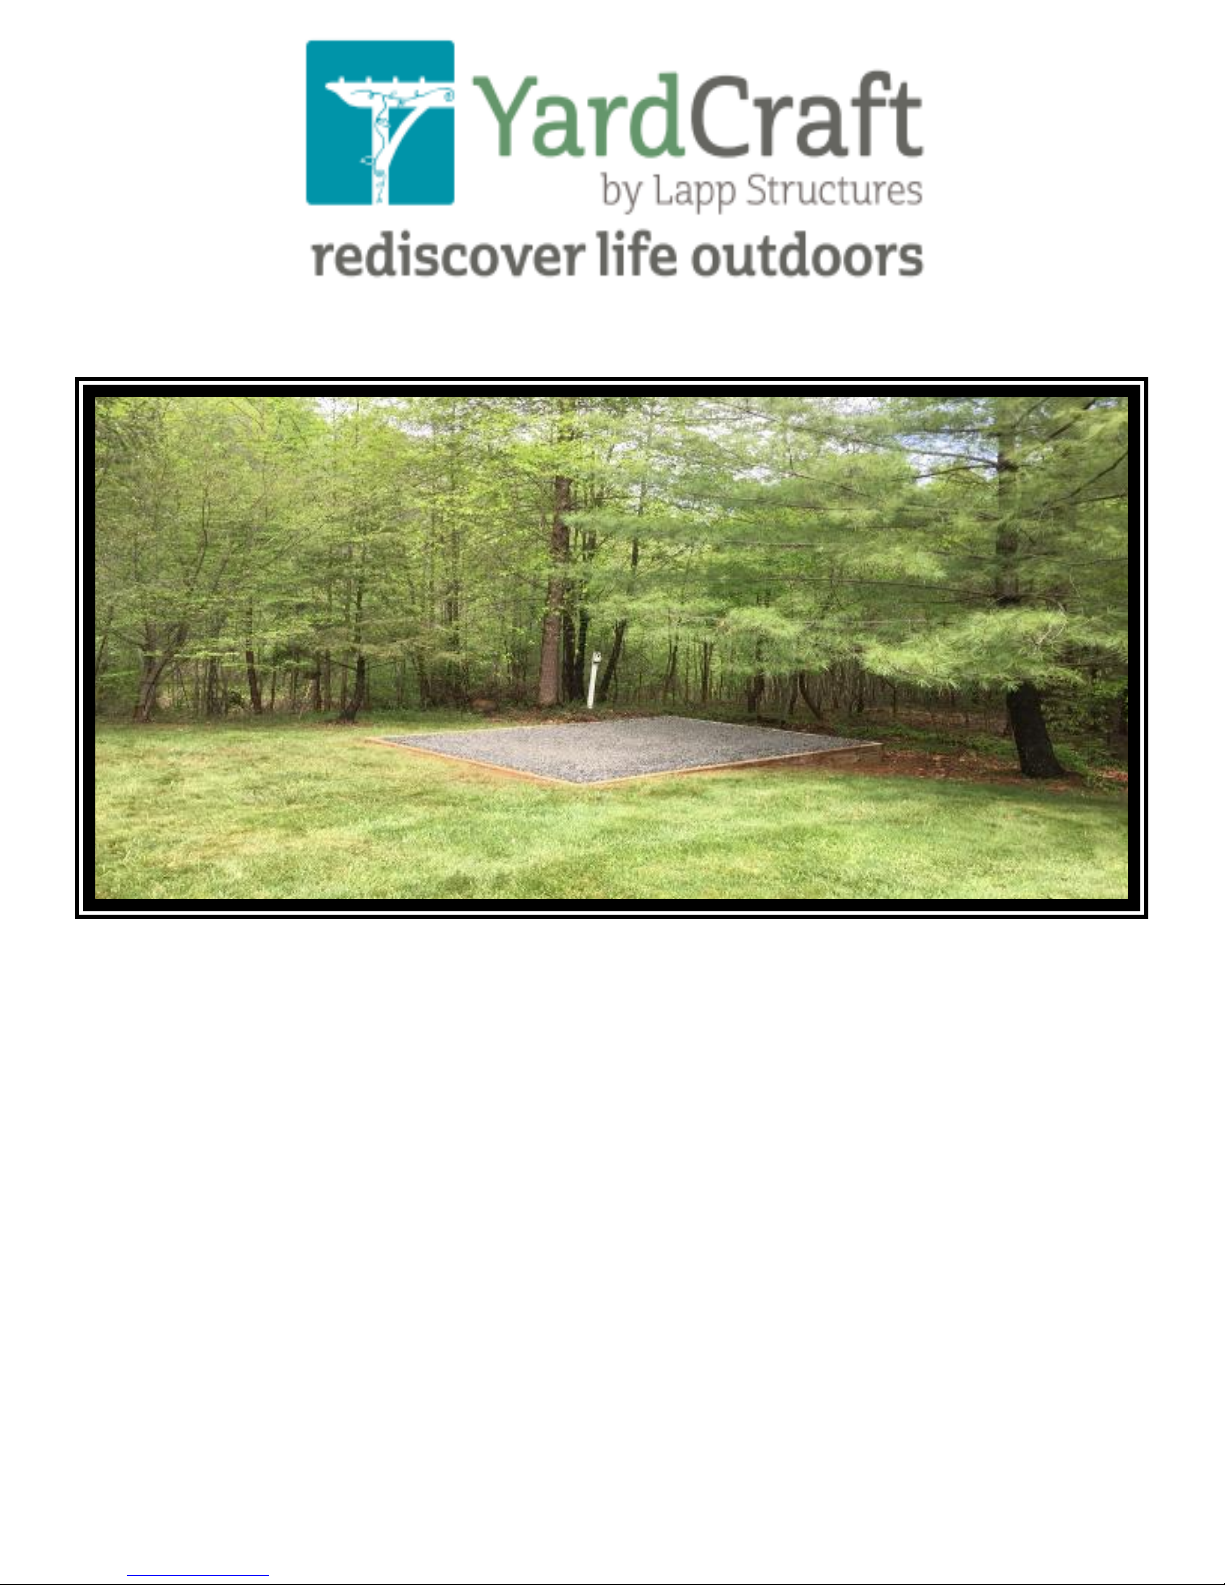
Shed Pad Preparation
Site Preparation
The best thing you can do to contribute to the longevity of your new building is to install
a quality pad. We recommend a minimum of a 6-12″ crushed stone base, at least 2′ larger than your building in both directions. Crushed stone allows for drainage should any
moisture get underneath your shed.
Drainage is of utmost importance, as the greatest enemy to any shed is moisture. If you
look at older sheds around your neighborhood, you will notice that many of them are
beginning to rot around the bottom of the structure. This is because most, if not all, of
those sheds do not have a prepared base underneath them. As rain falls from the edge
of the roof, it deflects off of the ground and splashes onto the sidewalls of the shed.
Over the years, this will cause the doors and lower siding of these sheds to rot. Using
stone as a base, the water is able to be absorbed into the ground instead of splashing
against your building.
IMPORTANT: Pad needs to be level for a more efficient building process!
(866) 210-9273 - info@yardcraft.com
3
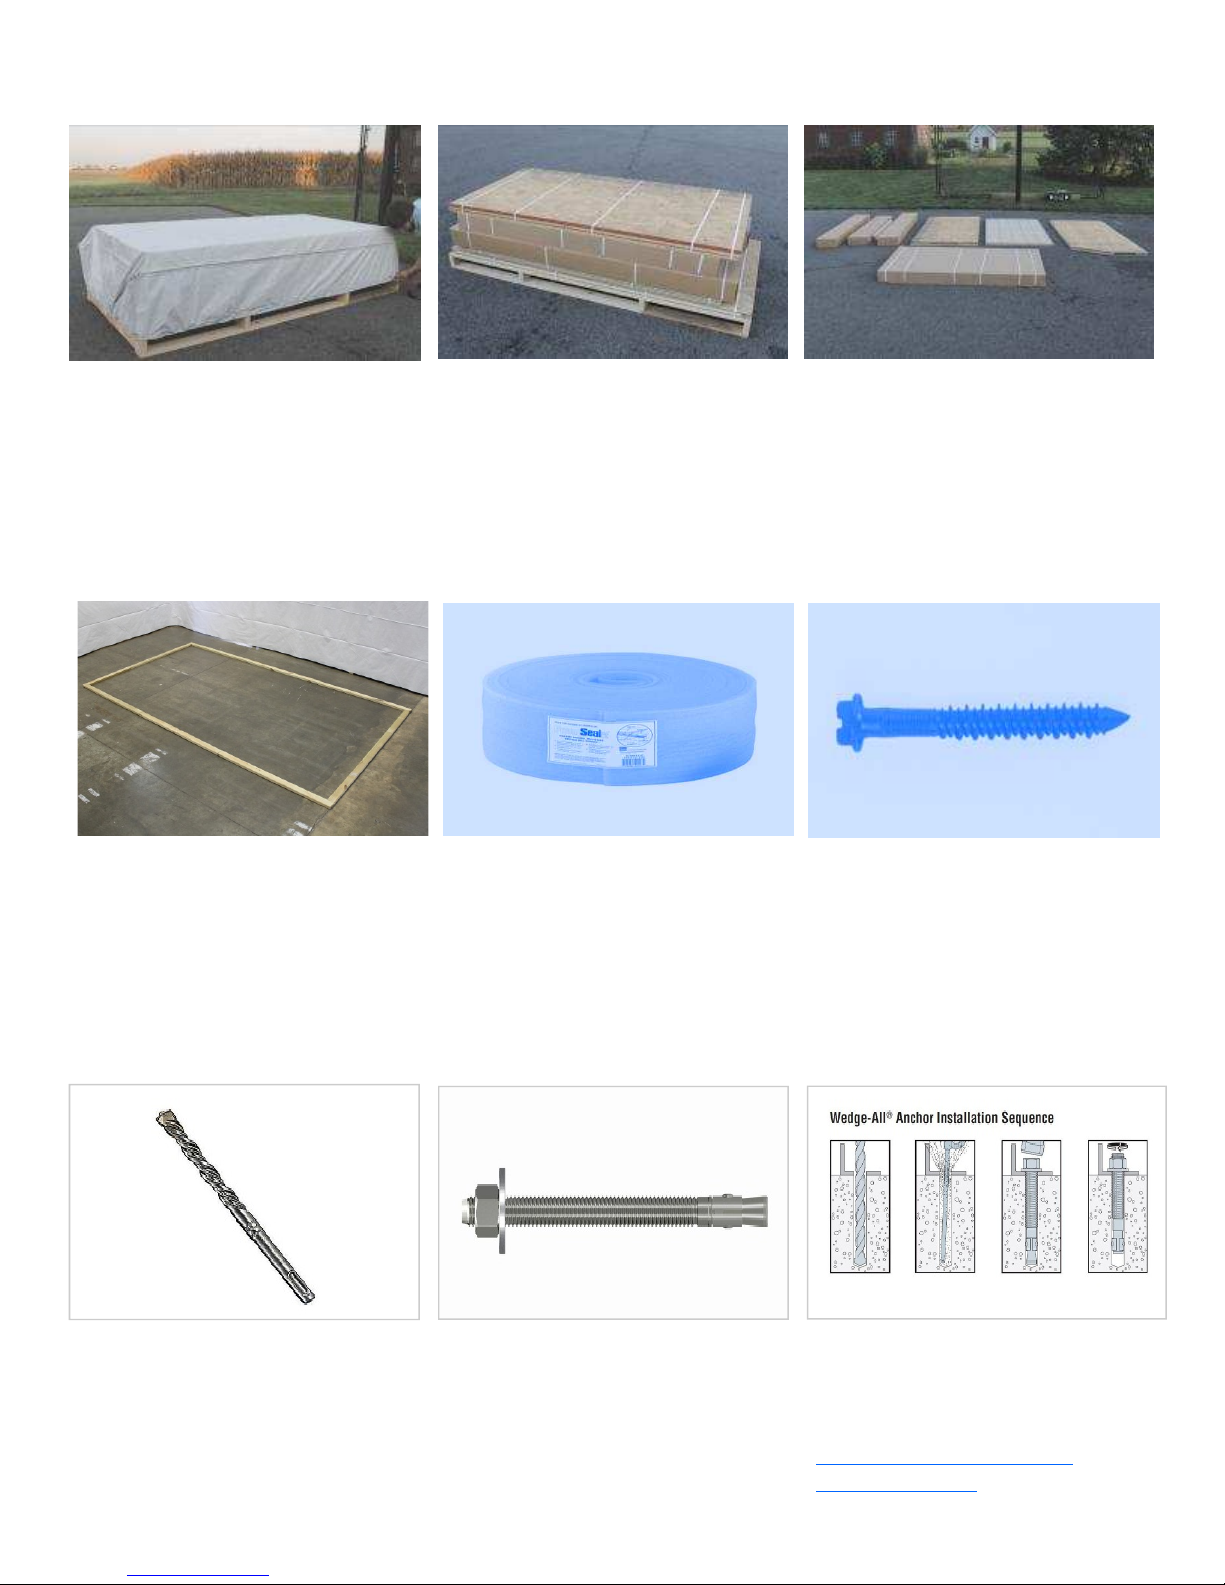
Unpack The Kit
(1) Place the package as close to
the assembly location as possible.
(2) Cut package bands.
(3) Remove and organize parts
from package.
If You Got A Floor With This Unit,
(Skip Steps 4-9)
(4) Locate and lay out the pressure
treated 2x4 Sill Plates, cutting
them to length as needed.
NOTE: Perimeter needs to be
square, and exactly 7’x7’
Steps 5 to 9 are for concrete
foundations only.
(5) Fasten the sill sealer (Not provided) to the bottom of the sill
plate. (You will need approximately 30 feet)
(6) After making sure the sill
plates are in the proper position,
pre-drill holes, then fasten to the
foundation, using 3” Tapcon
screws, (Not provided)
(7) After all the walls are set, permanently anchor the walls, first; pre
-drilling the holes, using a 1/2” concrete bit, (Not provided) then,
move to next step.
(866) 210-9273 - info@yardcraft.com
(8) Fasten the walls to the foundation, using 1/2” x 7” galvanized
wedge anchors, (Not provided) and
space them every 4 to 6 feet, or according to local code requirements.
(9) Ask your local hardware department for any additional info on
how to properly install the anchoring system, or refer to the video at
www.youtube.com/watch?
v=3JI_9ggbmcY
4

Assemble Floor
(10) Locate the parts to assemble
the floor joists.
(13) After making sure the pad is
level, locate the parts to assemble
the floor joists, and scatter them
out as shown.
(11) Locate the hardware & fasteners.
(14) Note: The band boards have
dado grooves precut to ensure
proper joist placement.
(12) Remove and organize them
for easy access.
(15) Begin with the end joist, making sure the band board is flush
with the joist.
(16) Continue this method for rest
of floor joists, using two 3” screws
per joist. *Holes are predrilled*
(866) 210-9273 - info@yardcraft.com
(17) Before proceeding with flooring, ensure that floor is square.
Both measurements need to be
equal.
(18) If measurements are not
equal, move the ends of the band
board left or right, accordingly.
5

Install Flooring
(19) Layout the flooring. (21) Attach the corner of the floor-
(22) Nail along the gable, making
sure flooring is flush with the floor
joist. Use an 8” to 12” nail spacing.
(20) Start on the front right corner
with the first piece, making sure
flooring is flush with perimeter.
NOTE: Both pieces of flooring are
41-7/8”x84”
(23) Now; nail front left corner,
again; making sure flooring is
flush with the band board.
ing, using 2” nails.
(24) Before you finish attaching
the first row flooring to the joist,
make marks 12” on center for a
guide to adjust the joist when nailing.
(25) Repeat previous steps for back
piece, using an 8” to 12” nail spacing, and ensuring all flooring is either flush or parallel with the floor
joists.
(866) 210-9273 - info@yardcraft.com
(26) Finally, make sure flooring is
nailed to all floor joists, then you
are ready for wall placement.
(27) Ready for walls! Refer to next
step.
6
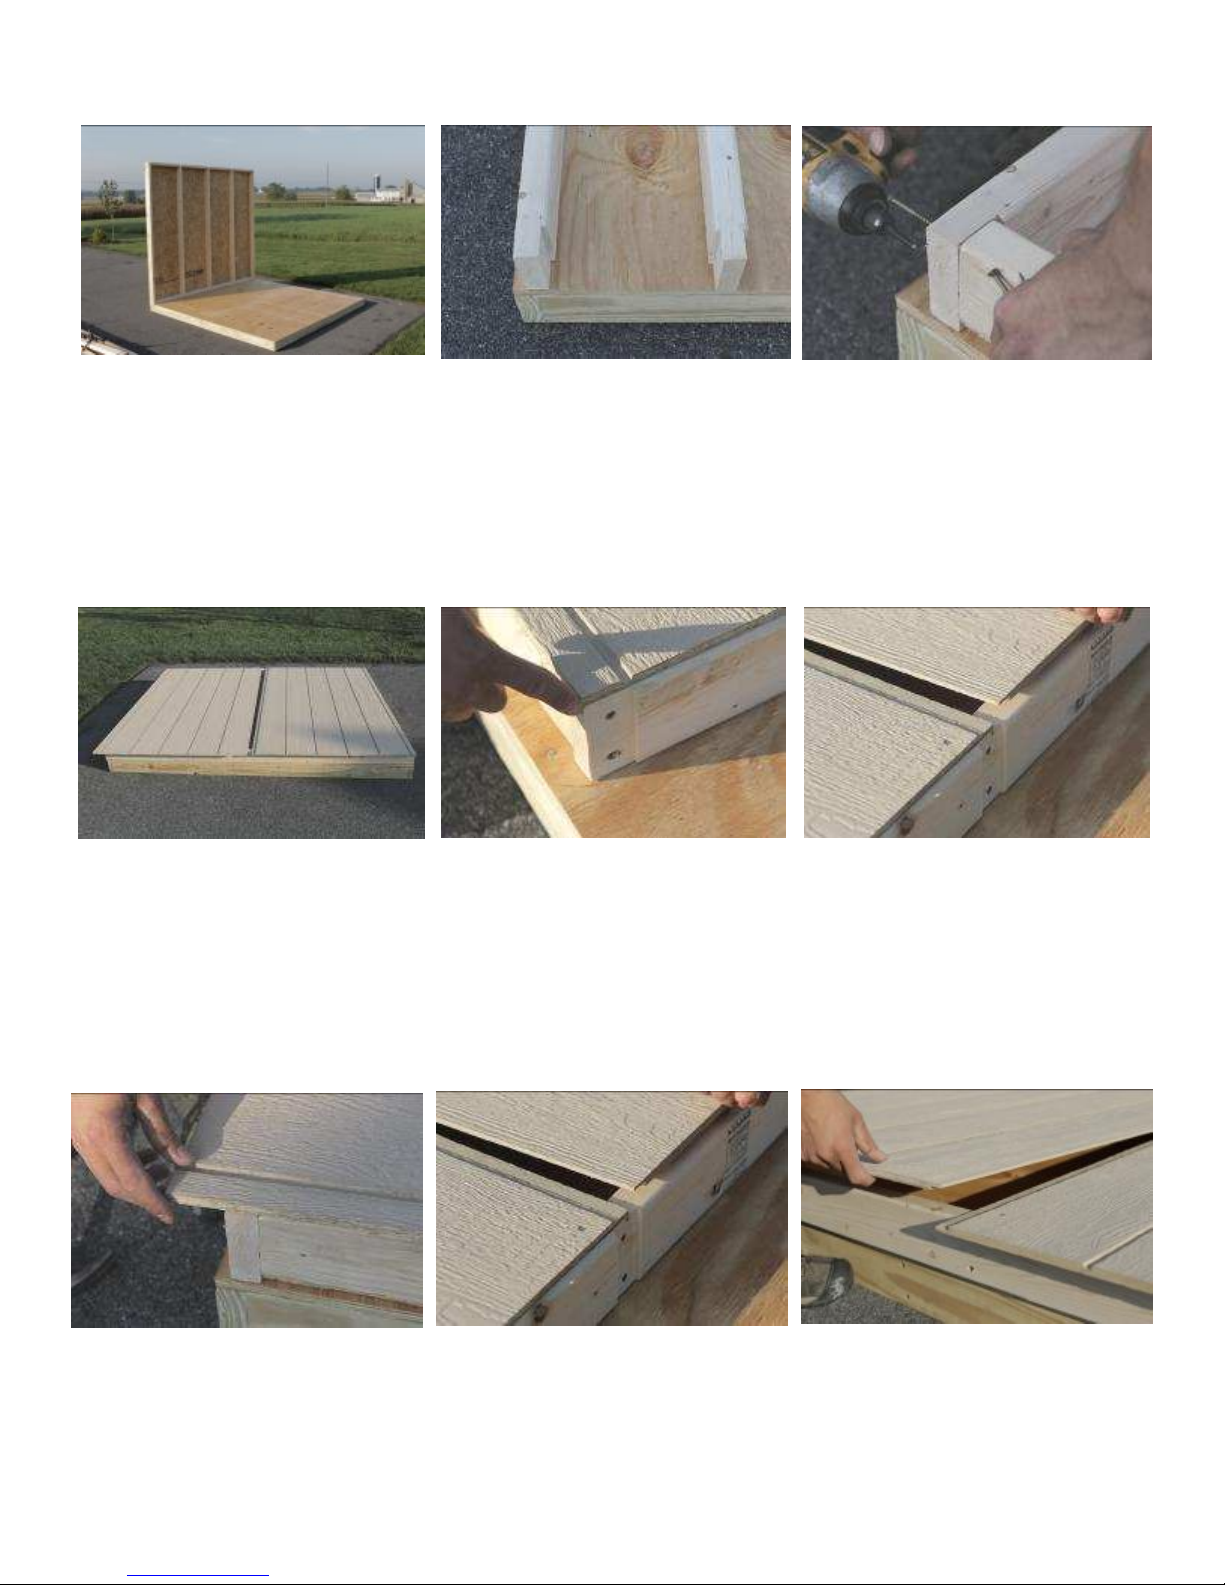
Assemble Walls
(28) Locate and lay out the parts to
assemble the left wall.
Note: (Dados are 21” on center)
(31) Repeat the process for the rest
of the wall studs; then lay out the
siding as shown, with factory
edges; overlap/underlap towards
the center.
(29) Use the dadoed 2x4’s for top
& bottom plate. The 2x4 plate on
the right; with dado’s on both the
top & bottom, is for the top plate.
(32) Starting on the top side of the
wall, align siding with both the
dado top plate & wall stud as
shown, then fasten with one 2”
nail.
(30) Insert two 3” screws through
the pre-drilled holes to attach bottom plate to each wall stud. Make
sure bottom plate and wall studs
are flush.
(33) Next; move along the top, to
the corner of the piece shown, fasten with 1 nail, then finish nailing
along the top of this piece, using
an 8” to 12” nail spacing, before
moving to next step.
(34) Now; align the bottom corner
of the siding with bottom corner of
wall as shown, before fastening.
(866) 210-9273 - info@yardcraft.com
(35) Put the next piece in place,
flush with the previous piece, making sure the splice looks similar to
the other grooves. Then fasten this
corner of the siding, and along the
entire top plate.
(36) Place the bottom of this piece
in the correct position, again; making sure the splice looks similar to
the other grooves. Then fasten the
corner.
7
 Loading...