

Manual for Wireless receiving and calling system
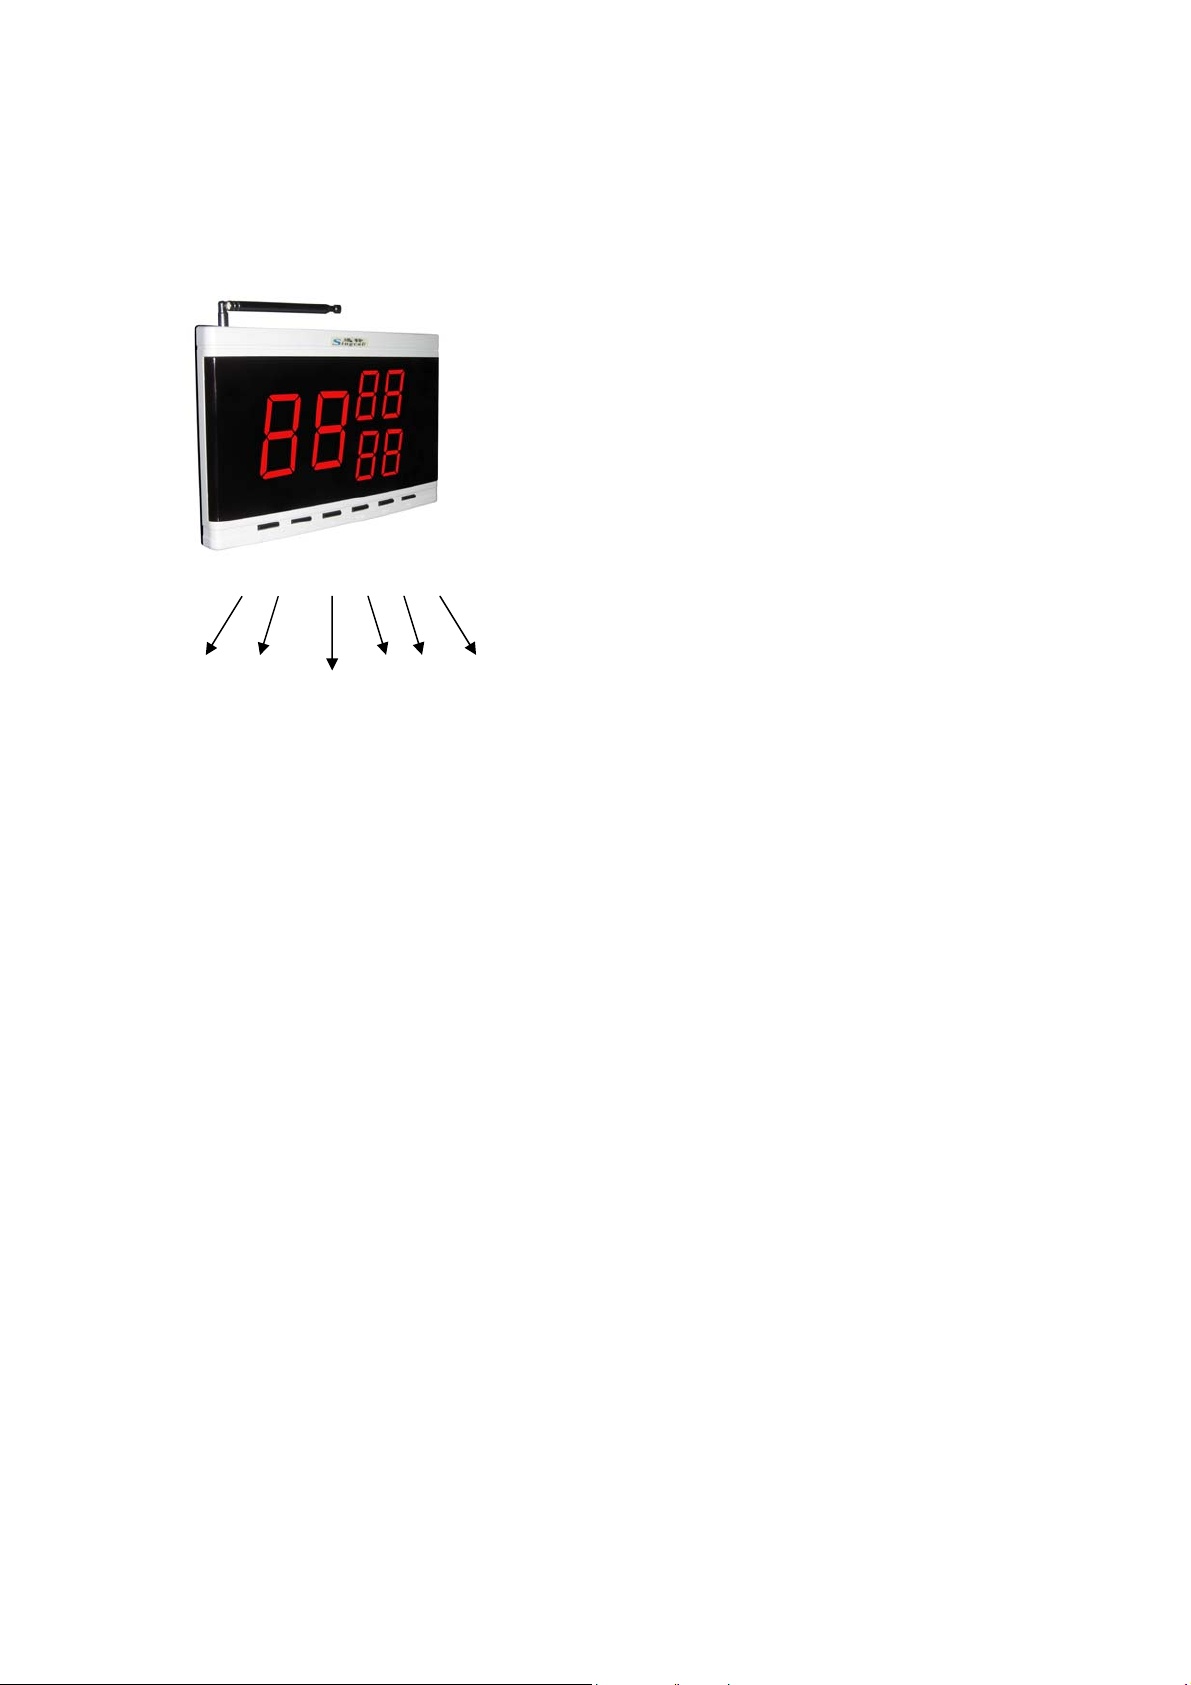
Singcall Receiver
1:[FUN] 2:[[ESC]] 3:[[ENT]]
1 2 3 4 5 6 4:[DOWN] 5:[[MOVE]] 6:
Operating Instructions
●call button registering:
1) Standby mode, press key [FUN] 3 seconds till[F1] appears on the screen.
2) Press key [ENT], [01] [001] or [001-01] appears
3) Press key [UP], [[MOVE]] or [DOWN] to choose the register number wanted.
4) Press the call button to be registered, the register number flashes on the
screen with music prompt and then stops.
5) Press key [ESC], and [F1] appears.
6) Press key [ESC] again, back to standby mode. The registration is finished.
7) Repeat step 3)~4)to register all the call buttons you need, and then press
key [ESC] twice back to standby mode. Done.
●prompt music setting
1) standby mode , press key [FUN] 3 seconds till[F1] appears on the screen.
2) Use key [UP] to choose [F2].
3) Press key [ENT] and [01] appears.
4) Use the key [UP], [DOWN] to choose prompt music (12 pieces of beautiful
music totally).
5) Press key [ENT], and [F2] appears
6) Press key [ESC] again and back to standby mode. Prompt setting is done.
●display time setting for the call button numbers.
1) standby mode, press key [FUN] 3 seconds till[F1] appears on the screen.
2) Use key [UP] to choose [F3].
3) Press key [ENT], and [20] appears on the screen.
4) Use key [UP], [DOWN] to choose the display time wanted. [00] means
[UP]

unlimited display, the figure of 01~99 mean the corresponding time from
1~99 seconds.
5) Press key [ENT], and [F3] appears.
6) Press key [ESC] and back to standby mode. Done.
●Prompt music length setting.
1) Standby mode, press key [FUN] 3 seconds and [F1] appears on the screen.
2) Use key [UP] to choose [F4].
3) Press key [ENT] and [01] appears on the screen.
4) Use key [UP] or [DOWN] to choose the prompt music length wanted, number
01-15 means 15 kinds of the length. 01 means 2 seconds, 02 means 4
seconds, and so on, 15 means 30 seconds of the music prompt.
5) Press key [ENT], and [F4] appears again.
6) Press key [ESC] and back to standby mode. Done.
●volume adjusting
For APE9000、APE9300、APE9500 and APE9600 only. (The volume of the
other models can be changed with the volume controlling knob on the top of the
receivers. )
1. Standby mode, press key [UP] or [DOWN] to choose the volume, 01~15
means 15 kinds of volume.
2. Press key [ESC], and back to standby mode. Done.
● Different prompt music for different call buttons
(APE1900/APE2900/APE8000/ APE8200 not included).
1) Standby mode, press key [FUN] 3 seconds and [F1] appears on the screen.
2) Press key [UP] to choose [F5].
3) Press key [ENT] and [01] appears on the screen.
4) Use key [UP], [MOVE] or [DOWN] to choose the prompt music.
5) Press key [ENT] and [01] or [001] appears.
6) Use key [UP], [MOVE] or [DOWN] to choose the number wanted.
7) Press the call button, and the number flashes on the screen with prompt
music and then stops.
8) Press key [ESC] and [F5] appears again, the registration is finished.
9) Press key [ESC] again back to standby mode.
10) Repeat step 4) ~8) if more than one call buttons need to be registered.
●time setting (for APE1900/APE2900/APE8000 /APE8200)
1) Standby mode, press key [FUN] 3 seconds till [F1] appears on the screen.
2) Use key [UP] to choose [F5]
3) Press key [ENT] and the current time, such as [13-29], displayed on the
screen,
4) Use key [UP], [MOVE] or [DOWN] to the right time.
5) Press key [ENT], and [F5] appears again.

6) Press key [ESC] and back to standby mode. Time setting done.
● Deleting registered number or initializing the receiver
1) Standby mode, press key [FUN] 3 seconds till [F1] appears on the screen.
2) Use key [UP] to choose [F6].
3) Press key [ENT], the registered minimum number appears.
4) Use key [UP], [MOVE], or [DOWN] to choose the number to be deleted.
5) Press key [ENT], with the prompt music, the selected number flashed and
deleted. The next registered number appears on the screen.
Keep pressing key [ENT], the numbers keep changing on the screen. When
[00]、[000]or[000-00] appears, the initializing is completed.
6) Press key [ESC] and [F6] appears again
7) Press key [ESC] once more, back to standby mode, the number deleting
done.
Special functions.
● Optional prompt music for key [cancel] (for multi-key requesters)
1) Standby mode, press key [FUN] 3 seconds till [F1] appears on the screen.
2) Use key [UP] to choose [F7].
3) Press key [ENT] and [01] appears on the screen.
4) Use key [UP], [MOVE] or [DOWN] to choose a number from 01 to 20. 1-10
means with prompt music, and 11-20 means without prompt music when
press key [cancel].
5) Press key [ENT] and [F7] appears again.
6) Press key [ESC], back to standby mode. Setting done.
● Number display mode setting( all-digital display or digits beginning with an
English letter display, for APE1200/APE1500/APE1800/APE1900/APE2000,
APE2500/APE2600/APE2900/APE9500 )
1) Standby mode, press key [FUN] 3 seconds till [F1] appears on the screen.
2) Use key [UP] to choose [F8].
3) Press key [ENT] and [01] appears.
4) Use key [UP], [MOVE], or [DOWN] to choose a number. 01~10 is all-digital
display (default setting), and 11~20 is digits beginning with an English letter
( A,B,C,D,E,F,H,P,J or L) display.
5) Press key [ENT] and [F8] appears on the screen.
6) Press key [ESC], back to standby mode. Done.
● Same or different prompt music for the keys of the multi-key requesters(for
APE1600/APE1800/APE2500/APE9600)
1) Standby mode, press key [FUN] 3 seconds till [F1] appears.
2) Use key [UP] to choose [F8] (for APE1600/APE9600) or [F9] (for APE1800 /
APE2500)
3) Press key [ENT] and [00] appears on the screen.

4) Use key [UP] or [DOWN] to choose a number. [01] means same prompt music
for different keys and [00] means different music for different keys (default
setting) .
5) Press key [ENT] and [F8] or [F9] appears on the screen.
6) Press key [ESC] and back to standby mode. The setting finished.
Special Instruction for APE8000
● Register the remote controller
1) Press the key [D] on standby mode(time display mode) and [F1] appears on
the screen.
2) Press the key [D] again and the screen is on standby
3) Press the key [B] and [F1] appears on the screen.
4) Press the key [B] again and the registration is done.
Note: All the register steps should be finished within 2 minutes after the receiver
turned on. The remote controller should be registered again when the
receiver is turned on every time.
The detailed operation is the same with the other receivers.
Below is the function of remote controller keys:
D: [FUN] (function) / [ENT](enter)
B: [ESC] (escape)
A: [ MOVE] (move)
C: [UP](up)
Volume adjustment:
1) Standby mode, press the key [C] to adjusting the volume. 01~15 means 15
kinds of volume.
2) Press the key [B], back to standby mode and the volume setting is done.
Cautions:
1、Please keep the wireless calling products away from below interference
sources.
1) base station of mobile equipments.
2) refrigerators、air conditioners and other high-powered electric appliances
.
3) large ultrasonic equipments in hospitals.
2、Installation notes.
1) Plug in the adapter first (no wet hands) and connect with the receiver after
power light on. Then, turn on the receiver.
2) Any abnormal founded, please contact with Singcall customer service
engineers. Do not disassemble the products by yourself to avoid unnecessary
troubles.
3) Please use original accessories for best performance.
4) The call buttons need to be registered to the receiver before use. Keep the
call buttons 30cm at least from the receiver and make sure no one else presses

the call buttons during the registration. It is normal if one or two call buttons can
not be registered successfully when many call buttons are registered at a time.
Register the failed ones again. Check the receiving distance before fixing the
registered call buttons.
5) Draw out the antenna of the registered receiver before use.
6) Please adjust the frequency of the walkie-talkie out of the range 433.92±
10MHZ to avoid disturbance if the wireless calling system and the walkie talkie
are using in the same place.
7) Call buttons shouldn’t be fixed on the metal base directly.
8) Stick the call buttons on smooth surface to avoid drop. Rough surface (such
as wallpaper) is not prefered.
9) Please keep dry and avoid circuit oxidation.
10)The weather influence the receiving distance.
FCC Statement
This equipment has been tested and found to comply with the limits for a Class B
digital device, pursuant to part 15 of the FCC rules. These limits are designed to
provide reasonable protection against harmful interference in a residential
installation. This equipment generates, uses and can radiate radio frequency
energy and, if not installed and used in accordance with the instructions, may
cause harmful interference to radio communications. However, there is no
guarantee that interference will not occur in a particular installation. If this
equipment does cause harmful interference to radio or television reception,
which can be determined by turning the equipment off and on, the user is
encouraged to try to correct the interference by one or more of the following
measures:
-Reorient or relocate the receiving antenna.
-Increase the separation between the equipment and receiver.
-Connect the equipment into an outlet on a circuit different from that to which the
receiver is connected.
-Consult the dealer or an experienced radio/TV technician for help.
To assure continued compliance, any changes or modifications not expressly
approved by the party. Responsible for compliance could void the user’s
authority to operate this equipment. (Example- use only shielded interface
cables when connecting to computer or peripheral devices).
This equipment complies with Part 15 of the FCC Rules. Operation is subject to
the following two conditions:
(1) This device may not cause harmful interference, and
(2) This device must accept any interference received, including interference
that may cause undesired operation.

Manual for calling button
Press button
When service is needed, press the button for 2 seconds till the indicator light is
on.
 Loading...