

Yamaha Audio TX-10MKII User Manual

B G
TX-10MK
Natural Sound AM/FM Stereo Tuner
Syntonisateur AM/FM stéréo de la série “Natural Sound”
“Natural Sound” MW/UKW-Stereo-Tuner
Natural Sound AM/FM stereotuner
Sintonizzatore stereo AM/FM a suono naturale
Sintonizador estéreo de AM/FM de sonido natural
Natural Sound Stereo Tuner
II
OWNER’S MANUAL
MODE D’EMPLOI
BEDIENUNGSANLEITUNG
BRUKSANVISNING
MANUALE DI ISTRUZIONI
MANUAL DE INSTRUCCIONES
GEBRUIKSAANWIJZING
SUPPLIED ACCESSORIES
ACCESSOIRES FOURNIS
MITGELIEFERTE ZUBEHÖRTEILE
MEDFÖLJANDE TILLBEHÖR
ACCESSORI IN DOTAZIONE
ACCESORIOS INCLUIDOS
BIJGELEVERDE ACCESSOIRES
●
After unpacking, check that the following parts are contained.
●
Après le déballage, vérifier que les pièces suivantes sont incluses.
●
Nach dem Auspacken überprüfen, ob die folgenden Teile vorhanden sind.
●
Kontrollera efter det apparaten packats upp att följande delar finns med.
●
Verificare che tutte le parti seguenti siano contenute nell’imballaggio dell’apparecchio.
●
Desembalar el aparato y verificar que los siguientes accesorios están en la caja.
●
Controleer na het uitpakken of de volgende onderdelen voorhanden zijn.
●
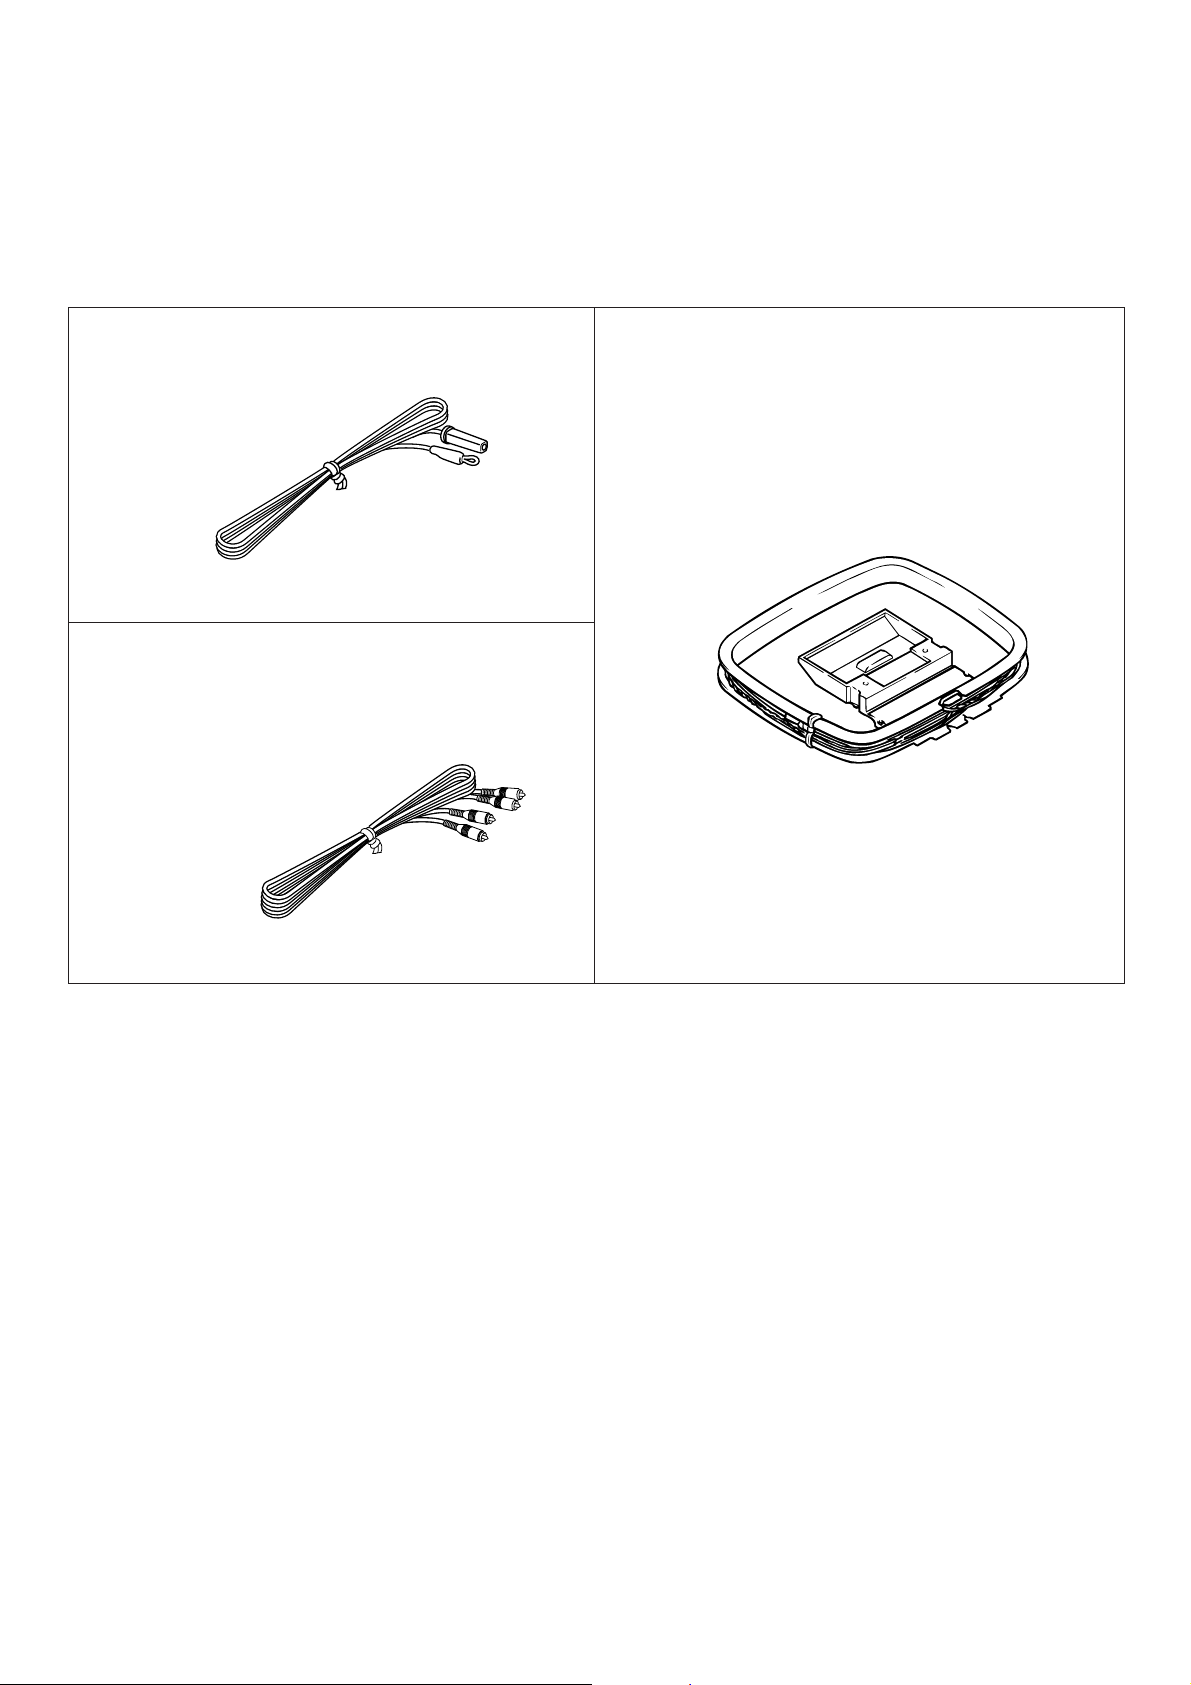
Indoor FM Antenna
●
Antenne FM intérieure
●
UKW-Innenantenne
●
FM inomhusantenn
●
Antenna FM per interni
●
Antena FM interior
●
FM Binnenantenne
●
Audio connection cord
●
Câble de connexion audio
●
Audio-Anschlußkabel
●
Audio anslutningssladdar
●
Cavo di collegamento audio
●
Cable de conexión de audio
●
Audio aansluitkabel
●
AM Loop Antenna
●
Cadre-antenne AM
●
MW-Rahmenantenne
●
AM ramantenn
●
Antenna AM ad anello
●
Antena de cuadro de AM
●
AM Lusantenne
2
Thank you for selecting this YAMAHA stereo tuner
English
FEATURES
40 Station Random Access Preset Tuning
•
Automatic Preset Tuning for RDS Stations
•
Multi-Status Station Memory
•
Direct PLL Synthesizer Tuning
•
Preset Station Shifting Capability (Preset Editing)
•
Multi-Functions for RDS Broadcast Reception
•
Supplied Accessories......................................................2
Caution............................................................................3
Connections....................................................................4
Controls and Their Functions..........................................7
Tuning Operations ..........................................................9
Preset Tuning................................................................11
Receiving RDS Stations ..............................................15
Troubleshooting............................................................20
Specifications................................................................21
CONTENTS
CAUTION: READ THIS BEFORE OPERATING YOUR UNIT.
1. This unit is a sophisticated stereo tuner. To assure proper
operation and the best possible performance, please read
this manual carefully.
2. Choose the installation location for the unit carefully.
Avoid placing it in direct sunlight or close to a source of
heat. Also avoid locations subject to vibration and
excessive dust, heat, cold or moisture. Keep it away from
such sources of hum as transformers or motors.
3. Do not open the cabinet, because this may result in
damage to the unit or electrical shock. If a foreign object
should get into the unit, contact your local dealer.
4. When not planning to use this unit for long periods of time
(ie., vacation, etc.), disconnect the AC power plug from the
wall outlet.
5. To prevent lightning damage, disconnect the AC power
plug and disconnect the antenna cable when there is an
electrical storm.
6. When disconnecting the power plug from the wall outlet,
always pull directly on the plug; never pull the cord itself.
7. Do not use force when operating switches and other
controls.
8. When moving the unit, be sure to first disconnect the
power plug and disconnect all wires connected from the
unit to other equipment.
9. Do not attempt to clean this unit with chemical solvents,
because this may damage the finish. Use a clean, dry
cloth.
10.Be sure to read the “TROUBLESHOOTING” section of this
manual for advice on common operating errors before
concluding that the unit is faulty.
11.Keep this manual in a safe place for future reference.
This unit is not disconnected from the AC power source as
long as it is connected to the wall outlet, even if this unit
itself is turned off.
In this state, this unit is designed to consume a very small
quantity of power.
IMPORTANT
Please record the serial number of this unit in the space
below.
Serial No.:
The serial number is located on the rear of the unit.
Retain this Owner’s Manual in a safe place for future
reference.
WARNING
TO REDUCE THE RISK OF FIRE OR ELECTRIC SHOCK,
DO NOT EXPOSE THIS APPLIANCE TO RAIN OR
MOISTURE.
For U.K. customers
If the socket outlets in the home are not suitable for the plug
supplied with this appliance, it should be cut off and an
appropriate 3 pin plug fitted. For details, refer to the
instructions described below.
Note: The plug severed from the mains lead must be
destroyed, as a plug with bared flexible cord is hazardous if
engaged in a live socket outlet.
Special Instructions for U.K. Model
IMPORTANT
THE WIRES IN THE MAINS LEAD ARE COLOURED IN
ACCORDANCE WITH THE FOLLOWING CODE:
Blue: NEUTRAL
Brown: LIVE
The colours of the wires in the mains lead of this apparatus
may not correspond with the coloured markings identifying
the terminals in your plug. Proceed as follows: the wire
which is coloured BLUE must be connected to the terminal
which is marked with the letter N or coloured BLACK. The
wire which is coloured BROWN must be connected to the
terminal which is marked with the letter L or coloured RED.
Making sure that neither core is connected to the earth
terminal of the three pin plug.
3

CONNECTIONS
75Ω UNBAL.
FM ANT GND AM ANT
Never plug in this unit and other components until all connections are completed.
ANTENNA CONNECTIONS
●
Each antenna should be connected to the designated terminals correctly, referring to the following figure.
●
Both AM and FM indoor antennas are included with this unit. In general, these antennas will probably provide sufficient signal
strength. Nevertheless, a properly installed outdoor antenna will give clearer reception than an indoor one. If you experience
poor reception quality, an outdoor antenna may result in improvement.
Outdoor FM antenna Outdoor AM antenna
Indoor FM
antenna
(included)
75-ohm
antenna
adapter
AM loop
antenna
(included)
300-ohm
feeder
75-ohm
coaxial cable
4
75-ohm/300-ohm
antenna adapter
Ground
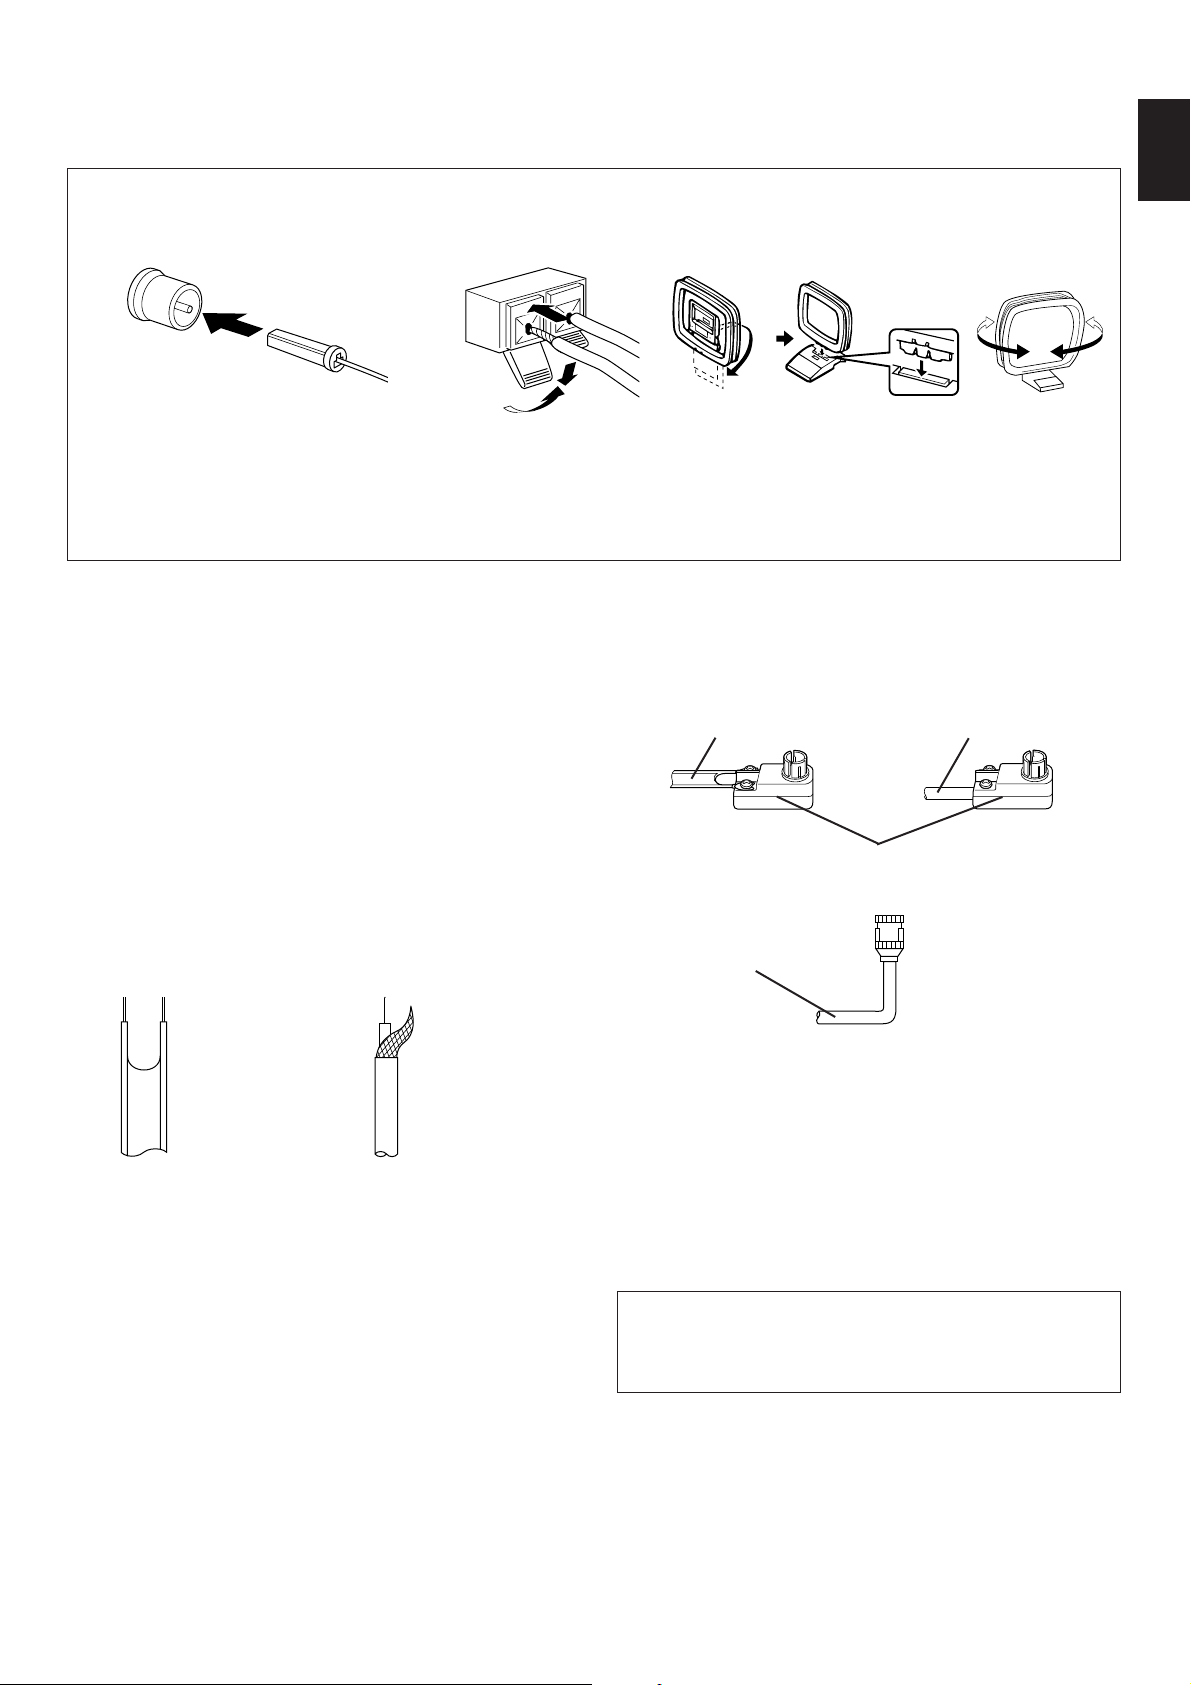
Connecting the indoor FM antenna Connecting the AM loop antenna
1 2 3
2
English
3
* If you connect an outdoor FM antenna to this unit, do not connect the indoor FM antenna to this unit.
* The AM loop antenna should be placed apart from the main unit. The antenna may be hung on a wall.
* The AM loop antenna should be kept connected, even if an outdoor AM antenna is connected to this unit.
1
m Optional outdoor FM antenna
Consult with your dealer or authorized service center about the
best method of selecting and erecting an outdoor FM antenna.
The choice of the feeder cable is also important. Flat ribbonshaped twin-lead cable performs well electrically, and is
cheaper and somewhat easier to handle when routing it
through windows and around rooms. Coaxial cable is more
expensive, does a much better job of minimizing interference,
is less prone to the effects of weather and close-by metal
objects, and is nearly as good a signal conductor as feeder
cable, particularly for foam-type coaxial cables. Coaxial cable
is somewhat more difficult to install at the point where the
cable enters the building. If coaxial cable is selected, make
sure the antenna is designed to be used with that type of
cable.
* Use a 75-ohm/300-ohm antenna adapter (not included) or a
75-ohm antenna adapter (not included) for connections.
300-ohm feeder cable 75-ohm coaxial cable
75-ohm/300-ohm antenna adapter
75-ohm coaxial
cable
Orient so that the best
reception is obtained.
75-ohm antenna
adapter
300-ohm feeder
cable
75-ohm coaxial
cable
m Optional outdoor AM antenna
In steel buildings or at a great distance from the transmitter, it
may be necessary to install an outside long wire antenna.
Notes for FM antenna installation
●
To minimize automobile ignition noise, locate the antenna
as far from heavy traffic as possible.
●
Keep the feeder cable or coaxial cable as short as possible.
Do not bundle or roll up excess cable.
●
The antenna should be at least two meters (6.6 feet) from
reinforced concrete walls or metal structures.
GND terminal
For maximum safety and minimum interference, connect
the GND terminal to a good earth ground. A good earth
ground is a metal stake driven into moist earth.
5
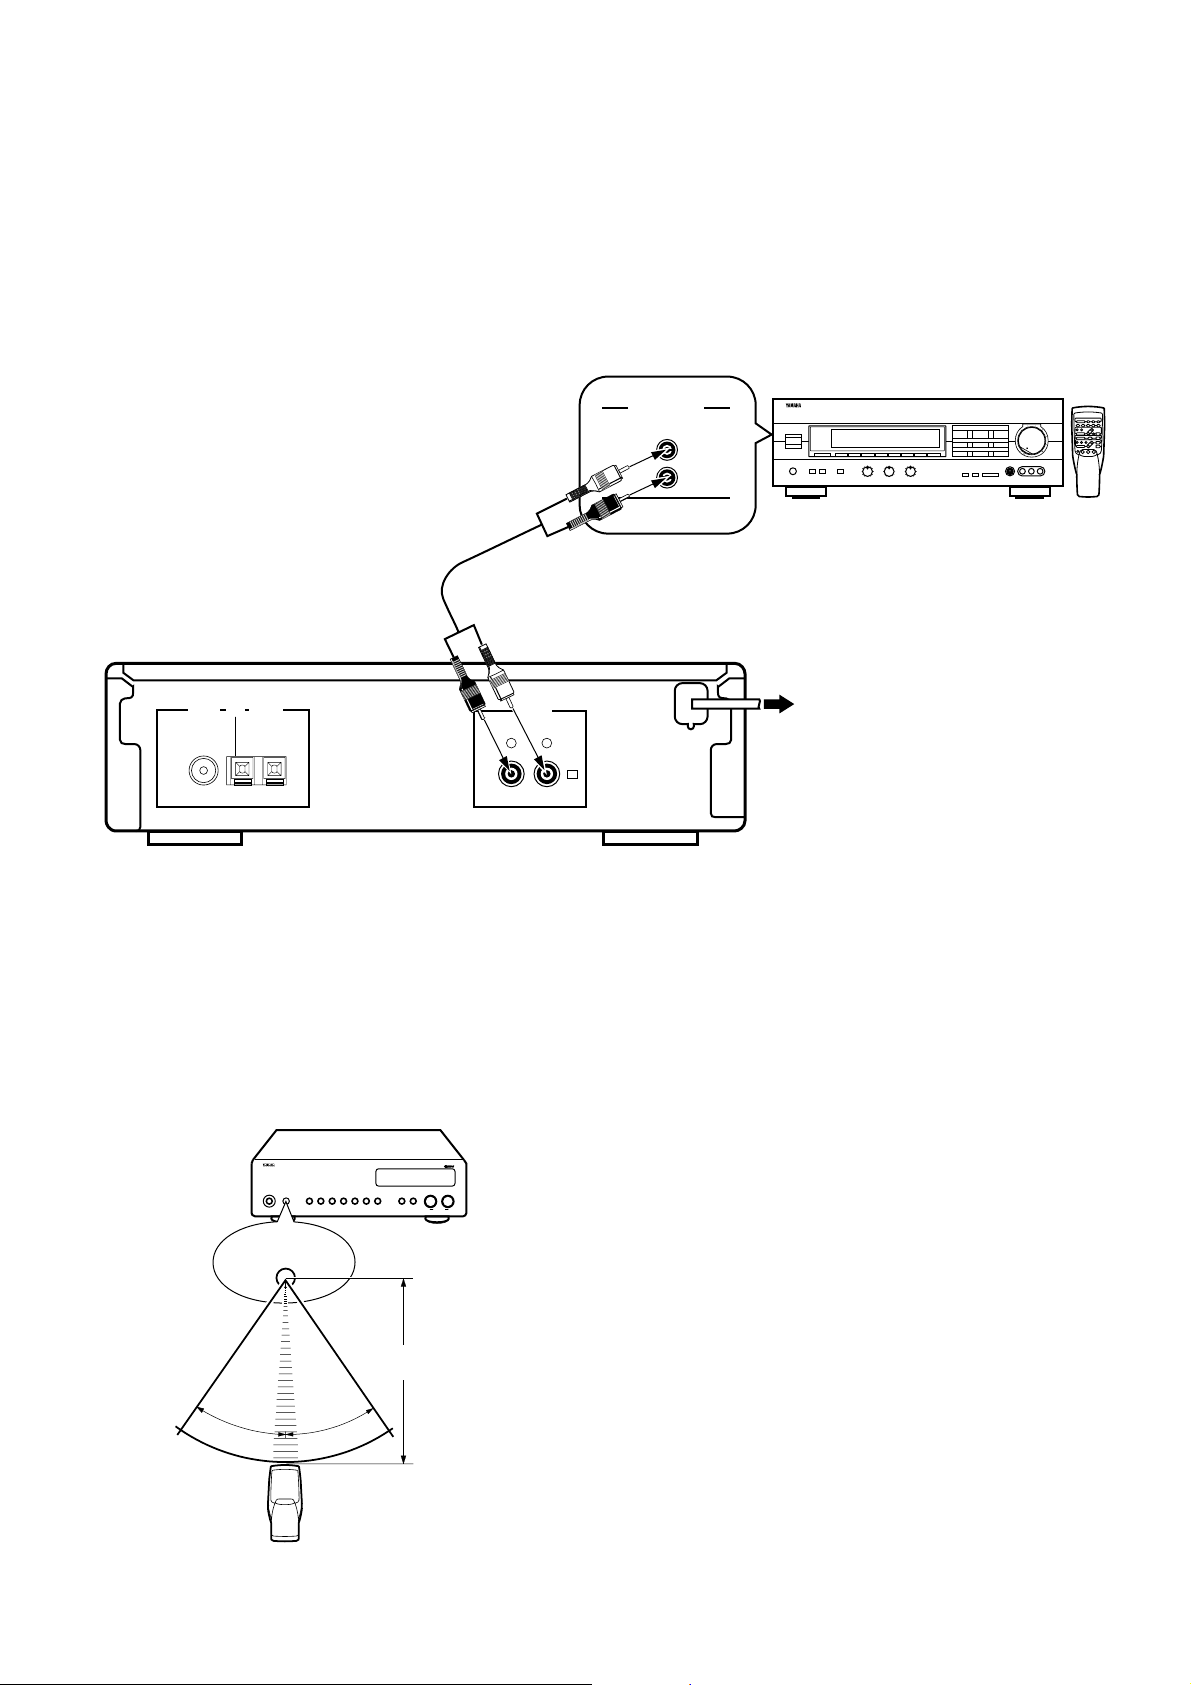
CONNECTIONS TO THE AMPLIFIER
TUNER
L
R
75Ω UNBAL.
FM ANT GND AM ANT LINE OUT
2
R L
l6
20
28
40
60
l2
8
4
2
0
–dB
POWER
DOWN UP
RDS MODE
/FREQ
PTY SEEK
MODE START
PRESET STATIONS
TUNING
PTY SELECTOR
EON KEY MODE
/EDIT
MEMORY
AUTO/
MAN’L MONO
MAN’L/
AUTO FM
TUNING
MODE
FM/AM A/B/C/D/E
NATURAL SOUND
AM/FM STEREO TUNER TX–10MK
II
30°
30°
●
Before making any connections, switch OFF the power to
this unit and the amplifier or other component.
●
Be sure that the connections from the left (“L”) and right
(“R”) LINE OUT terminals are connected to the
corresponding (left and right) input terminals of the amplifier
or other component.
Connection cord (included)
●
If you have a YAMAHA amplifier whose terminals on the
rear panel are numbered as 1, 2, 3, etc., connections can
be made easily by making sure to connect the LINE OUT
terminals of this unit to the input terminals of the amplifier
numbered 2.
This unit (Europe model)
Amplifier
To AC outlet
NOTES ABOUT CONTROLLING THIS UNIT WITH THE REMOTE CONTROL
TRANSMITTER
This unit has a remote control sensor. It receives signals from
a remote control transmitter provided with a YAMAHA amplifier
or receiver.
Remote control
sensor
Within approximately
6 m (19.7 feet)
Notes
●
There should be no large obstacles between the remote
control transmitter and the main unit.
●
If the remote control sensor is directly illuminated by strong
lighting (especially an inverter type of fluorescent lamp etc.),
it might cause the remote control transmitter not to work
correctly. In this case, reposition the main unit to avoid
direct lighting.
6
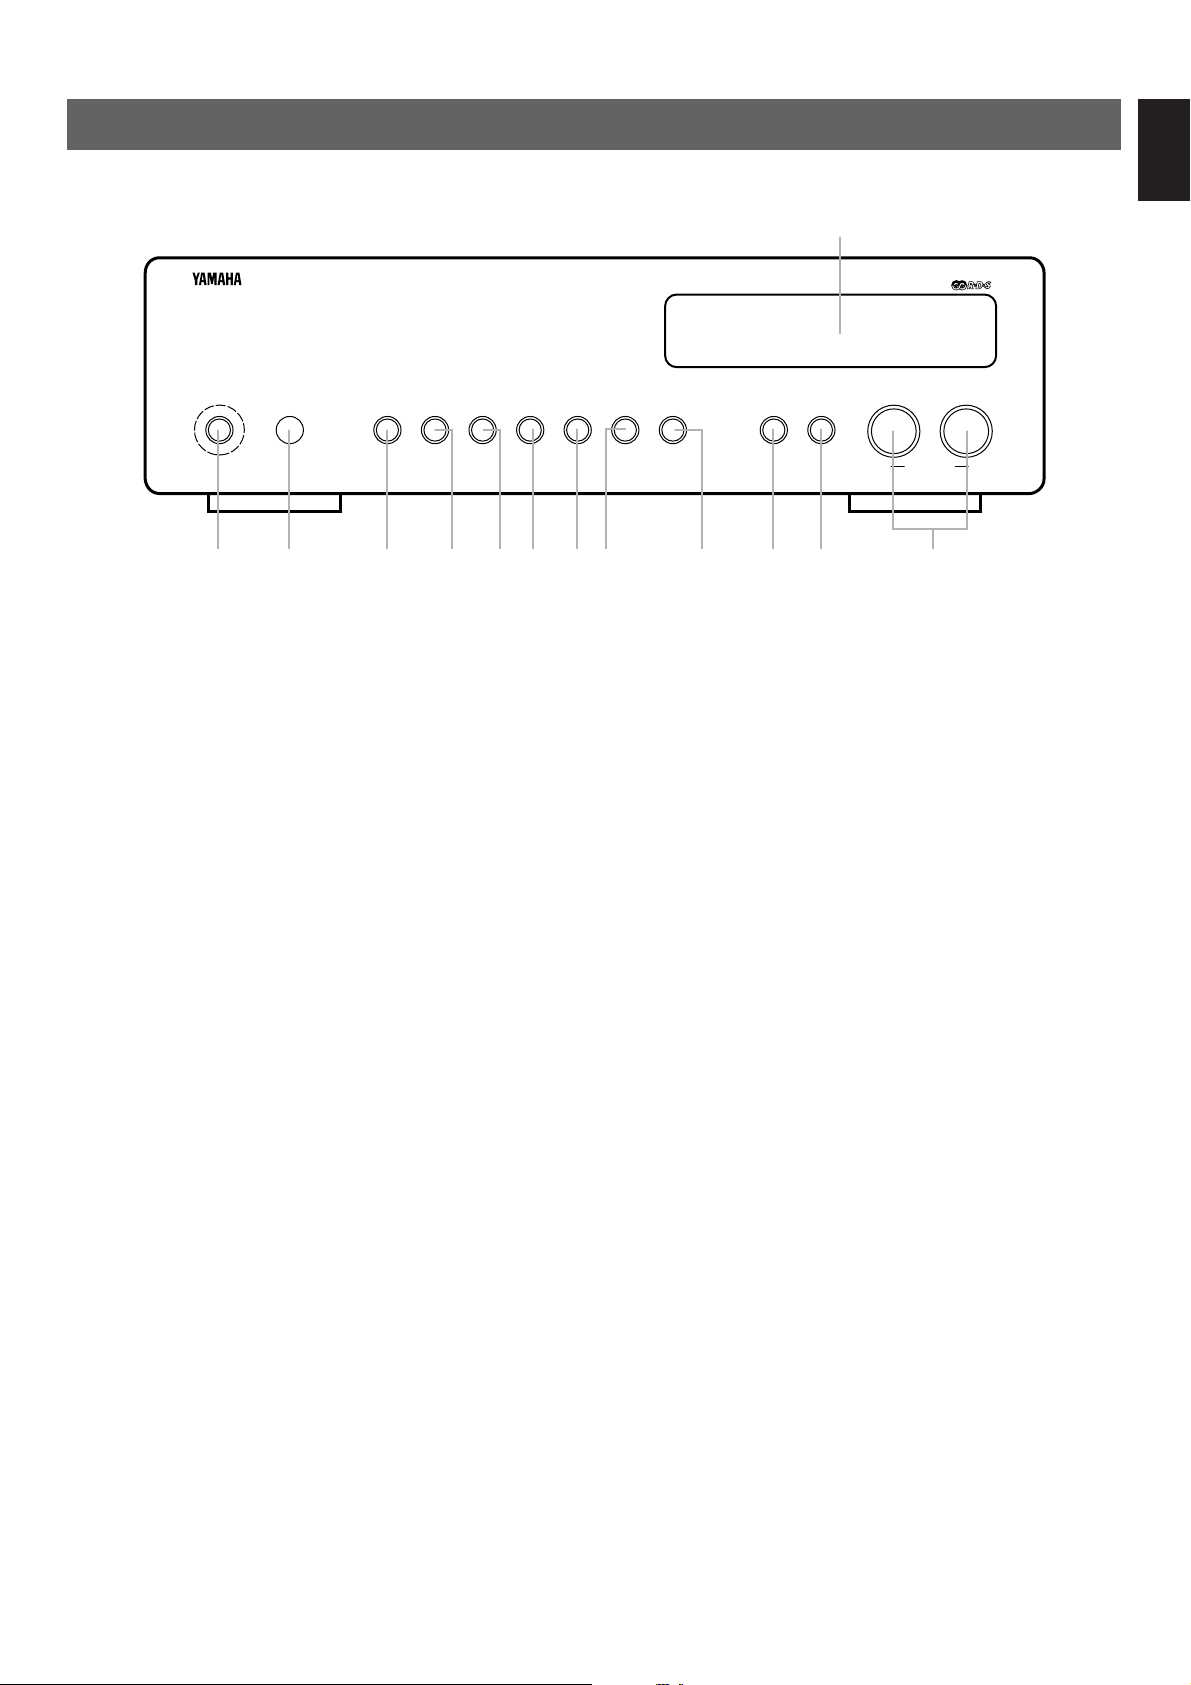
FRONT PANEL
POWER
DOWN UP
RDS MODE
/FREQ
PTY SEEK
MODE START
PRESET STATIONS
TUNING
PTY SELECTOR
EON KEY MODE
/EDIT
MEMORY
AUTO/
MAN’L MONO
MAN’L/
AUTO FM
TUNING
MODE
FM/AM A/B/C/D/E
NATURAL SOUND
AM/FM STEREO TUNER TX–10MK
II
C
BA06 7 821 3 4 5 9
English
CONTROLS AND THEIR FUNCTIONS
1 POWER switch
Press this switch to switch the power on. Press it again to
switch the power off.
2 Remote control sensor
Receives signals from a remote control transmitter provided
with a YAMAHA amplifier or receiver.
3 RDS MODE/FREQ button
When an RDS station is received, pressing this button changes
the display mode into the PS mode, PTY mode, RT mode
and/or CT mode (if the station employs those RDS data
services), and frequency display in turn.
4 PTY SEEK MODE button
When this button is pressed, the unit turns into the PTY SEEK
mode.
5 PTY SEEK START button
Press this button to begin searching for a station after the
desired program type is selected in the PTY SEEK mode.
6 EON button
Press this button to select a desired program type (NEWS,
INFO, AFFAIRS, SPORT) when you want to call a radio
program of that program type automatically.
7 KEY MODE/EDIT button
Whenever this button is pressed, “PRESET” appears and
disappears on the display alternately. This is for switching the
function of the PRESET STATIONS (TUNING) DOWN/UP
buttons.
This button is also used to exchange the places of two preset
stations with each other.
8 MEMORY (MAN’L/AUTO FM) button
When this button is pressed, the MEMO indicator flashes for
about 5 seconds. During this period, select a desired preset
station number by using the A/B/C/D/E button and the
PRESET STATIONS DOWN or UP button, and then press this
button again to enter the displayed station into the memory.
When this button is pressed and held for about 3 seconds, the
automatic preset tuning begins. (Refer to page 13 for details.)
9 TUNING MODE (AUTO/MAN’L MONO) button
Press this button to switch the tuning mode to automatic or
manual. To select the automatic tuning mode, press this
button so that “AUTO” lights up on the display. To select the
manual tuning mode, press this button so that “AUTO” goes
off.
0 FM/AM button
Press this button to switch the reception band to FM or AM.
A A/B/C/D/E button
Press this button to select a desired group (A–E) of preset
stations.
B PRESET STATIONS DOWN and UP buttons
When this unit is in the preset tuning mode, these buttons are
used for selecting a preset station number. Pressing the “UP”
button. Selects a higher preset station number and pressing
the “DOWN” button selects a lower preset station number.
TUNING DOWN and UP buttons
When this unit is in normal tuning mode, these buttons are
used for tuning search. Press the “UP” button to tune in to
higher frequencies, and press the “DOWN” button to tune in to
lower frequencies.
PTY SELECTOR buttons
When this unit is in the PTY SEEK mode, pressing these
buttons changes the currently selected program type.
C Display panel
Shows station frequencies and various information. (Refer to
the next page for details.)
7
 Loading...