

Page 1

QUICK REFERENCE GUIDE
GUIDE DE REFERENCE PRATIQUE
KURZANLEITUNG
English...........................1
Français.........................9
Deutsch .......................17
Page 2
QUICK REFERENCE GUIDE
English
PURPOSE
This guide is intended as a quick reference
to the major functions on your D5000. For
detailed information, refer to the D5000
Operating Manual.
CONTENTS
Selecting a Program (RECALL) ............................... 1
Editing a Program ....................................................2
Saving a Program (STORE) ...................................... 3
Setting the Input Mode (Stereo or Mono) ................ 4
Displaying the Delay Tempo .................................. 5
FREEZE .................................................................... 6
REPEAT DELAY .......................................................8
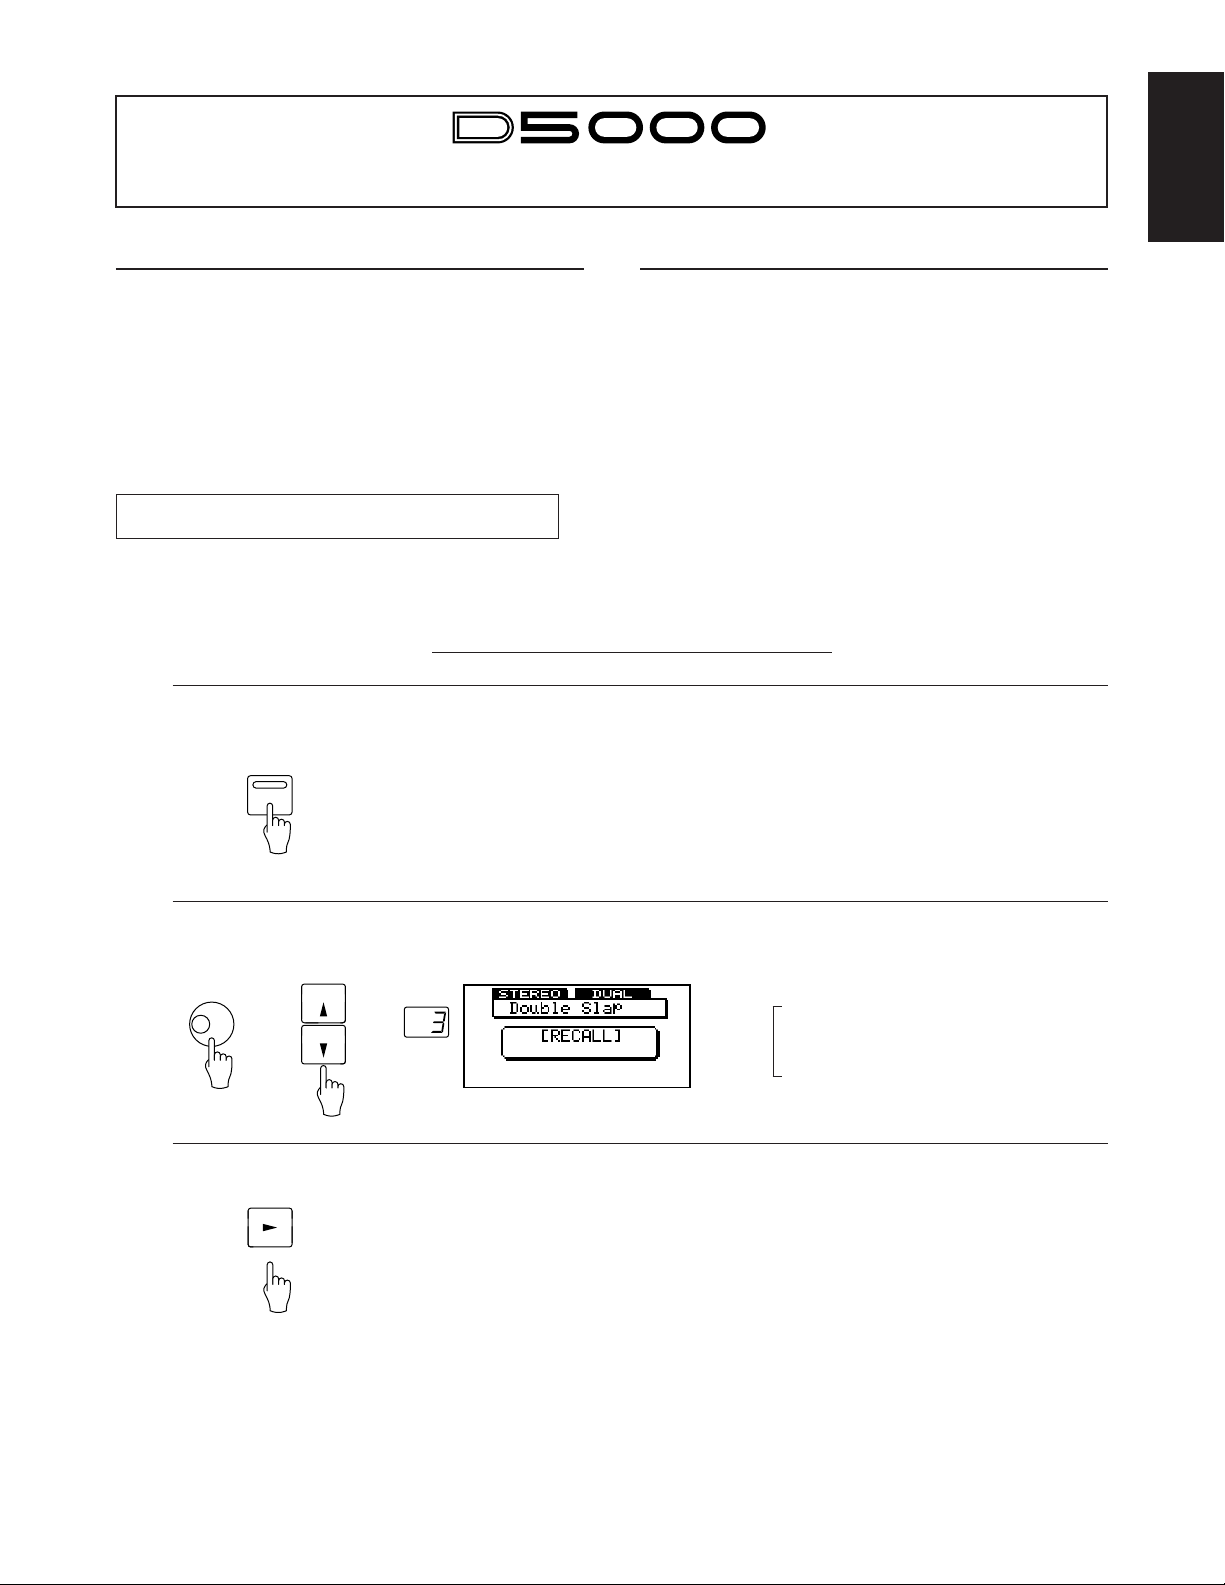
Selecting a Program (RECALL)
Use the RECALL function to select and load one of the D5000’s 100 user programs.
When selecting a program, make sure that the program type suits your objectives.
Example: Calling Program #3, “Double Slap”
Press [PROGRAM].
1
PROGRAM
Use the cursor keys or DATA ENTRY dial to select
the program.
2
DATA ENTRY
or
PROGRAM
Press [RECALL].
3
RECALL
★ If you have made changes to the current program and have not yet
saved them to memory, the LCD will display the “Are you sure?”
prompt when you first press [RECALL]. Press [RECALL] once
again to proceed with the recall (erasing the changes you have
made), or press any other key to abort.
← • Check that the program type is appropriate.
DUAL = Dual Delay
SINGLE = Single Delay
FREEZE = Freeze
S & H = Sample & Hold
1
Page 3
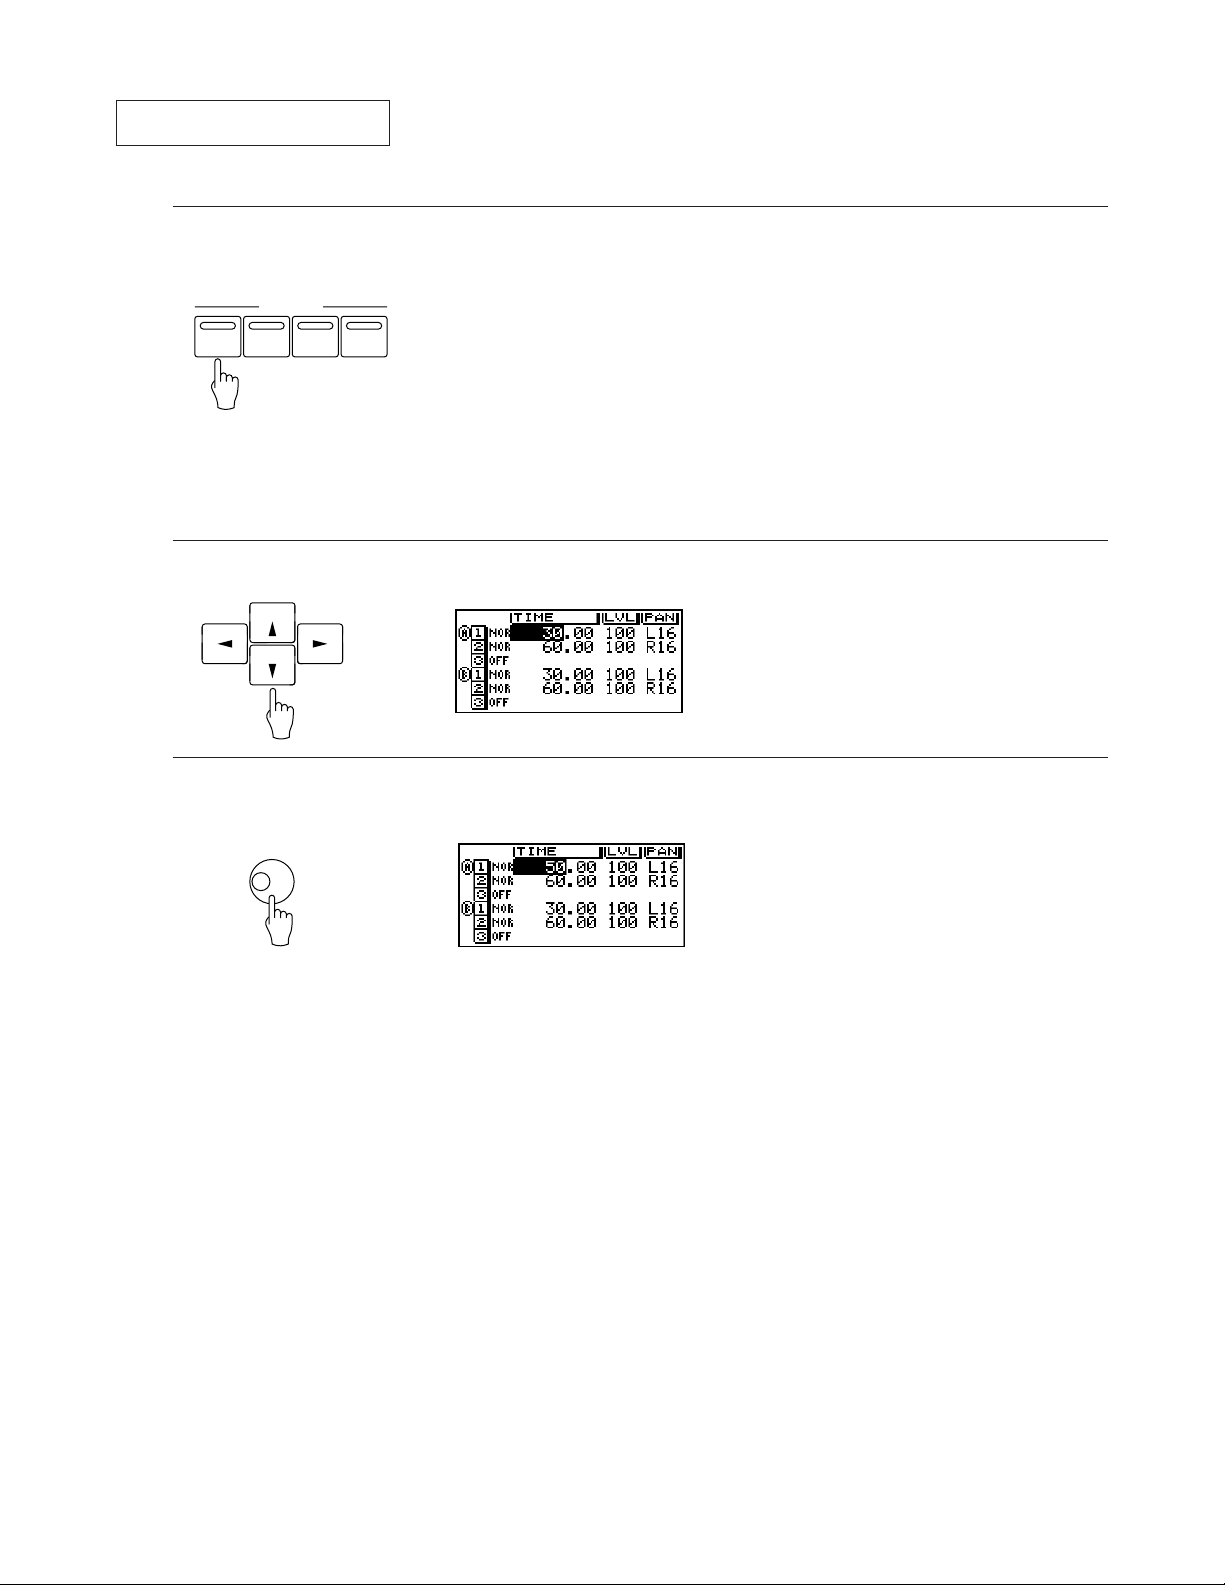
Editing a Program
Use the following procedure to edit the currently selected program.
Press the PARAMETER key corresponding to the
parameter(s) you wish to edit.
1
PARAMETER
DELAY FB MOD DUCK
★ Each press of the [DELAY] key displays a single page of the param-
eter list. Press the key as many times as necessary to advance to the
desired page.
Select the parameter you wish to change.
2
CURSOR
Use the DATA ENTRY dial to change the
parameter’s value.
3
DATA ENTRY
• If you are working with a Single or Dual delay pro-
gram, you can access parameters using any of the
four PARAMETER keys.
• If you are working with a Freeze or S&H program,
only the [DELAY] PARAMETER key is effective.
← • The cursor (reverse-video highlight) indicates
the currently selected parameter.
★ The [FB], [MOD], and [DUCK] keys also act as on/off toggles for
feedback, modulation, and duck functions. The first time you press
the key it returns the corresponding parameter list. Pressing the key
while the list is displayed will toggle the function ON or OFF.
2
Page 4
DATA ENTRY
or
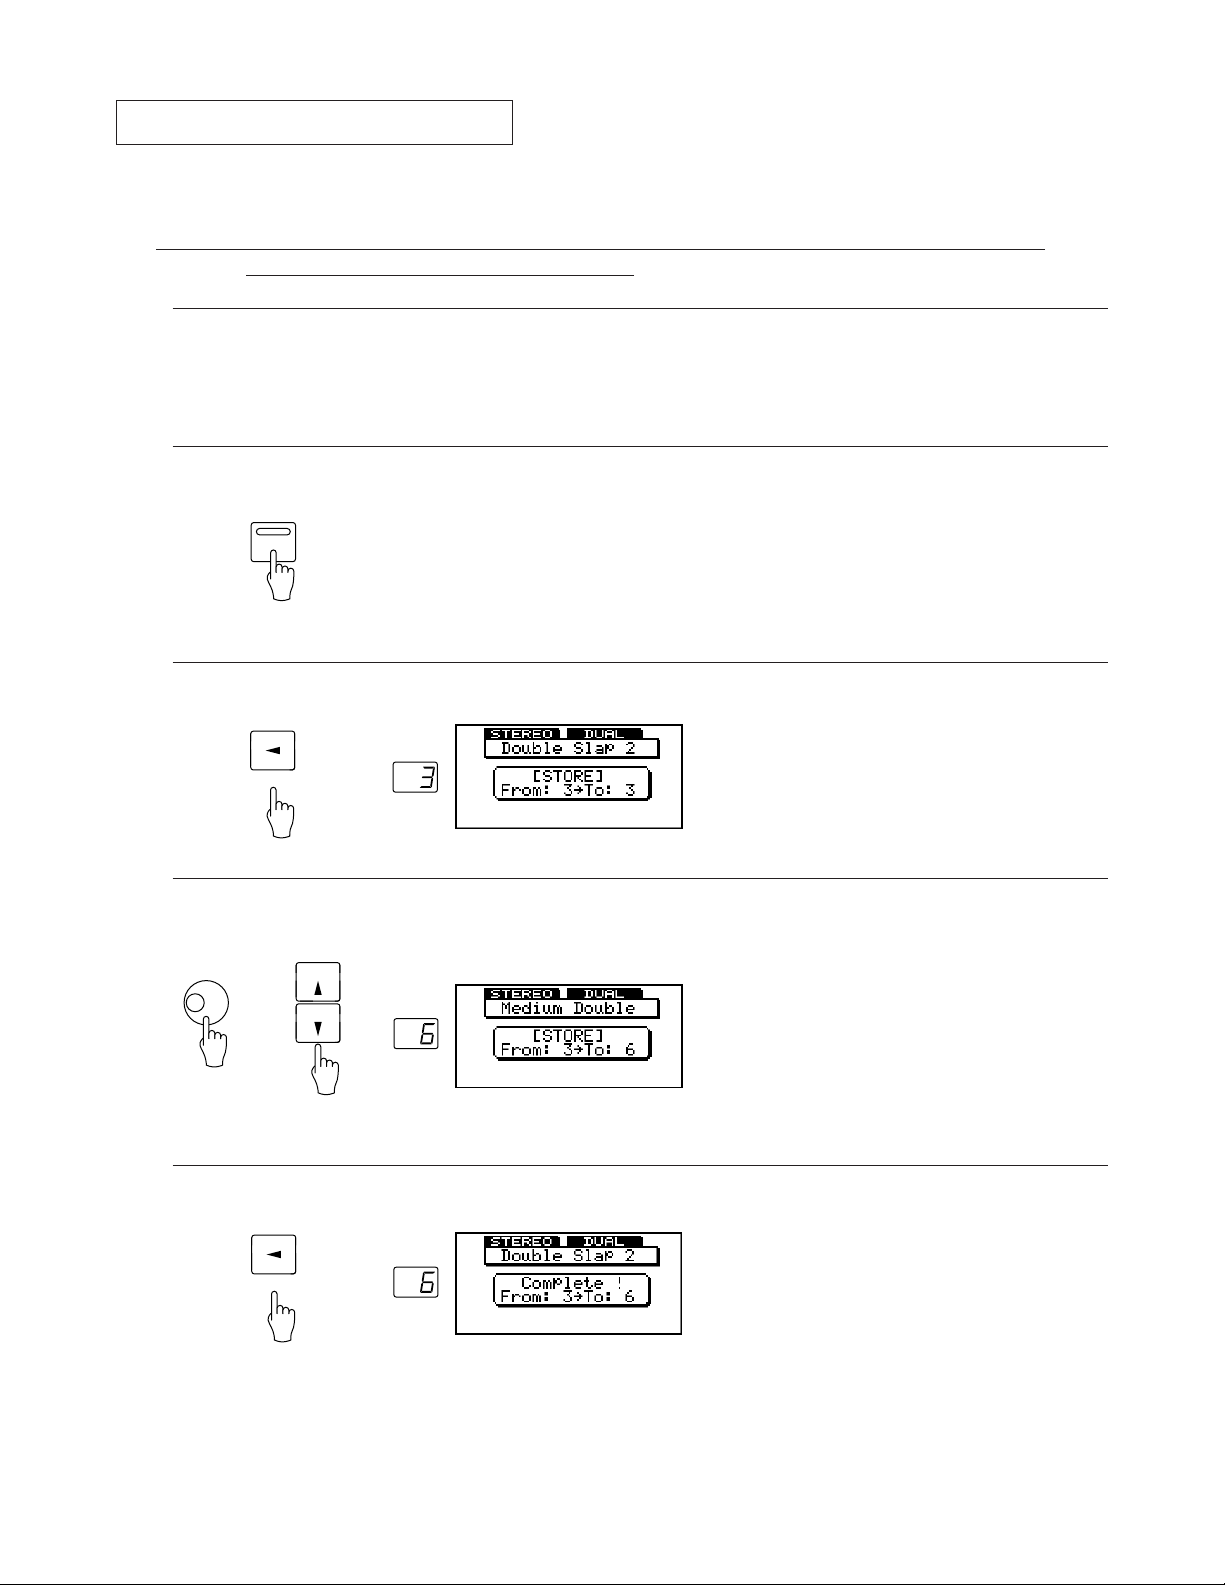
Saving a Program (STORE)
Use this function to store an edited program to memory. You can store the program into
any program number (1 to 100).
Example: You have edited Program #3 (“Double Slap”) and you want to store the edited results into
Program #6 under the title “Double Slap 2”.
Change the program title to “Double Slap 2”.
1
Press [DELAY] to advance to Page 3 of the parameter list, select TITLE, and change the title.
Press [PROGRAM].
2
PROGRAM
Press [STORE].
3
STORE
Select the program number for your edited program.
4
★ Step 3 and 4 can be carried out in either order.
Press [STORE].
PROGRAM
PROGRAM
5
STORE
PROGRAM
★ The store operation overwrites the program previously stored at the
selected program number. You can restore any of the original 100
programs (preset programs) at any time by using the Utility Mode's
PARAMETER COPY function.
3
Page 5

Setting the Input Mode (Stereo or Mono)
Use the following procedure to select stereo or monaural input for the current program.
Note that the selected mode is effective even when BYPASS is being used.
Press [DELAY] as many times as necessary to display one of the following screens.
1
<If you are working with a Single or Dual delay program:>
DELAY
<If you are working with a Freeze or S&H program:>
Move the cursor to “INPUT MODE” or “TRACK.”
2
CURSOR
Use the DATA ENTRY dial to select the input
3
mode.
DATA ENTRY
<If you are working with a Single or Dual delay program:>
<If you are working with a Freeze or S&H program:>
4
Page 6

Displaying the Delay Tempo
When working with a Single or Dual delay program, you can use the following procedure
to display the delay time in both tempo and notational form. You can then adjust the tempo
while referring to the display.
Press [DELAY] as many times as necessary to display the following screen.
1
DELAY
Move the cursor to “DISPLAY UNIT.”
2
CURSOR
Select TEMPO.
3
DATA ENTRY
Press [DELAY] twice to produce the following dis-
4
play.
DELAY
Use the DATA ENTRY dial or the [TRIGGER] key
5
to set the tempo.
DATA ENTRY
or
TRIGGER
• You can also set the tempo using the footswitch or a
MIDI clock.
• To set the tempo with the [TRIGGER] key, press the key two or more
times in succession at approximately the desired tempo. This D5000
responds by setting the tempo to the average interval between your
successive keypresses.
• The LED on the [TRIGGER] key flashes in sync with
the tempo.
5
Page 7

FREEZE
The FREEZE function allows you to digitally record a sound, then play it back as a repeating
loop. There are three recording modes. RECORD mode is for normal recording; OVERDUB
allows you to record new data over existing data; and CAPTURE retains the most recent 5.2
seconds (if stereo) or 10.4 seconds (if mono) of sound.
■ Recording
Select a Freeze program.
1
Press [DELAY].
2
DELAY
Set parameters as desired.
← • The FREEZE RECORD page appears.
3
Press [TRIGGER] or step on the footswitch to set the
D5000 into standby mode.
4
TRIGGER
★ This step is omitted if the mode is set to CAPTURE and the record-
ing method (AUTO/MAN) is MANUAL.
If MANUAL:
Press [TRIGGER] or step on the footswitch to start the
5
recording.
TRIGGER
If AUTO:
Recording starts automatically when the input signal is
received.
If recording mode is RECORD or OVERDUB:
6
Recording stops automatically when the maximum recordable length is reached.
← • Indicates the recording mode: REC READY,
OVERDUB READY, or CAPTURE READY.
← • Recording status
Shows the elapsed recording time in graphical
form.
If recording mode is CAPTURE:
Stop the recording by pressing [TRIGGER] (or stepping
on the footswitch) at any time after reaching maximum
recordable length. The D5000 will retain the final 5.2
seconds (10.4 seconds if mono) of received sound.
← • Recording status “OK” indicates that recording
has terminated.
TRIGGER
6
Page 8

■ Playback
Press [DELAY] to display the FREEZE PLAY page.
1
DELAY
Set parameters as desired.
2
If necessary, press [DELAY] once again and adjust
3
the parameters in the FREEZE PITCH page.
If replay mode is MOMENTARY:
Start playback by holding down the [TRIGGER]
4
key or footswitch. Playback continues until you
release the key (or footswitch).
← • FREEZE PLAY page
TRIGGER
If replay mode is CONTINU.:
Press the [TRIGGER] key or step on the footswitch
to start the playback. Playback continues through
the specified number of loops, then stops.
TRIGGER
You can terminate the replay before looping is finished by pressing [TRIGGER] one more time.
TRIGGER
• If you are controlling replay via MIDI, replay starts
upon receipt of a NOTE ON message, and continues
until receipt of a NOTE OFF message.
• If you are using MIDI, replay starts when a NOTE ON
message is received.
If replay mode is INPUT TRG:
Playback starts automatically when the input trigger is received, and continues through the designated number of loops.
★ You can execute replay while displaying any of the following pages:
FREEZE PLAY, FREEZE PITCH, or TITLE.
7
Page 9

REPEAT DELAY
This function sets all delay taps to equivalent intervals, allowing very easy setup of
multitap linear delay.
Select a Single or Dual delay program.
1
Press [UTILITY] as many times as necessary to display the REPEAT DELAY page.
2
DELAY
Set parameters as desired.
3
CURSOR
DATA ENTRY
and
Press [STORE].
4
★ You can view the time and level values for all taps by pressing the
STORE
[DELAY] key.
DELAY
8
Page 10

VT02100 R0 1 CR 94 10 500 CR
P.O.Box 1,Hamamatsu,Japan
Page 11

documentation manual, user maintenance, brochure, user reference, pdf manual
This file has been downloaded from:
User Manual and User Guide for many equipments like mobile phones, photo cameras, monther board, monitors, software, tv, dvd, and othes..
Manual users, user manuals, user guide manual, owners manual, instruction manual, manual owner, manual owner's, manual guide,
manual operation, operating manual, user's manual, operating instructions, manual operators, manual operator, manual product,
 Loading...