

Page 1
Make sure that your local AC mains voltage matches the voltage specified
on the name plate on the bottom panel. In some areas a voltage selector
may be provided on the bottom panel of the main keyboard unit near the
power cord. Make sure that the voltage selector is set for the voltage in your
area. The voltage selector is set at 240V when the unit is initially shipped.
To change the setting use a “minus” screwdriver to rotate the selector dial
so that the correct voltage appears next to the pointer on the panel.
IMPORTANT
Check your power supply
Page 2
SPECIAL MESSAGE SECTION
PRODUCT SAFETY MARKINGS: Yamaha electronic
products may have either labels similar to the graphics
shown below or molded/stamped facsimiles of these
graphics on the enclosure. The explanation of these
graphics appears on this page. Please observe all
cautions indicated on this page and those indicated in
the safety instruction section.
CAUTION
RISK OF ELECTRIC SHOCK
DO NOT OPEN
CAUTION: TO REDUCE THE RISK OF ELECTRIC SHOCK.
DO NOT REMOVE COVER (OR BACK).
NO USER-SERVICEABLE PARTS INSIDE.
REFER SERVICING TO QUALIFIED SERVICE PERSONNEL.
See bottom of Keyboard enclosure for graphic symbol markings
The exclamation point within the
equilateral triangle is intended to
alert the user to the presence of important operating and maintenance
(servicing) instructions in the
literature accompanying the product.
The lightning flash with arrowhead
symbol, within the equilateral triangle, is intended to alert the user to
the presence of uninsulated “dangerous voltage” within the product’s
enclosure that may be of sufficient
magnitude to constitute a risk of
electrical shock.
and the spirit of the law, we want you to be aware of
the following:
Battery Notice: This product MAY contain a small
non-rechargable battery which (if applicable) is
soldered in place. The average life span of this type of
battery is approximately five years. When replacement
becomes necessary, contact a qualified service
representative to perform the replacement.
Warning: Do not attempt to recharge, disassemble, or
incinerate this type of battery. Keep all batteries away
from children. Dispose of used batteries promptly and
as regulated by applicable laws. Note: In some areas,
the servicer is required by law to return the defective
parts. However, you do have the option of having the
servicer dispose of these parts for you.
Disposal Notice: Should this product become damaged
beyond repair, or for some reason its useful life is considered to be at an end, please observe all local, state,
and federal regulations that relate to the disposal of
products that contain lead, batteries, plastics, etc.
NOTICE: Service charges incurred due to lack of
knowledge relating to how a function or effect works
(when the unit is operating as designed) are not
covered by the manufacturer’s warranty, and are
therefore the owners responsibility. Please study this
manual carefully and consult your dealer before
requesting service.
NAME PLATE LOCATION: The graphic below indicates the location of the name plate. The model
number, serial number, power requirements, etc., are
located on this plate. You should record the model
IMPORTANT NOTICE: All Yamaha electronic products are tested and approved by an independent safety
testing laboratory in order that you may be sure that
when it is properly installed and used in its normal and
customary manner, all foreseeable risks have been
eliminated. DO NOT modify this unit or commission
others to do so unless specifically authorized by
Yamaha. Product performance and/or safety standards
may be diminished. Claims filed under the expressed
warranty may be denied if the unit is/has been
modified. Implied warranties may also be affected.
SPECIFICATIONS SUBJECT TO CHANGE: The
information contained in this manual is believed to be
correct at the time of printing. However, Yamaha
reserves the right to change or modify any of the
specifications without notice or obligation to update
existing units.
ENVIRONMENTAL ISSUES: Yamaha strives to produce products that are both user safe and
environmentally friendly. We sincerely believe that our
products and the production methods used to produce
them, meet these goals. In keeping with both the letter
92-469 1
number, serial number, and the date of purchase in the
spaces provided below and retain this manual as a
permanent record of your purchase.
Model _____________________________________
Serial No. __________________________________
Purchase Date ______________________________
Page 3
PRECAUTIONS
PLEASE READ CAREFULLY BEFORE PROCEEDING
* Please keep these precautions in a safe place for future reference.
WARNING
Always follow the basic precautions listed below to avoid the possibility of serious injury or even death from electrical shock,
short-circuiting, damages, fire or other hazards. These precautions include, but are not limited to, the following:
• Do not open the instrument or attempt to disassemble the internal parts or
modify them in any way. The instrument contains no user-serviceable parts.
If it should appear to be malfunctioning, discontinue use immediately and
have it inspected by qualified Yamaha service personnel.
• Do not expose the instrument to rain, use it near water or in damp or wet
conditions, or place containers on it containing liquids which might spill
into any openings.
• If the power cord or plug becomes frayed or damaged, or if there is a sudden
loss of sound during use of the instrument, or if any unusual smells or
CAUTION
Always follow the basic precautions listed below to avoid the possibility of physical injury to you or others, or damage to the
instrument or other property. These precautions include, but are not limited to, the following:
smoke should appear to be caused by it, immediately turn off the power
switch, disconnect the electric plug from the outlet, and have the instrument
inspected by qualified Yamaha service personnel.
• Only use the voltage specified as correct for the instrument. The required
voltage is printed on the name plate of the instrument.
• Before cleaning the instrument, always remove the electric plug from the
outlet. Never insert or remove an electric plug with wet hands.
• Check the electric plug periodically and remove any dirt or dust which may
have accumulated on it.
• Do not place the power cord near heat sources such as heaters or radiators,
and do not excessively bend or otherwise damage the cord, place heavy
objects on it, or place it in a position where anyone could walk on, trip over,
or roll anything over it.
• When removing the electric plug from the instrument or an outlet, always
hold the plug itself and not the cord. Pulling by the cord can damage it.
• Do not connect the instrument to an electrical outlet using a multiple-connector. Doing so can result in lower sound quality, or possibly cause overheating in the outlet.
• Remove the electric plug from the outlet when the instrument is not to be
used for extended periods of time, or during electrical storms.
• Before connecting the instrument to other electronic components, turn off
the power for all components. Before turning the power on or off for all
components, set all volume levels to minimum. Also, be sure to set the
volumes of all components at their minimum levels and gradually raise the
volume controls while playing the instrument to set the desired listening
level.
• Do not expose the instrument to excessive dust or vibrations, or extreme
cold or heat (such as in direct sunlight, near a heater, or in a car during the
day) to prevent the possibility of panel disfiguration or damage to the internal components.
• Do not use the instrument near other electrical products such as televisions,
radios, or speakers, since this might cause interference which can affect
proper operation of the other products.
• Do not place the instrument in an unstable position where it might accidentally fall over.
• Before moving the instrument, remove all connected cables.
• When cleaning the instrument, use a soft, dry or slightly damp cloth. Do not
use paint thinners, solvents, cleaning fluids, or chemical-impregnated wiping cloths. Also, do not place vinyl, plastic or rubber objects on the instrument, since this might discolor the panel or keyboard.
• Gently remove dust and dirt with a soft cloth. Do not wipe too hard since
small particles of dirt can scratch the instrument’s finish.
• Bumping the surface of the instrument with metal, porcelain, or other hard
objects can cause the finish to crack or peel. Use caution.
• Do not rest your weight on, or place heavy objects on the instrument, and do
not use excessive force on the buttons, switches or connectors.
• Take care that the key cover does not pinch your fingers, and do not insert a
finger or hand in the key cover gap.
• Never insert or drop paper or metallic or other objects between the slits of
the key cover and the keyboard. If this happens, immediately turn off the
power and remove the electric plug from the outlet and have the instrument
inspected by qualified Yamaha service personnel.
• Do not place the instrument against a wall (allow at least 3 cm/one-inch
from the wall), since this can cause inadequate air circulation, and possibly
result in the instrument overheating.
• Read carefully the attached documentation explaining the assembly process. Failure to assemble the instrument in the proper sequence might result in damage to the instrument or even injury.
• Do not operate the instrument for a long period of time at a high or uncomfortable volume level, since this can cause permanent hearing loss. If you
experience any hearing loss or ringing in the ears, consult a physician.
■USING THE BENCH (if included)
• Do not play carelessly with or stand on the bench. Using it as a tool or stepladder or for any other purpose might result in accident or injury.
• Only one person should sit on the bench at a time, in order to prevent the
possibility of accident or injury.
• Do not attempt to adjust the bench height while sitting on the bench, since
this can cause excessive force to be imposed on the adjustment mechanism, possibly resulting in damage to the mechanism or even injury.
• If the bench screws become loose due to extensive long-term use, tighten
them periodically using the included tool.
■SAVING USER DATA
• Save all data to an external device such as the Yamaha MIDI Data Filer MDF3,
in order to help prevent the loss of important data due to a malfunction or
user operating error.
Yamaha cannot be held responsible for damage caused by improper use or modifications to the instrument, or data that is lost or destroyed.
(1)B-6
Always turn the power off when the instrument is not in use.
CLP-955
3
Page 4
Introduction
Thank you for choosing a Yamaha Clavinova. Your Clavinova is a fine musical instrument that employs
advanced Yamaha music technology. With the proper care, your Clavinova will give you many years of
musical pleasure.
● The Clavinova CLP-955 digital piano offers unmatched sonic realism and natural grandpiano type playability with Yamaha’s original “AWM Dynamic Stereo Sampling” tone generation technology for rich, musical voices, and a special “Graded Hammer” keyboard which
provides graded key weight and response throughout the keyboard range. The grand piano
voices feature totally new samples painstakingly recorded from a full concert grand piano.
The GRAND PIANO 1 voice features multiple velocity-switched samples (Dynamic Sampling), a “Soundboard Reverb” effect which accurately simulates the resonance of a piano
soundboard, special “Sustain Samples” which recreate the unique resonance of an acoustic
grand piano’s soundboard and strings when the damper pedal is pressed, and “Key-off
Samples” that add the subtle sound produced when the keys are released.
● Dual mode allows 2 voices to be played simultaneously .
● Split mode allows different voices to be played by the left and right hands.
● Metronome feature with variable tempo facilitates practice.
● 2-track digital recorder lets you record and play back anything you play on the keyboard.
● MIDI compatibility and a range of MIDI functions make the Clavinova useful in a range of
advanced MIDI music systems.
● Built-in computer interface for direct connection to personal computers running advanced
music software.
In order to make the most of your Clavinova’s performance potential and features, we urge you to read
this Owner’s Manual thoroughly, and keep it in a safe place for later reference.
■ Trademarks
• Apple and Macintosh are trademarks of Apple Computer, Inc., registered in the U.S. and other
countries.
• IBM-PC/AT is a trademark of International Business Machines Corporation.
• Windows is the registered trademark of Microsoft® Corporation.
All other trademarks are the property of their respective holders.
Included Accessories
● Owner’s Manual
● Bench (included or optional depending on locale)
● “50 greats for the Clavinova” Score Collection
“The Clavinova-Computer Connection,” a document describing what you
can do with your Clavinova and a personal computer and how to set up a
Clavinova-Computer system is available online as a pdf document (in
English) at the following internet address:
Clavinova Home Page:
http://www.yamaha.co.jp/english/product/cl/
Manual Library (Electronic Musical Instruments and XG Related Products)
http://www2.yamaha.co.jp/manual/emi/index_e.html
(To use the Manual Library, you will need to register first. Then select
the Clavinovas [Digital Piano] category .)
CLP-955
4
○○○○○○○○○○○○○○○○○○○○○○○○○○○○○○○○○○○○○○○○○○○○○○○○○○○○○○○○
Page 5
Contents
The Control Panel ..........................................................6
Connections ................................................................... 8
Preparation ................................................................. 10
Selecting & Playing Voices .......................................... 11
Playing the Demonstration Tunes ................................ 12
■
Voice Demo..............................................................12
■
Preset Song .............................................................13
■
Preset Song A-B Repeat......................................... 14
■
Preset Song Part Cancel ........................................15
●
Synchro Start..................................................... 15
●
Left Pedal Start/Stop .........................................15
The Dual Mode ............................................................ 16
●
Other Dual Mode Functions............................... 16
The Split Mode ............................................................ 17
●
Selecting the Right and Left Voices...................17
●
Setting the Split Point ........................................17
●
Other Split Mode Functions ...............................17
Reverb ........................................................................ 18
●
Adjusting Reverb Depth.....................................18
The Effect .................................................................... 19
●
Adjusting Effect Depth.......................................19
Brilliance ..................................................................... 19
The Pedals................................................................... 20
●
Damper (Right) Pedal ........................................20
●
Sostenuto (Center) Pedal ..................................20
●
Soft (Left) Pedal.................................................20
Touch Sensitivity ......................................................... 21
Transposition ............................................................... 21
Tuning ......................................................................... 22
●
Tuning Up...........................................................22
●
Tuning Down ......................................................22
●
To Restore Standard Pitch.................................22
The Metronome & Tempo Control ................................ 23
■
The Metronome........................................................ 23
●
Metronome Time Signature ...............................23
●
Metronome Volume Function............................. 23
■
T empo Control .........................................................23
Using the User Song Recorder ..................................... 24
■
Recording ................................................................24
●
Changing the Initial Settings..............................25
●
Erasing a Single Track .......................................25
■
Playback...................................................................26
●
Synchro Start..................................................... 26
●
Left Pedal Start/Stop .........................................26
The Function Mode ...................................................... 27
●
To Select a Function …...................................... 27
■
F1: Tuning ................................................................28
■
F2: Scale ..................................................................28
F2.1: Scale ...........................................................28
F2.2: Base Note ...................................................28
■
F3: Dual Mode Functions .......................................29
F3.1: Dual Balance...............................................29
F3.2: Dual Detune ................................................29
F3.3: 1st Voice Octave Shift .................................29
F3.4: 2nd Voice Octave Shift ................................ 29
F3.5: 1st Voice Effect Depth .................................30
F3.6: 2nd Voice Effect Depth................................30
F3.7: Reset...........................................................30
■
F4: Split Mode Functions .......................................30
F4.1: Split Point ....................................................30
F4.2: Split Balance ...............................................30
F4.3: Right Voice Octave Shift.............................. 31
F4.4: Left Voice Octave Shift ................................ 31
F4.5: Right Voice Effect Depth.............................. 31
F4.6: Left Voice Effect Depth................................31
F4.7: Damper Range............................................31
F4.8: Reset...........................................................31
■
F5: Pedal Functions ................................................32
F5.1: Left Pedal Mode ..........................................32
F5.2: Sustain Sample Depth ................................32
■
F6: Metronome V olume ...........................................32
■
F7: Preset Song Part Cancel V olume..................... 32
■
F8: MIDI Functions ..................................................33
●
A Brief Introduction to MIDI ...............................33
F8.1: MIDI Transmit Channel Selection ................33
F8.2: MIDI Receive Channel Selection ................ 33
F8.3: Local Control ON/OFF ................................34
F8.4: Program Change ON/OFF ..........................34
F8.5: Control Change ON/OFF ............................35
F8.6: MIDI Transmit Transpose .............................35
F8.7: Panel/Status Transmit..................................35
F8.8: Bulk Data Dump ..........................................35
■
F9: Backup Functions.............................................36
F9.1: Voice............................................................36
F9.2: MIDI............................................................. 36
F9.3: Tuning.......................................................... 36
F9.4: Pedal ...........................................................36
Connecting to a Personal Computer ............................. 37
●
Connecting to an Apple Macintosh Series Computer
●
Connecting to an IBM-PC/AT Series Computer
●
Using a USB Interface (such as the Y amaha UX256)
....37
........38
....39
Factory Preset Recall .................................................. 40
Troubleshooting ........................................................... 40
Options & Expander Modules ...................................... 40
Voice Descriptions.............................................................41
Demo Song List..................................................................42
Factory Setting List............................................................42
MIDI Data Format................................................................43
MIDI Implementation Chart ...............................................47
Keyboard Stand Assembly................................................ 48
Specifications.....................................................................56
○○○○○○○○○○○○○○○○○○○○○○○○○○○○○○○○○○○○○○○○○○○○○○○○○○○○○○○○
CLP-955
5
Page 6
The Control Panel
MAX
MIN
BRILLIANCE
BRIGHT
MELLOW
4
5
DEMO
TRANS POSE
MASTER VOLUME
23
BRILLIANCE
MASTER VOLUME
C1 D1 E1 F1 G1 A1 B1 C2 D2 E2 F2 G2 A2 B2 C3 D3 E3 F3 G3 A3 B3 C4 D4 E4 F4 G4 A4 B4 C5 D5 E5 F5 G5 A5 B5 C6
B0A0G0F0E0D0C0B-1A-1
Tuning keys (See page 17)
PHONES Jacks (Bottom Panel)
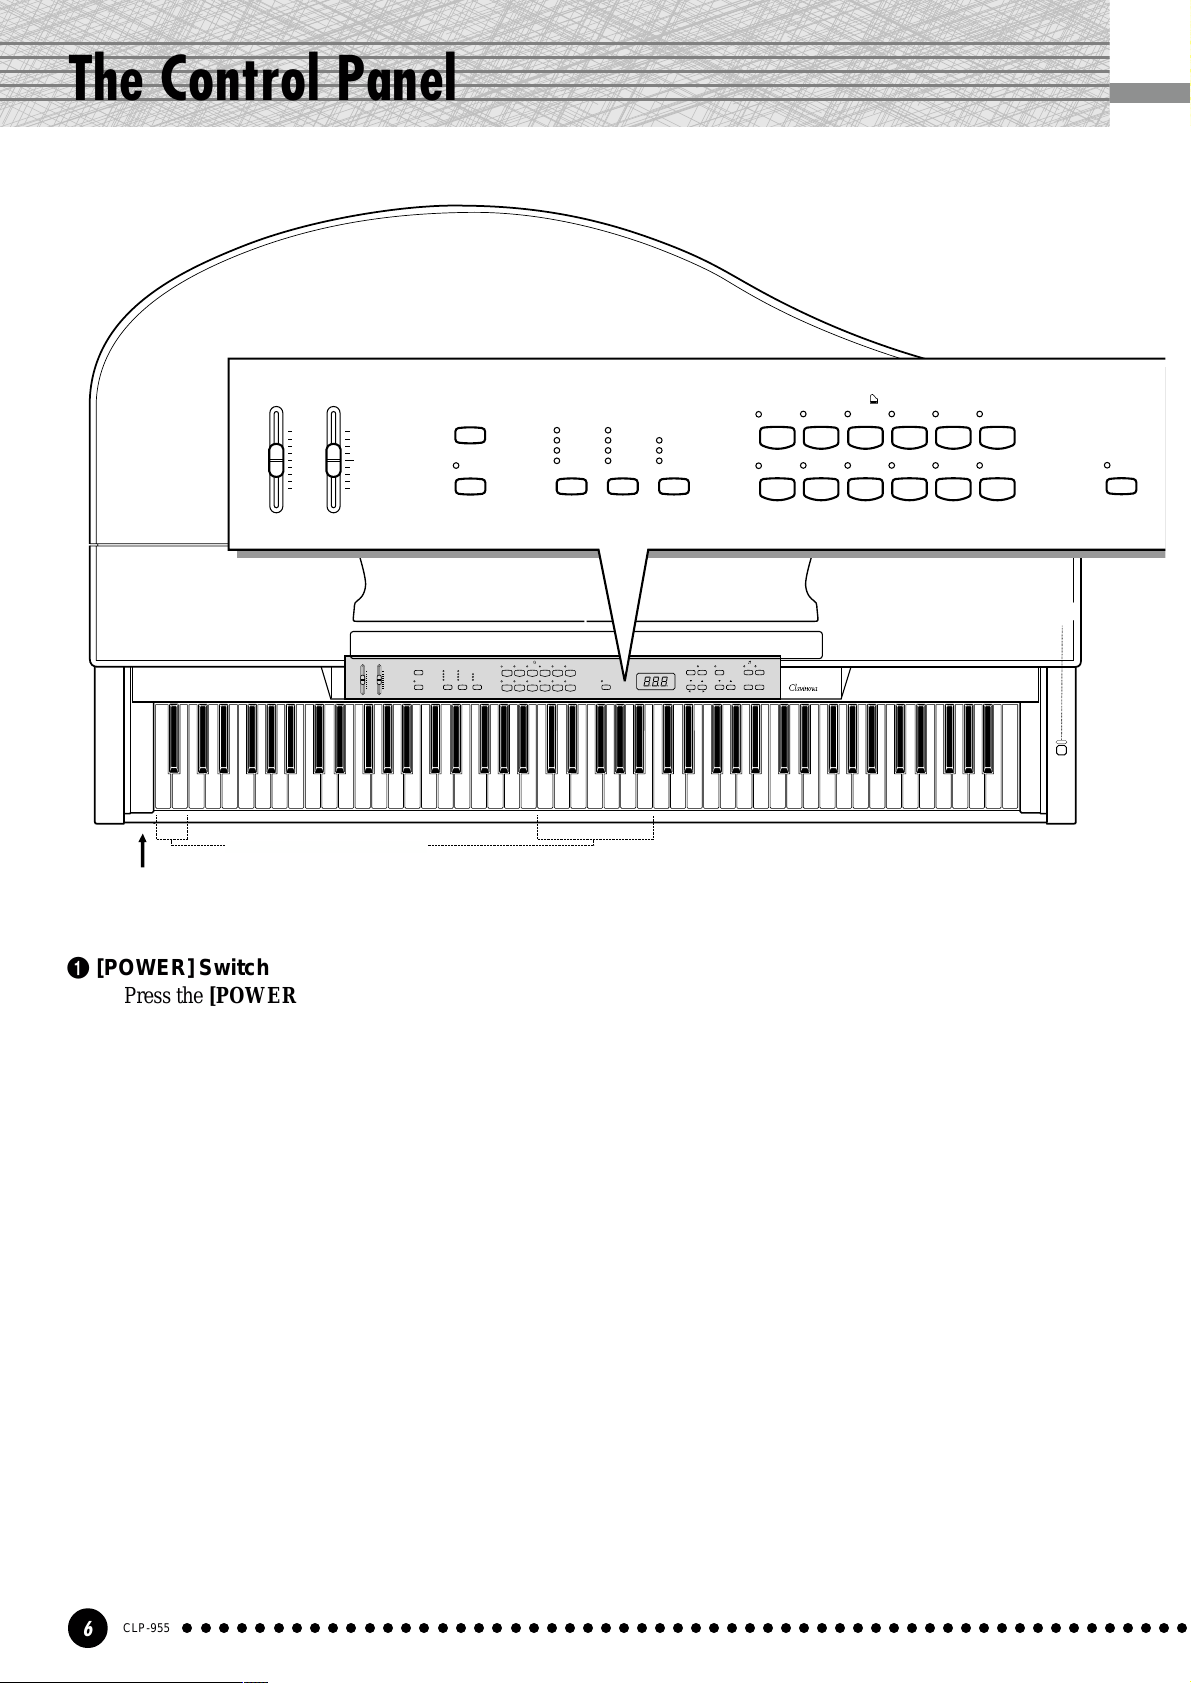
1 [POWER] Switch
Press the [POWER] switch once to turn the
power ON, a second time to turn the power OFF.
When the power is initially turned ON, a voice
selector LED will light, and the power indicator
located below the left end of the keyboard will light.
2 [MASTER VOLUME] Control
The [MASTER VOLUME] control adjusts the
volume (level) of sound produced by the Clavinova’s
internal stereo sound system. The [MASTER
VOLUME] control also adjusts headphone volume
when a pair of headphones is plugged into the
PHONES jack (page 10).
3 [BRILLIANCE] Control
The [BRILLIANCE] Control adjusts the tonality
or “timbre” of the output sound from a mellow tone
to a bright tone.
4 [DEMO] Button
Activates the demo playback mode in which you
can select playback of different demonstration
DEMO
TOUCH
REVERB
MAX
BRIGHT
MIN
MELLOW
EFFECT
ROOM
CHORUS
HALL 1
HARD
SYMPHONIC
HALL 2
MEDIUM
TREMOLO
STAGE
SOFT
DELAY
TRANS POSE
REVERB
ROOM
HALL 1
HALL 2
STAGE
EFFECT
CHORUS
PHASER
TREMOLO
DELAY
TOUCH
HARD
MEDIUM
SOFT
GRAND
PIANO 1
CHURCH
ORGAN
GRAND
PIANO 2
JAZZ
ORGAN
E. PIANO
1
STRINGS
E. PIANO2HARPSI-
CHOIR WOOD
CHORD
BASS
VIBRA-
PHONE
E. BASS
VOICE
678 9 0
VOICE
E. PIANO1GRAND
E. PIANO2HARPSI-
GRAND
PIANO 1
CHURCH
ORGAN
VIBRA-
PIANO 2
CHORD
PHONE
CHOIR WOOD
STRINGS
JAZZ
ORGAN
SPLIT
E. BASS
BASS
TEMPO/FUNCTION/SONG
METRONOME
FUNCTION
sequences for each of the Clavinova’s voices. See
page 12 for details.
5 [TRANSPOSE] Button
The [TRANSPOSE] button allows access to the
Clavinova’s TRANSPOSE function (to shift the
pitch of the entire keyboard up or down in semitone
intervals).
6 [REVERB] Button
The [REVERB] button selects a number of
digital reverb effects that you can use for extra depth
and expressive power. See page 18 for details.
7 [EFFECT] Button
This button selects a number of effects which can
give your sound greater depth and animation.
8 [TOUCH] Button
The [TOUCH] button makes it easy to adjust the
touch response of the Clavinova to match your
playing style. See page 21 for details.
SONG
FUNC-
TRACK1TRACK
PRESET
TION
TEMPO
2
SONG
START
/
SONG
REC
STOP
SELECT
–
/ NO+ / YES
CLP-
955
D6 E6 F6 G6 A6 B6 C7
SPLIT
1
POWER
CLP-955
6
○○○○○○○○○○○○○○○○○○○○○○○○○○○○○○○○○○○○○○○○○○○○○○○○○○○○○○○○
Page 7
The Control Panel
&
SONG
TRACK1TRACK
START
/
REC
STOP
^
TEMPO/FUNCTION/SONG
!# $
METRO-
NOME
FUNC-
TEMPO
FUNCTION
@
TION
PRESET
SONG
SELECT
–
/ NO+ / YES
%
SONG
9 V oice Selectors
Simply press any of the voice selectors to select
the corresponding voice. The voice selector LED
will light to indicate which voice is currently selected.
There is also a dual mode in which two voices
can be played simultaneously across the full range of
the keyboard (see page 16 for details), and a split
mode which allows different voices to be played by
the left and right hands (see page 17 for details).
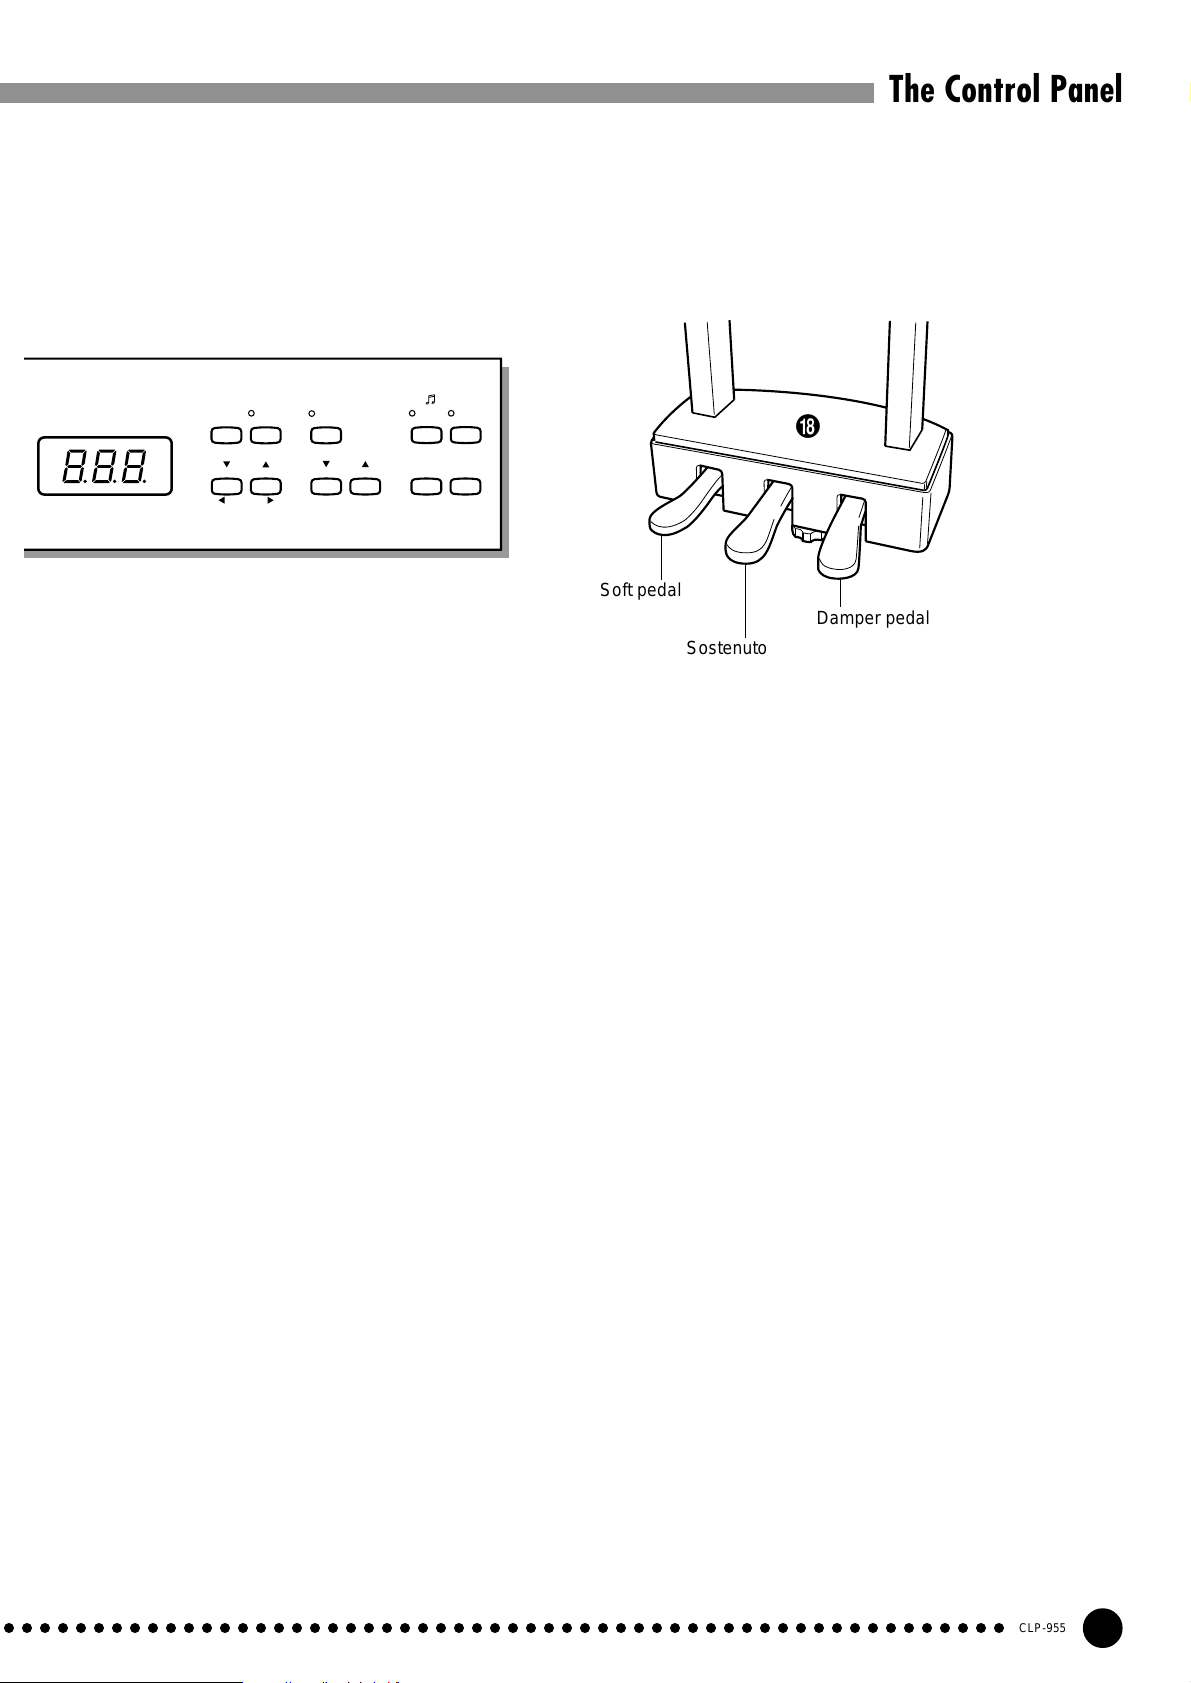
2
Soft pedal
Sostenuto pedal
*
Damper pedal
# [FUNCTION] Button
This button accesses a range of utility functions
— including the MIDI functions — that significantly
enhance versatility and playability. See page 27 for
details.
$ [PRESET SONG] Button
This button enters the preset song mode. While in
this mode you can use the [–/NO] and [+/YES]
buttons to select from 50 songs.
0 [SPLIT] Button
Engages the split mode, in which different voices
can be played on the left- and right-hand sections of
the keyboard. See page 17 for details.
! [METRONOME] Button
Turns the metronome sound on and off. The
[TEMPO ▼, ▲] buttons are used to set the tempo
of the metronome sound. The [–/NO] and [+/YES]
buttons are used to change the time signature (beat)
of the metronome if used while the [METRO-
NOME] button is held — page 23.
<<
@ [TEMPO ▼, ▲ (FUNCTION
>>
<,
>) Buttons
<<
>>
These buttons adjust the tempo of the metronome
function as well as the playback tempo of the recorder function. The tempo range is from 32 to 280
beats per minute — page 23. These same buttons are
also used to select functions — page 27.
○○○○○○○○○○○○○○○○○○○○○○○○○○○○○○○○○○○○○○○○○○○○○○○○○○○○○○○○
% [SONG SELECT ▼, ▲] (–/NO, +/YES) Buttons
These buttons select a preset song number for
playback, and are also used to adjust a range of other
parameters.
^ SONG [START/STOP] and [REC] Buttons
These buttons control the Clavinova’s user song
recorder, letting you record and play back just about
anything you play on the keyboard.
& TRACK [1] and [2] Buttons
The Clavinova has a 2-track recorder, and these
buttons are used to select the track(s) to be recorded
or played back. See page 24 for details.
* Pedals
The soft (left), sostenuto (center) and damper
(right) pedals provide a range of expressive control
capabilities similar to the pedal functions on an
acoustic piano. See page 20 for details.
CLP-955
7
Page 8
Connections
CAUTION
Bottom Panel
RL
AUX OUT
12 3 4
Stereo System
• Before connecting the Clavinova to other electronic components, turn off the power for all components. Before turning the power on or off for all components, set all-volume levels to minimum.
MIDI
MIDI
Mac
RL
/
/
L+R
AUX IN
L+R
TO HOST HOST SELECT
PC-1 PC-2
INOUTTHRU
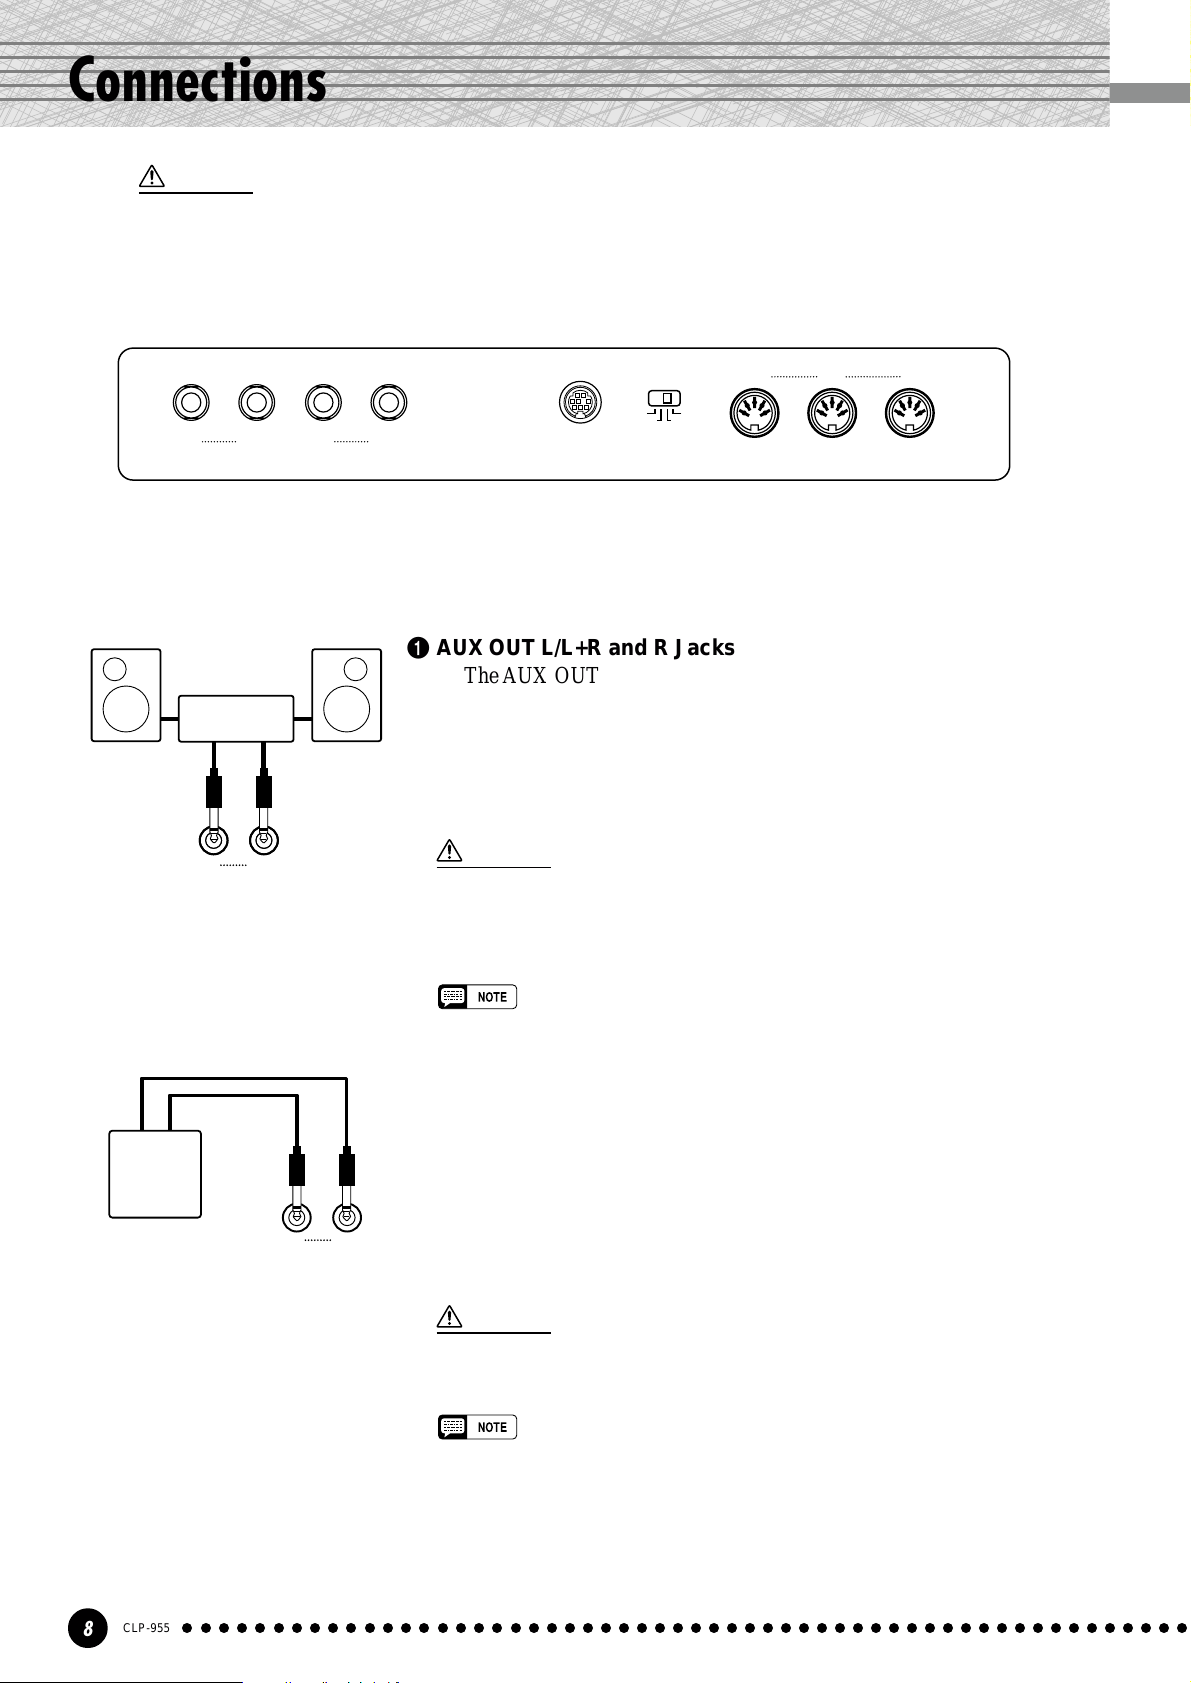
1 AUX OUT L/L+R and R Jacks
The AUX OUT L/L+R and R jacks deliver the output of the Clavinova
for connection to an instrument amplifier, mixing console, PA system, or
recording equipment. If you will be connecting the Clavinova to a monaural
sound system, use only the L/L+R jack. When a plug is inserted into the L/
L+R jack only, the left- and right-channel signals are combined and delivered via the L/L+R jack so you don’t lose any of the Clavinova’s sound.
DOU-10
/
L+R
RL
AUX OUT
/
L+R
RL
AUX IN
CAUTION
• When the Clavinova’s AUX OUT jacks are connected to an external sound system,
first turn the Clavinova power on, and then the power to the external amplifier/
speaker system. Reverse this order when turning the power off.
• The AUX OUT jack signal must never be returned to the AUX IN jacks, either directly
or through external equipment.
• The AUX OUT jack signal is not controlled by the Clavinova’s volume or
brilliance control. Use the volume control on the external audio equipment to
adjust the level.
2 AUX IN L/L+R and R Jacks
These jacks are intended for use with an external tone generator module
such as the Yamaha DOU-10 Disk Orchestra Unit. The stereo outputs from
the external tone generator module are connected to the AUX IN L/L+R
and R jacks, allowing the sound of the tone generator to be reproduced via
the Clavinova’s internal sound system and speakers. A line-level mono
source can be connected to the L/L+R jack.
CAUTION
• When the Clavinova’s AUX IN jacks are connected to an external source, first turn the
power to the external device on, and then the power to the Clavinova. Reverse this
order when turning the power off.
• The input signal from the AUX IN jacks is controlled by the Clavinova’s volume
and brilliance controls. Reverb and effect functions will have no affect.
• The input signal from the AUX IN jacks is delivered to the AUX OUT jacks.
CLP-955
8
○○○○○○○○○○○○○○○○○○○○○○○○○○○○○○○○○○○○○○○○○○○○○○○○○○○○○○○○
Page 9
Personal Computer
MIDIMac
PC-2PC-1
HOST SELECTTO HOST
Connections
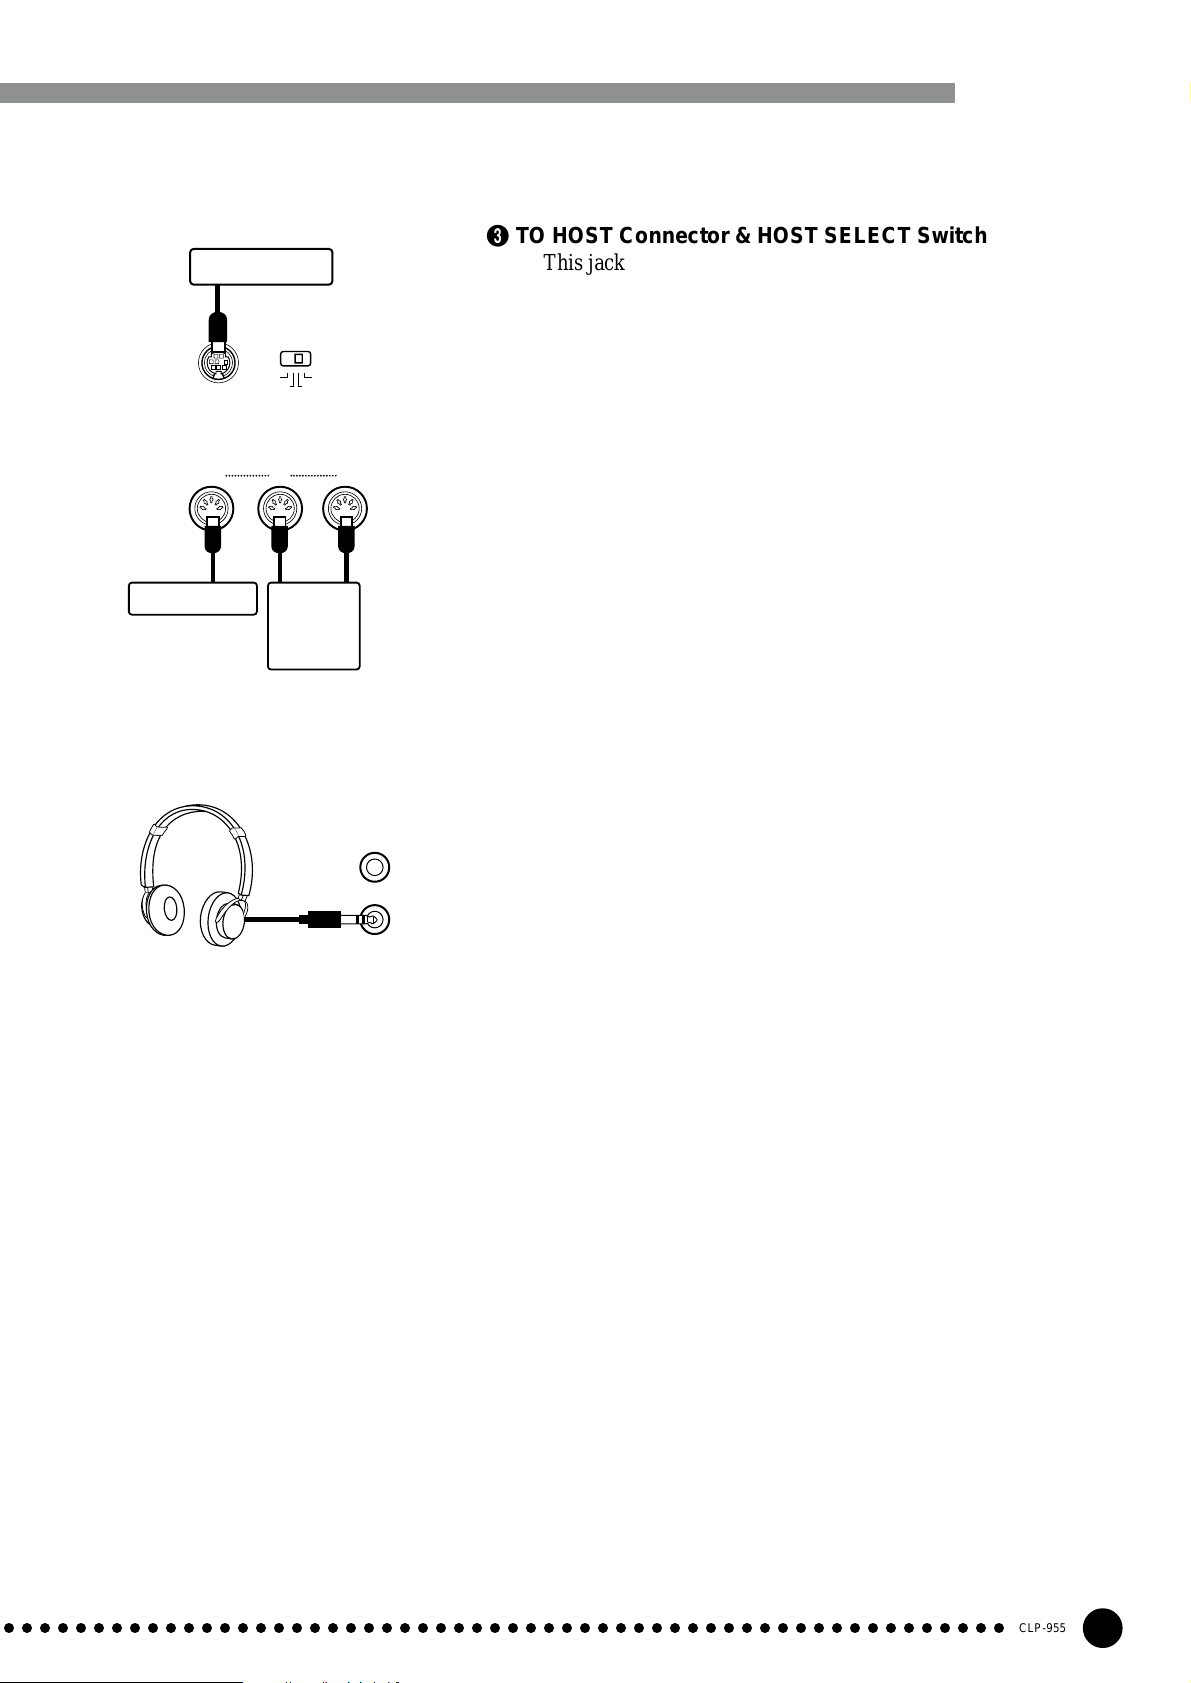
3 TO HOST Connector & HOST SELECT Switch
This jack and selector switch allow direct connection to a personal computer for sequencing and other music applications —
without the need for a separate MIDI interface. See page 37 for
details.
T one Generator
MIDI
DOU-10
INOUTTHRU
The MIDI IN connector receives MIDI data from an external
MIDI device (such as the DOU-10 Disk Orchestra Unit) which can
be used to control the Clavinova. The MIDI THRU connector retransmits any data received at the MIDI IN connector, allowing
“chaining” of several MIDI instruments or other devices. The MIDI
OUT connector transmits MIDI data generated by the Clavinova
(e.g. note and velocity data produced by playing the Clavinova
keyboard).
More details on MIDI are given in “MIDI Functions” on page 33.
4 MIDI IN, THRU and OUT Connectors
● PHONES Jacks
(Bottom Panel)
Two sets of standard stereo headphones can be plugged in here
for private practice or late-night playing. The internal speaker
system is automatically shut off when a pair of headphones is
plugged into either of the PHONES jacks.
○○○○○○○○○○○○○○○○○○○○○○○○○○○○○○○○○○○○○○○○○○○○○○○○○○○○○○○○
CLP-955
9
Page 10
Preparation
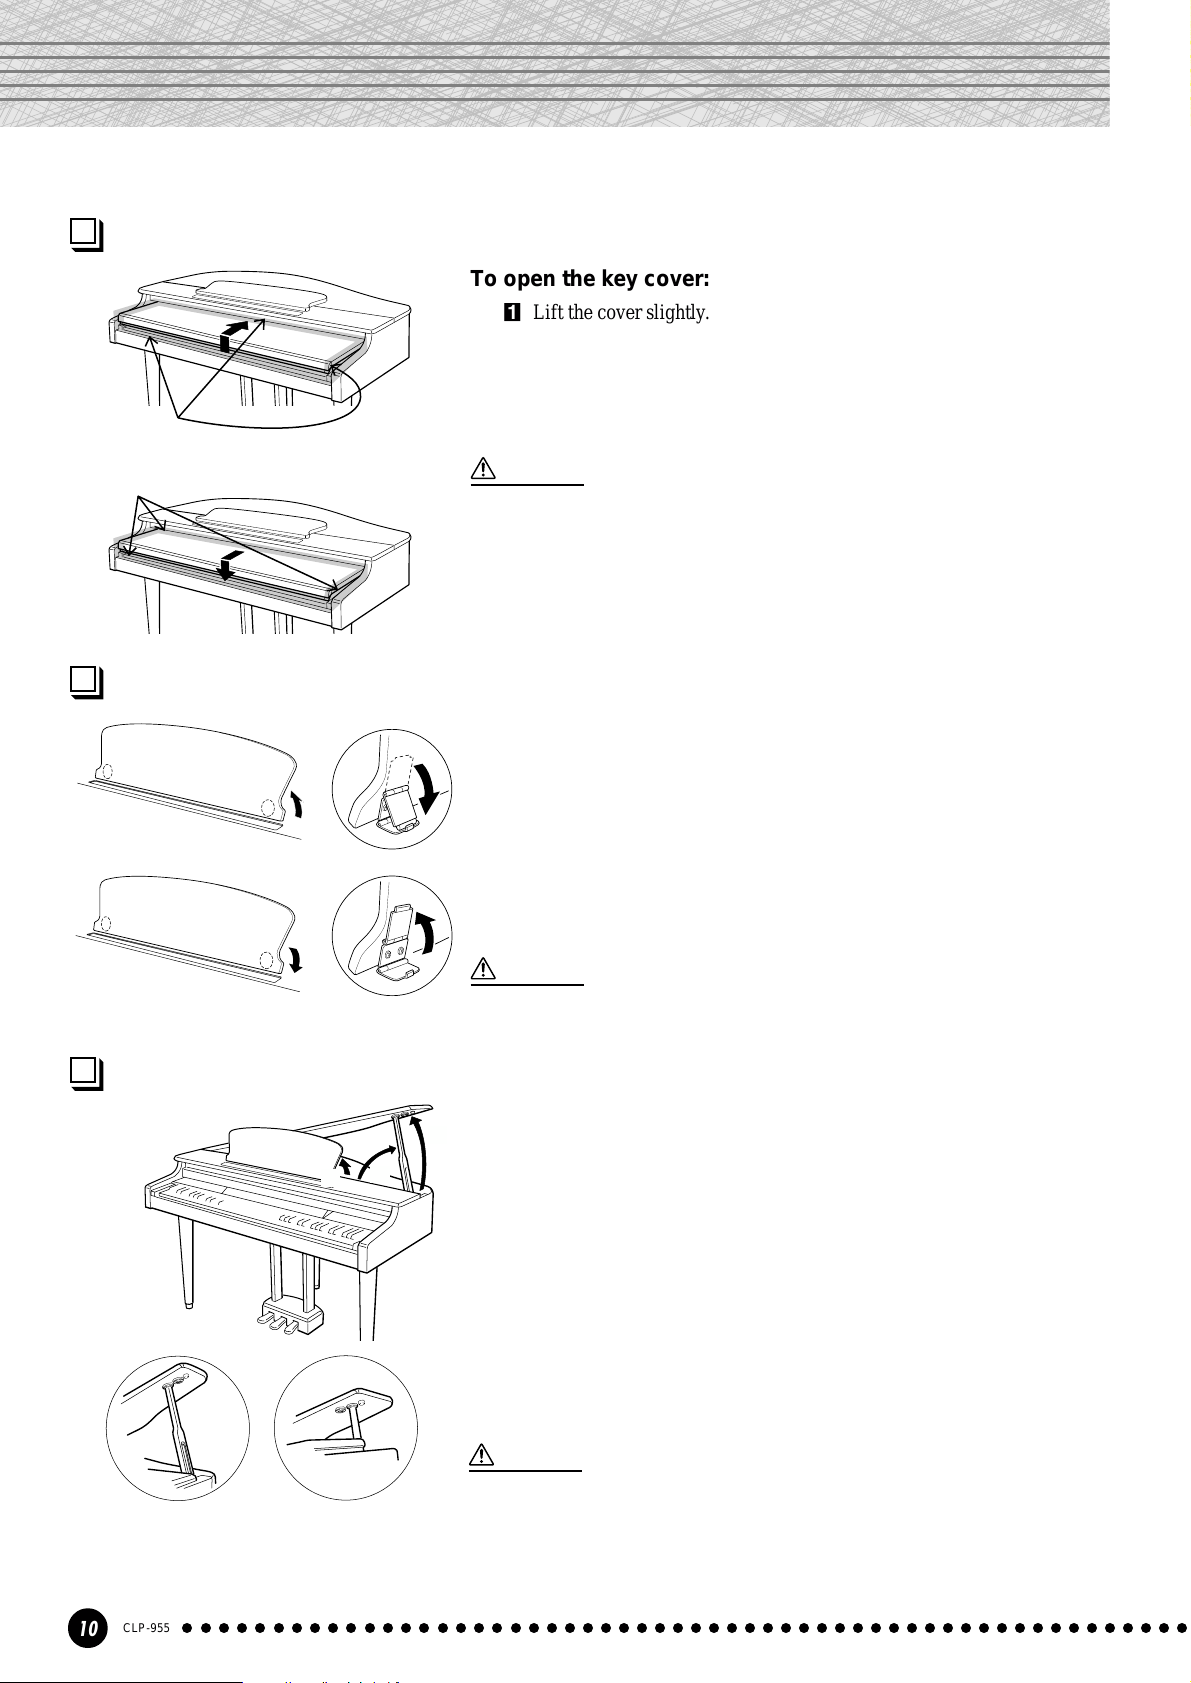
Key Cover............................................................................................................................................................................................
To open the key cover:
Z Lift the cover slightly.
X Slide the cover open.
To close the key cover:
Z Slide the cover toward you.
Be careful to avoid catching your fingers
when opening or closing the cover.
X Gently lower the cover over the keys.
CAUTION
• Hold the cover with both hands when moving it, and do not release it until it is
fully opened or closed. Be careful to avoid catching fingers (yours or others)
between the cover and main unit.
• Do not place objects on top of the key cover. Small objects placed on the key
cover may fall inside the main unit when the cover is opened and may not be
able to be removed. This could cause electric shock, short circuit, fire or other
serious damage to the instrument.
Music Stand......................................................................................................................................................................................
To raise the music stand:
Z Pull the stand up and toward yourself as far as it will go.
X Flip down the two metal supports at the left and the right on the rear of
the music stand.
C Lower the music stand so that it rests on the metal supports.
To lower the music stand:
Z Pull the music stand toward yourself as far as it will go.
X Raise the two metal supports (at the rear of the stand).
C Gently lower the music stand backward until it is all the way down.
CAUTION
• Do not try to use the music stand in a half-raised position.
When lowering the stand, do not release your hands from the music stand until it
is all the way down.
Opening and Closing the Lid.........................................................................................................................................
When Opening:
Z
X
C
Z
Raise the music stand as described in “The Music Stand”, above.
X Raise and hold the right side of the lid (viewed from the keyboard end
of the instrument).
C Raise the lid stay and carefully lower the lid so that the end of the stay
fits into the recess in the lid.
The lid can be opened to two positions. To open to the high position, use
the inner recess, to open to the low position, use the outer recess.
10
High Position
CLP-955
○○○○○○○○○○○○○○○○○○○○○○○○○○○○○○○○○○○○○○○○○○○○○○○○○○○○○○○○
Low Position
When Closing:
Z Holding the lid stay, lift the lid so that the lid stay clears the recess,
then carefully fold the lid stay and close the lid.
X Refer to the instructions on “The Music Stand” and lower the music
stand.
CAUTION
• Make sure that the end of the stay fits securely in the lid recess and make sure
the correct recess is used when opening to the high or low positions. If the stay
is not properly seated in the recess, the lid may fall resulting in damage or injury.
• Be careful that you or others do not bump the stay while the lid is raised. The stay
may be bumped out of the lid recess causing the lid to fall.
• Be careful not to catch your fingers when raising or lowering the lid.
Page 11
Selecting & Playing Voices
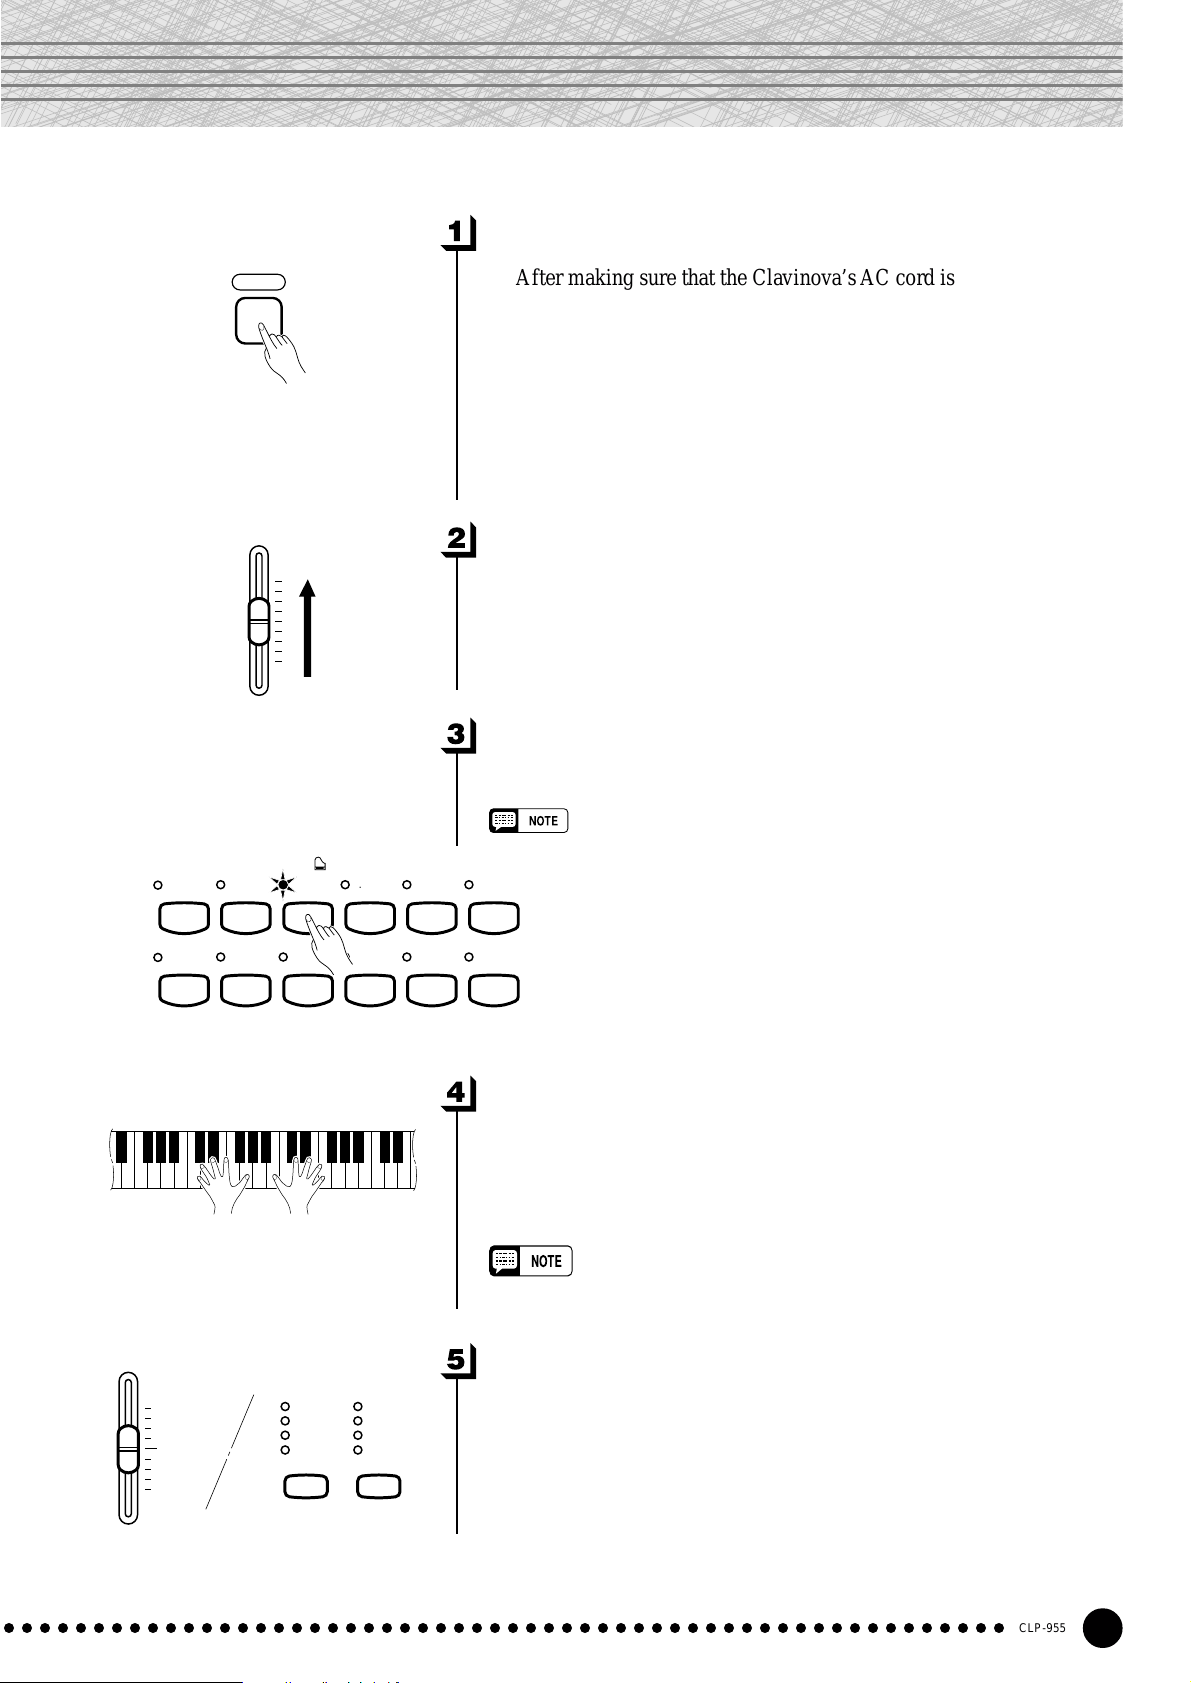
T urn Power On...................................................................................................
POWER
MASTER VOLUME
MAX
MIN
After making sure that the Clavinova’s AC cord is properly plugged
into the Clavinova itself and plugged into a convenient AC wall outlet,
press the [POWER] switch located to the right of the keyboard to turn
the power ON. In some areas a plug adaptor may be provided to match
the pin configuration of the AC wall outlets in your area.
When the power is turned ON, one of the voice selector LEDs will
light, and the power indicator located below the left end of the keyboard
will light.
Set the V olume..................................................................................................
Initially set the [MASTER VOLUME] control about half way
between the “MIN” and “MAX” settings. Then, when you start playing,
re-adjust the [MASTER VOLUME] control for the most comfortable
listening level.
Select a V oice.....................................................................................................
Select the desired voice by pressing one of the voice selectors.
• See “Voice Descriptions” on page 41.
BRILLIANCE
GRAND
PIANO 1
CHURCH
ORGAN
BRIGHT
GRAND
PIANO 2
JAZZ
ORGAN
E. PIANO
1
STRINGS
REVERB
ROOM
HALL 1
HALL 2
STAGE
VOICE
E. PIANO2HARPSI-
CHOIR WOOD
EFFECT
CHORUS
PHASER
TREMOLO
DELAY
CHORD
BASS
VIBRA-
PHONE
E. BASS
Play................................................................................................................................
The Clavinova also offers keyboard touch response, so the volume
and timbre of notes played can be controlled according to how “hard”
you play the keys. The amount of variation available depends on the
selected voice.
• Some voices do not have keyboard touch response. See “Voice Descriptions” on page 41 for details.
Add Effects As Required.......................................................................
You can add or change reverb, effects and brilliance as desired by
using the [REVERB] button (page 18), [EFFECT] button (page 19)
and the [BRILLIANCE] control (page 19).
MELLOW
○○○○○○○○○○○○○○○○○○○○○○○○○○○○○○○○○○○○○○○○○○○○○○○○○○○○○○○○
CLP-955
11
Page 12
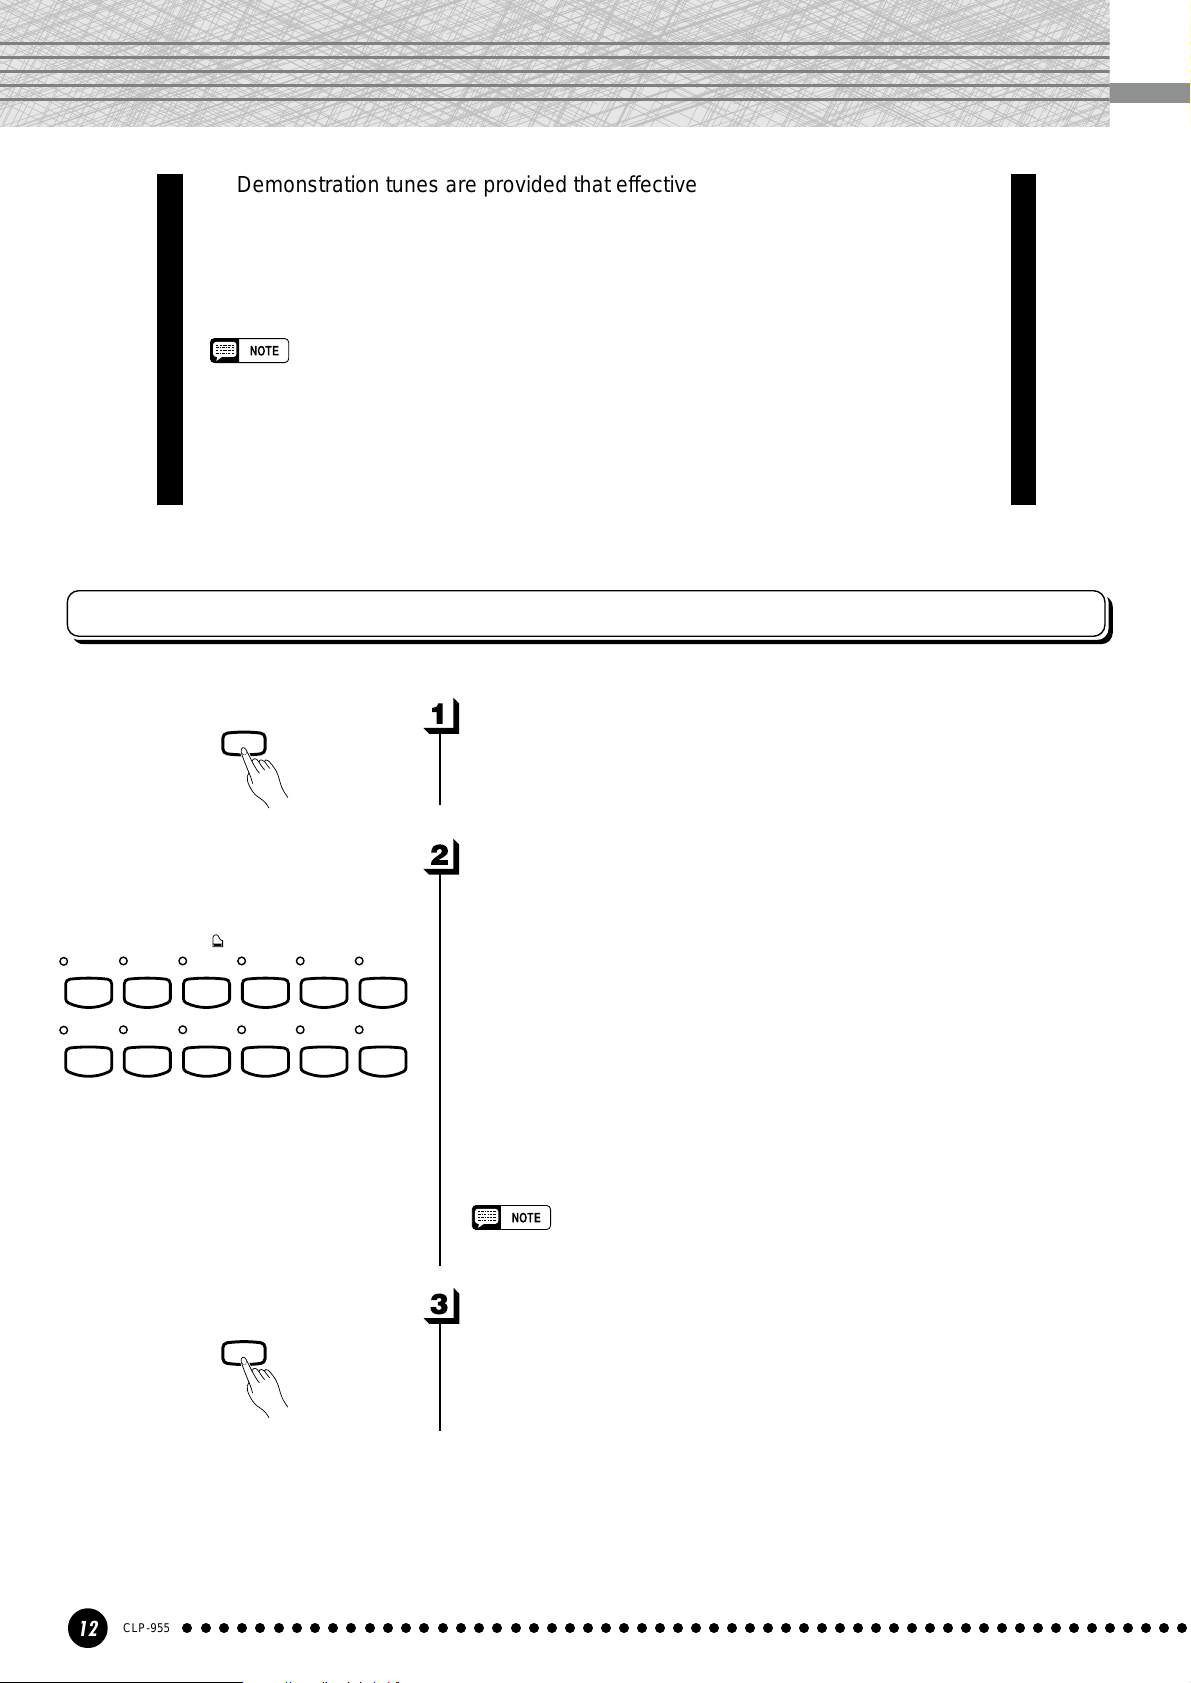
Playing the Demonstration Tunes
Demonstration tunes are provided that effectively demonstrate each of the
Clavinova’s voices. There are also 50 preset songs that you can play individually,
all in sequence, or in random order. The “50 greats for the Clavinova” score
collection provided with the Clavinova includes the written scores for all 50
preset songs. Here’s how you can select and play the demo tunes.
• The demo or preset song mode cannot be engaged while a user song recorder (page 24) is in
use.
• No MIDI reception occurs in the demo/preset song mode.
• The demo/preset song data is not transmitted via the MIDI connectors.
* See page 42 for a complete listing of the demo tunes.
Voice Demo
GRAND
PIANO 1
CHURCH
ORGAN
GRAND
PIANO 2
JAZZ
ORGAN
E. PIANO
1
STRINGS
DEMO
VOICE
E. PIANO2HARPSI-
CHOIR WOOD
CHORD
BASS
VIBRA-
PHONE
E. BASS
Engage the Demo Mode .........................................................................
Press the [DEMO] button to engage the demo mode — the voice
selector indicators will flash in sequence.
Play a V oice Demo.........................................................................................
Press one of the voice selectors to start playback of all songs starting
from the corresponding voice demo tune — featuring the voice normally selected by that voice selector button. (If you press the SONG
[START/STOP] button instead of a voice selector button, the GRAND
PIANO 1 demo tune will begin playback.) The indicator of the selected
voice selector button will flash during playback, and “- - -” will appear
on the LED display. You can start playback of any other voice demo
tune during playback by simply pressing the corresponding voice
selector. You can stop playback at any time by pressing the SONG
[START/STOP] button or the voice selector of the currently playing
demo.
• Use the [MASTER VOLUME] control to adjust the volume and the
[BRILLIANCE] control to adjust the brilliance (page 19).
DEMO
12
CLP-955
○○○○○○○○○○○○○○○○○○○○○○○○○○○○○○○○○○○○○○○○○○○○○○○○○○○○○○○○
Exit From the Demo Mode....................................................................
Press the [DEMO] button to exit from the demo mode and return to
the normal play mode.
Page 13
Playing the Demonstration Tunes
Preset Song
PRESET
SONG
PRESET
SONG
SONG
SELECT
–
/ NO+ / YES
TRACK1TRACK
TRACK1TRACK
START
STOP
TEMPO/FUNCTION/SONG
SONG
SONG
/
REC
2
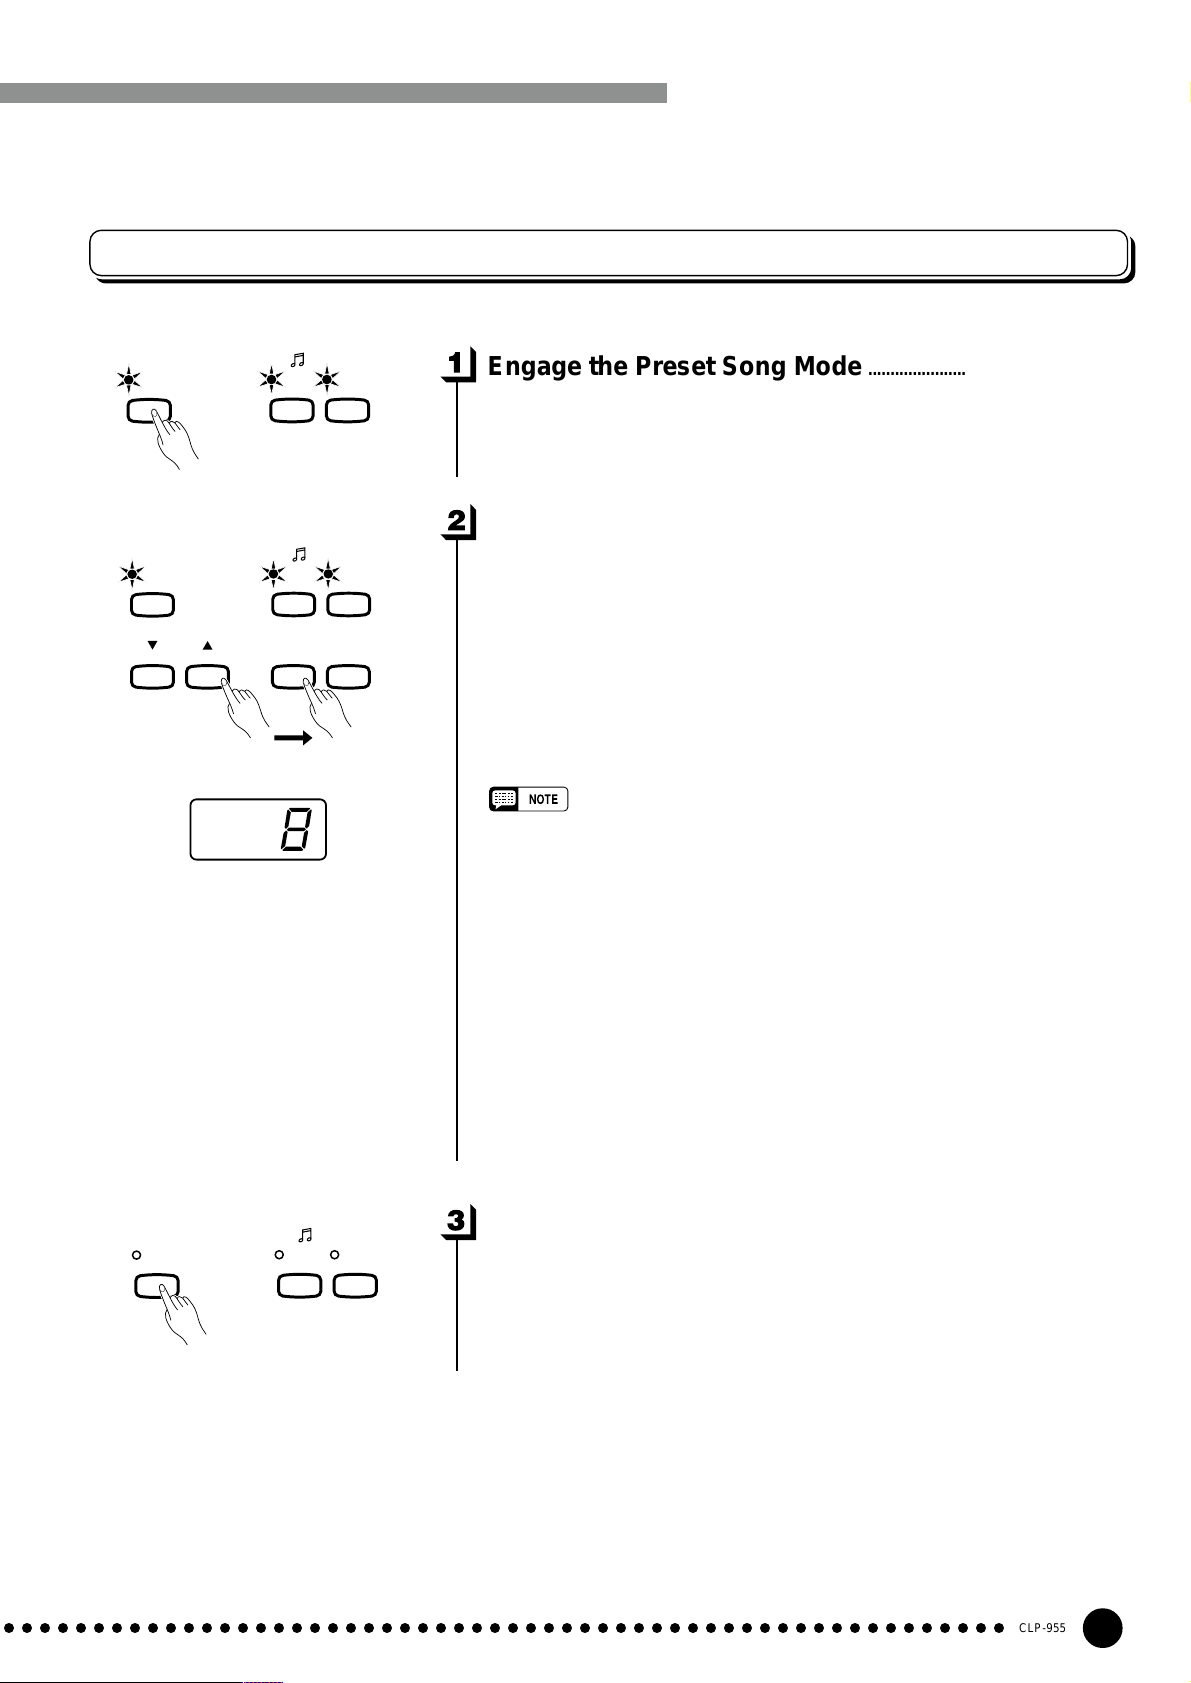
Press the [PRESET SONG] button to engage the preset song mode
— the [PRESET SONG], TRACK [1] and [2] indicators will light.
Play a Preset Song.......................................................................................
Engage the Preset Song Mode .......................................................
2
To play any of the 50 preset songs provided, use the [SONG SELECT
▼, ▲] buttons to select the number of the tune y ou want to play (the number
will appear on the LED display), then press the SONG [START/STOP]
button. Playback will stop automatically when playback of the selected preset
song has finished.
Select “ALL” instead of a number to play all preset songs in sequence, or
select “rnd” to continuously play all preset songs in random order. Press
the SONG [START/STOP] button to stop playback.
• Use the [MASTER VOLUME] control to adjust the volume.
• You can set the metronome to sound during playback (see page 23).
• You can use the [TEMPO
required. This produces a relative tempo variation, with a range from “-50”
through “- - -” to “50” at maximum; the range will differ depending on the
selected song.
• The default tempo “- - -” is automatically selected whenever a new preset
song is selected, or playback of a new preset song begins during “
rnd
” playback.
“
• You can play the keyboard along with the preset song playback. The voice
playing on the keyboard can be changed.
• You can change the Brilliance control and Reverb type that is applied to
the voice you play on the keyboard and for the preset song playback. Y ou
can change the Effect type and Touch sensitivity that is applied to the
voice you play on the keyboard. When a new preset song is selected or a
new preset song is automatically started in continuous play , the HALL 1
reverb type will automatically be selected.
▼,▲
] buttons to adjust the playback tempo as
ALL
” or
Exit From the Preset Song Mode..................................................
Press the [PRESET SONG] button to exit from the preset song mode,
PRESET
SONG
SONG
TRACK1TRACK
2
the indicator will go off, and return to the normal play mode.
○○○○○○○○○○○○○○○○○○○○○○○○○○○○○○○○○○○○○○○○○○○○○○○○○○○○○○○○
CLP-955
13
Page 14
Playing the Demonstration Tunes
Preset Song A-B Repeat
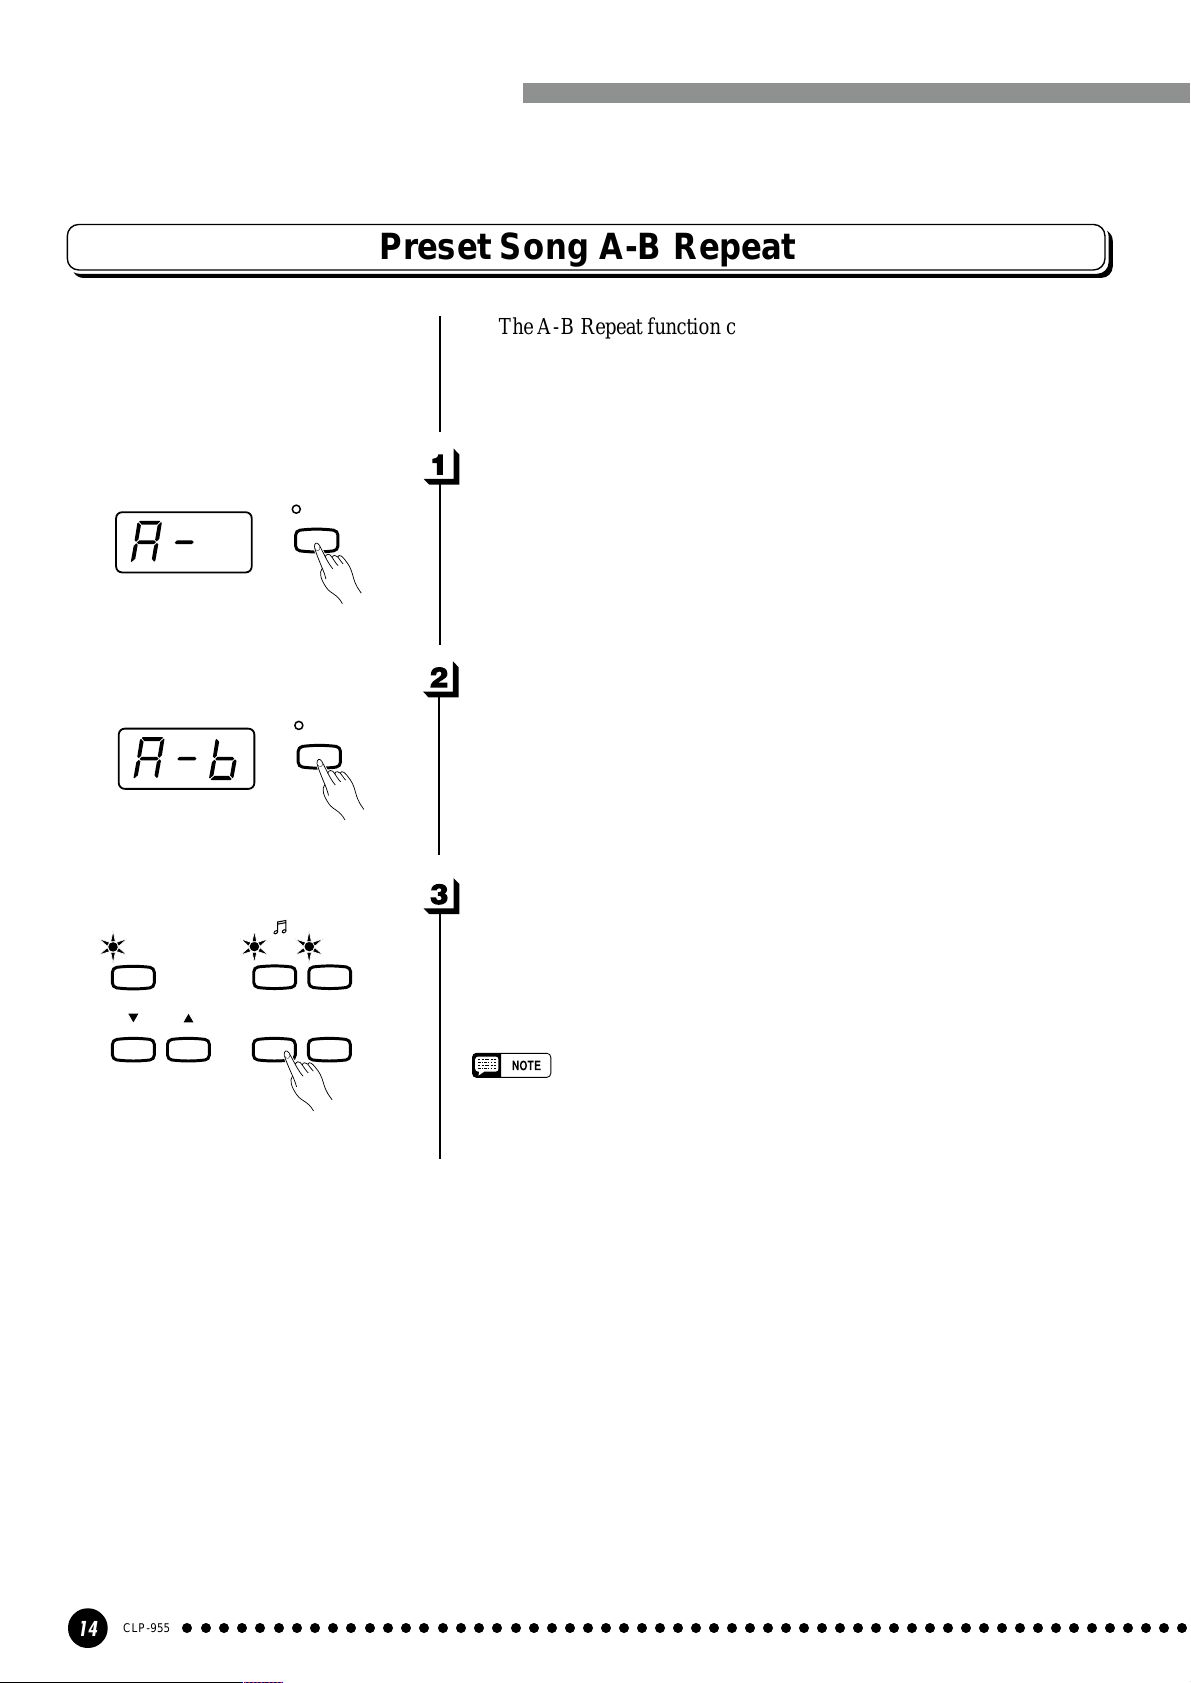
specified phrase within a preset song. Combined with the Part Cancel
function described below, this provides an excellent way to practice
difficult phrases.
The A-B Repeat function can be used to continuously repeat a
TEMPO/FUNCTION/SONG
TEMPO/FUNCTION/SONG
PRESET
SONG
SONG
SELECT
FUNC-
TION
FUNC-
TION
SONG
TRACK1TRACK
START
/
REC
STOP
Specify the Beginning (A) of the Phrase..............................
Select and play a preset song, then press the [FUNCTION] button
at the beginning of the phrase you want to repeat. This sets the “A”
point (“A-” will appear on the display).
To set the “A” point at the very beginning of the song, press the
[FUNCTION] button before starting playback.
Specify the End (B) of the Phrase ...............................................
Press the [FUNCTION] button a second time at the end of the
phrase. This sets the “B” point (“A-b” will appear on the display). At
this point repeat playback will begin between the specified A and B
points. The metronome will sound when playback begins to give you a
tempo reference.
Stop Playback....................................................................................................
2
Press the SONG [START/STOP] button to stop playback while
retaining the specified A and B points. A-B repeat playback will resume
if the SONG [START/STOP] button is then pressed again.
To cancel the A and B points press the [FUNCTION] button once.
14
–
/ NO+ / YES
CLP-955
• The A and B points are automatically canceled when a new song is
selected.
• The A-B Repeat function cannot be used during “
○○○○○○○○○○○○○○○○○○○○○○○○○○○○○○○○○○○○○○○○○○○○○○○○○○○○○○○○
ALL
” or “
rnd
” playback.
Page 15
Playing the Demonstration Tunes
Preset Song Part Cancel
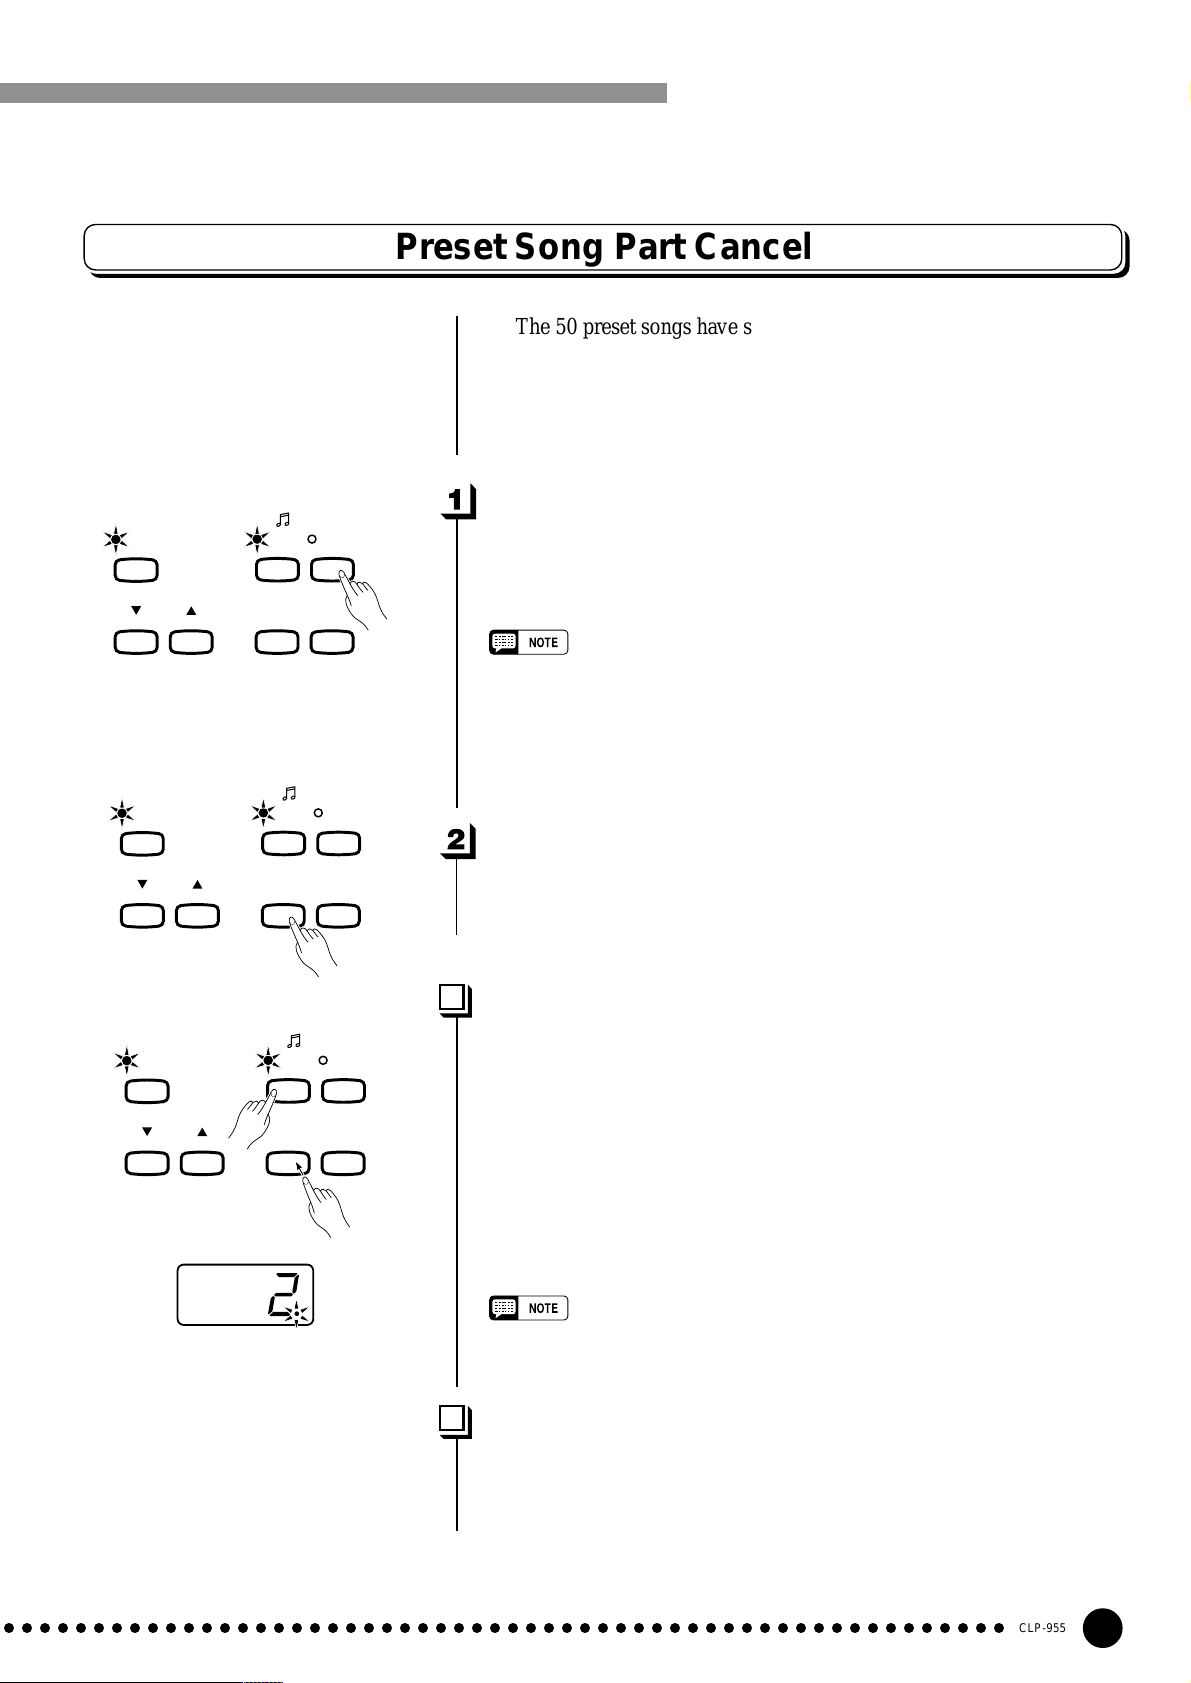
The 50 preset songs have separate left- and right-hand parts that can
be turned on and off as required so you can practice the corresponding
part on the keyboard. The right-hand part is played by TRACK [1]
track, and the left-hand part is played by TRACK [2] tr ack.
PRESET
SONG
SONG
SELECT
–
/ NO+ / YES
PRESET
SONG
SONG
SELECT
–
/ NO+ / YES
PRESET
SONG
SONG
SELECT
–
/
NO +
TRACK1TRACK
START
STOP
TRACK1TRACK
START
STOP
TRACK1TRACK
START
STOP
/
YES
TEMPO/FUNCTION/SONG
SONG
/
SONG
/
/
SONG
REC
2
REC
REC
Turn the Desired Part Off.......................................................................
Press the TRACK [1] or [2] button to turn the corresponding part off
— the corresponding indicator will go out (these buttons alternately
toggle the corresponding part on and off).
• The parts can be turned on or off even during playback.
• The Preset Song Part Cancel function cannot be used during “
rnd
” playback.
“
• The “Preset Song Part Cancel Volume” function described on page 32
can be used to set the canceled part so that it plays at a volume from “0”
(no sound) to “20”. The default setting is “5”.
• Both parts are automatically turned ON whenever a new song is selected.
2
ALL
” or
Start/Stop Playback.....................................................................................
Press the SONG [START/STOP] button to start and stop playback
as required.
Synchro Start .....................................................................................................
When the Synchro Start function is engaged, playback of the se-
2
lected preset song will begin automatically as soon as you start playing
on the keyboard.
To engage the Synchro Start function press the SONG [START/
STOP] button while holding the part button corresponding to the part
which is ON. A dot will appear in the lower right corner of the display.
(Repeat the previous operation to disengage the Syncro Start function.)
Playback will then start as soon as you begin playing on the key-
board.
• If you hold a track button which is OFF while pressing the SONG [START/
STOP] button, that track will be turned ON and the Synchro Start mode
will be engaged.
Left Pedal Start/Stop..................................................................................
The left pedal can be assigned to start and stop preset song playback
via the “Left Pedal Mode” function described on page 32.
○○○○○○○○○○○○○○○○○○○○○○○○○○○○○○○○○○○○○○○○○○○○○○○○○○○○○○○○
CLP-955
15
Page 16
The Dual Mode
N
O
R
O
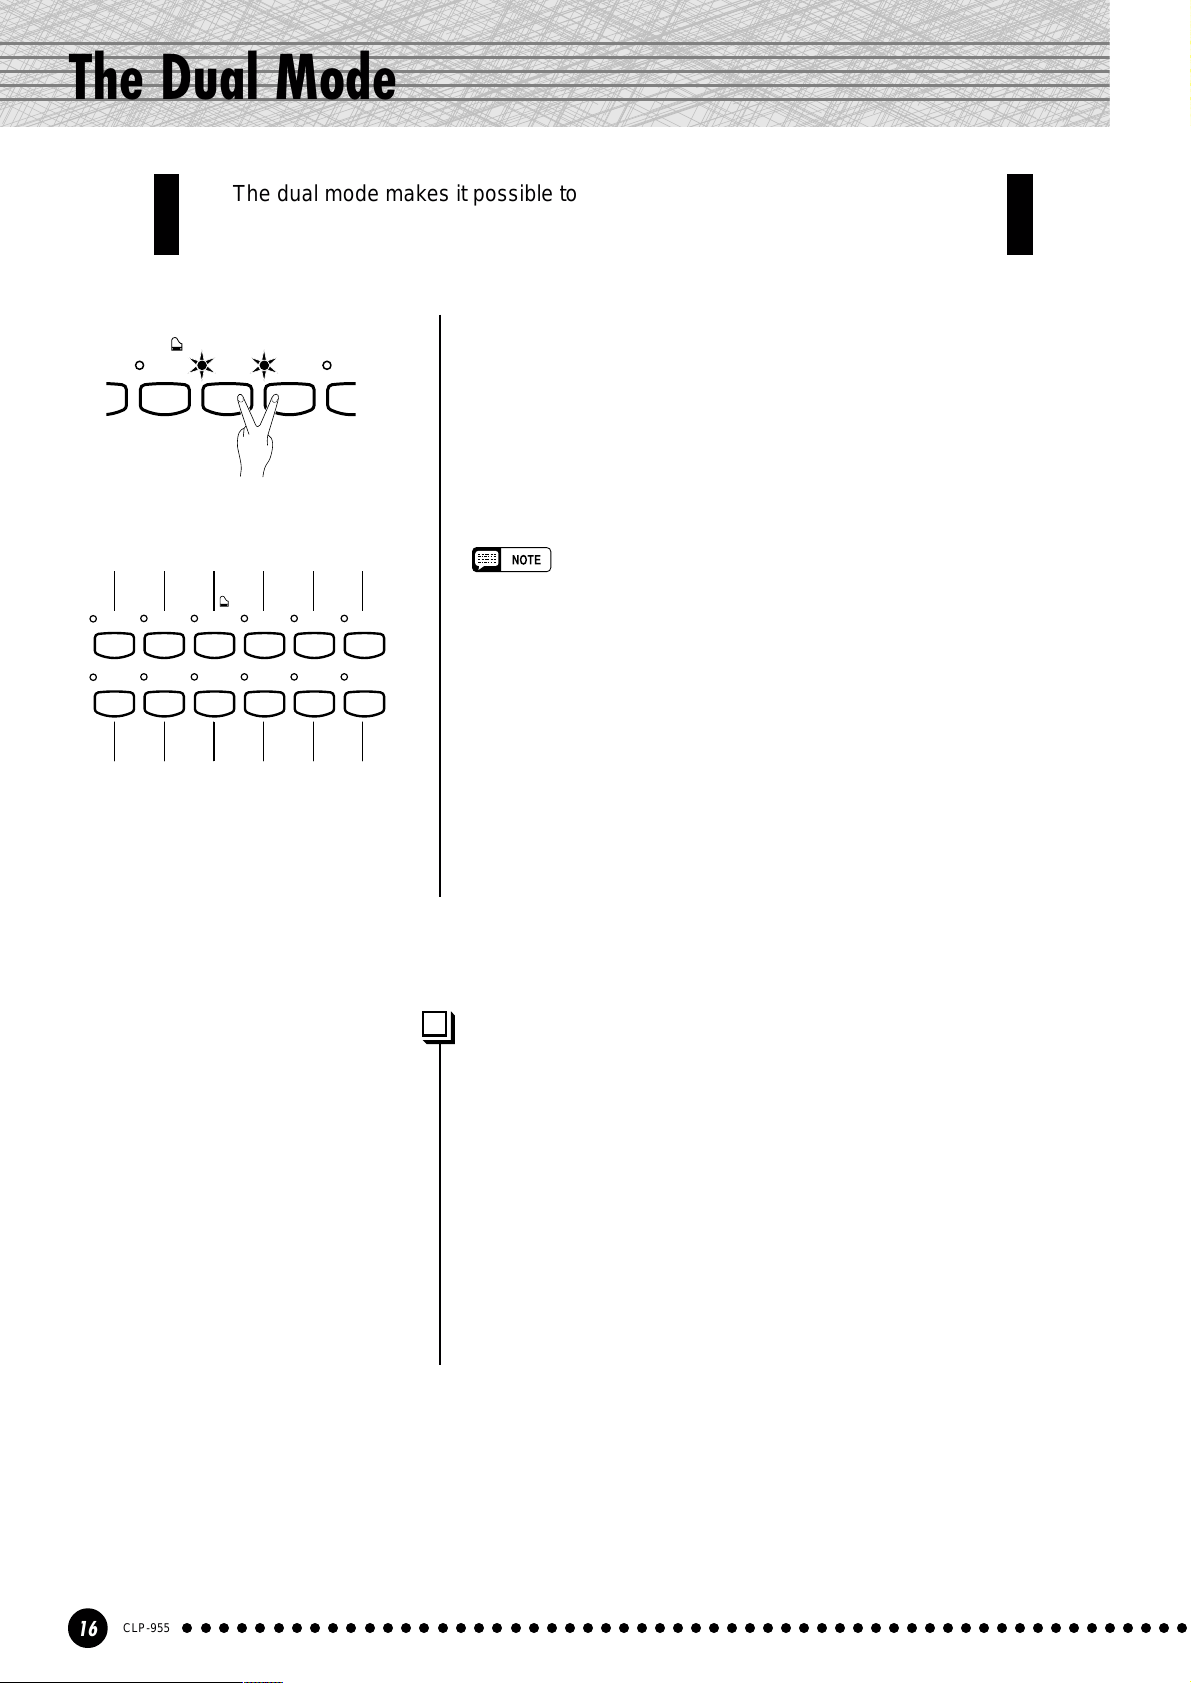
The dual mode makes it possible to play two voices simultaneously across
the entire range of the keyboard.
D
2
1
E. PIANO2HARPSI-
CHORD
VOICE
E. PIANO
Voice numbering priority
1 2 3 4 5 6
GRAND
PIANO 1
CHURCH
ORGAN
GRAND
PIANO 2
JAZZ
ORGAN
1
STRINGS
E. PIANO2HARPSI-
CHOIR WOOD
VOICE
E. PIANO
7 8 9 10 11 12
CHORD
BASS
To activate the dual mode simply press two voice selectors at the
VIB
PH
same time (or press one voice selector while holding another). The
voice indicators of both selected voices will light when the dual mode is
active. To return to the normal single-voice play mode, press any single
voice selector.
According to the voice numbering priority as shown in the diagram
on the left, lower valued voice numbers will be designated as the 1st
Voice (the other voice will be designated as the 2nd Voice).
• The dual and split modes cannot be engaged at the same time.
• [EFFECT] in the Dual Mode
VIBRA-
PHONE
E. BASS
Depending upon the conditions one effect type will take priority over the
other. Depth will be decided according to the depth default value of the
voice combination. However, using function F3 (see page 30) you can
change the depth value for each voice as you like.
Effect depth setting via the panel controls (i.e. pressing the [-/NO] or [+/
YES] buttons while holding the [EFFECT] button — see page 19) will be
applied to the 1st Voice only.
• [REVERB] in the Dual Mode
The reverb type assigned to the 1st Voice will take priority over the other .
(If the reverb is set to OFF, the 2nd Voice’s reverb type will be in affect.)
Reverb depth setting via the panel controls (i.e. pressing the [-/NO] or [+/
YES] buttons while holding the [REVERB] button — see page 18) will be
applied to the 1st Voice only.
Other Dual Mode Functions...............................................................
The Clavinova Function mode provides access to a number of other
dual-mode functions, listed below. See the corresponding pages for
details.
• Dual Balance ................................................. 29
• Dual Detune .................................................. 29
• 1st Voice Octave Shift ................................... 29
• 2nd Voice Octave Shift .................................. 29
• 1st Voice Effect Depth ................................... 30
• 2nd Voice Effect Depth.................................. 30
• Reset ............................................................. 30
16
CLP-955
○○○○○○○○○○○○○○○○○○○○○○○○○○○○○○○○○○○○○○○○○○○○○○○○○○○○○○○○
Page 17
The Split Mode
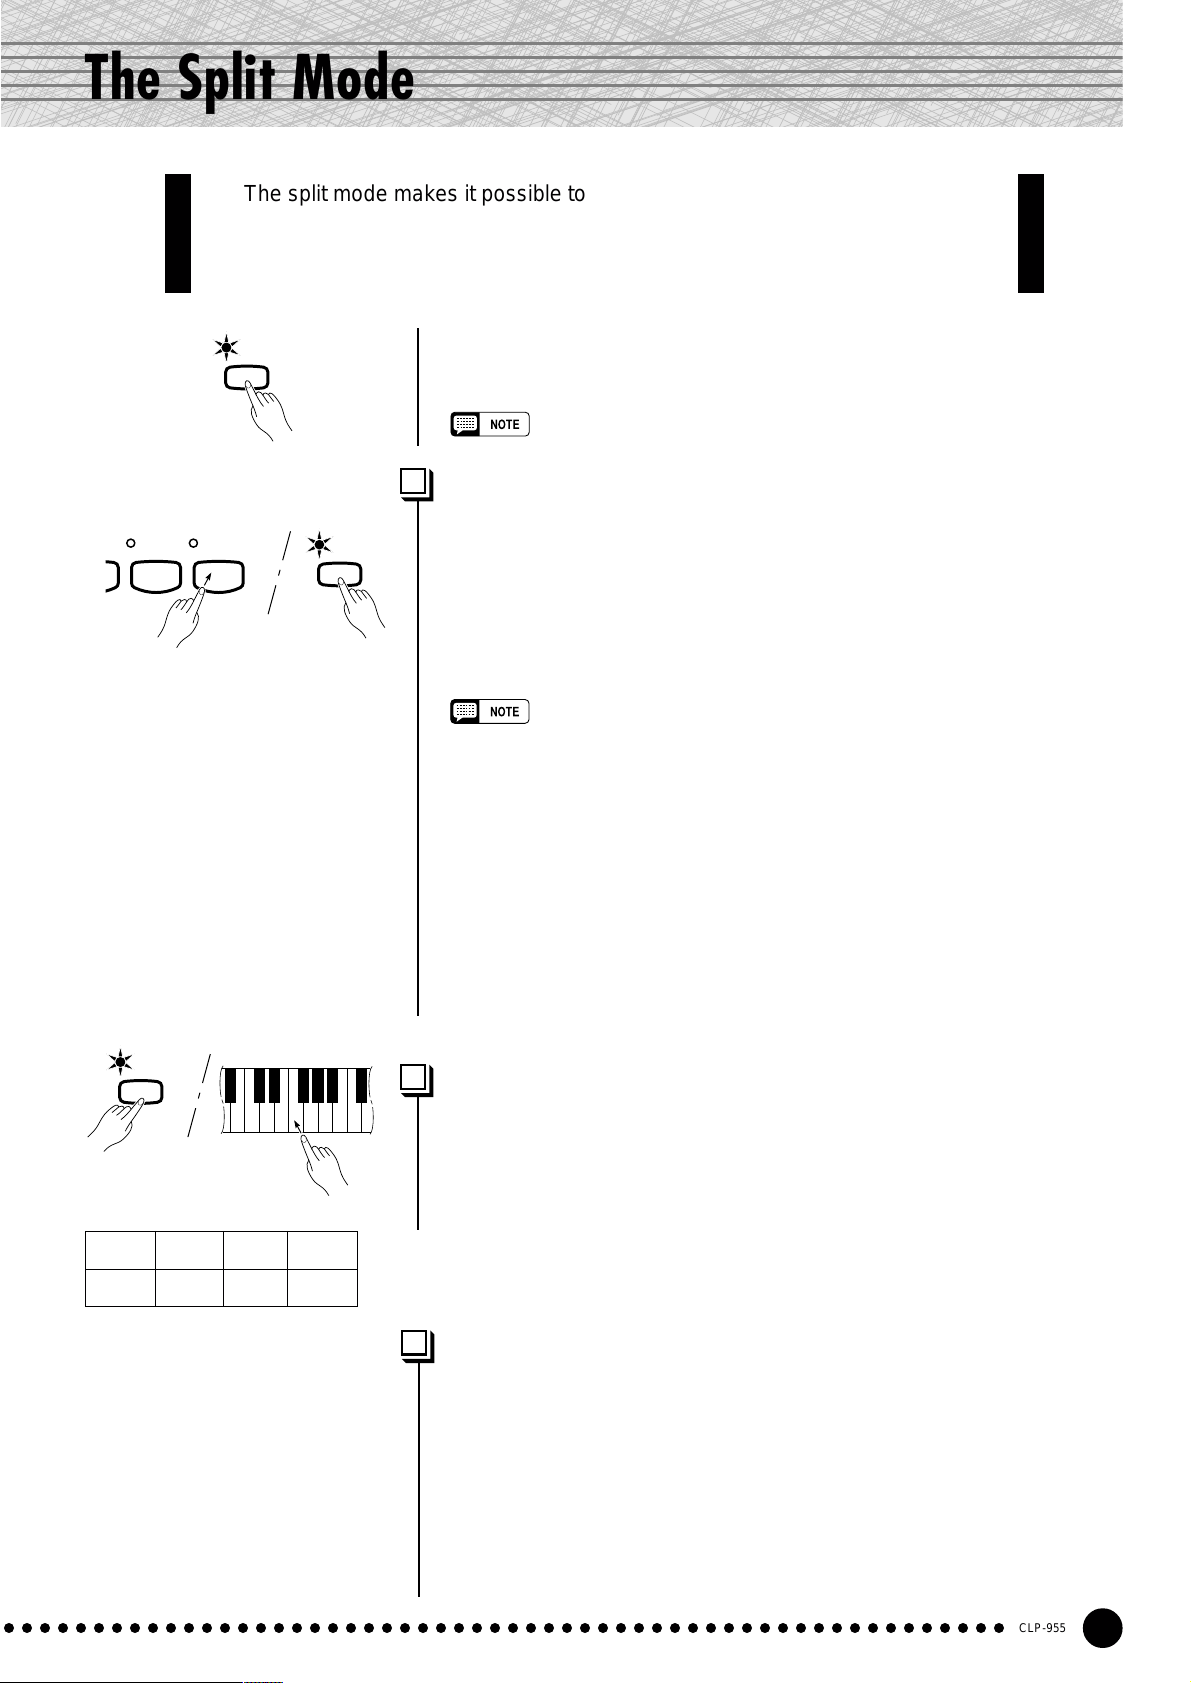
The split mode makes it possible to play two different voices on the keyboard
— one with the left hand and another with the right hand. The Left Voice is
played on all keys to the left of (and including) a specified “split point” key, while
the Right Voice is played on all keys to the right of the split point key.
O HARPSI-
CHORD
VIBRA-
PHONE
SPLIT
SPLIT
To activate the split mode simply press the [SPLIT] button so that its
indicator lights. The split mode can be turned off at any time by pressing the
[SPLIT] button again so that its indicator goes out.
• The dual and split modes cannot be engaged at the same time.
Selecting the Right and Left Voices.....................................................
The voice that was selected before the split mode was engaged becomes
the Right Voice in the split mode. (The Right Voice can also be changed while
in the split mode, by simply pressing the corresponding voice selector.)
To select a Left Voice press the corresponding voice selector while
holding the [SPLIT] button (default: [WOOD BASS]). The indicator of the
Left Voice selector will light while the [SPLIT] button is pressed, then only
the Right Voice selector and [SPLIT] button indicators will remain lit.
• [EFFECT] in the Split Mode
Depending upon the conditions, one effect type will take priority over the other.
Depth will be decided according to the depth default value of the voice
combination. However, using function F4 (see page 31) you can change the
depth value for each voice as you like.
Effect depth setting via the panel controls (i.e. pressing the [-/NO] or [+/YES]
buttons while holding the [EFFECT] button — see page 19) will be applied to
the Right Voice only .
• [REVERB] in the Split Mode
The reverb type assigned to the Right Voice will take priority over the other. (If
the reverb is set to OFF, the Left Voice’s reverb type will be in affect.)
Reverb depth setting via the panel controls (i.e. pressing the [-/NO] or [+/YES]
buttons while holding the [REVERB] button — see page 18) will be applied to
the Right Voice only .
SPLIT
Setting the Split Point.........................................................................................
The split point is initially set at the F#2 key by default. You can change
the split point to any other key by pressing the key while holding the
[SPLIT] button (the name of the current split-point key appears on the LED
display while the [SPLIT] button is held). The split point can also be set via
Example:
A-1 b=1 C 2 F~2
A-1 Bb-1 C2 F#2
•“b” is indicated with a lower “_”.
•“#” is indicated with an upper “~”.
○○○○○○○○○○○○○○○○○○○○○○○○○○○○○○○○○○○○○○○○○○○○○○○○○○○○○○○○
the Function mode (see below).
Other Split Mode Functions.........................................................................
The Clavinova Function mode provides access to a number of other
split-mode functions, listed below. See the corresponding pages for details.
• Split Point ...................................................... 30
• Split Balance ................................................. 30
• Right Voice Octave Shift................................ 31
• Left Voice Octave Shift .................................. 31
• Right Voice Effect Depth................................ 31
• Left Voice Effect Depth.................................. 31
• Damper Range .............................................. 31
• Reset ............................................................. 31
CLP-955
17
Page 18
Reverb
use for extra depth and expressive power.
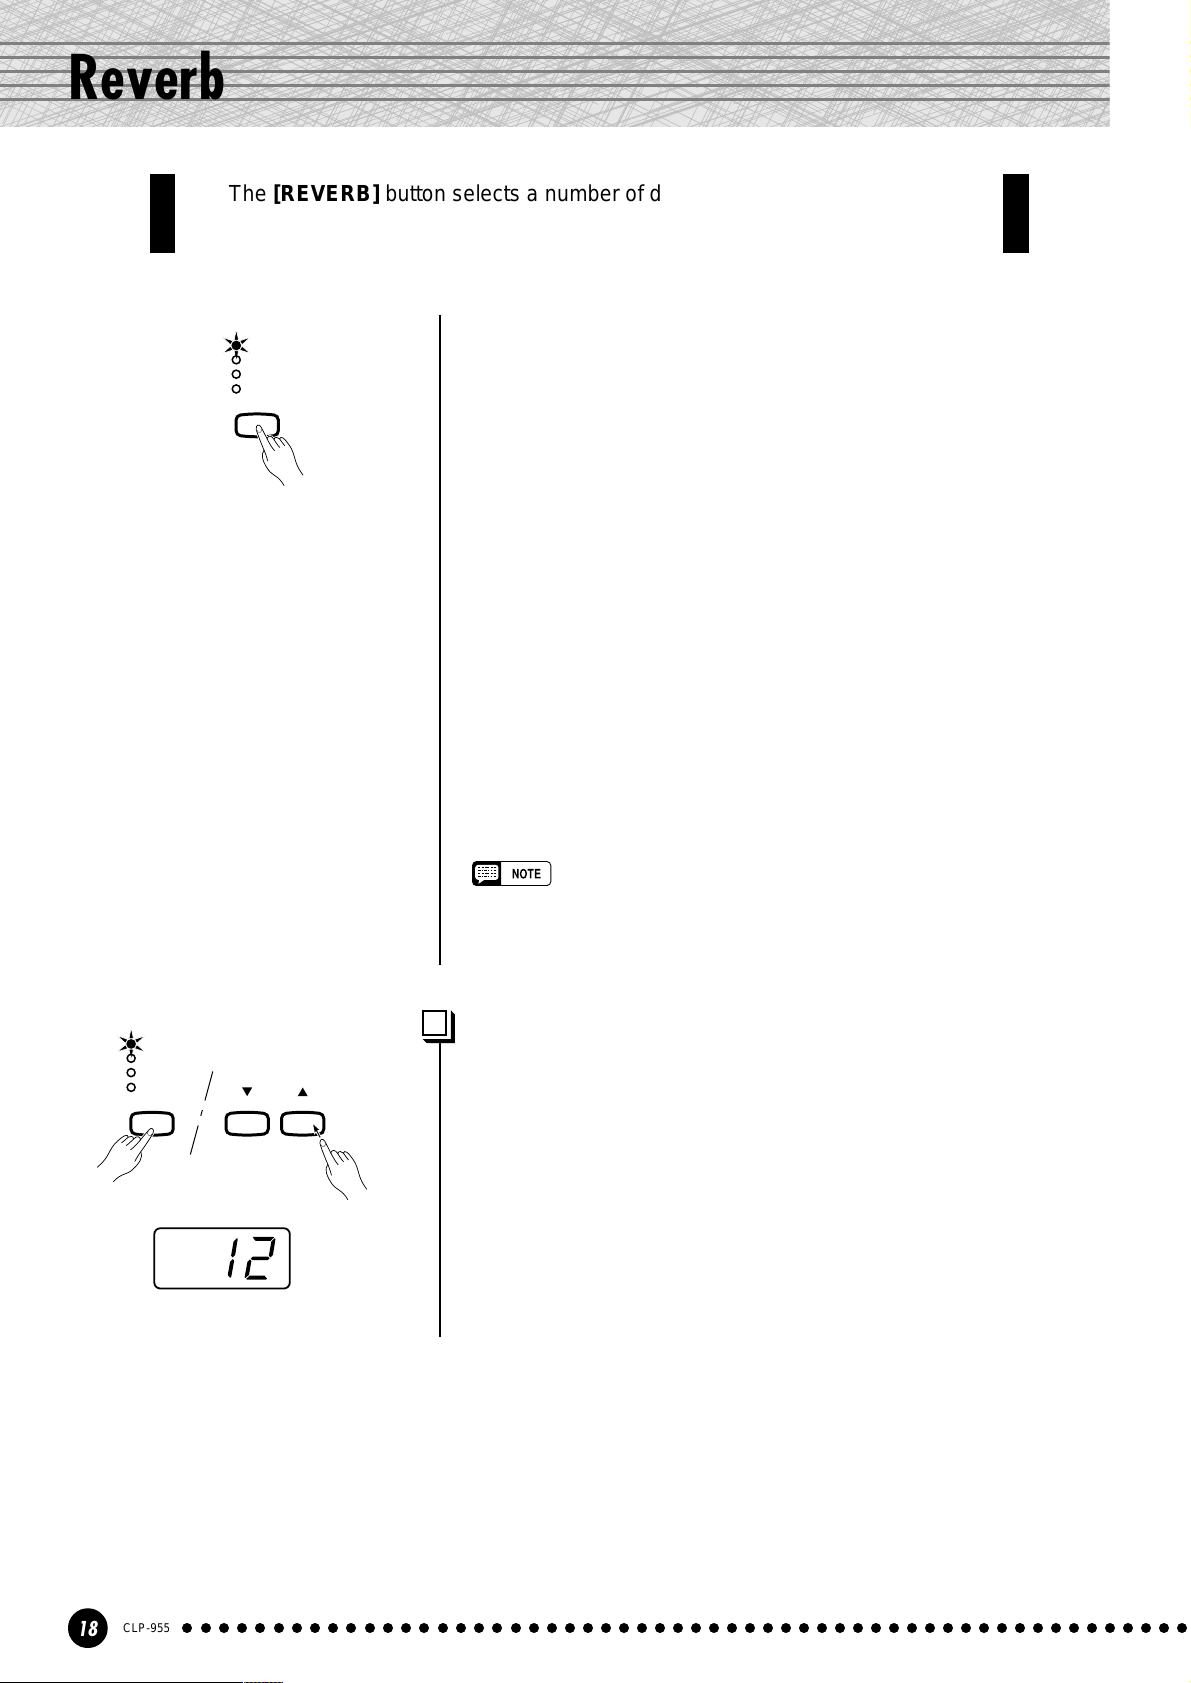
The [REVERB] button selects a number of digital reverb effects that you can
REVERB
ROOM
HALL 1
HALL 2
STAGE
To select a reverb type press the [REVERB] button a few times until
the indicator corresponding to the desired type lights (the indicators
light in sequence each time the [REVERB] button is pressed). No
reverb is produced when all indicators are off.
OFF
No reverb effect is selected when no REVERB indicator is lit.
ROOM
This setting add a continuous reverb effect to the sound that is similar
to the type of acoustic reverberation you would hear in a room.
HALL 1
For a “bigger” reverb sound, use the HALL 1 setting. This effect
simulates the natural reverberation of a small-size concert hall.
HALL 2
For a really spacious reverb sound, use the HALL 2 setting. This effect
simulates the natural reverberation of a large concert hall.
ST AGE
A simulation of the type of reverb produced in a stage environment.
• The default reverb type (including OFF) and depth settings are different
for each voice.
• Even if the REVERB effect is OFF, a “soundboard reverb” effect will be
applied when the GRAND PIANO 1 voice is selected.
REVERB
ROOM
HALL 1
HALL 2
STAGE
TEMPO/FUNCTION/SONG
SONG
SELECT
–
/ NO+ / YES
Adjusting Reverb Depth.........................................................................
Adjust the reverb depth for the selected voice by using the [–/NO]
and [+/YES] buttons while holding the [REVERB] button. The depth
range is from 0 through 20 (the current depth setting appears on the
LED display while the [REVERB] button is held). A setting of “0”
produces no effect, while a setting of “20” produces maximum reverb
depth. Press the [–/NO] and [+/YES] buttons simultaneously while
holding the [REVERB] button to recall the default setting for the
current voice (default depth settings are different for each voice).
18
CLP-955
○○○○○○○○○○○○○○○○○○○○○○○○○○○○○○○○○○○○○○○○○○○○○○○○○○○○○○○○
Page 19
The Effect
The [EFFECT] button allows you to select one of the effects that can give
your sound greater depth and animation.
EFFECT
EFFECT
CHORUS
PHASER
TREMOLO
DELAY
TEMPO/FUNCTION/SONG
CHORUS
PHASER
TREMOLO
DELAY
–
/ NO+ / YES
SONG
SELECT
To select an effect type press the [EFFECT] button a few times until
the indicator corresponding to the desired type lights (the indicators
light in sequence each time the [EFFECT] button is pressed). No effect
is produced when all indicators are off.
OFF
No effect is selected when no EFFECT indicator is lit.
CHORUS
Shimmering, broadening effect
PHASER
Adds depth to the sound.
TREMOLO
Tremolo effect
DELA Y
Echo effect
• The default effect type (including OFF) and depth settings are different for
each voice.
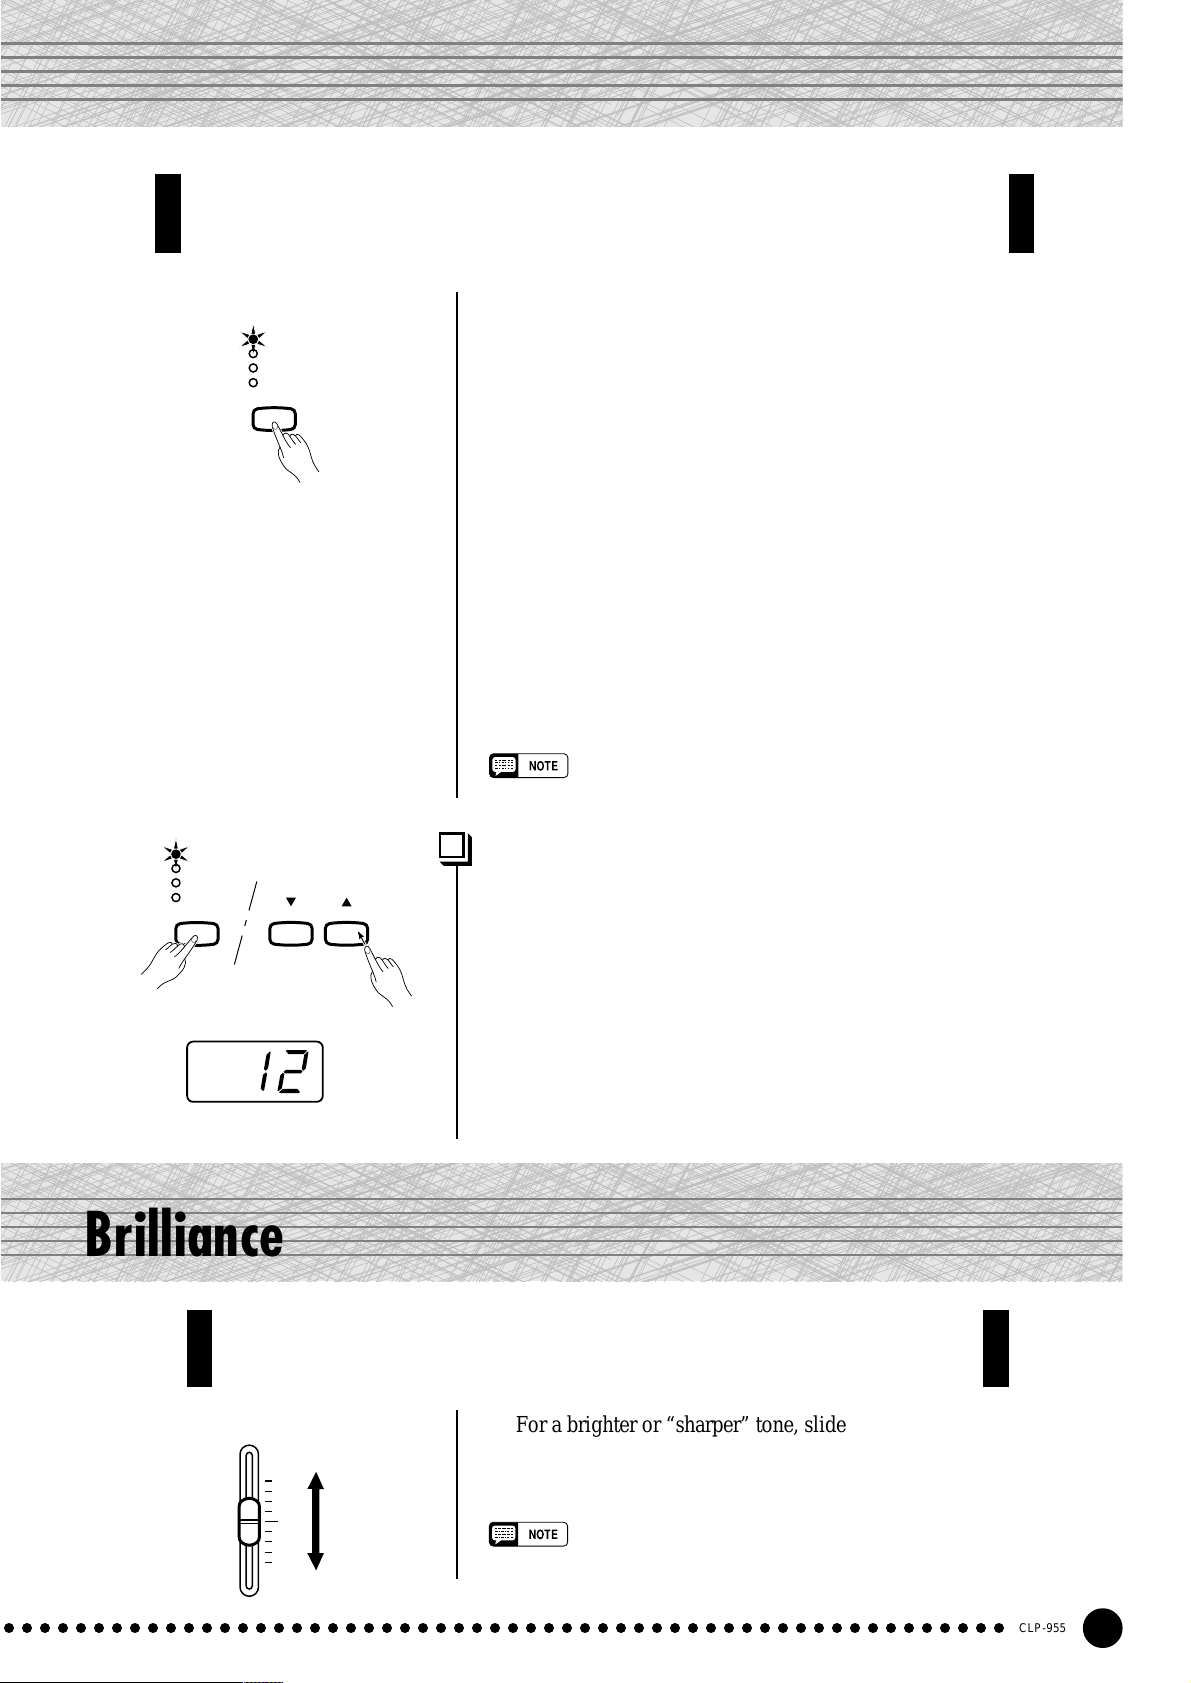
Adjusting Effect Depth.............................................................................
Effect depth can be individually adjusted for the selected voice by
using the [–/NO] and [+/YES] buttons while holding the [EFFECT]
button. The depth range is from 0 through 20 (the current depth setting
appears on the LED display while the [EFFECT] button is held). A
setting of “0” produces no effect, while a setting of “20” produces
maximum effect depth. Press the [–/NO] and [+/YES] buttons simultaneously while holding the [EFFECT] button to recall the default
setting for the current voice (the default depth settings are different for
each voice).
Brilliance
This control can be used to change the tonality or “timbre” of the sound
output. The control range is from MELLOW to BRIGHT.
BRILLIANCE
BRIGHT
MELLOW
○○○○○○○○○○○○○○○○○○○○○○○○○○○○○○○○○○○○○○○○○○○○○○○○○○○○○○○○
For a brighter or “sharper” tone, slide the control towards the
BRIGHT position. For a “rounder” more mellow tone, slide the control
towards the MELLOW position.
• When the BRILLIANCE is set to BRIGHT, the overall sound will be slightly
louder. If the MASTER VOLUME is set at a high level the sound may
become distorted. If so, lower the MASTER VOLUME level.
CLP-955
19
Page 20
The Pedals
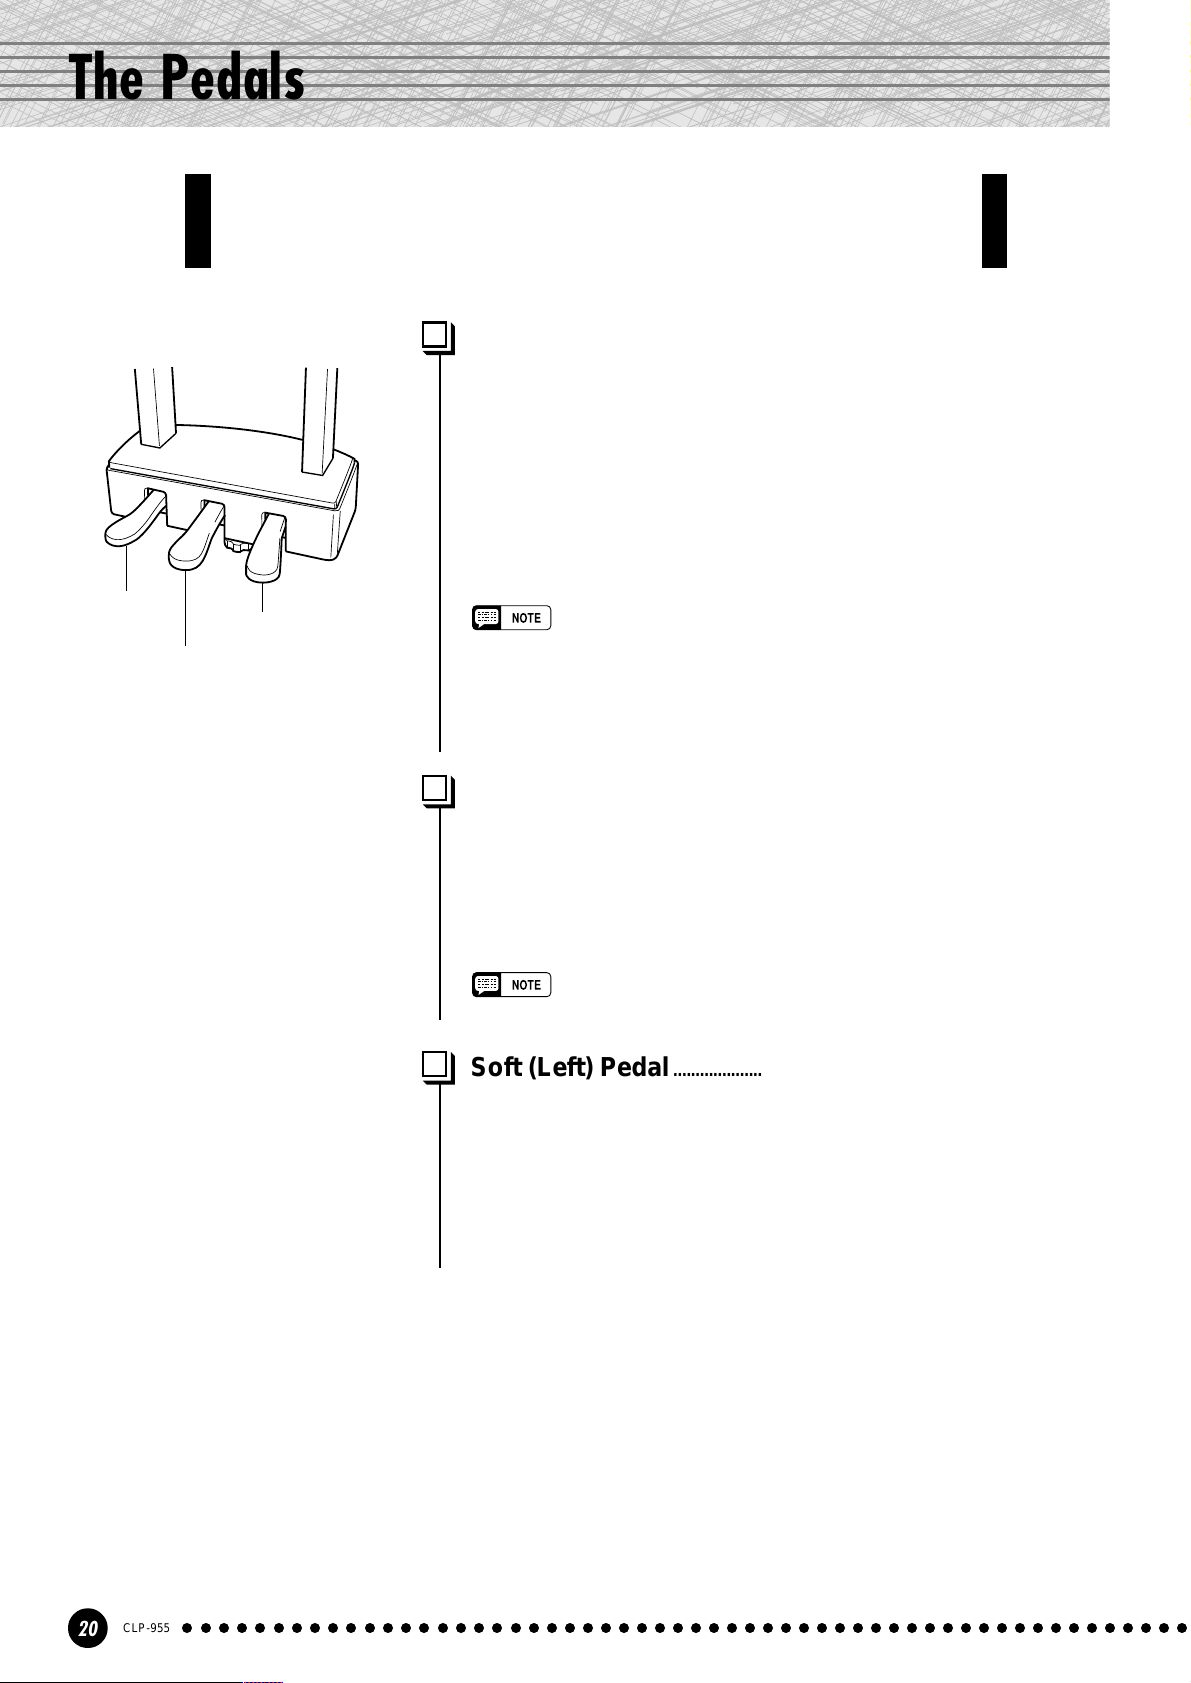
The Clavinova has three foot pedals that produce a range of expressive
effects similar to those produced by the pedals on an acoustic piano.
Soft pedal
Damper pedal
Sostenuto pedal
Damper (Right) Pedal ................................................................................
The damper pedal functions in the same way as a damper pedal on
an acoustic piano. When the damper pedal is pressed notes played have
a long sustain. Releasing the pedal immediately stops (damps) any
sustained notes.
When the GRAND PIANO 1 voice is selected, pressing the damper
pedal activates the instrument’s special “Sustain Samples” to accurately
recreate the unique resonance of an acoustic grand piano’s soundboard
and strings.
• The depth of the effect produced by the “Sustain Samples” can be
adjusted via the “Pedal Functions” (page 32) in the function mode.
• If the damper pedal doesn’t work, or notes are sustained even when the
pedal is not pressed, make sure that the pedal cord is properly plugged
into the main unit (page 50).
Sostenuto (Center) Pedal......................................................................
If you play a note or chord on the keyboard and press the sostenuto
pedal while the note(s) are held, those notes will be sustained as long as
the pedal is held (as if the damper pedal had been pressed) but all
subsequently played notes will not be sustained. This makes it possible
to sustain a chord, for example, while other notes are played “staccato.”
• Organ, string and choir voices will continue to sound for as long as the
sostenuto pedal is depressed.
Soft (Left) Pedal...............................................................................................
The soft pedal reduces the volume and slightly changes the timbre of
notes played while the pedal is pressed. The soft pedal will not affect
notes which are already playing when it is pressed.
The left pedal can also be assigned to song start/stop operation via
the “Left Pedal Mode” described on page 32.
CLP-955
20
○○○○○○○○○○○○○○○○○○○○○○○○○○○○○○○○○○○○○○○○○○○○○○○○○○○○○○○○
Page 21

Touch Sensitivity
Four different types of keyboard touch sensitivity — HARD, MEDIUM, SOFT
or FIXED — can be selected to match different playing styles and preferences.
TOUCH
HARD
MEDIUM
SOFT
To select a touch sensitivity type press the [TOUCH] button a few
times until the indicator corresponding to the desired type lights (the
indicators light in sequence each time the [TOUCH] button is pressed).
HARD
The HARD setting requires the keys to be played quite hard to
produce maximum loudness.
MEDIUM
The MEDIUM setting produces a fairly “standard” keyboard response.
This is the initial factory default setting.
SOFT
The SOFT setting allows maximum loudness to be produced with
relatively light key pressure.
FIXED (no indicator lit)
All notes are produced at the same volume no matter how hard the
keyboard is played.
When the FIXED type is selected, the volume of notes played in the
FIXED mode can be set by using the [–/NO] and [+/YES] buttons while
the [TOUCH] button is held (the current volume level appears on the
display). The volume range is from 1 through 127. The default setting
is 64.
Transposition
The Clavinova’s TRANSPOSE function makes it possible to shift the pitch of the
entire keyboard up or down in semitone intervals up to a maximum of 12 semitones
(i.e. a maximum of one octave up or down). “Transposing” the pitch of the Clavinova
keyboard facilitates playing in difficult key signatures, and you can easily match the
pitch of the keyboard to the range of a singer or other instrumentalist.
–
/
NO +
SONG
SELECT
/
YES
TRANS POSE
TEMPO/FUNCTION/SONG
• This setting does not change the weight of the keyboard.
• The touch sensitivity type and volume set in the FIXED mode will become
the common setting for all voices. However, the touch sensitivity settings
may have little or no effect with certain voices which are not normally
responsive to keyboard dynamics (Refer to the “Voice Descriptions” on
page 41).
Use the [–/NO] or [+/YES] button while holding the [TRANS-
POSE] button to transpose down or up as required. The transposition
range is from “–12” (down one octave) through “0” (normal pitch) to
“12” (up one octave). The amount of transposition appears on the LED
display while the [TRANSPOSE] button is held. The default transpose
setting is “0”.
• The [TRANSPOSE] button indicator remains lit when a transpose setting
other than “0” is selected.
• Notes below and above the A-1 … C7 range of the Clavinova sound one
octave higher and lower, respectively.
○○○○○○○○○○○○○○○○○○○○○○○○○○○○○○○○○○○○○○○○○○○○○○○○○○○○○○○○
CLP-955
21
Page 22

Tuning
Tuning makes it possible to adjust the pitch of the Clavinova over a 427.0 Hz
… 453.0 Hz (corresponding to the A3 note’s Hz) range in approximately 0.2
Hertz intervals. Pitch control is useful for tuning the Clavinova to match other
instruments or recorded music.
A-1B
A#
-1
A
-1
3
C
3
B
Tuning Up ...............................................................................................................
ZTo tune up (raise pitch), hold the A-1 and B-1 keys simultaneously.
XPress any key between C3 and B3. Each time a key in this range is
pressed the pitch is increased by approximately 0.2 Hz.
The [–/NO] and [+/YES] buttons can also be used to tune down or up,
SONG
SELECT
–
/ NO+ / YES
respectively, in
[+/YES] buttons simultaneously to recall standard tuning (A3 = 440
Hz).
approximately
1 Hz increments. Press the [–/NO] and
CRelease the A-1 and B-1 keys.
-1
3
C
3
B
T uning Down.......................................................................................................
ZTo tune down (lower pitch), hold the A-1 and A#-1 keys simulta-
neously.
XPress any key between C3 and B3. Each time a key in this range is
pressed the pitch is decreased by approximately 0.2 Hz.
The [–/NO] and [+/YES] buttons can also be used to tune down or up,
respectively, in
approximately
1 Hz increments. Press the [–/NO] and
[+/YES] buttons simultaneously to recall standard tuning (A3 = 440
Hz).
–
/
NO +
SONG
SELECT
/
YES
A#
A-1B
CRelease the A-1 and A#-1 keys.
-1
-1
3
C
3
B
To Restore Standard Pitch...................................................................
ZTo restore the default pitch (A3 = 440 Hz), hold the A-1, A#-1 and
B-1 keys simultaneously.
XPress any key between C3 and B3.
(Pressing once will restore the keyboard to standard pitch, regardless of the amount of pitch adjustment.)
CRelease the A-1, A#-1 and B-1 keys.
In terms of “Hertz”, the overall tuning range is from 427.0 Hz to 453.0
Hz. The current tuning setting is shown on the LED display while the tuning
is being adjusted. Tenths of a Hertz are indicated on the LED display by the
appearance and position of one or two dots, as in the following example:
Display Value
440 440.0
4.40 440.2
44.0 440.4
440. 440.6
4.40. 440.8
22
CLP-955
○○○○○○○○○○○○○○○○○○○○○○○○○○○○○○○○○○○○○○○○○○○○○○○○○○○○○○○○
• An alternative tuning method is available in the Function mode — page 28.
Page 23

The Metronome & Tempo Control
The Clavinova built-in metronome is a convenient feature for practice, and it
can also provide a solid rhythmic guide when recording using the User Song
Recorder feature, described in the next section.
The Metronome
TEMPO/FUNCTION/SONG
Beat indicator
METRO-
NOME
–
TEMPO/FUNCTION/SONG
SONG
SELECT
/ NO+ / YES
METRO-
NOME
The metronome sound is alternately turned on and off by pressing
the [METRONOME] button. When on, the beat indicator flashes at the
current tempo.
Metronome Time Signature.................................................................
The time signature (beat) of the metronome can be set by using the
[–/NO] and [+/YES] buttons while holding the [METRONOME]
button. You can set the beat to 0, 2, 3, 4, 5 or 6 (the current setting
appears on the LED display while the [METRONOME] button is
held). Press the [–/NO] and [+/YES] buttons simultaneously while
holding the [METRONOME] button to recall the default setting “0”
(no accent).
Metronome V olume Function............................................................
The volume of the metronome sound can be adjusted via the Metro-
nome Volume function in the Function mode—page 32.
Tempo Control
The tempo of the metronome and user song recorder playback (the
TEMPO/FUNCTION/SONG
TEMPO
FUNCTION
○○○○○○○○○○○○○○○○○○○○○○○○○○○○○○○○○○○○○○○○○○○○○○○○○○○○○○○○
recorder is described in the next section) can be set from 32 to 280
beats per minute by using the [TEMPO t, s] buttons. The selected
tempo will appear on the LED display while in the normal play mode
and while the [TEMPO t, s] buttons are being used to adjust the
tempo in the recording/playback mode. The default tempo (120 or the
recorded song tempo when the recorder contains data and the playback
track indicator is lit) can be recalled by simultaneously pressing the [t]
and [s] buttons.
CLP-955
23
Page 24
Using the User Song Recorder
O
A
R
H
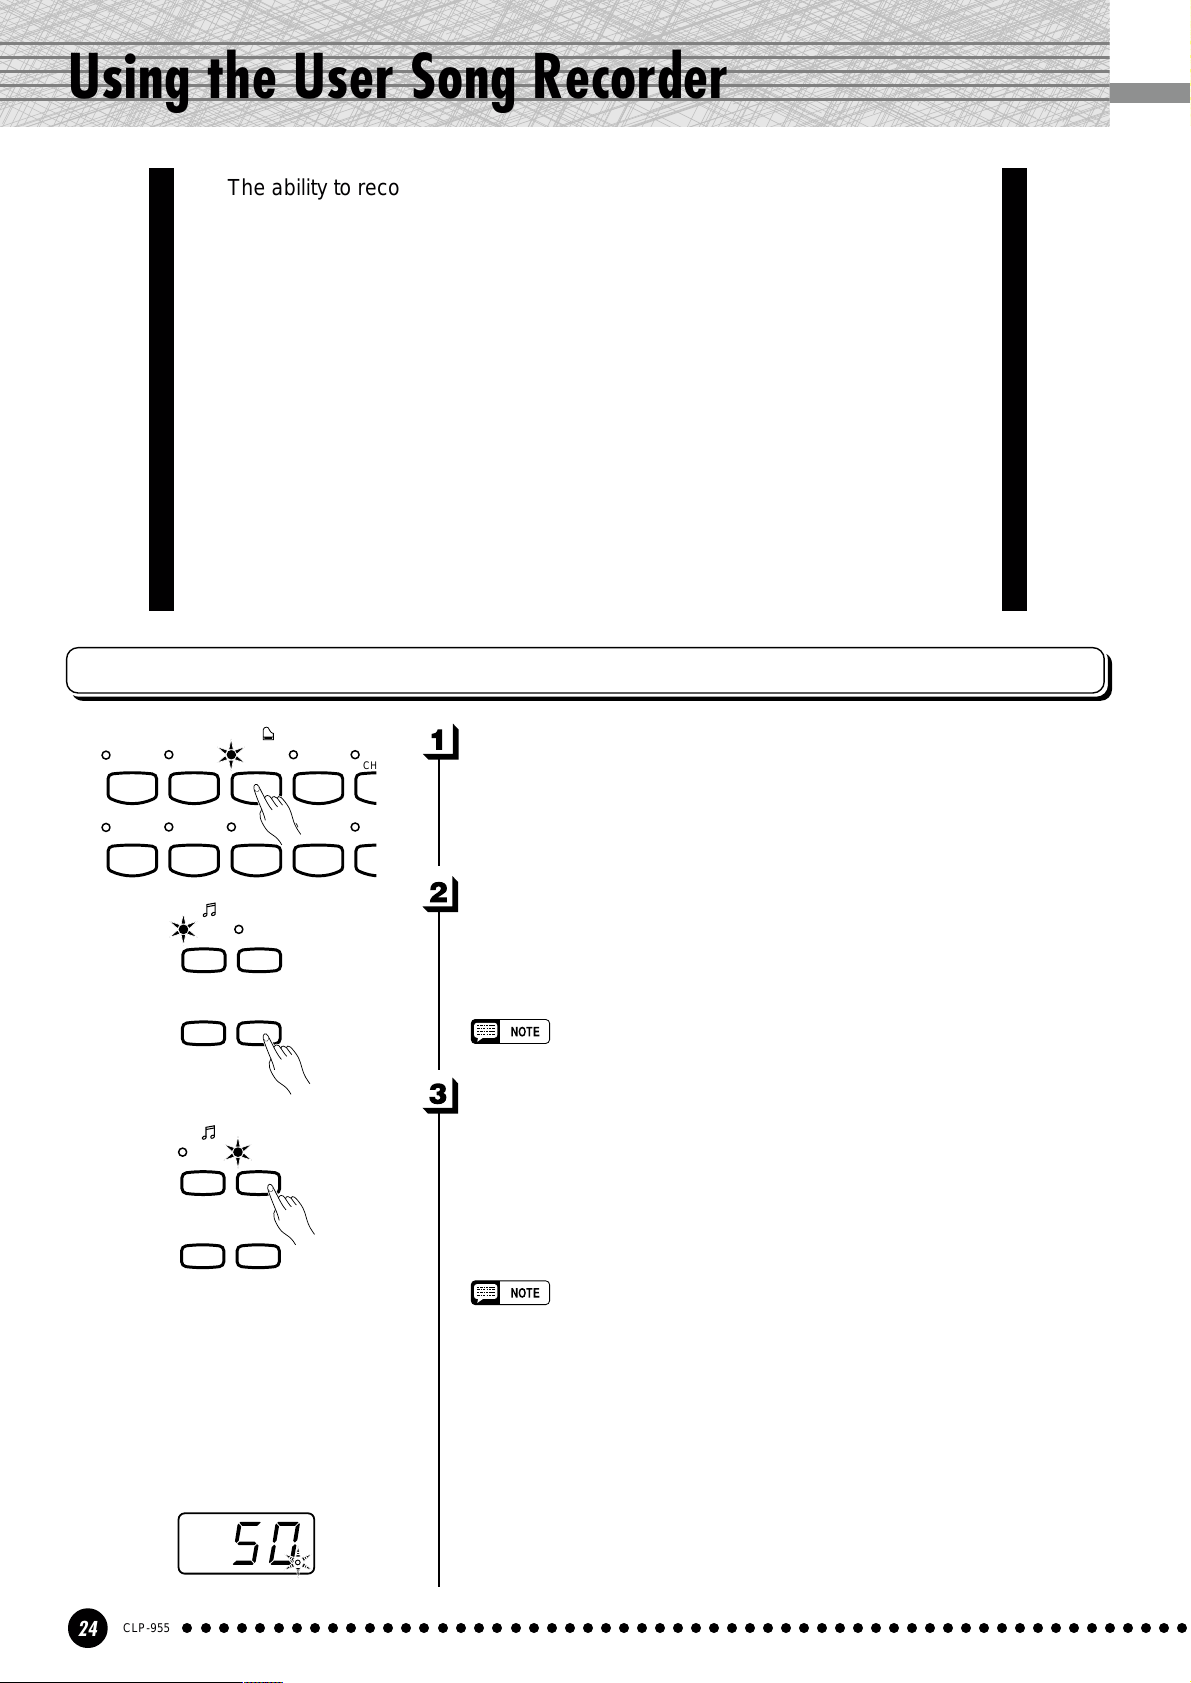
The ability to record and play back what you’ve played on the Clavinova
keyboard can be an effective practice aid. You can, for example, record just the
left-hand part, and then practice the right-hand part while playing back the recorded left-hand part. Or, since you can record up to two tracks separately, you
could record the left- and right-hand parts separately, or record both parts of a
duet and hear how they sound when played back.
The user song recorder actually records the following data:
■ Entire Song
● Tempo ● Time signature (beat) ● Reverb type (including OFF) ● Effect type
■ Individual Tracks
● Notes played ● Voice selection
● Dual mode voices ● Split mode voices
● Damper pedal ● Soft pedal
● Sostenuto pedal (not recorded as an initial setting)
● Effect depth ● Reverb depth
● Dual balance (F3) ● Dual detune (F3) ● Dual octave shift (F3)
● Split balance (F4) ● Split octave shift (F4)
GRAND
PIANO 1
CHURCH
ORGAN
GRAND
PIANO 2
JAZZ
ORGAN
SONG
TRACK1TRACK
START
/
STOP
SONG
TRACK1TRACK
START
/
STOP
E. PIANO
1
STRINGS
2
REC
2
REC
VOICE
E. PIANO2HA
CHOIR W
Recording
C
B
Make All Necessary Initial Settings...........................................
Before actually beginning to record, select the voice you want to
record with (or voices if you will be using the dual or split mode). You
might also want to set the volume and tempo controls.
Engage the Record Ready Mode ..................................................
Press the [REC] button to engage the record ready mode (recording
does not actually start yet). The record ready mode can be disengaged
before recording by pressing the [REC] button a second time.
• The record ready mode cannot be engaged while the demo/preset song
mode is engaged.
Select the Record Track..........................................................................
When the record mode is engaged in the previous step, the last-
recorded track will automatically be selected for recording and its indicator — i.e. the TRACK [1] or [2] button indicator — will glow red. If you
want to record on a different track, press the appropriate track button so
that its indicator glows red.
TEMPO/FUNCTION/SONG
24
CLP-955
○○○○○○○○○○○○○○○○○○○○○○○○○○○○○○○○○○○○○○○○○○○○○○○○○○○○○○○○
• The track button indicators of tracks which contain previously recorded data
will glow green (unless the track is turned off as described below). The
previously-recorded data on the non-record track will normally be played
back as you record, so you can play along with a previously-recorded track.
If you don’t want to hear the previously recorded track as you record (when
you want to record a song different from what you recorded on the previous
track etc.,), press the playback track button before pressing the [REC]
button (step 1, above) so that its indicator goes out.
• Recording on a track which already contains data will erase all previous
data on that track.
• When the record mode is engaged the amount of memory available for
recording will be shown on the LED display in approximate kilobytes
(starting at “50”), and the rightmost dot on the LED display will flash at the
current METRONOME tempo setting.
Page 25
Using the User Song Recorder
START
/
STOP
REC
TRACK1TRACK
2
SONG
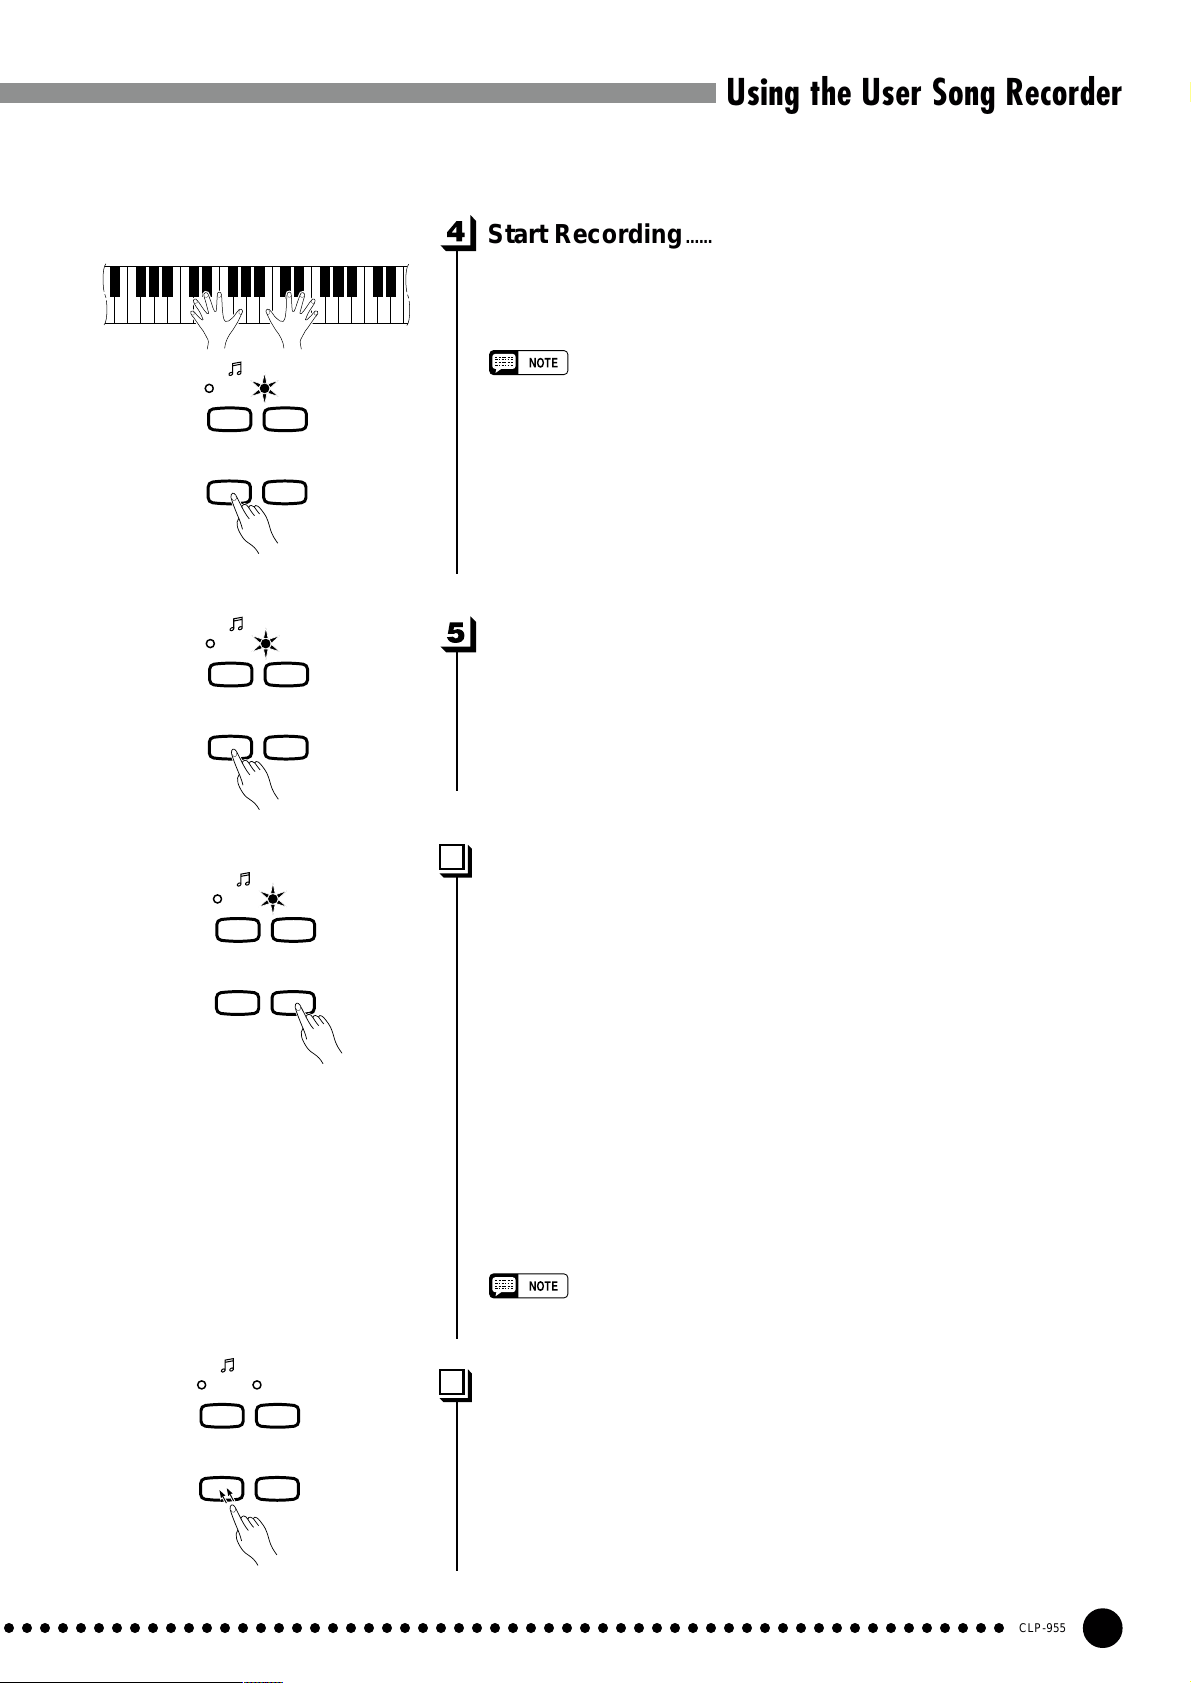
Start Recording................................................................................................
Recording will begin automatically as soon as you play a note on the
keyboard or press the SONG [START/STOP] button. The current
measure number will appear on the display while recording.
SONG
TRACK1TRACK
START
/
REC
STOP
SONG
TRACK1TRACK
START
/
STOP
2
REC
• The left pedal can be assigned to start and stop recording via the “Left
Pedal Mode” function described on page 32.
• If the metronome was on when you started recording, you’ll be able to
keep time with the metronome while recording, but the metronome sound
will not be recorded.
• You can record up to a maximum of about 10,000 notes on the Clavinova,
depending on pedal usage and other factors. The record track indicator
will begin to flash when recorder memory is almost full. If the memory
becomes full during recording, “
recording will stop automatically . (All recorded data up to that point will be
retained.)
FUL
” will appear on the display and
Stop Recording................................................................................................
Press either the [REC] or SONG [START/STOP] button to stop
recording.
The indicator of the recorded track will glow green to indicate that it
now contains data.
Changing the Initial Settings.............................................................
2
The initial voice, tempo, reverb type, reverb depth, and effect settings
made in step 1 of the recording procedure are actually recorded by the
Clavinova.
These initial settings can be changed after the recording is finished by
pressing the [REC] button to engage the record ready mode, pressing the
appropriate track button, making the required changes, and then pressing
the [REC] button again to exit from the record ready mode and register
the changes.
If you do this, be careful not to press the SONG [START/STOP]
button or a key on the keyboard, either of which will start recording and
erase all previous recorded data on the selected track.
It is possible to cancel the operation even after changes have been
made: change tracks and then press the [REC] button to exit from the
record mode (this also cancels data for the entire song).
• The following data for initial settings cannot be changed: “Dual balance
(F3)”, “Dual detune (F3)”, “Dual octave shift (F3)”, “Split balance (F4)” or
“Split octave shift (F4)”.
SONG
TRACK1TRACK
2
Erasing a Single T rack..............................................................................
All data can be erased from either of the recorder’s tracks by engag-
START
/
REC
STOP
○○○○○○○○○○○○○○○○○○○○○○○○○○○○○○○○○○○○○○○○○○○○○○○○○○○○○○○○
Press twice.
ing the record mode, selecting the track you want to erase, and then
pressing the SONG [START/STOP] button twice without recording
any data.
CLP-955
25
Page 26

Using the User Song Recorder
To play back what you’ve recorded, first make sure that the green track indica-
SONG
TRACK1TRACK
START
/
REC
STOP
2
tors of the tracks you want to play are lit. If not, press the corresponding track
button(s) so that they are lit. Then press the SONG [START/STOP] button.
Playback starts from the beginning of the recorded data, and will stop automatically at the end of the recorded data. You can also stop playback at any time by
pressing the SONG [START/STOP] button.
To mute a track so that it doesn’t play back, press the corresponding track
button so that its indicator goes out (press again to turn the track back on).
The current measure number appears on the display during playback.
Playback
• It is possible to play along on the keyboard during playback. In this case, the playback
voice and the voice you play on the keyboard are not the same. The playback voice is
the voice that was set when the data was recorded. The voice you play on the keyboard
is the voice that is selected on the panel.
• The playback volume and tempo can be adjusted by using the [MASTER VOLUME]
control and [TEMPO
to recall the default tempo).
• All user song recorder data will be retained in memory for about one week after the
power is turned off. If you want to keep your recorded data for longer periods, turn the
power on for a few minutes at least once a week. It is also possible to store it to an
external MIDI storage device such as the Y amaha MIDI Data Filer MDF3 by using the
Bulk Data Dump function described on page 35.
• The track indicators will not light automatically when the power is turned on even if the
user song recorder contains data. It is therefore necessary to press the track buttons so
that the corresponding green indicators light before starting recorder playback. It is also
a good idea to press the track buttons to check if the tracks contain data before
recording. If the green indicator lights when the corresponding track button is pressed,
that track contains data which will be erased and replaced by the newly-recorded data.
• If the metronome is being used during playback, the metronome will automatically stop
when playback is stopped.
• During recorder playback, the volume of a track which is turned off will always be “0”
(i.e. the “Preset Song Part Cancel Volume” function — page 32 — only affects preset
song playback.
• The playback data is not transmitted via the MIDI OUT connector.
• Playback cannot be started when the demo/preset song mode is engaged.
• Playback cannot be started when the recorder contains no data, or when both track
buttons are off.
• If the REVERB type is changed via the panel controls during playback, both the
playback and keyboard reverb effects will be changed.
• If the EFFECT type is changed via the panel controls during playback, the playback
effect may be switched off in some cases.
▼, ▲
] buttons (press both [TEMPO ▼, ▲] buttons simultaneously
SONG
TRACK1TRACK
2
Synchro Start ............................................................................................................................
When the Synchro Start function is engaged, recorder playback will begin
automatically as soon as you start playing on the keyboard.
START
STOP
/
REC
To engage the Synchro Start function press the SONG [START/STOP] button
while holding a track button which is ON. The rightmost dot on the display will
flash at the current tempo. (Repeat the previous operation to disengage the Syncro
Start function.) Playback will then start as soon as you begin playing on the keyboard.
TEMPO/FUNCTION/SONG
If you hold a track button which is OFF while pressing the SONG [START/STOP]
button, that track will be turned ON and the Synchro Start mode will be engaged.
Left Pedal Start/Stop.........................................................................................................
The left pedal can be assigned to start and stop recorder playback via the “Left Pedal
Mode” function described on page 32. This is convenient for starting playback of the
recorded part anytime after you have started playing.
CLP-955
26
○○○○○○○○○○○○○○○○○○○○○○○○○○○○○○○○○○○○○○○○○○○○○○○○○○○○○○○○
Page 27

The Function Mode
The [FUNCTION] button provides access to a range of functions that give the
Clavinova extraordinary versatility . The functions are categorized in groups as
follows:
F1 Tuning ...................................................................... 28
F2 Scale......................................................................... 28
F3 Dual Mode Functions.............................................. 29
F4 Split Mode Functions.............................................. 30
F5 Pedal Functions ...................................................... 32
F6 Metronome Volume ................................................. 32
F7 Preset Song Part Cancel Volume........................... 32
F8 MIDI Functions ........................................................ 33
F9 Backup Functions ................................................... 36
FUNC-
TION
TEMPO
FUNCTION
● Operation Example
Press [+/YES]
Use FUNCTION
[<], [>]
(sub-mode)
To Select a Function … ...........................................................................
ZPress the [FUNCTION] button so that its indicator lights.
• Functions cannot be selected during demo/preset song playback or when
the user song recorder is in operation.
XUse the FUNCTION [<] and [>] buttons to select the desired
function: F1 through F9.
CIn the case of the Scale (F2), Dual Mode (F3), Split Mode (F4),
Pedal Functions (F5), MIDI (F8), and Backup (F9) functions, you
will have to press the [+/YES] button once to enter the respective
sub-mode after the function has been selected, and then use the
FUNCTION [<] and [>] buttons again to select the desired subfunction.
• The Dual or Split mode must be engaged before the F3 and F4 functions
can be selected, respectively . If the corresponding mode is not engaged,
“
F3.-
” or “
F4.-
” will appear on the display and the corresponding sub-
mode will not be available.
• The Dual mode can be engaged while in the Function mode, but the
Function mode must be exited before the Split mode can be engaged.
Press [–/NO] or [+/YES]
once
Use [–/NO], [+/YES]
buttons (see the individual function descriptions, below).
• After selecting the function, the current setting will be displayed when the
[–/NO] or [+/YES] button is pressed for the first time.
BPress the [FUNCTION] button so that its indicator goes out to exit
from the function mode.
○○○○○○○○○○○○○○○○○○○○○○○○○○○○○○○○○○○○○○○○○○○○○○○○○○○○○○○○
VSet the function as required by using the [–/NO] and [+/YES]
CLP-955
27
Page 28

The Function Mode
F1
F2
Tuning
In addition to the tuning method described on page 22, overall tuning can also be accom-
plished via the F1 function.
After selecting “F1”, use the [–/NO] and [+/YES] buttons to lower or raise the pitch in
approximately 0.2 Hz increments (the first time the [–/NO] or [+/YES] button is pressed
simply switches to the tuning value display without actually changing the tuning). The overall
tuning range is from 427.0 Hz to 453.0 Hz (corresponding to the A3 note’s Hz). Press the
[–/NO] and [+/YES] buttons simultaneously to recall the default value “440 Hz”.
Tenths of a Hertz are indicated on the LED display by the appearance and position of one
or two dots, as in the following example:
Display Value
440 440.0
4.40 440.2
44.0 440.4
440. 440.6
4.40. 440.8
Scale
After selecting “F2.Y”, press the [+/YES] button to engage the scale function sub-mode,
then use the FUNCTION [<] and [>] buttons to select the desired scale function, as listed
below.
F2.1: Scale ..........................................................................................................................................................
In addition to the standard Equal Temperament tuning, the Clavinova includes 6 classic
tunings that you can select and use to play music of the corresponding period, or experiment
with in a more modern context. The tunings are:
1: Equal Temperament 5: Mean Tone
2: Pure Major 6: Werckmeister
3: Pure Minor 7: Kirnberger
4: Pythagorean
Use the [–/NO] and [+/YES] buttons to select the number of the desired tuning.
Press the [–/NO] and [+/YES] buttons simultaneously to recall the default settings (Equal
Temperament tuning).
F2.2: Base Note.............................................................................................................................................
Unlike Equal Temperament tuning, these classic tunings must be tuned to a specific key.
Use the [–/NO] and [+/YES] buttons to select the key you want the previously selected tuning
to be based. The selected key will appear on the display, followed by a low bar if flat (e.g.
“A_”) or a high bar if sharp (e.g. “F~”).
Press the [–/NO] and [+/YES] buttons simultaneously to recall the default settings “C”.
• The base note setting is effective for tunings other than the Equal Temperament tuning.
CLP-955
28
○○○○○○○○○○○○○○○○○○○○○○○○○○○○○○○○○○○○○○○○○○○○○○○○○○○○○○○○
Page 29

The Function Mode
F3
Dual Mode Functions
After selecting “F3.Y”, press the [+/YES] button to engage the dual-mode function sub-
mode, then use the FUNCTION [<] and [>] buttons to select the desired dual mode function, as listed below.
If the Dual mode is not engaged “F3.-” will appear instead of “F3.Y” and the Dual mode
functions cannot be selected. If this happens engage the Dual mode and proceed.
■ SHORTCUT: You can jump directly to the dual-mode functions (F3) by pressing the
[FUNCTION] button while holding the two dual-mode voice selectors.
• Dual mode function settings are set individually for each voice combination.
F3.1: Dual Balance.....................................................................................................................................
The volume levels of the two voices combined in the dual mode can be adjusted as re-
quired by using this function. Use the [–/NO] and [+/YES] buttons to adjust the balance as
required. The balance range is from 0 through 20. A setting of “10” produces equal balance
between the two dual-mode voices. Settings below “10” increase the volume of the 2nd Voice
in relation to the 1st Voice, and settings above “10” increase the volume of the 1st Voice in
relation to the 2nd Voice (“1st” and “2nd” is explained on page 16). Press the [–/NO] and [+/
YES] buttons simultaneously to recall the default setting (different for each voice combination).
You can set one voice as the main voice, and another voice as a softer, mixed voice.
F3.2: Dual Detune .......................................................................................................................................
This function makes it possible to detune the 1st and 2nd dual-mode Voices to create a
thicker sound. Use the [–/NO] and [+/YES] buttons to set the amount of detuning as required.
The detune range is from –10 through 10. A setting of “0” sets both voices to the same pitch.
“+” values raise the pitch of the 1st voice while lowering the pitch of the 2nd voice, and “-”
values raise the pitch of the 2nd voice while lowering the pitch of the 1st voice. (“1st” and
“2nd” is explained on page 16). Press the [–/NO] and [+/YES] buttons simultaneously to
recall the default setting (different for each voice combination).
• The maximum amount of pitch variation increases toward the lower key range (±60 cents at the A-1
key), and decreases toward the higher key range (
±
5 cents at the C7 key). 100 cents = 1 semitone.
F3.3: 1st V oice Octave Shift.............................................................................................................
F3.4: 2nd V oice Octave Shift...........................................................................................................
Depending on which voices you combine using the dual mode, the combination may sound
better if one of the voices is shifted up or down an octave. Use the [–/NO] and [+/YES]
buttons to set the octave of the 1st or 2nd Voice as required (“1st” and “2nd” is explained on
page 16). The available settings are “0” for normal pitch, “–1” to shift the pitch down one
octave, and “1” to shift the pitch up one octave. Press the [–/NO] and [+/YES] buttons simultaneously to recall the default setting (different for each voice combination).
○○○○○○○○○○○○○○○○○○○○○○○○○○○○○○○○○○○○○○○○○○○○○○○○○○○○○○○○
CLP-955
29
Page 30

The Function Mode
F3.5: 1st V oice Effect Depth.............................................................................................................
F3.6: 2nd V oice Effect Depth...........................................................................................................
These functions make it possible to individually set the depth of the effect for the 1st and
2nd dual-mode Voices (“1st” and “2nd” is explained on page 16). Use the [–/NO] and [+/
YES] buttons to set the effect depth for the corresponding voice as required. The depth range
is from 0 through 20. A setting of “0” produces no effect, while a setting of “20” produces
maximum effect depth. Press the [–/NO] and [+/YES] buttons simultaneously to recall the
default setting (different for each voice combination).
F3.7: Reset..........................................................................................................................................................
This function resets all dual-mode functions to their default values. Press the [+/YES]
button to reset the values. “End” will appear on the display when all functions have been
reset.
• The effect depth settings cannot be changed unless the EFFECT is ON. The Function mode must be
exited before EFFECT can be turned ON.
F4
Split Mode Functions
After selecting “F4.Y”, press the [+/YES] button to engage the split-mode function sub-
mode, then use the FUNCTION [<] and [>] buttons to select the desired split mode func-
tion, as listed below.
If the Split mode is not engaged “F4.-” will appear instead of “F4.Y” and the Split mode
functions cannot be selected. Also note that you must exit from the Function mode before the
Split mode can be engaged.
■ SHORTCUT: You can jump directly to the split-mode functions (F4) by pressing the
[FUNCTION] button while holding the [SPLIT] button.
• Split mode function settings are set individually for each voice combination.
F4.1: Split Point.............................................................................................................................................
In addition to the split point setting method described on page 17, the split point can be set
via this function. Use the [–/NO] and [+/YES] buttons to set the split point as required, or
simply press the appropriate key on the keyboard: from “A-1” to “C7”. Press the [–/NO] and
[+/YES] buttons simultaneously to recall the default setting “F#2”.
F4.2: Split Balance.....................................................................................................................................
The volume levels of the two voices combined in the split mode can be adjusted as re-
quired by using this function. Use the [–/NO] and [+/YES] buttons to adjust the balance as
required. The balance range is from 0 through 20. A setting of “10” produces equal balance
between the two split-mode voices. Settings below “10” increase the volume of the Left Voice
in relation to the Right Voice, and settings above “10” increase the volume of the Right Voice
in relation to the Left Voice. Press the [–/NO] and [+/YES] buttons simultaneously to recall
the default setting (different for each voice combination).
CLP-955
30
○○○○○○○○○○○○○○○○○○○○○○○○○○○○○○○○○○○○○○○○○○○○○○○○○○○○○○○○
Page 31

The Function Mode
F4.3: Right V oice Octave Shift.......................................................................................................
F4.4: Left V oice Octave Shift...........................................................................................................
Depending on which voices you combine using the split mode, the combination may sound
better if one of the voices is shifted up or down an octave. Use the [–/NO] and [+/YES]
buttons to set the octave of the Left or Right Voice as required. The available settings are “0”
for normal pitch, “–1” to shift the pitch down one octave, and “1” to shift the pitch up one
octave. Press the [–/NO] and [+/YES] buttons simultaneously to recall the default setting
(different for each voice combination).
Set according to the pitch extent for the song you want to play.
F4.5: Right V oice Effect Depth......................................................................................................
F4.6: Left V oice Effect Depth...........................................................................................................
These functions make it possible to individually set the depth of the effect for the Left and
Right split-mode Voices. Use the [–/NO] and [+/YES] buttons to set the effect depth for the
corresponding voice as required. The depth range is from 0 through 20. A setting of “0”
produces no effect, while a setting of “20” produces maximum effect depth. Press the [–/NO]
and [+/YES] buttons simultaneously to recall the default setting (different for each voice
combination).
• The effect depth settings cannot be changed unless the EFFECT is ON. The Function mode must be
exited before EFFECT can be turned ON.
F4.7: Damper Range................................................................................................................................
The Damper Range function determines whether the damper pedal affects the Right Voice,
the Left Voice, or both the Left and Right Voices in the split mode. Use the [–/NO] and [+/
YES] buttons to select “2” for the Left Voice, “1” for the Right Voice, or “ALL” for both
voices. Press the [–/NO] and [+/YES] buttons simultaneously to recall the default setting
“ALL”.
F4.8: Reset..........................................................................................................................................................
This function resets all split-mode functions to their default values. Press the [+/YES]
button to reset the values. “End” will appear on the display when all functions have been
reset.
○○○○○○○○○○○○○○○○○○○○○○○○○○○○○○○○○○○○○○○○○○○○○○○○○○○○○○○○
CLP-955
31
Page 32
The Function Mode
F5
Pedal Functions
After selecting “F5.Y”, press the [+/YES] button to engage the pedal functions sub-mode,
then use the FUNCTION [<] and [>] buttons to select the desired pedal functions, as listed
below.
F5.1: Left Pedal Mode.............................................................................................................................
This function conveniently lets you set the left pedal for normal soft pedal operation, or for
song start/stop operation. Use the [–/NO] and [+/YES] buttons to select the desired left-
pedal mode. Press the [–/NO] and [+/YES] buttons simultaneously to recall the default
setting “1”.
1: Soft The left pedal functions as the soft pedal.
2: Start/Stop The left pedal functions in the same manner as the SONG [ST ART/STOP] button.
F5.2: Sustain Sample Depth............................................................................................................
The GRAND PIANO 1 voice features special “Sustain Samples” which recreate the unique
resonance of an acoustic grand piano’s soundboard and strings when the damper pedal is
pressed. This function lets you adjust the depth of this effect. Use the [–/NO] and [+/YES]
buttons to set the effect depth as required. The effect depth range is from 0 through 20. A setting
of “0” produces no effect, while a setting of “20” produces maximum effect depth. Press the [–/
NO] and [+/YES] buttons simultaneously to recall the default setting “12”.
F6
F7
Metronome V olume
■ SHORTCUT: You can jump directly to the metronome functions by pressing the [FUNC-
TION] button while holding the METRONOME [ST ART/ST OP] button.
The volume of the metronome sound can be changed. After selecting “F6”, use the [–/NO]
and [+/YES] buttons to set the metronome volume as required. The volume range is from 1
through 20. A setting of “1” produces minimum sound, while a setting of “20” produces
maximum metronome volume. Press the [–/NO] and [+/YES] buttons simultaneously to recall
the default setting “10”.
Preset Song Part Cancel Volume
This function sets the volume at which a “canceled” part is played during preset song
playback (see page 15 for information on the “part-cancel” function). Use the [–/NO] and [+/
YES] buttons to set the volume as required. The volume range is from 0 through 20. A setting
of “0” produces no sound, while a setting of “20” produces maximum volume. Press the [–/
NO] and [+/YES] buttons simultaneously to recall the default setting “5”.
Adjust the part volume to a comfortable level to use the “canceled” part as a guide to play
along with. Set to “0” if you don’t want to hear the part.
CLP-955
32
○○○○○○○○○○○○○○○○○○○○○○○○○○○○○○○○○○○○○○○○○○○○○○○○○○○○○○○○
Page 33
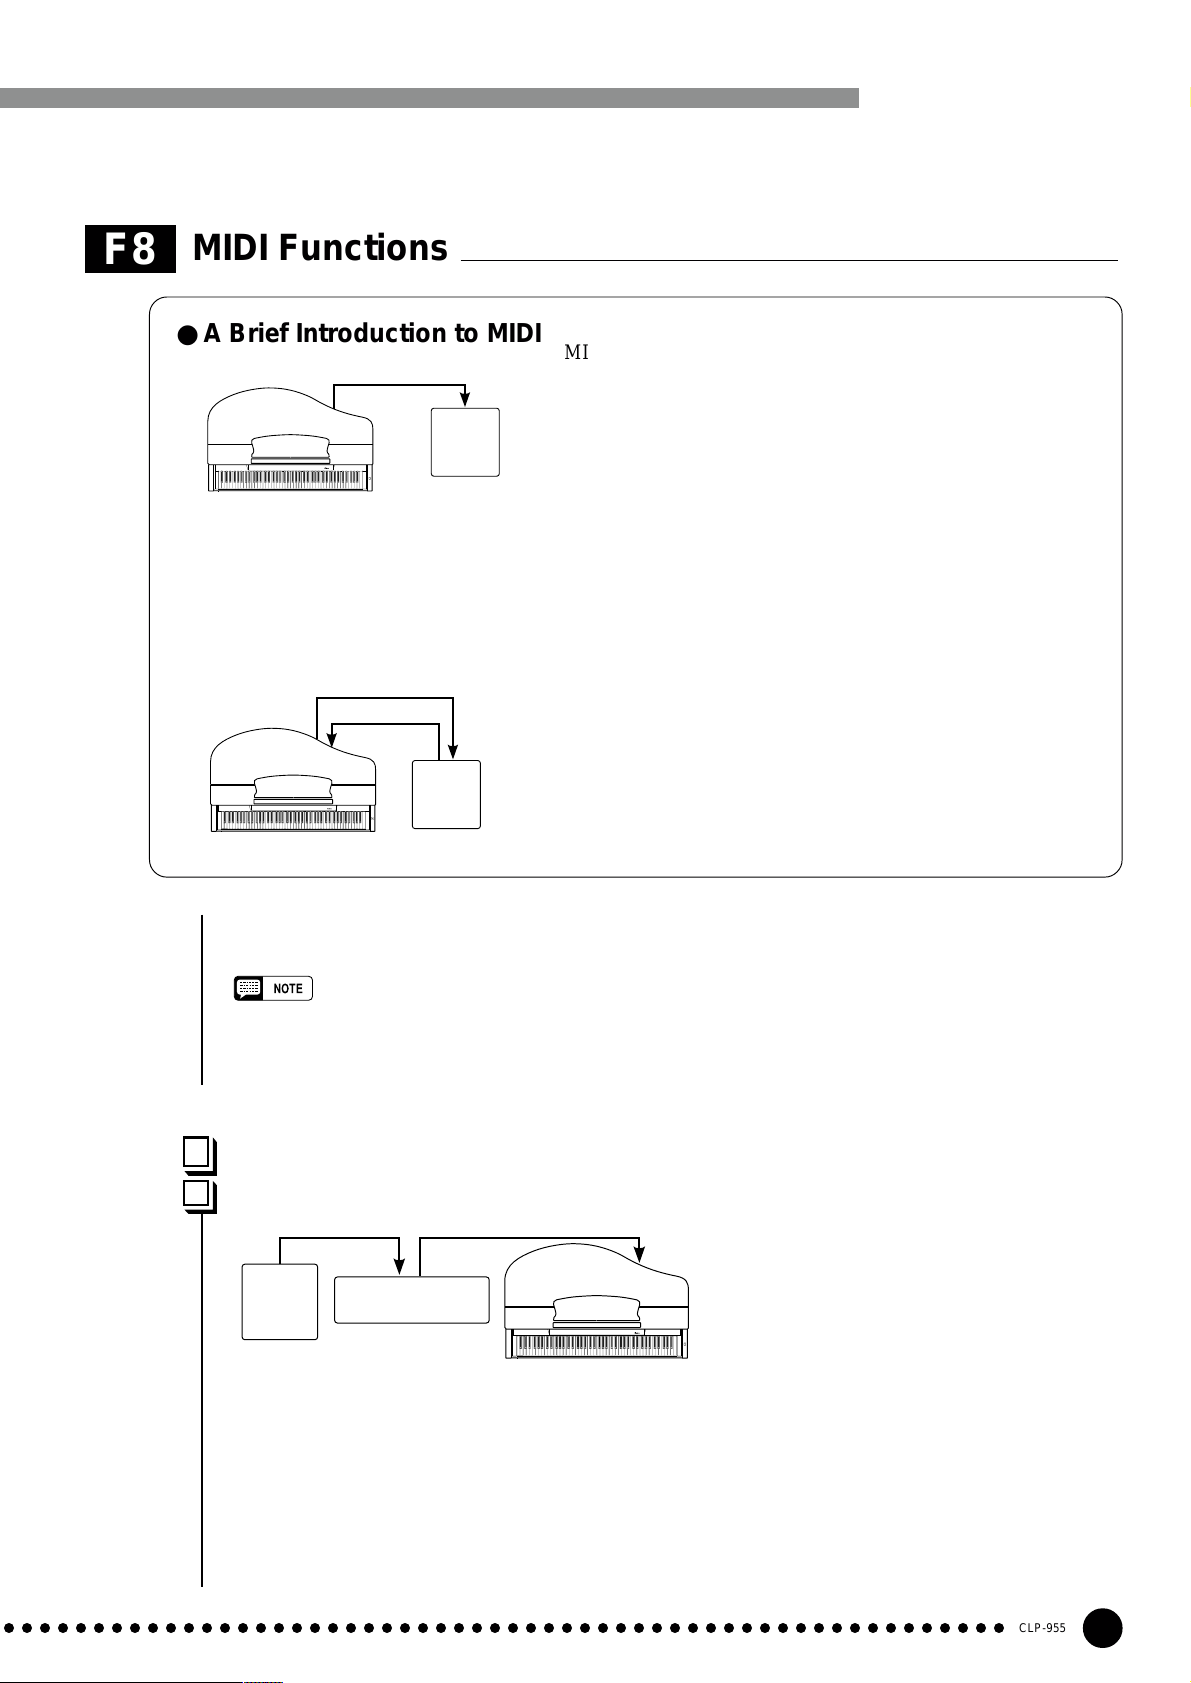
The Function Mode
F8
MIDI Functions
● A Brief Introduction to MIDI
MIDI Cable
MIDI OUT
CLP-
955
POWER
Clavinova
and velocity (touch response) information via the MIDI OUT connector whenever a note is played on the
keyboard. If the MIDI OUT connector is connected to the MIDI IN connector of a second keyboard (synthesizer,
etc.) or a tone generator (essentially a synthesizer with no keyboard), the second keyboard or tone generator will
respond precisely to notes played on the original transmitting keyboard. The result is that you can effectively
play two instruments at once, providing thick multi-instrument sounds.
Data Being Recorded
MIDI OUT
Clavinova
Playback Data
MIDI IN
CLP-
955
POWER
MIDI IN
DOU-10
MIDI INMIDI OUT
DOU-10
MIDI, the Musical Instrument Digital Interface, is a worldstandard communication interface that allows MIDI-compatible
musical instruments and equipment to share musical information and
control one another. This makes it possible to create “systems” of
MIDI instruments and equipment that offer far greater versatility and
control than is available with isolated instruments. For example, most
MIDI keyboards (including the Clavinova, of course) transmit note
This same type of musical information transfer is used for MIDI
sequence recording. A sequence recorder can be used to “record”
MIDI data received from a Clavinova, for example. When the
recorded data is played back, the Clavinova automatically “plays”
the recorded performance in precise detail.
The examples given above really only scratch the surface. MIDI
can do much, much more. The Clavinova MIDI functions allow it to
be used in fairly sophisticated MIDI systems.
After selecting “F8.Y”, press the [+/YES] button to engage the MIDI function sub-mode, then use
the FUNCTION [<] and [>] buttons to select the desired MIDI function, as listed below.
• The bottom-panel HOST SELECT switch must be set to “MIDI” in order to use the MIDI connectors. When you
use the TO HOST connector, set the HOST SELECT switch to the appropriate position for the type of computer
you are using (see page 37). In this situation, all MIDI settings described below will have affect on the MIDI
signal in and out of the TO HOST connector.
• Always use a high-quality MIDI cable to connect MIDI OUT to MIDI IN terminals. Never use MIDI cables longer
than about 15 meters, since cables longer than this can pick up noise which can cause data errors.
F8.1: MIDI T ransmit Channel Selection............................................................................................
F8.2: MIDI Receive Channel Selection.............................................................................................
MIDI OUT
DOU-10
MIDI IN MIDI THRU
Tone Generator
(Set to receive on MIDI
channel 2)
Clavinova
(Set to receive on MIDI
channel 1)
MIDI IN
CLP-
955
POWER
ent instruments or tone generators. One of the instruments or tone generators could be set to receive
only on channel 1, while the other is set to receive on channel 2. In this situation the first instrument
or tone generator will respond only to channel-1 information transmitted by the sequence recorder,
while the second instrument or tone generator will respond only to channel-2 information. This
allows the sequence recorder to “play” two completely different parts on the receiving instruments or
tone generators.
The MIDI system allows transmission
and reception of MIDI data on 16 different
channels. Multiple channels have been
implemented to allow selective control of
certain instruments or devices connected in
series. For example, a single MIDI sequence
recorder could be used to “play” two differ-
○○○○○○○○○○○○○○○○○○○○○○○○○○○○○○○○○○○○○○○○○○○○○○○○○○○○○○○○
CLP-955
33
Page 34
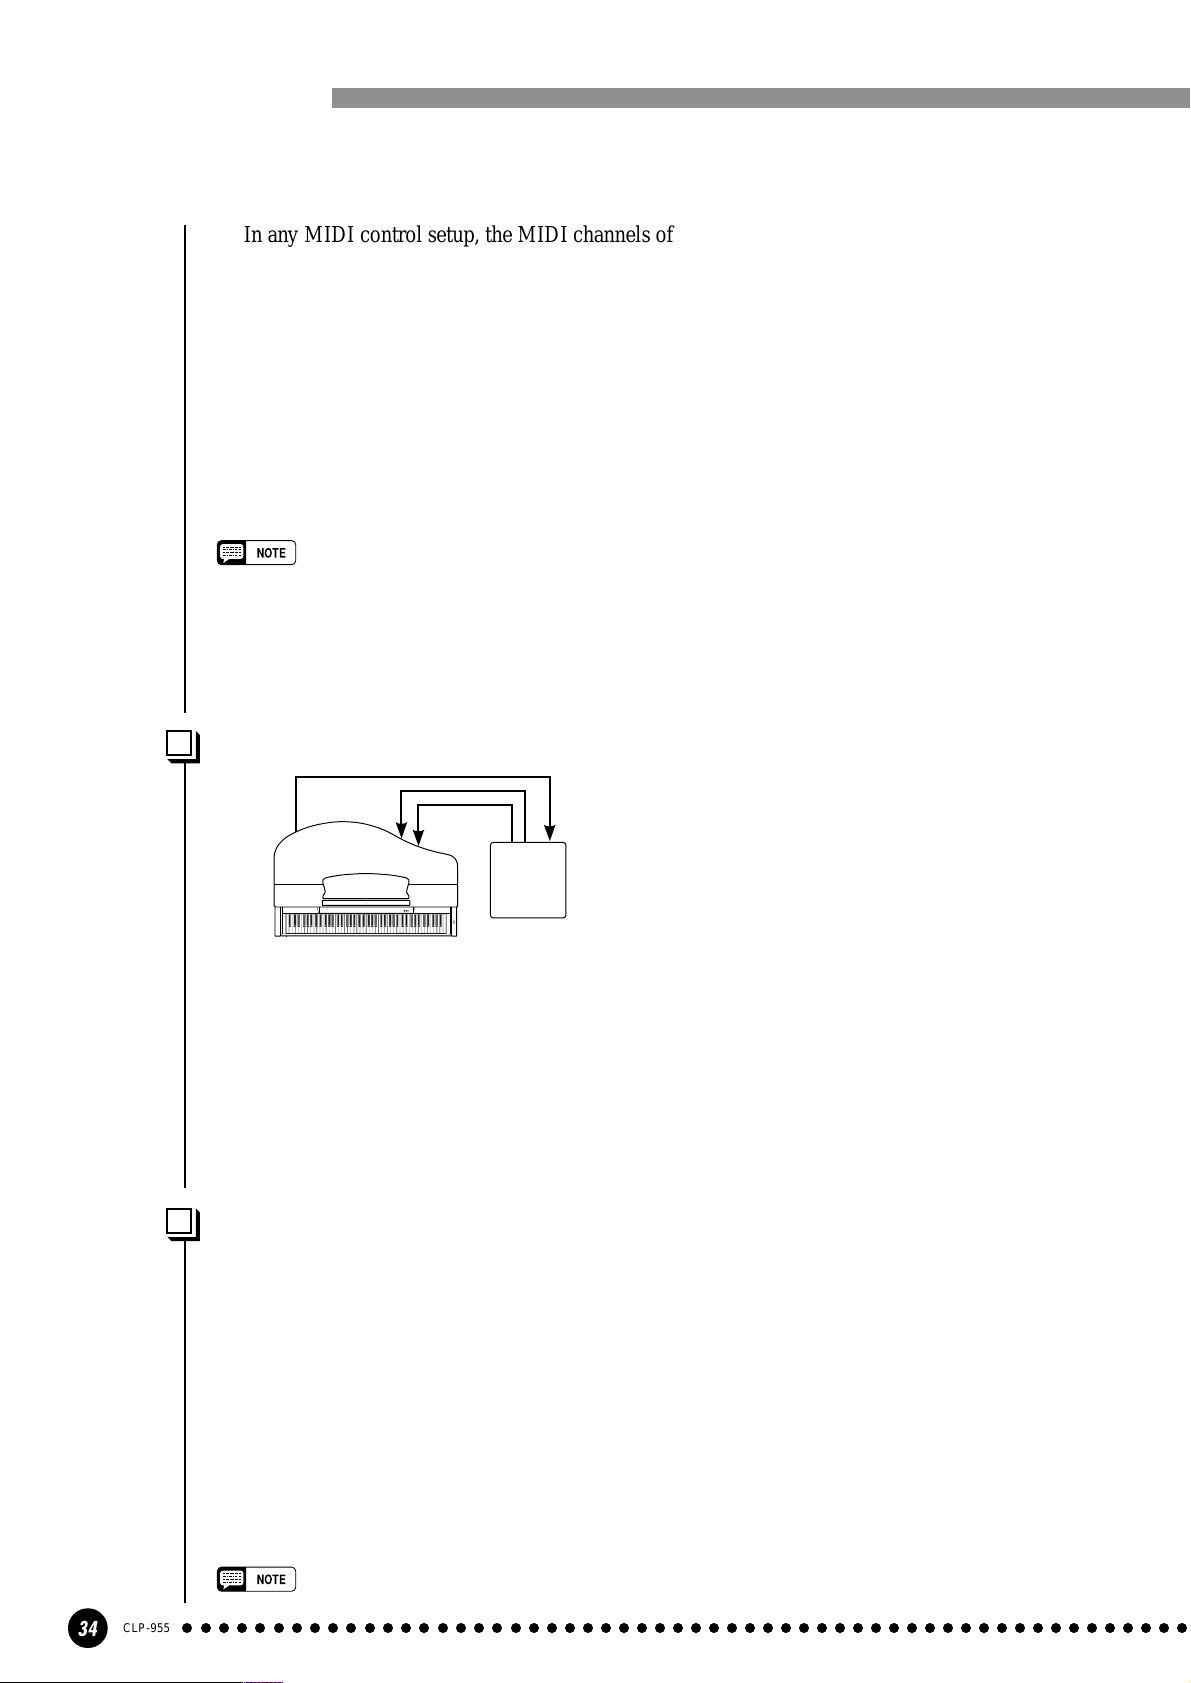
The Function Mode
In any MIDI control setup, the MIDI channels of the transmitting and receiving equipment must
be matched for proper data transfer. A “Multi-timbre” receive mode is also av ailable, which allows
simultaneous reception of different parts on all 16 MIDI channels, allowing the Clavinova to play
multi-channel song data received from a music computer or sequencer. There’s also a “1-2” mode
which allows simultaneous reception on channels 1 and 2.
Use the [–/NO] and [+/YES] buttons to select the desired transmit or receive channel. The transmit channel parameter can also be turned “OFF” if you don’t want the Clavinova to transmit any
MIDI data. To select the multi-timbre receive mode, set the receive channel to “ALL”. Select “1-2”
for multi-timbre reception on channels 1 and 2 only.
Press the [–/NO] and [+/YES] buttons simultaneously to recall the default setting: transmit = “1”;
receive = “ALL”.
• In the dual mode first voice data is transmitted on its set channel, and in the split mode right voice data is
transmitted on its set channel. In the dual mode second voice data is transmitted on the next greater channel
number of the set channel, and in the split mode left voice data is transmitted on the next greater channel
number of the set channel. In either mode, no data is transmitted if the transmit channel is set to “OFF”.
• Demo/preset song data and recorder playback data are not transmitted via MIDI.
• No MIDI reception occurs when the demo/preset song mode is engaged.
• Program change and other like channel messages received will not affect the Clavinova’s panel settings or
what is being played on the keyboard.
F8.3: Local Control ON/OFF ........................................................................................................................
“Local Control” refers to the fact that, normally, the
Clavinova keyboard controls its internal tone generator,
allowing the internal voices to be played directly from
the keyboard. This situation is “Local Control On” since
the internal tone generator is controlled locally by its
own keyboard.
Local control can be turned OFF, however, so that
MIDI OUT
Clavinova
AUX IN
L
OUT PUT
R
CLP-
955
R
DOU-10
POWER
MIDI
L
IN
the Clavinova keyboard does not play the internal voices, but the appropriate MIDI information is
still transmitted via the MIDI OUT connector when notes are played on the keyboard. At the same
time, the internal tone generator responds to MIDI information received via the MIDI IN connector.
When using the DOU-10 Disk Orchestra Unit with the Clavinova, for example, Local Control
should be turned OFF when recording using the DOU-10 voices only, and ON when recording the
Clavinova voices while listening to playback of the DOU-10 voices.
Use the [–/NO] and [+/YES] buttons to turn local control “On” or “OFF”.
Press the [–/NO] and [+/YES] buttons simultaneously to recall the default setting “On”.
F8.4: Program Change ON/OFF...............................................................................................................
Normally the Clavinova will respond to MIDI program change numbers received from an external keyboard or other MIDI device, causing the correspondingly numbered voice to be selected on
the corresponding channel (the keyboard voice does not change). The Clavinova will normally also
send a MIDI program change number whenever one of its voices is selected, causing the correspondingly numbered voice or program to be selected on the external MIDI device if the device is set up to
receive and respond to MIDI program change numbers.
This function makes it possible to cancel program change number reception and transmission so
that voices can be selected on the Clavinova without affecting the external MIDI device.
Use the [–/NO] and [+/YES] buttons to turn program change transmission and reception “On” or
“OFF”.
Press the [–/NO] and [+/YES] buttons simultaneously to recall the default setting “On”.
• For information on program change numbers for each of the Clavinova’s voices, refer to page 44 in the MIDI
Data Format section.
CLP-955
34
○○○○○○○○○○○○○○○○○○○○○○○○○○○○○○○○○○○○○○○○○○○○○○○○○○○○○○○○
Page 35
The Function Mode
F8.5: Control Change ON/OFF......................................................................................................
Normally the Clavinova will respond to MIDI control change data received from an external MIDI device or keyboard, causing the voice on the corresponding channel to be affected
by pedal and other “control” settings received from the controlling device (the keyboard voice
is not affected). The Clavinova also transmits MIDI control change information when one of
its pedals or other appropriate controls are operated.
This function makes it possible to cancel control change data reception and transmission so
that, for example, the Clavinova pedals and other controls can be operated without affecting an
external MIDI device.
Use the [–/NO] and [+/YES] buttons to turn control change transmission and reception
“On” or “OFF”.
Press the [–/NO] and [+/YES] buttons simultaneously to recall the default setting “On”.
• For information on control changes that can be used with the Clavinova, refer to the MIDI Data Format
on page 43.
F8.6: MIDI T ransmit Transpose......................................................................................................
This function allows the MIDI note data transmitted by the Clavinova to be transposed up
or down in semitone increments by up to plus or minus 12 semitones. The pitch of the
Clavinova itself is not affected.
Use the [–/NO] and [+/YES] buttons to set the desired amount of MIDI transmit transposition. The range is from “–12” (down one octave) through “0” (no transposition) to “12” (up
one octave).
Press the [–/NO] and [+/YES] buttons simultaneously to recall the default setting “0”.
F8.7: Panel/Status T ransmit .............................................................................................................
This function causes all the current Clavinova panel settings (selected voice, etc.) to be
transmitted via the MIDI OUT terminal. This is particularly useful if you will be recording
performances to a MIDI sequence recorder such as the Yamaha MIDI Data Filer MDF3 which
will be used to control the Clavinova on playback. By transmitting the Clavinova panel settings and recording them on the MIDI sequence recorder prior to the actual performance data,
the Clavinova will be automatically restored to the same settings when the performance is
played back.
Press the [+/YES] button to transmit the panel/status data. “End” will appear on the LED
display when the data has been successfully transmitted.
• See page 44 for list of the “Panel Data Contents” transmitted by this function.
• Panel setting data that is transmitted to an external device can only be reloaded on a model of the
same type. Panel setting data can also be directly transferred to or from instruments of the same
model type.
F8.8: Bulk Data Dump ............................................................................................................................
This function is used to transmit all data stored in the Recorder memory to a MIDI data
storage device such as the Yamaha MIDI Data Filer MDF3, other sequence recorders, or MIDI
compatible computers.
Press the [+/YES] button to begin bulk transmission. “End” will appear on the LED
display when the data has been successfully transmitted.
• User song recorder data that is transmitted to an external device can only be reloaded on a model of
the same type. Recorder data can also be directly transferred to or from instruments of the same
model type.
• The reload operation cannot be executed when the demo/preset song mode or user song recorder is
in operation, or when the Function mode is engaged.
•
No MIDI note/panel data transmission or data reception occurs during a bulk data dump transmit operation.
○○○○○○○○○○○○○○○○○○○○○○○○○○○○○○○○○○○○○○○○○○○○○○○○○○○○○○○○
CLP-955
35
Page 36

The Function Mode
F9
Backup Functions
After selecting “F9.Y”, press the [+/YES] button to engage the backup function sub-mode,
then use the FUNCTION [<] and [>] buttons to select the desired backup function, as listed
below.
• The backup settings themselves, and the contents of the user song recorder memory, are always
backed up.
• Even if the Backup is turned on, factory presets can be recalled at any time (see page 40). The factory
setting list is found on page 42.
Even if backup is turned on via one of the functions described below, the data will only be
retained in memory for about 1 week if the power is not turned on during this time. If the
backup period is exceeded, all settings will be reset to their default values. If you want to
retain the backup settings for longer periods, be sure to turn the power switch on for a few
minutes at least once a week.
F9.1: Voice...........................................................................................................................................................
Turns backup of the voice functions listed below on or off. Use the [–/NO] and [+/YES]
buttons to turn backup “On” or “OFF”.
The default backup mode is “OFF”.
• Voice (Keyboard, Dual, and Split)
• Dual (ON/OFF, Voice, and Dual Functions for each voice combination)
• Split (ON/OFF, Voice, and Split Functions for each voice combination)
• Reverb (ON/OFF , T ype, and Depth for each voice)
• Effect (ON/OFF, Type, and Depth for each voice)
• Touch Sensitivity (including the FIXED volume)
• Metronome (Beat, Volume)
• Preset Song Part Cancel Volume
F9.2: MIDI.............................................................................................................................................................
Turns backup of the MIDI functions listed below on or off. Use the [–/NO] and [+/YES]
buttons to turn backup “On” or “OFF”.
The default backup mode is “OFF”.
• Channel (Transmit, Receive) • Local ON/OFF
• Program Change ON/OFF • Control Change ON/OFF
• MIDI Transmit Transpose
F9.3: Tuning .......................................................................................................................................................
Turns backup of the tuning functions listed below on or off. Use the [–/NO] and [+/YES]
buttons to turn backup “On” or “OFF”.
The default backup mode is “OFF”.
• Transpose • T uning • Scale (including base note)
F9.4: Pedal..........................................................................................................................................................
Turns backup of the pedal functions listed below on or off. Use the [–/NO] and [+/YES]
buttons to turn backup “On” or “OFF”.
The default backup mode is “OFF”.
• Left Pedal Mode • Sustain Sample Depth
CLP-955
36
○○○○○○○○○○○○○○○○○○○○○○○○○○○○○○○○○○○○○○○○○○○○○○○○○○○○○○○○
Page 37
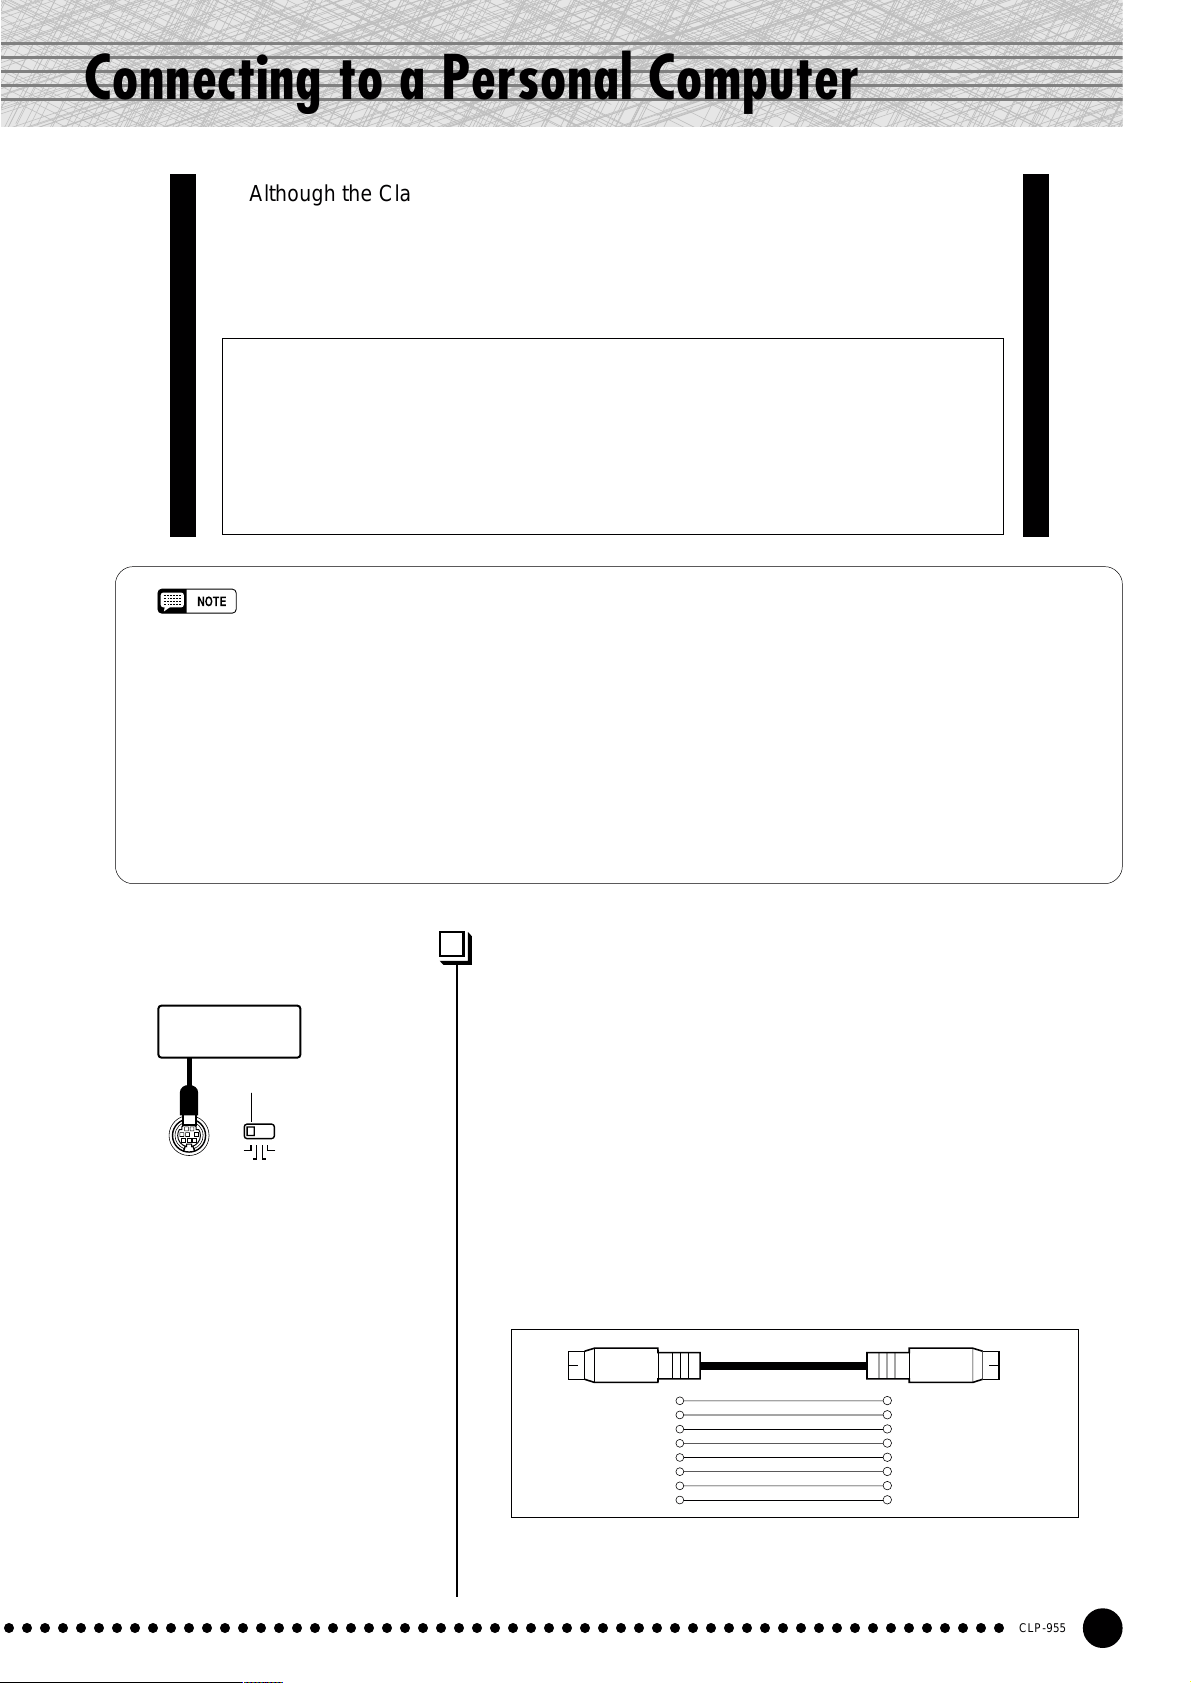
Connecting to a Personal Computer
Although the Clavinova can be connected to a personal computer via the
MIDI IN/OUT connectors and a MIDI interface, the T O HOST connector and
HOST SELECT switch allow direct connection to Apple Macintosh or IBM-PC/AT
personal computers for sequencing and other music applications without the
need for a separate MIDI interface.
“The Clavinova-Computer Connection,” a document describing what you can do with your
Clavinova and a personal computer and how to set up a Clavinova-Computer system is
available online as a pdf document (in English) at the following internet address:
Clavinova Home Page:
http://www.yamaha.co.jp/english/product/cl/
Manual Library (Electronic Musical Instruments and XG Related Products)
http://www2.yamaha.co.jp/manual/emi/index_e.html
• When connecting the Clavinova to a personal computer, first turn the power to both the Clavinova and the computer
OFF before connecting the cable and setting the HOST SELECT switch. After connecting the cable and making the
appropriate HOST SELECT switch setting, turn the power to the computer on first, then turn on the Clavinova.
• When not using the [TO HOST] terminal of the Clavinova, make sure the cable is disconnected from the [TO HOST]
terminal. If the cable is left connected, the Clavinova may not function properly .
•“
HS(
” will appear in the display if the host computer is not turned on, the connecting cable is not properly connected, the HOST SELECT switch is not in the proper position, or the MIDI driver or MIDI application is not active. In
this case, turn the power off on both the Clavinova and the computer, and check the cable connection and the
position of the HOST SELECT switch. Once the connection and HOST SELECT switch position is verified, turn the
power of the computer on first, then the Clavinova, to check if the MIDI driver and MIDI application function properly.
• When the HOST SELECT switch is set to “Mac”, “PC-1”, or “PC-2, no data transfer occurs via the MIDI connectors.
T o use the MIDI connectors for connection via a standard MIDI interface, set the HOST SELECT switch to “MIDI”.
Apple Macintosh
Series Computer
Set to the “Mac” position.
MIDIMac
PC-2PC-1
HOST SELECTTO HOST
Connecting to an Apple Macintosh Series
Computer................................................................................................................
Connect the TO HOST connector of the Clavinova to the modem or
printer port on your Macintosh, depending on which port your MIDI
software is using for MIDI data communication, using a standard
Macintosh 8-pin system peripheral cable. Set the HOST SELECT
switch to the “Mac” position.
You may also have to make other MIDI interface settings on the
computer side, depending on the type of software you use (refer to your
software owner’s manual). In any case the clock speed should be set to
1 MHz.
● “Mac” Cable Connections
MINI DIN
8-PIN
2 (HSK i)1
MINI DIN
1 (HSK 0)2
8-PIN
5 (RxD-)3
4 GND4
3 (TxD-)5
8 (RxD+)6
7 (GP i)7
6 (TxD+)8
• 8-pin system peripheral cable.
• Data transfer rate: 31,250 bps.
○○○○○○○○○○○○○○○○○○○○○○○○○○○○○○○○○○○○○○○○○○○○○○○○○○○○○○○○
CLP-955
37
Page 38

Connecting to a Personal Computer
Connecting to an IBM-PC/AT Series Computer ............
IBM-PC/AT
Series Computer
Set to the “PC-2” position.
MIDIMac
PC-2PC-1
HOST SELECTTO HOST
• If your system doesn’t work properly with the connections and settings listed above, your software may require
different settings. Check your software operation manual and if it requires a 31,250 bps. data transfer rate, set the
HOST SELECT switch to “PC-1”.
• When using the TO HOST terminal to connect to a personal computer using Windows, a Yamaha MIDI driver must
be installed in the personal computer. The Yamaha MIDI driver can be obtained at Yamaha’s home page on the
World Wide Web, <http://www .yamaha.co.jp/english/xg/>.
Connect the TO HOST connector of the Clavinova to the RS-232C port
on your IBM computer, using a standard 8-pin MINI DIN → 9-pin D-SUB
cross cable. Set the HOST SELECT switch to the “PC-2” position.
Refer to your software owner’s manual for information on any
settings you might have to make on the computer side.
● “PC-2” Cable Connections
MINI DIN
8-PIN
4 5 (GND)
8
• 8-pin mini DIN → 9-pin D-SUB cable.
• Data transfer rate: 38,400 bps.
8 (CTS)1
D-SUB
7 (RST)2
9-PIN
2 (RxD)3
3 (TxD) 5
● Connector Pin Numbers
MINI DIN 8-PIN
678
34
5
1
2
D-SUB 9-PIN
594837261
38
CLP-955
○○○○○○○○○○○○○○○○○○○○○○○○○○○○○○○○○○○○○○○○○○○○○○○○○○○○○○○○
Page 39
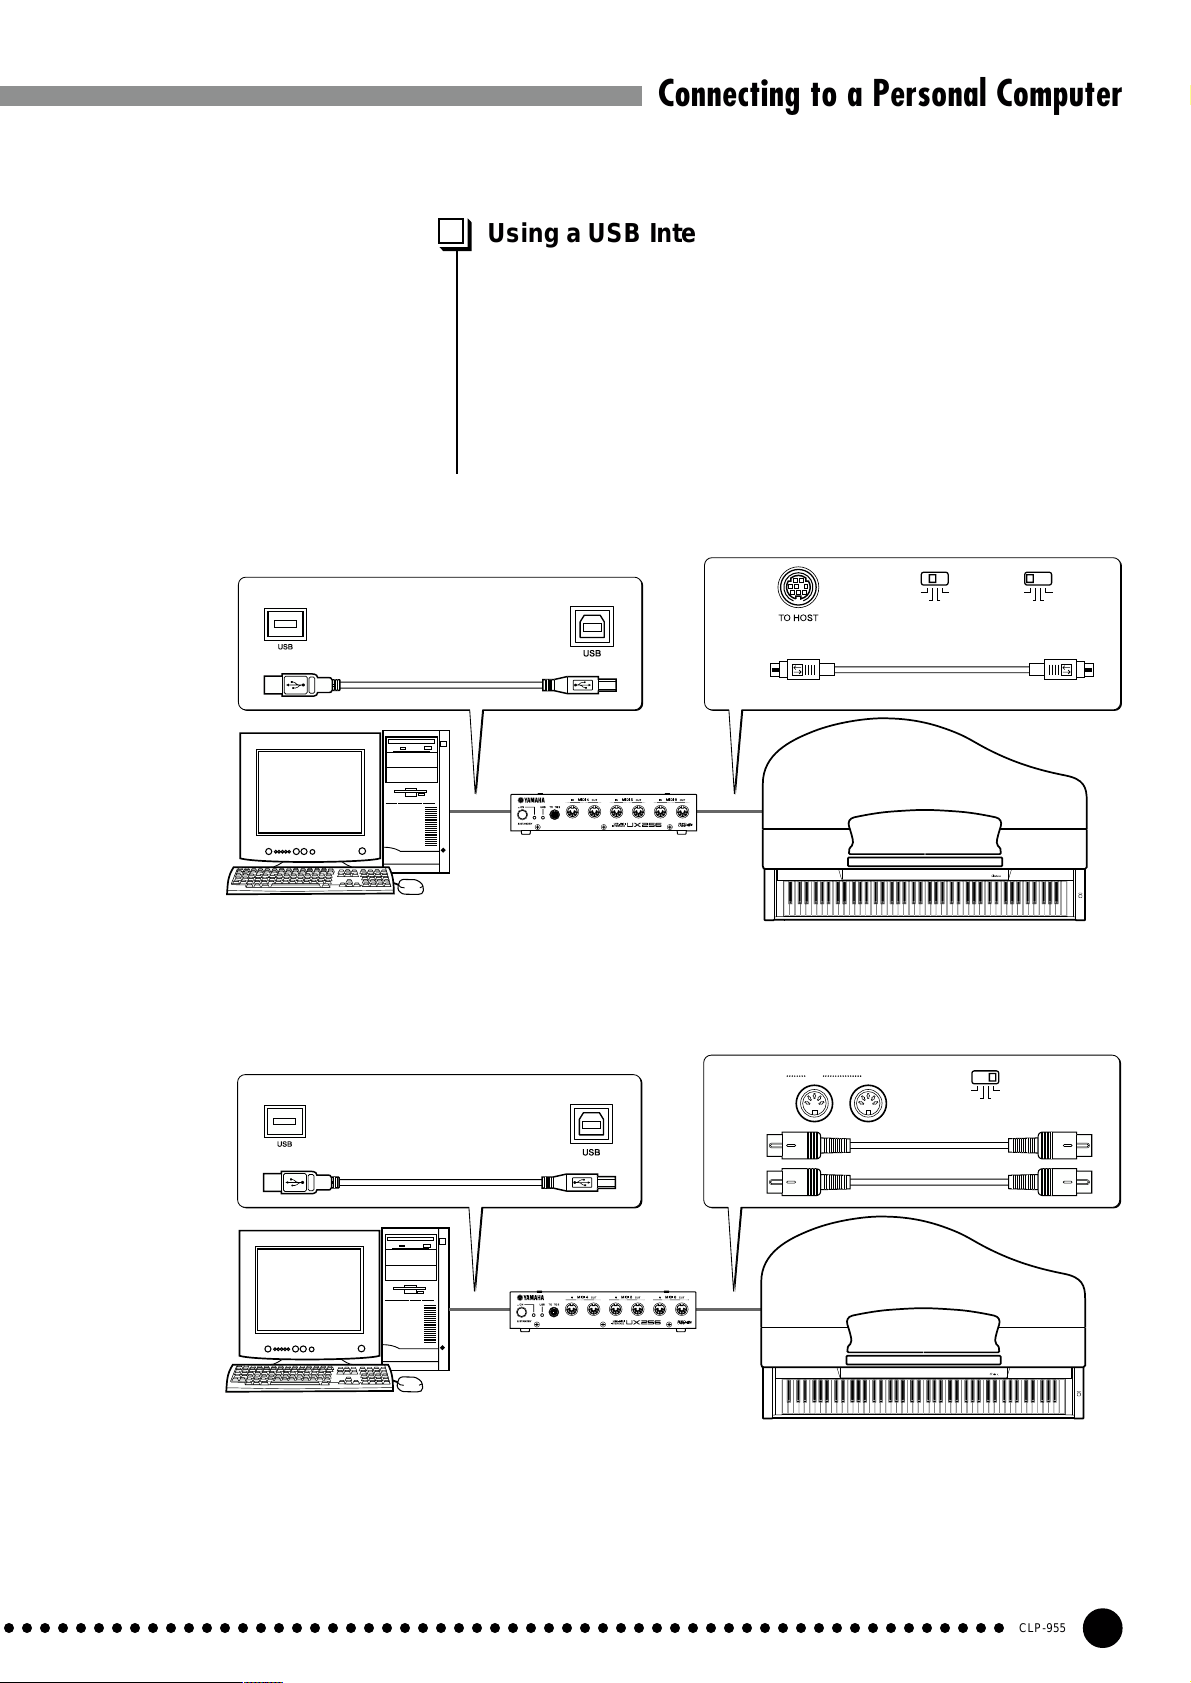
Connecting to a Personal Computer
Using a USB Interface (such as the Yamaha UX256)
Connect the USB interface (Yamaha UX256 or equivalent) to your
computer using a USB cable. Install the driver software supplied with
the interface (or other appropriate driver software) on your computer
according to the supplied instructions. Connect your instrument to the
USB interface using either a standard Macintosh 8-pin system peripheral cable or MIDI cables. Refer to the manual supplied with your USB
interface for details.
● Connecting the USB Interface and Instrument via a Serial Cable
HOST SELECT
Standard Macintosh 8-pin system peripheral cable
PC-1
or
Mac
HOST SELECT
USB cable
Mini-DIN 8-pin
UX256 or equivalent
Computer
Clavinova
● Connecting the USB Interface and Instrument via MIDI Cables
MIDI
INOUT
USB cable
MIDI cables
HOST SELECT
CLP-
MIDI
955
POWER
UX256 or equivalent
Computer
Clavinova
○○○○○○○○○○○○○○○○○○○○○○○○○○○○○○○○○○○○○○○○○○○○○○○○○○○○○○○○
CLP-
955
CLP-955
POWER
39
Page 40

Factory Preset Recall
All dual mode, split mode, reverb, effect, touch sensitivity, tuning
POWER
settings, and the settings affected by the Backup Functions can be
restored to their original factory preset values by holding the C7 key
(rightmost key on the keyboard) while turning the [POWER] switch
ON. This also erases all recorder data, and sets all Backup on/off
settings (F9) to “OFF”.
• The factory setting list is found on page 42.
Troubleshooting
If you encounter what appears to be a malfunction, please check the following points before assuming
that your Clavinova is faulty .
1. No Sound When the Power is T urned ON
Is the AC plug properly connected to the Clavinova
and an AC wall outlet? Check the AC connection
carefully. Is the MASTER VOLUME control turned
up to a reasonable listening level?
Also make sure that a pair of headphones is not
plugged into the PHONES jack, and that the Local
Control (page 34) is ON.
2. The Damper Pedal Doesn’t Work
If the damper pedal doesn’t work, or notes are sustained even when the pedal is not pressed, make sure
that the pedal cord is properly plugged into the main
unit (page 50).
3. The Clavinova Reproduces Radio or TV
Sound
This can occur if there is a high-power transmitter in
your vicinity. Contact your Yamaha dealer.
4. Intermittent Static Noise
This is usually due to turning ON or OFF a household
appliance or other electronic equipment which is fed
by the same AC mains line as your Clavinova.
5. Interference Appears On Radio or TV Sets
Located Near the Clavinova
The Clavinova contains digital circuitry which can
generate radio-frequency noise. The solution is to
move the Clavinova further aw ay from the affected
equipment, or vice versa.
6. Noise is heard from the Clavinova’s speakers.
The noise may be due to interference caused by the
use of a mobile phone in close proximity to the
Clavinova.
Turn off the mobile phone, or use it further away
from the Clavinova.
7. Distorted Sound When the Clavinova is
Connected to An External Amplifier/Speaker
System
If the Clavinova is connected to a stereo system or
instrument amplifier and the sound is distorted,
reduce the volume of the external equipment to a
level at which the distortion ceases.
● If “Scn” appears on the display an internal
malfunction has occurred. In this case,
contact your Y amaha dealer .
Options & Expander Modules
● Options
HPE-160 Stereo Headphones
High-performance lightweight dynamic headphones
with extra-soft ear pads.
CLP-955
40
○○○○○○○○○○○○○○○○○○○○○○○○○○○○○○○○○○○○○○○○○○○○○○○○○○○○○○○○
● Expander Modules
DOU-10 Disk Orchestra Unit
A range of MIDI recording and playback functions, plus Yamaha DOC software, Disklavier
PianoSoft™, and General MIDI/Standard MIDI File
disk playback capability.
Page 41
Voice Descriptions
Voice
GRAND
PIANO 1
GRAND
PIANO 2
E.PIANO 1
E.PIANO 2
HARPSICHORD
VIBRAPHONE
CHURCH
ORGAN
JAZZ
ORGAN
STRINGS
CHOIR
WOOD
BASS
E.BASS
Stereo/
Mono
Stereo
Stereo
Stereo
Mono
Stereo
Stereo
Stereo XX
Mono
Stereo
Stereo
Mono
Mono
Touch
Response Sampling*
Dynamic
OO
XO
OO
OO
XX
OO
XX
XO
XO
XO
XO
Voice Descriptions
Newly-recorded samples from a full concert grand piano. Also includes dynamic sampling, sustain samples, and key-off
samples for exceptionally realistic acoustic grand piano sound. Perfect for classical compositions as well as any other style
that requires acoustic piano.
Neu aufgezeichnete Samples eines echten Konzertflügels. Mit “Dynamic Sampling”, “Sustain Samples” und “Key-off
Samples” für einen außergewöhnlich realistischen Konzertflügelklang. Perfekt für klassische Kompositionen sowie viele
andere Musikrichtungen, für die ein akustischer Klavierklang wichtig ist.
Échantillons nouvellement enregistrés à partir d’un vrai piano à queue de concert. Inclus également des échantillons
dynamique, sustain et hors touche destinés à produire une sonorité acoustique réaliste d’un vrai piano à queue de concert.
Parfaits pour les compositions classiques comme pour tout autre style nécessitant un piano acoustique.
Muestras nuevas grabadas en un piano de cola para conciertos. Incluyen también muestras dinámicas, muestras de
sostenido, y muestras de soltado de cuerdas para ofrecer un sondo de piano de cola acústico muy realista. Son perfectas
para composiciones clásicas así como para otros estilos que requieren piano acústico.
A bright, expansive piano sound which is ideal for rock and popular genres.
Ein heller, weiträumiger Pianosound, der sich ideal für Rock und andere populäre Musikgenres eignet.
Sonorité de piano brillante et expansive idéale pour les genres de musiques rock et populaire.
Sonido de piano claro y con expansión que es ideal para música rock y popular.
An electronic piano sound created by FM synthesis. Extremely “musical” response with varying timbre according to keyboard
dynamics.
Ein elektronischer Pianosound, der durch FM-Synthese erzeugt wird. Äußerst “musikalische” Ansprache mit
anschlagstärkeabhängiger Klangfärbung.
Sonorité de piano électronique créée par synthèse FM. Réponse extrêmement “musicale” avec un timbre variant en
proportion de la dynamique du clavier.
Sonido de piano electrónico creado con síntesis de FM. Tiene una respuesta muy “musical” con variación del timbre de
acuerdo con la dinámica del teclado.
The sound of an electric piano using hammer-struck metallic “tines.” Soft tone when played lightly, and an aggressive tone
when played hard.
Der Sound eines elektrischen Pianos mit metallischen “Hammeranschlag-Spitzen”. Bei leichtem Anschlagen erhält man einen
weichen Klang, mit zunehmender Anschlagstärke einen aggressiveren Sound.
Sonorité de piano électrique se servant de “pointes” métalliques de frappe de marteau. Sonorité atténuée lorsque les touches
sont frappées légèrement et sonorité agressive lorsque le jeu est plus dur.
Sonido de piano eléctrico que usa los tonos metálicos de golpe de martillo. Es un tono suave cuando se toca con delicadeza,
y es un tono agresivo cuando se toca con fuerza.
The definitive instrument for baroque music. Since harpsichord uses plucked strings, there is no touch response. There is,
however, a characteristic additional sound when the keys are released.
Cembalo, das maßgebliche Instrument der Barockmusik. Da die Saiten bei diesem Instrument angezupft werden, spricht
diese Stimme nicht auf Anschlagdynamik an. Beim Freigeben der Tasten ist jedoch ein zusätzlicher charakteristischer Klang
zu hören.
L’instrument définitif pour la musique baroque. Étant donné que la harpe se sert de cordes pincer, il n’existe aucune réponse de
touche. Cependant, cette sonorité supplémentaire caractéristique est obtenue lorsque les touches sont relâchées.
El instrumento perfecto para música barroca. Puesto que el clavicordio emplea cuerdas de punteado, no hay respuesta a la
pulsación. Sin embargo, hay un sonido característico adicional al soltar las teclas.
Vibraphone played with relatively soft mallets. The tone becomes more metallic the harder you play.
Das Vibraphon wird mit relativ weichen Schlegeln gespielt. Je härter der Anschlag, um so metallischer wirkt der Klang.
Vibraphone joué avec des maillets relativement souples. La sonorité devient plus métallique au fur et à mesure que le jeu des
touches est plus dur.
Vibráfono tocado con mazos relativamente blandos. El tono pasa a ser más metálico a medida que se toca con más fuerza.
A soft pipe-organ type voice that is ideal for hymn accompaniment and other styles.
Ein sanfter pfeifenorgelähnlicher Klang, der sich ideal für Hymnenbegleitung und andere Musikstile eignet.
Voix de type orgue à tuyaux et sonorité enveloppée convenant parfaitement pour l’accompagnement d’un hymne ou d’autres
styles.
Una voz del tipo de órgano de tubos que es ideal para acompañamientos de himnos y otros estilos.
The sound of a “tonewheel” type electric organ. Often heard in jazz and rock idioms.
Der Sound einer “Tonewheel”-Elektroorgel. In Jazz- und Rockidiomen weit verbreitet.
Sonorité d’une molette de courbure du son de type orgue électrique. Souvent entendue dans les dialectes de jazz et de rock.
Sonido de un órgano eléctrico del tipo “rueda fónica”. Se oye normalmente en estilos de jazz y rock.
A large string ensemble. Try combining this voice with piano in the DUAL mode.
Ein großes Streicherensemble. Probieren Sie diese Stimme einmal kombiniert mit Piano im Dualmodus aus.
Grand ensemble à cordes. Essayez d’associer cette voix avec le piano en mode DUAL.
Un conjunto de instrumentos de cuerdas grande. Pruebe combinando esta voz con la de piano en el modo DUAL.
A big, spacious choir voice. Perfect for creating rich harmonies in slow pieces.
Ein satter, reichhaltiger Klang. Perfekt zur Erzeugung voller Harmonien in Stücken mit langsamem Tempo.
Une ample et spacieuse voix de chœur. Convient parfaitement pour créer de riches harmoniques dans les passages lents.
Una voz de coros grande y espaciosa. Es perfecta para crear ricas armonías de piezas lentas.
An upright bass played fingerstyle. Ideal for jazz and Latin music.
Ein mit den Fingern gespielter Kontrabaß. Ideal für Jazz und lateinamerikanische Musik.
Sorte de doigté de basse droite. Convient parfaitement pour la musique de jazz et la musique latine.
Contrabajo tocado con punteado. Es ideal para jazz y música latina.
Electric bass for a wide range of music styles, jazz, rock, popular, and more.
E-Baß für eine Reihe von Musikrichtungen wie Jazz, Rock, Pop usw.
Basse électrique destinée à une vaste gamme de styles de musique de jazz, rock, populaire et autres.
Bajo eléctrico para una amplia variedad de estilos de música, jazz, rock, popular, y otros.
* Dynamic Sampling provides multiple velocity-switched samples to accurately simulate the timbral response of an acoustic piano.
○○○○○○○○○○○○○○○○○○○○○○○○○○○○○○○○○○○○○○○○○○○○○○○○○○○○○○○○
CLP-955
41
Page 42

Demo Song List
Voice Demo Tune Titles
Voice Name Title Composer
GRAND PIANO 1 Nocturne op.9-2 F.F.Chopin
GRAND PIANO 2 Piano Sonate op.13 “Pathétique” 2nd mov. L.v.Beethoven
E.PIANO1 Clair de lune C.A.Debussy
E.PIANO2 Scherzo-valsa (Pièces Pittoresques) E.Chabrier
HARPSICHORD Le Coucou L-C.Daquin
VIBRAPHONE Study in A minor Georges Pheiffer
CHURCH ORGAN Organ Concerto Op.4 No.2 G.F.Händel
JAZZ ORGAN Trolltog (Lyriske Småstykker No.5) E.H.Grieg
STRINGS Brandenburgisches Konzert No.3 J.S.Bach
CHOIR Kantate Nr.140 J.S.Bach
WOOD BASS L’Eléphant Saint-Saëns
E.BASS In The Kings Hall E.H.Grieg
• Some of the demonstration pieces listed above are short rearranged excerpts from the original compositions.
Factory Setting List
Backup Group
Voice GRAND PIANO 1
Dual Mode OFF
Split Mode OFF
Split Mode Left Voice WOOD BASS
Reverb Type Preset for each voice
Reverb Depth Preset for each voice
Effect Type Preset for each voice
Effect Depth Preset for each voice
Touch Sensitivity MEDIUM
Volume in the FIXED Mode 64
Metronome OFF —
Metronome Time Signature 0 (no accent) F9.1
Tempo 120 —
Transpose 0 F9.3
F9.1
“—”: Not memorized
Function
Function Default
F1 Tuning A3=440Hz
F2.1 Scale 1 (Equal Temperament) F9.3
F2.2 Base Note C
F3.1 Dual Balance Preset for each voice combination
F3.2 Dual Detune Preset for each voice combination
F3.3, F3.4 Dual Octave Shift Preset for each voice combination
F3.5, F.3.6 Dual Effect Depth Preset for each voice combination
F4.1 Split Point F#2 F9.1
F4.2 Split Balance Preset for each voice combination
F4.3, F4.4 Split Octave Shift Preset for each voice combination
F4.5, F4.6 Split Effect Depth Preset for each voice combination
F4.7 Damper Range ALL
F5.1 Left Pedal Mode 1 (soft pedal)
F5.2 Sustain Sample Depth 12
F6 Metronome Volume 10
F7 Preset Song Part Cancel Volume 5
F8.1 MIDI Transmit Channel 1
F8.2 MIDI Receive Channel ALL
F8.3 Local Control ON
F8.4 Program Change Send & Receive ON
F8.5 Control Change Send & Receive ON
F8.6 MIDI Transmit Transpose 0
F9 Backup All OFF
Backup Group
F9.4
F9.1
F9.2
Always backed up
42
CLP-955
○○○○○○○○○○○○○○○○○○○○○○○○○○○○○○○○○○○○○○○○○○○○○○○○○○○○○○○○
Page 43

MIDI Data Format
If you’re already very familiar with MIDI, or are using a computer to control your music hardware with computer-generated
MIDI messages, the data provided in this section can help you to control the Clavinova.
1. NOTE ON/OFF
Data format: [9nH] -> [kk] -> [vv]
9nH = Note ON/OFF event (n = channel number)
kk = Note number (Transmit: 09H ~ 78H = A-2 ~ C8 /
Receive: 00H ~ 7FH = C-2 ~ G8)*
vv = Velocity (Key ON = 01H ~ 7FH, Key OFF = 00H)
Data format: [8nH] -> [kk] -> [vv] (reception only)
8nH = Note OFF event (n = channel number)
kk = Note number: 00H ~ 7FH = C-2 ~ G8
vv = Velocity
* If received value exceeds the supported range for the selected
voice, the note is adjusted by the necessary number of octaves.
2. CONTROL CHANGE
Data format: [BnH] -> [cc] -> [vv]
BnH = Control change (n = channel number)
cc = Control number
vv = Data Range
(1) Bank Select
ccH Parameter Data Range (vvH)
00H Bank Select MSB 00H:Normal
20H Bank Select LSB 00H...7FH
Bank selection processing does not occur until receipt of next
Program Change message.
(2) Main Volume (reception only)
ccH Parameter Data Range (vvH)
07H Volume MSB 00H...7FH
(3) Expression
ccH Parameter Data Range (vvH)
0BH Expression MSB 00H...7FH
(4) Damper
ccH Parameter Data Range (vvH)
40H Damper MSB 00H...7FH
(5) Sostenuto
ccH Parameter Data Range (vvH)
42H Sostenuto 00H-3FH:off, 40H-7FH:on
(6) Soft Pedal
ccH Parameter Data Range (vvH)
43H Soft Pedal 00H-3FH:off, 40H-7FH:on
(7) Effect1 Depth ( Reverb Send Level )
ccH Parameter Data Range (vvH)
5BH Effect1 Depth 00H...7FH
Adjusts the reverb send level.
(8) Effect4 Depth ( Variation Effect Send Level )
ccH Parameter Data Range (vvH)
5EH Effect4 Depth 00H...7FH
3 MODE MESSAGES
Data format: [BnH] -> [cc] -> [vv]
BnH = Control event (n = channel number)
cc = Control number
vv = Data Range
(1) All Sound Off
ccH Parameter Data Range (vvH)
78H All Sound Off 00H
Switches off all sound from the channel. Does not reset Note On
and Hold On conditions established by Channel Messages.
(2) Reset All Controllers
ccH Parameter Data Range (vvH)
79H
Reset All Controllers
Resets controllers as follows.
Controller Value
Expression 127 (max)
Damper Pedal 0 (off)
Sostenuto 0 (off)
Soft Pedal 0 (off)
(3) Local Control (reception only)
ccH Parameter Data Range (vvH)
7AH Local Control 00H (off), 7FH (on)
(4) All Notes Off
ccH Parameter Data Range (vvH)
7BH All Notes Off 00H
Switches OFF all the notes that are currently ON on the specified
channel. Any notes being held by the damper or sostenuto pedal
will continue to sound until the pedal is released.
(5) Omni Off (reception only)
ccH Parameter Data Range (vvH)
7CH Omni Off 00H
Same processing as for All Notes Off.
(6) Omni On (reception only)
ccH Parameter Data Range (vvH)
7DH Omni On 00H
Same processing as for All Notes Off.
(7) Mono (reception only)
ccH Parameter Data Range (vvH)
7EH Mono 00H
Same processing as for All Sound Off.
(8) Poly (reception only)
ccH Parameter Data Range (vvH)
7FH Poly 00H
Same processing as for All Sound Off.
• When control change reception is turned OFF in the Function
mode, control change data will not be transmitted or received
except for Bank Select and Mode messages.
• Local on/off, OMNI on/off are not transmitted. (The appropriate
note off number is supplied with “All Note Off” transmission).
• When a voice bank MSB/LSB is received, the number is stored
in the internal buffer regardless of the received order, then the
stored value is used to select the appropriate voice when a
program change message is received.
• The Multi-timbre and Poly modes are always active. No change
occurs when OMNI ON, OMNI OFF, MONO, or POLY mode
messages are received.
00H
○○○○○○○○○○○○○○○○○○○○○○○○○○○○○○○○○○○○○○○○○○○○○○○○○○○○○○○○
CLP-955
43
Page 44

MIDI Data Format
4. PROGRAM CHANGE
Data format: [CnH] -> [ppH]
CnH = Program event (n = channel number)
ppH = Program change number
P.C.#=Program Change number
MSB LSB
GRAND PIANO 1 0 112 0
GRAND PIANO 2 0 112 1
E.PIANO 1 0 112 5
E.PIANO 2 0 112 4
HARPSICHORD 0 112 6
VIBRAPHONE 0 112 11
CHURCH ORGAN 0 112 19
JAZZ ORGAN 0 112 16
STRINGS 0 112 48
CHOIR 0 112 52
WOOD BASS 0 112 32
E.BASS 0 112 33
P.C.#
• When program change reception is turned OFF in the Function
mode, no program change data is transmitted or received.
Also, Bank MSB/LSB is not transmitted or received.
5. SYSTEM REALTIME MESSAGES
[rrH]
F8H: Timing clock
FAH: Start
FCH: Stop
FEH: Active sensing
Data Transmission Reception
F8H Transmitted every Received as 96-clock tempo timing
96 clocks when MIDI clock is set to External
FAH Recorder start Recorder start
Not received when the MIDI clock
is set to Internal.
FCH Recorder stop Recorder stop
Not received when the MIDI clock
is set to Internal.
FEH Transmitted every If a signal is not received via MIDI
200 milliseconds for more than 400 milliseconds, the
same processing will take place for
All Sound Off, All Notes Off and
Reset All Controllers as when those
signals are received.
• Caution: If an error occurs during MIDI reception, the Damper, Sostenuto,
and Soft effects for all channels are turned off and an All Note Off occurs.
6. SYSTEM EXCLUSIVE MESSAGES
(Yamaha MIDI Format)
Panel Data Transmit
Data format: [F0H] -> [43H] -> [0nH] -> [7CH] -> ... ->
[F7H]
F0H, 43H, 0nH, 7CH (n: channel number)
00H, 2AH (
43H, 4CH, 20H, 20H (CL)
43H, 4CH, 50H, 27H, 30H, 30H (CLP-955)
30H, 30H (version x, y)
[PANEL DATA]
[CHECK SUM (1byte)] = 0-(43H+4CH+20H+......+Data end)
F7H
data length
)
• Panel Data Contents
(1) 1'st Voice
(2) Dual On/Off
(3) Dual Voice
(4) Dual Balance
(5) Dual Detune
(6) Dual Voice1 Octave
(7) Dual Voice2 Octave
(8) Dual Voice1 Effect Depth
(9) Dual Voice2 Effect Depth
(10) Split On/Off
(11) Split Voice
(12) Split Point
(13) Split Balance
(14) Split Voice1 Octave
(15) Split Voice2 Octave
(16) Split Voice1 Effect Depth
(17) Split Voice2 Effect Depth
(18) Split Dumper Mode
(19) Reverb Type 1
(20) Reverb Type 2
(21) Reverb Depth1
(22) Reverb Depth2
(23) Effect Type 1
(24) Effect Type 2
(25) Effect Depth
(26) Touch Sensitivity
(27) Fixed Data
(28) Left Pedal Function
(29) Absolute tempo low byte
(30) Absolute tempo high byte
• Panel data send requests cannot be received.
7. SYSTEM EXCLUSIVE MESSAGES
(Universal System Exclusive)
(1) Universal Realtime Message
Data format: [F0H] -> [7FH] -> [XnH] -> [04H] -> [01H] ->
[ll H] -> [mmH] -> [F7H]
MIDI Master Volume
• Simultaneously changes the volume of all channels.
• When a MIDI master volume message is received, the volume
only has affect on the MIDI receive channel, not the panel
master volume.
F0H = Exclusive status
7FH = Universal Realtime
7FH = ID of target device
04H = Sub-ID #1=Device Control Message
01H = Sub-ID #2=Master Volume
ll H = Volume LSB
mmH = Volume MSB
F7H = End of Exclusive
or
F0H = Exclusive status
7FH = Universal Realtime
XnH = When n is received n=0~F, whichever is received.
X = don’t care
04H = Sub-ID #1=Device Control Message
01H = Sub-ID #2=Master Volume
ll H = Volume LSB
mmH = Volume MSB
F7H = End of Exclusive
44
CLP-955
○○○○○○○○○○○○○○○○○○○○○○○○○○○○○○○○○○○○○○○○○○○○○○○○○○○○○○○○
Page 45

(2) Universal Non-Realtime Message (GM 0n)
General MIDI Mode On
Data format: [F0H] -> [7EH] -> [XnH] -> [09H] -> [01H] ->
[F7H]
F0H = Exclusive status
7EH = Universal Non-Realtime
7FH = ID of target device
09H = Sub-ID #1=General MIDI Message
01H = Sub-ID #2=General MIDI On
F7H = End of Exclusive
or
F0H = Exclusive status
7EH = Universal Non-Realtime
XnH = When received, n=0~F.
X = don’t care
09H = Sub-ID #1=General MIDI Message
01H = Sub-ID #2=General MIDI On
F7H = End of Exclusive
When the General MIDI mode ON message is received, the MIDI
system will be reset to its default settings.
This message requires approximately 50ms to execute, so sufficient time should be allowed before the next message is sent.
8. SYSTEM EXCLUSIVE MESSAGES (XG Standard)
(1) XG Native Parameter Change
Data format: [F0H] -> [43H] -> [1nH] -> [4CH] -> [hhH] ->
[mmH] -> [ll H] -> [ddH] -> [F7H]
F0H = Exclusive status
43H = YAMAHA ID
1nH = When received, n=0~F.
When transmitted, n=0.
4CH = Model ID of XG
hhH = Address High
mmH = Address Mid
ll H = Address Low
ddH = Data
|
F7H = End of Exclusive
Data size must match parameter size.
When the XG System On message is received, the MIDI system
will be reset to its default settings.
The message requires approximately 50ms to execute, so sufficient time should be allowed before the next message is sent.
(2) XG Native Bulk Data (reception only)
Data format: [F0H] -> [43H] -> [0nH] -> [4CH] -> [aaH] ->
[bbH] -> [hhH] -> [mmH] -> [ll H] ->
[ddH] ->...-> [ccH] -> [F7H]
F0H Exclusive status
43H YAMAHA ID
0nH When received, n=0~F.
When transmitted, n=0.
4CH Model ID of XG
aaH ByteCount
bbH ByteCount
hhH Address High
mmH Address Mid
ll H Address Low
ddH Data
| |
| |
ccH Check sum
F7H End of Exclusive
• Receipt of the XG SYSTEM ON message causes reinitialization
of relevant parameters and Control Change values. Allow sufficient time for processing to execute (about 50 msec) before
sending the Clavinova another message.
• XG Native Parameter Change message may contain two or four
bytes of parameter data (depending on the parameter size).
• For information about the Address and Byte Count values, refer
to Table 1 below. Note that the table’s Total Size value gives the
size of a bulk block. Only the top address of the block (00H, 00H,
00H) is valid as a bulk data address.
9. SYSTEM EXCLUSIVE MESSAGES
(Clavinova MIDI Format)
Data format: [F0H] -> [43H] -> [73H] -> [xxH] -> [nnH] ->
[F7H]
F0H = Exclusive status
43H = Yamaha ID
73H = Clavinova ID
xxH = Product ID (CLP-955 common ID: 67H or
CLP common ID: 01H)
nnH = Substatus
nn Control
02H Internal MIDI clock
03H External MIDI clock
06H Bulk Data (the bulk data follows 06H)
F7H = End of Exclusive
* When nn=02H or 03H, Clavinova common ID (01H) is
recognized as well as 50H.
BULK DUMP FORMAT
F0H, 43H, 73H
xxH =Product ID (CLP-955: 6BH)
06H =Bulk ID
05H =Sequence data
0nH, 0nH, 0nH, 0nH, 0nH, 0nH, 0nH, 0nH =Data length
[BULK DATA] =
[CHECK SUM (1byte)] = 0-sum (BULK DATA)
F7H = End of Exclusive
10. SYSTEM EXCLUSIVE MESSAGES (Special Control)
Data format: [F0H] -> [43H] -> [73H] -> [xxH] -> [11H] ->
[0nH] -> [ccH] -> [vvH] -> [F7H]
F0H = Exclusive status
43H = Yamaha ID
73H = Clavinova ID
67H = CLP-955 common ID
11H = Clavinova special control
0nH = Control MIDI change (n=channel number)
cc = Control number
vv = Value
F7H = End of Exclusive
Control 0n ccH vvH
Split Point Always 00H 14H 14H :
Metronome Always 00H 1BH 00H : off
Damper Level ch: 00H-0FH 3DH (Sets the Damper Level
Channel Detune ch: 00H-0FH 43H (Sets the Detune value for
Voice Reserve ch: 00H-0FH 45H 00H : Reserve off
* When Volume, Expression is received for Reserve On, they will
be effective from the next Key On. Reserve Off is normal.
for each channel)
each channel)
Split Key Number
01H : –
02H : 2/4
03H : 3/4
04H : 4/4
05H : 5/4
06H : 6/4
7FH : No accent
00H-7FH
00H-7FH
7FH : on*
11. SYSTEM EXCLUSIVE MESSAGES (Others)
Data format: [F0H] -> [43H] -> [1nH] -> [27H] -> [30H] ->
[00H] -> [00H] -> [mmH] -> [ll H] -> [ccH] ->
[F7H]
Master Tuning (XG and last message priority) simultaneously
changes the pitch of all channels.
F0H = Exclusive Status
43H = Yamaha ID
1nH = Transmission from n=CLP is always 0. 0-F is received.
27H = Model ID of TG100
30H = Sub ID
00H =
00H =
mmH = Master Tune MSB
ll H = Master Tune LSB
ccH = don’t care (under 7FH)
F7H = End of Exclusive
○○○○○○○○○○○○○○○○○○○○○○○○○○○○○○○○○○○○○○○○○○○○○○○○○○○○○○○○
CLP-955
45
Page 46

MIDI Data Format
<Table 1>
MIDI Parameter Change table ( SYSTEM )
Address (H) Size (H) Data (H) Parameter Description Default value (H)
00 00 00 4
01 1st bit 3 - 0 → bit 15 - 12 400
02 2nd bit 3 - 0 → bit 11 - 8
03 3rd bit 3 - 0 → bit 7 - 4
04 1 00 - 7F MASTER VOLUME 0 - 127 7F
05 1 — —
06 1 34 - 4C(*2) TRANSPOSE -12 - +12[semitones] 40
7E 00 XG SYSTEM ON 00=XG sytem ON
7F 00 RESET ALL PARAMETERS 00=ON (receive only)
TOTAL SIZE 07
*1: Values lower than 020CH select -50 cents. Values higher than 05F4H select +50 cents.
*2: Values from 28H through 33H are interpreted as -12 through -1. Values from 4DH through 58H are interpreted as +1 through +12.
<Table 2>
MIDI Parameter Change table ( EFFECT 1)
Refer to the “Effect MIDI Map” for a complete list of Reverb, Chorus and Variation type numbers.
Address (H) Size (H) Data (H) Parameter Description Default value (H)
02 01 00 2 00-7F REVERB TYPE MSB Refer to Effect MIDI Map 01(=HALL1)
02 01 40 2 00-7F VARIATION TYPE MSB Refer to Effect MIDI Map 00(=Effect off)
• “VARIATION” refers to the EFFECT on the panel.
<Table 3>
MIDI Parameter Change table ( MULTI PART )
Address (H) Size (H) Data (H) Parameter Description Default value (H)
08 nn 11 1 00 - 7F DRY LEVEL 0 - 127 7F
nn = Part Number
020C - 05F4(*1)
00-7F REVERB TYPE LSB 00 : basic type 00
00-7F VARIATION TYPE LSB 00 : basic type 00
MASTER TUNE -50 - +50[cent] 00 04 00 00
4th bit 3 - 0 → bit 3 - 0
● Effect MIDI Map
REVERB
ROOM 02H 10H
HALL 1 01H 10H
HALL 2 01H 11H
STAGE 03H 10H
Sound board 03H 12H
EFFECT
CHORUS 42H 10H
PHASER 48H 10H
TREMOLO 42H 12H
DELAY 05H 10H
MSB LSB
MSB LSB
46
CLP-955
○○○○○○○○○○○○○○○○○○○○○○○○○○○○○○○○○○○○○○○○○○○○○○○○○○○○○○○○
Page 47

YAMAHA [Clavinova] Date: 1 March, 2000 Model: CLP-955 MIDI Implementation Chart Version: 1.0
Function Transmitted Recognized Remarks
Basic Default 1 1
Channel Changed 1~16 1~16
Default 3 1 *1 Poly Mode only
Mode Messages XX
Altered ***************** X
Note 9~120 0~127
Number : True voice ***************** 21~108
Velocity Note on O 9nH, v=1~127 O v=1~127
Note off X 9nH, v=0 X
After key’s XX
Touch Ch’s XX
Pitch Bender XX
Control Change
0, 32 OOBank Select
07 XOVolume
11 OOExpression
64 OODamper
66 OOSostenuto
67 OOSoft pedal
91 OOReverb Depth
94 OOEffect Depth
120 XOAll sounds off
121 XOReset All Controllers
Program OO
Change : True # *****************
System Exclusive OO
System : Song Position XX
: Song Select XX
Common : Tune XX
System : Clock OO
Real Time : Commands OO
Aux : Local ON/OFF XO
: All Notes Off OO (123~127)
Messages : Active Sense OO
: Reset XX
Notes : *1 = Recieve Mode is always multi timbre and Poly mode.
Mode 1: OMNI ON, POLY Mode 2: OMNI ON, MONO O: Yes
Mode 3: OMNI OFF, POLY Mode 4: OMNI OFF, MONO X: No
○○○○○○○○○○○○○○○○○○○○○○○○○○○○○○○○○○○○○○○○○○○○○○○○○○○○○○○○
CLP-955
47
Page 48
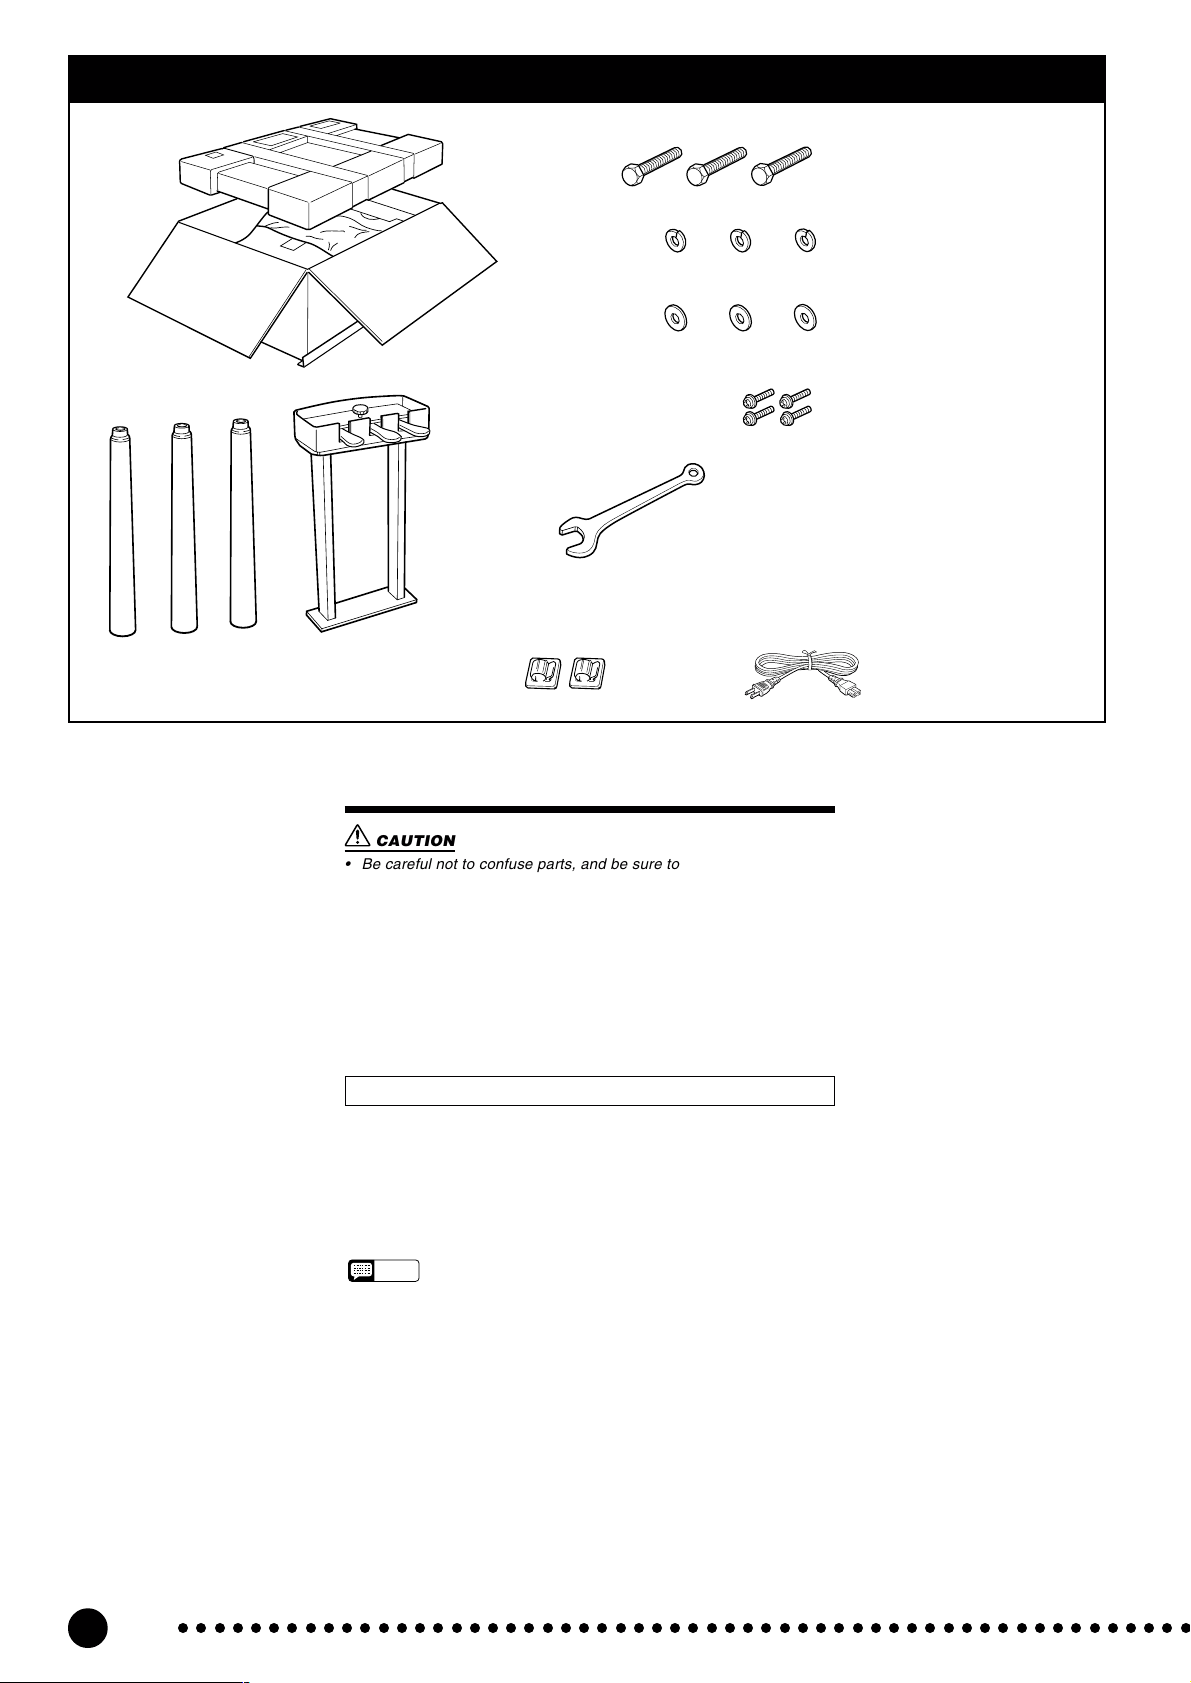
Assembly Parts
10 x 60mm bolts
Spring Washers
Washers
1 x 3
2 x 3
3 x 3
B
A
A
A
A: Legs
B: Pedal box
Wrench
Cord holders
• After assembly is complete, keep the wrench for future
maintenance.
5 x 20mm screws
AC power cord
4 x 4
Keyboard Stand Assembly
CAUTION
• Be careful not to confuse parts, and be sure to install all parts in the
correct direction. Please assemble in accordance with the sequence
given below.
• Assembly should be carried out by at least two persons.
• Be sure to use the correct screw size, as indicated above. Use of
incorrect screws can cause damage.
• Be sure to tighten up all screws upon completing assembly of each
unit.
• The entire package must be turned over during assembly, so select
an area that is large enough for the unpacking and assembly operation.
Have a Phillips-head (+) screwdriver ready.
Open the carton and remove the parts from the upper
level.
The parts shown in the “Assembly Parts” illustration will
be used. Follow the assembly instructions and select the
parts as needed.
NOTE
• A bench may be supplied or optional, depending on
the location in which the instrument was purchased.
○○○○○○○○○○○○○○○○○○○○○○○○○○○○○○○○○○○○○○○○○○○○○○○○○○○○○○○○
CLP-955
48
Page 49
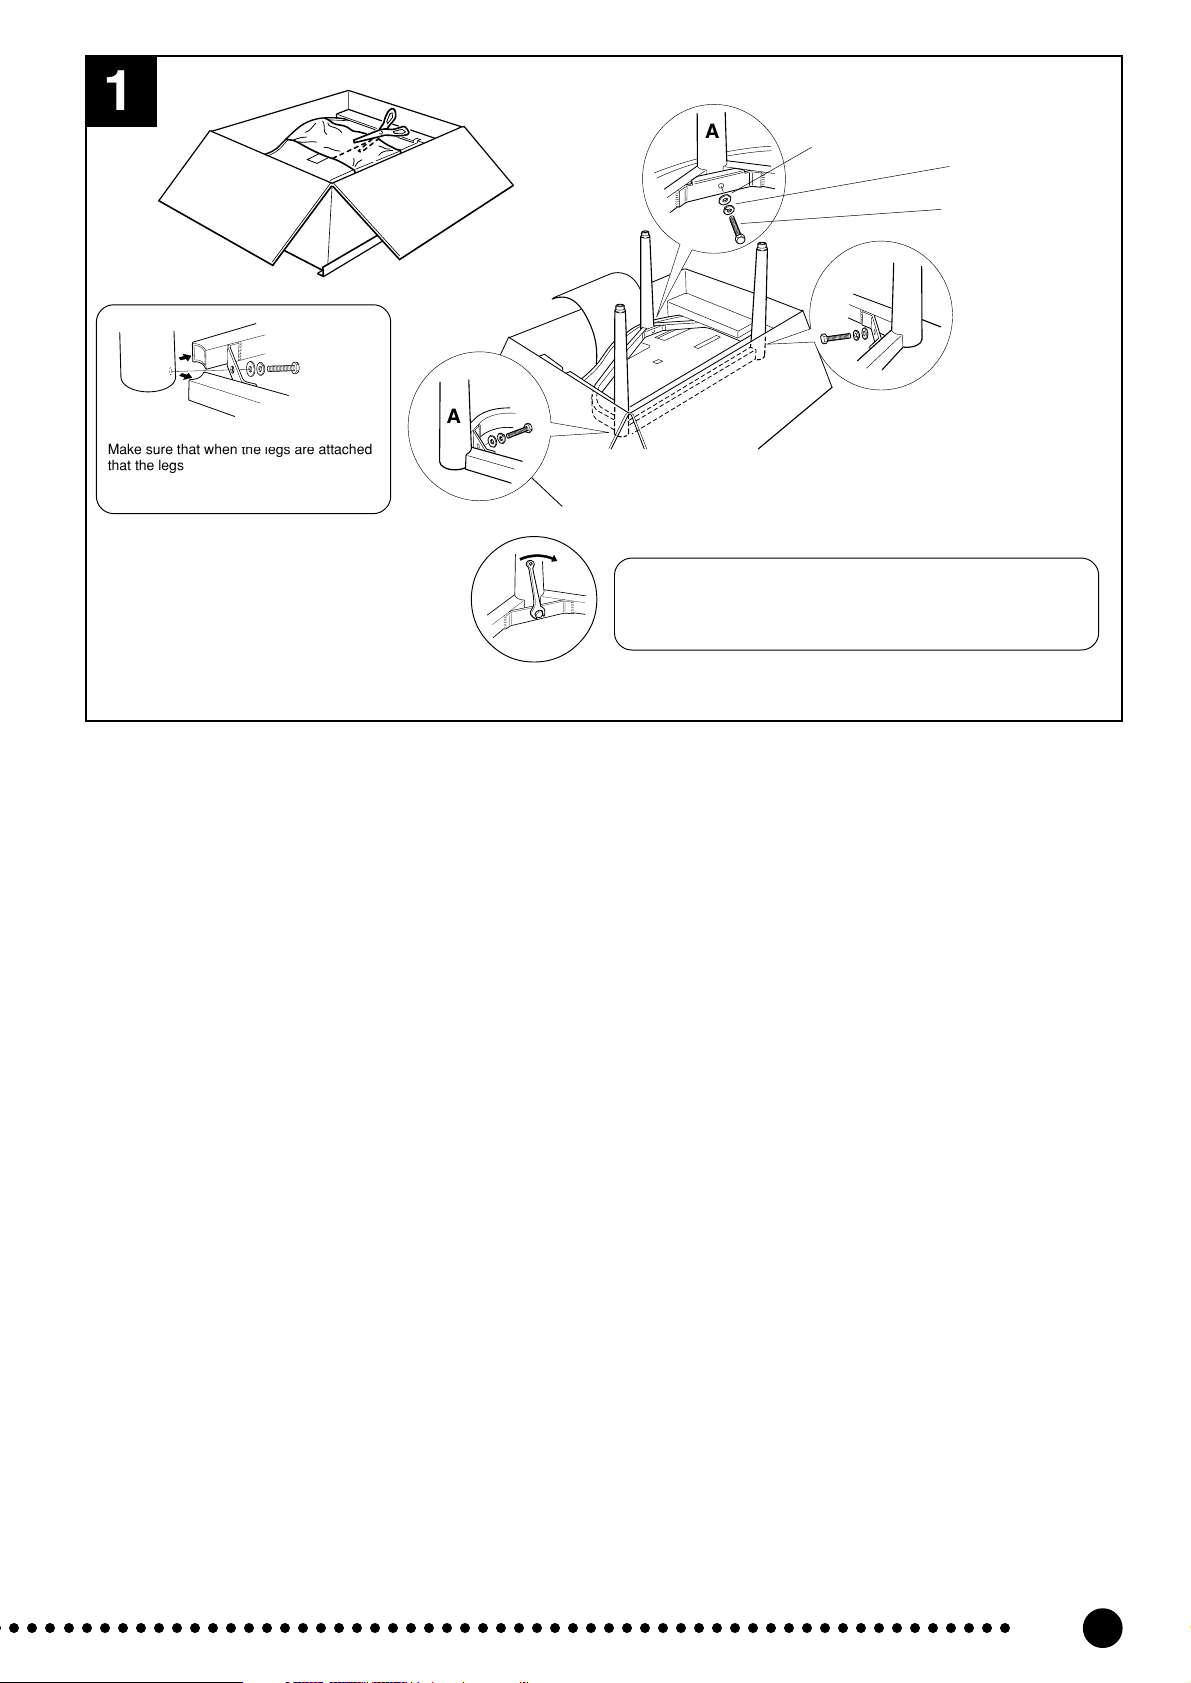
1
A
Washer 3
Spring Washer 2
10 x 60mm bolt 1
A
A
Rectangular Pipe
Make sure that when the legs are attached
that the legs are fitted to the rectangular
pipe’s rounded edge.
A
When attaching the legs, make sure to tighten each bolt using the supplied
wrench until there remains no gap between the washer, spring washer and the
bolt. As you tighten the bolt, occasionally shake the leg to remove any looseness
between the pipes and the leg.
Attach the three legs (A).
Z
Use scissors or a cutter to remove the packing material in
which the main unit is wrapped. Then attach the legs to the bottom of the main unit using one 10 x 60mm bolt 1 per leg. The
legs (A) are identical so they can be used at any position on the
unit however, please pay close attention to the illustration and
ensure that the legs are properly fitted to the rectangular pipe’s
rounded edge.
CLP-955
49
Page 50

2
Remove the vinyl tie.
B
5 x 20mm screws 4
Rear Side
Keyboard Side
Attach the pedal box (B).
X
Before attaching the pedal box, remove the vinyl tie holding
the pedal cord to the base plate then connect the pedal cord. Pull
the pedal plug out from the hole in the base plate and plug it into
the PEDAL jack in the bottom of the main unit with the flat side
of the plug facing the keyboard side of the main unit (refer to the
illustration). If the plug won’t go in properly, do not force it ...
check the plug orientation and try again.
Making sure that the pedal cord doesn’t get caught between
the base plate and main unit, carefully lower the pedal box
assembly onto the bottom of the main unit and line up the screw
holes. Finally, attach the pedal box with four 5 x 20 mm screws
4.
○○○○○○○○○○○○○○○○○○○○○○○○○○○○○○○○○○○○○○○○○○○○○○○○○○○○○○○○
CLP-955
50
Page 51

3
Front leg
Front leg
Turn over the instrument and packing.
C
Make sure that the three legs are firmly attached, then using
the front legs for support, turn over the instrument and packing so
that the carton is on top of the instrument.
CLP-955
51
Page 52

4
Remove the carton and packing material.
V
Lift and remove the carton, then remove the remaining
packing material from the main unit.
At this time, make sure the Clavinova makes no rattling noise
when you shake it. If it does, go back and retighten all bolts and
screws.
○○○○○○○○○○○○○○○○○○○○○○○○○○○○○○○○○○○○○○○○○○○○○○○○○○○○○○○○
CLP-955
52
Page 53

5
● A voltage selector is provided in some areas.
110
127
240
220
6
● Cord holders
B
Voltage Selector
B
Before connecting the AC power cord, check the setting of the
voltage selector which is provided in some areas. To set the selector for 110V, 127V, 220V or 240V main voltages, use a “minus” screwdriver to rotate the selector dial so that the correct
voltage for your region appears next to the pointer on the panel.
The voltage selector is set at 240V when the unit is initially
shipped.
CAUTION
• An improper voltage setting can cause serious damage to the
Clavinova or result in improper operation.
Attach the cord holders and plug in the AC
N
cord.
Remove the protective backing from the adhesive surface of
the cord holders, and attach at approximately the locations shown
in the illustration. Plug the main-unit end of the AC cord into the
corresponding socket on the bottom of the main unit, then secure
the cord with the cord holders.
Move the instrument to the location where it will be used and
connect the AC power cord to an AC wall outlet. A plug adaptor
may be also provided in some areas to match the pin configuration of the AC wall outlets in your area.
CLP-955
53
Page 54

7
B
Set the adjuster.
M
For stability, an adjuster is provided on the bottom of the
pedal box (B). Rotate the adjuster until it comes in firm contact
with the floor surface. The adjuster ensures stable pedal operation
and facilitates pedal effect control. If the adjuster is not in firm
contact with the floor surface, distorted sound may result.
■ After completing the assembly, please
check the following.
● Are there any parts left over?
m Review the assembly procedure and correct any errors.
● Is the Clavinova clear of doors and other movable fixtures?
m Move the Clavinova to an appropriate location.
● Does the Clavinova make a rattling noise when you shake it?
m Tighten all screws.
● Does the pedal box rattle or give way when you step on the
pedals?
m Turn the adjuster so that it is set firmly against the floor.
● Are the pedal and power cords inserted securely into the
sockets?
m Check the connection.
● If the main unit creaks or is otherwise unsteady when you play
on the keyboard, refer to the assembly diagrams and retighten
all screws.
● After assembly is complete, it will be necessary to remove the
keyboard string. This procedure is performed once only and the
string will never have to be reattached again. For instructions on
its removal, refer to the paper titled "REQUEST" that can be
found on the keys underneath the key cover (see page 10).
○○○○○○○○○○○○○○○○○○○○○○○○○○○○○○○○○○○○○○○○○○○○○○○○○○○○○○○○
CLP-955
54
Page 55
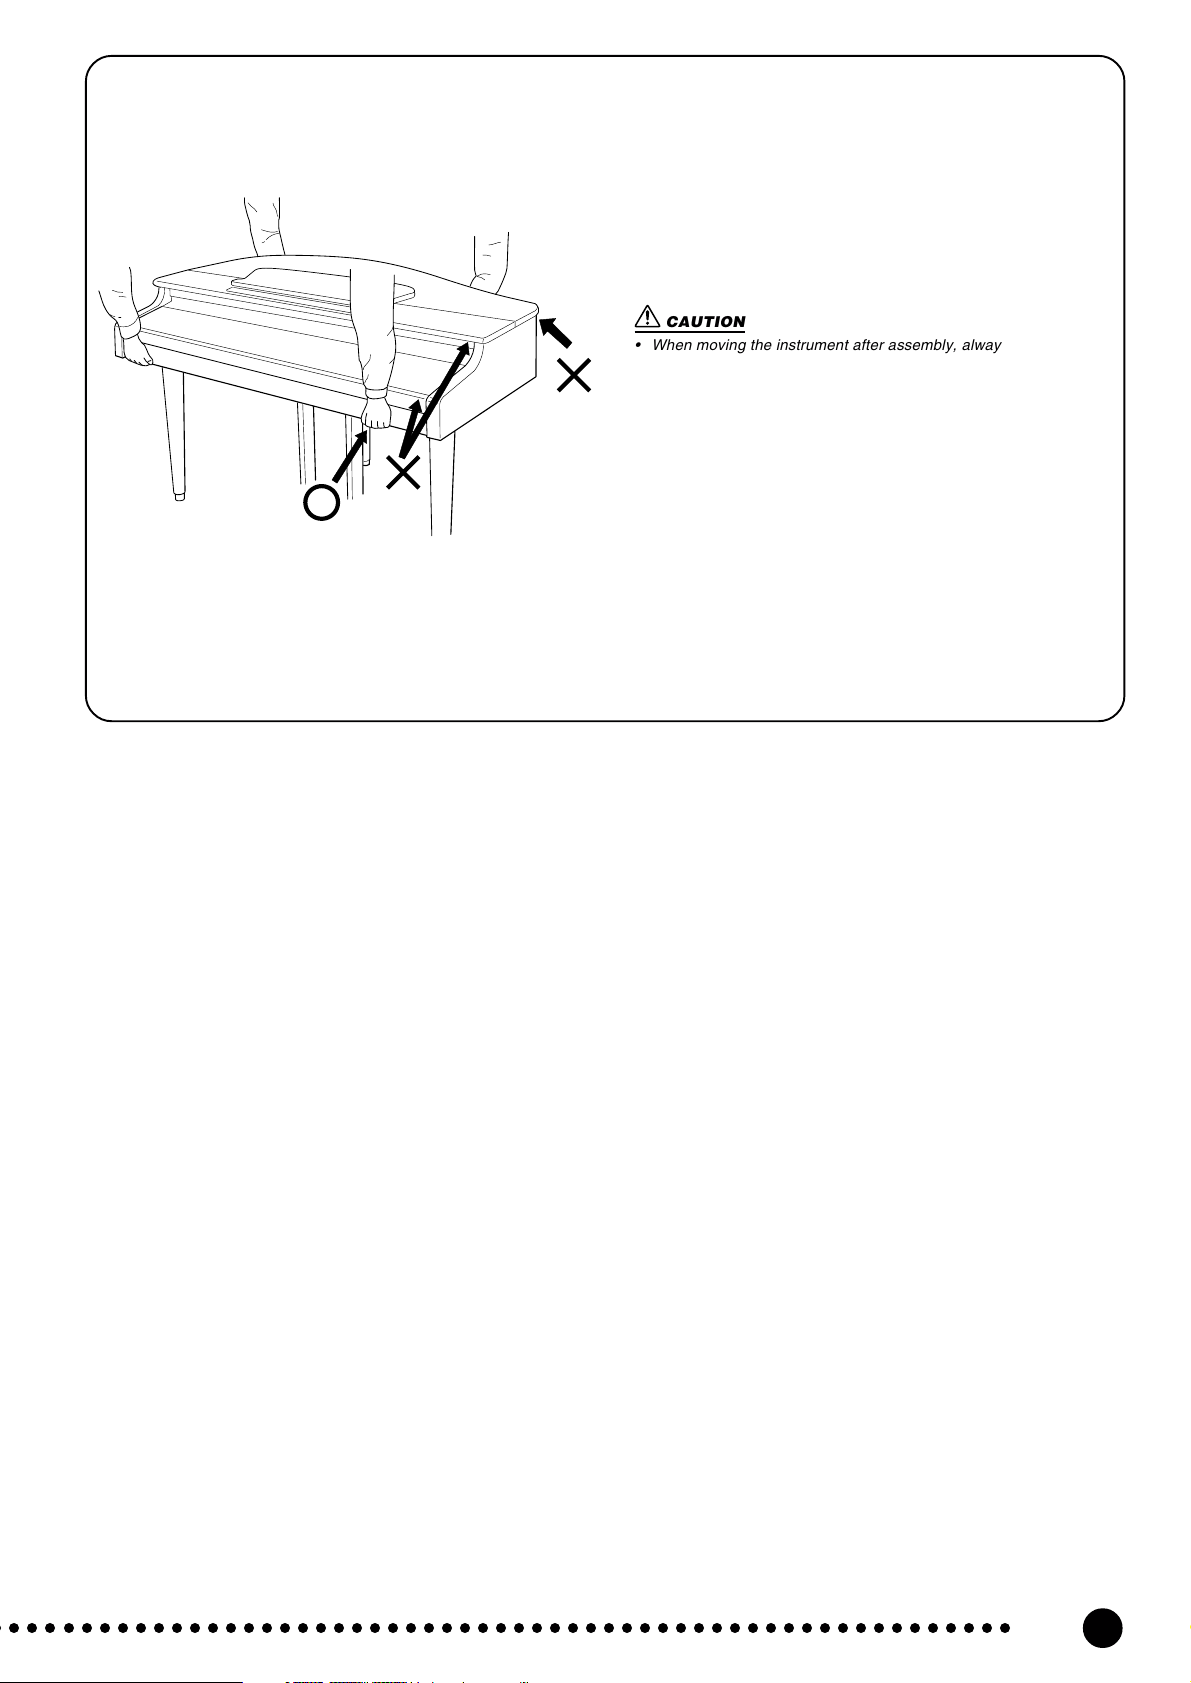
CAUTION
• When moving the instrument after assembly, always hold the
lower surface of the main unit, NEVER the lid, the top portion or
keyboard cover. Improper handling can result in damage to the
instrument or personal injury.
CLP-955
55
Page 56
Specifications
CLP-955
KEYBOARD
POLYPHONY
VOICE SELECTORS
REVERB
EFFECT
TOUCH SENSITIVITY
SONG CONTROLS
PEDAL CONTROLS
OTHER CONTROLS
JACKS/CONNECTORS
INPUT & OUTPUT
LEVEL/IMPEDANCE
MAIN AMPLIFIERS
SPEAKERS
DIMENTIONS
(W x D x H)
WEIGHT
Lid down
Lid up
88 KEYS (A-1 ~ C7)
64 NOTES MAX.
12 voices
ROOM, HALL 1, HALL 2, STAGE
CHORUS, PHASER, TREMOLO, DELAY
HARD, MEDIUM, SOFT, FIXED
TRACK 1, TRACK 2, SONG [START/STOP], REC
SOFT, SOSTENUTO, DAMPER
MASTER VOLUME, BRILLIANCE, DEMO, TRANSPOSE, FUNCTION,
METRONOME, TEMPO ts/FUNCTION <>, SONG SELECT ts/[–/NO] [+/YES],
PRESET SONG, SPLIT, LED Display
PHONES x 2, AUX OUT R & L/L+R, AUX IN R & L/L+R,
MIDI IN/OUT/THRU, HOST SELECT, TO HOST, PEDAL*
AUX IN: Input impedance 10 kΩ / Input sensitivity 0.26V
1417 x 868 x 885 mm (55-13/16" x 34-13/16" x 34-13/16")
1417 x 868 x 1225 mm (55-13/16" x 34-13/16" x 48-3/16")
* The PEDAL connector is not accessible from the outside of the instrument’s cabinet (it is internally
connected to the pedal unit during the assembly procedure).
AUX OUT: Output impedance 600 Ω
60W x 2
16 cm x 2, 5 cm x 2
78.0 kg (171.95 lbs.)
• Specifications and descriptions in this owner’s manual are for information purposes only. Yamaha Corp. reserves the right
to change or modify products or specifications at any time without prior notice. Since specifications, equipment or options
may not be the same in every locale, please check with your Yamaha dealer.
56
CLP-955
○○○○○○○○○○○○○○○○○○○○○○○○○○○○○○○○○○○○○○○○○○○○○○○○○○○○○○○○
Page 57

IMPORTANT SAFETY INSTRUCTIONS
INFORMATION RELATING TO PERSONAL INJURY, ELECTRICAL SHOCK,
AND FIRE HAZARD POSSIBILITIES HAS BEEN INCLUDED IN THIS LIST.
WARNING- When using any electrical or electronic prod-
uct, basic precautions should always be followed. These precautions include, but are not limited to, the following:
1. Read all Safety Instructions, Installation Instructions,
Special Message Section items, and any Assembly Instructions
found in this manual BEFORE marking any connections, including connection to the main supply.
2. Main Power Supply Verification: Yamaha products are
manufactured specifically for the supply voltage in the area
where they are to be sold. If you should move, or if any doubt
exists about the supply voltage in your area, please contact
your dealer for supply voltage verification and (if applicable)
instructions. The required supply voltage is printed on the
name plate. For name plate location, please refer to the graphic
found in the Special Message Section of this manual.
3. This product may be equipped with a polarized plug
(one blade wider than the other). If you are unable to insert the
plug into the outlet, turn the plug over and try again. If the
problem persists, contact an electrician to have the obsolete
outlet replaced. Do NOT defeat the safety purpose of the plug.
4. Some electronic products utilize external power sup-
plies or adapters. Do NOT connect this type of product to any
power supply or adapter other than one described in the owners
manual, on the name plate, or specifically recommended by
Yamaha.
5. WARNING: Do not place this product or any other
objects on the power cord or place it in a position where anyone could walk on, trip over, or roll anything over power or
connecting cords of any kind. The use of an extension cord is
not recommended! If you must use an extension cord, the
minimum wire size for a 25' cord (or less) is 18 AWG. NOTE:
The smaller the AWG number, the larger the current handling
capacity. For longer extension cords, consult a local electrician.
6. Ventilation: Electronic products, unless specifically
designed for enclosed installations, should be placed in locations that do not interfere with proper ventilation. If instructions for enclosed installations are not provided, it must be
assumed that unobstructed ventilation is required.
7. Temperature considerations: Electronic products
should be installed in locations that do not significantly contribute to their operating temperature. Placement of this product close to heat sources such as; radiators, heat registers and
other devices that produce heat should be avoided.
8. This product was NOT designed for use in wet/damp loca-
tions and should not be used near water or exposed to rain. Examples of wet/damp locations are; near a swimming pool, spa, tub,
sink, or wet basement.
9. This product should be used only with the components
supplied or; a cart, rack, or stand that is recommended by the
manufacturer. If a cart, rack, or stand is used, please observe all
safety markings and instructions that accompany the accessory
product.
10. The power supply cord (plug) should be disconnected from
the outlet when electronic products are to be left unused for extended periods of time. Cords should also be disconnected when
there is a high probability of lightning and/or electrical storm
activity.
11. Care should be taken that objects do not fall and liquids are
not spilled into the enclosure through any openings that may exist.
12. Electrical/electronic products should be serviced by a
qualified service person when:
a. The power supply cord has been damaged; or
b. Objects have fallen, been inserted, or liquids have been
spilled into the enclosure through openings; or
c. The product has been exposed to rain: or
d. The product dose not operate, exhibits a marked change
in performance; or
e. The product has been dropped, or the enclosure of the
product has been damaged.
13. Do not attempt to service this product beyond that de-
scribed in the user-maintenance instructions. All other servicing
should be referred to qualified service personnel.
14. This product, either alone or in combination with an ampli-
fier and headphones or speaker/s, may be capable of producing
sound levels that could cause permanent hearing loss. DO NOT
operate for a long period of time at a high volume level or at a
level that is uncomfortable. If you experience any hearing loss or
ringing in the ears, you should consult an audiologist.
IMPORTANT: The louder the sound, the shorter the time period
before damage occurs.
15. Some Yamaha products may have benches and/or acces-
sory mounting fixtures that are either supplied as a part of the
product or as optional accessories. Some of these items are designed to be dealer assembled or installed Please make sure that
benches are stable and any optional fixtures (where applicable) are
well secured BEFORE using. Benches supplied by Yamaha are
designed for seating only. No other uses are recommended.
92-469-2
PLEASE KEEP THIS MANUAL
○○○○○○○○○○○○○○○○○○○○○○○○○○○○○○○○○○○○○○○○○○○○○○○○○○○○○○○○
Page 58

FCC INFORMATION (U.S.A.)
1. IMPORTANT NOTICE: DO NOT MODIFY THIS UNIT!
This product, when installed as indicated in the instructions contained in this manual, meets FCC requirements. Modifications not
expressly approved by Yamaha may void your authority, granted
by the FCC, to use the product.
2. IMPORTANT: When connecting this product to accessories and/
or another product use only high quality shielded cables. Cable/s
supplied with this product MUST be used. Follow all installation
instructions. Failure to follow instructions could void your FCC
authorization to use this product in the USA.
3. NOTE: This product has been tested and found to comply with
the requirements listed in FCC Regulations, Part 15 for Class “B”
digital devices. Compliance with these requirements provides a
reasonable level of assurance that your use of this product in a
residential environment will not result in harmful interference with
other electronic devices. This equipment generates/uses radio
frequencies and, if not installed and used according to the instructions found in the users manual, may cause interference harmful
to the operation of other electronic devices. Compliance with FCC
* This applies only to products distributed by YAMAHA CORPORATION OF AMERICA.
IMPORTANT NOTICE FOR THE UNITED KINGDOM
Connecting the Plug and Cord
IMPORTANT. The wires in this mains lead are coloured in accordance with the following code:
BLUE : NEUTRAL
BROWN : LIVE
As the colours of the wires in the mains lead of this apparatus may
not correspond with the coloured makings identifying the terminals
in your plug proceed as follows:
The wire which is coloured BLUE must be connected to the terminal which is marked with the letter N or coloured BLACK.
The wire which is coloured BROWN must be connected to the
terminal which is marked with the letter L or coloured RED.
Making sure that neither core is connected to the earth terminal of
the three pin plug.
regulations does not guarantee that interference will not occur in
all installations. If this product is found to be the source of interference, which can be determined by turning the unit “OFF” and
“ON”, please try to eliminate the problem by using one of the
following measures:
Relocate either this product or the device that is being affected by
the interference.
Utilize power outlets that are on different branch (circuit breaker
or fuse) circuits or install AC line filter/s.
In the case of radio or TV interference, relocate/reorient the antenna. If the antenna lead-in is 300 ohm ribbon lead, change the
lead-in to co-axial type cable.
If these corrective measures do not produce satisfactory results,
please contact the local retailer authorized to distribute this type
of product. If you can not locate the appropriate retailer, please
contact Yamaha Corporation of America, Electronic Service Division, 6600 Orangethorpe Ave, Buena Park, CA90620
The above statements apply ONLY to those products distributed
by Yamaha Corporation of America or its subsidiaries.
(class B)
• This applies only to products distributed by Yamaha-Kemble Music (U.K.) Ltd.
(2 wires)
CAUTION: TO PREVENT ELECTRIC SHOCK, MATCH WIDE
BLADE OF PLUG TO WIDE SLOT, FULLY INSERT.
ATTENTION: POUR ÉVITER LES CHOCS ÉLECTRIQUES,
INTRODUIRE LA LAME LA PLUS LARGE DE LA FICHE DANS LA
BORNE CORRESPONDANTE DE LA PRISE ET POUSSER JUSQU’AU
FOND.
• This applies only to products distributed by Yamaha Canada Music Ltd.
• Ceci ne s’applique qu’aux produits distribués par Yamaha Canada Musique Ltée.
(polarity)
Page 59

For details of products, please contact your nearest Yamaha or the
authorized distributor listed below.
Pour plus de détails sur les produits, veuillez-vous adresser à Yamaha ou
au distributeur le plus proche de vous figurant dans la liste suivante.
Die Einzelheiten zu Produkten sind bei Ihrer unten aufgeführten
Niederlassung und bei Yamaha Vertragshändlern in den jeweiligen
Bestimmungsländern erhältlich.
Para detalles sobre productos, contacte su tienda Yamaha más cercana
o el distribuidor autorizado que se lista debajo.
NORTH AMERICA
CANADA
Yamaha Canada Music Ltd.
135 Milner Avenue, Scarborough, Ontario,
M1S 3R1, Canada
Tel: 416-298-1311
U.S.A.
Yamaha Corporation of America,
Keyboard Division
6600 Orangethorpe Ave., Buena Park, Calif. 90620,
U.S.A.
Tel: 714-522-9011
CENTRAL & SOUTH AMERICA
MEXICO
Yamaha de Mexico S.A. De C.V.,
Departamento de ventas
Javier Rojo Gomez No.1149, Col. Gpe Del
Moral, Deleg. Iztapalapa, 09300 Mexico, D.F.
Tel: 686-00-33
BRAZIL
Yamaha Musical do Brasil LTDA.
Av. Rebouças 2636, São Paulo, Brasil
Tel: 011-853-1377
ARGENTINA
Yamaha Music Argentina S.A.
Viamonte 1145 Piso2-B 1053,
Buenos Aires, Argentina
Tel: 1-371-7021
PANAMA AND OTHER LATIN
AMERICAN COUNTRIES/
CARIBBEAN COUNTRIES
Yamaha de Panama S.A.
Torre Banco General, Piso 7, Urbanización Marbella,
Calle 47 y Aquilino de la Guardia,
Ciudad de Panamá, Panamá
Tel: 507-269-5311
EUROPE
THE UNITED KINGDOM
Yamaha-Kemble Music (U.K.) Ltd.
Sherbourne Drive, Tilbrook, Milton Keynes,
MK7 8BL, England
Tel: 01908-366700
IRELAND
Danfay Ltd.
61D, Sallynoggin Road, Dun Laoghaire, Co. Dublin
Tel: 01-2859177
GERMANY/SWITZERLAND
Yamaha Europa GmbH.
Siemensstraße 22-34, 25462 Rellingen,
F.R. of Germany
Tel: 04101-3030
AUSTRIA
Yamaha Music Austria
Schleiergasse 20, A-1100 Wien Austria
Tel: 01-60203900
THE NETHERLANDS
Yamaha Music Nederland
Kanaalweg 18G, 3526KL, Utrecht, The Netherlands
Tel: 030-2828411
BELGIUM
Yamaha Music Belgium
Keiberg Imperiastraat 8, 1930 Zaventem, Belgium
Tel: 02-7258220
FRANCE
Yamaha Musique France,
Division Claviers
BP 70-77312 Marne-la-Vallée Cedex 2, France
Tel: 01-64-61-4000
ITALY
Yamaha Musica Italia S.P.A.,
Home Keyboard Division
Viale Italia 88, 20020 Lainate (Milano), Italy
Tel: 02-935-771
SPAIN/PORTUGAL
Yamaha-Hazen Electronica Musical, S.A.
Ctra. de la Coruna km. 17, 200, 28230
Las Rozas (Madrid) Spain
Tel: 91-201-0700
GREECE
Philippe Nakas S.A.
Navarinou Street 13, P.Code 10680, Athens, Greece
Tel: 01-364-7111
SWEDEN
Yamaha Scandinavia AB
J. A. Wettergrens Gata 1
Box 30053
S-400 43 Göteborg, Sweden
Tel: 031 89 34 00
DENMARK
YS Copenhagen Liaison Office
Generatorvej 8B
DK-2730 Herlev, Denmark
Tel: 44 92 49 00
FINLAND
F-Musiikki Oy
Kluuvikatu 6, P.O. Box 260,
SF-00101 Helsinki, Finland
Tel: 09 618511
NORWAY
Norsk filial av Yamaha Scandinavia AB
Grini Næringspark 1
N-1345 Østerås, Norway
Tel: 67 16 77 70
ICELAND
Skifan HF
Skeifan 17 P.O. Box 8120
IS-128 Reykjavik, Iceland
Tel: 525 5000
OTHER EUROPEAN COUNTRIES
Yamaha Europa GmbH.
Siemensstraße 22-34, 25462 Rellingen,
F.R. of Germany
Tel: 04101-3030
AFRICA
Yamaha Corporation,
International Marketing Division
Nakazawa-cho 10-1, Hamamatsu, Japan 430-8650
Tel: 053-460-2312
MIDDLE EAST
TURKEY/CYPRUS
Yamaha Europa GmbH.
Siemensstraße 22-34, 25462 Rellingen,
F.R. of Germany
Tel: 04101-3030
OTHER COUNTRIES
Yamaha Music Gulf FZE
LB21-128 Jebel Ali Freezone
P.O.Box 17328, Dubai, U.A.E.
Tel: 971-4-81-5868
ASIA
HONG KONG
Tom Lee Music Co., Ltd.
11/F., Silvercord Tower 1, 30 Canton Road,
Tsimshatsui, Kowloon, Hong Kong
Tel: 2737-7688
INDONESIA
PT. Yamaha Music Indonesia (Distributor)
PT. Nusantik
Gedung Yamaha Music Center, Jalan Jend. Gatot
Subroto Kav. 4, Jakarta 12930, Indonesia
Tel: 21-520-2577
KOREA
Cosmos Corporation
1461-9, Seocho Dong, Seocho Gu, Seoul, Korea
Tel: 02-3486-0011
MALAYSIA
Yamaha Music Malaysia, Sdn., Bhd.
Lot 8, Jalan Perbandaran, 47301 Kelana Jaya,
Petaling Jaya, Selangor, Malaysia
Tel: 3-703-0900
PHILIPPINES
Yupangco Music Corporation
339 Gil J. Puyat Avenue, P.O. Box 885 MCPO,
Makati, Metro Manila, Philippines
Tel: 819-7551
SINGAPORE
Yamaha Music Asia Pte., Ltd.
11 Ubi Road #06-00, Meiban Industrial Building,
Singapore
Tel: 65-747-4374
TAIWAN
Yamaha KHS Music Co., Ltd.
10F, 150, Tun-Hwa Northroad,
Taipei, Taiwan, R.O.C.
Tel: 02-2713-8999
THAILAND
Siam Music Yamaha Co., Ltd.
121/60-61 RS Tower 17th Floor,
Ratchadaphisek RD., Dindaeng,
Bangkok 10320, Thailand
Tel: 02-641-2951
THE PEOPLE’S REPUBLIC OF CHINA
AND OTHER ASIAN COUNTRIES
Yamaha Corporation,
International Marketing Division
Nakazawa-cho 10-1, Hamamatsu, Japan 430-8650
Tel: 053-460-2317
OCEANIA
AUSTRALIA
Yamaha Music Australia Pty. Ltd.
17-33 Market Street, South Melbourne, Vic. 3205,
Australia
Tel: 3-699-2388
NEW ZEALAND
Music Houses of N.Z. Ltd.
146/148 Captain Springs Road, Te Papapa,
Auckland, New Zealand
Tel: 9-634-0099
COUNTRIES AND TRUST
TERRITORIES IN PACIFIC OCEAN
Yamaha Corporation,
International Marketing Group
Nakazawa-cho 10-1, Hamamatsu, Japan 430-8650
Tel: 053-460-2312
[CL] 20
HEAD OFFICE Y amaha Cor poration, Pr o Audio & Digital Musical Instrument Division
Nakazawa-cho 10-1, Hamamatsu, Japan 430-8650
Tel: 053-460-3273
Page 60

This document is printed on chlorine free (ECF) paper
with soy ink.
Auf Umweltpapier mit Sojatinte gedruckt.
Ce document a été imprimé sur du papier non blanchi
au chlore avec de l’encre d’huile de soja.
Este documento se ha impreso en papel sin cloro
alguno, con tinta de soja.
M.D.G., Pro Audio & Digital Musical Instrument Division, Yamaha Corporation
© 2000 Yamaha Corporation
V597090 009POCP5.2-02B0 Printed in Japan
Page 61

documentation manual, user maintenance, brochure, user reference, pdf manual
This file has been downloaded from:
User Manual and User Guide for many equipments like mobile phones, photo cameras, monther board, monitors, software, tv, dvd, and othes..
Manual users, user manuals, user guide manual, owners manual, instruction manual, manual owner, manual owner's, manual guide,
manual operation, operating manual, user's manual, operating instructions, manual operators, manual operator, manual product,
 Loading...