

Page 1
Upgrade Guide for Version 2
1
Page 2

Using this Upgrade Guide
This guide explains the new features and operating changes introduced with Version 2 of the A3000 Professional
Sampler. Please use this guide as a supplement to your Owner’s Manual, which is based on Version 1.
Notations
• This guide uses the following two symbols to refer to you appropriate pages.
☞ xx Refers you a page in the Owner’s Manual.
→ xx Refers you to another page within this Upgrade Guide.
• The illustrations and LCD screens as shown in this guide are for instructional purposes only, and may appear
somewhat different from those on your instrument.
Using this Upgrade Guide
Important Information about Purchase of Expansion SIMMs for the A3000
The A3000 does not necessarily support all commercially available SIMMs. Before purchasing SIMMs, please
consult your Yamaha dealer or an authorized Yamaha distributor (see list at end of the Owner’s Manual) for
advice. Note that Yamaha cannot assume responsibility for SIMM malfunctions.
SIMM Type and SIMM Configuration
• You need to use 72-pin SIMMs with access time of 70ns or less. The SIMM module size may be 4MB, 8MB,
16MB, or 32MB. The A3000 is designed for use with 32-bit SIMMs, but can also accept installation of 36-bit
(parity-type) SIMMs.
• When purchasing SIMMs, make sure that the SIMM design does not utilize more than 18 memory chips per
module. (SIMMs comprised of more than 18 chips do not operate correctly on the A3000.)
• SIMMs must be installed in pairs: you can install either two SIMMs or four SIMMs. Both modules in a pair
must have the same memory capacity.
• The A3000 ships with 2MB of sampling memory installed, and is capable of accessing up to 128MB. If you add
one pair of 32MB SIMMs, for example, you increase the available sampling memory to a total of (2 + 32 × 2 =)
66MB. If you install four 32MB SIMMs, however, the sampling memory size becomes 128MB (and the original
2MB are effectively disabled).
• Yamaha recommends that you purchase SIMMs that conform to the JEDEC* standard. Please be aware, however, that conformance to this standard does not constitute a guarantee that the SIMMs will operate correctly
on the A3000.
* JEDEC (Joint Electron Device Engineering Council) sets standards for terminal configurations within
electronic devices.
Reproduction of copyrighted software for purposes other than purchaser’s personal use may be prohibited by law.
2
Page 3

PROFESSIONAL SAMPLER
Using this Upgrade Guide
Upgrade Guide for Version 2
Thank you for your purchase of the Yamaha A3000 Professional Sampler Version 2. This new version offers an even
wider range of functions and features than its predecessor. The A3000 Version 2 is a unique tool suited to a wide
variety of professional music applications.
Please read through this guide to learn about all the new Version 2 features. Keep this guide together with your
A3000 Owner’s Manual for future reference.
3
Page 4

Contents
Contents
Chapter 1 New Features
Major New Features .......................................................................... 6
Other New Features .......................................................................... 9
Chapter 2 Upgrade Reference
System-Wide Changes .................................................................... 14
Changes in PLAY MODE ................................................................. 16
Changes in EDIT MODE ................................................................. 28
Changes in Recording Mode ........................................................... 34
Changes in DISK MODE ................................................................. 36
Changes in UTILITY MODE ............................................................ 37
Appendix
New Error Message ......................................................................... 42
Changes in MIDI Data Format ....................................................... 43
4
Page 5

1
1
Chapter 1
New Features
Page 6

Major New Features
Sound Production Features
Major New Features
This section summarizes the most important changes introduced with Version 2. For
detailed information about these features, please refer to the indicated pages.
Version 2 includes many new sound-related settings: new filters, new LFOs, new effect
settings, and so on. Please be aware that these settings are meaningful on Version 2
machines only. Samples and programs that use these features may not reproduce correctly if transferred to a Version 1 machine.
Ten new filter types → 32
Version 2 adds ten new filter types: LowPass3, Peak1, Peak2, 2Peaks, 2Dips, DualLPFs,
LPF+Peak, DualHPFs, HPF+Peak, and LPF+HPF. This gives you a total of 16 filter types, for
an ever-wider range of sound variations.
Program LFO → 26, 27
A new program LFO (low frequency oscillator) can modulate the program parameters
and the sound of all samples within the program. The program LFO can be driven by an
external MIDI clock, so that you can control the LFO frequency in real time.
Random Pan, Random Cutoff Frequency, and Random Q/Width
You can now set pan, filter cutoff frequency, and filter Q/Width to vary at random, so
that tone and sound position change with each note.
→ 31, 32
Use Note Number and Velocity as Standard “Controllers” → 25, 33
Set so that selected parameters change value dynamically in accordance with the pitch
and force of the notes being produced.
Wider Range of Controller Parameters → 25, 33
Version 2 increases the number of parameters that can be controlled by your controllers. At the program level, Version 2 adds effect width and program-LFO depth. At the
sample level, Version 2 adds filter EG level, cutoff-frequency distance, and filter gain.
Send Effects to Assignable Outputs → 24
On Version 1, only the main outputs could produce the sound coming through the
effects circuit. With Version 2, you can now transmit effects through all A3000 outputs:
main outputs, assignable outputs, and digital outputs.
New Effect Configurations → 24
Version 2 gives you two new ways to configure the three effect blocks: 1/2→3 and
1→2←3.
6
Chapter 1 New Features
Page 7

Operational Improvements
Even Easier Easy Editing → 24
Version 2 groups the Easy Edit parameters onto eight pages, so they are easier to find
and easier to set. Version 2 also adds three new parameters: cutoff-frequency distance,
filter gain, and AEG decay rate.
Reset Value by Pushing the Knob → 14
You can now instantly reset any signed parameter to 0 by pushing the knob. You can
then return to the original setting by pushing the knob again. This feature makes it easy
to compare the sounds produced at the two different settings.
Select Sample by Turning Knob 1 → 14
On Version 1, Knob 1 rotation was used for page turning only. On Version 2, you can
choose between page-turn action and sample-select action. The sample-select feature
lets you change samples quickly when working at editing screens. Each time you change
the sample, the new sample name appears briefly on the screen.
Major New Features
Chapter 1
Stronger Character-Input Features → 15
The paste buffer now holds four names instead of one. The character-entry screen offers
a new CAPS function (uppercase/lowercase toggle) and a new JUMP function (jumps to
different locations in the alphanumeric list).
Enhanced MIDI-to-Sample Operation → 16, 40
The MIDI-to-Sample feature lets you change the in-edit sample by playing notes at an
external keyboard. Version 2 significantly improves the usefulness of this feature.
Save Data Across Multiple FDs → 14
On Version 1, floppy-disk saves were limited by the disk capacity. Version 2 can save data
across multiple disks, so the save size is unlimited.
Better Hard-Disk Support → 15
Version 2 supports hard-disk sizes up to 8GB (partition size of 1GB). Disk access is faster
than on Version 1.
Better Support for Foreign Data → 36
Version 2 offers improved compatibility for CD-ROMs and hard disks designed for other
popular samplers.
Chapter 1 New Features
7
Page 8

Major New Features
New Editing Functions
DIVIDE LOOP → 20
Automatically cuts up the loop section of an existing sample and maps the pieces along
the keyboard, so you can play them in any order. Ideal for generating new breakbeat
variations.
REMIX LOOP → 30
An easy way to create effective new breakbeats. Cuts up the loop section of an existing
sample, makes some intelligent adjustments, then rearranges the pieces. Keep trying
until the results are just right, then store the new loop as a new sample.
Stereo-to-Mono Sample Copy → 18
You can now reproduce a stereo sample as a monaural sample, either by mixing both
tracks or by retaining only one of the tracks.
ARRANGE PROGRAM and ARRANGE SAMPLE BANK → 18, 19
These new commands automatically remap the samples within the selected program or
sample bank. Samples are mapped to consecutive keys along the keyboard.
MOVE → 20
This new command moves samples from a program into a sample bank, from a sample
bank into a program, or from one sample bank to another. The “freeze” option lets you
transfer the program’s easy edit settings (or the bank’s bank-level settings) into the
samples, so that they carry this information with them when they move.
8
Chapter 1 New Features
Page 9

Other New Features
Other New Features
PLAY Mode
The next three pages outline additional new features. Some of these feature enhance
your creative control, while other simply make things easier. Again, please refer to the
indicated pages for more information.
• You can now select the copy destination directly from the Copy COMMAND page.
(→ 17)
• The SETINIT page now lets you choose either the program’s current settings or else
the A3000 factory settings as the program defaults. (Selection of factory settings was
not available on Version 1.) (→ 17)
• The new EXPORT command lets you save samples to floppy disk in AIFF format.
(→ 22)
• The new “Freeze Program” command transfers the program’s easy-edit settings into
the program’s samples and sample banks. (→ 22)
• Knob 5 of the PLAY | SAMPLE SmpSel page now offers four operations: SAVE (save
sample or bank), NEWBNK (create bank), DELETE (delete sample or bank), and DUPL
(duplicate sample or bank). (→ 23)
• The program-effect setup pages now include settings for effect width and effect out-
put destination. (→ 24)
• You can now select exponential conversion of incoming control-change values (where
Version 1 offered linear conversion only). (→ 25)
• Under standard conditions, note play begins at Note-On and ends with Note-Off. Version 2 lets you change the operation so that Note-Offs are ignored, and each new
Note-On automatically terminates the previous Note-On. (→ 26)
Chapter 1
EDIT Mode
• It is now possible to set the curve type for loop crossfades. (→ 28)
• The SETINIT page now lets you choose either the sample’s current settings or else the
A3000 factory settings as the sample defaults. (Selection of factory settings was not
available on Version 1.) (→ 29)
• The new “Freeze Sample Bank” command transfers a sample bank’s settings into the
underlying samples. (→ 29)
Chapter 1 New Features
9
Page 10

Other New Features
RECORDING Mode
• Loop-start and loop-end addresses are now retained after resampling. (→ 28)
• A new “Copy Parameters” command lets you copy parameter settings from one sam-
ple or bank into another. (→ 29)
• Knob 5 of the EDIT | TRIM/LOOP Wave page now offers two operations: EXTRACT
and NORM (normalize). (→ 30)
• The EDIT | MAP/OUT KeyRnge page now lets you set the low key or high key value so
that it is equivalent to (and locked to) the original-key setting. (→ 31)
• The velocity sensitivity parameter (at the Velocity Range page) now accepts settings
from -127 to +127 (up from -63 to +63 on Version 1). (→ 31)
• You can now select exponential conversion of incoming control-change values (where
Version 1 offered linear conversion only). (→ 33)
• The Coarse tune setting on the EDIT | MAP/OUT Pitch page is now also effective for
sample banks.
• A level meter now appears on the “recording standby” and “recording-in-progress”
pages. (→ 34)
• A new PAUSE feature lets you temporarily pause operation when recording a series of
samples. (→ 34)
• You can set the A3000 to place your series of recorded samples into a single sample
bank. (→ 34)
• The REC | SETUP KeyRnge page includes a new Map parameter. If you set the parameter to auto, the A3000 will automatically map the recorded samples. (→ 35)
• The width parameter has been added to the recording effects page. (→ 35)
• The monitor on/off setting is now stored in nonvolatile memory, so that it is not lost
at power-off. (→ 35)
DISK Mode
• “Quick” formatting is now available for floppy disks. (→ 36)
• Names of samples, sequences, volumes, and imported files are now displayed alphabetically.
10
Chapter 1 New Features
Page 11

UTILITY Mode
Other New Features
• A new “Create Oscillators” command automatically generates basic oscillator sam-
ples. (→ 37)
• Knob 5 of the UTILITY | SEQUENCE SeqSel page now offers three operations: NEW
(create new sequence), SAVE (save sequence), and DELETE (delete sequence).
(→ 37)
• If you start to record to a non-empty sequence, the A3000 will now ask for confirma-
tion before overwriting the original sequence data. (→ 38)
• The ASSIGNABLE key now supports two additional operations: enable/disable MIDI-
to-Sample, and enable/disable knob controllers and function-key play. (→ 38)
• The SYSTEM function includes a new AUDITION-key setup page. (→ 39)
• You can now set Mode and Function keys to operate independently (so that you can
press the keys in either order when navigating the matrix.) (→ 39)
• The memory status page now shows both free memory and total memory. (→ 39)
• Version 2 includes a greater amount of parameter memory.
Chapter 1
Chapter 1 New Features
11
Page 12

12
Chapter 1 New Features
Page 13

2
2
Chapter 2
Upgrade Reference
Page 14

System-Wide Changes
Multiple-FD Saves and Loads ☞ 81
System-Wide Changes
Version 2 can now save volumes across multiple floppy disks. FD saves are no longer
limited to the capacity of a single disk.
If the A3000 runs out of space on the first FD during the save, it displays a message
asking whether you wish to continue the save onto multiple disks. If you decide to go
ahead, answer OK to the message and then follow the displayed instructions.
You do not need to use formatted disks. The A3000 can format new disks without aborting the save procedure.
Disks used for multi-FD saves take a special format, and must be treated as a set. You
cannot use DISK mode to check the individual samples or programs stored on disks, or
to save additional data to these disks. When reloading, you must reload the entire volume.
When making the save, the A3000 gives each disk the same disk name followed by a
sequential number. Since you cannot check the names of individual objects on the disk,
it is suggested that you use a descriptive disk name.
To reload the volume: Insert the first of the disks, then go the DISK | VOLUME function
and begin loading in the usual way. Insert the remaining disks in accordance with the
instructions displayed on the LCD.
Changing the Value of a Signed Setting ☞ 87
If you are changing the value of a signed setting, you can immediately change the value
to +0 by pushing the knob. If you push the knob a second time, the value returns to its
initial value. If the original value is -49, for example, pushing the knob once will change
the value to +0; pushing again returns the value to -49. Note that if you toggle the
value to +0 and then switch to a different screen, the nonzero value (in the toggle
buffer) will be lost.
Note that there are a few screens where the knob-push action is assigned to a different
operation and will therefore not operate in this way.
Knob-1 Turn Action ☞ 86
On Version 1, you use Knob-1 turn action to change the page within the selected function. On Version 2, you have two options:
1. Set Knob 1 turn action so that it selects the page. (Same as on Version 1.)
2. Set Knob 1 turn action so it changes the sample selection. Each time you change
the selection, the new sample name appears on the top line of the screen for about
one second.
To assign the Knob 1 turn action, go to the UTILITY | SYSTEM Keys page.
Note that if you set Knob 1 to operate as a sample selector, you must use the function
keys to change the pages.
14
Chapter 2 Upgrade Reference
Page 15
System-Wide Changes
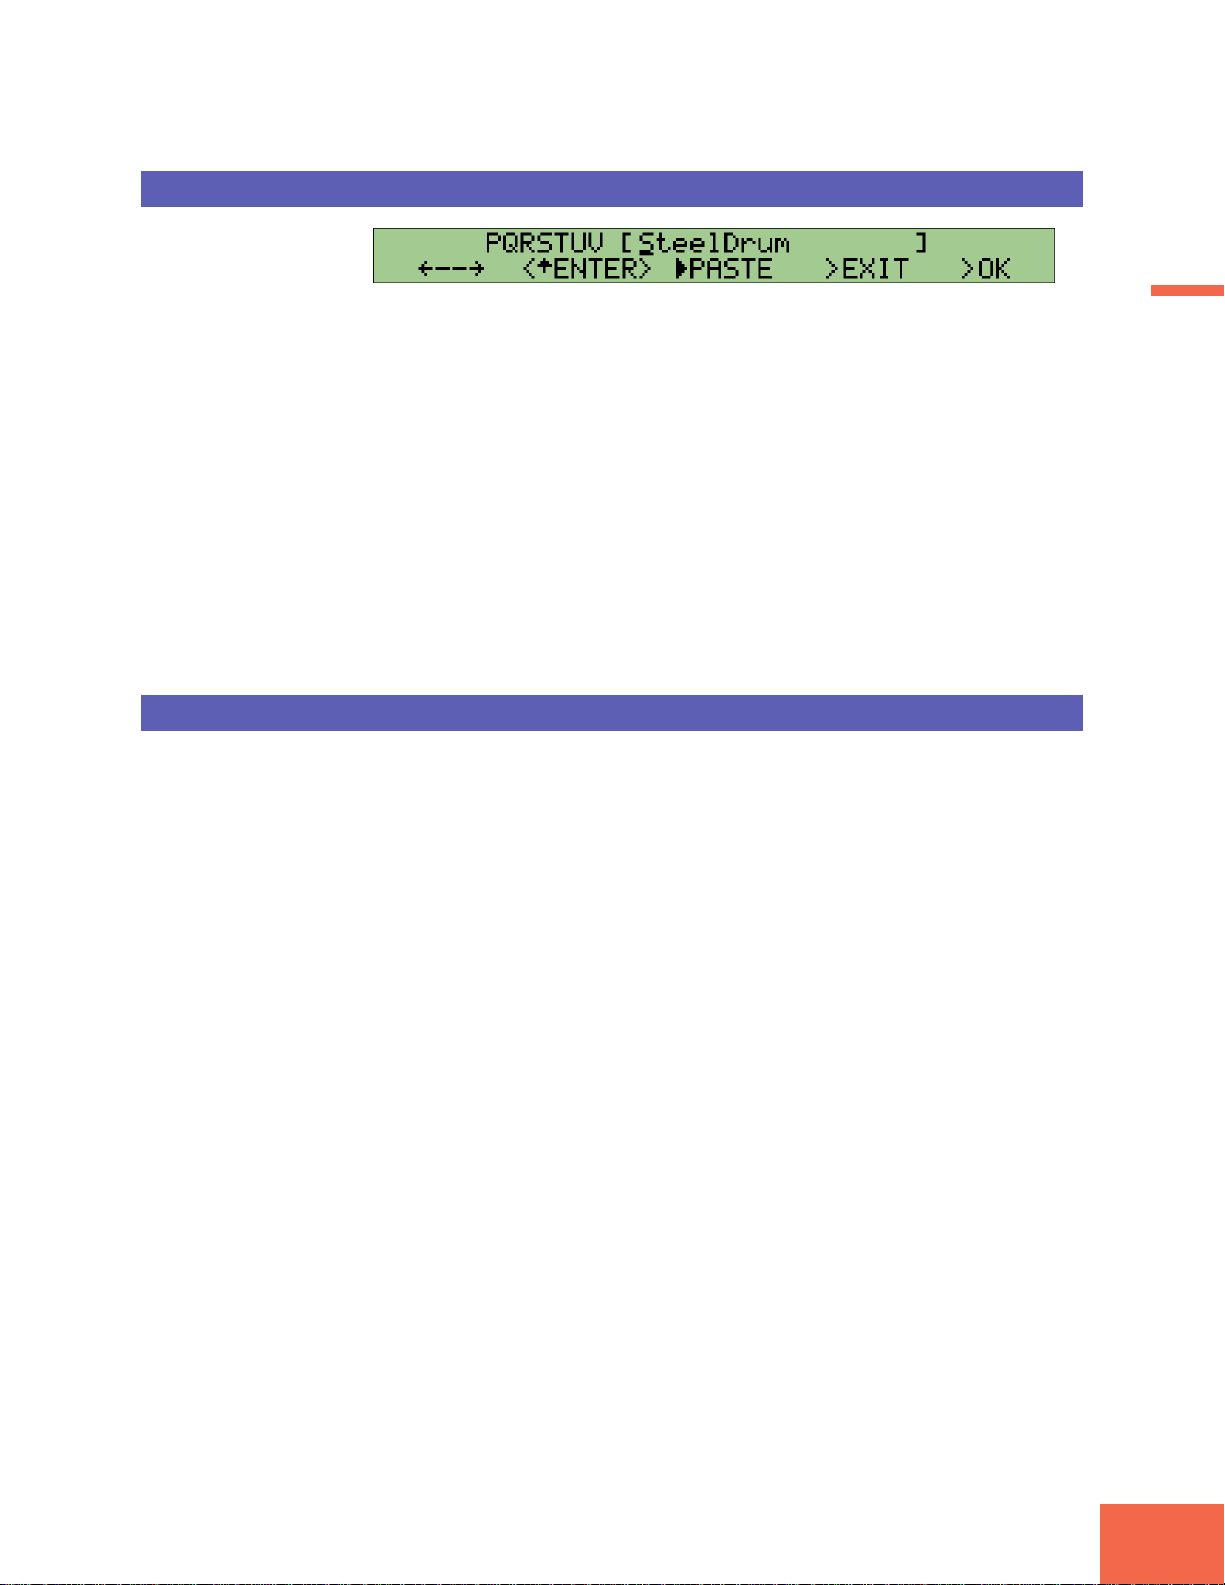
New Name-Entry Features ☞ 88
• The Knob 3 Paste buffer now stores the last four names that you entered (where
Version 1 saved the most recent name only). After turning Knob 3 to select PASTE,
you can push the knob as necessary to cycle through five names: the four names in
the buffer and the “fifth” name that was originally on the screen.
• Knob 3 can now operate also as a lowercase/uppercase toggle. Simply turn the knob
to select CAPS, then push the knob to switch the current character (the character at
the cursor position) between lowercase and uppercase.
• Knob 3 also includes a new jump feature that lets you navigate more quickly through
the available characters. Turn the knob to select JUMP, then push the knob to jump
to different parts of the alphanumeric list (1 → A → a → 1 ....). You can then turn
Knob 2 as necessary to select the character.
• A 7-character “window” of the alphanumeric list now appears at the top left part of
the screen. The currently selected character appears directly above the up arrow located just above Knob 2.
Chapter 2
Hard-Disk Support
• The A3000 now supports hard disk sizes up to 8GB. Maximum supported partition
size is 1GB. (To use an 8GB disk, you must divide it into 8 partitions.)
• Overall disk access speed has been improved. For fastest loading speed, switch off the
Play&Load setting (in the DISK | DISK DskMode page). (→ 36)
Chapter 2 Upgrade Reference
15
Page 16
Changes in PLAY MODE
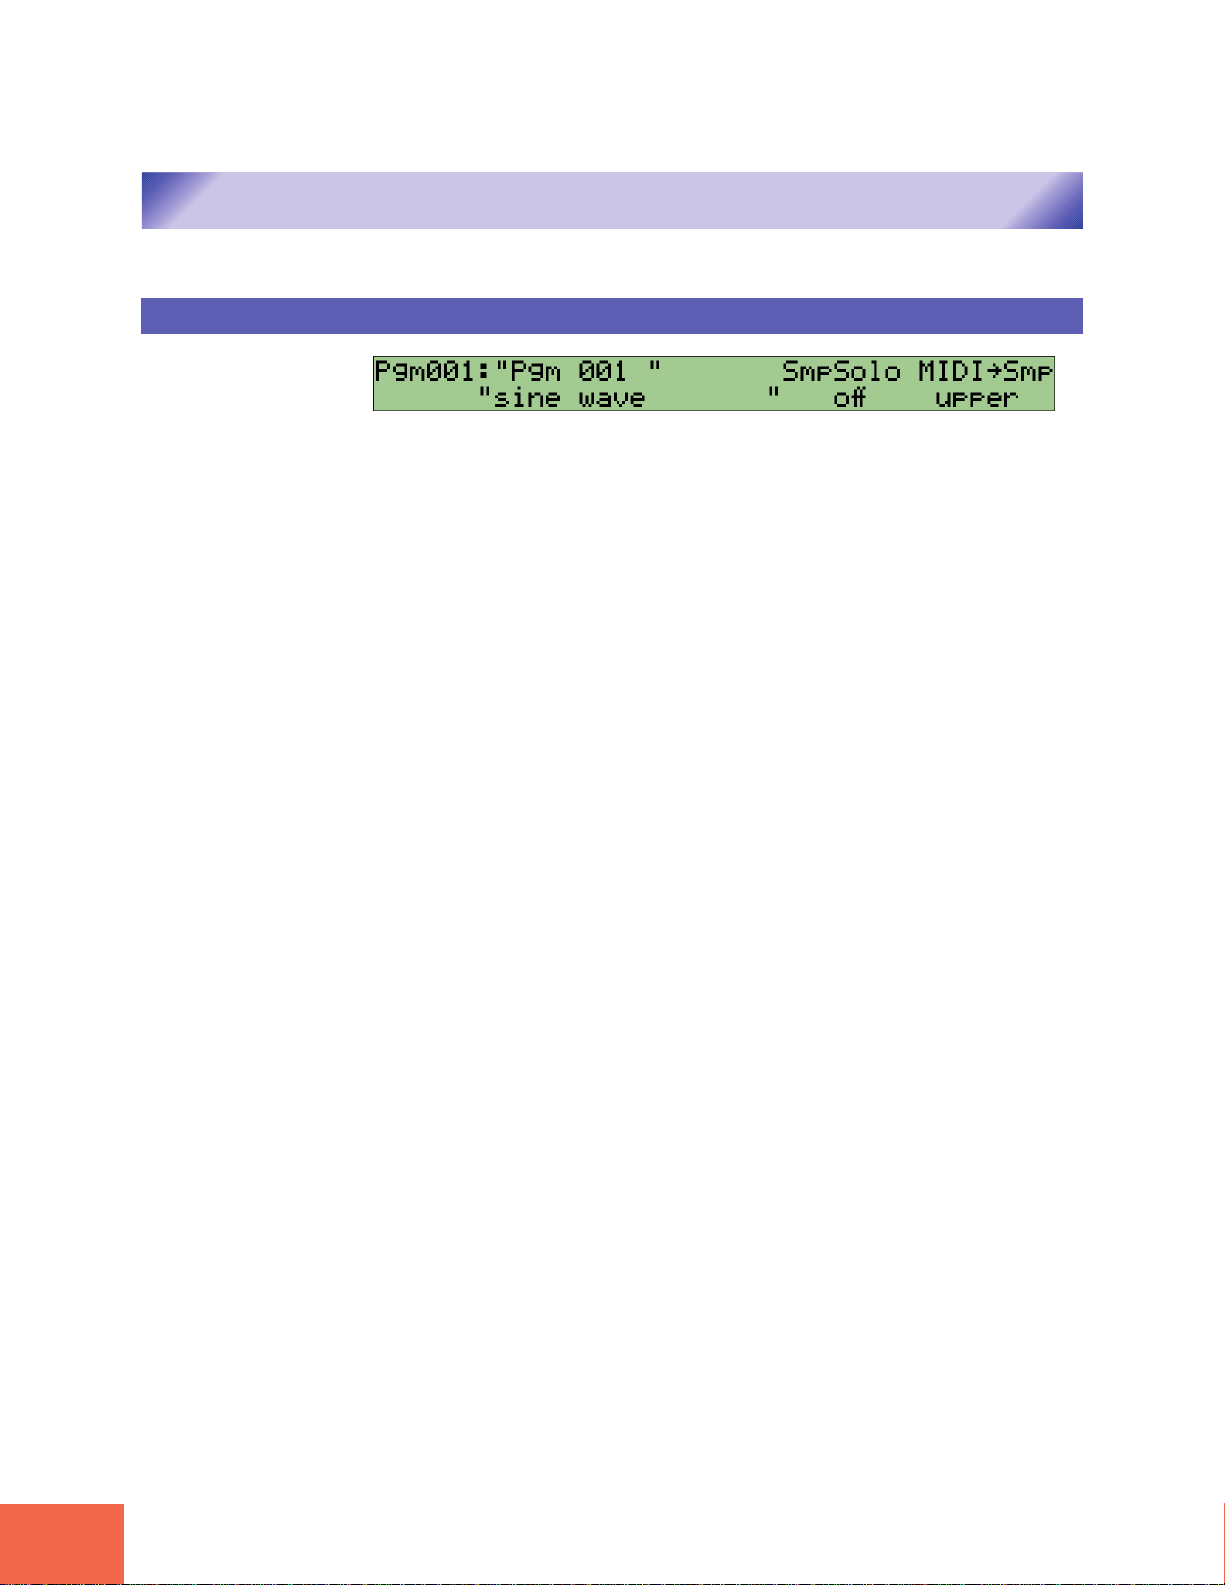
PLAY - PROGRAM/SAMPLE SELECTION ☞ 95
Changes in PLAY MODE
As before, you can jump to this special screen from almost any page (with the exception
of command pages) by pushing Knob 1. The screen exists as part of PLAY mode but,
unlike other screens, can be selected directly from all modes and functions.
• It is now possible to access command pages directly from this page (by pressing the
Command key).
• The Knob 5 MIDI → Smp (MIDI-to-sample) feature has been improved to provide
better handling of cases where a given note is assigned to multiple samples (layer-
ing). On Version 1, it was not possible to predict which of these samples the note
would select for editing. On Version 2, the note will select the relevant samples
sequentially. It is also possible to choose whether the feature works with respect to
“upper” objects only (freestanding samples, and sample banks), or “lower” objects
only (samples only, ignoring all sample banks).
Specifically, the MIDI → Smp parameter now offers three settings: off, upper, and
lower (where Version 1 offered only off and on). The off setting disables the feature, as
on Version 1. The upper setting targets freestanding samples and sample banks only,
while the lower setting will target samples only (and will ignore sample banks). Ex-
amples are as follows.
■
Assume that you select upper; and that note C3 is set to produce sound from Sample A, Sample B, and Sample Bank C; and that Sample Bank C contains Samples X
and Y. In this case, successive input of note C3 will change the selection as follows:
Sample A → Sample B → Sample Bank C → Sample A ...
■
Now assume that you select lower, and the setup is the same as above. In this case,
successive input of note C3 will change the selection as follows:
Sample A → Sample B → Sample X → Sample Y → Sample A...
The new LayerSelection parameter in the UTILITY | MIDI MIDI → Smp page determines
whether the sequential selection of layered samples described here works (1) on this
page only, or (2) on all pages where the MIDI → Smp input is supported. (→ 40)
16
Chapter 2 Upgrade Reference
Page 17

Changes in PLAY MODE
PLAY - COMMAND Key - COPY ☞ 102
• You can now use Knob 3 to select the items to be copied. You can choose to copy all
parameters (AllParam), sample assignments and easy-edit data only (Merge), or effects settings for any one of the effect blocks (Effect1, Effect2, or Effect3). Note that
the AllParam copy overwrites all content of the destination. If you select Merge, the
A3000 includes all sample and sample banks from the source program into the destination program (by switching the ToPgm settings to on), and copies the easy-edit
settings related to these samples and banks.
• Knob 2 selects the program to be copied (you can no longer use Knob 3 for this
purpose), and Knob 4 selects the destination program (you can no longer use Knob 5
for this). If you are copying the settings for an effect block, you use Knob 5 to select
the destination block for these settings.
• If you wish, you can use this function to copy the effect data from one block into
another block of the same program: simply select the same program as both source
and destination, and set different values for the source and destination effects.
Chapter 2
PLAY - COMMAND Key - SETINIT ☞ 104
The EFFECT, SETUP, and CONTROL parameters can each be set to off, current, or factory
(where Version 1 offered off and on).
If you select current, the A3000 registers the current values as the program’s defaults.
(This is equivalent to Version 1’s on setting.) If you select factory, the A3000 registers
the factory defaults as the program’s defaults.
Chapter 2 Upgrade Reference
17
Page 18

Changes in PLAY MODE
PLAY - COMMAND Key - ARNG_PGM [Arrange Program]
This is a new command. The command can be accessed from any PLAY-mode function.
Use this command to automatically arrange (remap) the program’s samples along the
keyboard. The command maps the samples to successive keys up the keyboard, one
sample per key. The samples are arranged in order of their Low key-range setting.
Note that the command does not affect the program’s sample banks.
• Push Knob 1 to execute the command.
• Knob 2 selects the MIDI Receive Channel. The command will only arrange the samples that are set to operate on the selected channel. If you set the value to all, the
command will arrange all samples (with the exception of those eliminated by the
Knob-3 setting.)
• Knob 3 selects the range of samples to be targeted for arrangement. Note that you
can only select the low note for the range; the high note is fixed at G8. The A3000 will
remap only those samples whose key range falls entirely within the range you set
here. In other words, the A3000 will not remap any sample whose Low setting is
below the note value that you set here.
• Knob 4 selects the starting note for the new arrangement. The A3000 will map the
first sample (the sample with the lowest Low setting) to this note, the next sample to
the next higher note, and so on up the keyboard.
• Knob 5 selects whether samples are mapped to all keys (all) or to white keys only
(white).
PLAY - COMMAND Key - DUPL [Duplicate] ☞ 107
If you are duplicating a stereo sample, you now use Knob 2 to select the type of operation.
L/R Duplicate the stereo sample without change (creating a new stereo sample).
L+R Mix the two channels of the stereo sample (creating a monaural sample).
L Copy the left channel only (creating a monaural sample).
R Copy the right channel only (creating a monaural sample).
18
Chapter 2 Upgrade Reference
Page 19

Changes in PLAY MODE
PLAY - COMMAND Key - ARNG_SB [Arrange Sample Bank]
This is a new command. The command can be accessed from the PLAY mode’s SAMPLE
function.
Use this command to automatically arrange (remap) the samples within the selected
sample bank. The command maps the samples to successive keys up the keyboard, one
sample per key. The samples are arranged in order of their Low key-range setting.
• Push Knob 1 to execute the command.
• Knob 2 selects the MIDI Receive Channel. The command will only arrange the samples that are set to operate on the selected channel. If you set the value to all, the
command will arrange all samples within the bank (with the exception of those eliminated by the Knob-3 setting.)
• Knob 3 selects the range of samples to be targeted for arrangement. Note that you
can only select the low note for the range; the high note is fixed at G8. The A3000 will
remap only those samples whose key range falls entirely within the range you set
here. In other words, the A3000 will not remap any sample whose Low setting is
below the note value that you set here.
Chapter 2
• Knob 4 selects the starting note for the new arrangement. The A3000 will map the
first sample (the sample with the lowest Low setting) to this note, the next sample to
the next higher note, and so on up the keyboard.
• Knob 5 selects whether samples are mapped to all keys (all) or to white keys only
(white).
Chapter 2 Upgrade Reference
19
Page 20

Changes in PLAY MODE
PLAY - COMMAND Key - MOVE
This is a new command. The command can be accessed from the PLAY mode’s SAMPLE
function.
You use this command to move samples from a sample bank to the selected program,
from the selected program to a sample bank, or from one sample bank into another.
Note that if the operation targets any sample or sample bank that is also in use by
another program, the A3000 will replace these samples with “duplicates” before carrying out the move (so that the original samples and sample banks will remain unchanged
within the other program that uses them).
• Push Knob 1 to execute the move.
• Knob 2 selects the type of operation. If you select Pgm →, the command moves all of
the current program’s freestanding samples (i.e., all samples that are not within sam-
ple banks) into the specified sample bank. If you select Pgm (Freeze) →, the com-
mand does the same thing but will also adjust the samples so that they reflect the
program’s Easy-Edit functions. If you choose Pgm ←, the command takes all samples
out of the selected sample bank and maps them to the program (as freestanding
samples). Pgm ← (Freeze) is similar to Pgm ←, but in this case the command will set
each of the samples to reflect the sample bank’s settings before mapping into the
program. If you select SB → SB, the command moves all samples from one sample
bank into another.
• Use Knobs 3, 4, and 5 to set the source and destination sample banks.
PLAY - COMMAND Key - LOOPDIV [Divide Loop]
This is a new command. The command can be accessed from the PLAY mode’s SAMPLE
function.
You use this command to break the looping section of a selected sample into a specified
number of smaller pieces mapped to successive keys. You can then play the pieces in any
order from the keyboard.
Specifically, the command operates by reproducing the looping section of the selected
sample as a series of smaller samples, placing these smaller samples into a sample bank,
and mapping them to consecutive keys on the keyboard. The waveform data itself is not
reproduced; instead, the smaller samples continue to reference the waveform data from
the original sample. (The waveform will be retained in memory even if you delete the
original sample. To delete the original waveform itself, you must delete both the original samples and all of the smaller samples.)
• The wave start addresses for the new samples are set so that each sample begins at a
successive part along the looping section of the original waveform (where “looping
section” refers to the section between the original waveform’s loop start address and
loop end address). For example, assume that the loop section starts at address 0 and
has a length of 1000, and you divide this into 10 pieces. Then the first new sample
(piece) will begin at location 0, the second piece will begin at 100, and so on.
20
Chapter 2 Upgrade Reference
Page 21

Changes in PLAY MODE
• The waveform end addresses for the new samples are determined by Knob 3, as described below.
• The loop mode for the new samples is set to “Forward, No Loop” (- - - →). The loop-
start and loop-end addresses for each new sample are set equal to the sample’s wavestart and wave-end addresses, which are determined as described here.
• The command assigns the name Div SmpBank x to the new sample bank, where x is a
sequential number.
• Push Knob 1 to execute the command.
• Turn Knob 2 to select the number of smaller samples (number of divisions) to be
created. The command divides the loop playback area of the original sample into the
specified number of pieces, and creates new samples to play each of these pieces.
• Turn Knob 3 to select the Length of the new samples: either ToEnd or else a percent-
age value (from 10% to 800%, in 10% steps). If you set Knob 3 to “ToEnd,” all
samples will play to the end of the original waveform (their end addresses will be set
equal to the loop-end address of the original waveform). If you set Knob 3 to x%, the
A3000 sets the end addresses such that the distance between each sample’s start address and end address is equal to (x%)(original sample’s loop-section length)/(number
of divisions). If you set Knob 3 to 100%, for example, the new samples will play an
equal-length portion of the loop section such that the entire section is completely
covered with no overlap. If you set Knob 3 to less the 100%, then all samples will have
equal length and no overlap, but there will be gaps in the coverage. If you set the
value above 100%, then the samples will overlap, and the samples toward the end of
the loop may have shorter playback time (since they may reach the original sample’s
wave-end address before playing the fully allotted time).
• Knob 4 selects the starting note for sample mapping. The A3000 will map the first
sample (the division that plays the first part of the loop) to this note, the next sample
to the next higher note, and so on up the keyboard.
• Knob 5 selects whether samples are mapped to all keys (all) or to white keys only
(white).
Chapter 2
Chapter 2 Upgrade Reference
21
Page 22

Changes in PLAY MODE
PLAY - COMMAND Key - EXPORT
This is a new command. The command can be accessed from the PLAY mode’s SAMPLE
function.
You use this command to export (save) a sample to floppy disk in AIFF file format. You
can then load the files into a computer and use them with any of a variety of commercially available applications.
If you select a sample bank for the save, the A3000 exports all of the samples contained
in the bank.
Be aware that most of the sample’s sound-related parameter settings will be lost in the
conversion. Although it is possible to reload the AIFF file into the A3000, the original
settings will not be restored.
• Push Knob 1 to execute the command.
• Use Knob 2 or Knob 3 to select the sample or sample bank that you wish to export.
Note that all data must fit on a single floppy disk. It is not possible to export onto multiple disks.
PLAY - COMMAND Key - FREZ_PGM [Freeze Program]
This is a new command. The command can be accessed from the PLAY mode’s EASY
EDIT function.
The command “freezes” the program sound by transferring most of the easy edit settings directly into the program’s samples and sample banks. In other words, the command modifies the samples and banks so that the current easy-edit sound becomes their
“built-in” sound.
This command operates only on freestanding samples and on sample banks. It has no
affect on samples that exist within sample banks.
After making the transfer, the command reinitializes the Easy Edit settings that were
transferred. Note that the following Easy Edit settings cannot be transferred and are not
reinitialized. (Under certain conditions various other settings may also be omitted from
the transfer.)
If sample: MIDICtl (MIDI Control) setting.
If sample bank: MIDICtl; Pitch page Fine setting; KeyLimit page RngShft (range shift),
• Push Knob 1 to execute the command.
• Turn Knob 2 to select whether to target a single sample only (Smp) or else all samples
and sample banks within the program (allSmp).
• If you have selected Smp at Knob 2, use Knob 3 to select the sample or sample bank
to be adjusted.
22
Chapter 2 Upgrade Reference
LoLimit, and HiLimit settings.
Page 23

Changes in PLAY MODE
PLAY - PROGRAM - PgmSel [Select Program] ☞ 110
On Version 1, pushing Knob 4 (SAVE) or Knob 5 (ALL) moves you to a special page. On
Version 2, these actions move you to the standard SAVE command page.
When you push Knob 4 (SAVE), the save type automatically sets to Pgm. When you press
Knob 5 (ALL), the type sets to AllPgm(wp).
PLAY - SAMPLE - SmpSel [Select Sample] ☞ 112
• You can turn Knob 5 to select any of four operations. You can push the knob to
execute the operation. These operations are as follows.
SAVE Jump to the standard SAVE command page.
NEWBNK Create sample bank
DELETE Delete currently selected sample or bank.
DUPL Duplicate the currently selected sample or bank.
Chapter 2
• If you turn Knob 4 to switch ToPgm to off while Easy Edit settings are in effect,
Version 2 will prompt for confirmation before proceeding to de-assign the sample.
PLAY - SAMPLE - ToBank [Assign Sample to Bank] ☞ 115
If you select a sample that is already assigned to a program or to another sample bank,
the following page will appear when you press Knob 5 (ADD).
You can now select either of the following operations by turning the knob, and then
execute by pushing the knob.
DUPL&ADD Create a duplicate copy of the sample, and assign the duplicate to
the selected sample bank.
MOVE&ADD Remove the sample from its original program or sample bank and
place it into the selected bank.
Chapter 2 Upgrade Reference
23
Page 24

Changes in PLAY MODE
PLAY - EASY EDIT ☞ 119
Version 2 groups the Easy Edit parameters onto a number of pages so that they are
easier to work with, and adds a few new parameters.
The Easy Edit pages and parameters are as follows.
Page Parameters
Mix Level, Pan, MIDI Receive Channel
Output Main Output, Main Out level, Assignable Output, Assignable Out
Level
Filter Cutoff, Distance, Q/Width, Gain
Pitch Coarse, Fine
AEGRate AEG Attack Rate, Decay Rate, Release Rate
KeyLimit Key Range Shift, Key Low Limit, Key High Limit, Key Crossfade
VelLimit Velocity Low Limit, Velocity High Limit, Velocity Crossfade
Mode&Ctl Poly/Mono, Portamento, Alternate Group, MIDI Control
PLAY - EFFECT - EfType ☞ 121
Knob 5 offers two new Connect settings: 1/2 → 3 and 1 → 2 ← 3.
1/2 → 3 Output from Effect Block 2 passes through Effect Block 3. Effect
block 1 operates independently.
1 → 2 ← 3 Output from Effect Block 1 and output from Effect Block 3 both
pass through Effect Block 2.
PLAY - EFFECT - In&Out1, In&Out2 ☞ 126
Version 1’s In&Out page has been renamed In&Out1, and a new In&Out2 page has been
added.
You can use the new page to set the width and output destination for each of the effect
blocks.
• Knob 3 sets the effect block’s width (stereo expanse).
• Knob 4 sets the block’s output destination. On Version 1, output was always to the
A3000 stereo outputs. On Version 2, you can direct the output to the stereo outputs,
to any assignable-output pair, or to the digital output. Note that this setting is not
available for any effect block whose output is directed to another effect block (as set
up by the Connect parameter in the PLAY | EFFECT EfType page).
24
Chapter 2 Upgrade Reference
Page 25

Changes in PLAY MODE
PLAY - SETUP - ADOut [Output Setup for A/D Input Signal] ☞ 134
The MainOut display above Knob 2 has been slightly upgraded. If you set the output
destination to an effect block, the screen now indicates both the block (Ef1, Ef2, or Ef3)
and effect type that is currently set for that block. Version 1 indicated only the block
(Effect1, Effect2, or Effect3).
PLAY - CONTROL - PgmCtl1 [Program Controller Setup 1] ☞ 136
• Knob 3 offers three additional “devices”: Note Number, Velocity, and Program LFO.
• The program LFO is a new feature on Version 2. To set the program LFO to modify a
specific parameter, just set Knob 3 to ProgramLFO and then turn Knob 4 or Knob 5 to
select the parameter. (The program LFO itself is set up at the PLAY | CONTROL
PgmLF01 and PgmLF02 pages; see below.)
Chapter 2
Note that you cannot select ProgramLFO at this page if the Wave type (at the PgmLF01
page) is set to Saw or Square.
• On Version 1, the Knob 3 display area showed only the controller number. On Version
2, the display shows both the controller number and the name of the corresponding
device (if any). If you have set up a knob to act as controller, the knob name and
transmit channel will appear next to the controller number (for example, 073/K4(5)
would indicate that Knob 4 is set to operate as Controller 073 transmitting over
Transmit Channel 5).
• Knobs 4 and 5 include four new parameters: EF1: Width, EF2:Width, EF3:Width,
and PgmLFODepth. The first three control the widths for effect blocks 1 to 3, respec-
tively. PgmLFODepth controls the depth of the program LFO.
PLAY - CONTROL - PgmCtl2 [Program Controller Setup 2] ☞ 139
The Knob 3 control type offers two new settings, +ofst(-exp) and -ofst(+exp). Like the
+offset setting, these two new settings will also cause the A3000 to convert received
control-change values to corresponding values in the range {0 to Range}. The difference
is that +offset uses a linear conversion, +ofst(-exp) produces exponentially greater changes
at lower control-change values, and ofst(+exp) produces greater changes at higher values.
Chapter 2 Upgrade Reference
25
Page 26

Changes in PLAY MODE
PLAY - CONTROL - Reset [Controller Reset] ☞ 141
PLAY - CONTROL - PgmLFO1 [Program-LFO Setup 1]
In addition to its original purpose, this page can now also be used to set the Note On
mode. Knob 4 sets the mode for the specified MIDI channel: either normal or toggle.
normal Input of Note-On causes note to begin playing. Input of Note-Off
causes note to stop playing.
toggle Note-Off ev ents are ignored. Each new Note-On event switches of f
playback of any note triggered by a previous Note-On event. (Only
1 note can be “on” at a time)
Program LFOs are a new feature with Version 2. The program-LFO setup pages are
located in the PLAY mode’s CONTROL function.
The program LFO applies the same modulation speed to all samples assigned to the
program. You select the modulated parameters using the PLAY | CONTROL PgmCtl1
page and the EDIT | MIDI/CTRL SmpCtl1 page. (To select, set Device to ProgramLFO,
and then set Function to the desired parameter.)
Note that the program LFO does not operate while the A3000’s built-in sequencer is in
use.
• Knob 2 selects the LFO waveform type. Please be sure to set the value to off if you do
not wish to use a program LFO with the current program. Note that if you set the
wave to Saw or Square, program-LFO settings in the PLAY | CONTROL PgmCtl1
become ineffective. (Program LFO settings in the EDIT | MIDI/CTRL SmpCtl1 page
remain active.)
• Knob 3 selects the method used to determine the LFO speed. If you select manual,
the speed is set locally in accordance with the Knob 4 Tempo setting and Knob 5
Cycle setting. (One LFO cycle corresponds to the time span of the selected note value
at the selected tempo.) If you select MIDI, the LFO speed is synchronized to an external MIDI clock. In this case Knob 4 is ineffective, and Knob 5 again sets the note
length of the cycle (the LFO cycle is equivalent to the time that the MIDI clock takes
to generate the specified note length).
26
Chapter 2 Upgrade Reference
Page 27

Changes in PLAY MODE
PLAY - CONTROL - PgmLFO2 [Program-LFO Setup 2]
• Knob 2 sets the LFO’s initial phase. If Sync = MIDI, this phase will coincide with the
start of the MIDI-clocked note length. If Sync = manual, this phase is produced by
LFO reset. Note that reset conditions themselves are set up by Knobs 3 and 4 as
follows.
• Knob 3 sets the MIDI channel that can be used to reset the LFO. You can set the value
to off (resets disabled); audition (reset generated by pressing the AUDITION key); 1 to
16 (reset generated by note-on events over the specified MIDI channel only), or Bch
(reset generated by note-on events received over the basic receive channel).
• Knob 4 sets the specific note that generates the reset. This setting is available only if
Knob 3 is set to 1 to 16 or to Bch. You can select any single note on the keyboard (C-
2 to G8), or you can select all notes. Reset is generated when a note-on event for the
specified note is received over the MIDI channel selected by Knob 3.
• It is recommended that you use the note you select here only as a “reset switch,” and
that you avoid mapping any samples to it. Although it is possible to use this note both
for reset and playback purposes, the playback timing may be noticeably delayed.
Chapter 2
Chapter 2 Upgrade Reference
27
Page 28

Changes in EDIT MODE
EDIT - COMMAND Key - REVERT ☞ 149
EDIT - COMMAND Key - NORM ☞ 150
Changes in EDIT MODE
This page now also shows the name of the selected sample or sample bank.
This page now also shows the name of the sample selected for normalization.
EDIT - COMMAND Key - RESMPL - TmStrch [Resampling - Time Stretch] ☞ 151
On Version 1, the length was always indicated by address units. On Version 2, you can
also display the length in beats or time units by setting the EndType parameter (in the
EDIT | TRIM/LOOP Config page) to beats or time, respectively.
Unlike Version 1, Version 2 will now retain the loop-start and loop-end addresses after
resampling.
EDIT - COMMAND Key - REVERS [Reverse] ☞ 157
This page now also shows the name of the sample selected for reversal.
EDIT - COMMAND Key - LOOPXFD [Loop Crossfade] ☞ 158
• The Area parameter was moved from Knob 3 to Knob 4.
• Knob 3 is now used to select the crossfade curve. For information about curve settings, see the Owner’s Manual, page 156.
28
Chapter 2 Upgrade Reference
Page 29

Changes in EDIT MODE
EDIT - COMMAND Key - SETINIT [Register Initial Parameter Values] ☞ 160
Version 2 lets you select the initialization type: either current or factory.
current Register the selected sample’s current values as the defaults.
factory Use the A3000 factory defaults.
When you turn the knob to select current, the screen displays the name of the currently
selected sample.
EDIT - COMMAND Key - FREZ_SB [Freeze Sample Bank]
This is a new command. The command can be accessed from any EDIT-mode function.
Chapter 2
The command “freezes” the sample bank’s sound by copying the bank’s parameter settings directly into the samples within the bank. After completing the copy, the command reinitializes the sample bank’s settings.
• Push Knob 1 to execute the command.
• Turn Knob 2 or Knob 3 to select the operation type. You can select from three types,
as follows.
param Copy settings as described above.
LpMode Change loop mode for all samples to the mode selected by Knob 4.
(But do not copy setting.)
param&LpMode
After copying settings into samples, change loop mode for all samples to the mode selected by Knob 4.
EDIT - COMMAND Key - COPY_PRM [Copy Parameters]
This is a new command. The command can be accessed from any EDIT-mode function.
This command copies parameter settings from a selected sample or bank into the currently selected sample or bank.
All settings are copied, with the exception of the following:
Original Key, Fine Tune, Key Range Low, Key Range High, Loop Mode, Wave Addresses, Loop Addresses
Use Knob 2 or Knob 3 to select the sample or bank from which settings are copied.
Chapter 2 Upgrade Reference
29
Page 30

Changes in EDIT MODE
EDIT - TRIM/LOOP -Wave [Edit Waveform] ☞ 164
EDIT - TRIM/LOOP - LoopRmx [Remix Loop]
Knob 5 now offers two functions: EXTRACT and NORM (normalize). Turn the knob to
select the function, and then push the knob to execute.
This is a new command. The command can be accessed from the EDIT mode’s TRIM/
LOOP function.
This command creates a new loop pattern by breaking up and rearranging an existing
loop pattern. This makes it easy to create effective new drum patterns from your existing drum-pattern samples. This feature works best with patterns that are 1 or 2 bars
long.
Specifically, the command generates a temporary rearrangement of the selected sample’s loop section (the waveform area between the loop-start and loop-end addresses). If
you are pleased with the rearranged loop, you can save it into a new sample. If you are
not pleased, you can simply try again.
For good results, be sure to set the original sample’s loop addresses carefully before
executing the remix.
Knob 2 (Type) and Knob 3 (Vari) set the general parameters for the “intelligent” but
random remixing. The Type setting determines the portions of the loop to which changes
are applied, and the Vari (variation) setting selects the probable amount of change (where
variation A will generally produce the smallest change and D will generally produce the
largest). Different combinations will produce significantly different kinds of results.
To begin, set Knobs 2 and 3 to the appropriate values. You can then turn Knob 4 to set
the speaker icon
the new pattern.
If you set the
the icon setting, you can then listen to the new pattern as many times as you like by
pressing the AUDITION key.
If you are not pleased with the new pattern, you can press Knob 4 to generate another
pattern. Each execution generates a different pattern (even if you leave the Type and Vari
settings unchanged). Continue as necessary until you get the pattern you like.
on or off. When you are ready to proceed, push Knob 4 to generate
icon on, the A3000 immediately plays out the new pattern. Regardless of
When you are satisfied with the pattern, press Knob 5 to store it into a new sample. The
A3000 generates the name for the new sample by appending a sequential number (the
number shown in brackets at the top right of the screen) to the name of the original
sample. The original sample itself remains unchanged.
30
Chapter 2 Upgrade Reference
Page 31

Changes in EDIT MODE
EDIT - MAP/OUT - KeyRnge [Key Range] ☞ 170
The Low and High parameters at Knobs 3 and 4 now offer a new =Orig setting.
• To set the Low parameter to =Orig, turn Knob 3 all the way to the left. This setting
sets the sample’s low key equal to the sample’s original key.
• To set the High parameter to =Orig, turn Knob 4 all the way to the right. The setting
sets the sample’s high key equal to the sample’s original key.
EDIT - MAP/OUT - VelRnge [Velocity Range] ☞ 172
The VelSens parameter at Knob 5 now supports values from -127 to +127 (up from -63
to +63 on Version 1).
Chapter 2
EDIT - MAP/OUT - Lvl&Mode [Level & Mode] ☞ 174
An Rnd (“random”) setting has been added for the Pan parameter at Knob 3. If you set
the value to Rnd, the pan will change at random each time a note is played.
EDIT - MAP/OUT - Output ☞ 176
The MainOut display above Knob 2 has been slightly upgraded. If you set the output
destination to an effect block, the screen now indicates both the block (Ef1, Ef2, or Ef3)
and effect type that is currently set for that block. Version 1 indicated only the block
(Effect1, Effect2, or Effect3).
Chapter 2 Upgrade Reference
31
Page 32

Changes in EDIT MODE
EDIT - FILTER - Filter ☞ 182
Version 2 includes the following additional filter types (Knob-2 Type settings).
LowPass3 Low pass filter #3
Peak1 Emphasis at a specified frequency
Peak2 Emphasis at specified frequency
2Peaks Emphasis at two specified frequencies
2Dips De-emphasis at two specified frequencies
DualLPFs Two low-pass filters
LPF+Peak Low-pass filter combined with peak filter
DualHPFs Two high-pass filters
HPF+Peak High-pass filter combined with peak filter
LPF+HPF Low-pass filter combined with high-pass filter
Note that if you select any of the final seven filters in the above listing, you will need to
set two frequencies. Use Knob 3 (Cutoff) to set the first of the frequencies; and then use
the new Distance parameter (at Knob 4) to set the second frequency by its (positive or
negative) distance from the first. Note that a 0 distance setting will cause the frequencies to coincide. (For the LPF+Peak, HPF+Peak, and LPF+HPF frequencies, the Cutoff
value sets the frequency for the filter written at the left side, and the Distance setting
determines the frequency for the filter written at the right side.)
On Version 1, Knob 4 controlled the FltGain parameter. On Version 2, this parameter is
now located at Knob 5 in the FltSens page.
EDIT - FILTER - FltSens [Filter Sensitivity] ☞ 184
• Five new “random” settings, Rnd1 to Rnd5, have been added to the Vel → Cutoff and
Vel → Q/Width parameters at Knobs 2 and 4. You can select these settings by turn-
ing the knob to the right (so that it moves past +63). Each of values causes the
corresponding characteristic (frequency or Q/Width) to vary at random around its
true setting each time a note is played, where Rnd1 produces the smallest amount of
variation and Rnd5 produces the greatest.
• It is no longer possible to use Knob 3 to set the Vel → Cutoff parameter, or to use
Knob 5 to set the Vel → Q/Width parameter.
• Knob 5 now sets the FltGain (filter gain) parameter. On Version 1 this parameter was
located in the Filter page (see page 182 of the Owner’s Manual).
32
Chapter 2 Upgrade Reference
Page 33

Changes in EDIT MODE
EDIT - MIDI/CTRL - SmpCtl1 [Sample Controller Setup 1] ☞ 210
• Knob 3 offers three additional devices: Note Number, Velocity, and Program LFO.
• The program LFO is a new feature on Version 2. To set the program LFO to modify a
specific controller, just set Knob 3 to Program LFO and then turn Knob 4 or Knob 5 to
select the parameter. (The program LFO itself is set up at the PLAY | CONTROL
PgmLF01 and PgmLF02 pages.)
•
On Version 1, the Device indication showed only the controller number. On Version 2,
it shows both the controller number and the corresponding device (if any). If you have
set up a knob to act as controller, then the knob name and transmit channel will both
appear next to the controller number (for example, 073/K4( 5) would indicate that
Knob 4 is set to operate as Controller 073 transmitting over Transmit Channel 5).
• Knobs 4 and 5 include three new parameters: FEG Level (filter-EG level), CutoffDistanc
(distance between filter frequencies), and Filter Gain.
Chapter 2
EDIT - MIDI/CTRL - SmpCtl2 [Sample Controller Setup 2] ☞ 213
The Knob 3 control type offers two new settings, +ofst(-exp) and -ofst(+exp). Like the
+offset setting, these two new settings will also cause the A3000 to convert received
control-change value to a corresponding value in the range {0 to Range}. The difference
is that +offset uses a linear conversion, +ofst(-exp) produces exponentially greater changes
at lower control-change values, -and ofst(+exp) produces greater changes at higher values.
Chapter 2 Upgrade Reference
33
Page 34

Changes in Recording Mode
Changes in Recording Mode
REC - RECORD - Record ☞ 223
The “recording standby” page and “recording in progress” screens have been modified.
Both screens now display a level meter,. and the top right of each screen indicates the
original key that will be applied to the recorded sample.
If recording operation is set to New+ (in the RECORD | SETUP Target page), a PAUSE
command appears above Knob 3 on the standby page. You can pause the standby by
pressing the knob. When you are ready, you can restart the standby by pressing Knob 4
(Continue).
REC- SETUP - Target ☞ 230
If Knob 2 is set to New+, then Knob 5 (ToPgm) offers three settings: off, on, and NewSB.
If you select NewSB, the A3000 places all of the samples recorded during that series
into a new sample bank.
34
Chapter 2 Upgrade Reference
Page 35

Changes in Recording Mode
REC - SETUP - KeyRnge [Key Range] ☞ 232
A new Map parameter is provided at Knob 2. This parameter selects the method used to
map newly recorded samples: either manual or auto.
If you select manual, you can then use Knob 3 to set the original key, and Knobs 4 and 5
to set the low and high keys. Note that the low and high key values can now also be set
to =Orig (sample’s original key). To set the low value to =Orig, turn Knob 4 all the way
to the left. To set the high value to =Orig, turn Knob 5 all the way to the right.
If you select auto, you can then use Knob 3 to set the original key. The A3000 then
automatically sets both the high and low keys equivalent to the original key, so that the
range consists of a single note.
If you record a series of samples under the auto setting, the A3000 automatically maps
the samples to successively higher keys on the keyboard. Use Knob 4 to select whether
samples are mapped to white keys only (white), or to all keys (all).
REC - EFFECT - In&Out1, In&Out2 ☞ 240
Version 1’s In&Out page has been renamed In&Out1, and a new In&Out2 page has been
added.
You can use the new page to set the width for each recording effect.
Knob 3 sets the effect’s width (stereo expanse).
Chapter 2
REC - MONITOR - Monitor ☞ 243
The A3000 now retains the Monitor setting (at Knob 5) in nonvolatile memory, so that
the value is no longer lost at power-off.
Chapter 2 Upgrade Reference
35
Page 36

Changes in DISK MODE
DISK - COMMAND Key - FD_FMT ☞ 258
DISK - DISK - DskMode [Disk Mode]
Changes in DISK MODE
The floppy-disk format page includes a new Quick format command. This command
lets you do a very quick reformat of a disk that has already been formatted at least once.
If you try this on a disk that has never been formatted, the screen displays a message
informing you that normal formatting is required and asking you whether you wish to
continue. If you wish to proceed you must also specify the disk type (2HD or 2DD).
This is a new page. You access this page by selecting the DISK | DISK function and then
moving to the last page.
The Knob 1 (TopPartition) setting makes it possible to work with multipartition hard
disks and CD-ROMs designed for use with foreign samplers. The setting selects the
number of the first partition accessed by the A3000. This setting has no meaning when
you are working with disks set up for use with the A3000.
Knob 4 (Play&Load) lets you select whether it is possible to play sound from the A3000
at the same time as you are loading data from disk. Set to on to enable simultaneous
playing and loading, or off to disable. Note that load time will be longer if you enable
this setting. Note also that A3000 polyphony drops to 32 when loading is in progress.
36
Chapter 2 Upgrade Reference
Page 37

Changes in UTILITY MODE
Changes in UTILITY MODE
UTILITY - COMMAND Key - CREATE_OSC [Create Oscillators]
This is a new command. The command can be accessed from the UTILITY mode’s MASTER function.
This command automatically generates the following seven “oscillator” samples: sine
wave, saw up, triangle, square, pulse 1, pulse 2, and pulse 3. To execute the command,
push Knob 1.
Note that the command will not create any samples for which matching sample names
already exist.
Chapter 2
UTILITY - PANEL PLAY - KnobSet ☞ 292
Parameter assignments for Knobs 3 to 5 have been rearranged: Knob 3 now sets the Device,
Knob 4 sets the controller enable (Ctrl), and Knob 5 sets the transmit channel (T-ch).
•
On Version 1, the Device indication showed only the controller number. On Version 2,
it shows both the controller number and the corresponding device (if any). If you have
set up a knob to act as controller, then the knob name and transmit channel will both
appear next to the controller number (for example, 073/K4( 5) would indicate that
Knob 4 is set to operate as Controller 073 transmitting over Transmit Channel 5).
• The T-Ch (transmit channel) parameter at Knob 5 can now be set to AUDITION. If
you set the value to AUDITION, the knob will act as a controller during audition
replay.
UTILITY - SEQUENCE - SeqSel [Select Sequence] ☞ 296
Knob 5 now offers three operations: >NEW (create a new sequence; same as on Version
1), >SAVE (save the currently selected sequence), and >DELETE.(delete the currently
selected sequence). Turn the knob to select the operation, then push to execute.
Chapter 2 Upgrade Reference
37
Page 38

Changes in UTILITY MODE
UTILITY - SEQUENCE - Play&Rec [Playing and Recording] ☞ 297
UTILITY - SYSTEM - KEYS ☞ 300
If you attempt to record to a non-empty sequence, the A3000 will now ask for confirmation before overwriting the original sequence data.
• You can now jump to this page from almost any location by pressing COMMAND +
ASSIGNABLE.
• The ASSIGNABLE key now supports two additional operations, as selected by the
ASSIGNABLE parameter at Knobs 2 and 3. The new Knob & FKEY on/off setting sets
the ASSIGNABLE key so that it simultaneously enables or disables knob controller
action and function-key play. The new MIDI → Smp on/off sets the ASSIGNABLE key
so that it toggles the MIDI-to-sample feature on and off.
• Knob 5 (Knob1Type) is now used to select the turn action for Knob 1. This setting
applies to the turn action on all A3000 pages. On Version 1, Knob 1 rotation can only
be used to switch from page to page. On Version 2, rotation can be used either to
switch the page or to switch the sample selection.
To select page-switch action, set Knob1Type to page. To select sample-select action,
set Knob1Type to sample. Note that if you set Knob 1 to operate as a sample selector,
you must use the function keys to change the pages.
• On Version 1, Knob 5 set the AUDITION parameter. This parameter has now been
moved to the new Audition page, described below. The parameter is now named
TrigMode.
38
Chapter 2 Upgrade Reference
Page 39

UTILITY - SYSTEM - Audition
This is a new page. This page is located between the Keys and Display pages in the
UTILITY | SYSTEM function. You can jump to this page from almost location by pressing COMMAND + AUDITION.
Changes in UTILITY MODE
• Knob 2 (Effect) selects whether audition sound is passed through the program’s effects. Select on to pass the sound through the effects, or off to disconnect the effects.
Note that if you set the value to on and also set the MainOut parameter (EDIT | MAP/
OUT | Output page) to one of the effect blocks, you can use the audition feature to
hear how the selected effect sounds.
• Knob 3 (EasyEd) selects whether the program’s Easy Edit settings are applied to the
audition sound. Select on to apply the Easy Edit settings, or off to switch them off.
• Knob 4 (NameView) selects whether the screen displays the name of the sample
being played by the AUDITION key. Set to enable to display the name, or to disable to
suppress the display. If you set to enable, the name will appear on screen for about 1
second each time you play the audition.
• Knob 5 (TrigMode) sets the AUDITION key’s trigger mode. This parameter is equiva-
lent to Version 1’s AUDITION parameter (in Version 1’s Keys page). If you set the
mode to normal, the AUDITION key produces sound only while held down. If you set
the mode to toggle, each press of the key toggles audition playback on or off.
UTILITY - SYSTEM - Page ☞ 303
The atModeChange parameter at Knobs 2 and 3 now supports a new HoldFunction
setting. If you select this setting, the mode keys and function keys will operate independently – the function-key selection will no longer change automatically each time
you press a different mode key. As a result, you will be able to move to any point in the
matrix by pressing the corresponding mode and function keys in either order.
Chapter 2
UTILITY - SYSTEM - FreeMem [Free Memory] ☞ 304
This screen now both the free memory amount and the total memory amount. The
Wave(kB) value shows free_wave_memory/total_wave_memory, and the Param(kB) value
shows free_parameter_ memory/total_ parameter_ memory.
Chapter 2 Upgrade Reference
39
Page 40

Changes in UTILITY MODE
UTILITY - MIDI - MIDI → Smp [MIDI-to-Sample]
This is a new page. You access this page by selecting the UTILITY | MIDI function and
then moving to the last page.
You use this page to set up the “MIDI to sample” feature. These settings are effective
only if MIDI-to-sample operation is enabled within the PROGRAM/SAMPLE SELECTION page.
Recall that MIDI-to-sample feature allows you to use MIDI note-on input to switch the
sample being edited.
• Knob 2 or 3 (LayerSelection) selects whether sequential cycling (as set by the upper
or lower setting at the PROGRAM/SAMPLE SELECTION page) is used on all pages
that support MIDI-to-sample operation. You can set the value as shown below. For
information about how layering works, refer to the explanation of the PROGRAM/
SAMPLE SELECTION page, above (→ 16).
atAllPages Layered cycling is supported at all pages. Repeated input of a
given note will cause the A3000 to cycle through the samples
(banks) assigned to this note.
atSelectionPage Layered cycling is used only when you are working at the PR O-
GRAM/SAMPLE SELECTION page. When working at other
pages, the A3000 will not c ycle the sample selection in response
to repeated input of the same note.
• Knob 5 (NameView) selects whether the screen displays the sample (bank) name
each time a new sample (bank) is selected by MIDI input. Set to enable to show the
name, or to disable to suppress the display. If you select enable, the name will remain on screen for about 1 second following selection by MIDI input.
40
Chapter 2 Upgrade Reference
Page 41

A
A
Appendix
Page 42

New Error messages
The following error message is new on Version 2.
New Error Message
Too many samples. ............................. Could not carry out operation because too many samples were targeted. The
maximum number of samples that can be arranged at one time is 128. The
maximum number of samples per sample bank is 127.
42
Appendix
Page 43

Changes in MIDI Data Format
Changes in MIDI data format under Version 2 are listed below.
3. Additional Realtime Messages
The following messages have been added. (☞ 353)
3.1.2 Timing clock, Start, Continue, Stop
If Program-LFO Sync is set to MIDI, the A3000 controls the LFO period and phase in
accordance with the following incoming realtime messages: timing clock (F8), start
(FA), continue (FB), and stop (FC).
5. Additional Yamaha System Exclusives
Changes in MIDI Data Format
5.3. Parameter change
The following messages have been added. (☞ 357)
5.3.7. Object link change
0F0
11110000
143
01000011
2 nnnn = Device Number
0001nnnn
358
01011000
404
00000100
5
0ccccccc
↓upper object name (16 bytes)
20
21 upper object type
22
↓ lower object name (16 bytes)
37
38 lower object type
39 data (0:link off, 1:link on)
40 F7
This message changes the linking between the specified upper and lower objects (between program and sample, program and sample bank, or sample and sample bank).
The message will not do anything if the current state of either specified object does not
permit the link change, or if either object would need to be replicated to enable the link
change.
↓
0ccccccc
0ttttttt
0ccccccc
↓
0ccccccc
0ttttttt
0ddddddd
11110111
Appendix
Appendix
43
Page 44

Changes in MIDI Data Format
5.3.8. Object link request
0F0
11110000
143
01000011
2 nnnn = Device Number
0011nnnn
358
01011000
404
00000100
5
0ccccccc
↓upper object name (16byte)
20
21 upper object type
22
↓ lower object name (16byte)
37
38 lower object type
39 F7
↓
0ccccccc
0ttttttt
0ccccccc
↓
0ccccccc
0ttttttt
11110111
Returns Object-Link-Change Format message indicating the current linkage between
the specified upper and lower objects. This message is received only.
44
Appendix
Page 45

6. Table 1 Sound parameters
■ Program Bulk Dump
The following parameters have been added or changed. (☞ 357)
p s v name
0072 UC b b0:AD in on, b2-1:AD in source,
b5-3:effect connect, b6:program LFO sync
0073 UC b b2-0:program LFO cycle, b5-3:program LFO wave,
b7-6:program LFO init phase
0076 US b b0:MIDI channel1 note on normal/toggle...
b15:MIDI channel1 note on normal/toggle
0084 SC - reserved
0085 SC - reserved
0087 SC -2,-1,0-16 program LFO reset channel (*2)
0092 UC 25-250 program LFO tempo
0093 SC -1,0-127 program LFO reset note (*3)
(*2) -2:off, -1:AUDITION
(*3) -1:all
Changes in MIDI Data Format
■ Parameter Block
[Control Matrix]
The following parameters have been changed. (☞ 358)
p s v name
0000 UC 0-125 control device
0001 UC 0-m control function (program:m=63, sample:m=21)
0002 UC 0-3 control type
0003 SC ±63 control range
[Sample Parameters]
The following parameters have been added or changed. (☞ 358)
p s v name
0058 UC 0-127,128 key range high (*2)
0059 SC -1,0-127 key range low (*3)
0097 UC 0-16 filter type
0104 SC ±63,64-68 cutoff velocity sensitivity (*4)
0105 SC ±63,64-68 Q/width velocity sensitivity (*4)
0120 SC ±127 key velocity sensitivity
0125 SC ±63 filter distance
(*2) 128:“=Orig”
(*3) -1:“=Orig”
(*4) 64-68:“Rnd1”-“Rnd5”
Appendix
Appendix
45
Page 46

Changes in MIDI Data Format
[Easy Edit Parameters]
[Effect Parameters]
The following parameters have been added or changed. (☞ 358)
p s v name
0024 SC ±127 pan offset
0026 SC ±127 fine tune offset
0038 SC ±127 AEG decay rate offset
0042 SC ±63 filter gain offset
0043 SC ±31 filter Q/width offset
0044 SC ±127 filter distance offset
The following parameters have been added or changed. (☞ 359)
p s v name
0004 UC 0-5 output
0005 SC -126-0 width
0006 UC - reserved
<Parameter change tables for sound parameters>
■ Program Parameters
The following parameters have been added or changed. (☞ 359)
P1 P2 P3 P4 P5 P6 s v name
1 2 0-15 - - - UC 0,1 note on normal/toggle
1 11 - - - - UC 0-6 program LFO cycle
1 12 - - - - UC 0,1 program LFO sync
1 14 - - - - UC 25-250 program LFO tempo
1 16 - - - - UC 0-5 program LFO wave
1 21 0-2 6 - - UC 0-5 effect output
1 21 0-2 7 - - SC -126-0 effect width
1 22 0-3 0 - - UC 0-125 control device 1-4
1 22 0-3 1 - - UC 0-63 control function 1-4
1 22 0-3 2 - - UC 0-3 control type 1-4
1 23 - - - - UC 0-4 effect connection
1 24 - - - - UC 0-3 program LFO init phase
1 25 - - - - UC -2,-1,0-16 program LFO reset channel (*2)
1 26 - - - - UC -1,0-127 program LFO reset note (*3)
2 0-9 0-99 4 0 - SC ±127 pan offset
2 0-9 0-99 5 0 - SC ±127 fine tune offset
2 0-9 0-99 20 0 - SC ±31 filter Q/width offset
2 0-9 0-99 27 - - SC ±127 AEG decay rate offset
2 0-9 0-99 28 - - SC ±63 filter gain offset
2 0-9 0-99 29 - - SC ±127 filter distance offset
(*2) -2:off, -1:AUDITION
(*3) -1:all
46
Appendix
Page 47

■ Parameter Blocks
[Sample Parameters]
The following parameters have been added or changed. (☞ 360)
P1 P2 P3 P4 P5 P6 s v name
2 10 - - - - UC 0-127,128 key range high (*2)
2 10 - - - - SC -1,0-127 key range low (*3)
2 21 - - - - UC 0-16 filter type
226----SC±63,64-68 cutoff velocity
227----SC±63,64-68 Q/width velocity
241----SC±127 key velocity sensitivity
252----SC±63 filter distance
2 83 0-5 0 - - UC 0-125 control device 1-4
2 83 0-5 1 - - UC 0-21 control function 1-4
2 83 0-5 2 - - UC 0-3 control type 1-4
(*2) 128:“=Orig”
(*3) -1:“=Orig”
(*4) 64-68:“Rnd1”-“Rnd5”
Changes in MIDI Data Format
sensitivity (*4)
sensitivity (*4)
Appendix
Appendix
47
Page 48

Changes in MIDI Data Format
7. Table 2 System parameters
■ System-Parameter Bulk Dump
■ System-Parameter Change Table
The following parameters have been added or changed. (☞ 360)
p s v name
0022 UC b b0:omni, b1:program change enable,
b2:length lock, b3:auto zero, b4:auto snap,
b5:audition with easy edit,
b6:audition with effect, b7:play&load
0023 UC -1,0-16 knob2 control MIDI transmit channel (*3)
0024 UC -1,0-16 knob3 control MIDI transmit channel (*3)
0025 UC -1,0-16 knob4 control MIDI transmit channel (*3)
0026 UC -1,0-16 knob5 control MIDI transmit channel (*3)
(*3) -1:AUDITION
The following parameters have been added or changed. (☞ 361)
P1 P2 P3 s v name
1 7 0-3 UC -1,0-16 knob2-5 control MIDI transmit
channel (*3)
1 28 - UC 0,1 audition with easy edit
1 29 - UC 0,1 audition with effect
1 30 - UC 0-4 loop remix type
1 31 - UC 0-3 loop remix variation
1 32 - UC 0,1 play&load
(*3) -1:AUDITION
8. Table 3 Switch remote switch numbers
The following parameters have been added. (☞ 361)
ppppppp Panel name
20 [COMMAND]+[ASSIGNABLE]
21 [COMMAND]+[AUDITION]
48
Appendix
Page 49

YAMAHA [ Professional Sampler ] Date:19-MAR-1998
Model A3000 MIDI Implementation Chart Version : 2.0
+----------------------------------------------------------------------+
: : Transmitted : Recognized : Remarks :
: Function ... ::::
:-------------------+----------------+----------------+----------------:
:Basic Default :1-16 :1-16 :memorized :
:Channel Changed :1-16 :1-16 : :
:-------------------+----------------+----------------+----------------:
: Default : x : 1,2,3,4 : memorized :
:Mode Messages : x : POLY,MONO(M=1) : :
: altered : ************** : x : :
:-------------------+----------------+----------------+----------------:
:Note :0-127 :0-127 : :
:Number : True voice: **************:0-127 : :
:-------------------+----------------+----------------+----------------:
:Velocity Note ON : o v=1-127 : o v=1-127 : :
: Note OFF : x : x : :
:-------------------+----------------+----------------+----------------:
:After Key's : x : x : :
:Touch Ch's : o : o : :
:-------------------+----------------+----------------+----------------:
:Pitch Bender : o : o *1:7 bit resolution:
:-------------------+----------------+----------------+----------------:
: 5 : o : o *1:portamento time :
: 7 : o : o *1:volume :
: 10 : o : o *1:pan :
: Control 64 : o : o *1:sustain :
: 65 : o : o *1:portamento :
: 66 : o : o *1:sostenute :
: Change 0 - 120 : o : o *1:(assignable) :
: ::::
: ::::
: ::::
: ::::
: ::::
:All Sound Off(120) : x : o : :
:ResetAllCntrl(121) : x : o : :
:-------------------+----------------+----------------+----------------:
:Prog : x : o 0-127 *1: :
:Change : True # : *********** : o 0-127 : :
:-------------------+----------------+----------------+----------------:
:System Exclusive : o : o *2: object etc. :
:-------------------+----------------+----------------+----------------:
: : Song Pos. : x : x : :
:common : Song Sel. : x : x : :
: : Tune : x : x : :
:-------------------+----------------+----------------+----------------:
:System :Clock : x : o *3: :
:Real Time :Commands: x : o *3: :
:-------------------+----------------+----------------+----------------:
:Aux :Local ON/OFF : x : x : :
: :All Notes OFF: x : o : :
:Mes- :Active Sense : x : o : :
:sages:Reset : x : x : :
:-------------------+----------------+----------------+----------------:
:Note *1 receive if each receive filter = enable. :
: *2 receive if device No is not off. :
: *3 receive if program LFO sync = MIDI. :
: :
+-------------------+----------------+----------------+----------------+
Mode 1 : OMNI ON, POLY Mode 2 : OMNI ON, MONO o : Yes
Mode 3 : OMNI OFF, POLY Mode 4 : OMNI OFF, MONO x : No
Page 50

M.D.G., EMI Division © Yamaha Corporation 1998
804CRIT8.2 -01A0 Printed in JapanV257250
Page 51

documentation manual, user maintenance, brochure, user reference, pdf manual
This file has been downloaded from:
User Manual and User Guide for many equipments like mobile phones, photo cameras, monther board, monitors, software, tv, dvd, and othes..
Manual users, user manuals, user guide manual, owners manual, instruction manual, manual owner, manual owner's, manual guide,
manual operation, operating manual, user's manual, operating instructions, manual operators, manual operator, manual product,
 Loading...