

Yamaha NS-555, NS-777 Owners Manual
OWNER’S MANUAL
NS-777/NS-555
Thank you for selecting a YAMAHA speaker system.
Speaker
System
URG
PRECAUTIONS
Read these precautions carefully before using your
speakers.
• To assure the finest performance, please read this
manual carefully. Keep it in a safe place for future
reference.
• Install the speaker in a cool, dry, clean place - away from
windows, heat sources, sou r ces of excessive vibration,
dust, moisture and cold. Avoid sources of humming
(transformers, motors). To prevent fire or electrical
shock, do not expose the speaker to rain or water.
• To prevent the enclosure from warping or discoloring,
do not place the speaker where it wi ll be exposed to
direct sunlight or excessive humidity.
• Do not place the following objects on the speaker:
Glass, china, small metallic, etc.
If glass etc. falls by vibrations and break s, it may
cause bodily injury.
A burning candle etc.
If the candle falls by vibrations, it may cause fire and
bodily injury.
A vessel with water in it
If the vessel falls by vibrations and water spills, it may
cause damage to the speaker, and/or you may get an
electric shock.
• Do not place the speaker where foreign objects such as
water drips might fall. It might cause a fire, damage to
the speaker, and/or bodily injury.
• Do not place the sp eaker where it is liable to be kno cked
over or struck by falling objects. Stable placement will
also ensure better sound performan ce.
• Placing the speaker on the same shelf or rack as the
turntable can result in feedba ck.
• Never put a hand or a fore ign object i nto the port locate d
on the rear of the speaker as this might cause bodily
injury and/or damage to the speaker.
• When moving the speaker, do not hold t he port as it
might cause bodily injury and/or damage to the speaker.
• Any time you note dis tortion, re duce the volum e control
on your amplifier to a lower setting. Never allow your
amplifier to be driven into “clipping”. Otherwise the
speaker may be damaged.
• When using an amplifier with a rated output power
higher than the nominal input power of the speaker, care
should be taken never to exceed the speaker’s maximum
input.
• Do not attempt to clean the speaker with chemical
solvents as this might damage the fini sh. Use a clean, dry
cloth.
• Do not attempt to modify or fix the speaker. Contact
qualified YAMAHA service personnel when any service
is needed. The cabinet shoul d never be opened for any
reasons.
• Secure placement or installatio n is the o w ne r’s
responsibility. YAMAHA shall not be liable for any
accident caused by improper placement or
installation of speaker.
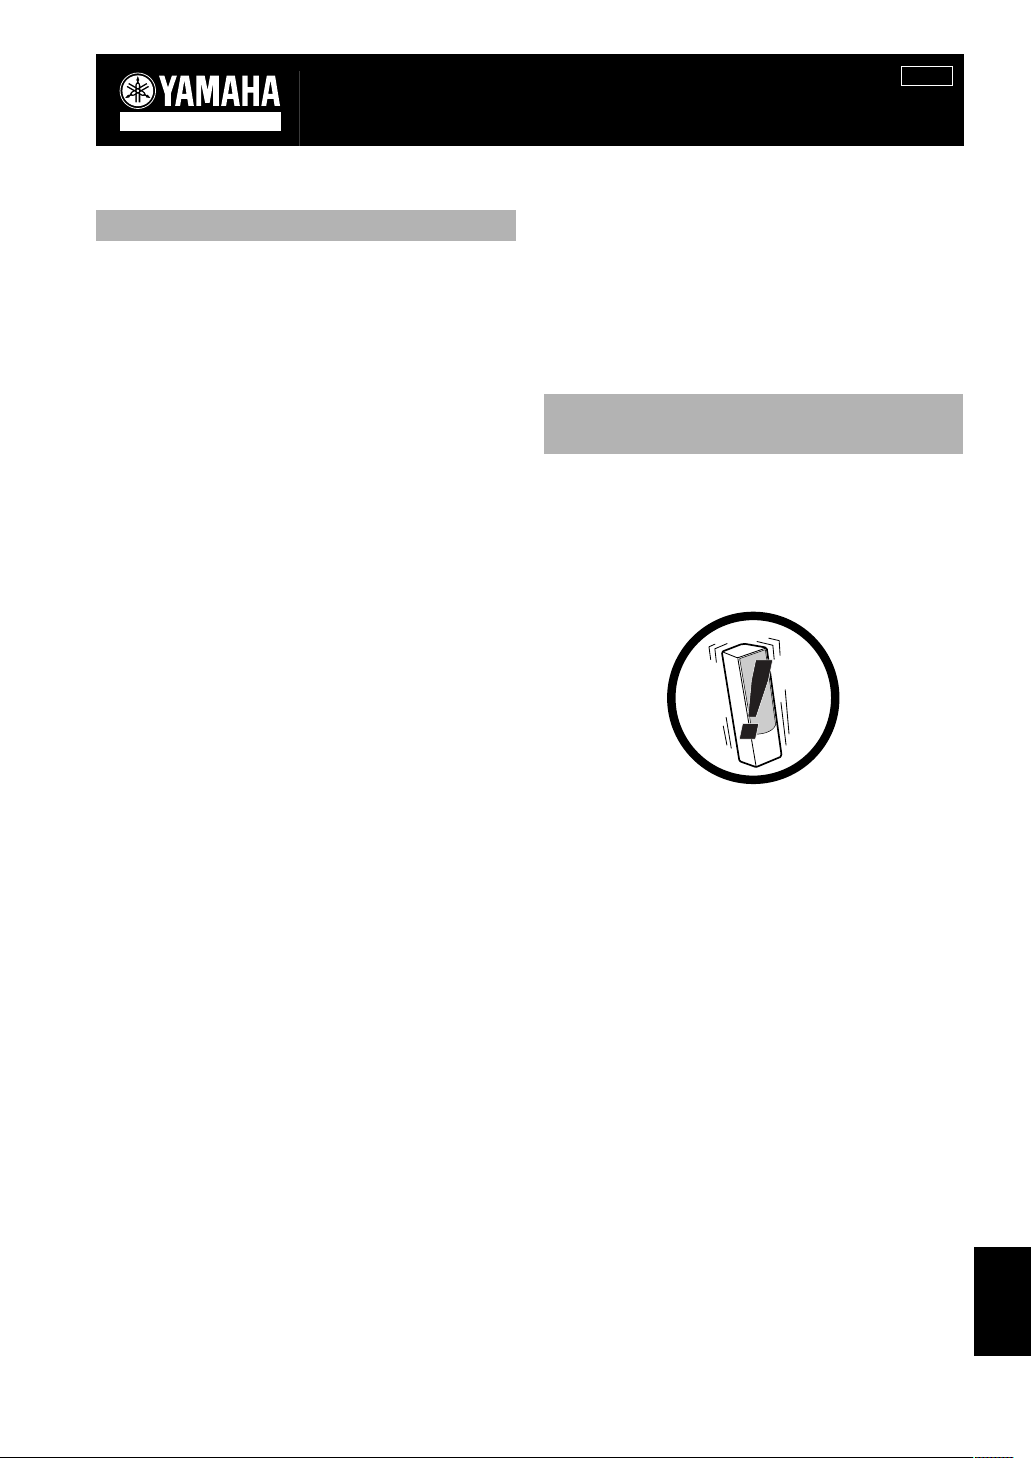
PRECAU TIONS WHEN
POSITIONING THE SPEAKERS
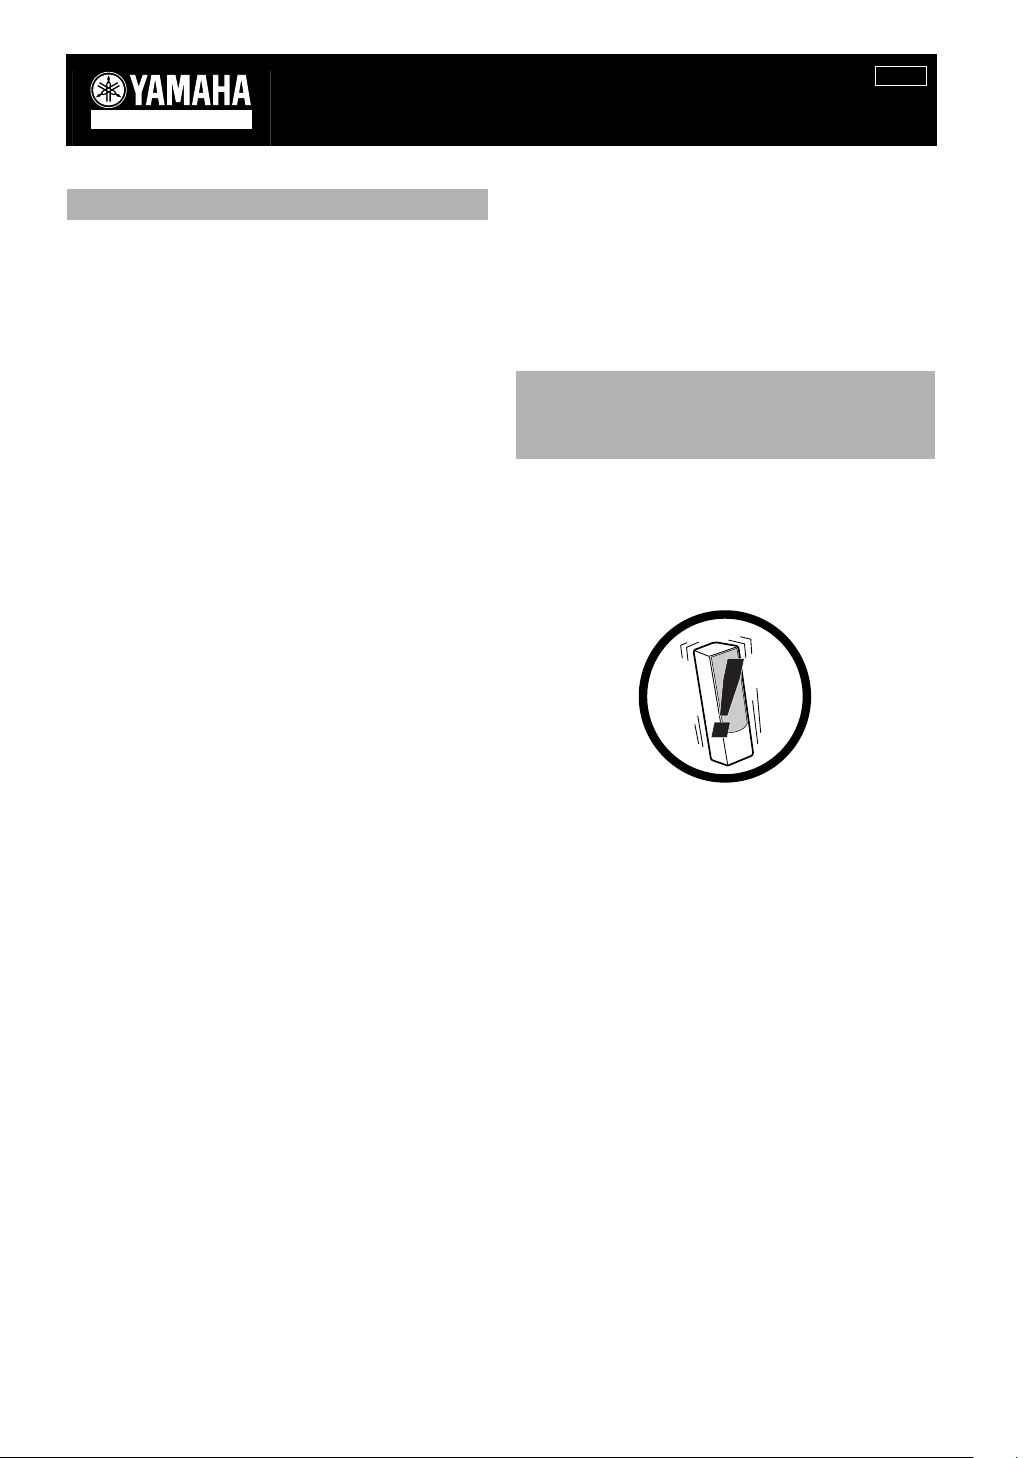
The speaker is constructed with the majority of th e weight
located in its upper portion, and is thus susceptible to
falling over if proper care is not taken to insure its stability.
If the speaker falls over, it may damage the speaker or be
the cause of injury (or even death) to persons and/or
damage to personal property.
For safe and proper use of the speaker:
• Position the speaker in a location that is soli d, leve l,
smooth, and low (with respect to the floor).
• Do not push or apply pressure to the side of the speaker
when moving, or lean objects against the side of the
speaker.
• Do not sit on or set objects on top of the speaker.
Vibrations or jolts associated with earthquakes and other
phenomena or activities may cause the speaker to fall over.
For safety reasons, using commercially available products
that increase stability in the speaker is recommended
(metal fittings or chains, etc.).
Use the stands included with the speaker to
increase stability:
Be sure to use the stands regardless of where the speaker is
positioned. Attaching the stands included with the speaker
reinforces the base of the speaker not to fall over.
Please be cautioned that even though the stands are
connected, this does not guarantee that the speaker will not
fall over.
English
1
.
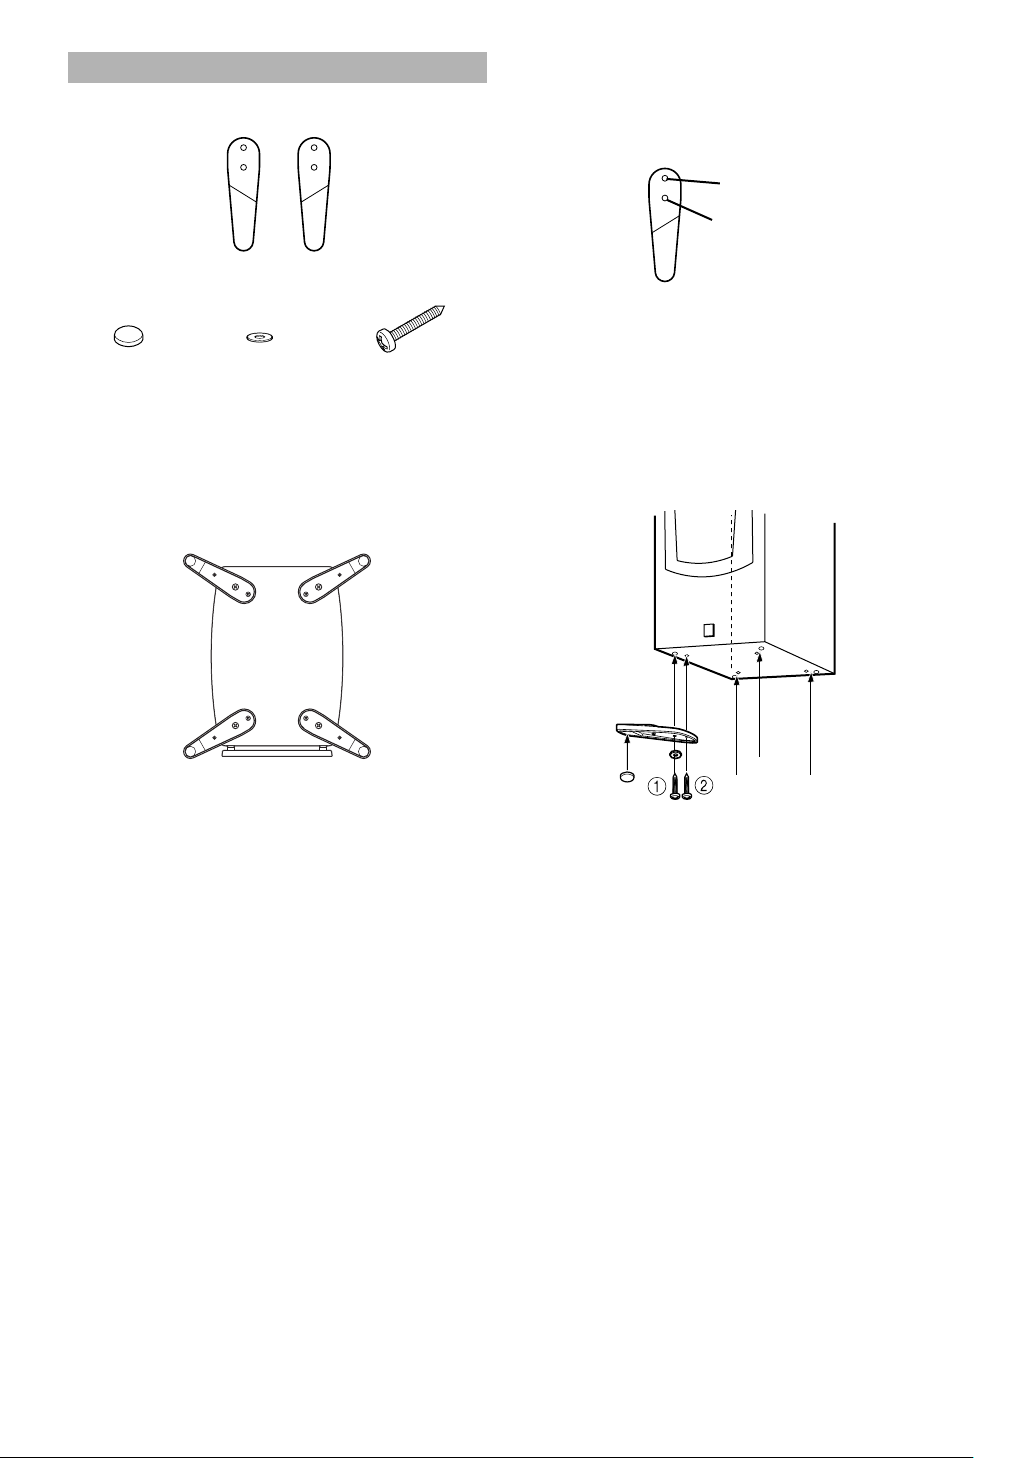
ATTACHING THE STANDS
When placing the speakers, be sure to use the stands to
increase stability.
(L) (R)
Stand (R x 2, L x 2)
Pad x 4
Note
The provided stands are in two types. Two stands are for the right
side and othe rs are f or the le ft side. Attach each stan d to the proper
position on the bottom of th e spe ake r by following the figure
below.
View from the bottom of the speaker
(L)
Washer x 4
Back
Screw
(25mm) x 8
(R)
Procedure:
1 First, put the screw through the washer, then through
the inner hole of th e stand, and scre w it into the outside
hole of the speaker. Do not tighten too much at this
point.
Outer hole
Inner hole
2 Put a screw through the outer hole on the stand , and
screw it into the other hole on the base of the speaker.
3 Tighten both of the screws firmly.
4 Attach a pad to the bottom of the end portion of the
stand.
5 Attach the other stands to th e other corn ers of the ba se
of the speaker in the same way and con f irm that all 4
stands have been firmly attach ed.
(R)
Front
(L)
Use the 8 specified holes located on the base of the speaker.
2
1
Note
Be carefull not to apply force to the side of the speaker, otherwise
the speaker may fall causing damage to the speaker or pers ona l
injury.
2
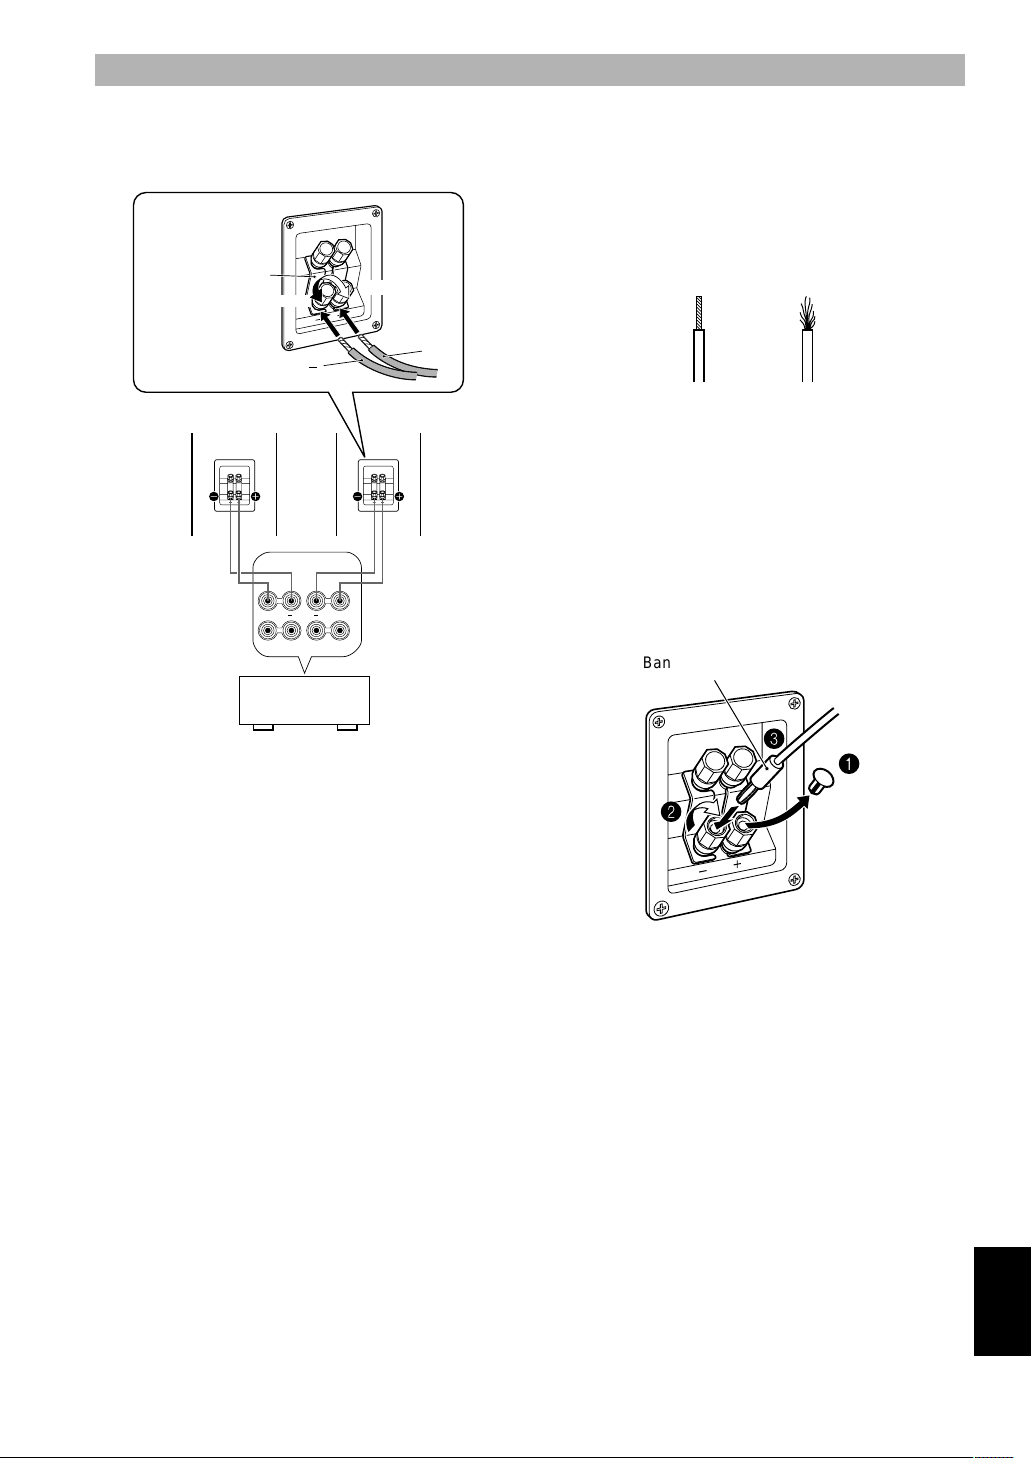
CONNECTIONS TO YOUR AMPLIFIER
This speaker system is capable of standard connections and bi-wired connections. Before
making connections, make sure that the amplifier is switched off.
[Standard Connection]
Leave the short
bars in place when
connecting.
Short bar
NS-777/NS-555 (R)
Speaker output
terminals of the
amplifier
Loosen
SPEAKERS
R
+
Amplifier or
Receiver
Tighten
NS-777/NS-555 (L)
L
A
+
B
+
■CONNECTIONS
• Connect the screw-type input terminals at the rear of the
speaker to the speaker output termi nals of the amplifier
(or receiver) with the speaker cable.
• Connect the (+) terminals on the amplifier (or receiver)
and the speaker using one side of the cable. Connect the
(–) terminals on bo th compone nts using th e other si de of
the cable.
• Connect one speaker to the left (marked L) terminals of
your amplifier, and ano ther speaker to th e right (ma rked
R) terminals, making sure not to reverse the polarity (+,
–). If one speaker is connected with reversed polarity,
the sound will be unnatural and lack bass.
How to Connect:
1 Remove the in sulation c oating at th e extremity of each
speaker cable by twisting the coating off.
Good No Good
2 Loosen the terminal knob.
3 Insert the bare wire.
4 Tighten the knob and secure the cable. Test the
firmness of the connection by pulling lightly on the
cable at the terminal.
Note
Do not let the bare speaker wire s touch each other to avoid
damaging the speaker or the amplifier, or both of them.
Using a Banana Plug
Banana Plug
3
1
2
1 Remove the speaker te rminal cover by gently pullin g it
toward you.
2 Tighten the terminal knob.
3 Simply insert the banana plug into the terminal.
English
3
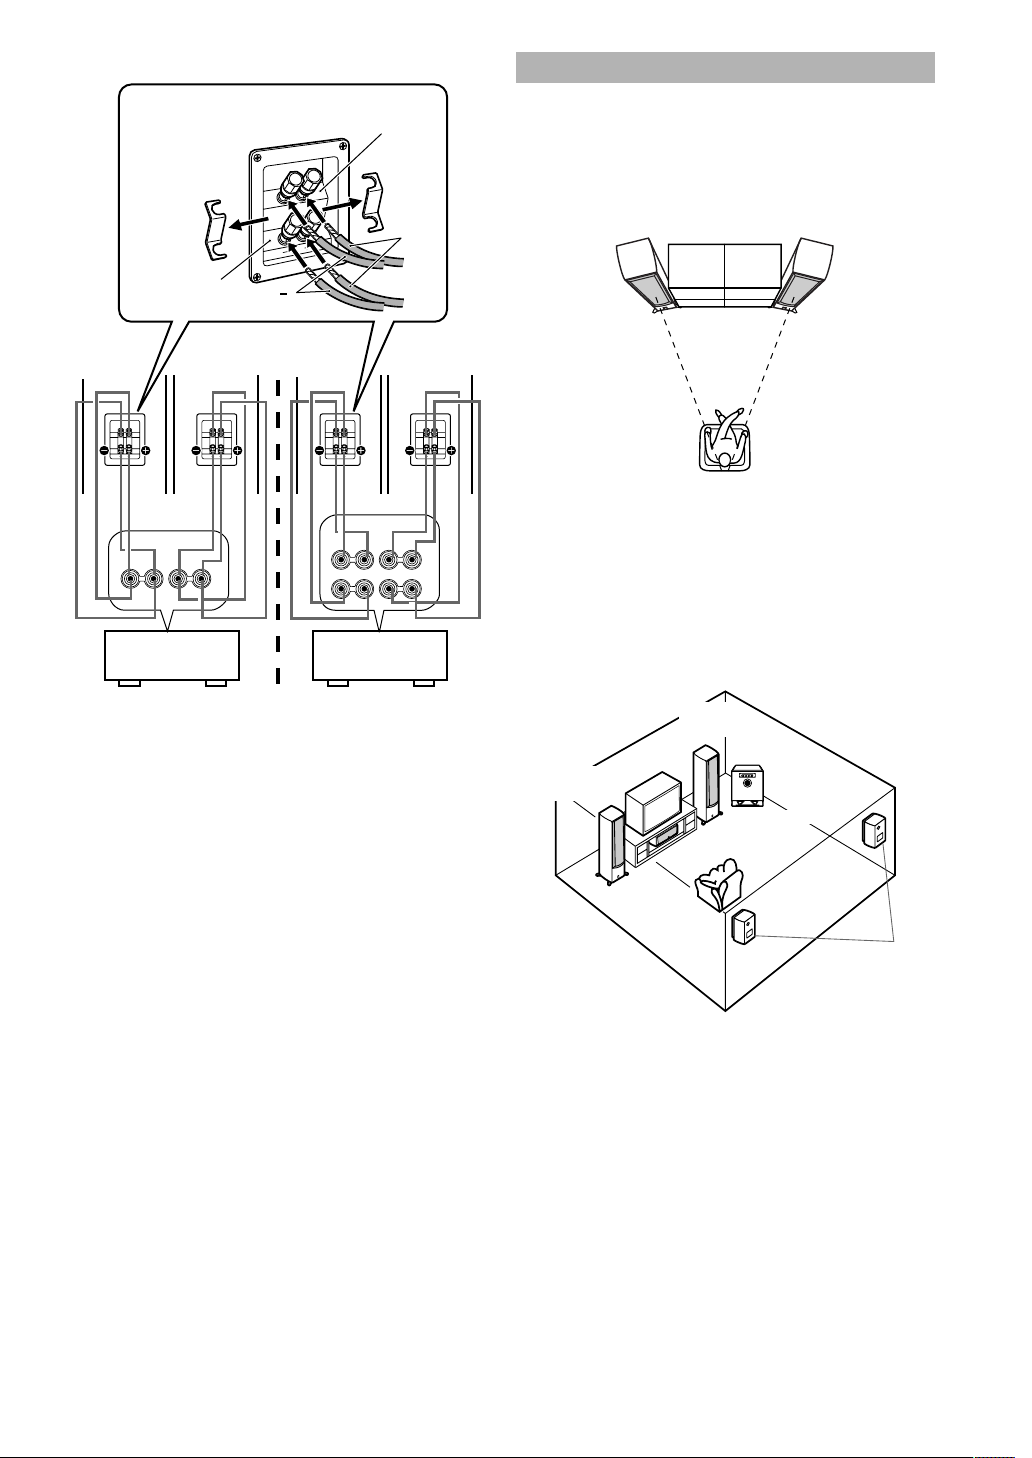
[Bi-Wired Connection]
Remove the short
bars before
connecting.
Mid-woofer/
woofer terminals
Tweeter
terminals
.
PLACING THE SPEAKERS
Place the speakers on a sturdy, vibration-free surface, on a
well-built stand.
■ Using as 2ch stereo speakers
Better stereo images will be obtained when the speakers
are slightly angled in towards the listeners.
+
NS-777/
NS-555 (R)
+–
NS-777/
NS-555 (L)
SPEAKERS
R
L
–
Amplifier or
Receiver
+
NS-777/
NS-555 (R)
NS-777/
NS-555 (L)
SPEAKERS
R
L
–+
+–
Amplifier or
Receiver
A
B
Both SPEAKERS A and
B should be selected.
This speaker system is capable of bi-wired connections. To
connect the speaker to the output terminals of the amplifier
(or receiver), two pairs of cables for each of mid-woofer/
woofer and tweeter used instead of standard connections.
This type of connection decreases the modulation
distortion caused by electr ic resistance of the cables and
driving current of the speakers. Consequently, purer sound
quality can be expected.
To utilize bi-wired connections, remove the short bars
from the terminals first, and then connect the mi d-woofer/
woofer and tweeter to the amplifier separately using two
pairs of cables.
■ Using as main speakers in a multi channel
system
Position the speakers on both sides of the TV. The
positioning of speakers is important, beca use it controls the
whole sound quality of a multi chan nel syste m . Se t up the
speakers on the basis of your listening position by
following the owner’s manual supplied with your
amplifier.
NS-777/
NS-555
NS-777/
NS-555
Subwoofer
Center
Rear effect
Note
This speaker features a magnetically shielded design, but there is
still a chance that placing it too close to a TV set might impair picture color. Should this happen, move the speaker away from the
TV set.
4
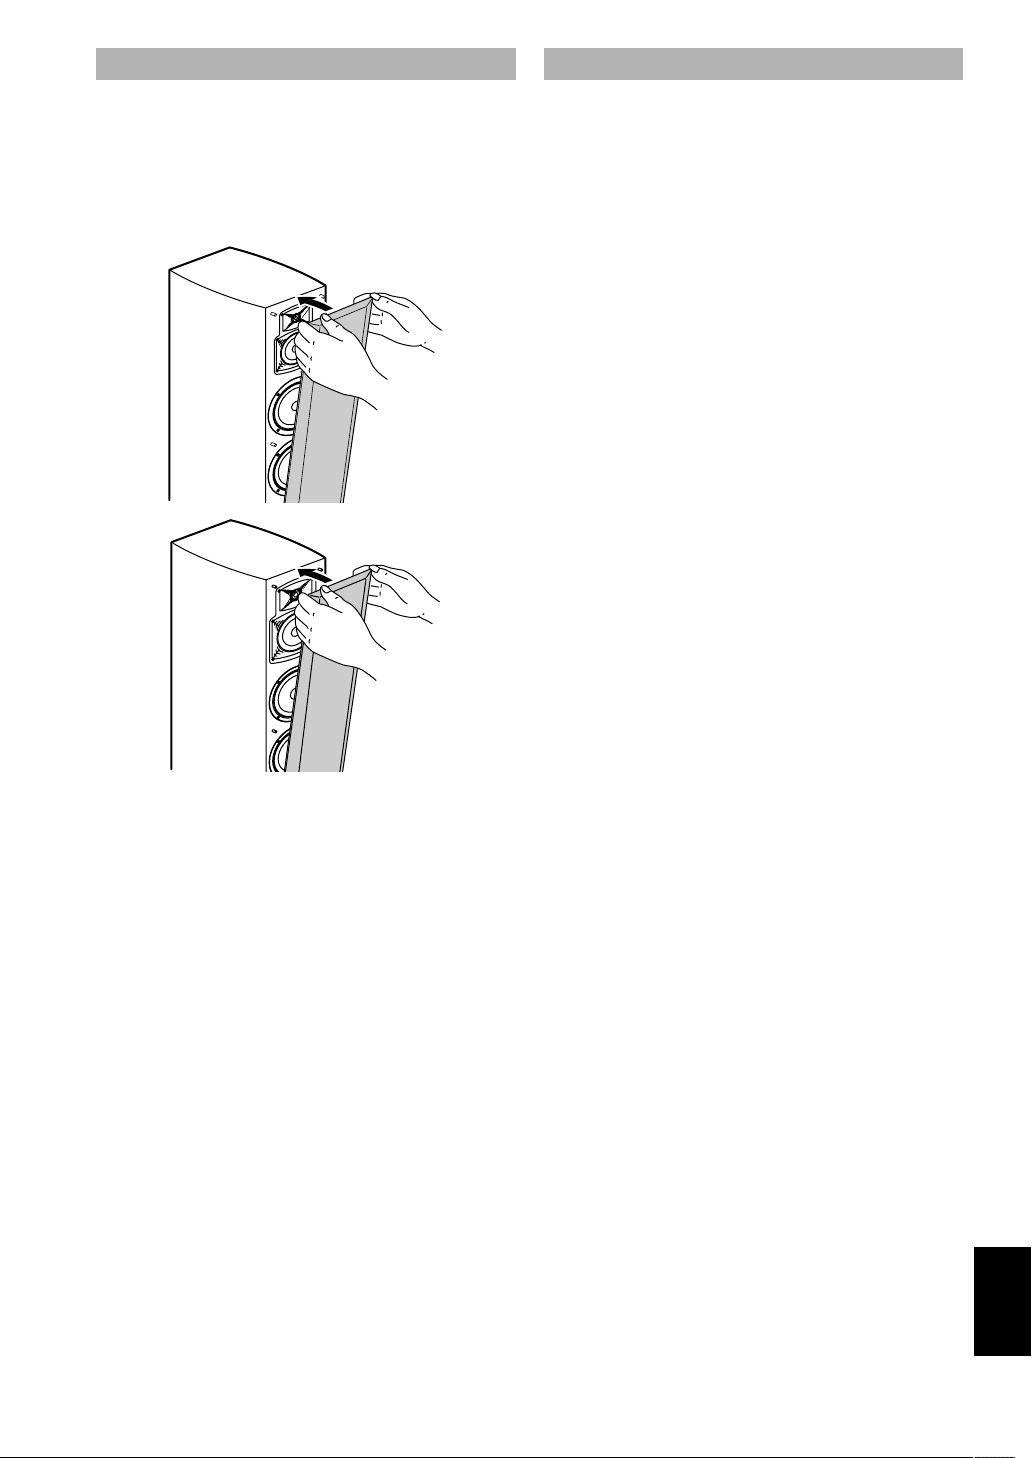
REMOVING THE FRONT COVER
The front cover is fastened to the enclosure at six points
and can be removed if desired. To remove the cover , hold
on to both sides and slowly pull straight away from the
speaker. To reattach, line up the six pegs on the inside
surface of the cover with the six corresponding holes on the
speaker and push gently.
NS-777
NS-555
Note
When the cover is remove d, ta ke c are not to t ouc h the speaker
units with your hands or to exert excessive force w ith to ols.
SPECIFICATIONS
NS-777
Type.................... .... .... .3-way bass reflex speaker system
Magnetic shielding type
Driver.....................................20 cm (8") cone woofer x 2
Wave guide horn 13 cm (5") cone mid-range
Wave guide horn 2.5 cm (1") dome tweeter
Frequency response. .... ..................... .... ....30 Hz – 35 k H z
Nominal impedance........................................ ... ....6 ohms
Nominal input power....................... .... ...................100 W
Maximum input power ............................ ... .... ........250 W
Sensitivity................................................89 dB/2.83 V/m
Crossover frequency.................................... 1 kHz, 4 kHz
Dimensions (W x H x D)
..................... ....................276 mm x 1100 mm x 390 mm
(10.9" x 43.3" x 15.4")
Weight...........................................24.4 kg (53 lbs. 13 oz.)
Accessories ........................................Stand (R x 2, L x 2)
Washer x 4
Screw x 8
Pad x 4
NS-555
Type.................... .... .... .3-way bass reflex speaker system
Magnetic shielding type
Driver...................... .... ........16 cm (6.5") cone woofer x 2
Wave guide horn 13 cm (5") cone mid-range
Wave guide horn 2.5 cm (1") dome tweeter
Frequency response. .... ..................... .... ....35 Hz – 35 k H z
Nominal impedance........................................ ... ....6 ohms
Nominal input power....................... .... ...................100 W
Maximum input power ............................ ... .... ........250 W
Sensitivity................................................88 dB/2.83 V/m
Crossover frequency.................................... 1 kHz, 4 kHz
Dimensions (W x H x D) ... 222 mm x 980 mm x 345 mm
(8.74"x 38.6" x 13.6")
Weight......................................................20 kg (44.1 lbs)
Accessories ........................................Stand (R x 2, L x 2)
Washer x 4
Screw x 8
Pad x 4
• Specifications subject to change without notice due to
product improvements.
• Care should be taken not to exceed th e input power
values noted above.
English
5
MODE D’EMPLOI
NS-777/NS-555
Nous vous remercions d’avoir acheté un système d’enceintes YAMAHA.
PRECAUTIONS
Lire ces précautions avant d’utiliser les enceintes.
• Pour garantir les meilleures performances possibles,
lire ce manuel avec attention. Le garder dans un
endroit sûr pour une utilisation ultérieure.
• Installer l’enceinte dans un endroit frais, sec et propre loin des fenêtres, sources de chaleur et d’endroits où
les vibrations, la poussière, l’humidité ou le froid sont
importants. Eviter les sources de bourdonnement
(transformateurs, moteurs). Afin d’éviter un incendie
ou une électrocution, ne pas exposer l’enceinte à la pluie
ni à l’humidité.
• Pour éviter que le coffret se gondole ou se décolore, ne
pas placer l’enceinte à un endroit où elle sera exposée
aux rayons directs du soleil ou à une trop forte humidité.
• Ne pas placer les objets suivants sur l’enceinte :
Des verres, de la vaisselle, des petits objets métalliques,
etc.
Des blessures pourraient être causées par des débris de
verre, etc. dûs aux vibrations et aux brisures.
Une bougie allumée, etc.
Si celle-ci tombe à cause des vibrations, cela peut
déclencher un incendie ou causer une blessure
corporelle.
Un récipient rempli d’eau
Si le récipient tombe et l’eau se renverse, le système
risque d’être endommagé et/ou de vous exposer à une
électrocution.
• Ne pas placer l’enceinte dans un endroit où des corps
étrangers comme des gouttes d’eau peuvent tomber.
Ceci peut causer un incendie, des dommages à l’enceinte
et/ou une blessure corporelle.
• Ne pas placer l’enceinte à un endroit où elle risque d’être
renversée ou percutée par des objets tombants. Un
endroit bien stable améliorera aussi la qualité du son.
• Si l’enceinte est placée sur la même étagère ou dans le
même meuble que le tourne-disque, un effet de retour
sonore risquera de se produire.
• Ne jamais placer la main ou un objet quelconque dans le
port situé à l’arrière de l’enceinte car ceci pourrait causer
une blessure corporelle et/ou endommager l’enceinte.
• En cas de déplacement de l’enceinte, ne jamais la tenir
par le port, car ceci pourrait causer une blessure
corporelle et/ou endommager l’enceinte.
• Si des distorsions sonores se produisent, réduire le
niveau sonore en réduisant la commande de volume de
l’amplificateur. Ne jamais laisser de “pincement” sonore
se produire sur l’amplificateur, sinon, les enceintes
risqueront d’être endommagées.
• Lorsqu’on utilise un amplificateur dont la puissance de
sortie nominale est supérieure à la puissance d’entrée
nominale de l’enceinte, veiller à ne jamais dépasser
l’entrée maximale de l’enceinte.
• Ne pas essayer de nettoyer l’enceinte avec des diluants
chimiques, ceci endommagerait la finition. Utiliser un
chiffon propre et sec.
Système
URG
d’enceintes
• Ne pas essayer de modifier ou de réparer l’enceinte.
Contacter un dépanneur YAMAHA qualifié en cas de
nécessité de réparation. Le coffret ne doit jamais être
ouvert pour quelque raison que ce soit.
• Installer ou placer les enceintes dans un endroit sûr
relève de la responsabilité de l’utilisateur. YAMAHA
décline toute responsabilité en cas d’accident causé
par un positionnement ou une installation
inadéquate de l’enceinte.
PRECAUTIONS A PRENDRE
LORS DU POSITIONNEMENT
DES ENCEINTES
L’enceinte a été conçue de manière à ce que la majeure
partie de sa masse soit située dans sa partie supérieure, ce
qui la rend potentiellement instable si elle est mal installée.
Si une enceinte tombe, elle risque de s’endommager ou de
provoquer des blessures corporelles graves (ou même la
mort) et/ou de provoquer des dommages à des biens
personnels.
Pour une utilisation correcte et sûre
de l’enceinte :
• Placer l’enceinte sur une surface plane, solide, droite
et basse (par rapport au niveau du sol).
• Ne pas pousser ou appliquer une force excessive sur
l’enceinte en cas de déplacement, ou laisser des objets en
appui contre le côté de l’enceinte.
• Ne pas s’asseoir ou placer des objets sur le haut de
l’enceinte.
Les vibrations et les secousses accompagnant les
tremblements de terre ou d’autres phénomènes naturels
peuvent faire tomber l’enceinte.
Il est recommandé d’utiliser des dispositifs améliorant
la stabilité (comme par exemple des attaches en métal ou
des chaînes, etc.) pour des raisons de sécurité.
Utiliser les pieds d’enceinte fournis avec
l’enceinte afin d’améliorer la stabilité :
Il est nécessaire d’utiliser les pieds d’enceinte
indépendamment de sa position d’installation. Le montage
des pieds d’enceinte fournis avec l’enceinte renforce la
base de l’enceinte et empêche cette dernière de chuter.
Cependant prendre compte du fait que l’installation des
pieds d’enceinte ne garantit en aucun cas le fait que
l’enceinte ne risquera jamais de tomber.
1
 Loading...