


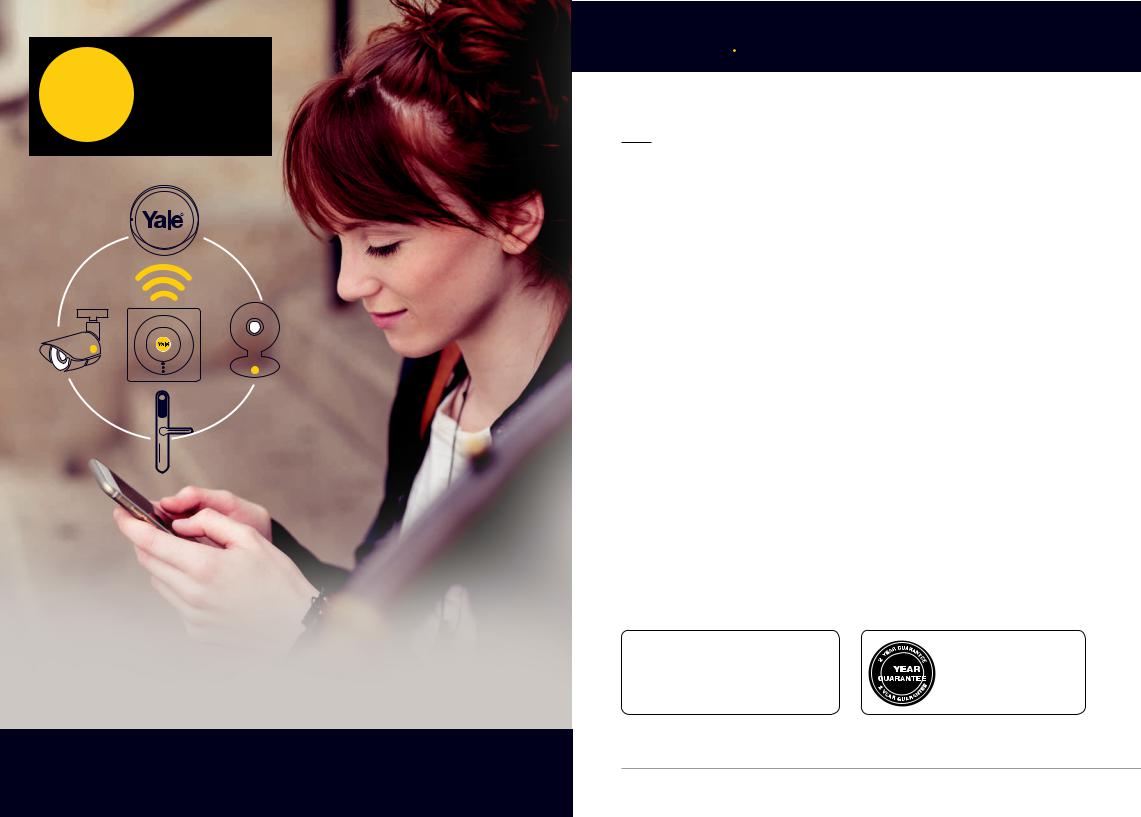
Yale Smart Home
Alarm Manual•
SR-310 • SR-320 • SR-330 • SR-340
The smarter way to protect your home•
smart


 Living
Control your home security from your smartphone
Introduction
Contents
1. Location planning |
4 |
2. Un-pack & power devices |
6 |
3. Initial set-up |
10 |
4. Mounting devices |
13 |
5. Using the system |
18 |
6. Default settings |
21 |
7. Adding & using devices |
22 |
8. Changing batteries |
26 |
9. Troubleshooting |
31 |
10. Specifications |
33 |
For more information on this product and |
|
The 2 year guarantee for this |
Yale Smart Living Range visit |
|
product is active from the |
www.yale.co.uk/smart-living |
2 |
date of purchase (A copy of |
Consumer Support: |
|
this guarantee is available on |
|
www.yale.co.uk/help |
our website). |
|
2 |
The smarter way to protect your home• |
3 |
|

Location Planning•
Plan device locations and check devices range before mounting.
30m Operating Range
All devices must be within 30 metres of the Smart Hub and must not be mounted on or near large metal objects. Avoid obvious sources of electrical interference such as fridges and microwave ovens.
Key Pad
•The Key Pad should be accessible from a protected entry/exit point
•Ensure that the Key Pad is not visible from the outside of the premises.
Smoke Detector |
External Siren |
|
|
Mount on a ceiling in main |
Mount as high as possible, out of |
access areas e.g. hallways, top |
easy reach. |
of stairs. |
|
30M
30M  30M 30M
 Door/Window Contact
• Mount as high as possible on the door or window frame.
Key Fob
• Use inside or outside within a 30m range
|
Smart Hub 2.0 |
|
• Ensure the Smart Hub is hidden |
|
from view. |
30M |
• Access to a mains socket and |
|
broadband internet router is |
|
required. |
Information and illustrations are subject to change within this document. Yale reserves the right to alter the specification and product design at anytime without notice. Yale® is a registered trademark. © 2018 ASSA ABLOY. All rights reserved.
Panic Button
The Panic Button can activate your alarm immediately - even when the system is disarmed.
•Keep out of reach of children
•Keep hidden from view, but easily accessible.
PIR Motion Detector
•Mount 1.8m - 2.1m above floor level
•Location in a corner will ensure wider room coverage
•Do not mount the PIR where its field of view will be obstructed
•Do not point directly at sources of heat e.g. fires or boilers, and do not position directly above radiators
•Avoid mounting the PIR directly facing a window
•Do not point the PIR at a door protected by a Door/ Window Contact
Pet PIR Motion Detector
•Suitable for homes with pets up to 25kg
•For rooms where pets are active and may climb on furniture, protect the area with a Door/Window contact instead to prevent false alarms.
4 |
5 |

Unpacking the devices•
Smart Hub 2.0
1. Plug in the power adaptor and connect the Smart Hub to your internet router using the cable provided.
Router
NOT INCLUDED
|
|
|
|
|
|
a |
|
|
ttery> |
Learn |
tt |
ery |
<On O > |
b |
|
|
Ban O |
|
|
> |
|
|
|
Po |
r <O |
|
Ba |
O |
|
|
|
|
|
<On |
|
|
|
|
|
we |
|
|
|
|
|
|
|
Alarm Hub Status
Top Light: Shows server connection status
Middle Light:
Shows fault status
Bottom Light: Shows arming status
HOME SERVER
Fault--Seee troubleshooting (page31)22)oror checkapp forrnotificationsnotifica
 OK
OK
Solid Red -
Fully Armed
Flashing Red -
Part Armed
White -
ArmedDisarmed
Key Pad
Yale
|
1 |
2 |
|
4 |
5 |
Away |
7 |
8 |
/ |
|
0 |
|
|
See page 16 for Key pad installation.
 Panic button A

 Panic button B 3 LED
6Learn button=
Press 8 and 9 together
9
 Disarm
PartHomeArmArm
PIR
Yale
Status
L
 E
E
 D
D
Learn/Test button |
Cover |
|
screw |
Door/Window Contact
|
|
LED |
Sensor |
Yale |
Learn/Test |
button |
||
|
|
Gap no more |
Magnet |
|
than 10mm |
6 |
7 |
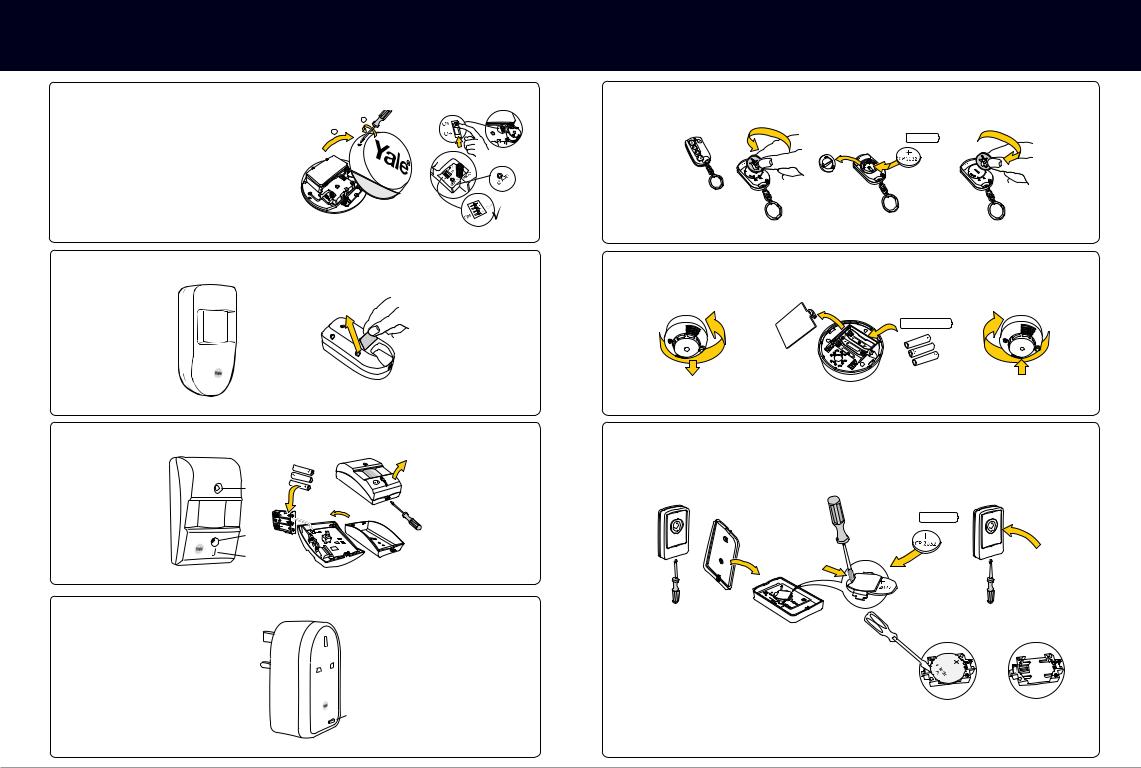
Unpacking the devices•
External Siren |
|
|
|
WARNING |
1.2 |
a |
2.4 |
The Siren is very loud! Take care not to activate |
|
b |
|
the Siren tamper switch unnecessarily. |
|
|
|
PIR Image Camera
 Learn/Test button
 Flash light

 Camera
PIR Video Camera
Power Switch
Plug in to mains socket.
Key Fob
1.
Smoke Detector
Panic Button
2. 3.
CR 2032
3 x 1.5v AA |
CR 2032
8 |
9 |
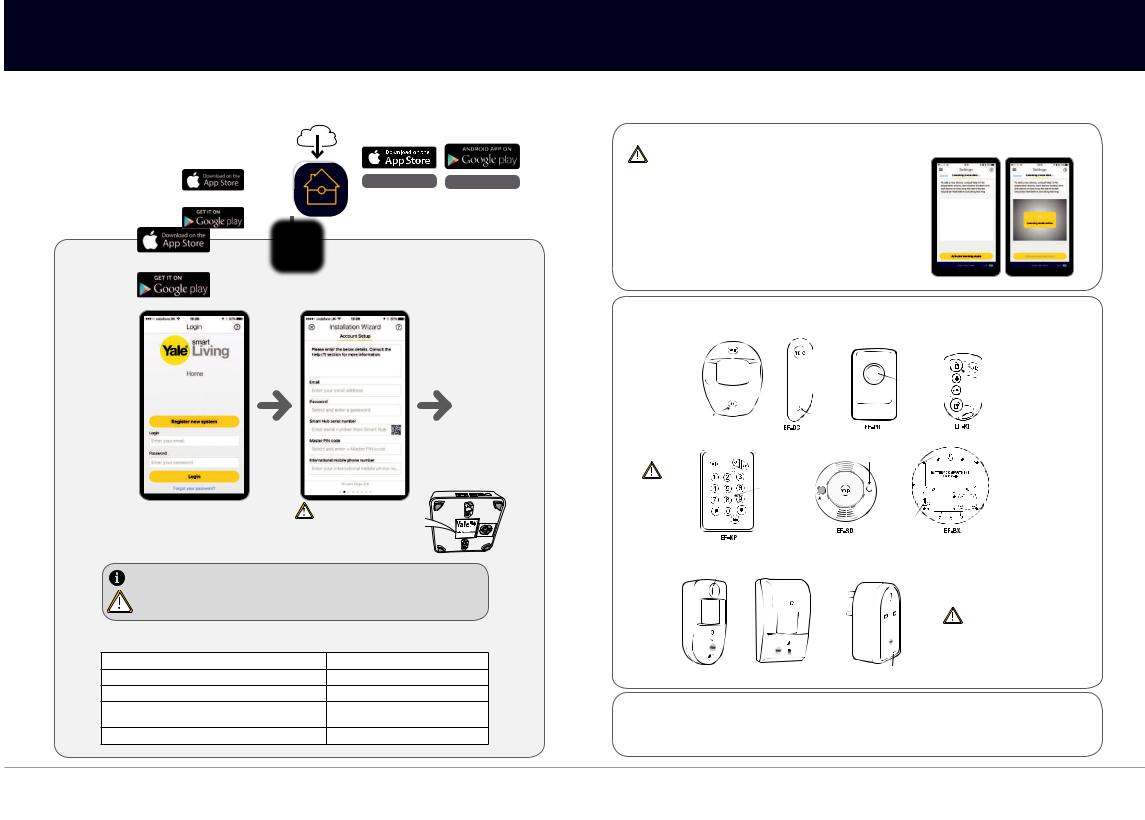
Download the app•
Please ensure all devices are powered and operational at this point.
Download the Yale Home App
Internet Connection: Required on
Yale Smart Living Home |
|
|
|
iOS 9 + |
Android 4.2 + |
|
|
|
|
|
|
|
|
|
|
|
|
First time registration
Follow the set-up instructions in the app.
Please Note:
Panel Serial Number can be found on the Smart Hub sticker.
Please register the hub within one hour of power up, otherwise app ‘authentication error’ will appear
– re-boot the hub (including switching off / on the back-up battery) and start the process again if necessary.
Recording your set-up information
E-mail used to set up system:
Smart Security Hub 2.0 serial number
Phone number used for notifications:
Key Pad PIN Code for Disarm/Arm (default 1234):
Key Pad code for key Pad setting (default 0000):
Setting up devices•
Adding new devices (Optional: Use it only if you have extra devices outside the kit)
All devices in the kit are linked to the Smart Hub. If you want to add more devices, you can do this by using the “Add new device” section in the Smart Living Home app.
Go to the app menu
Select Add Device, then activate leaning mode.
1
Enter Learn Mode
Learn in Devices
2 |
Press the learn button on the device you leant to add then see diagrams below. The Smart Hub will beep (single or multiple |
|||||
dependent on device) when a new device is registered. You will then see your new device in your device List within the home app. |
||||||
|
|
|
|
|
Learn/ Test |
Learn/Test |
|
|
|
|
|
||
|
|
|
|
|
||
|
|
|
|
|
button |
|
|
|
|
|
|
Press & hold |
button |
|
|
|
|
|
for 3 seconds |
One single |
|
|
|
|
|
|
press. |
|
Learn/Test |
|
|
|
|
|
|
button |
EF-PETPIR |
|
Learn/Test |
|
|
|
One single |
|
button |
|
|
|
|
press. |
|
|
One single |
|
|
|
|
|
|
press. |
|
|
|
|
|
|
|
Learn/Test button |
|
|
|
|
|
|
One single press. |
|
|
Ensure you |
|
Learn/Test |
|
|
|
|
initialise your |
|
button |
|
|
|
|
|
Press 8 and 9 |
|
|
||
|
keypad before |
|
|
|
||
|
|
together |
|
|
||
|
you learn it in. |
|
|
|
|
|
|
(See page 17) |
|
|
|
|
|
|
|
|
|
LED |
Learn/Test button |
|
|
|
|
|
|
One single press. |
|
|
the |
devices, please hold the |
button for 10 seconds, |
mode. |
||
|
Foror thefollowingollowing accessories, please hold theLearnearn button for 10 seconds,beforeorereleasinging to enterLLearnmode. |
|||||
|
Learn/Test button |
If the device doesn’t learn in, remove the batteries for 5 seconds, then replace and |
||||
|
Hold for 10 seconds try relearning within 3 minutes. |
|
||||
SR-PVC must be learned in with the tamper screw removed so that the tamper is open. Sensor will not learn with tamper closed.
SR-PC |
SR-PVC Learn/Test button |
SR-PS |
Learn/Test button |
|
Hold for 10 seconds |
|
Hold for 10 seconds |
3 |
Exit Learn Mode: |
Press Stop learning mode on the app |
10 |
11 |
 Loading...