

Yale Keyfree Connected Installation Manual
Installation Guide
Keyless Connected
ISL-1290-01
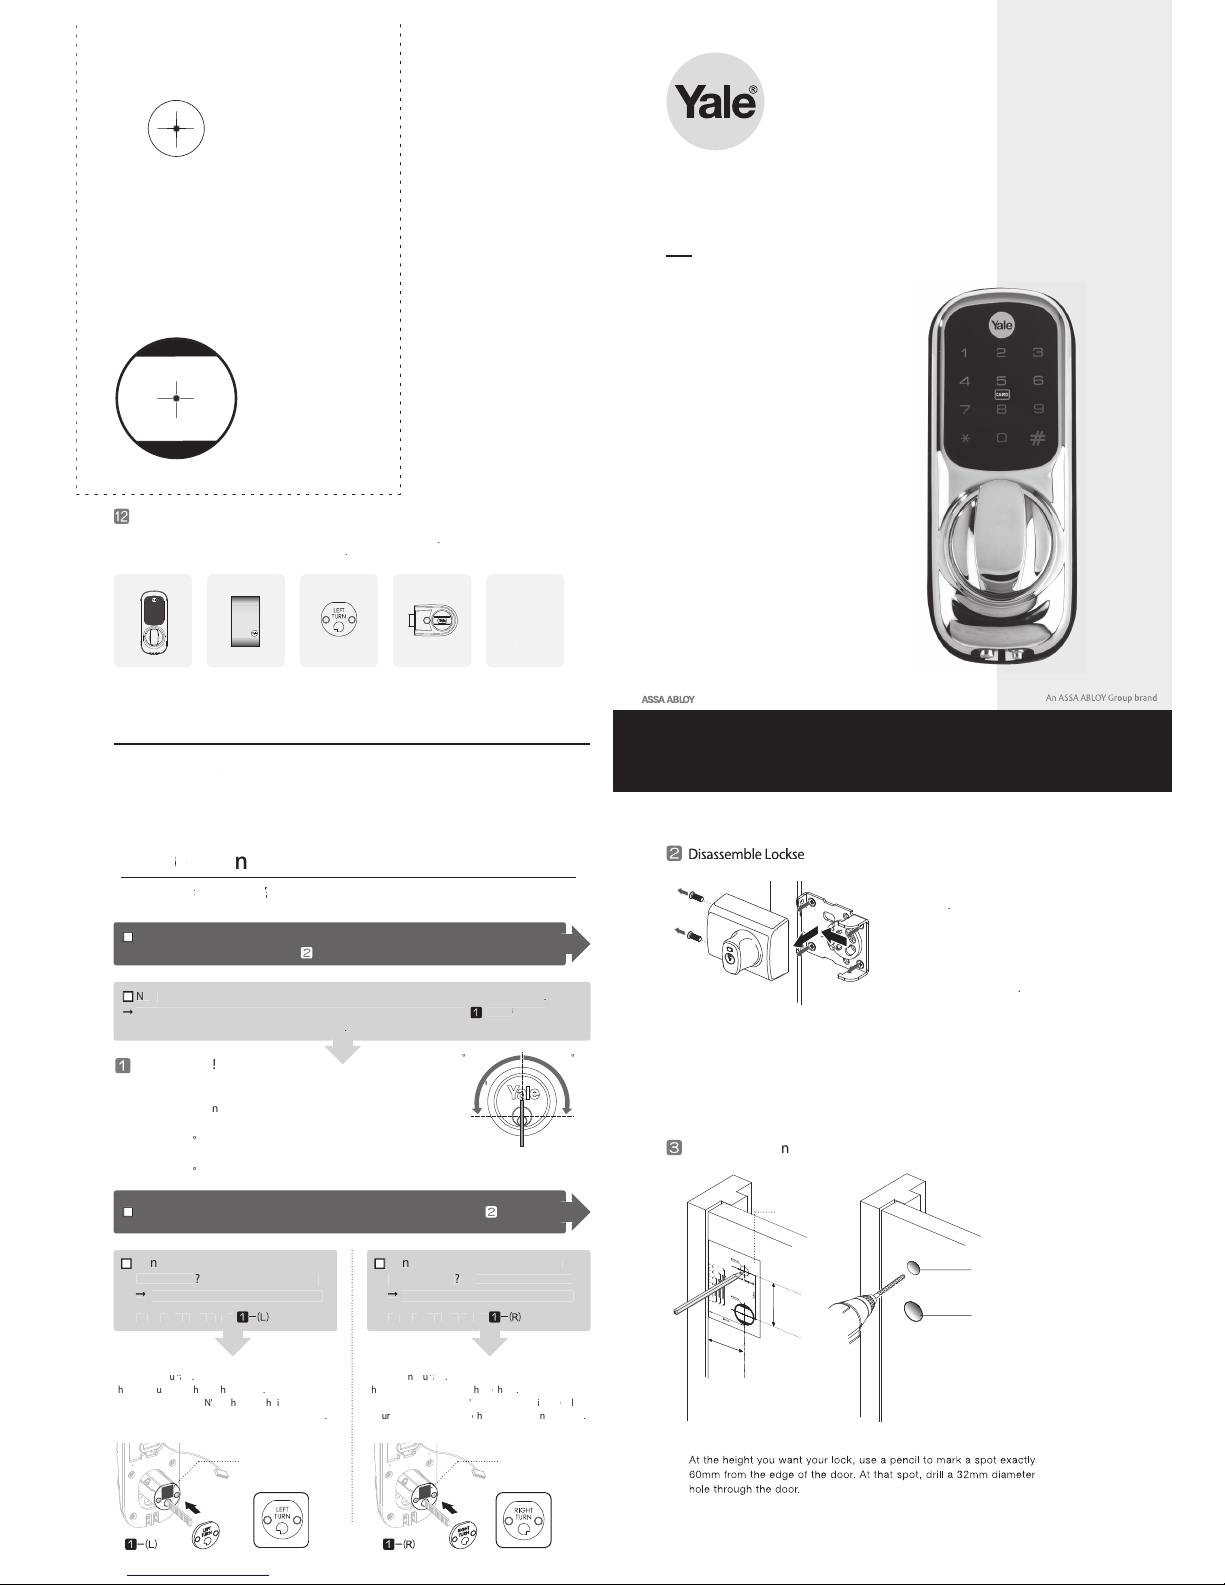
Contents Includ
e
Fit Yale digital lock using hand Philips screw driver to avoid cross threading xing screws
.
If using a cordless, please ensure it is set to low speed & torque
.
Front Body
Battery Pack
Handing Plat
e
Y3 Chrome
Nightlatch
Box(Option)
Screws
Batteries
Self adhesive
pa
d
•
•
•
20mm Hol
e
32mm Hol
e
60m
m
72.5m
m
g
,
There are many types of Nightlatches, so please start from installation step
W
W
follow the check points for correct installation
YES , I have bought the complete package to install them onto my door.
➞ Please start from installation step
w
Turn the key 90
Turn the key 90
Can you open with your key in both directions? Please go to step
you open with your key only in the
Your Nightlatch needs an additional plate.
e
cyli
eg s
ace
T
eatete
alig
e
d
w
th
e sha
e
TUoas
t
eage
el
o
cyli
er
g
ac
e
T
e te
e
ali
ghe
d
w
t
sae
thee
be
ow
o
latch is
op
e
on
to
t
e
T
d
t
y t
y
you open with your key only in th
Your Nightlatch needs an additional plate.
t
* The nightlatch & plates above are generic images.
your product may be dierent
ON THE RIGHT PAGE
TTATT
A
Ⓒ
Ⓓ
Ⓑ
Y
Living
The smarter way to protect your home
•
The functions and design of this product can be changed
without prior notice for performance and quality improvements.
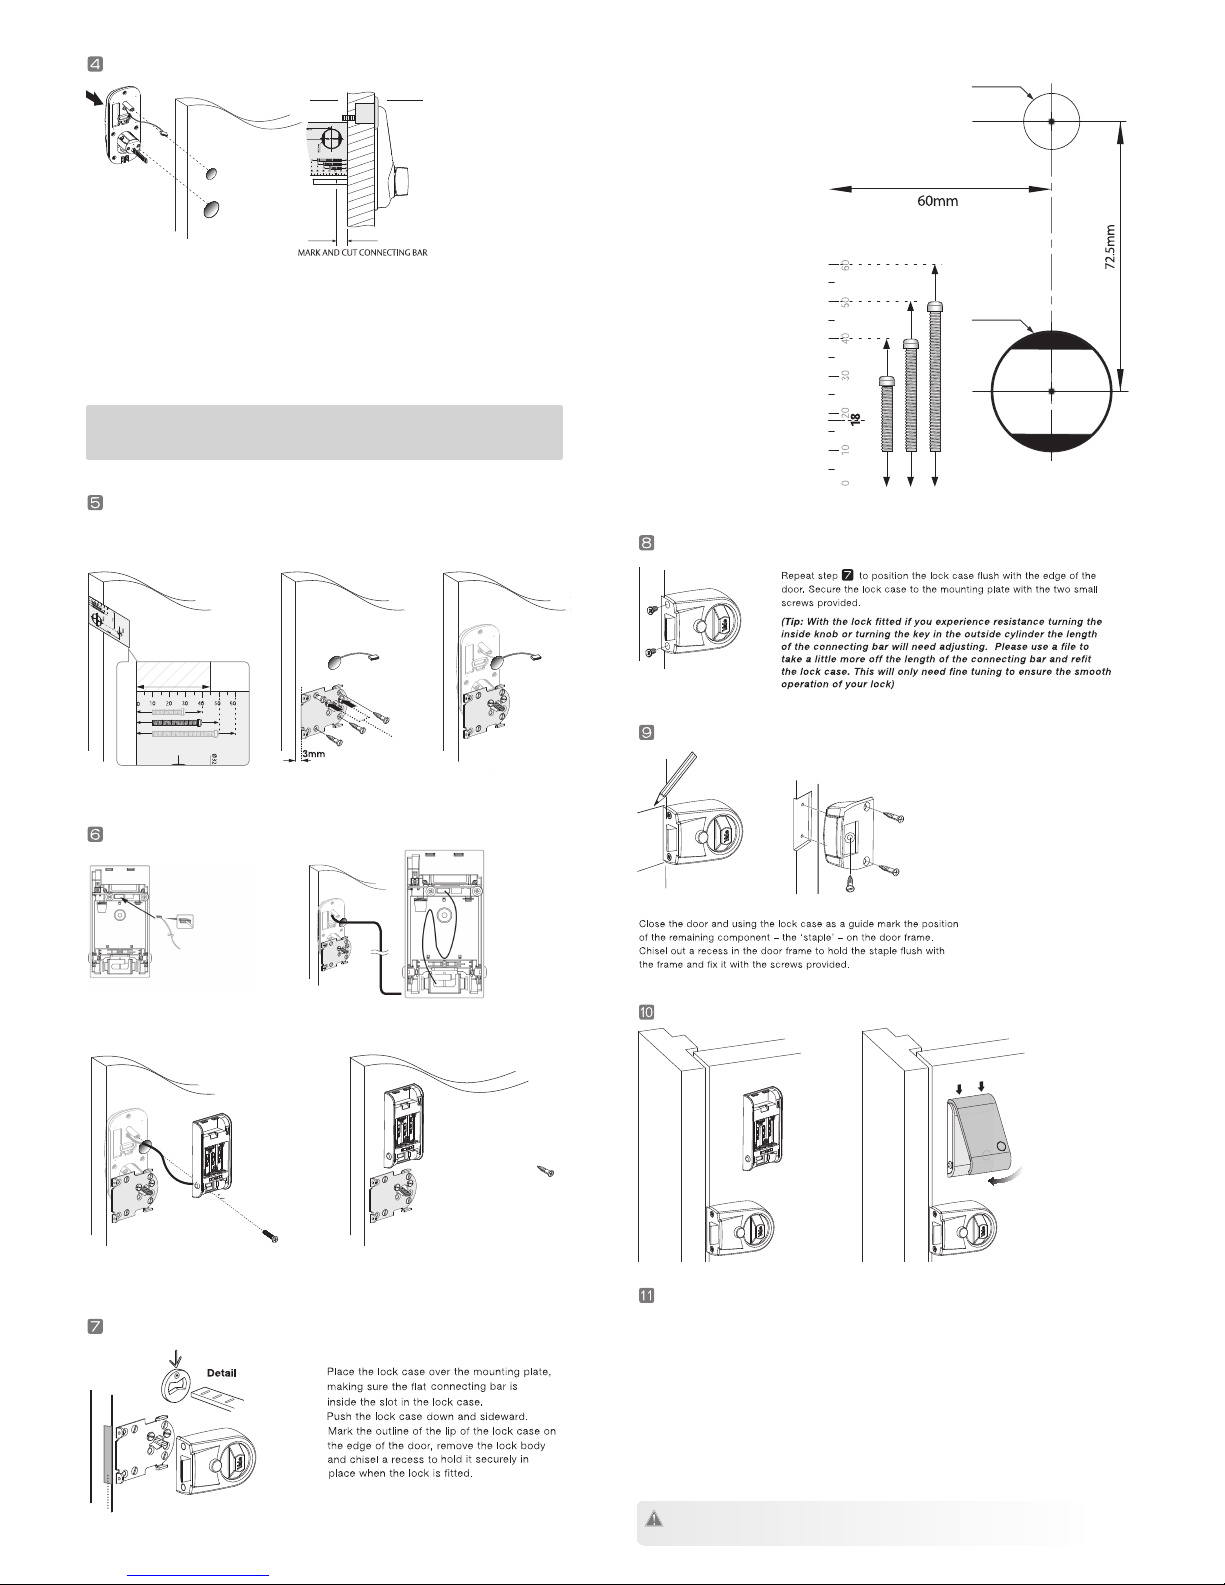
Make sure battery back
is square with the door
Chisel required
Connect the cable
to the battery pack
Cut with pliers to ensure a clean cut.
Use the template provided to
choose correct screw length
according to your door thickness.
Fix with the cylinder retaining screws rst that you chose.
Make sure the front keypad is aligned before xing the
screws tightly. Now x the mounting plate onto the door.
18mm
Cut Connecting Bar
Mount External Keypad and Mounting Plate
Secure Battery Pack
Place Lock Case and Chisel
Place the electronic keypad in the hole on the outside of the door.
Measure the connecting bar with the provided template, then mark at 18mm and cut. If
neccessary, use a hacksaw to shorten the at connecting bar so it projects 18mm beyond the
surface of the door.
* If you are retrotting with your existing Nightlatch, please place your existing cylinder onto the
door side and mark and cut the connect
ing bar at the same length with your cylinder.
(Please refer to the ‘*’ marked image above)
Warning: The projection of the connecting bar is important to ensure the lock works correctly.
If you are tting with Y3 Nightlatch, it should not be shorter than 18mm.
If you are retrofting, please make sure you do not cut the tail bar shorter than the existing tail bar.
Door Thickness
*
Inside Outside
Fit rst
Screw into boss Fix screw to completely
secure battery pack.
* If you have used a handing plate on STEP 1-(L) or 1-(R),
please turn the follower to the end position according to
your direction before xing the lock case.
*
Door Template
Secure Lock Case
Staple Fitting
Insert Batteries and Close the Cover
Check Points after Installation
Ⓐ
①
Make sure to leave the door open when registering your PIN because you may accidentally lock
the door while trying to register or change your PIN code.
Ⓑ
Ⓒ
Ⓓ
Ⓔ
Touch the keypad with your palm to wake up the keypad.
Enter a PIN code 123456 and enter * button or touch the keypad with your palm to open the door.
Turn the knob handle several times to retract the latch bolt.
The knob handle will not retract the latch bolt after few seconds.
To avoid any possibility of being locked out, do not close the door
until a PIN code has been successfully registered to allow access back in.
if you have diculty locating the bar into the slot in
the lock case, enter the master code 123456
followed by * to unlock the lock, this will engage the
bar and make it easier to locate.
PLEASE NOTE: Remember to change your master code after installation.
ø32mm
ø20mm
Feed the cable through the slot and then, being careful
not to overlap it, zig-zag any excess cable
behind the battery pack.
 Loading...