

Page 1
Page 2
User’s Manual/English/ Version1.0/ Hypersound128
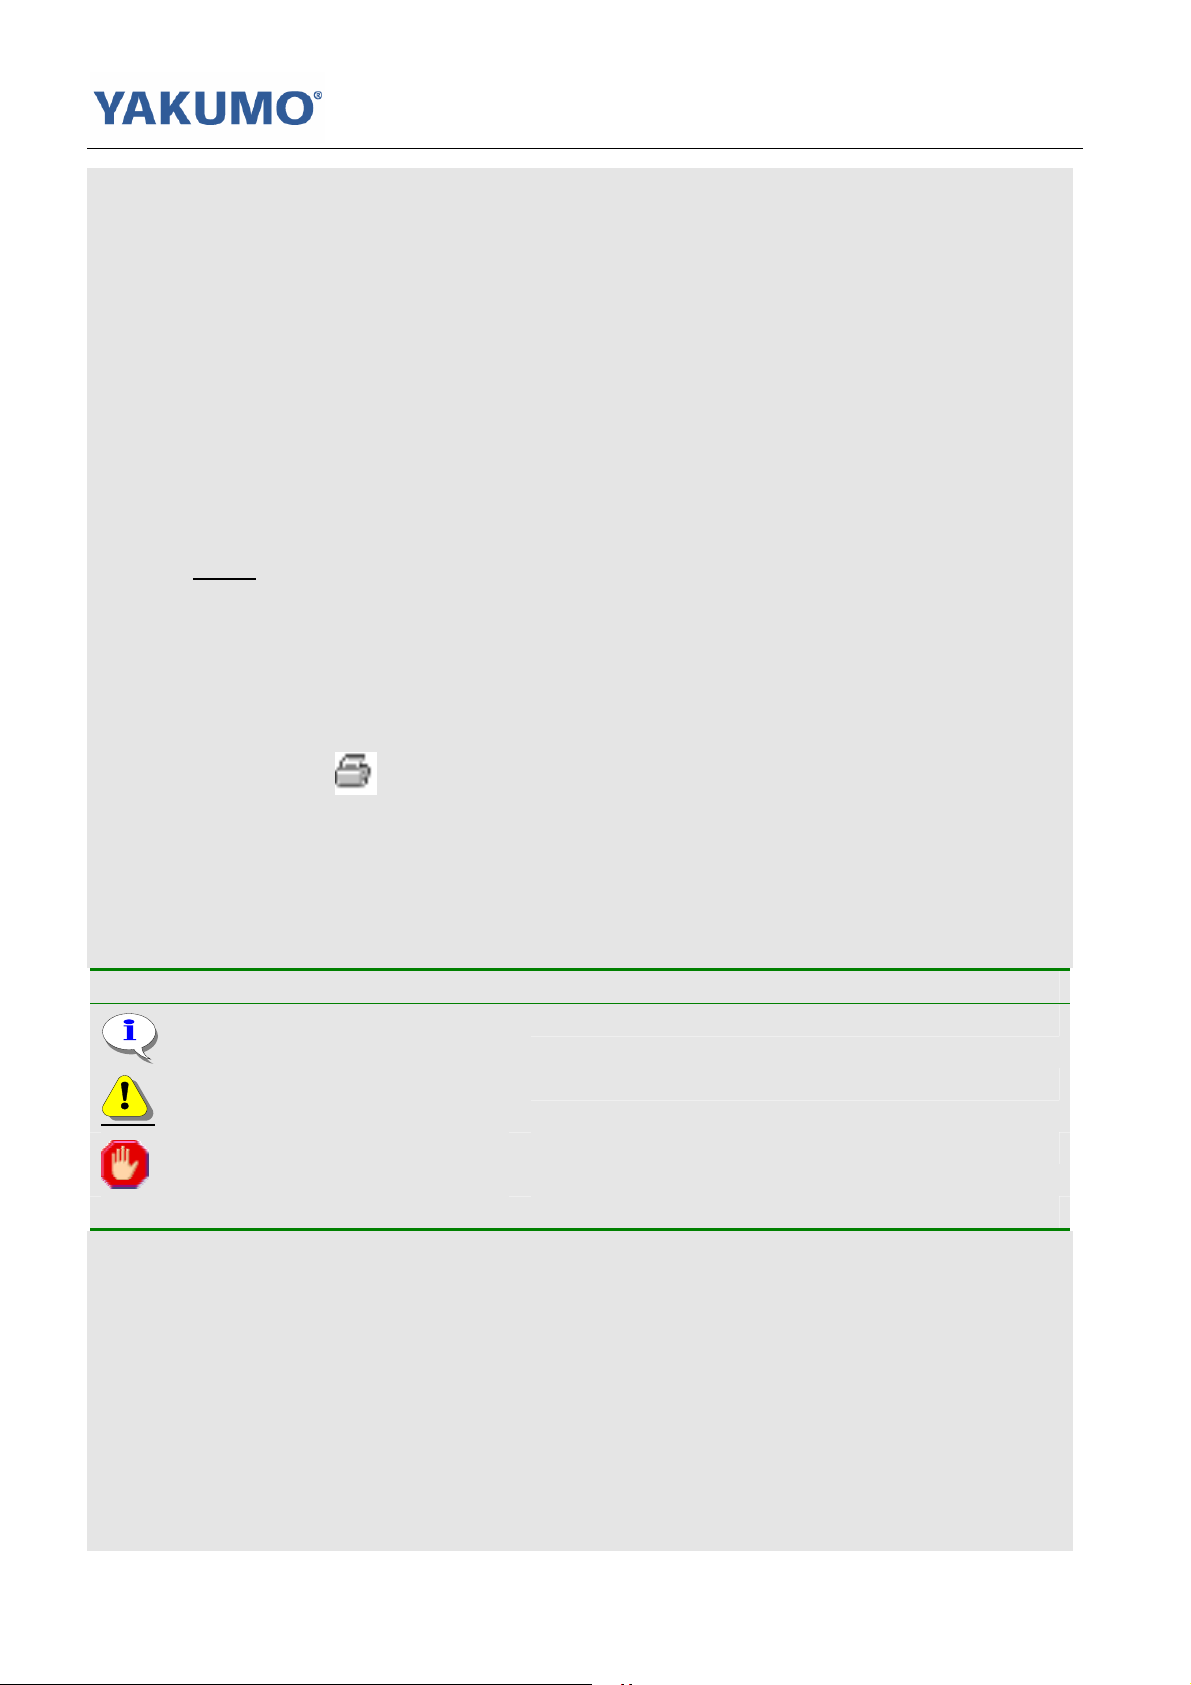
Navigating the User’s Manual
This User’s Guide is in Adobe Acrobat (.PDF) file format.
Important:
We recommend that you use Adobe Acrobat Reader version 4.0 or higher to view and
print the User’s Manual. Acrobat Reader 4.0 is available on this CD.
Click blue, underlined text links to jump to another location in the document or to a
location on the Internet.
Click the Index link at the bottom of any page to go to the index of the User’s Manual.
Using Acrobat
Click the navigation buttons in the Acrobat toolbar to go to the first page,
previous page, next page, or last page of the User’s Manual.
Click the print button in the Acrobat toolbar to print the User’s Manual.
This symbol Indicates
One useful information
Attention please
A warning
Page 3

User’s Manual/English/ Version1.0/ Hypersound128
INDEX
Chapter 1 Introduction
1-1 Your Hypersound MP3 Player………. ………………………………………………….…….…………..1
1-1.1 Features ……………………………………………………………………………….……………………………..1
1-1.2 System Requirements…………………………………………………………………..…………………….1
1-1.3 In the Package…………………………………………………………………………………………………….1
1-1.4 Location of Controls………………………………………………………………………………………….…2
1-1.5 Battery……………………………………………………………………………………………………………….…3
1-1.5.1 Checking out the remaining power capacity………………………………………..3
1-1.5.2 Recharge the battery……………………………………………………………………………..3
Chapter 2 Install Software
2-1 For Windows…………………………………………………………………………………………………….....5
2-2 For Macintosh OS……………………………………………………………………………………………….…6
Chapter 3 Connect to PC
3-1 For Windows………………………………………………………………………………………………………...7
3-2 For Macintosh OS………………………………………………………………………….………………………8
Chapter 4 Download Music
4-1 For Windows……………………………………………………………………………..………………………...9
4-2 For Macintosh OS…………………………………………………………………………….…………………..9
Chapter 5 Starts to Play
5-1 Getting Started……………………………………………………………………………………………………10
5-2 LCD Display and Menu…………………………………………………………………………………….…11
5-3 Play MP3/WMA Music…………………………………………………………………………………….……12
5-4 Record Voice Memos………………………………………………………………………………..…..……13
5-5 Playback Voice Memos…………………………………………………………………………………..……13
5-6 Advanced Setting…………………………………………………………………………………………..……13
5-7 Erase files……………………………………………………………………………………………………….……15
5-8 About………………………………………………………………………………………………………..…….……16
5-9 Reset………………………………………………………………………………………………………………………16
Chapter 6 Software Utility
6-1 Software Utility……………………..……………………………………………….……………………..……17
6-2 Player Format………………..……………………………………………………….………………..…………17
6-3 Player Update………………………………………………………………………………………..…………….18
Chapter 7 Appendix
7-1 Cautions……………………………………………………………………………………………………………….…I
7-2 Specifications…………………………………………………………………………………………..……………II
7-3 FAQ ………………………………………………………………………………………….……………III
7-4 Make your own Opening Screen
………………………………………………………….…………V
Page 4

User’s Manual/English/ Version 1.0/ Hypersound 128
Chapter 1 Introduction
1-1 Your Hypersound MP3 Player
1-1.1 Features
Slim & Portable
Full Function Integrated
Plays WMA/MP3 Digital Music
Digital Voice Recording
Built-in Flash Memory
Dot Matrix LCD Display
Blue EL Type Back Light
USB Disk Function, Upload and Download, No Limit By The File Type
USB V1.1 Port
Recharging Via USB Port
Built-in Rechargeable Battery
5 Kinds of Music Equalizer Preset
5 Kinds of Music Play Modes
Digital Volume Adjustment
Firmware Updateable Via USB Port
No Need a Driver To Upload and/or Download(Windows ME/xp/2000)
Supports WINDOWS 98/ME/2000、Mac Os X(Version 10.2.6 and above)
Supports Voice Recording Via External Microphone
1-1.2 System Requirements
Pentium MMX 200 or above CPU
30MB Available Free Hard Drive Space
One Available USP Port
CD-ROM Drive 4x or above
Operation System
Windows Microsoft Windows 98, Windows 98SE,
Windows Me, Windows 2000, Windows XP or
above
Macintosh OS Mac OS X (Version 10.2.6 or above)
1-1.3 In the Package
Hypersound 128
Bundled CD Quick Start Guide
Hang type Stereo Earphone USB Cable
Adapter
Warranty Card
Page1 Index
Page 5
User’s Manual/English/ Version 1.0/ Hypersound 128
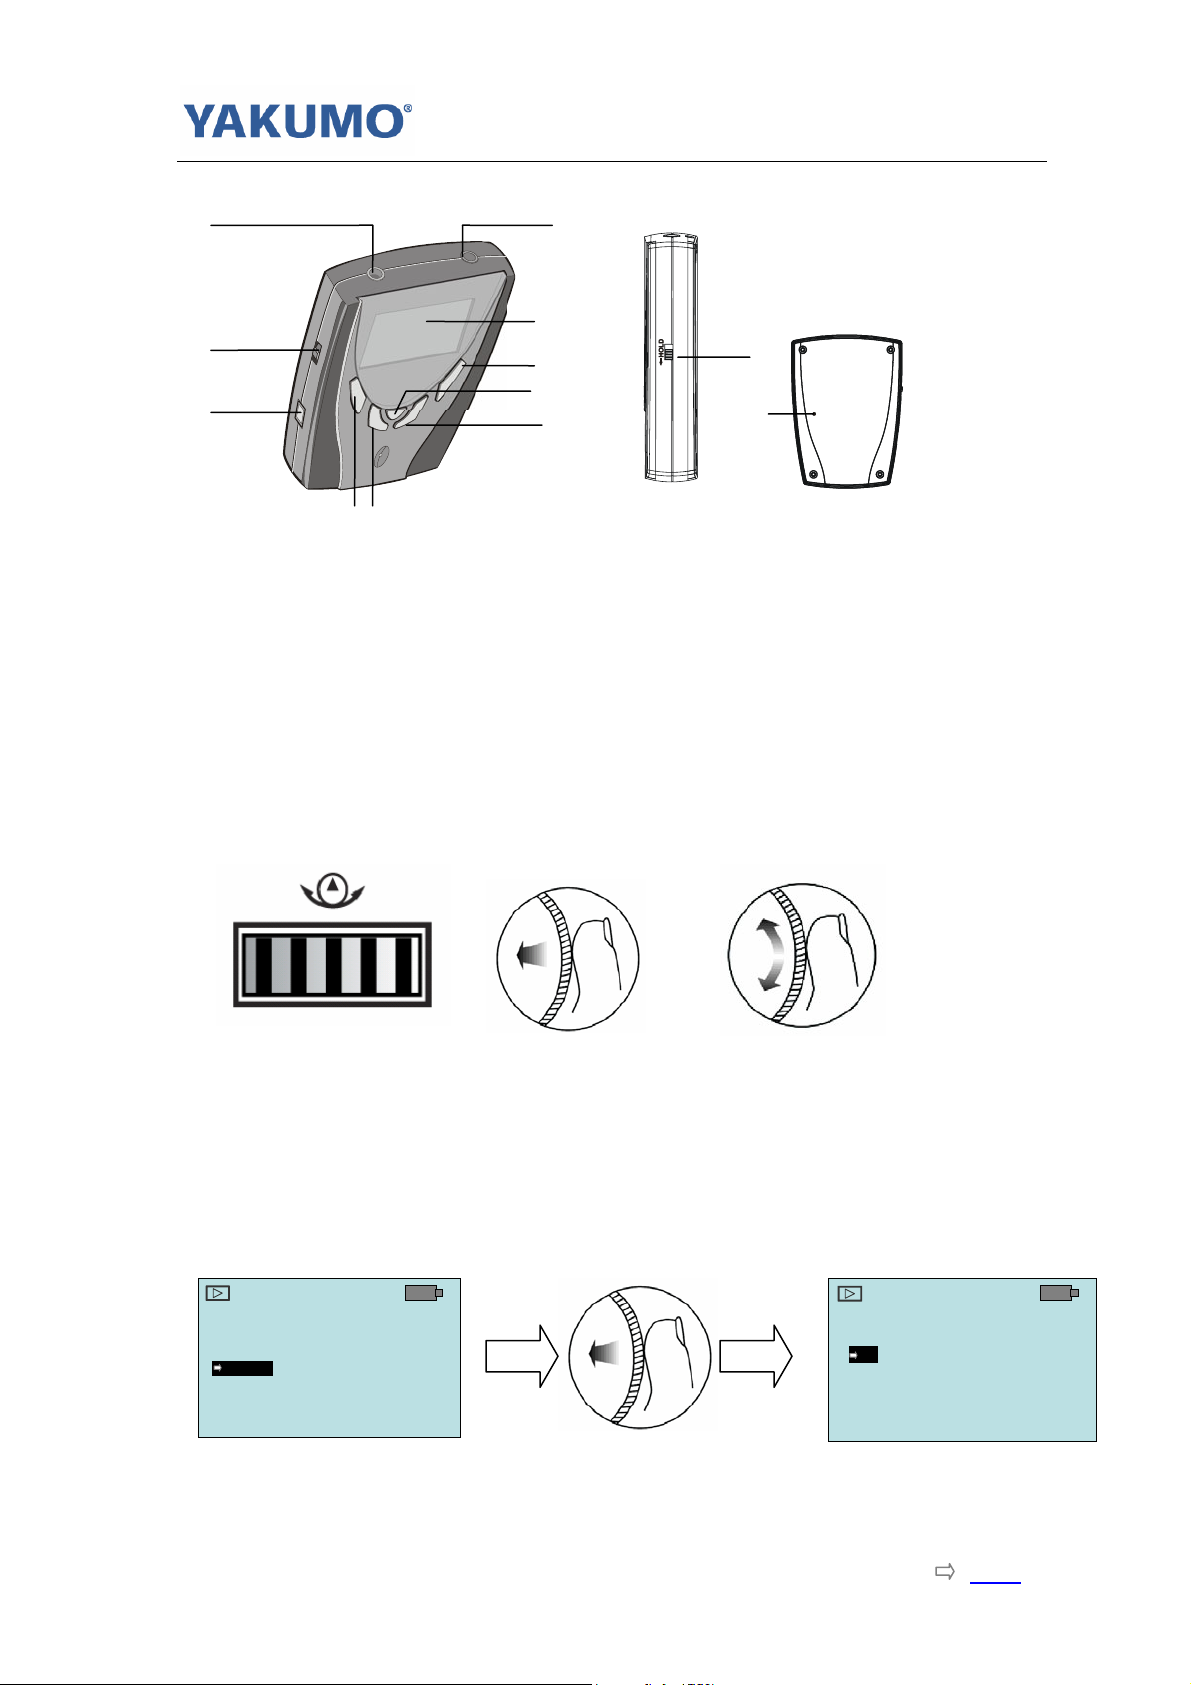
1-1.4 Location of Controls
9
11
1
2
10
3
6
12
5
8
4
7
1 Power ON/Play/Pause
Press the button to power ON, playback music or voice file.
2 Stop/Power OFF
Press to Stop the playback or Recording; Press and holding for some seconds to
turn off the player.
3/4Volume +/ Press these two buttons to adjust the earphone output volume level.
5 Menu (Operation Button)
The 3-way Operation button is one special button of the player. It has some different
functions when Press Down, Shift Up and Shift Down.
While playing music, shift Up/Down the Operation Button, causes to skip to Previous/Next
music。 And it will fast skip backward/forward in one music track if keeps on shifting
Up/Down the button.
While playing music, press down the Operation Button, the LCD displays Menu list.
Shift Up/Down the Button can move the select bar on the display.
Press down the Button to Enter one Sub-Menu or Confirm one selected Menu Options.
Music
Music
Voice
Voice
Settings
Settings
Erase Files
Erase Files
m
m
Settings
Eq
Eq
Play Mode
Play Mode
Backlight
Backlight
Contrast
Contrast
Settings
m
m
To Exit the Menu List, just Keep on Pressing Down the Operation Button for
almost 1 second. The screen will switch back to playback screen.
Page2 Index
Page 6
User’s Manual/English/ Version 1.0/ Hypersound 128
6 Hold Switch
Hold:When you need to lock the player buttons, slide the Hold Switch Upwards. If the
player is on at this moment, the LCD will display as following when any key touch:
Release:You can re-operate the player only when the Hold Switch is Released. Slide
the Hold Switch back to Release.
Notice: Ensure that the Hold Switch is Released before you turn on the player.
Or you can not use the player.
7 A-B Repeat / REC Button
Repeat a selected section of the music continuously:
While playback music or voice memo, Press this button to mark the repeat point
where you want the section to start, and press this button again where you want
the section to end. The player starts to playback the selected section from start to
end repeatedly.
To cancel the A-B Repeat, press the A-B repeat button again. The A-B repeat
indicator disappears from the LCD and the music continues playing from the point.
Record voice:
Press and hold the A-B Repeat/REC button for 1 second to start record.
8 Mini-USB Port
You can upload / download / manage the files via this port with supplied USB cable.
You can recharge the battery via this port with supplied USB cable or supplied
power adapter.
9 Microphone In Jack
It is for an external microphone. If there is an external microphone connected to
this port, the player switches to use the external microphone when voice recording.
If no external microphone connected, the player uses the built-in microphone.
10 LCD Display
Displays Playback Status, Menu Setting, Music Information, etc.
11 Earphone Jack
For earphone.
12 Reset Hole
You can use one thin and solid stick and press on the Reset button inside the Reset
hole to reset the player.
1
1
1
1
VOL
VOL
VOL
VOL
I LOVE NAPA,I’M HERE WAITING
I LOVE NAPA,I’M HERE WAITING
A-B
A-B
A-B
A-B
ROCK
ROCK
ROCK
ROCK
Song 01 / 21
Song 01 / 21
Song 01 / 21
Song 01 / 21
I AM HERE WAITING
I AM HERE WAITING
Richard Marx
Richard Marx
Richard Marx
Richard Marx
1:31 / 4:42
1:31 / 4:42
01:31 / 04:23
01:31 / 04:23
m
m
m
m
Page3 Index
Page 7
User’s Manual/English/ Version 1.0/ Hypersound 128
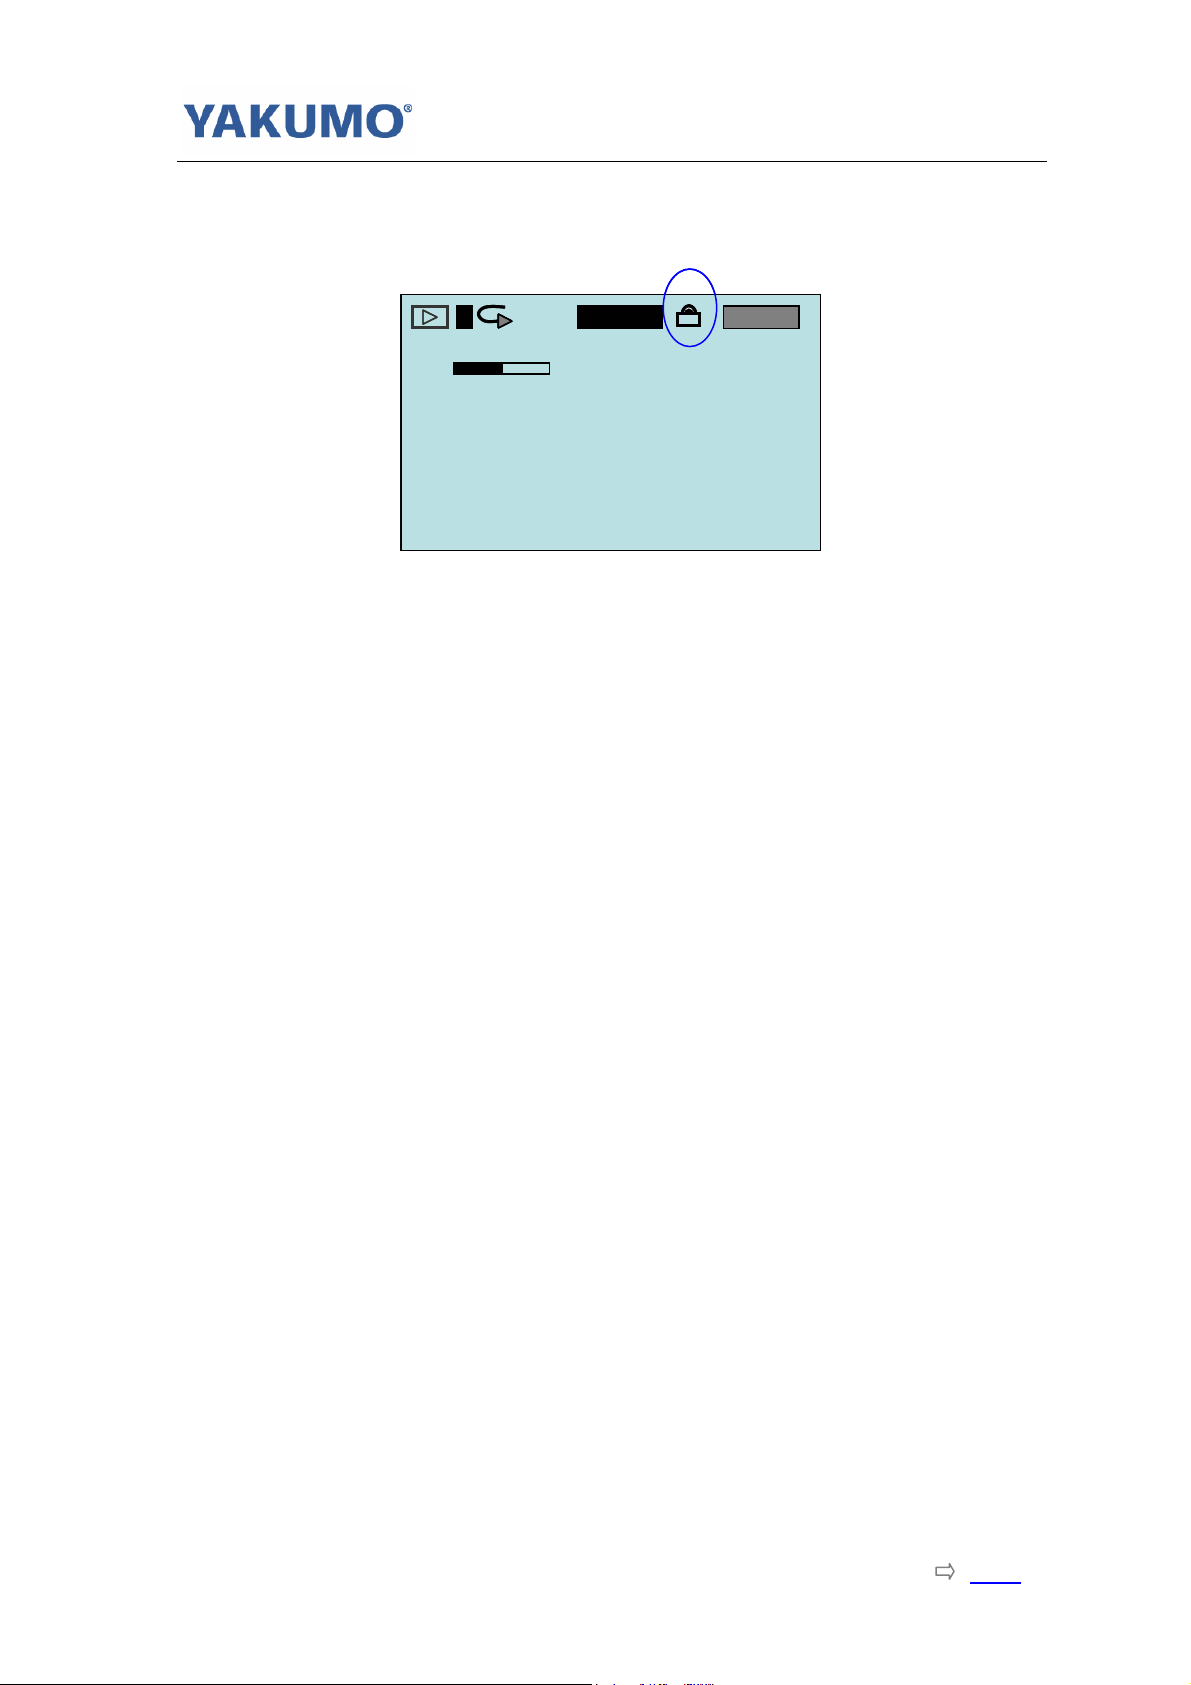
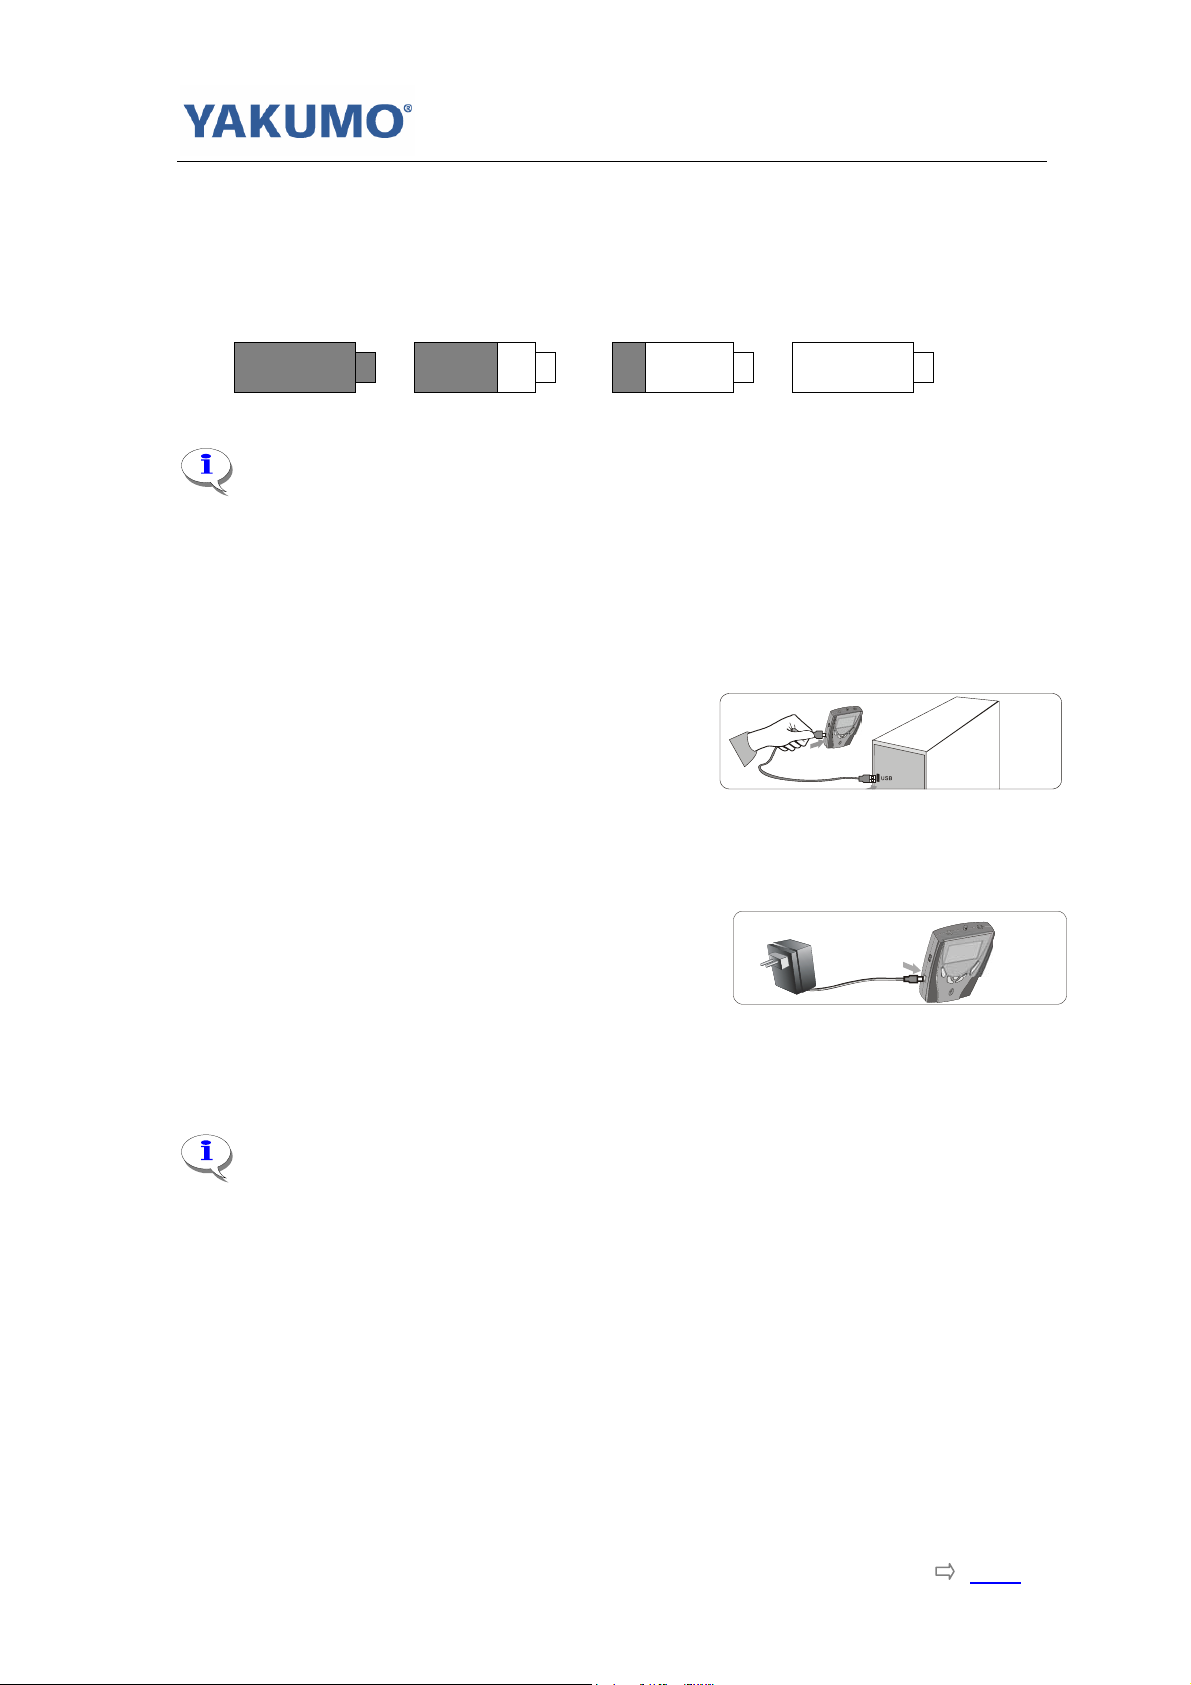
1-1.5 Battery
The player uses built-in rechargeable battery. There is battery power capacity
indicator appears on the LCD display. There are two ways to charge the battery.
1-1.5.1 Checking out the remaining power capacity
Power Capacity Indicator Symbols
Full Power Not Full Power Low Power Need to charge
If not use the player for a long time, you may find the battery capacity
becomes low. It is normal and just uses it up and recharges the battery to full
capacity.
1-1.5.2 Charge the Battery
Charging with the PC power:
Connect the flat port of the supplied USB cable to the USB port of PC,
Connect the minor port of the cable to the
mini-USB port of this player;
Press the Play button to turn on the player.
The Recharging starts. The Power Capacity
Indicator indicates the charging progress.(Be sure the PC has been turned on)
Charging with the supplied adapter:
Connect the mini-USB type port of the supplied
power adapter to the mini-USB port of this player,
Connect the power adapter to the power outlet.
Press the Play button to turn on the player.
The Recharging starts. The Power Capacity Indicator indicates the charging
progress.
3-2
It is recommended that charging with the supplied adapter to ensure
recharging time and electronic current quality.
It takes about 8~10 hours to fully recharge the battery. Recharge the battery
over 24 hours before the first time use the player.
Page4 Index
Page 8
User’s Manual/English/ Version 1.0/ Hypersound 128
Chapter 2 Install Software
If you are using Windows Me/XP/2000, it is no need to install driver. Just
connect the player to your PC, the player will be detected and install one general
driver. The built-in flash memory of the player will appear in “My Computer” as
one Removable Disk. After it is finished, you can upload, download and manage
the files in the player.
You still need to install the driver from bundled CD if you want to upgrade the
firmware or completely format the flash memory of the player.
If you are using Windows 98 or 98SE, you need install the driver from bundled CD.
Otherwise you can not upload, download and manage the files in the player,
because Windows 98 has not integrated general drivers for USB MP3 player.
How To Install Driver – Step by Step
2-1 For Windows
Step 1. Insert the bundled CD into the CD-ROM
drive. If the Setup program does not run
automatically, do steps 2 through 3.
Otherwise, skip to step 4.
Step 2. Click Start -> Run.
Step 3. In the Run dialog, type
D:\showmenu.exe (where D:\ is your
CD-ROM drive) and click OK.
Step 4. At the YAKUMO Driver & Menu Select screen, Click and Select “English”
from the Manual Language Select bar.
Step 5. Click on the “View Manual” button on the right side of the screen. The
manual screen will pop up. If it is the first time to use the product, please
read the manual carefully.
Step 6. Click on the “Setup Driver” button below the “View Manual” button on
the right side of the screen. The driver install wizard starts to guide you
install the driver.
Step 7. Click on the “logomaker” button below the “Setup Driver” button on
the right side of the screen. The logomaker setup program is running
automatically. (About logomaker, please refer to Make your own Opening
Screen in appendix.)
Step 8. Click [Next] start to install driver. Follow the instructions on the screen.
(Simply Bypass Logo Testing Message- Choose "Continue" if prompted
this question under Windows XP/2K/ME).
Page5 Index
Page 9
User’s Manual/English/ Version 1.0/ Hypersound 128
Step 9. When prompted to restart your
system, take out the CD from
the CD-ROM drive and select the
Yes, I want to restart my
computer now option and then
click the Finish button。
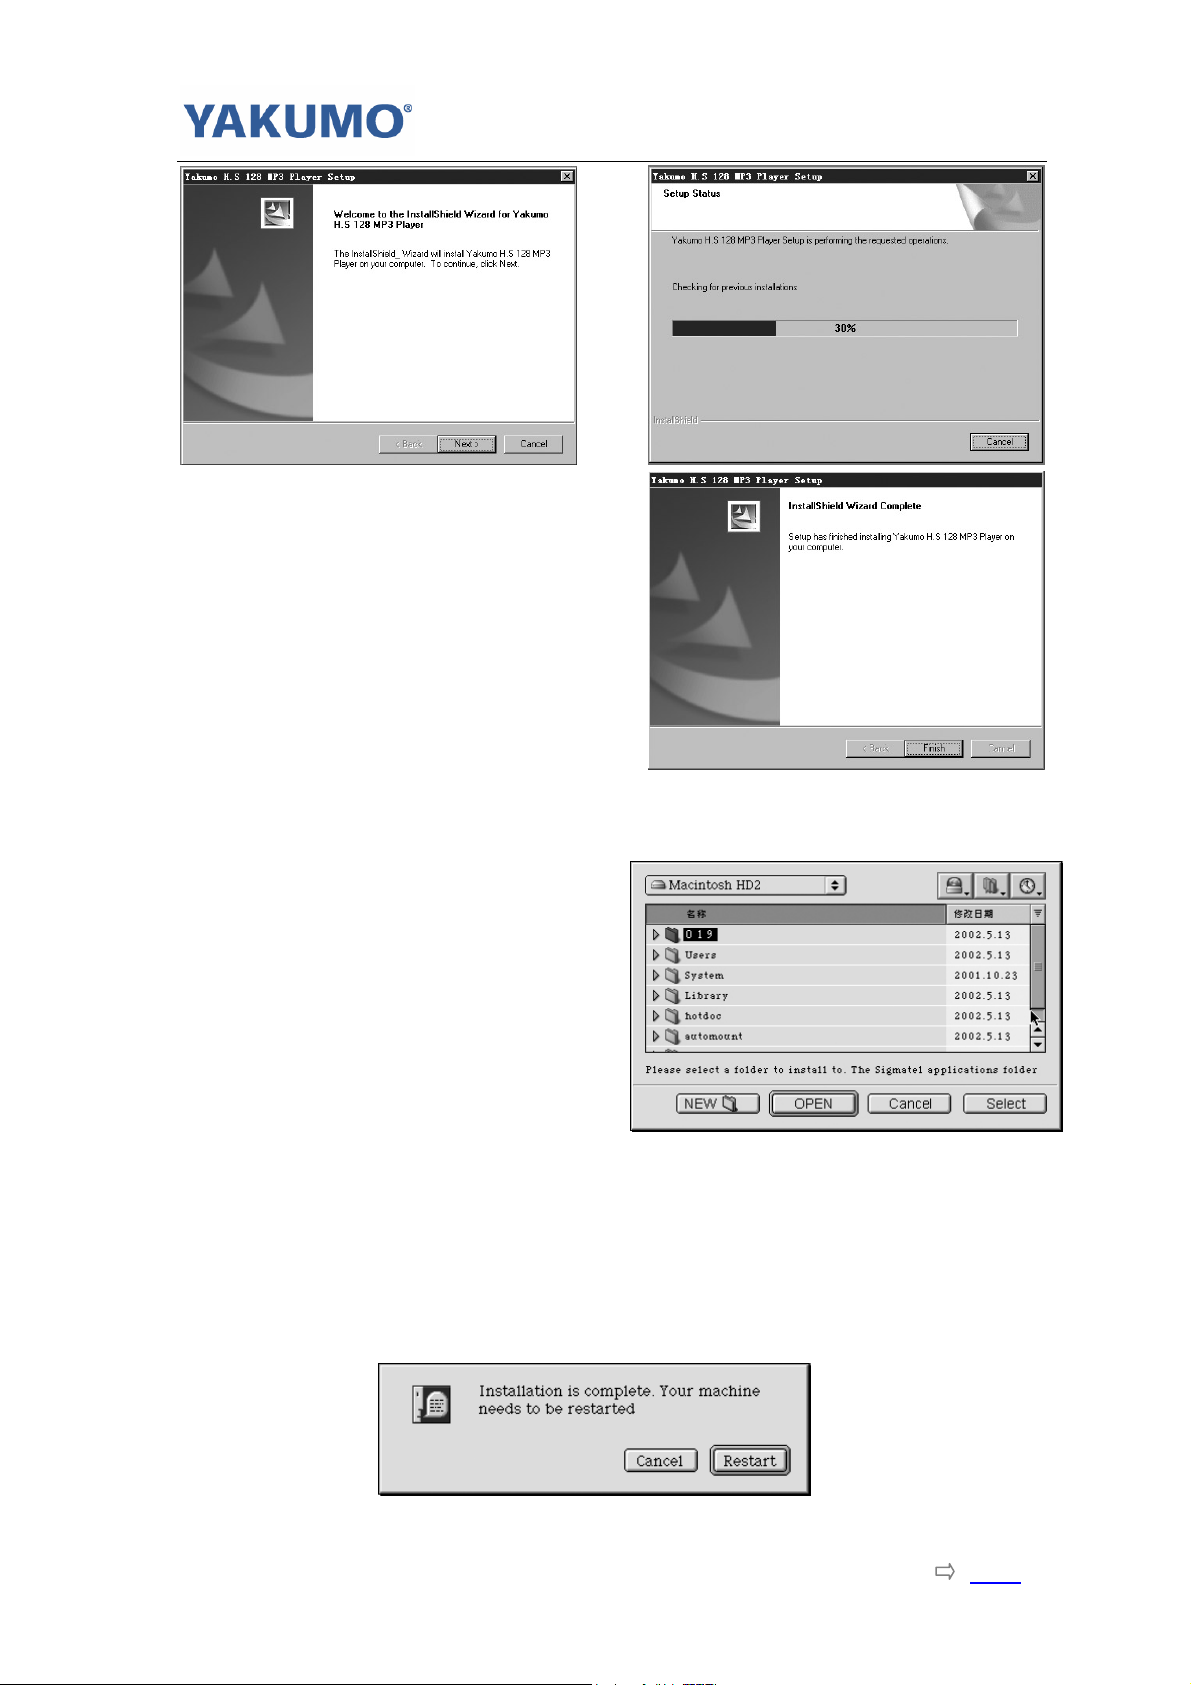
2-2 For Macintosh OS
Step 1. Insert the bundled CD into the CD-ROM drive.
Step 2. Double click on the CD-ROM icon on desktop.
Step 3. When the CD-ROM file list
window appears, double click
the MAC_OS icon. When
MAC_OS window appears,
double click the
Hypersound128_V_1_1.sit
icon. You will be prompted to
select one application
installation folder.
Step 4. Select one existing folder, or
create one new folder, then click on “Select”.
Step 5. Double click to open the folder. Then double click on Install icon.
Step 6. The driver starts to be installed. Following the instructions on the
screen.
Step 7. If prompted to restart your system, take the CD out from the CD-ROM
drive and click on Restart button.
Page6 Index
Page 10

User’s Manual/English/ Version 1.0/ Hypersound 128
Chapter 3 Connect to PC
You need not switch off your computer when you connect the player to the PC
since USB is Plug-and-Play. Before USB connecting with computer,disconnect the
earphone from the player.
Setup Connection
(1) Position the PC so that its USB ports can be easily accessed.
(Note: The USB port(s) on you PC may be found on the front panel instead of
the back panel. Contact your system vendor if need)
(2) Connect the flat port of the supplied USB cable to the USB port of PC;
(3) Connect the minor port of the cable to the mini-USB port of this player;
(4) Press Play button to turn on the player. A diagram appears on the LCD,
indicating that the player is connected to your PC. The player starts to recharge
the battery.
Connect to PC
3-1 For Windows
Step 10. Once you have plugged in the player to your PC, system detects New
hardware and starts to install the drivers automatically. Wait for system finish
the installation.
Step 11. When finished, you can click Start -> Program -> Yakumo H.S 128
MP3 Player -> Update. If current firmware version is lower than Update
firmware version, please click on Start button. Otherwise, you need not to
update. Click on Close button to exit.
Step 12. The driver installation has finished.
Step 13. Double-click on My Computer on d esk top. It s hal l b e ob ser ve d th at o ne
new Removable Disk appears in the My Computer window. It is the memory
built-in the player.
Step 14. Now you can download your WMA/MP3 music to the player by copying
the files to the new Removable Disk.
Page7 Index
Page 11

User’s Manual/English/ Version 1.0/ Hypersound 128
3-2 For Macintosh OS
Step 8. System detects the new hardware and one new Untitled Disk icon
appears on desktop.
Step 9. Now you can download your WMA/MP3 music to the player by copying
the files to the new Untitled Disk.
If you are using Windows Me、Windows 2000 、Windows XP, users are
recommended to click on the small icon on the taskbar of the Windows (Safely
Remove Hardware), which is an utility aims to disconnect the MP3 player from
the USB connection in a much secure manner.
When you are going to disconnect the player, double-click on this icon, and click on
the Stop button in the “Remove Hardware Device” dialog window. And click on OK
button when asked which device to be stopped. The “Safely Remove Hardware”
window appears to tell you that now it is safe to remove the player. Now you can
disconnect the player from computer safely.
If you disconnect the player not following the instructions in
Windows Me、Windows 2000 and Windows XP, it may cause damage to the
data or file, even causes the player can not work. If it occurs, please refer
to How to Refresh the Firmware to fix this problem and make the player
back to normal.
Page8 Index
Page 12

User’s Manual/English/ Version 1.0/ Hypersound 128
Chapter 4 Download Music
The player can be used as one mobile data storage device. It needs no special
software to upload, download and manage the music and files. Just using the copy,
paste, delete and etc. commands of your Operation System such as Windows and
Macintosh OS, it is very easy and fast by clicking the mouse.
To Download Music to the Player, connect the player with PC, then:
4-1 For Windows
Step 1. Select the music you want to download to the player by clicking on the
file icon
(If you want to choose more than one music, press and hold the Ctrl or
Shift key when you clicking)
Step 2. Right-click on the files, a menu appears. Click Copy
Step 3. Double-click on the Removable Disk to open the drive. The Removable
Disk window appears.
Step 4. Right-click on the Removable Disk window and click Paste in the menu.
Step 5. Starts to copy the files. The LCD of the player displays ‘WRITING’ and
flashing.
Step 6. Before disconnect the player, make sure the LCD of the player displays
“READY”. If you are using Windows Me, Windows 2000 or Windows XP,
please follow the Safely Remove Instructions to disconnect the player.
4-2 For Macintosh OS
Step 1. Select some WMA/MP3 music files.
Step 2. Drag and drop the files onto the Untitled Disk icon on the Desktop.
Step 3. Starts to copy the files. The LCD of the player displays ‘WRITING’ and
flashing.
Step 4. Before disconnect the player, make sure the LCD of the player displays
“READY”.
DO NOT DISCONNECT THE CONNECTION WHILE THE PLAYER
LCD DISPLAYS [READING] AND/OR [WRITING]. IT MAY
CAUSE SERIOUS DAMAGES TO YOUR DATA AND THE
PLAYER.
Page9 Index
Page 13

User’s Manual/English/ Version 1.0/ Hypersound 128
Chapter 5 Starts to play
5-1 Getting Started
Power ON
Power ON:Press the Power On button to turn on the player.
VOL
VOL
VOL
VOL
VOL
VOL
VOL
VOL
I LOVE NAPA,I ’M HERE WAITING
I LOVE NAPA,I ’M HERE WAITING
I LOVE NAPA,I ’M HERE WAITING
I LOVE NAPA,I ’M HERE WAITING
Music / Voice / Record
If you like, you can switch to playback voice memos or start to record voice. Just
press the Operation Button and select voice or record in the menu list.
m
Music
Music
Voice
Voice
Settings
Settings
Erase Files
Erase Files
m
ROCK
ROCK
ROCK
ROCK
ROCK
ROCK
ROCK
ROCK
Song: 01 / 21
Song: 01 / 21
Song: 01 / 21
Song: 01 / 21
Song: 01 / 21
Song: 01 / 21
Song: 01 / 21
Song: 01 / 21
I AM HERE WAITING
I AM HERE WAITING
I AM HERE WAITING
I AM HERE WAITING
Richard Marx
Richard Marx
Richard Marx
Richard Marx
Richard Marx
Richard Marx
Richard Marx
Richard Marx
0:00 / 0:00
0:00 / 0:00
0:00 / 0:00
00:00 / 04:32
0:00 / 0:00
0:00 / 0:00
0:00 / 0:00
00:00 / 04:32
Music
Music
Voice
Voice
Settings
Settings
Erase Files
Erase Files
m
m
m
m
m
m
m
m
m
m
About
About
Record
Record
Exit
Exit
m
m
No Files Present
If there is no any WMA/MP3 files found in the player, the LCD displays “No Files
Present” when you want to play music.
No Files
If there is no any recorded voice files found in the player, the LCD displays “No
Files” when you want to listen to voice memos.
Power OFF
Power OFF: To turn off the player, keep on pressing the Stop button until the Shut
Down Bar has finished.
Continue Holding To
Continue Holding To
Power Off
Power Off
To turn off the player, must press the Stop button until the Shut Down Bar has
finished. Otherwise the player returns to the status before press the Stop
button.
Page10 Index
Page 14

User’s Manual/English/ Version 1.0/ Hypersound 128
5-2 LCD Display and Menu
The Menu
Remark
Music Go to Play Music
Voice Go to Play Voice
Settings Adjust the player settings
Eq
Play Mode
Normal Normal effect
Rock Rock music effect
Jazz Jazz music effect
Classical Classical music effect
Pop Pop music effect
Normal No repeat
Repeat Track Play current music repeatedly
Repeat All Play all music repeatedly
Shuffle Random play music and stop
Shuffle Repeat Random play music repeatedly
Contrast Adjust the LCD screen contrast value
Back Light
Disable The backlight is off.
3 seconds The backlight time
5 seconds The backlight time
10 seconds The backlight time
Power
Savings
Disable No power saving function.
1 min The player shuts off time (How long the player
is idle)
2 min The player shuts off time (How long the player
is idle)
5 min The player shuts off time (How long the player
is idle)
10 min The player shuts off time (How long the player
is idle)
Exit Exit to Menu screen
Erase
Files
Music Choose one music to erase.
Voice Choose one voice memo to erase.
Exit Exit to Menu screen.
About Displays the Firmware version, Media capacity
and Free space.
Record Go to Record Voice memo.
Exit Exit to previous mode.
Page11 Index
Page 15

User’s Manual/English/ Version 1.0/ Hypersound 128
The LCD
1. Battery indicator
2. Hold key indicator
10
3. Play Modes indicator
4. A-B Repeat indicator
9
5. ID3 Tag display
6. Trac k Nu mbe r
7. M: Music Mode; V: Voice Mode
8. EQ indicator
9. Volume level indicator
10. Player Status indicator
11. Elapsed Time/Track Time
VOL
VOL
8
ROCK
1
1
A-B
S A-B
I AM HERE WAITING
Richard Marx
1:31 / 4:42
01:31 / 04:32
ROCK
Song 01 / 21
Song 01 / 21
’M HERE WAITING
Richard Marx
11
1 2 34
7
m
m
5-3 Play MP3/WMA Music
Select one song
After turn on the player, shifts up/down the Operation button to select one song to
listen.
Play MP3/WMA Music
Press Play button to start playback.
VOL
VOL
VOL
VOL
I LOVE NAPA,I ’M HERE WAITING
I LOVE NAPA,I ’M HERE WAITING
I LOVE NAPA,I ’M HERE WAITING
I AM HERE WAITING
Pause the playback
To pause the playback, press the Play button while playback. To continue the
playback, press the Play button again.
Fast Forward or Backward Skip in one song
Shift up/down and holding the Operation button to fast skip in current playback
song.
A-B Repeat
(Repeat a selected section of the music or voice memo continuously)
VOL
VOL
VOL
VOL
VOL
VOL
VOL
VOL
I LOVE NAPA,I ’ M HERE WAITING
I LOVE NAPA,I ’ M HERE WAITING
I LOVE NAPA,I ’ M HERE WAITING
I LOVE NAPA,I ’ M HERE WAITING
I LOVE NAPA,I ’ M HERE WAITING
I LOVE NAPA,I ’ M HERE WAITING
While playback music or voice memo, Press this button to mark the repeat point
where you want the section to start, and press this button again where you want
ROCK
ROCK
ROCK
ROCK
Song 01 / 21
Song: 01 / 21
Song 01 / 21
Song: 01 / 21
Richard Marx
Richard Marx
Richard Marx
Richard Marx
1:31 / 4:42
1:31 / 4:42
1:31 / 4:42
01:31 /04:32
ROCK
ROCK
ROCK
ROCK
ROCK
ROCK
ROCK
ROCK
A-
A-
A-
A-
A-
A-
A-
A-
Song 01 / 21
Song: 1 / 21
Song 01 / 21
Song: 1 / 21
Song 01 / 21
Song: 1 / 21
Song 01 / 21
Song: 1 / 21
I AM HERE WAITING
I AM HERE WAITING
Richard Marx
Richard Marx
Richard Marx
Richard Marx
Richard Marx
Richard Marx
Richard Marx
Richard Marx
1:31 / 4:42
1:31 / 4:42
1:31 / 4:42
01:31 / 04:42
1:31 / 4:42
1:31 / 4:42
1:31 / 4:42
01:31 / 04:42
m
m
m
m
m
m
m
m
m
m
m
m
6
5
Page12 Index
Page 16

User’s Manual/English/ Version 1.0/ Hypersound 128
the section to end. The player starts to playback the selected section from start to
end repeatedly.
To cancel the A-B Repeat, press the A-B repeat button again. The A-B repeat
indicator disappears from the LCD and the music continues playing from the point.
File Name Display
When you select one song, the file name is displayed on LCD. And the file name will
scroll from left to right if the file name is longer than the display.
ID3 Tag Display
If the music contains ID3 tag which marks the music title and artist name, the LCD
of the player displays them. The player supports English.
And the display will scroll from left to right if it is longer than the display.
5-4 Record Voice Memos
Start Record
Press and hold the A-B repeat/REC button to start voice record.
You can also activate this function from the menu:
In menu list, select Record and enter. The player is ready to record. To start record,
press A-B Repeat button. Voice Record starts.
VOL
Stop Record
Press Stop button to stop the record. The voice memo has been saved as one file
named VXXX.WAV in Voice folder.
Notice: The LCD displays MEMORY FULL when there has been no sufficient
memory space to record more. The Record stops.
If this happens, please remove some files in the player to PC, or erase
some music or voice memos which you think not useful anymore, and
restart the recording.
VOL
/VOICE/V023.WAV
/VOICE/V023.WAV
06:31:45
06:31:45
00:00:01
00:00:01
v
v
5-5 Playback voice memos
The operation is almost same as playback music. Select Voice in menu and enter
voice mode. You can select one memo to listen by shifting the Operation button.
Press Play button to playback the voice memo.
Page13 Index
Page 17

User’s Manual/English/ Version 1.0/ Hypersound 128
5-6 Advanced Setting
Setting the Menu
m
Music
Music
Voice
Voice
Settings
Settings
Erase Files
Erase Files
m
Press the Operation button to enter menu list. Shift the Operation button and select
Setting. Press the button to enter Setting. There are several advanced setting
options.
1、Equalizer Setting
Select Equalizer in the Setting list and enter.
The Equalizer (EQ) setting is to adjust the music playback effect. There are 5 kinds
of EQ preset in the player: Normal, Rock, Jazz, Classical, and Pop.
Shift the Operation to select one EQ .The selected equalizer activates when you
select.
Press and hold the Operation button to exit the menu.
2、Play Modes Setting
In the Setting list, Select Play Modes and enter.
Normal
Normal
Repeat Track
Repeat Track
Repeat All
Repeat All
Shuffle
Shuffle
Shuffle Repeat
Shuffle Repeat
The Play Modes List appears. Shift the Operation button to select one play mode.
Once you select one play mode, it has been effected without to press the Operation
button.
Press and hold the Operation button to exit the menu.
3、Adjust LCD Contrast
In the Setting list, Select Contrast and enter.
Contrast
Contrast
Shift the Operation button to adjust the contrast level.
m
m
m
m
Eq
Eq
Play Mode
Play Mode
Backlight
Backlight
Contrast
Contrast
Settings
Settings
m
m
Page14 Index
Page 18

User’s Manual/English/ Version 1.0/ Hypersound 128
4、Back Light
In the Setting list, Select Back Light and enter.
Disable
Shift the Operation button to select turn on or turn off the back light. Press the
Operation button to confirm.
5、Power Saving
In the Setting list, Select Power Savings and enter.
The Power Saving setting is to set how long after the player is idle to shut down the
player automatically.
Disable
1 min
3 seconds
2 mins
5 seconds
seconds
5 mins
10
10 mins
Disable
Disable
1 min
1 min
2 mins
2 mins
5 mins
5 mins
10 mins
10 mins
m
m
m
m
5-7 Erase files
Warning: The file can not be recovered after erased.
Step 1. Cease the playback or recording when you start to erase files.
Step 2. Press the Operation button to enter menu. Select Erase Files and
enter. There are two options to select in Erase Files screen.
Step 3. To erase music files, select Music and enter. To erase voice memos,
select Voice and enter.
m
m
Erase files
Erase files
Music
Music
Music
Voice
Voice
Exit
Exit
Music
Voice
Voice
Exit
Exit
Erase files
Erase files
Page15 Index
m
m
Page 19

User’s Manual/English/ Version 1.0/ Hypersound 128
Step 4. You are asking if you are sure to erase the listed music file or voice
memo. The file name is listed
on the screen to help you
decide. The selected answer
is No by default. If it is not
the one to erase, press the
Operation button. Another
file is listed on the screen and
you are asking if to erase this
file again.
Step 5. If you are sure to erase the listed file, shift the Operation button to
select Yes. Then press the Operation button to confirm.
Step 6. The file is erased. Another file is listed on the screen and you are
asking if to erase this file.
Step 7. When you have finished erasing the file, the player will automatically
exit to Erase Files screen.
Step 8. Select Exit and enter to exit to menu list.
5-8 About
Select About in menu list and enter.
Here you can read information of the firmware version, built-in memory size and
free memory size.
Press any key to exit to menu list screen.
5-9 Reset
During the course of using player, some unexpected reasons (static or un-correctly
operation etc.) may cause the system halted of the player. If above mentioned
situations take place, please use one thin and solid stick and press on the Reset
button inside the Reset hole on the back of the player.
abnormal and can try to reset.
EXAMPLE Ver2.105
Int Media 128M
Free XXM
About
About
Hypersound 128
Ver 1.000
Int Media 128 MB
Free xxxxx KB
Are you sure you want to
Are you sure you want to
Are you sure you want to
Are you sure you want to
delete the file
delete the file
delete the file
delete the file
I Love NAPA,I’m here waiting
I Love NAPA,I’m here waiting
I’m here waiting
I’m here waiting
Yes No
Yes No
Yes No
Yes No
m
m
Any reason causes the player
Page16 Index
Page 20

User’s Manual/English/ Version 1.0/ Hypersound 128
Chapter 6 Software Utility
6-1 Software Utility
Upon the driver installation is completed, two
software utilities will be installed in PC. Customer can
use the utilities to format or upgrade the unit.
Start
>Program> Yakumo H.S 128 MP3 Player
Connect the player to computer and click the
corresponding program to run:
6-2 Player Format
For Windows98:
Click on Start button, you can format the player
storage.
Warning: Files can not be recovery after been
formatted! Please backup useful files before format.
If don’t want to format now, click on Close button to
exit. If want to format, click on Start button to start
format. After it is finished, click on Close button to exit.
Before click on Start button, there is one “Quick
format” option.
Quick format check box:(Quick format)
Selected(default) : Quick format the player storage,
not scan for bad sectors.
Not Selected: Full format the player storage,
scanning the storage for bad sectors.
For Windows 2000/XP
(As the right Fig. )
Warning: Files can not be recovery after been
formatted! Please backup useful files before format.
Media Format : Quick format the player storage. If
don’t want to format now, click on Close button to exit.
If want to format, click on Start button to start format.
After it is finished, click on Close button to exit.
Page17 Index
Page 21

User’s Manual/English/ Version 1.0/ Hypersound 128
6-3 Player Update
The firmware in the player will be able to update
through Player Update utility running on your PC.
To update the firmware, user needs to run the MP3
Player Update utility from:
Start
->Program-> Yakumo H.S 128 MP3 Player
Check the Current Firmware Version and Upgrade
Firmware Version. If you are sure it is the right
version to update, click on Start button. The
firmware is been updated to the player. Please wait
until it is finished.
Click Close button to exit.
About the Quick download option
Selected (default): Update the firmware only
Not selected: Update the firmware and format the storage. Please backup
useful files if you want to update without Quick download.
How to Refresh the Firmware
Notice:
The firmware of the player may be corrupted if under illegal operations and
special weather conditions. The player can not work if the firmware is
corrupted. Please refresh the firmware to fix this problem.
How To Refresh The Firmware
1) Press and hold the Play button of the player;
2) Keeps on pressing the Play button and connect the player to your computer.
Release the Play button after 5 seconds.
3) Click and run the Player Update utility. Click on Quick download option to let it
be Not Selected status. Then click on Start button.
4) After it is completed, click on Close button to exit.
5) For the OS above Windows98, you can now click and run the Player Format
Utility. You can now Full Format the storage by click on Start button under
Media Recovery mode. It is one optional operation; helps check and fix the
storage errors.
6) When the Refresh is completed, you still can not find the Removable Disk drive
in My Computer. Disconnect the player and reconnect to your computer.
7) You can download music to the player.
Waning: DO NOT DISCONNECT THE PLAYER WHILE FORMATING
AND/OR UPDATING. IT MAY CAUSE SEVERE DAMAGE TO THE PLAYER!
Page18 Index
Page 22

User’s Manual/English/ Version1.0/ Hypersound128
Appendix 1 Cautions
Handle the player
z No altering or remodeling.
This can cause malfunctioning.
z No dropping or strong impacts
This may damage the unit.
z Locations to be avoided
Avoid using or storing the unit in following locations since they can cause
malfunctioning.
1. Bathrooms and other moisture-prone places
2. Warehouses and other dusty place.
3. Very hot places near heating appliances, etc.
z Avoid keeping the unit in places with high humidity, strong
magnetic field, or near high heat source(s).
z Do not leave the unit exposed to direct sunlight for long periods of time
Precautions for Listening with the Earphones
z Do not play your earphones at a high volume. Hearing experts advise
against continuous extended play.
z If you experience a ringing in your ears, reduce volume or discontinue use.
z Do not use while operating a motorized vehicle. It may create a traffic
hazard and is illegal in many areas.
z You should use extreme caution or temporarily discontinue use in
potentially hazardous situations.
z Don’t turn up the volume so high that you can’t hear what’s around you.
z Discontinue use if you experience discomfort with the headphones or
earphones. Continued use may cause rashes or other allergic reactions.
z Static may cause player appear unusual situations, such as system halted
etc. If above-mentioned situations take place, reset player can be solved.
Appendix I Index
Page 23

User’s Manual/English/ Version1.0/ Hypersound128
Appendix 2 Specifications
Size (W x H x D) (Approximation)
About 55 x 78 x 16 mm
Memory
Internal Memory (Built-in the main unit)
128MB
No Memory Expansion Slot
Interface
USB Rev. 1.1
Power
Built-in Rechargeable Battery
Battery continuous playing time > 20 hours
Re-Charging via USB Port
Equalizer
Normal, Rock, Classic, Pop, Jazz
Display
128 x 64 dots Dot-Matrix LCD
EL Blue Back-Light
Button & Switch
One Jog-Dial type 3-way key (Menu / Next / Previous / Select)
Power On/ Play / Pause button
Stop / Power Off button
A-B / REC. button
Volume + button
Volume – button
Hold Switch
Processor
65 MIPS DSP
Audio Playback
Windows Media Audio (WMA) decode
MPEG Audio Layer 3 (MP3) decode
Voice Recording
IMA-ADPCM encoding.
About 8 hours recording @128MB Memory.
Signal to Noise Ratio
86 dB
Frequency Response
20 Hz ~ 20 KHz
Output
5mW (each output)
Total Harmonic Distortion Output
< 0.1%
Ports
Mini-USB Port
Phone Out
MIC-IN
Firmware
Flash based. User upgradeable.
Appendix II Index
Page 24

User’s Manual/English/ Version1.0/ Hypersound128
Appendix 3 FAQ
1, Why am I unable to install the installation software to my
operating system?
Please note that Windows95 is unable to support USB interface properly. Please
upgrade your system to Windows98 (Version 2.0, 4.10.2222 A), 2000, ME, or
XP.
Please note that there is no driver required for PC running Windows2000, ME,
and XP (Plug and Play).
2, Why can't I turn off the player while it is connecting with my
PC?
First of all, disconnect the player with your PC. Under stop mode and without
any key operations, the player will power off automatically after 1, 2, 5 or 10
minutes, depends on the setting of Power Saving of the player.
3, What can I do if I encountered a download failure to the
internal memory?
Be sure the power is enough for writing mode.
Ensure your operating system has recognized the player as a Removable Drive.
Ensure your PC meets the minimum system requirements for operating the
player.
Check the connection between the player and PC.
Re-format the internal memory with the player’s utility and download again.
Send to repair if failure still exists.
4, Why the player’s utility window cannot show-up sometimes?
The player’s utility only works on connection with PC and the player was power
on at first. The correct connecting procedures are: turn on the player and plug
in both sides of USB cable to the player and PC. It is not recommended to
connect both player and PC first and then power on the player, which will fail to
start up the player’s utility window.
5, Why the files cannot be transferred or played back on the unit?
The files may be corrupted. You have to initialize the internal memory by doing
the following procedure:
1) Turn off the power of the player.
2) Power on the player. Press MENU once, select Erase Files then press MENU again.
The player enters into erase status and the memory is ready to be initialized.
3) Erase all the files on the memory.
4) Exit the Erase menu, and you now should be able to transfer MP3 files into the
unit and play again.
Appendix III Index
Page 25

User’s Manual/English/ Version1.0/ Hypersound128
6, Why the LCD cannot display the details of the tracks?
Please ensure the tracks are encoded with their ID3 tags being created as well.
You may MP3 playback software such as Winamp to edit the ID3 tags of the tracks
and the information must be recorded either in English or Traditional Chinese.
7, How long should I charge the battery before I use the player
for the first time?
Recharge the battery over 24 hours before the first time use the player.
8, What are the VBR or CBR supported by the player?
The player is capable of supporting the content encoded with VBR (Variable Bit
Rate) from 32, and up to 320 Kbps per MP3 track, or CBR (Constant Bit Rate)
48Kbps. It will read MP3 tracks that are sampled at 32khz, 44.1khz or 48khz.
The playback possibility of 32, 40, 48, 56, 64, 80, 96, 112, 128, 160, 192,224,
256 and 320 Kbps is allowed per MP3 track.
9, Why does distortion come out during playback?
This maybe caused by low battery or temporary interrupt from outsides. Or, the
content was bad encoded.
10, Why does the playback quality is bad?
Please playback the same content on PC. Download again if it playback well with
PC. If the problem is still there, please re-format the memory with the player’s
utility to clear the memory and try to download again. Or, it maybe caused by
bad encoded or the source is bad quality either. Please close any temporary
programs before encoding to attend good quality result.
11, Why are the buttons not functioning on the player?
Please check if Hold switch slides to down or not. While the Hold switch is down,
all the buttons will not be working at all.
12, Why do I hear nothing after press the Play button?
Please check the Hold switch is on or off. It should be off.
Check that files have been stored in the built-in flash memory. Press the MENU
button to view the information of internal memory (About) and press the Play
button to try again.
Check the earphone connection or replace with another one.
Check the volume level and see if it has been set too low.
File format maybe incorrect. Only MP3 and WMA files can be played.
Ensure the MP3 or WMA files are not stored in folder(s) or directories.
Please send to repair if failure still exists.
13, Why does the LCD show blank but earphone output is still well?
Please send the player to your local product service centre. The LCD becomes
faulty substantially.
Appendix IV Index
Page 26

User’s Manual/English/ Version1.0/ Hypersound128
Appendix 4 Make your own Opening Screen
Step 1. Run LogoMaker.exe from CD or hard drive.
Step 2. Then, if you are going to draw one opening screen manually, please skip to Step 5. If you are going to
convert a photo to opening screen, please continue from Step 3.
Step 3. Open source image (Click File-> Open image, then select one image file)
LogoMaker supports 3 types of image file: BMP, GIF and ICO.
Step 4. Configure the convert options and convert the image to opening screen frames
Because the source images not fit on the LCD display, so, it is necessary to configure some options to get the
best display.
Option Remark
Center Align to center
Horizontally Flipped Flip along the horizontal axis
Vertically Flipped Flip along the vertical axis
Appendix V Index
Page 27

User’s Manual/English/ Version1.0/ Hypersound128
Inverted Invert the color
Resize Resize the source image
Resize
Options
Rotation 90 deg. Rotate source image by 90-degrees clockwise
Left window will demo what the opening screen will be. When you have finished configure, click Convert Single
or Convert All.
Maintain original aspect ratio Resize and maintain original aspect ratio of source image
LCD aspect ratio Resize in LCD aspect ratio
Best fit LCD screen Resize by program automatically
Notice
“Convert Single” and “Convert All”
“Convert Single” is to convert the image to current frame.
“Convert All” is to convert the image to all frames. So, if the source image is a GIF file which contains
multi-frame, “Convert All” will convert all frames in one time. But “Convert All” will erase all existing frames.
Please be careful when using “Convert All”.
Appendix VI Index
Page 28

User’s Manual/English/ Version1.0/ Hypersound128
Step 5. Modify frame / set up display options of the opening screen frames
Option Function Default Available value
Frame picture edit / modify tools:
Button Name Function
Pen tool / Eraser tool
Move tool Move the selection
Move and copy tool Move the copy of selection
Resize tool
Auto size tool
Step 6. Save the opening screen file to the player(format the player first)
Clear screen before display current frame. No clear No Clear / Clear
Setup current frame display time 0.1 sec. 0 ~ 3 sec.
Setup number of display times 1 (No repeat) 1 ~ 256 times
Clicking the left button, it is a pen; clicking the right mouse, the mouse icon
will change to an eraser.
Enable this size tool so you can change the visible area of the frame. The
visible area is the blue line block.
Click once, LogoMaker will reduce to minimize visible area of current frame.
Click again, LogoMaker will resize the visible area to full size.
After you have finished the file, connect the player. Please format
the player first before save the opening screen file to the player
(the removable disk in “My Computer”). Please do not modify the
default filename (Mylogo.dat), or the player will not be able to
recognize the file (until its filename is Mylogo.dat).
Close LogoMaker.
Then stop the player and disconnect the player.
The player will power on automatically and use the new opening
screen.
Appendix VII Index
Page 29

User’s Manual/English/ Version1.0/ Hypersound128
FAQ & Troubleshooting
1) How can I make an animation type opening screen logo?
Answer: It is easy if you have one GIF file which contains animation. Open one gif file, setup convert options, then
convert the file into opening screen frames.
Note: Some gif type files have only one frame, so they will be converted to a one-frame opening screen only.
2) How can I preview the new opening screen logo?
Answer: If it is a one-frame opening screen, it will be always displays in the preview windows. But if it is animation
type, please click “Play -> Demo Play” from menu.
3) Can I “undo” my operation?
Answer: Sorry, you can not undo any operations.
4) It seems that the logo preview does not demo with Loop setting?
Answer: The loop setting will take effect ONLY when it displays on player LCD.
5) Why I can not stop the player after I save logo file to the player in LogoMaker?
Answer: Please close LogoMaker after you save the logo file. Or you can not stop the player in some cases.
6) After download, if I want to skip the opening screen, what can I do?
Answer: Press any key when the player is turning on. The player will skip the opening screen for this time. If you
don’t want this opening screen any longer, just erase the file from the player. The opening screen will be back to
default.
7) The player hangs after I download Mylogo.dat to the player?
Answer: Please full format the player and download the file again. If your player can not power on, you need have
to refresh the firmware (please ref. User Manual of the player).
8) The player opening screen is still the default photo, but I have downloaded the logo to the player.
Answer: There maybe several reasons: 1, Please stop the device before disconnect (WinMe/2K/XP) after download
the logo. Otherwise the logo file may not download to the player. 2. The opening screen file must be download to
“Root“ directory of the player, and the file name must be “Mylogo.dat” (as default). 3. Please check the player
firmware if it supports Personalize Opening Screen feature.
Appendix VIII Index
Page 30

 Loading...