

Page 1
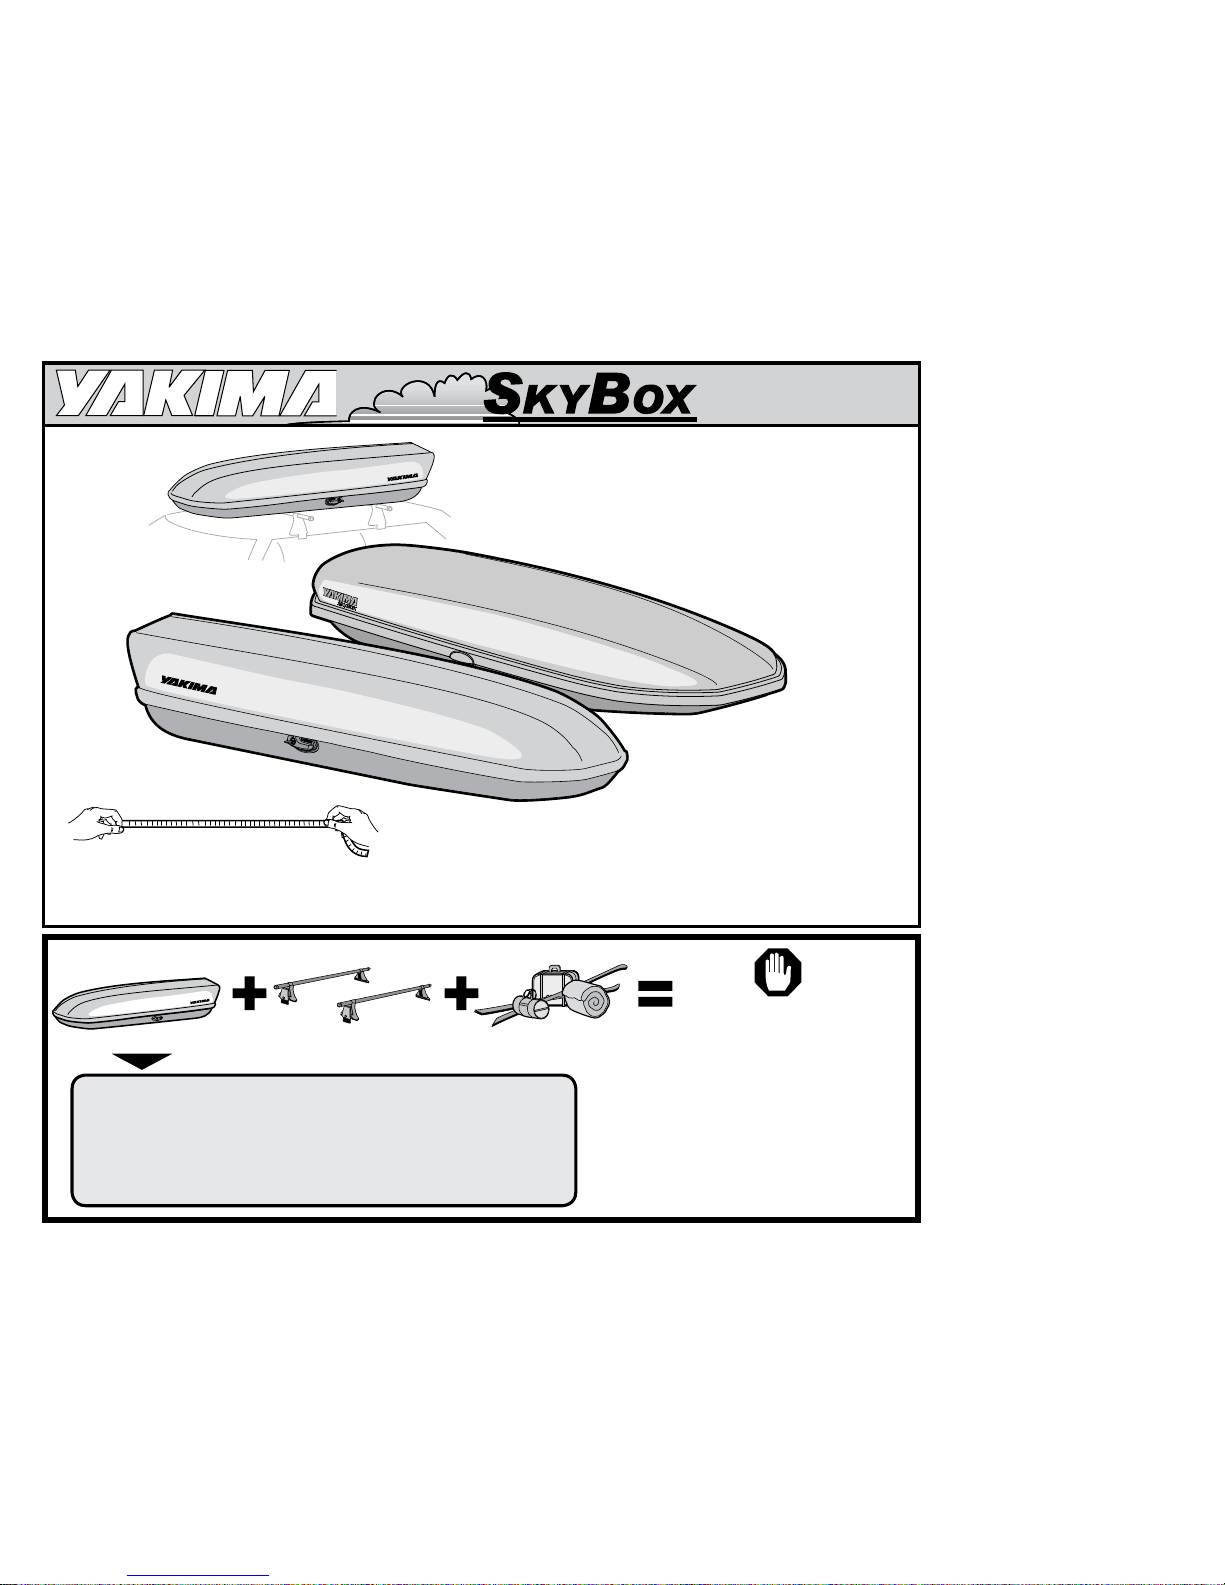
SkyBox 12............................................41 lbs. / 19 kg
SkyBox 16............................................47 lbs. / 21 kg
SkyBox 18............................................52 lbs. / 24 kg
SkyBox Lo............................................52 lbs. / 24 kg
SkyBox 21............................................62 lbs. / 28 kg
NO PRE-ASSEMBLY REQUIRED
MaxiMuM l
oad
liMiTS:
box contents
Y
ou may need a
measuring tape or ruler.
box weight
do NoT ExCEEd
YouR RaCK’S
WEiGHT liMiT!
Check with your Y
AKIMA
dealer or visit “Choose my
Rack” at yakima.com for
your vehicle’s load limits.
SKYBOX (1X)
rack weight
(if appropriate)
Page 2
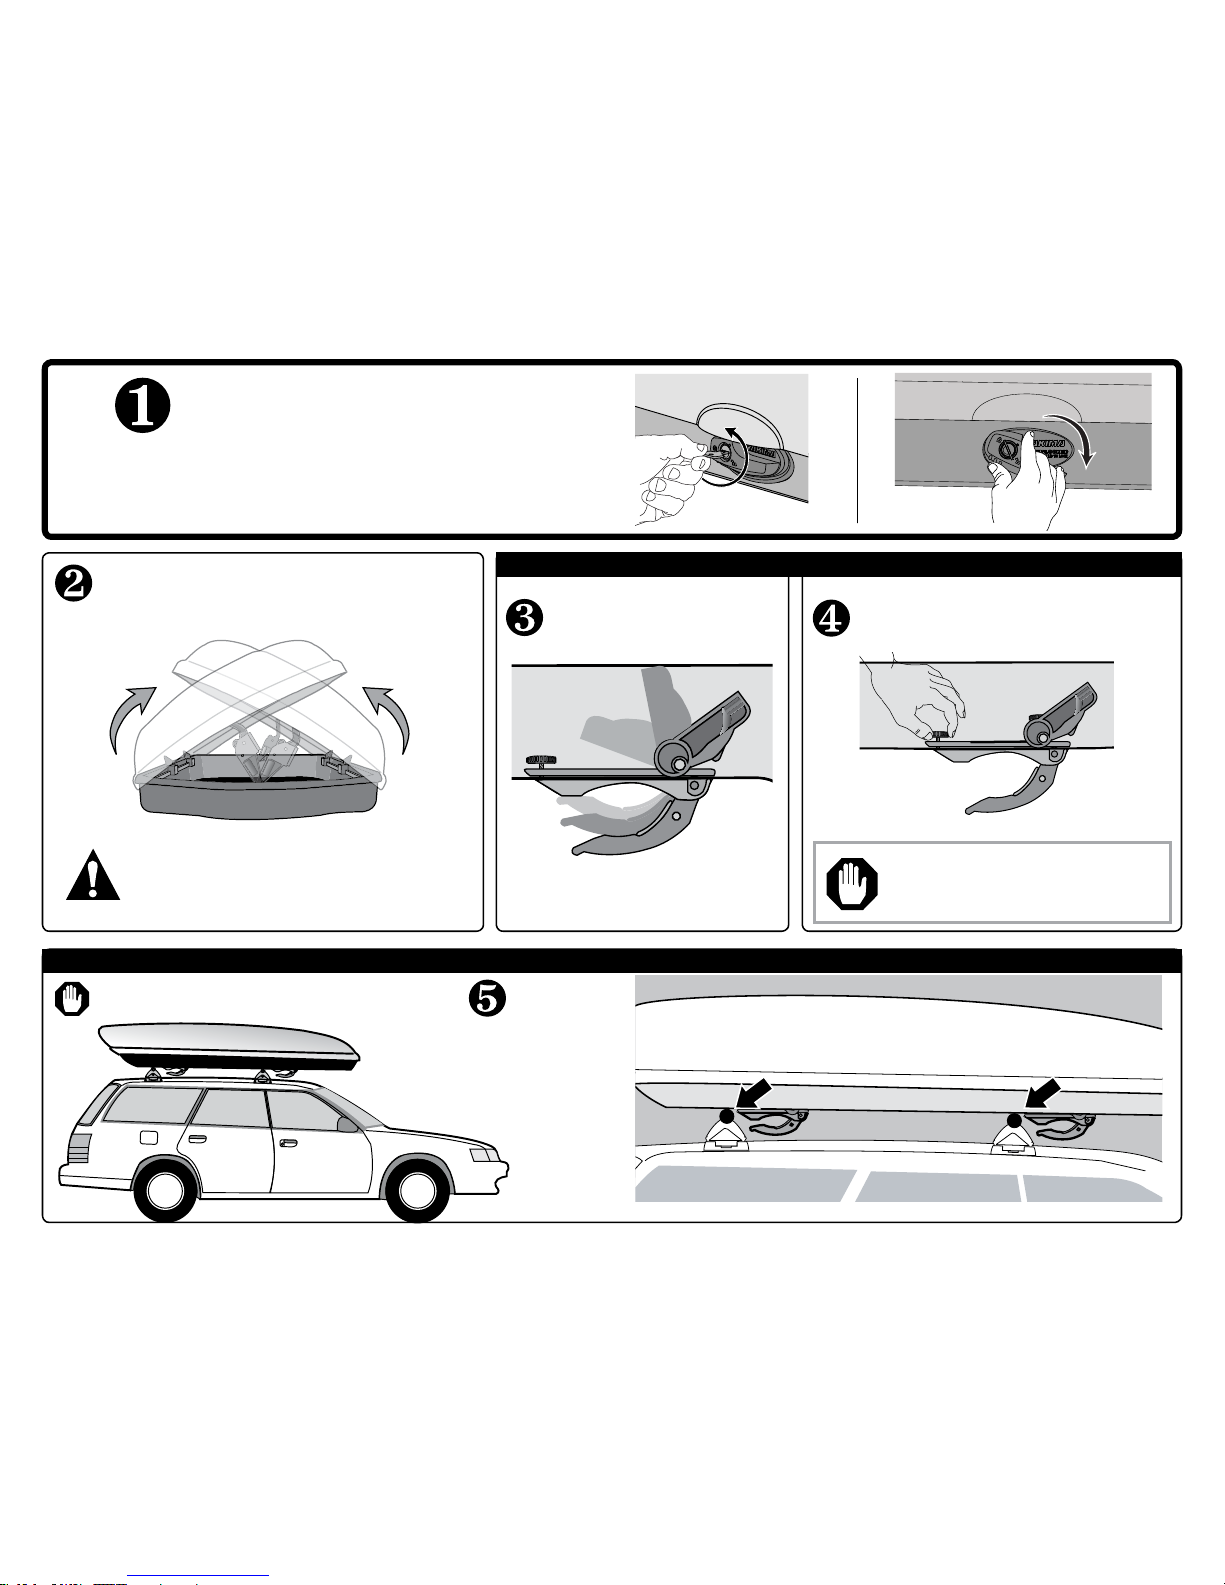
If your vehicle has a fairing, you must
remove it if there is any interference.
Open levers all the way
to lower clamps.
Place box on vehicle with
clamps in front of crossbars.
A friend could help with this.
Loosen track thumb wheel 1/2 turn.
Do not remove wheel.
iNSidE THE Box:
load CaRGo Box oNTo VEHiClE:
REMOVING THUMBWHEELS WILL
CAUSE DISASSEMBLY OF LEVER/
CLAMP MECHANISM.
Lid will open both ways for ease
of installation.
• Latches must be engaged before
opening other side.
• Box should only be opened one
side at a time.
opEN GEaR Box.
• Insert key. Turn counter clock-wise to unlock.
• Rotate handle (handle will not rotate if box is locked).
• Lift to open.
Page 3
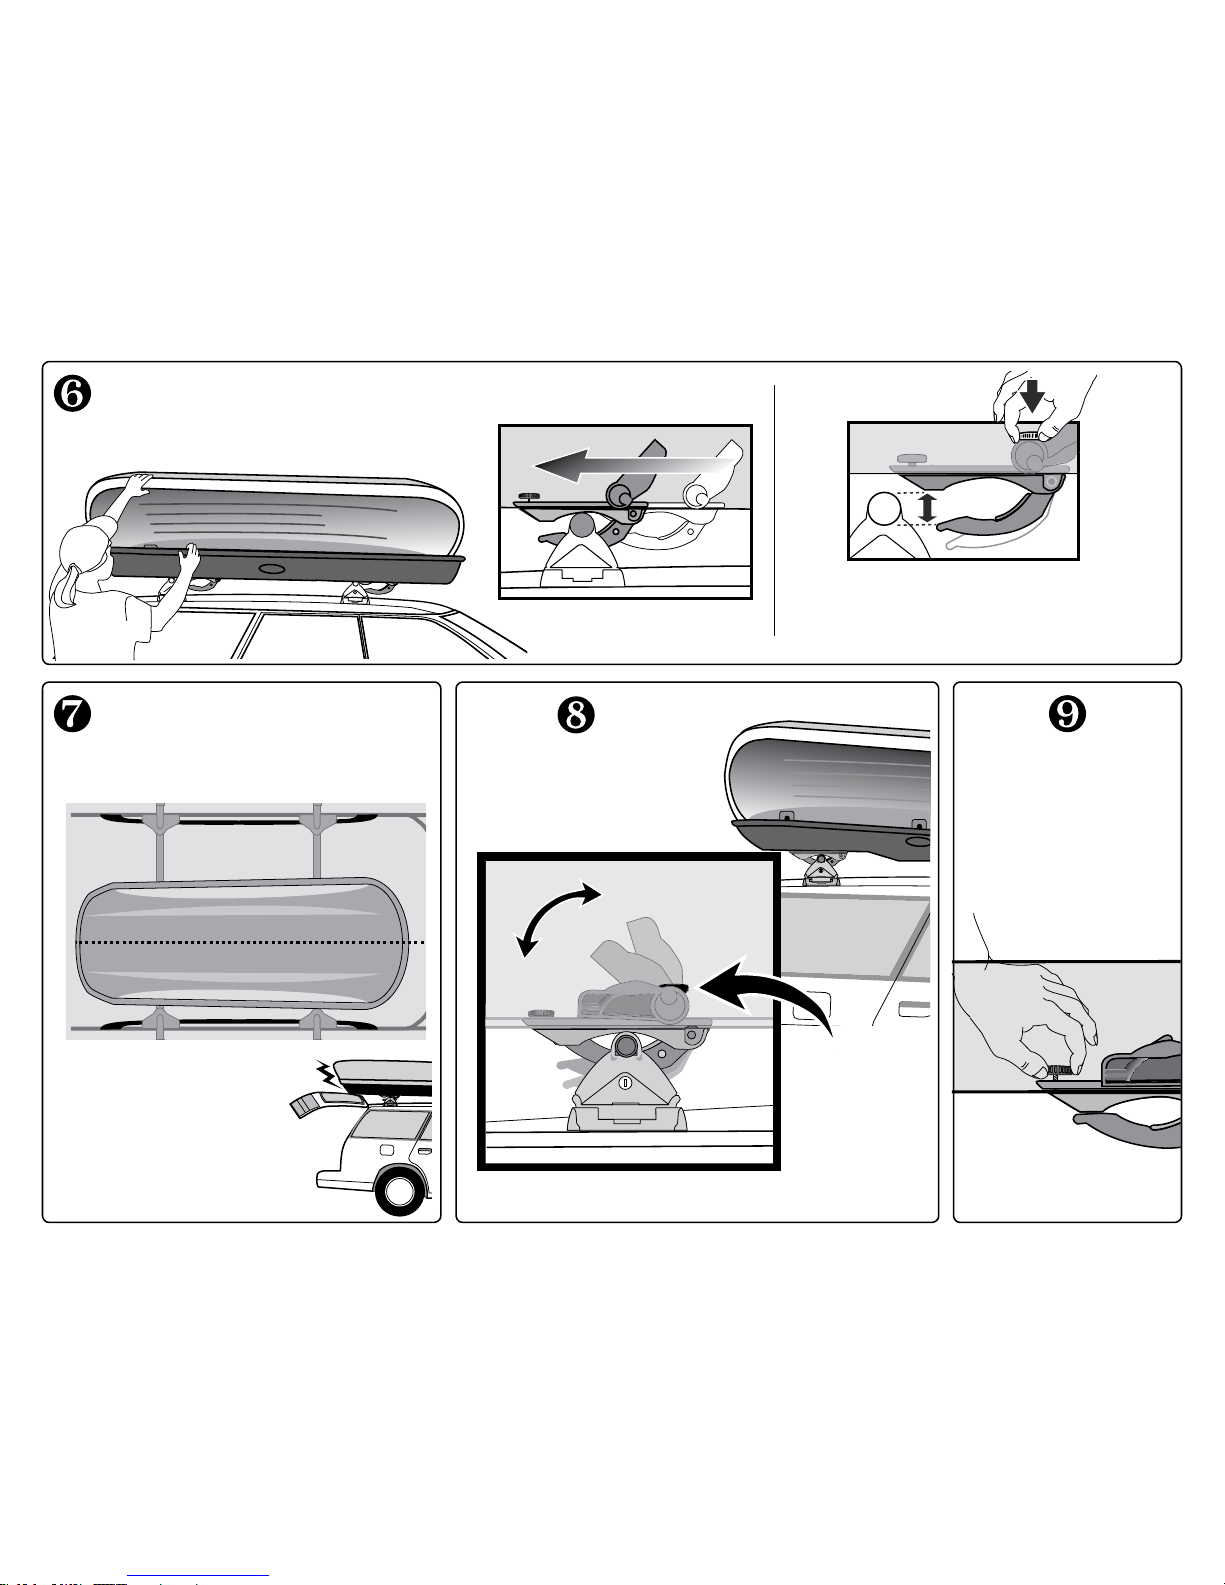
Adjust box position, checking for
good alignment.
Always position box to avoid
interference with rear hatch or sunroof.
Tighten clamp
thumb wheels
until the levers
close with firm
resistance.
Slide clamps along tracks (inside box) to
engage crossbars.
Close levers to
engage clamps.
open
closed
TIGHTEN ALL
THUMB WHEELS.
• Check clamp opening for crossbar clearance.
• Loosen clamp thumb wheel if necessary.
On some vehicles,
hatch interference is
unavoidable. Use caution
when opening your hatch.
Open lid to gain access to levers.
Page 4
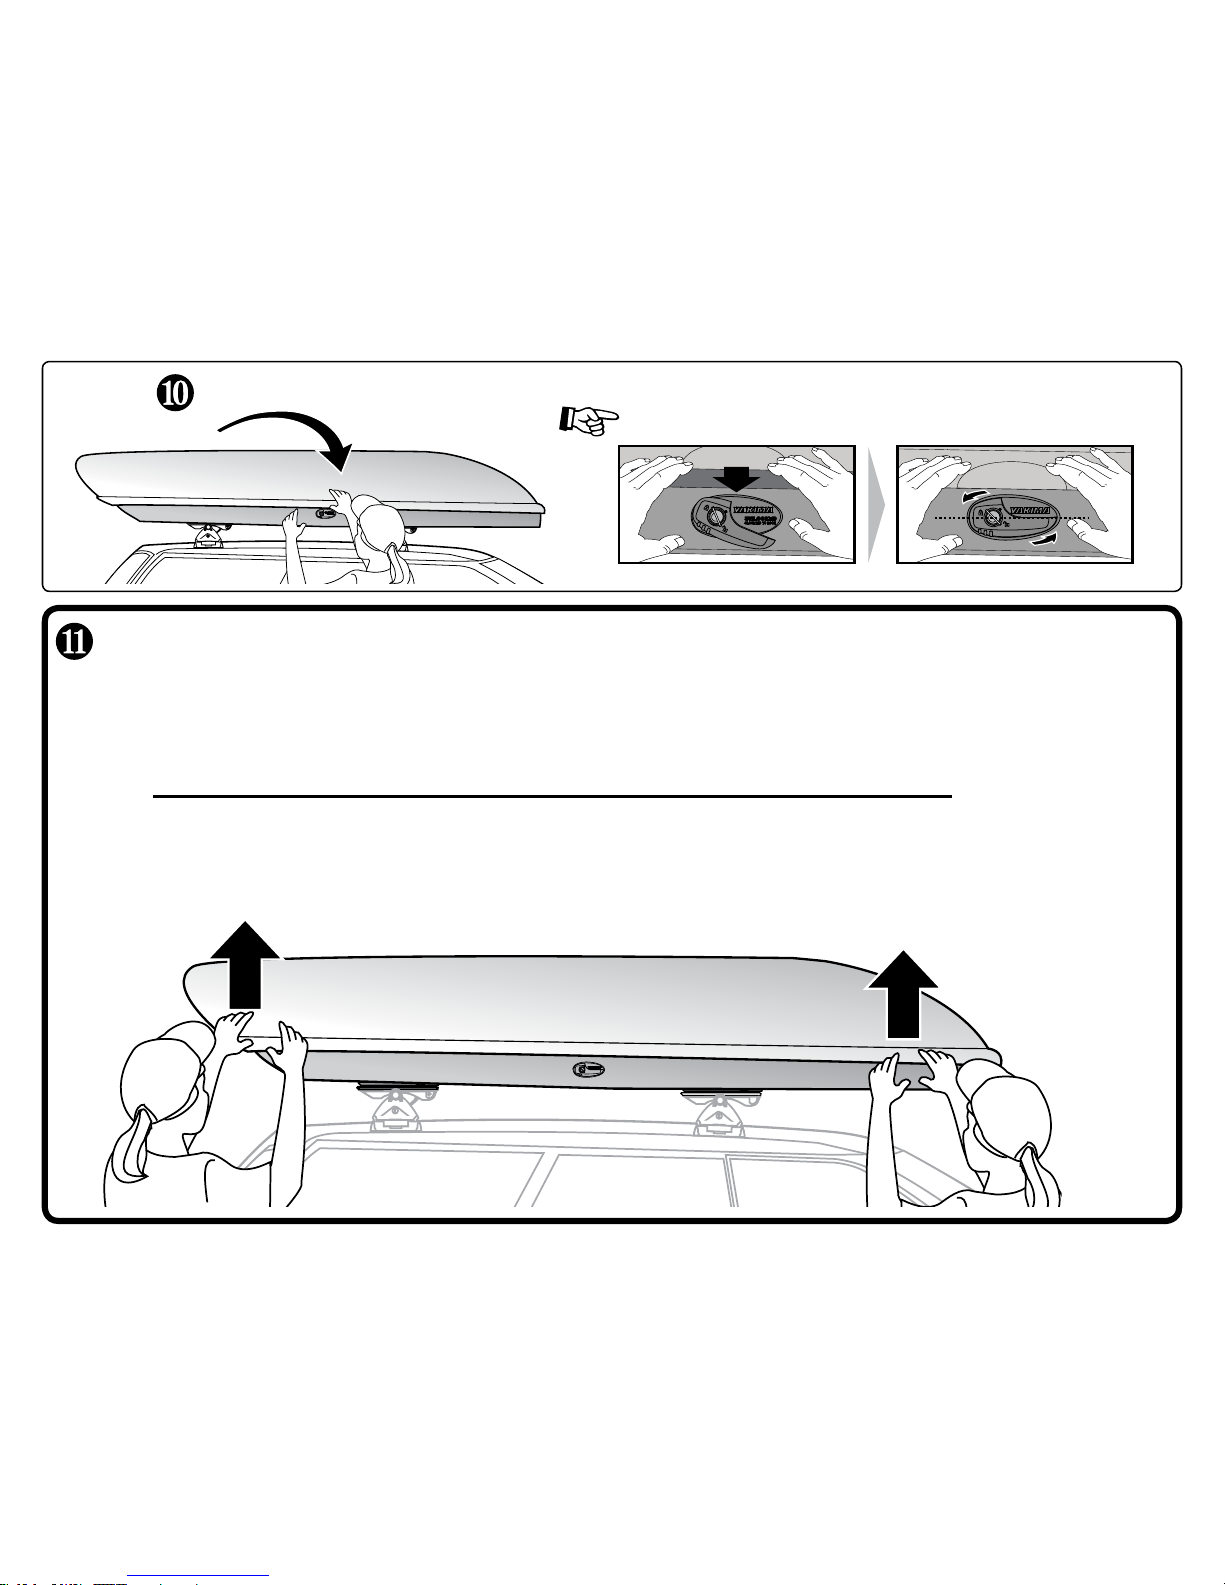
Check that box is closed by
liFTiNG up aT BoTH ENdS.
CAUTION:
Overstufng the box
may prevent a secure closure.
Push the lid down until the handle returns to a horizontal position.
CHECK THE CloSuRE—puSH up oN lid.
Handle must return to the horizontal position to lock box and remove key.
Close the box...
Page 5
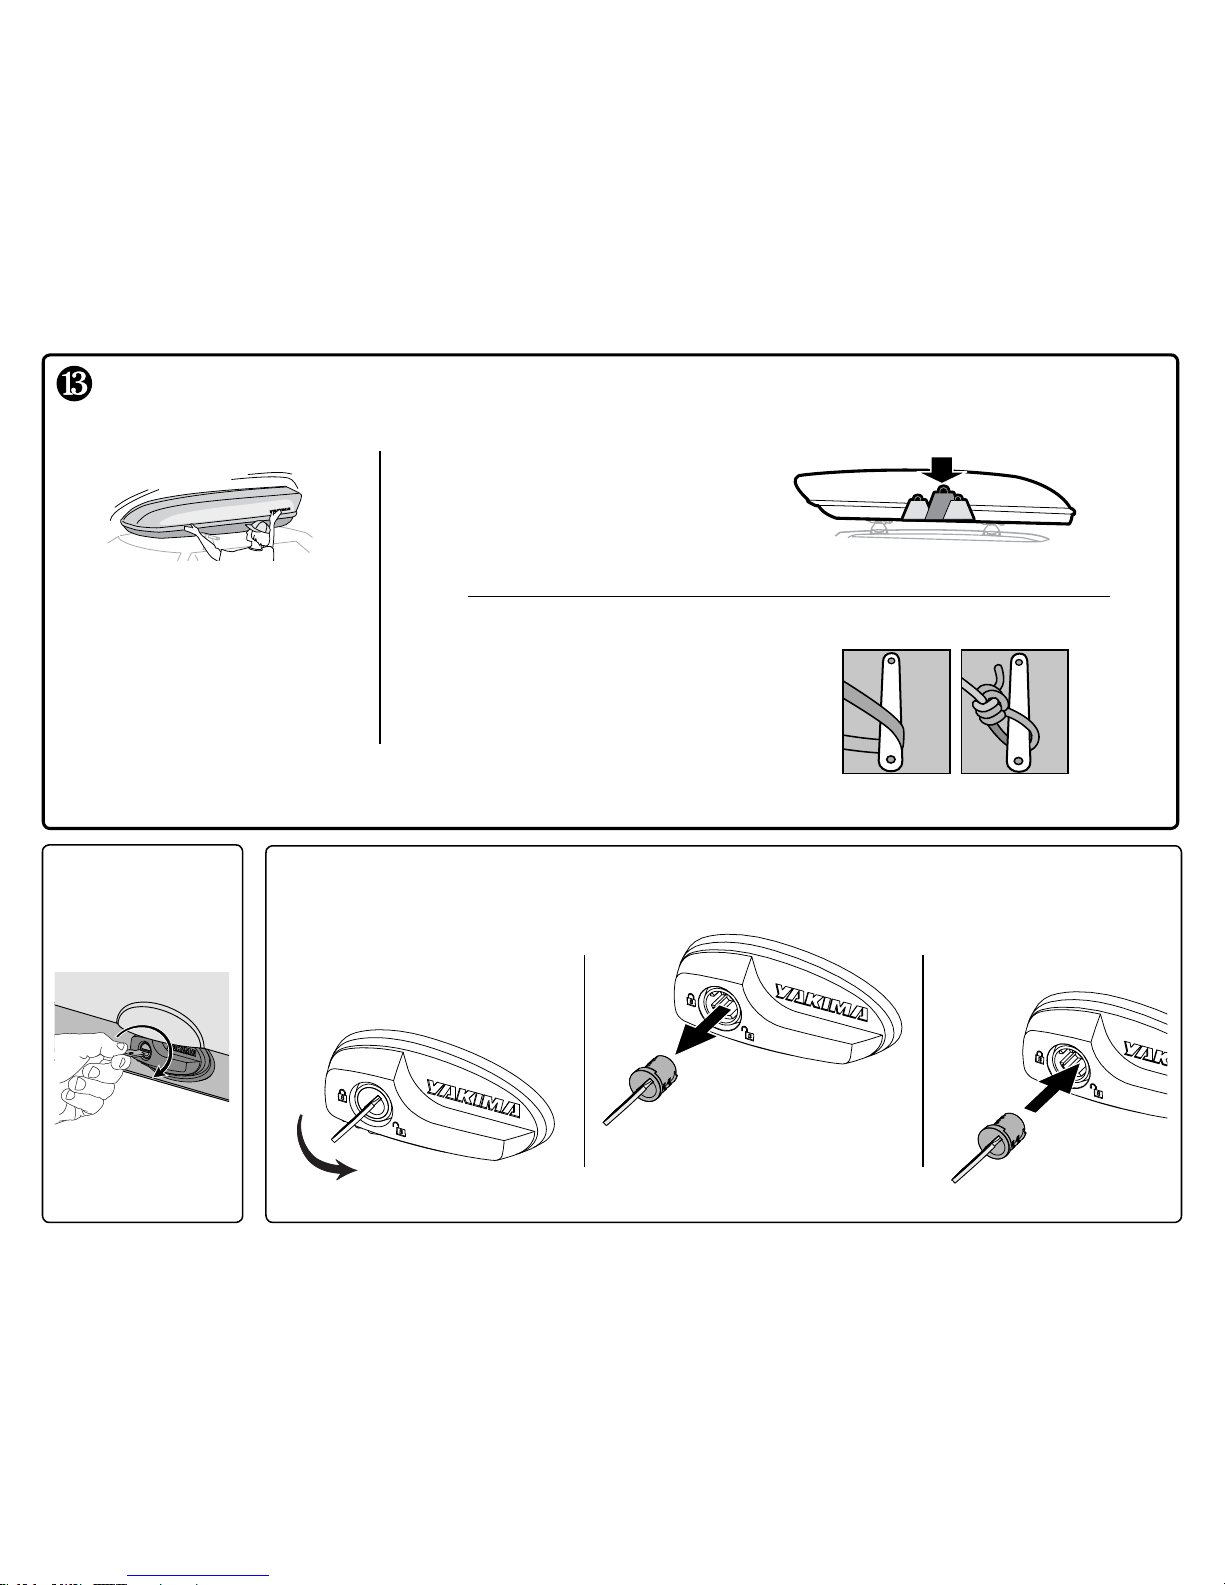
Use tie-down locations in rails.
Make sure installation is
secure by tugging at box.
• The box should not slide
on the bars.
• Open the box and tighten
levers if necessary.
CHECK iNSTallaTioN BEFoRE dRiViNG aWaY
CENTER HEaViER loadS iN
THE CENTER oF THE Box.
• Turn key clockwise.
• To unlock, insert
key and turn key
counterclockwise.
alWaYS SECuRE THE load
iNSidE THE Box.
• Insert key and turn it to 45º
counter clockwise. Remove key.
• Insert control key
and remove core
with control key.
• Install new lock core.
Follow instructions
that came with your
lock core purchase.
• Close box.
NOTE: Box must be closed
and handle in horizontal
position in order to lock
box and remove key.
To lock... To replace lock core...
Page 6
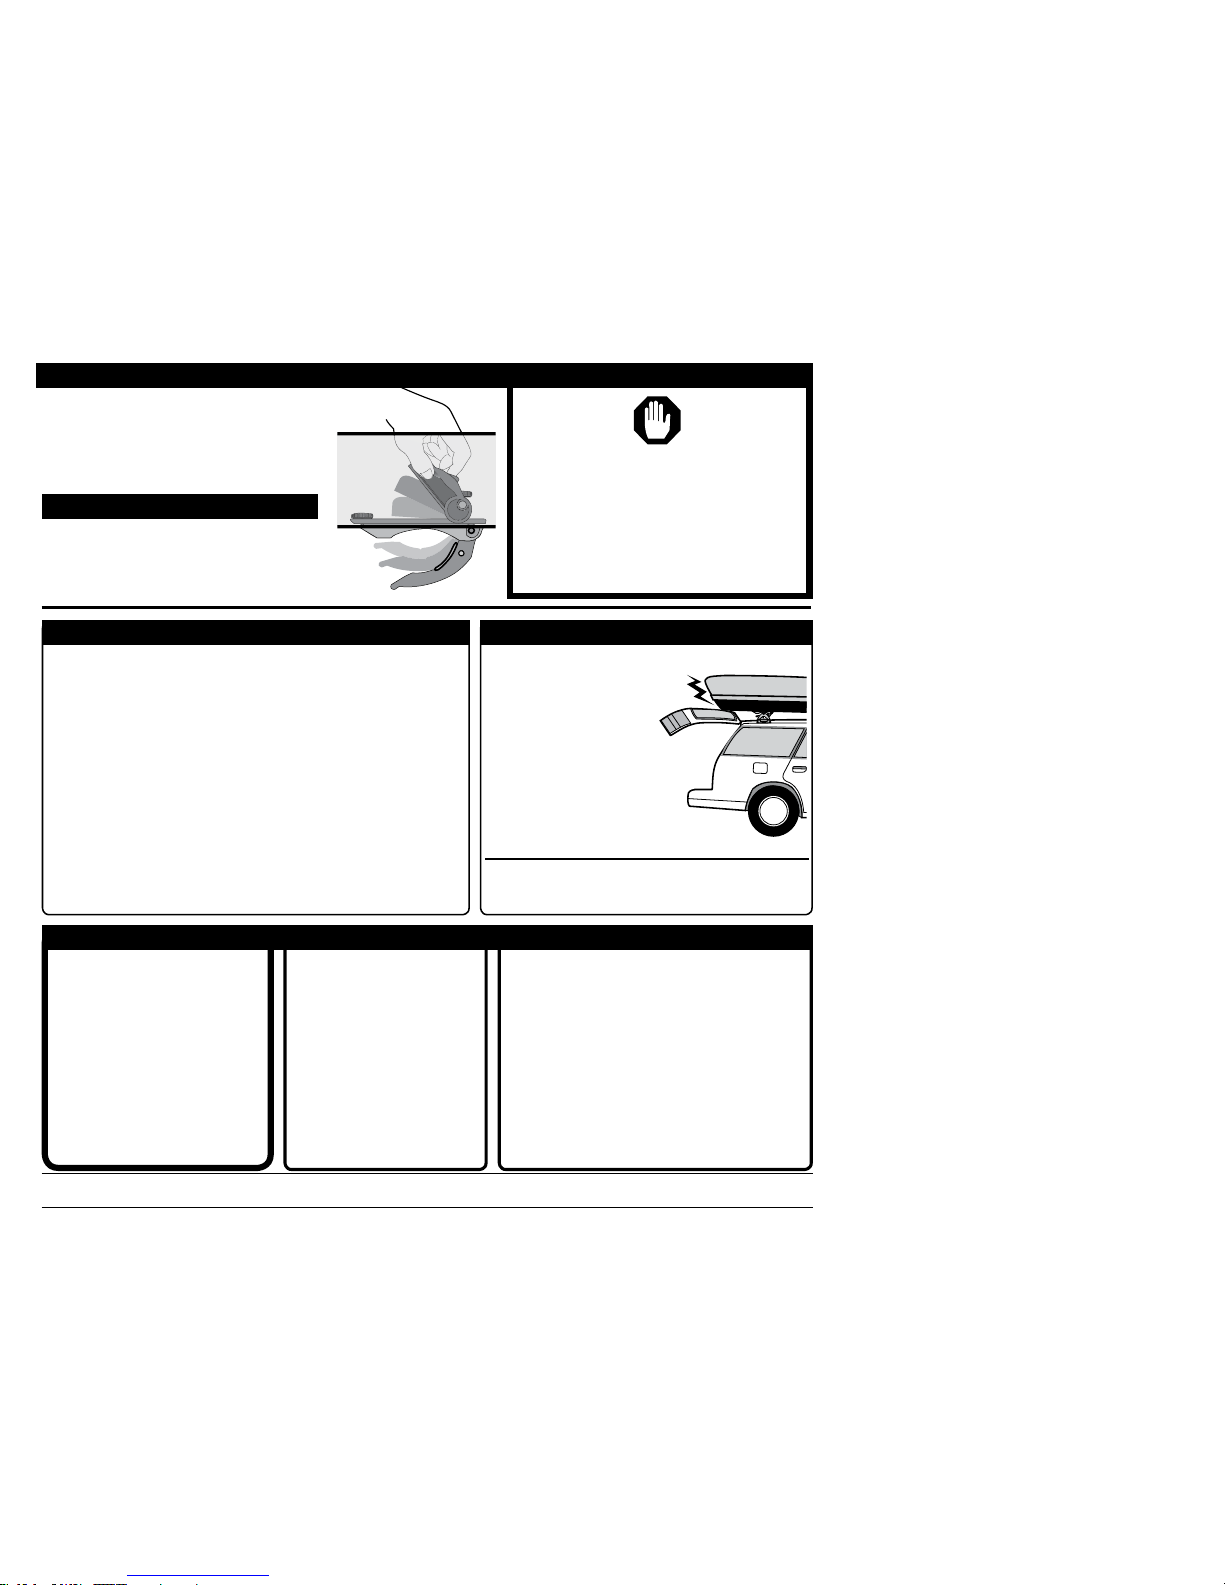
REad THESE WaRNiNGS!
KEEP THESE INSTRUCTIONS
CaRE aNd MaiNTENaNCE
YAKIMA cargo boxes should be cared for and
maintained, especially in extreme weather
conditions.
• To clean, use only mild detergents. Harsh
detergents could damage the gear box surface.
• Protect your gear box from extreme temperatures,
(heat or cold) during prolonged storage.
• Remove gear box before entering automatic car
wash.
• Hardware such as locks should be lubricated with
graphite or other dry lubricant.
On some vehicles,
hatch interference
is unavoidable.
Use caution when
opening your hatch.
iF YouR VEHiClE HaS
a REaR HaTCH:
BE SURE ALL HARDWARE IS
SECURED ACCORDING TO
INSTRUCTIONS. FAILURE TO
PERFORM SAFETY CHECKS
BEFORE DRIVING AWAY
CAN RESULT IN PROPERTY
DAMAGE, PERSONAL INJURY,
OR DEATH.
ATTACHMENT
HARDWARE CAN
LOOSEN OVER TIME.
CHECK AND TIGHTEN
IF NECESSARY,
BEFORE EACH USE.
periodically
check the levers
inside the box
and tighten if
necessary.
CauTioN
To REMoVE CaRGo Box:
• Do not remove or adjust thumb
wheels.
• Simply raise levers and remove box
from crossbars.
To REiNSTall:
• With gear box adjusted to your
vehicle, simply reload onto car, close
levers and check for tightness.
To retain the adjustments for
your vehicle, leave thumb
wheels tightened.
REMOVING THUMBWHEELS
WILL CAUSE DISASSEMBLY OF
LEVER/CLAMP MECHANISM.
If your vehicle has a fairing, you must
remove it if there is any interference.
 Loading...