

Page 1
RECOMMENDED TOOLS:
Phillips screwdriver
Tapemeasure or ruler
LOAD LIMITS:
▲
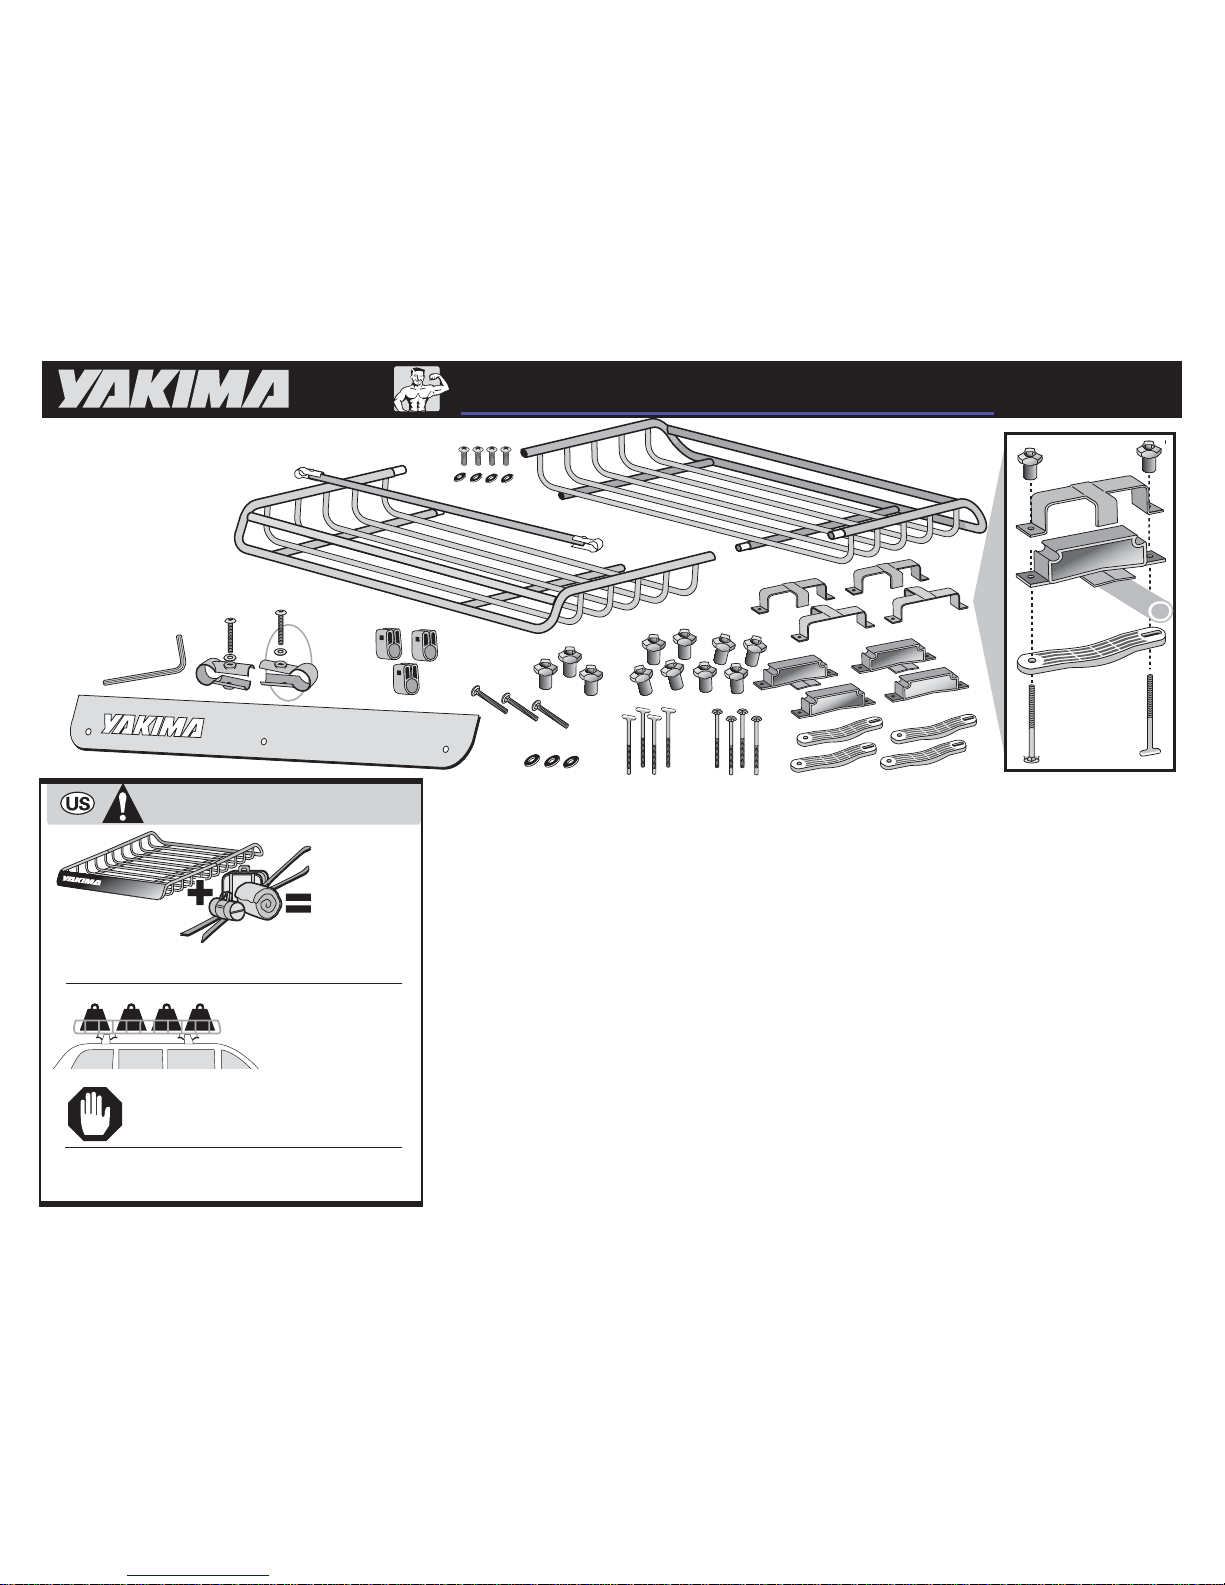
35 lbs.
(16 kg)
▲
basket
contents
DO NOT
EXCEED
YOUR
RACK’S
weight limit!
DO NOT EXCEED
BASKET CONTENT WEIGHT LIMIT:
130 LBS. (60 KG)
Always tie down long loads at
front and rear.
MEGAWARRIOR
(1x)
(2x)
(3x)
(3x)
(3x)
(11x)
(4x)
(4x)
(4x)
(4x)
(1x)
(1x)
(2x)
(4x)
(4x)
DISTRIBUTE YOUR
LOAD EVENLY INSIDE
THE BASKET.
Page 2
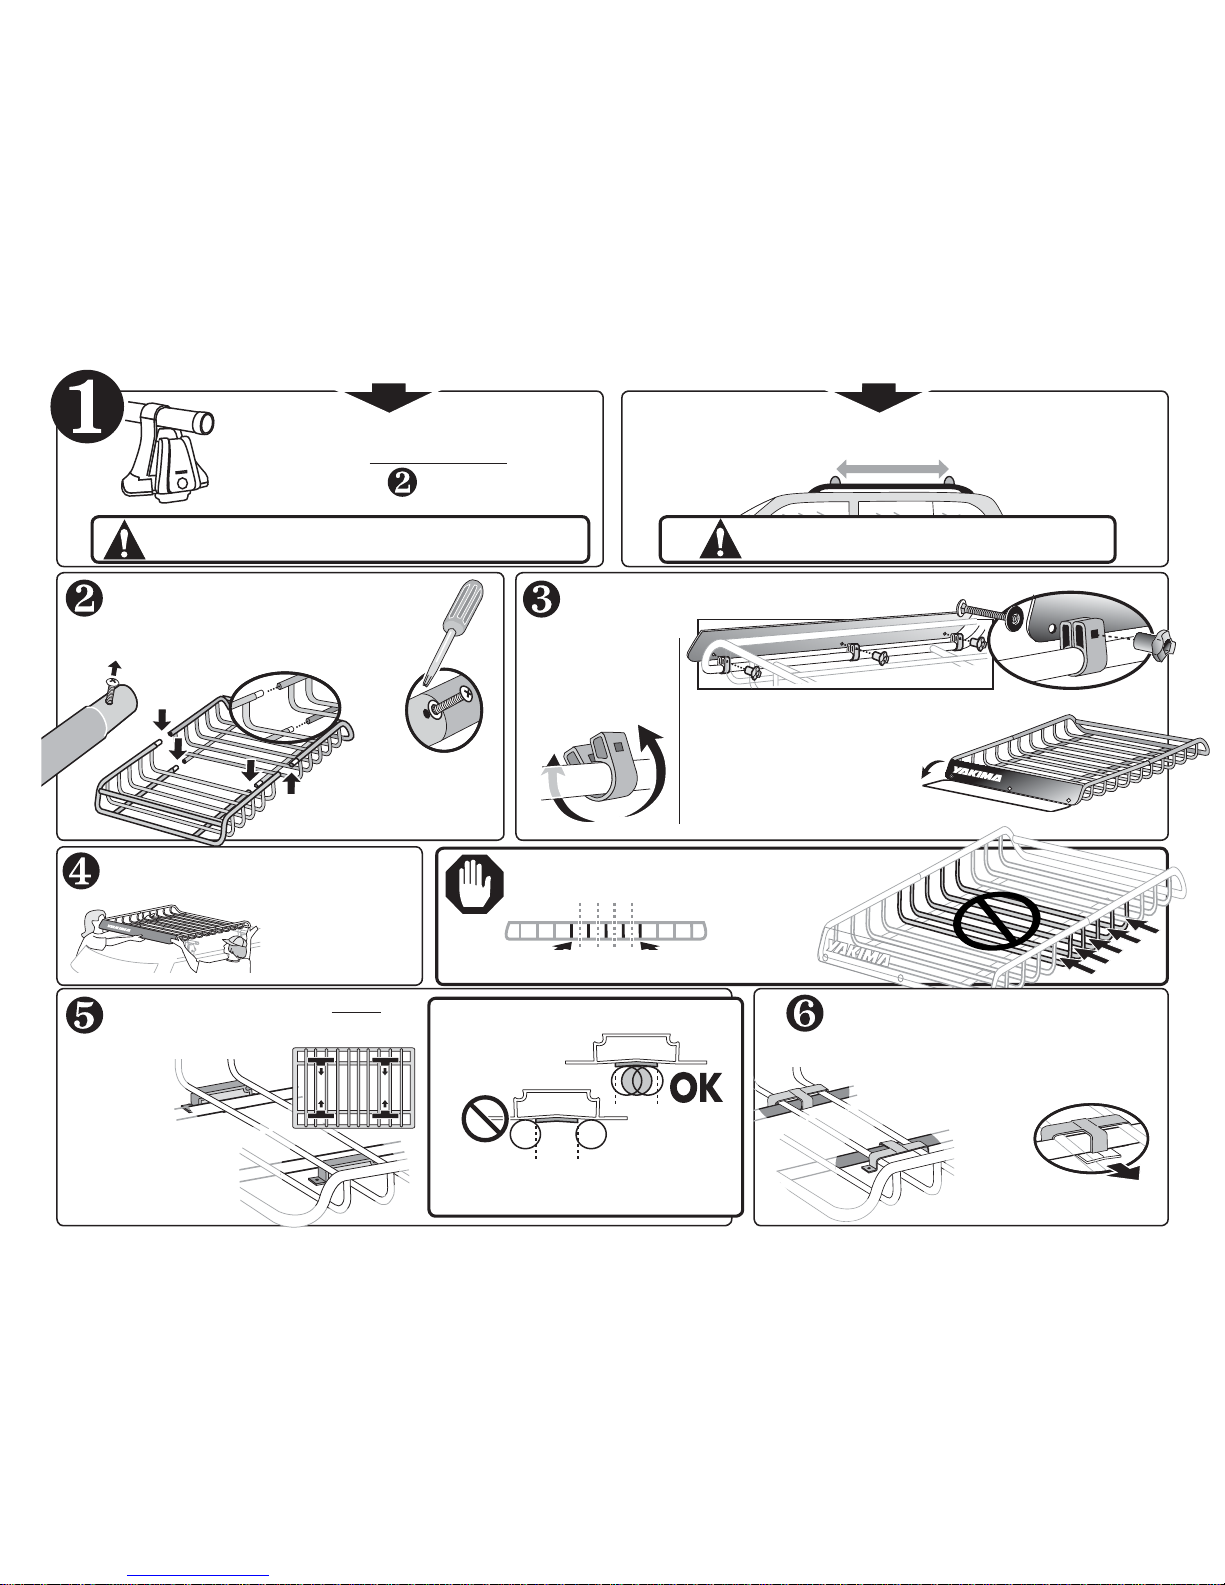
IF YOU HAVE BARS THAT CAN BE MOVED…
Move the bars to minimum 30” (76cm) apart.
• Insert screws with
washers into each joint
and tighten them.
ATTACH FAIRING TO EITHER END OF BASKET.
Pry open the
SnapArounds,
attach them to the
LOWER FRONT BAR.
• Insert bolts through washers, fairing
and SnapArounds.
• Attach knobs and TIGHTEN.
NOTE: The fairing can
fold down when carrying
accessories and long loads.
ASSEMBLE THE BASKET.
• Remove the machine screws from
the ends of the LoadWarrior tubes.
LOAD BASKET ONTO RACKS.
Center basket over your rack’s crossbars.
DO NOT ATTACH BRACKETS
TO UNSTABLE POINTS.
Do not attach brackets at these locations.
•IF YOU HAVE FIXED BARS: •IF YOUR BARS MOVE:
(SIDE VIEW)
A friend
would make
this easier .
Q TOWER OWNERS:
NEVER REPOSITION THE Q TOWERS!
IF YOU HAVE “Q TOWERS”
OR BARS THAT CANNOT MOVE…
Continue to STEP
.
Position the support brackets above your
vehicle’s crossbars.
It may be necessary to move the
bracket to a new position, or to
adjust the basket position.
KEEP BAR
BELOW TAB!
POSITION THE COVER BRACKETS.
Position cover bracket onto installed
support brackets.
Hooked tab should cover the larger
support bar.
Arrow points inboard to
center of vehicle.
TIGHTEN YOUR CROSSBARS
IF YOU LOOSENED THEM.
• Place the brackets
OUTSIDE of the
basket frame.
• Tabs on brackets face
INBOARD.
Page 3

ATTACH THE KNOBS:
Engage the threads of the
bolts.
T-BOLT IS LOCKED
when the “T” of the
bolt is turned inside
the hole:
TIGHTEN
THE KNOBS.
SECURE THE
BASKET TO
THE BARS .
Lock the T-Bolts.
ATTACH BOLTS.
Insert bolt into round hole,
and T-bolt into slotted hole.
REFER TO THE DRAWINGS BELOW
FOR BAR PLACEMENT, or to
determine if the bar is
required.
ATTACH LOAD BAR.
With a washer on the bolt, align the end
clamps to the hole in the bar. Thread
the bolts into the embedded nuts.
DO NOT COVER
JOINT SCREWS
WITH END CLAMPS.
Tighten bolts
while
pushing the
end clamps
together.
BIKES BOATS
SKIS
Long loads may interfere with LoadBar.
• Attach carrier at front of
basket and to load bar.
• Adjust the bar for load
stability.
• For shorter boats, attach accessory at front
of basket and to load bar.
• Longer loads, such as canoes or sea
kayaks, require the load bar to be removed.
• Attach accessory at
front of basket and to
load bar.
On some
vehicles, hatch
interference is
unavoidable.
USE CAUTION
WHEN OPENING
YOUR HATCH.
CHECK INSTALLATION:
Make sure installation is secure
by tugging at basket.
TO REMOVE THE BASKET, DO NOT
DISASSEMBLE THE HARDWARE.
• Loosen the knobs until barely
attached.
• Unlock the T-bolts and let curved
brackets swing freely.
• Remove basket.
The basket should NOT
SLIDE on the bars.
Tighten knobs.
Always tie down
long loads to
front and rear of
vehicle.
ACCESSORIES MUST BE ATTACHED TO THE FRONT OF THE BASKET (FRONT OF VEHICLE).
 Loading...