

Page 1
“BH-2” Bluetooth® Head Set
EAF44U760
When the optional BU-1 Bluetooth® Adapter Unit is installed in the Transceiver*, you may use the optional BH2 Bluetooth® Headset as a wireless link to send and receive audio to the Transceiver*.
* Check with your Vertex Standard Dealer or Catalog for applicable models.
Controls & Connections
Microphone
POWER switch
VOLUME
Press this switch while pressing and holding the PTT
switch, to decreases the microphone gain.
VOLUME
Press this switch while pressing and holding the PTT
switch, to increases the microphone gain.
LED Indicator
Blinking Blue: When the BH-2 Bluetooth® Headset is
Blinking Red: When the BH-2 Bluetooth
Blinking Red/Blue: Battery Voltage is Low.
PTT switch
Press this key to transmit. Release this key to return to
receive (Depends on transceiver settings).
SPEAKER
Earhook
You can wear the BH-2 on your left or right ear.
(–)
switch
(+)
switch
correctly recognized by the transceiver.
not correctly recognized by the transceiver.
®
Headset is
BH-2 is not designed to attach to a motorcycle helmet.
Specifications are subject to change without notice.
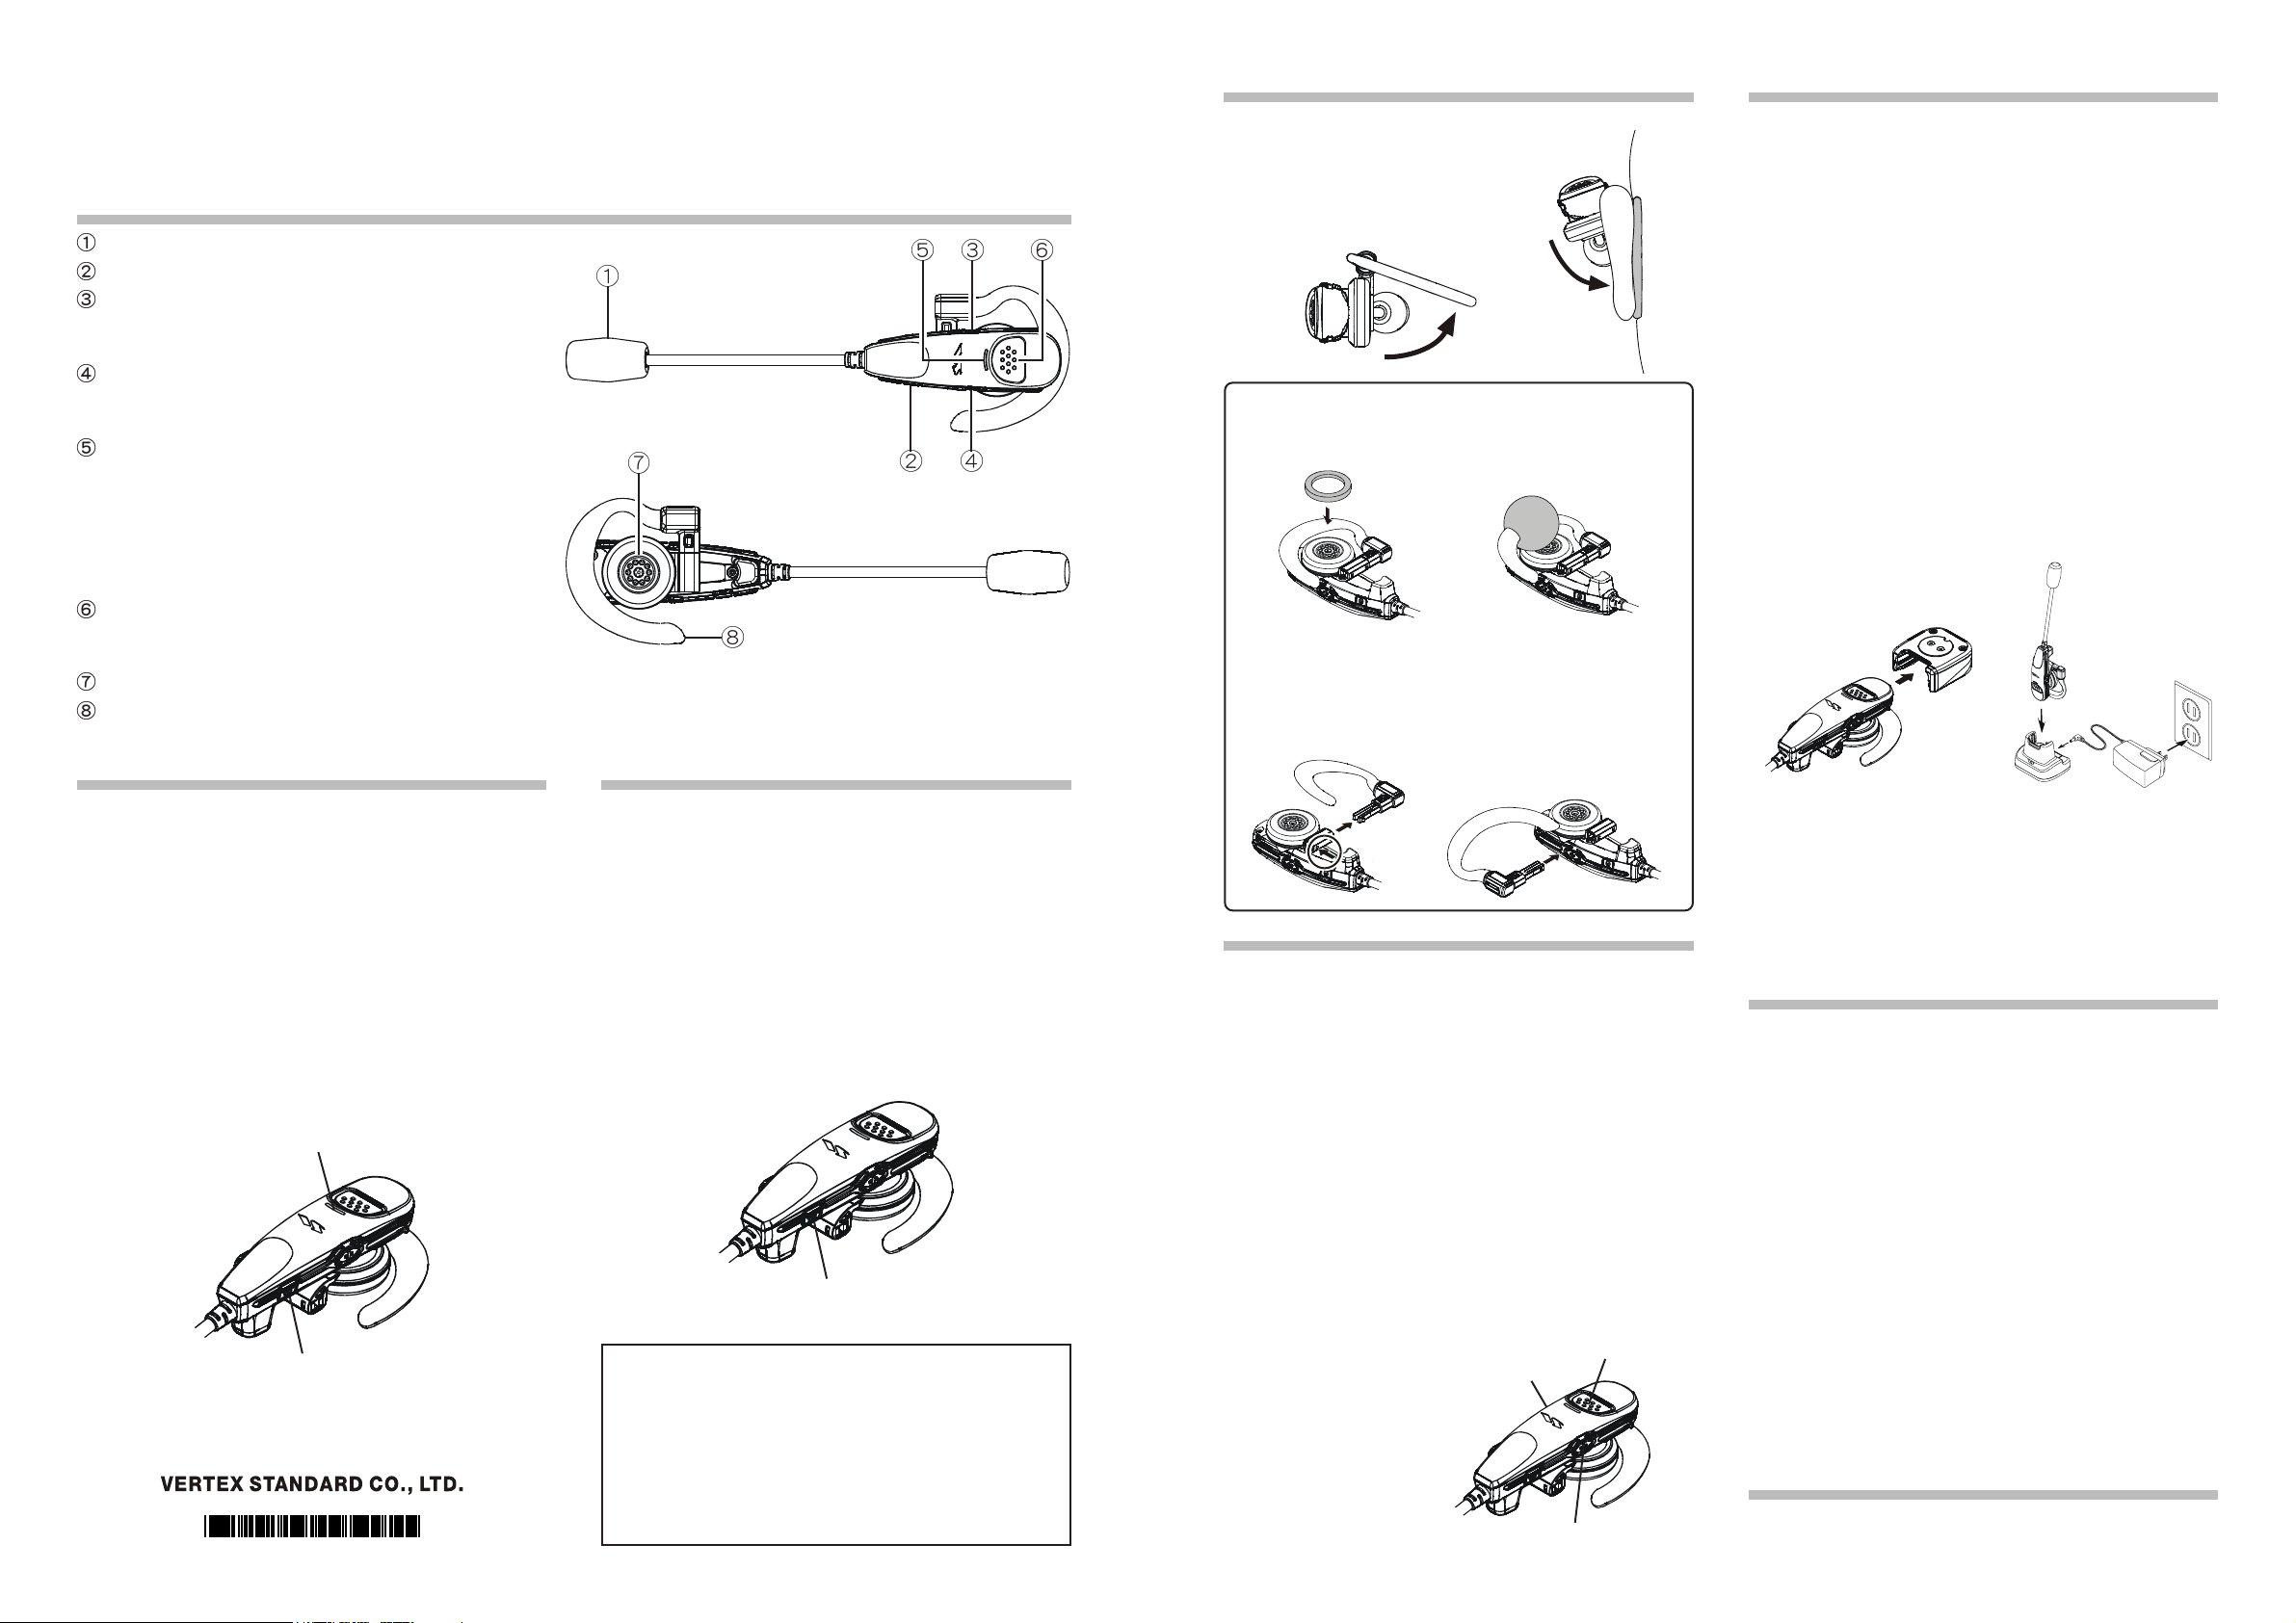
Wearing the BH-2
1. Open the earhook.
2. Loop the earhook over your ear.
3. Press the BH-2 to your ear.
4. Adjust the flexible boom microphone
by bending the boom towards your
mouth.
For more comfort when wearing the BH-2, affix the supplied sponge on the speaker and press the supplied sponge
ball onto the earhook, and adjust as necessary.
The BH-2 comes ready to fit the left ear. You may change
the BH-2 to fit the right ear in the following procedure.
1. Remove the Earhook by pushing it out with a pointed
object.
2. Insert the Earhook from the other side.
Battery
When the battery voltage becomes low, the BH-2’s LED indicator will blink red/blue alternately, and the beeper sounds
a low pitch tone.
If the battery has never been used, or its charge is depleted,
it may be charged by connecting to the Charger Sleeve* or
Charger Cradle*, as shown in the illustration.
Please refer to the transceiver’s manual for installation of
the Charger Sleeve.
* Check with your Vertex Standard Dealer or Catalog for appli-
cable models.
1. Insert the BH-2 into the Charger Sleeve or Charger Cradle.
NoteNote
Note
: The BH-2 is automatically set to “sleep” mode,
NoteNote
when it is inserted into the Charger Sleeve or
Charger Cradle.
When it is disconnect from the Charger Sleeve or
Charger Cradle, the BH-2 will be active again.
2. If the BH-2 is inserted correctly, the LED indicator will
glow Red. A fully discharged battery will be charged completely in 3 hours. When charging is finished, the LED
indicator will glow blue.
Pairing
Before you can use your BH-2 for the first time, the BH-2
and the transceiver must be paired.
Refer to the Transceiver’s Operating Manual for Pairing instructions.
P Please bring the BH-2 and the Transceiver close together
when doing Pairing.
1. Make sure that the BH-2 is off.
2. Press and hold the POWER switch for five seconds, until
the LED indicator blinks red/blue alternately.
When the BH-2 is correctly recognized (Requires a 20 to 30
seconds) by the transceiver, the LED indicator will blink
blue.
LED indicator
POWER Switch
Turning ON and OFF
TT
o turn the o turn the
T
o turn the BH-2
TT
o turn the o turn the
Press and hold the POWER switch for three seconds, until the BH-2’s LED indicator glows red, and the beeper
sounds a high pitch tone.
When the BH-2 is correctly recognized by the transceiver,
the LED indicator will blink blue.
PWhen the BH-2 is not correctly recognized by the trans-
ceiver, the LED indicator will blink red.
TT
o turn the o turn the
T
o turn the BH-2
TT
o turn the o turn the
Press and hold the POWER switch for five seconds, until
the BH-2’s red LED indicator blinks rapidly, the beeper
sounds two brief tones, and the BH-2 turns off.
The communications range between the BH-2 and the
Transceiver is around 10m (33 ft).
Obstacles between the BH-2 and the Transceiver may
decreas the communications distance.
When you move out of range, the beeper sounds a low
pitch tone. When you move back into range, the beeper
sounds a high pitch tone.
ON ON
ON
ON ON
OFF OFF
OFF
OFF OFF
POWER Switch
Effective Communications Range
Operation
TT
ransmissionransmission
T
ransmission
TT
ransmissionransmission
Press the PTT switch to transmit, and release the switch
to return to receive (Depends on transceiver settings).
Adjusting the VAdjusting the V
Adjusting the V
Adjusting the VAdjusting the V
Adjust the receiver audio level, using the VOLUME (–) or
(+) switch.When the audio level reaches the maximum
or minimun, the beeper sounds two brief tones.
VOLUME (+): Adjusts the receiver audio level upward.
VOLUME (–): Adjusts the receiver audio level downward.
Microphone Gain SettingMicrophone Gain Setting
Microphone Gain Setting
Microphone Gain SettingMicrophone Gain Setting
Press and hold the PTT switch, while using the VOLUME
(+) or (–) switch to select a comfortable Microphone gain
level (Five steps). When the microphone gain reaches the
maximum or minimun, the beeper sounds a high pitch tone.
VOLUME (+): Sets the MIC gain upward.
VOLUME (–): Sets the MIC gain downward.
olume levelolume level
olume level
olume levelolume level
VOLUME (–) Switch
VOLUME (+) Switch
PTT Switch
Example:Use the “CAB-1” Example:Use the “CD-40”
Battery saverBattery saver
Battery saver
Battery saverBattery saver
If there has been no signal or key button activity for 20 seconds, the Battery Save automatically puts the BH-2 in “sleep”
mode, to conserve battery life.
When a signal is received or the PTT key is pressed the
BH-2 will be active again.
Refer to the Transceiver’s Manual for Battery saver instructions.
Specifications
Bluetooth specification Ver1.2
Bluetooth profiles HSP
Radio Frequency 2402 MHz - 2480 MHz
Modulation method GFSK
Transmitter output power 0 dBm Class 2
Receiver sensitivity <-80 dBm
Distance (open area) 32 ft (10 meters)
Audio format SBC
Audio frequency range 100 Hz - 20 kHz
Power supply Rechargeable Lithium-Polymer
Battery life 6 hours
Button/Switch Power On/Off, Volume Up/Down, PTT
LED indicators Power on: Flash blue twice
Unlink: Flash red
Link: Flash blue
Pairing: Red and Blue blinking
Battery low: Flash red and blue
Power off: Flash red 3 times
Operating temperature 32 °F to 104 °F (0 °C to 40 °C)
Operating humidity 5 - 90 %
Certification FCC, CE, BQB
Replacement Parts
Ear hook ................. S8002323
Ear hook sponge ..... S8002325
Speaker sponge ....... S8002324
Wind Screen ........... S8002322
 Loading...