

Page 1
X-Z LAB, Inc. | Bishop Ranch 6 | 2440 Camino Ramon, Suite #264 | San Ramon, CA 94583 | United States
Office: (925) 359-6908 | Fax: (925) 380-6784
IoT-Cloud 2.0 Configuration Software User Guide
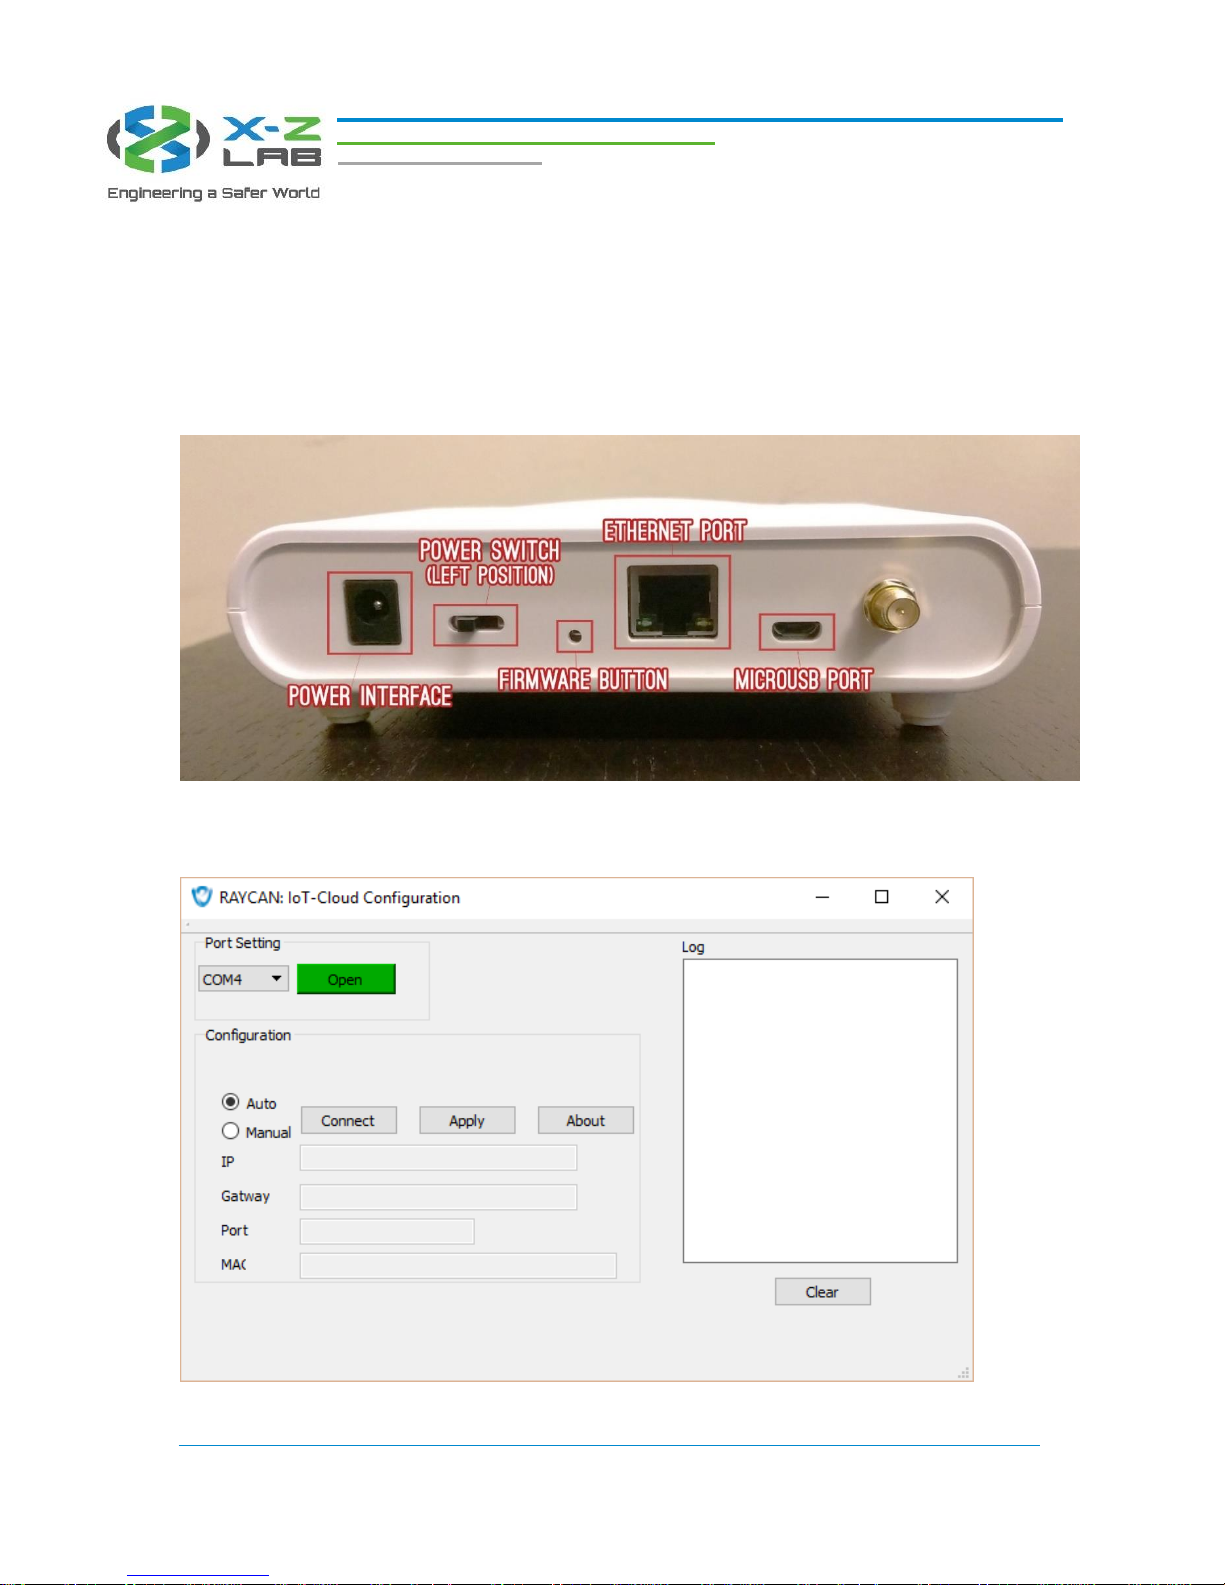
1. Connect IoT-Cloud to the PC using a MicroUSB cable. Flip the power switch to the right. If you
plan to use IoT-Cloud while connected to a secondary Ethernet port on your computer, plug in
an Ethernet cable to IoT-Cloud and the PC as well.
2. Open the IoT-Cloud configuration software (cloudConfigured.exe) and open the COM port
associated with IoT-Cloud.
Page 2
X-Z LAB, Inc. | Bishop Ranch 6 | 2440 Camino Ramon, Suite #264 | San Ramon, CA 94583 | United States
Office: (925) 359-6908 | Fax: (925) 380-6784
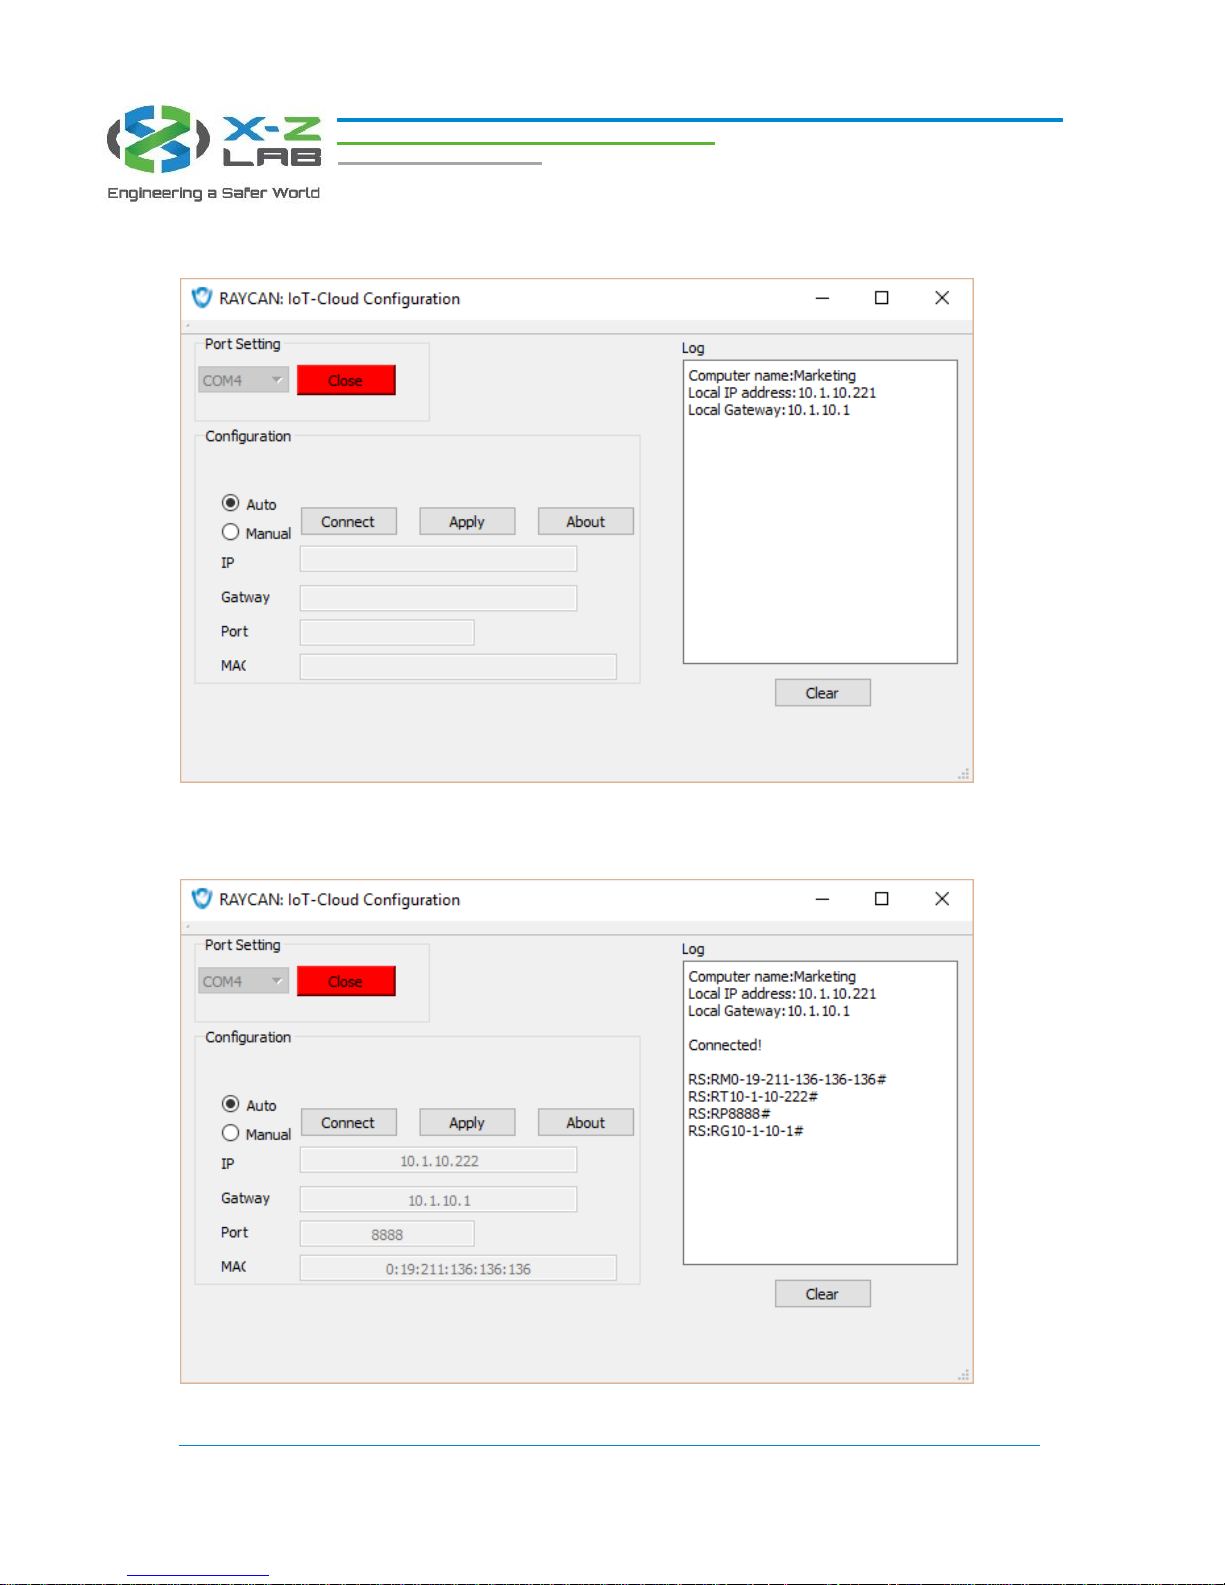
3. Once the port is opened, the log will display the PC name, local IP address, and local gateway.
4. Click the Connect button to retrieve IoT-Cloud’s MAC address, IP address, port, and gateway. If
successful, the log will indicate the status “Connected!”
Page 3

X-Z LAB, Inc. | Bishop Ranch 6 | 2440 Camino Ramon, Suite #264 | San Ramon, CA 94583 | United States
Office: (925) 359-6908 | Fax: (925) 380-6784
5. There are two configuration modes to choose from. Auto mode allows the software to configure
IoT-Cloud based on the PC’s information. Manual mode allows the user to configure IoT-Cloud
manually. The IP address must be configured to the same segment as your PC or router,
depending on which you are connecting to, so that IoT-Cloud and your computer/router can
communicate. Select the desired mode and click Apply to save changes. The log will return IoTCloud’s new IP address, gateway, and port.
6. Open RadSuite-Monitor and click on the gear icon. Click on System Settings and enter IoT-
Cloud’s IP address and port, which were configured in step 8. Click OK to save changes. Once a
proper Ethernet connection is established, IoT-Cloud will connect to RadSuite-Monitor.
 Loading...