

Page 1
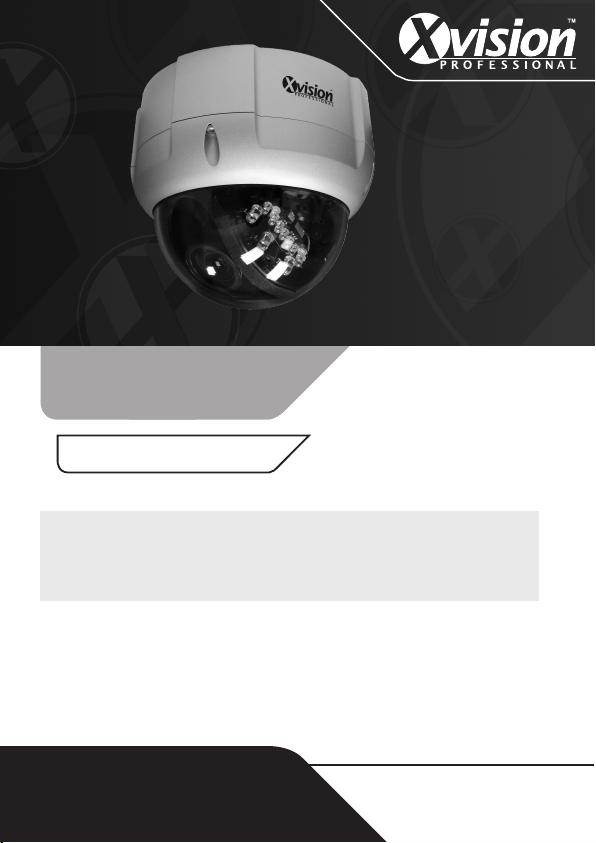
Model: XPD621
True Day/Night 580/700 TVL Vandal Resistant
IR Dome Camera with 25m Night Vision & Auto
Iris Varifocal Lens
Before you begin
• Please unpack the box carefully and identify that all the parts are present.
The camera is suitable for indoor or outdoor use. Please bear in mind the following
points when choosing a mounting position.
• The camera must be positioned so that it will not point directly into the sun (sunrise
and sunset) or any bright light, as this may cause damage to the camera.
• Do not cut the camera cables, this will void the warranty.
• Make sure you use only the recommended power supply. Damage caused to the
camera by incorrect voltage or wiring is not covered by the warranty.
Model:
XPD621
True Day/Night 580/700 TVL Vandal Resistant IR Dome
Camera with 25m Night Vision & Auto Iris Varifocal Lens
Page 2
Thank you for purchasing this Xvision camera. Before operating this product, please read
this instruction manual carefully.
1. Safety Precautions
z When in use please avoid direct contact with eyes and do not touch the camera body
as it can get very hot.
z When installing the camera, please avoid pointing it directly at paper or flammable
materials.
z Please avoid all direct contact with the tempered glass cover to avoid contamination. If
you need to clean the cover use cotton wool balls dipped in alcohol or glass wipes.
2
2. Product Description
The XPD621 dome camera is designed for high risk applications and is able to withstand a
blow from a 10 pound sledgehammer. It offers very high resolution images of 580 TVL in
Colour mode and 700 TVL in B/W mode, with a low lux sensitivity of 0.0003 lux. It features
Dynamic Night View, Number Plate Recognition, Wide Dynamic Range, Smart DNR for disk
saving and an Auto Iris Varifocal Lens with 36x Optical Zoom. It is designed for internal or
external use and can be wall or ceiling mounted.
In addition to this the camera features high output IR LEDs for up to 25 metres IR night
vision in complete darkness.
Page 3
3. Features
z 700 TVL resolution images in B/W mode and 580 TVL in Colour.
z Sony 1/3” Ex View CCD Image Sensor with Xvision XX3 DSP.
z 2.8 to 11.0mm Aspherical Auto Iris Varifocal lens for 26° to 92° viewing angle for super
sharp images and easy selection of the optimum viewing angle during installation.
z Integrated Long Life Infra Red LEDs turn on automatically in low light conditions or
complete darkness and provide up to 25 metres Night Vision.
z Dynamic Night View technology provides clear images without the need for IR LEDs
down to 0.0003 lux, this is achieved by using Field Integration, please note due to way
in which field integration works, whilst it is in operation the frame per second will
reduce. The darker the scene the lower the frame per second.
z Number Plate Recognition using advanced Highlight Suppression Technology.
z Smart DNR (3D Digital Noise Reduction) reduces the noise on the image when viewing
in low lux environments (like at night), this reduces the size of the image when being
recorded by a DVR, resulting in a saving of disk space.
z WDR (Wide Dynamic Range) feature allows the camera to display balanced pictures
even when the scene being watched has bright spots or various light level and back
light conditions.
z Designed for Wall or Ceiling Mounting, suitable for Internal or External use.
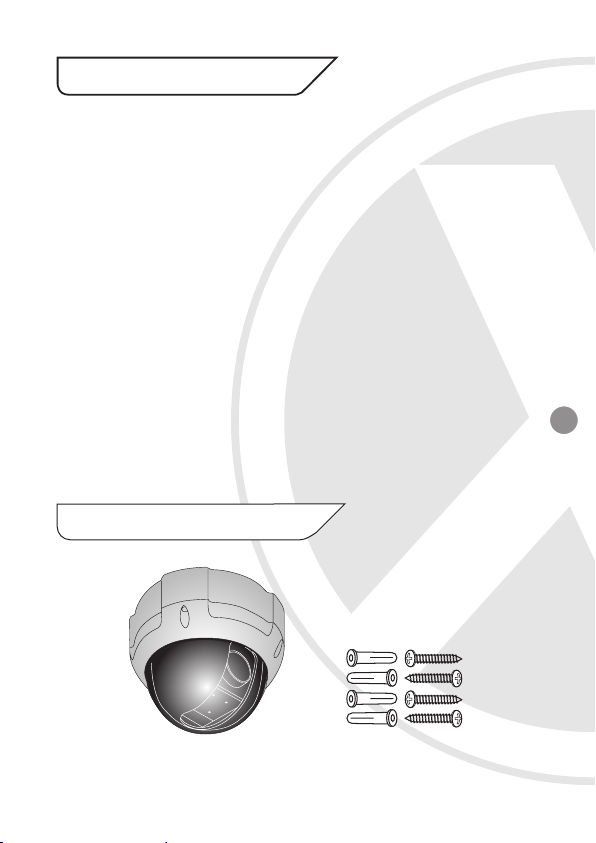
4. Contents
3
XPD621 Camera
4x Fixing Screws
4x Wall Plugs
Page 4
5. Installation
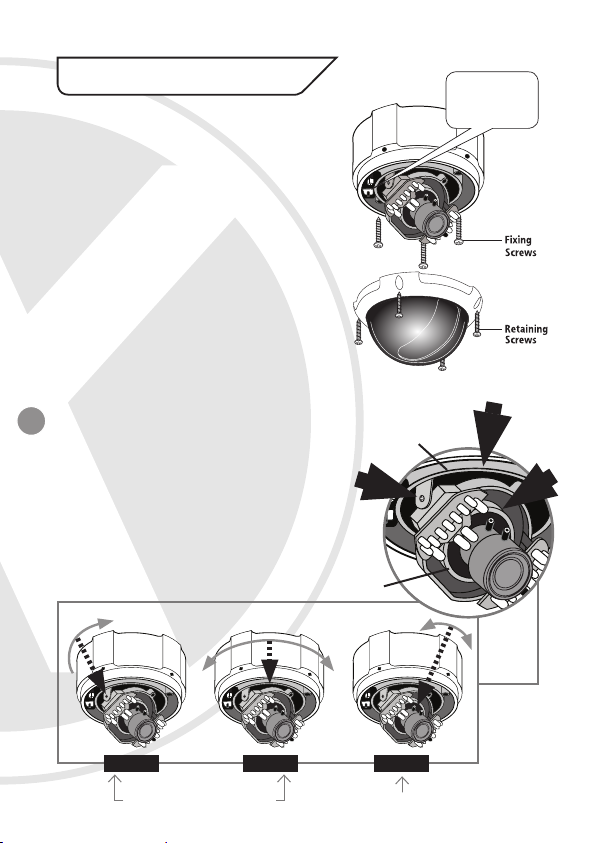
1. Select a suitable position on the wall or ceiling
to install the camera.
2. Remove the dome housing from the camera
housing by removing the four cross head
retaining screws.
3. Secure the camera in the desired ceiling
position with the four fixing screws (as shown
in Figure 1).
4. Adjust the camera viewing angle. See
‘Adjusting Camera View’ and ‘Adjusting Lens’
for more information’.
5. Place the dome cover on the camera base and
secure it by tightening the cover screws.
ADJUSTING CAMERA VIEW
4
Adjust the camera viewing angle by first tilting
(STEP 1) then rotating the camera module (STEP
2), and then turn the horizontal adjustment ring
(STEP 3) to correct the image and achieve proper
orientation (as shown in Figure 2).
After adjusting, secure the fixture by tighten the
small screws located on the camera module & ring.
Figure 2
Camera
Ring
1
Figure 1
Camera
Module
Unscrew the
camera to also
access the Camera
OSD Controls
2
3
Tilt Rotate
STEP 1 STEP 2 STEP 3
Camera Module Adjustment Camera Ring Adjustment
Rotate
Page 5
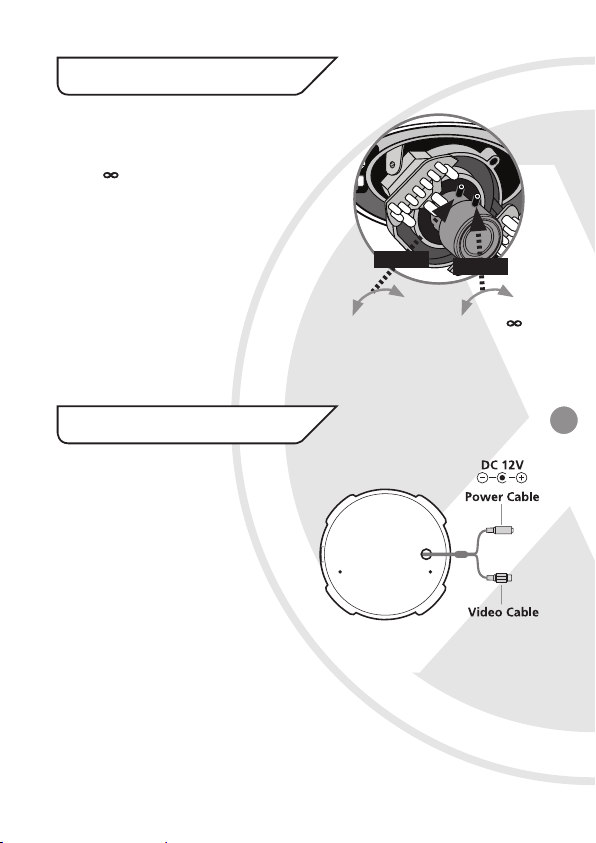
5. Installation continued
ADJUSTING LENS
Make the Zoom Adjustment by rotating the screw
anticlockwise for NEAR adjustment and clockwise
for FAR ( ) adjustment until you get the desired
view. Next make the Focal Adjustment by rotating
the screw anti-clockwise for TELE adjustment and
Clockwise for WIDE adjustment until you get the
desired view.
After adjustment tighten both.
FOCUS
ZOOM
6. Connection
1. Connect the video output (BNC Connector)
to a monitor or other video device through
a 75 Ohms type coaxial cable.
2. To connect the power source, insert the
DC Power plug into the DC Jack on the
camera’s trailing lead. (as shown in
Figure 4).
WIDE
TELE
Figure 3
Figure 4
NEAR
FAR
( )
5
Page 6
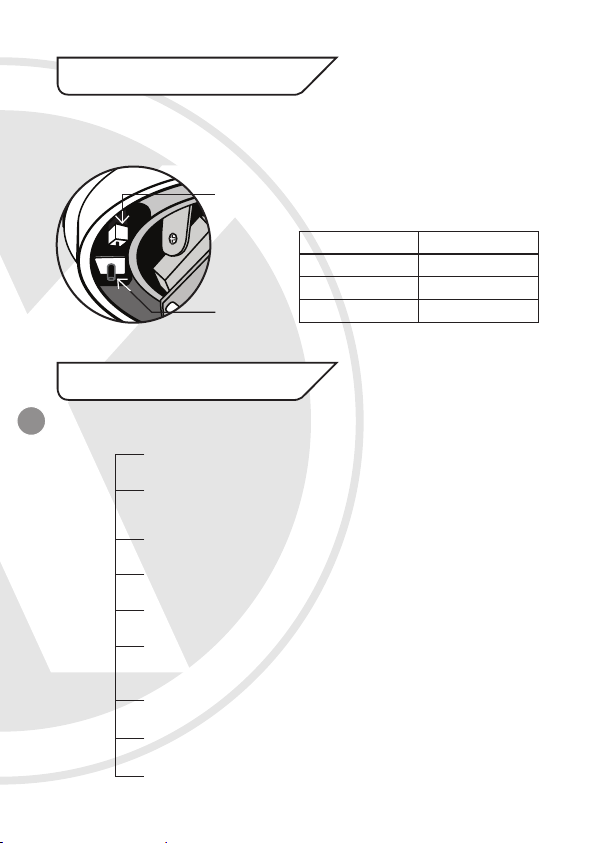
7. Camera OSD Control
1. Remove the dome housing to access the OSD Menu. (See Figure 1 for details).
2. Push the joystick controller down to access the menu options.
Video Test
Connector
OSD Joystick
Controller
OSD Joystick Controller Actions
Press this Control For this Action
UP, DOWN Select a new item
LEFT, RIGHT Select a menu item
SETUP (MENU) Access a sub menu
8. OSD Menu Structure
6
SETUP MENU
LENS
● DC ● MANUAL
EXPOSURE
● SHUTTER ● BRIGHTNESS ● AGC ● SENSE-UP
● BLC ● D-WDR ● RETURN
WHITE BALANCE
● ATW ● INDOOR ● OUTDOOR ● AWC-> SET ● MANUAL
DAY/NIGHT
● COLOR ● AUTO ● EXT ● B/W
3DNR
● ON ● OFF
SPECIAL
● CAMTITLE ● D-EFFECT ● RS-485 ● MOTION
● PRIVACY ● SNYC ● LANGUAGE ● RETURN
ADJUST
● SHARPNESS ● BLUE ● RED ● RETURN
RESET
● FACTORY ● RETURN
EXIT
Page 7
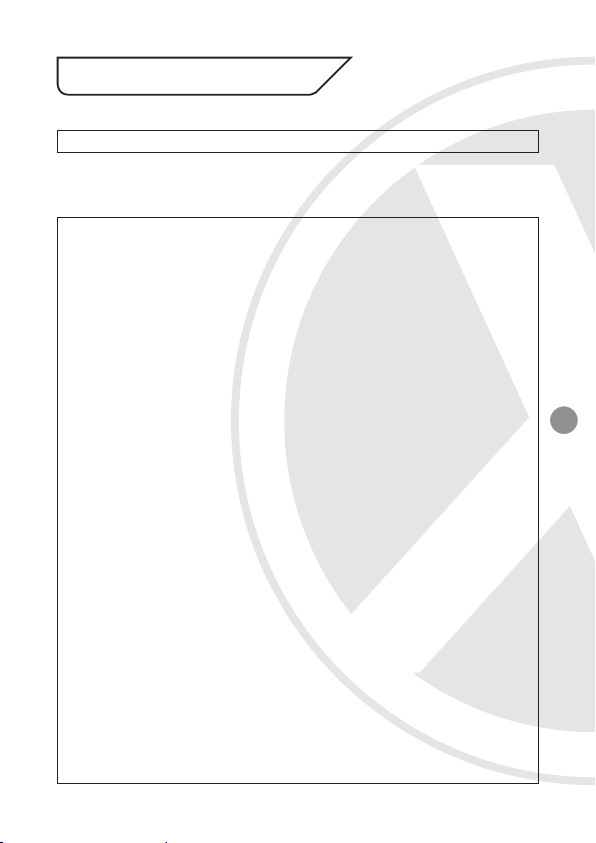
9. SETUP Menu Functions
1. LENS <Option : DC / MANUAL>
This option should be left on DC.
2. EXPOSURE
<Option : SHUTTER / BRIGHTNESS / AGC / SENS-UP / BLC / D-WDR / RETURN>
• SHUTTER: Adjusts shutter settings <AUTO / FLK / MANUAL>
- AUTO - Adjusts shutter settings to control the brightness level on screen.
- FLK (Flickerless mode) - Reduces on-screen flickering. FLK is the only option
available when the camera lens is set to DC mode.
- MANUAL - Allows you to adjust the shutter speed from 1/60~1/120,000 of a
second (NTSC), or 1/50~1/100,000 (PAL).
• BRIGHNTESS: Adjusts brightness settings
• AGC: Automatic Gain Control <HIGH / MIDDLE / LOW / OFF>
For better performance in low light conditions the AGC can be increased. This has
the effect of making the picture brighter (however it may also add more noise to the
picture, as it is amplifying all aspects of the video signal).
• SENS-UP (DYNAMIC NIGHT VIEW): <AUTO / OFF>
To get a clear image under night or low lighting level.
- AUTO - In low light or at night time, select this feature. Select proper level from X2
to X256 (use the X256 setting for the lowest lux level response of the camera)
- OFF - Deactivate SENS-UP feature
• BLC: Back Light Compensation <OFF / BLC / HSBLC>
The BLC function makes objects in front of a bright scene (such as a window on
a bright sunny day) clearer to see by increasing their brightness and making the
background darker.
- OFF - Deactivate BLC feature
- BLC - Select this feature for standard BLC Mode
- HSBLC (Highlight Suppress BLC for Numberplate Recognition) - Select this
feature to select masking of bright areas in the image, such as when viewing
number plates when car headlights are on.
• D-WDR: Wide Dynamic Range <OFF / INDOOR / OUTDOOR>
Wide Dynamic Range allows the camera to display balanced pictures even when the
scene being watched has bright spots or various light level and back light conditions
Select INDOOR or OUTDOOR mode to activate this feature depending on the
environment the camera is installed in.
• RETURN: Select to return to Main Menu.
7
Page 8
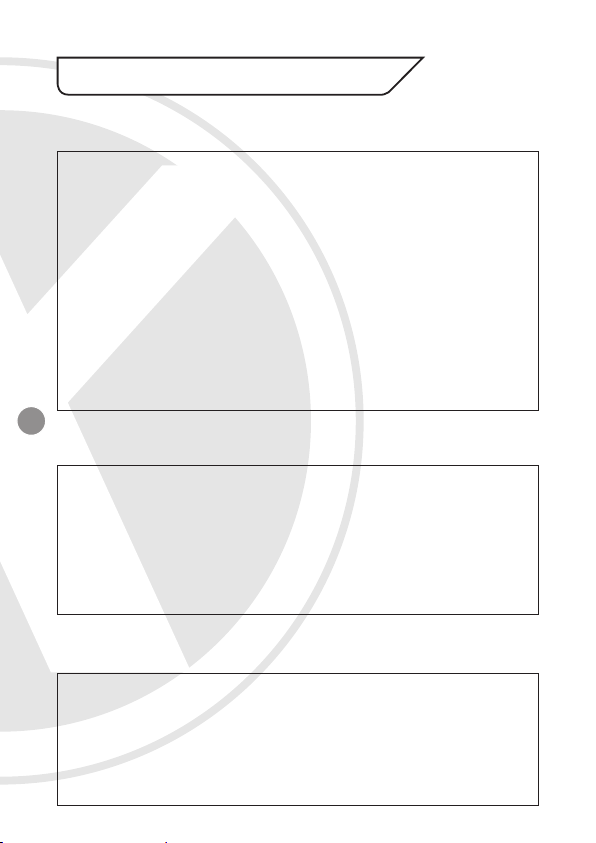
9. SETUP Menu Functions continued
3. WHITE BALANCE
<Option : ATW / AWB / AWC-SET / MANUAL / INDOOR / OUTDOOR >
• ATW: Auto Tracking White Balance. Use this mode when the colour temperature is
between 1800k~10,500k
• AWB: Automatic White Balance. This feature automatically adjusts the colour
temperature of the camera image to match the type of light available, so that white
and other colours appear as natural as possible.
• AWC-SET: Find the optimal setting for the current luminance environment in this
mode. Set the point the camera towards a sheet of white paper and press the Joystick
S/W. If the environment changes, re-adjust it.
• MANUAL: To fine-tune the White Balance manually, set White Balance first by using
the ATW or AWC mode. After that switch to Manual mode, fine-tune the White Balance
and then press Joystick S/W.
• INDOOR: Use this mode when the colour temperature is between 4,500k~8,500k.
• OUTDOOR: Use this mode when the colour temperature is between 1,800k~10,500k
(Sodium light included).
8
4. DAY/NIGHT <Option : COLOR / AUTO / B/W / EXT>
COLOR : Sets the display to always show a colour picture.
• AUTO: Sets the display to automatically switch to colour in a normal environment, and
to B/W when illumination is low. <DELAY / S-LEVEL / E-LEVEL>
- DELAY - Set Delay time to switch colour to B/W
- S-LEVEL - Set Start Level of luminance that you define.
- E-LEVEL - Set End Level of luminance that you define.
• B/W: Sets the display to always show a B/W picture.
• EXT: It enables user to control DAY/NIGHT mode by inputting an external signal.
5. 3DNR - 3D DIGITAL NOISE REDUCTION <Option : ON / OFF>
Select this function to reduce the noise on the image when viewing in low lux
environments (like at night), this reduces the size of the image when being recorded
by a DVR, resulting in a saving of disk space. The 3D function reduces the noise on all
3 dimensions of an object, resulting in a better image than is possible with standard
Digital Noise Reduction.
• ON: Activate 3DNR by selecting the desired 3DNR Level
• OFF: Deactivate 3DNR Mode.
Page 9
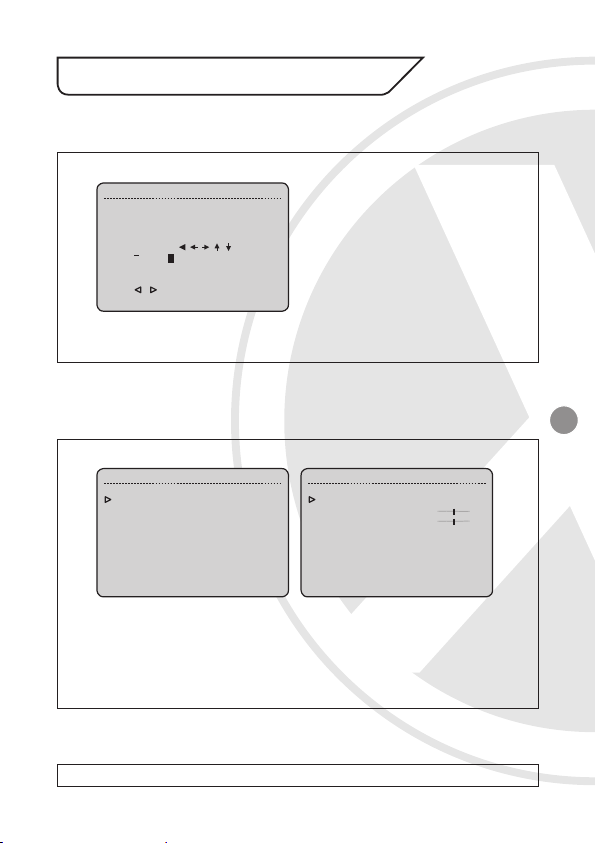
9. SETUP Menu Functions continued
6. SPECIAL MENU
6.1 CAM TITLE <Option : ON / OFF>
Use the feature to display a title on the monitor.
• ON: Enter your desired title by using the Joystick control.
• OFF: Deactivate CAM TITLE. No title will be appeared on the monitor.
CAM TITLE
0 1 2 3 4 5 6 7 8 9
A B C D E F G H I J K
L M N O P Q R S T U V
W X Y Z ( )
- _ / = & : ~ , .
CLR POS END
NEXT CHIP
6.2 D-EFFECT
<Option : FREEZE / MIRROR / D-ZOOM / GAMMA / NET.IMAGE>
Use Digital Effect for specific effects.
D-EFFECT
FREEZE OFF
MIRROR OFF
D-ZOOM OFF
GAMMA 0.45
NEG. IMAGE OFF
RETURN RET
D-ZOOM
D-ZOOM X 1.0
PAN 0
TILT 0
RETURN RET
• FREEZE: Hold the camera image displayed on screen.
• MIRROR: Reverse the picture vertically or horizontally.
• D-ZOOM To enable 32x Digital Zoom. Set your desirable Zoom ratio and position.
• GAMMA: 0.45 is fixed. We recommend you do not change this setting.
• NET. IMAGE: Changes the camera image to display in ‘negative’ colours.
6.3 RS-485 <Option : ON / OFF>
Set the BAUD RATE to communicate with other devices.
9
Page 10
9. SETUP Menu Functions continued
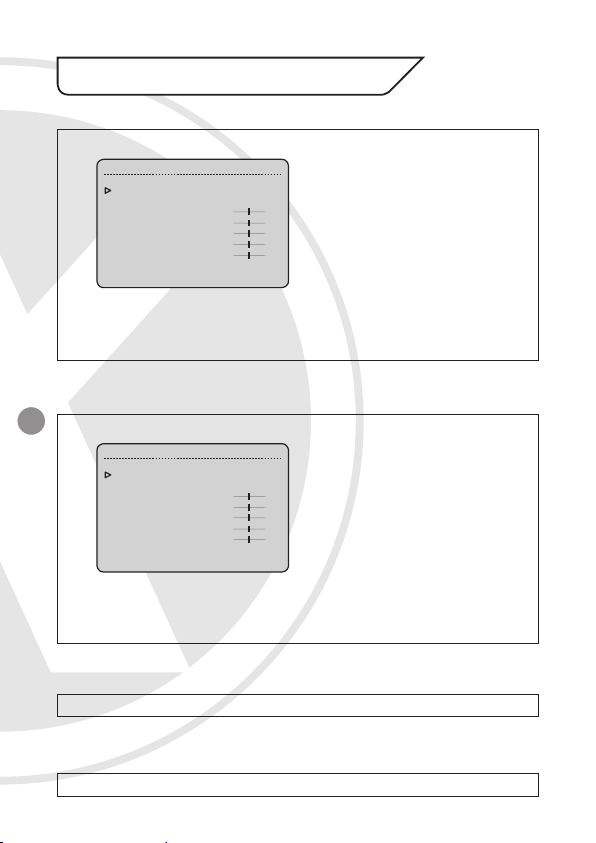
6.4 MOTION <Option : ON / OFF>
This function will transmit an alert signal when it detects motion on screen.
AREA SELECT AREA 1
AREA DISPLAY ON
LEFT/RIGHT 8
WIDTH 32
TOP/BOTTOM 4
HEIGHT 24
SENSITIVITY 40
MOTION VIEW OFF
RETURN RET
• ON: Activate Motion Detection mode. Select the motion detection area where you
want by using the Joystick control. Up to 4 areas can be selected.
• OFF: Deactivate Motion Detection mode.
6.5 PRIVACY <Option : ON / OFF>
10
This function will mask up to 8 areas on the display.
AREA SELECT AREA 1
AREA DISPLAY ON
LEFT/RIGHT 8
WIDTH 16
TOP/BOTTOM 8
HEIGHT 16
COLOR 0
MOTION VIEW OFF
RETURN RET
• ON: Activate Privacy. Select the areas to be masked by using the Joystick control. Up to
8 areas can be selected.
• OFF: Deactivate Privacy mode.
MOTION
PRIVACY
6.6 PRIVACY <Option : INTERNAL / LINE LOCK >
Two SYNCHRONIZATION modes are available, Internal / Line Lock.
6.7 LANGUAGE <Option : ENGLISH / CHINESE >
Select the language the OSD Menu will be displayed in.
Page 11
9. SETUP Menu Functions continued
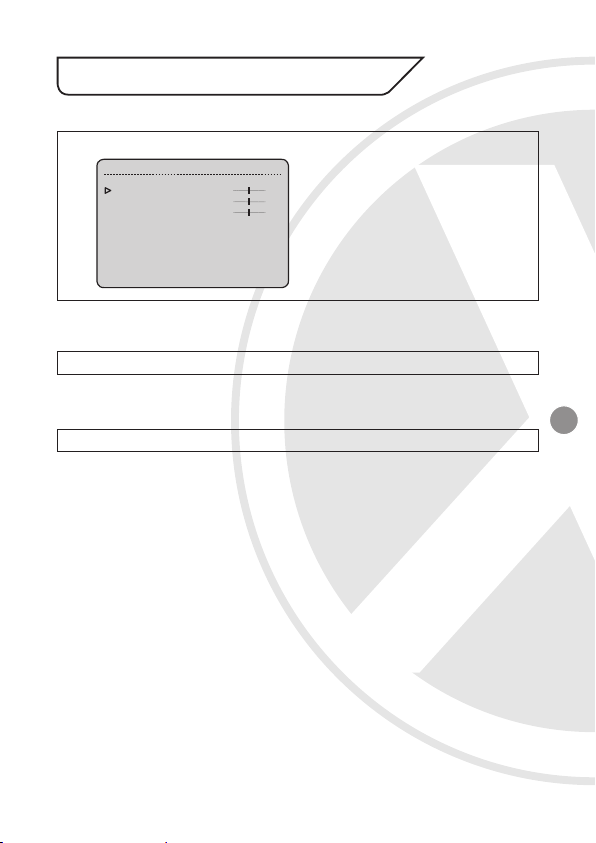
7. ADJUST <Option : SHARPNESS / BLUE / RED / RETURN >
Adjust sharpness / RED and BLUE levels on the camera image.
MOTION
SHARPNESS 17
BLUE 69
RED 63
RETURN RET
8. RESET
Resets all settings to Factory Default.
9. EXIT (SAVE)
Select to save OSD Menu settings and EXIT the Setup Menu.
11
Page 12

Specifications
Model: XPD621
Picture Type: Day/Night (B/W & Colour)
Image Sensor: Sony 1/3” Ex View CCD
DSP: Xvision XX3
Resolution:
Lens Viewing Angle: 26 to 92°
Infra Red Night Vision: 25 metres
Minimum Illumination:
Audio: No
Operating Voltage: 12V DC 750mA
Suggested Power Supply: 12V DC 1250mA
Mounting: Wall or Ceiling
12
Weatherproofing: Yes
Dimensions (ØxH): 130mm x 111mm
TECHNICAL SUPPORT:
For Technical Support for any Xvision product please contact your local distributor.
LIMITED WARRANTY:
This product is supplied with a 3 Year warranty. The Warranty excludes products that have been
misused, (including accidental damage) and damage caused by normal wear and tear. In the
unlikely event that you encounter a problem with this product, it should be returned to the place
of purchase.
Should you require replacement LEDs please contact your local distributor.
580 TVL (Colour mode)
700 TVL (B/W mode)
0 Lux (IR on)
0.0003 Lux (IR off & B/W mode)
Manufactured exclusively for Xvision - www.x-vision.co.uk
UK/Europe
Xvision Group (UK)
Unit 2, Valley Point,
Beddington Farm Road,
Croydon, Surrey
CR0 4WP
E: [email protected]
Far East
Kyoung Am Building
157-27 Samsung-dong
Kangnam-ku
135 090 Seoul
Korea
E: [email protected]
Middle East
Burjuman Tower,
18th Floor
PO Box 121828
Dubai 43659
United Arab Emirates
E: [email protected]
North America
100 Park Avenue
New York City,
New York
10017
United States
E: [email protected]
 Loading...