

Page 1
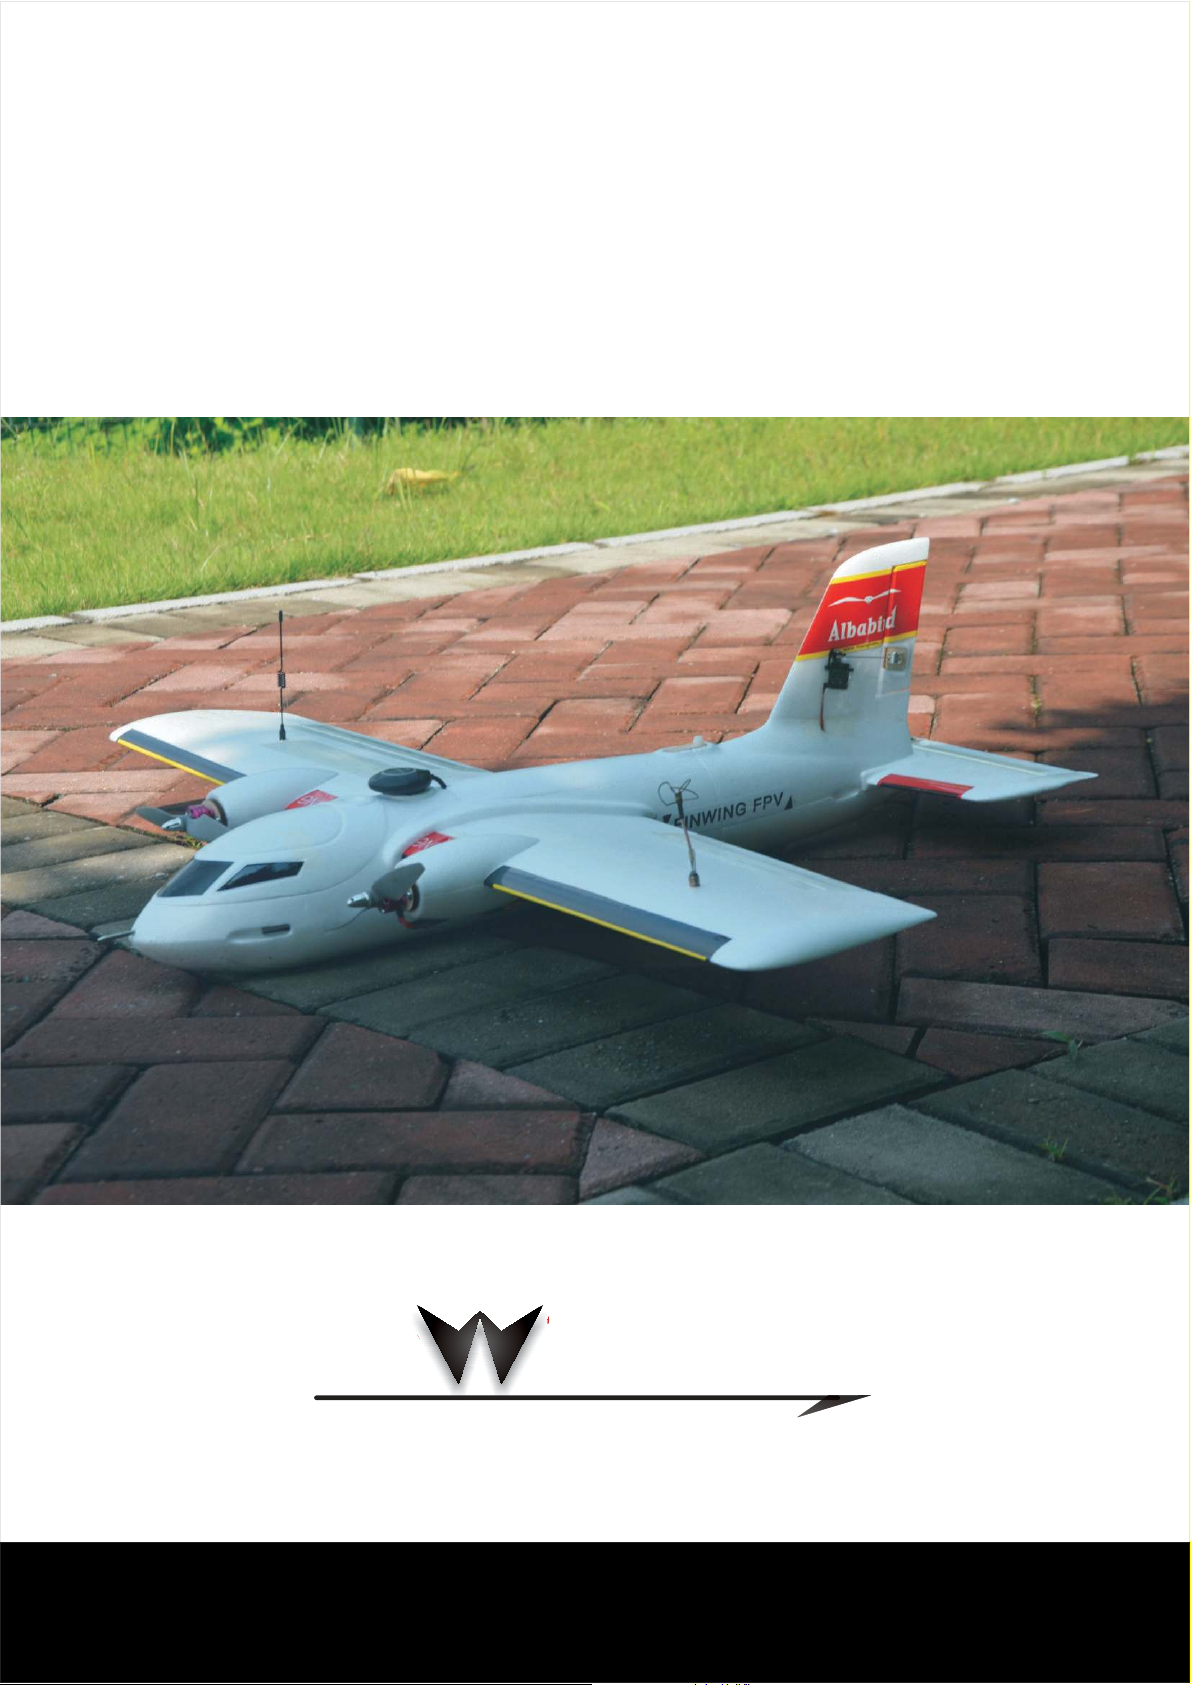
AlbaBird
User Manual
FPV
Fin inghobby
Finwinghobby
WWW FINWINGHOBBY COM. .
FINWING TECHNOLOGY
PATENT OWNER FINWINGHOBBY:
Page 2

Pleasereadthroughthemanual beforeinstallationandflying
Thismanual useronhowtobuild RCplane.
Pleasevisitthe finwinghobby com officialwebsiteformore introductions.
as introductions to ing this
. .
www
Warning:
1 This model airplane is not a toy not recommended for children under 14 years old. , ,
2.Becautiousandpreparedwhileflyingthisplaneasarangeofissuescouldleadtoacrash
includingtheenvironment/weather,speed,piloterror, improperbuilding/testing,
interferenceorothercomponentfailures
3.Flyingfield:Chooseanadequateflyingspaceatleast100meters long/wideandinanunpopulated
andnon-builtupareaforsafeflying. Thisincludesavoidingflyingovercitiesorotherpopulatedareas.
4.Pleasedon'tflythismodelairplaneinbadweatherincludingrainyand/orwindyenvironments.
5.Remembertounplugyourflight/videobatterywhennotinusetoavoidanyinterferencetoothers
.
whomightbeonsimilarchannels.
6.Pleaserememberswitchonthetransmitterfirstbeforeconnectingthebattery,anddisconnect
thebatteryfirstbeforeswitchingoffyourtransmitter.
7.Keepawayfromthepropellerwhenthe Airplaneispoweredasitcanbedangerousandcould
leadtoinjury.Keepthepoweredplaneawayfromchildrenatalltimestoavoidanyaccidentsorinjury.
Will post the information on time to weixin and facebok
once we have new airplane for sales or big discount promotions
Be the first one to knew!
Like us
Subscribe
( )
Facebook Page
WeiChatFinwinghobby
Page 3
CG.
A
C
Main wing
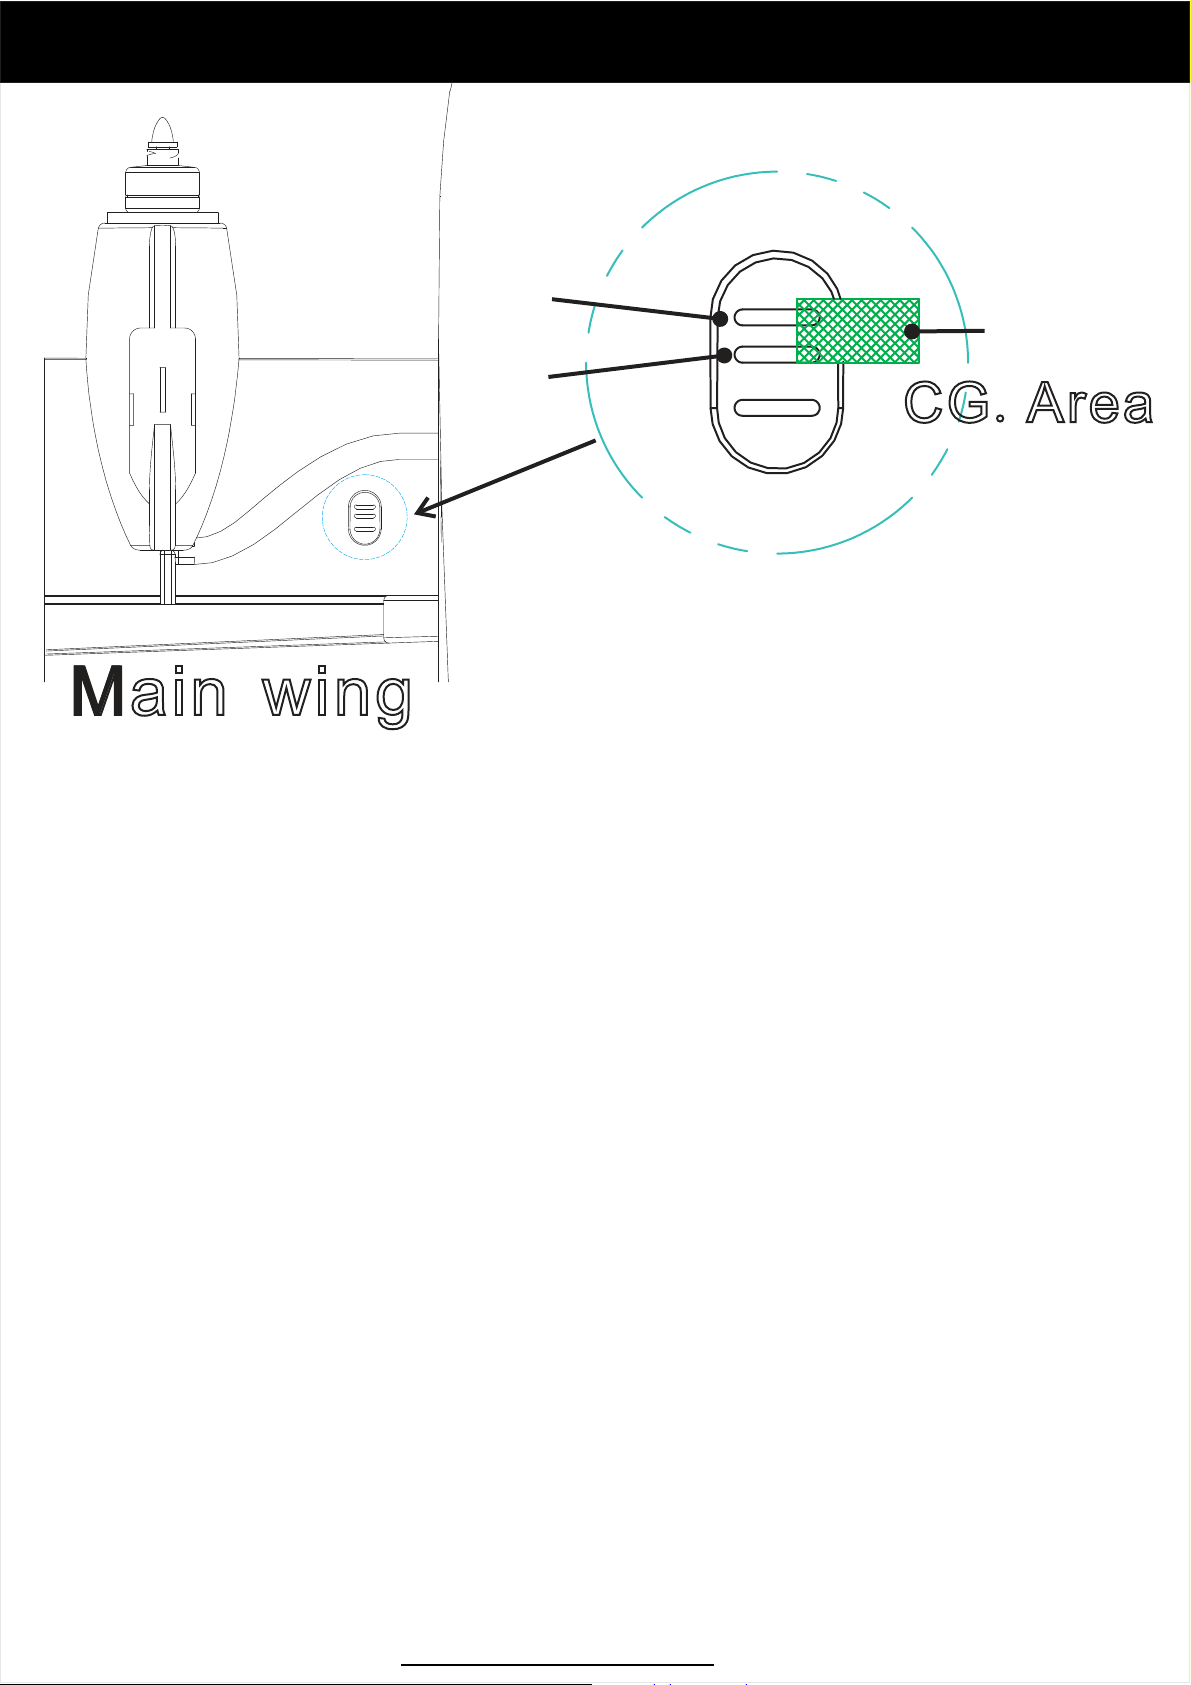
CG Setting introductions
. :
B
CG Area.
Green area C
After lots of testing concluded CG must be in the Green Area
Point B For safety purpose recommend Maiden flight use Point B
Point A if plane assemble correctly we found that A is the best
Different people measuring differently by fingers
Moving CG backward a little 3mm if plane pitch down tendency
Moving CG forward a little 3mm if plane pitch up tendency
if still not good after CG Adjustment must checking horizontal wing
and main wing especial after crash happened
:
: ,
. ( )
. ( )
. ,
- !
.
Finwinghobby com.
Page 4
Special Recommendations
We have solved potentional problem by new desgin
s
and improving Mould making but what ever in case
we still introduce this for your reference
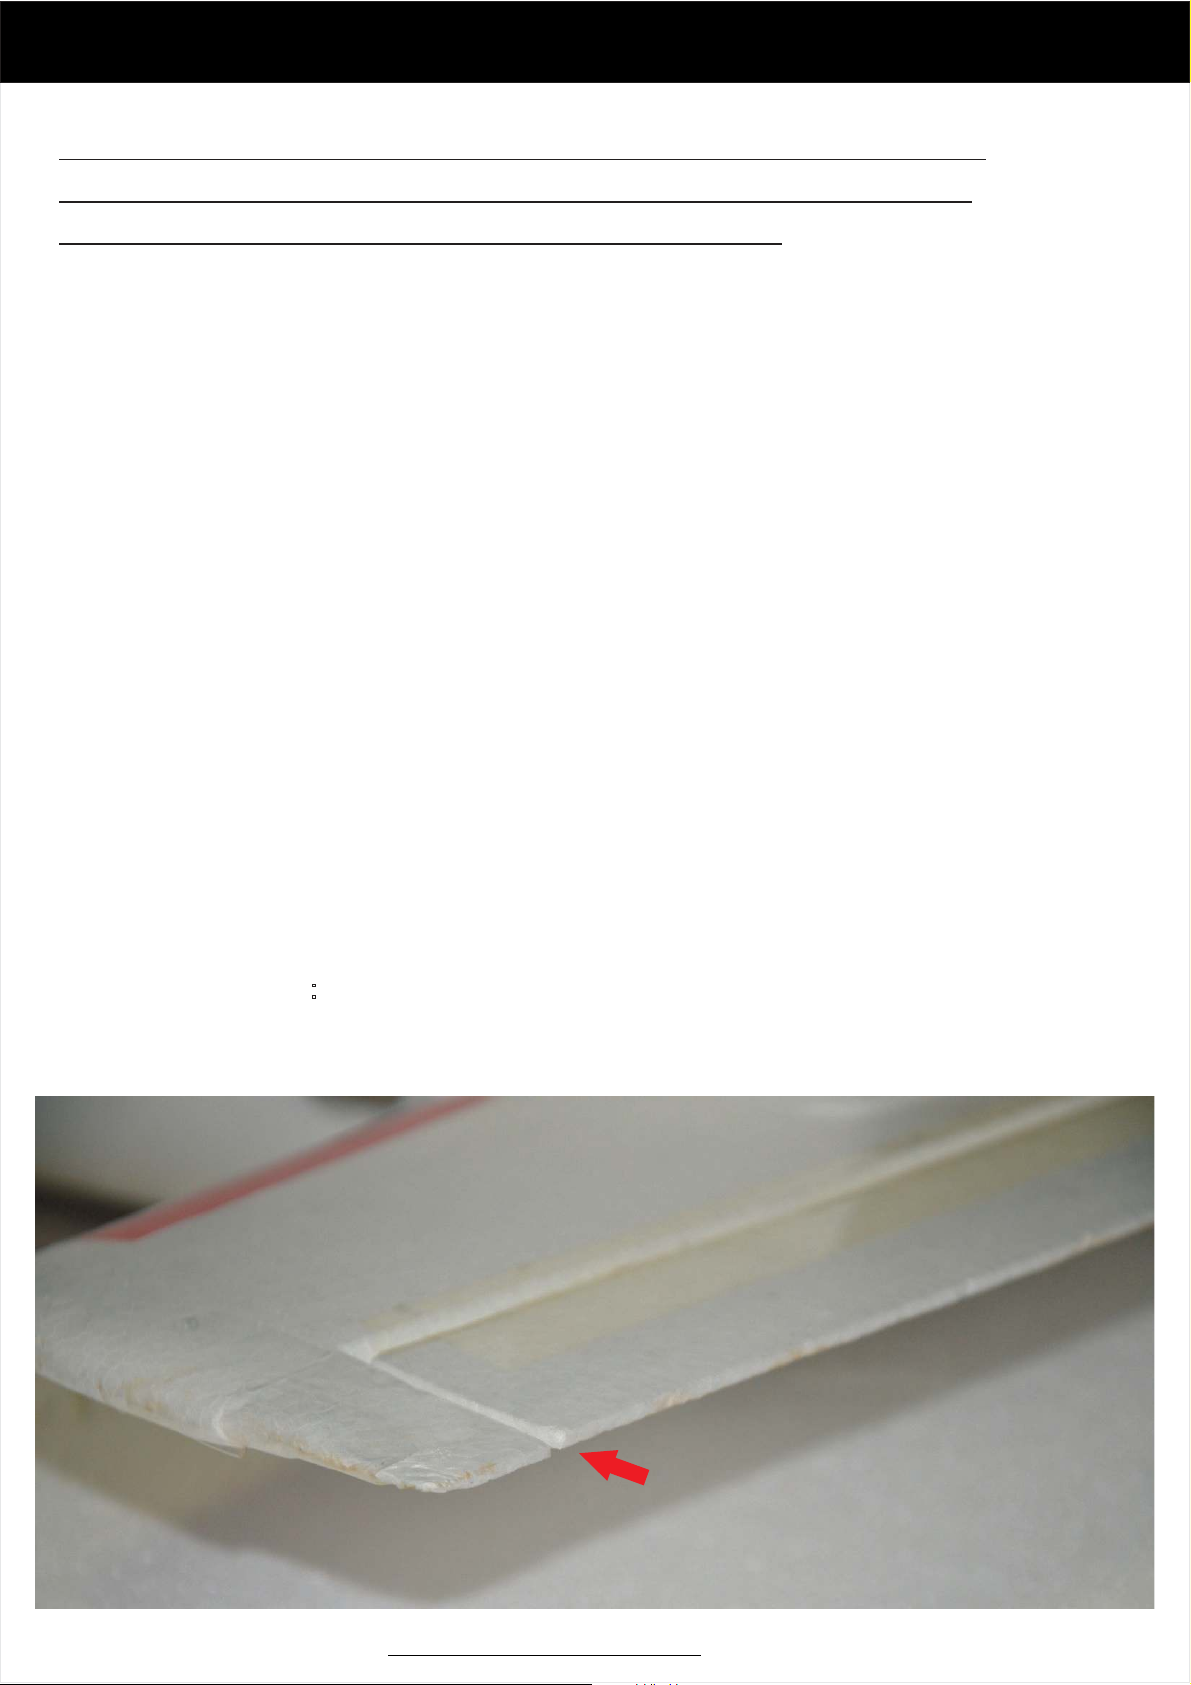
In case nose heavy:
plane still nose heavy diving a lot even if CG is at Point B
Solutions:
Elevator up approximately 1 5MM travel as following picture
.
CG is still between A and B
What caused
Horizontal wing should be exactly horizontal but fuselage tail section
has to be molded by two half transportation may caused horizontal
?
.
,
.
wing to be deformed or not drying properly after gluing etc
All of these may caused horizontal wing picth up
a picth up horizontal wing definitely forced the plane nose down diving
But But if installing properly and horizontal wing not deformed
this won t happened
At last Reminder
must let fuselage drying at least 12 hours after gluing together
to avoid that problem
' !
:
.
Finwinghobby com.
Page 5
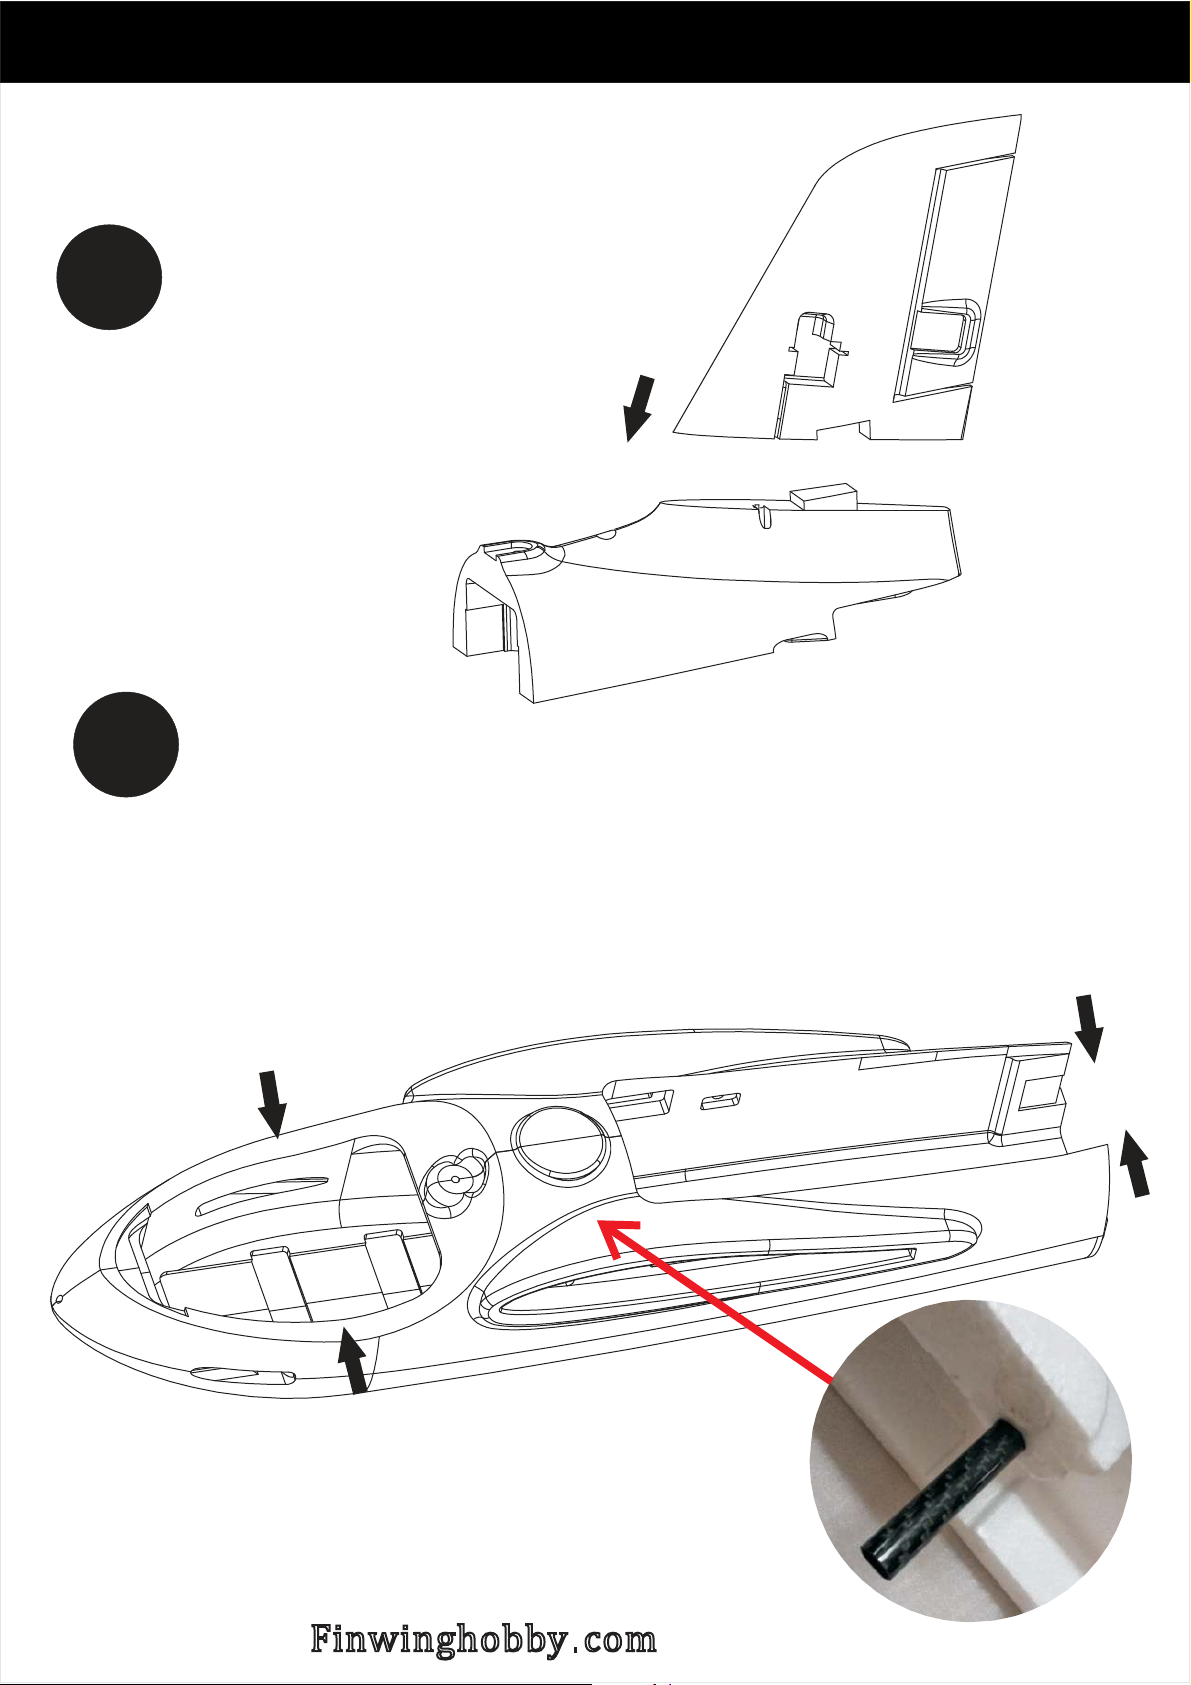
Airframe Building
Pleae do to building as per instructions
as below step by step
1
Glue vertical wing
Install properly and drying
2
Note Don't install wings and other devices until drying
Glue Fuselage
:
at least 12 hours
Finwinghobby com.
Page 6
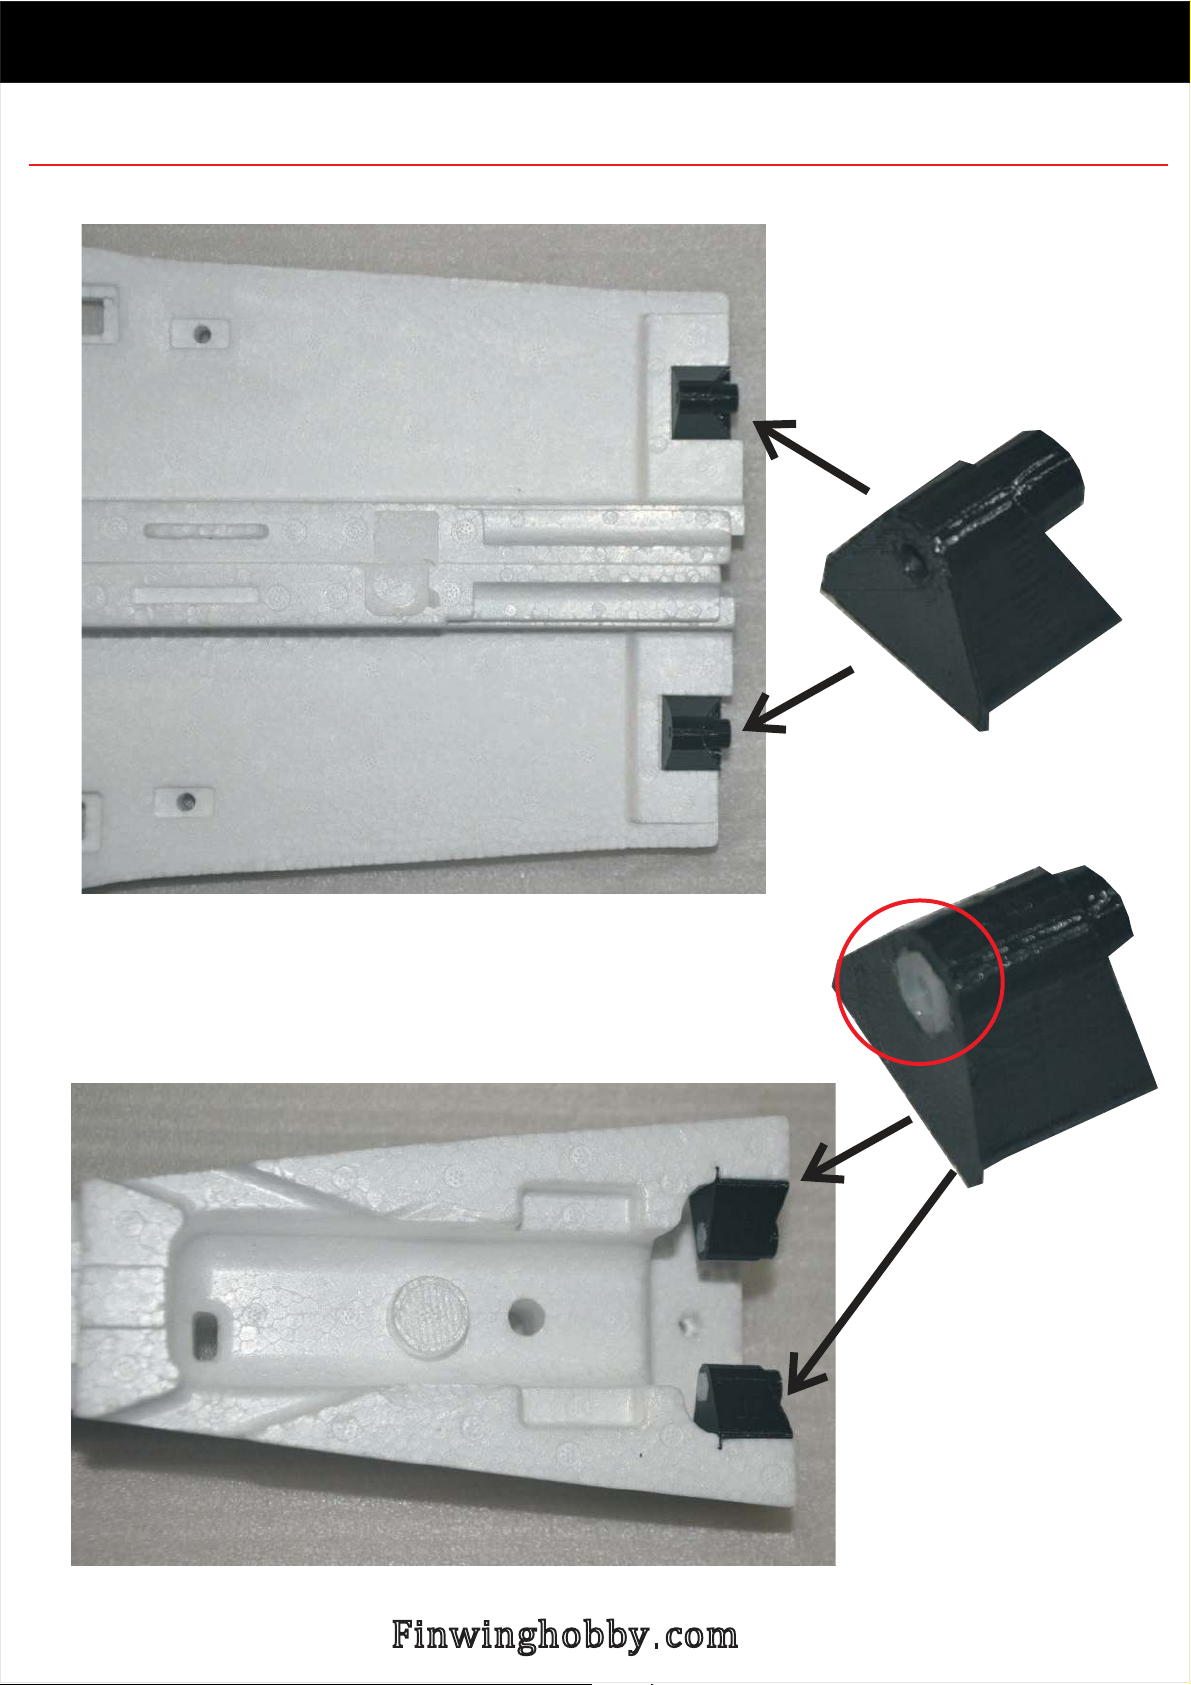
Non detachable fuselge please skip to next page-
Detachable Fuselage
Fuselage
Fuselage tail boom-
Nut
Finwinghobby com.
Page 7
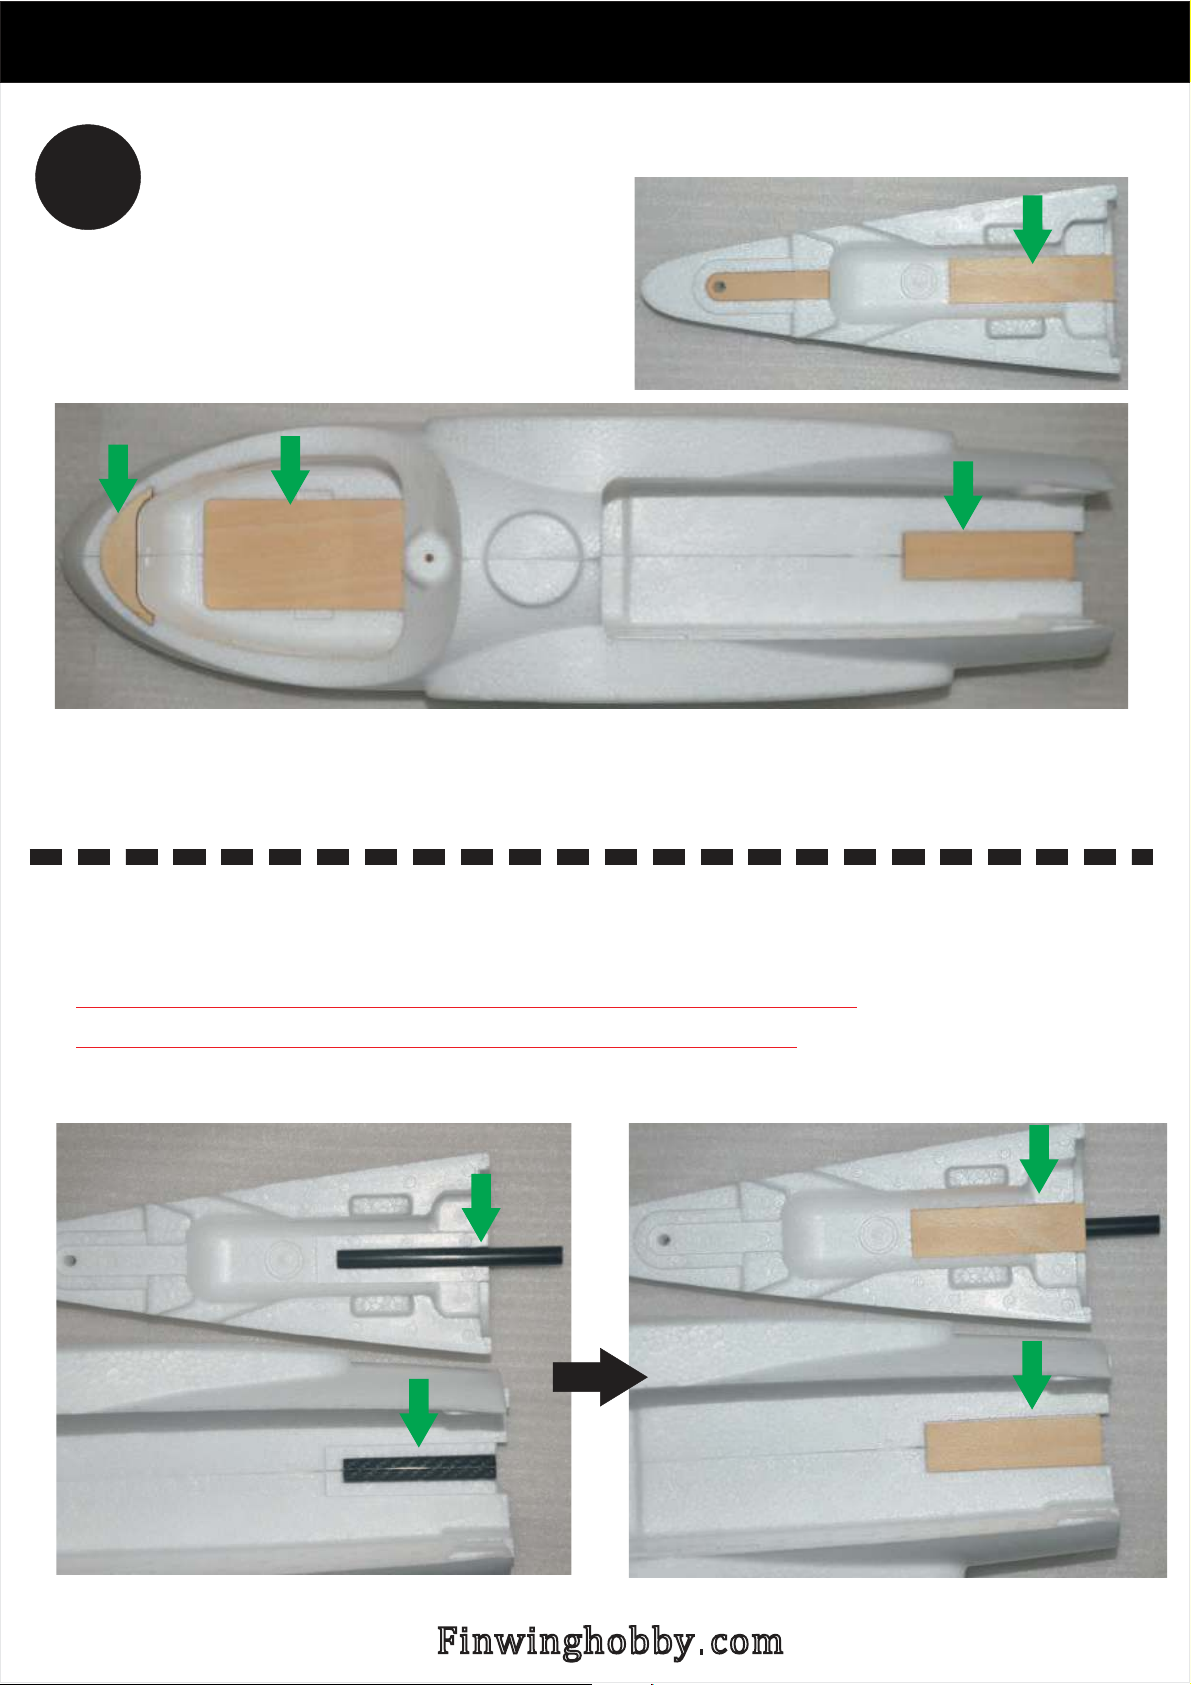
Airframe Building
Plywood
3
plywood reinforcements
Detachable fuselge must install rods
Standard Non Detachable fuselge no need
to install rods please skip to next page
-
,
Finwinghobby com.
Page 8
Airframe Building
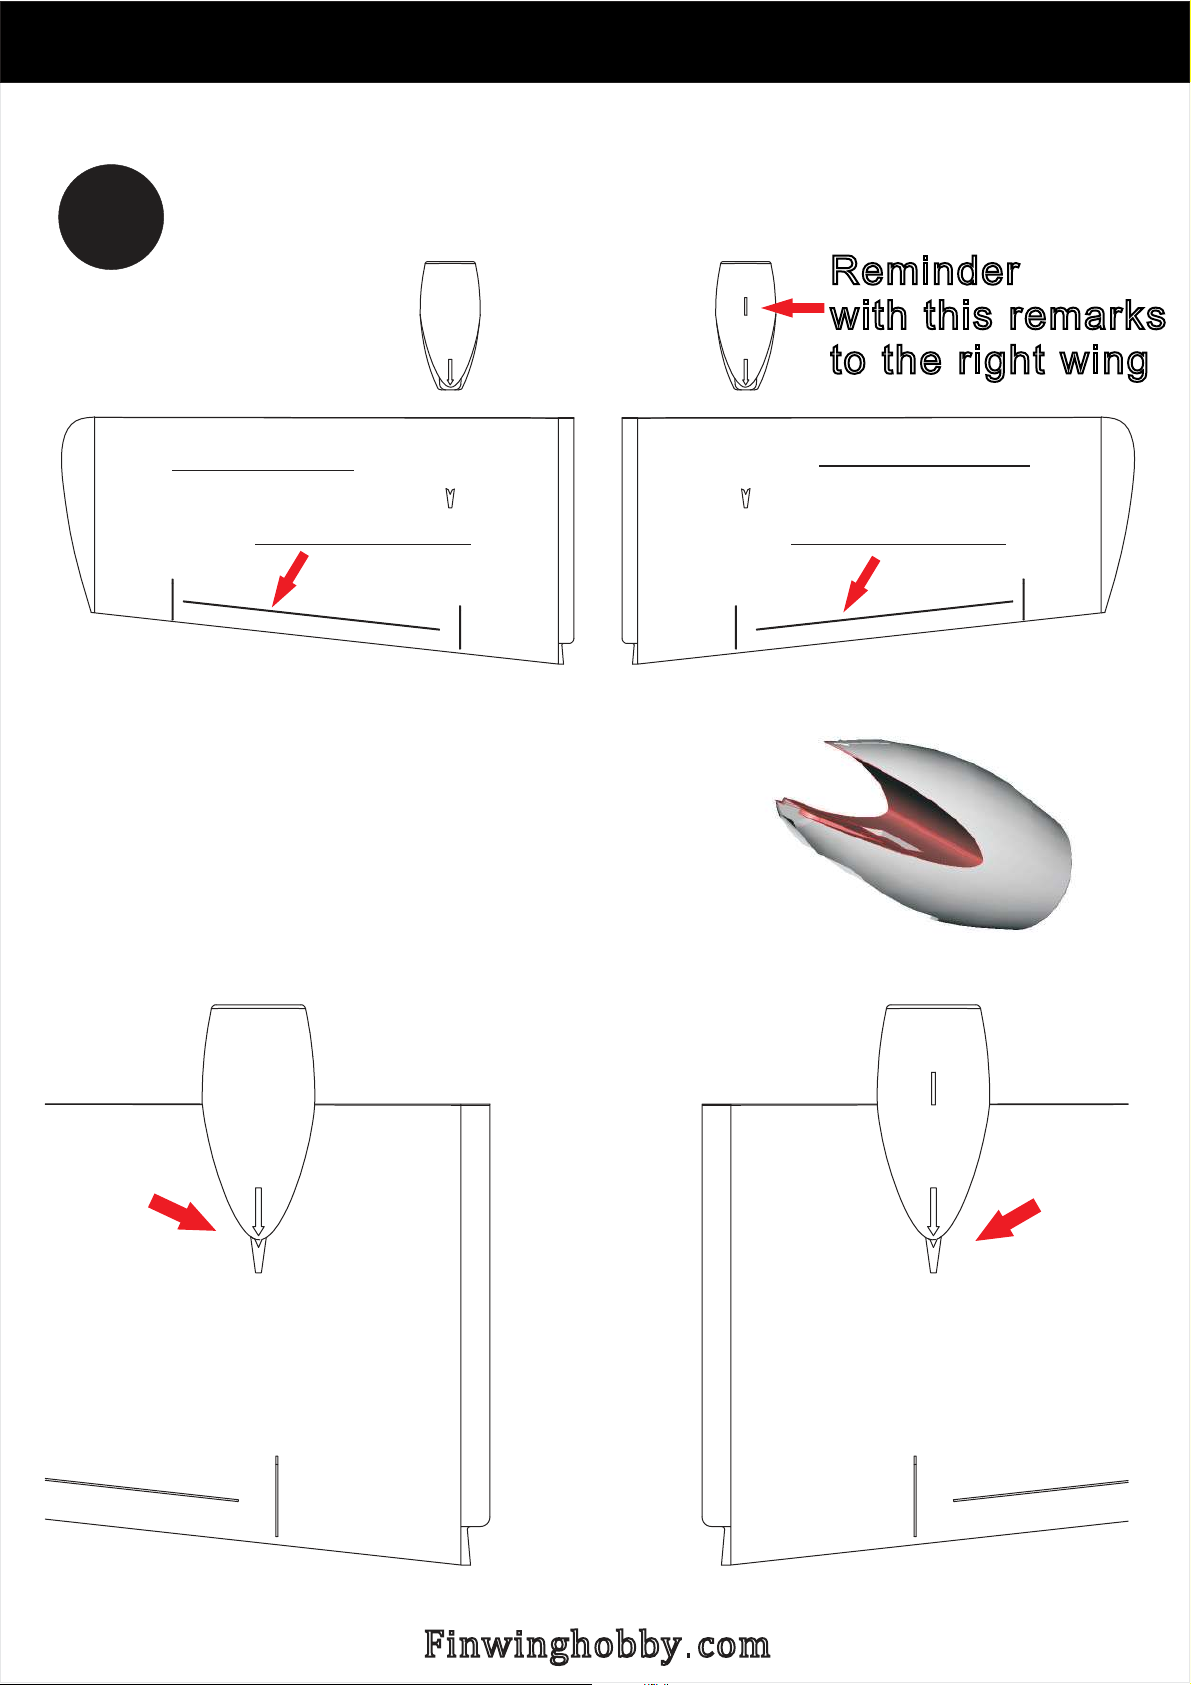
We can build main wing now let fuselage glue drying- ,
4
Glue properly to the red area
Glue motor mounts
Left wing
Carbon strip
Reminder
with this remarks
to the right wing
Right wing
Carbon strip
drying one minutes then install
properly to the main wing-
Finwinghobby com.
Page 9
Airframe Building
5
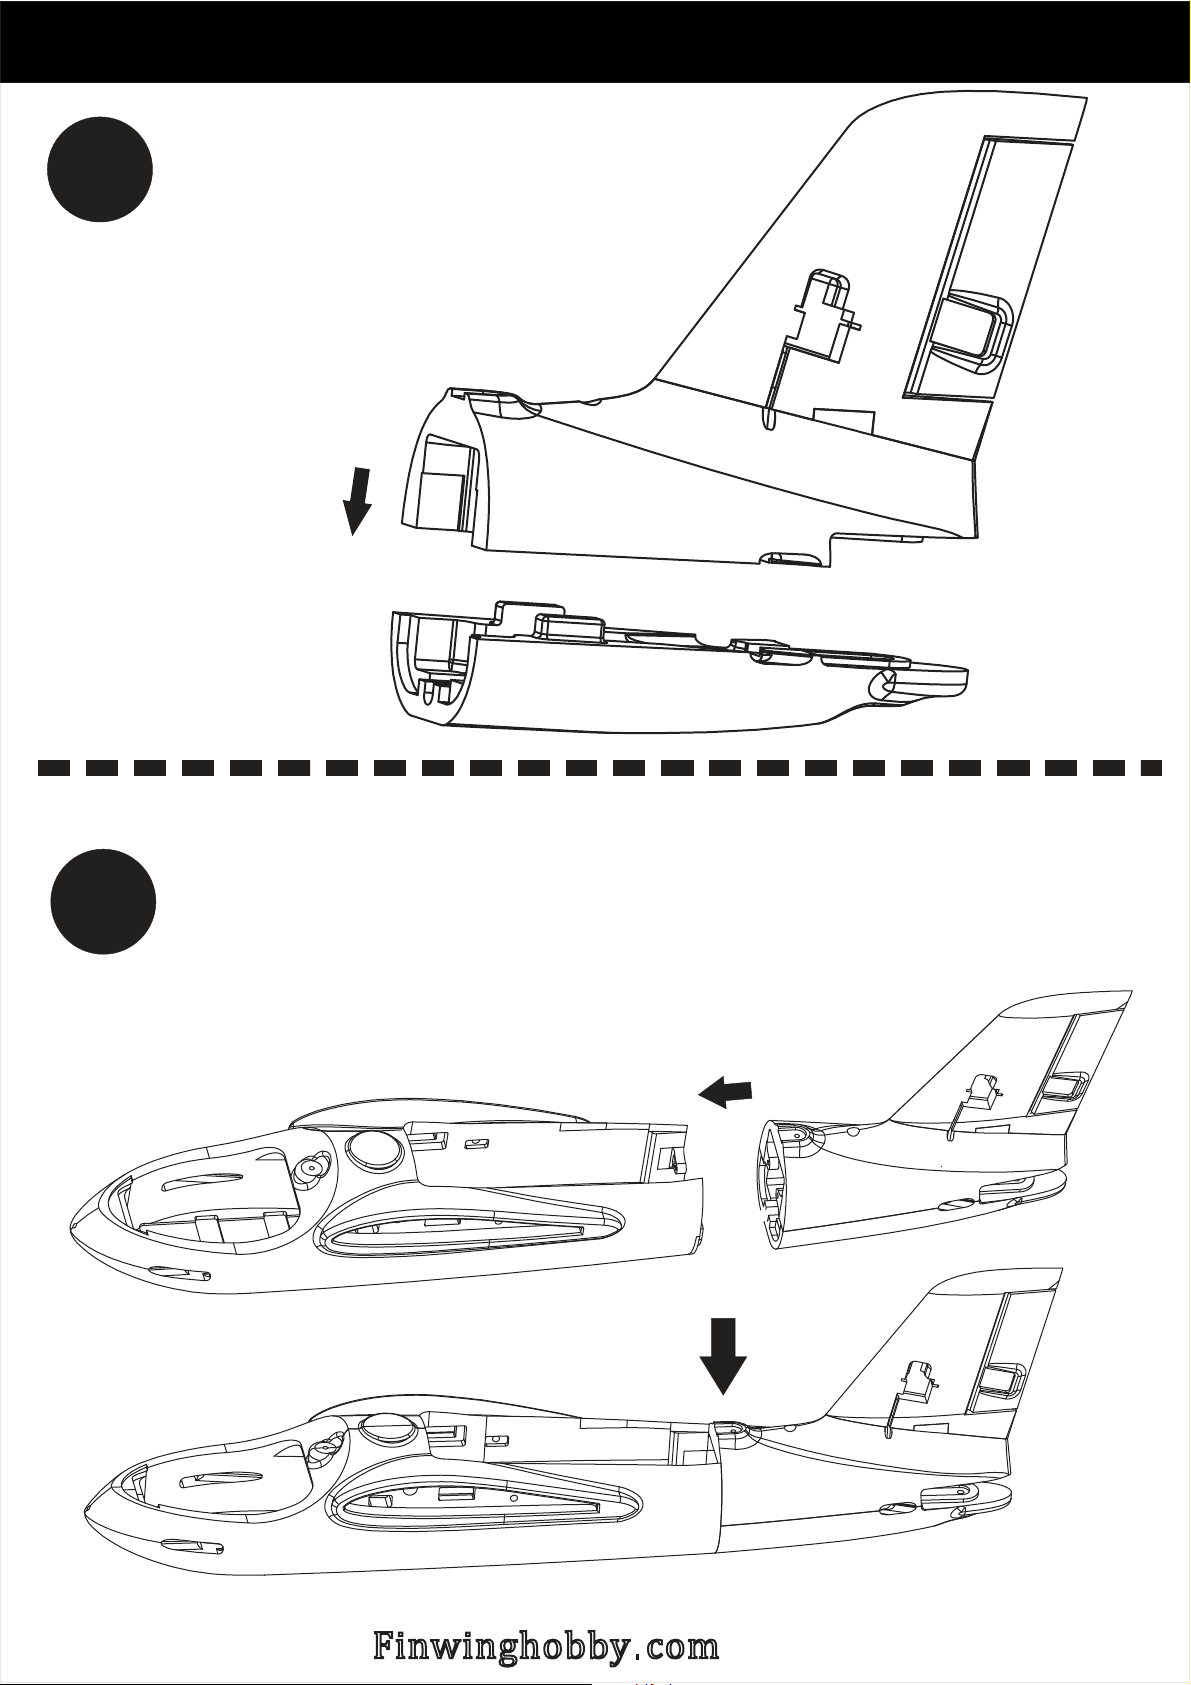
Reminder:must drying at least
1 hour before continuing to
step 6
Glue tail boom-
6
( )Detachable Fuselage please skip
Glue tail boom to fusealge-
Reminder must let fuselage drying at least 12 hours
this is very important otherwise may cause
horizontal wing wrongly pitch up
:
,
Finwinghobby com.
Page 10
Airframe Building
( )Detachable fuselage please skip
Let it stand up like this drying 12 hours
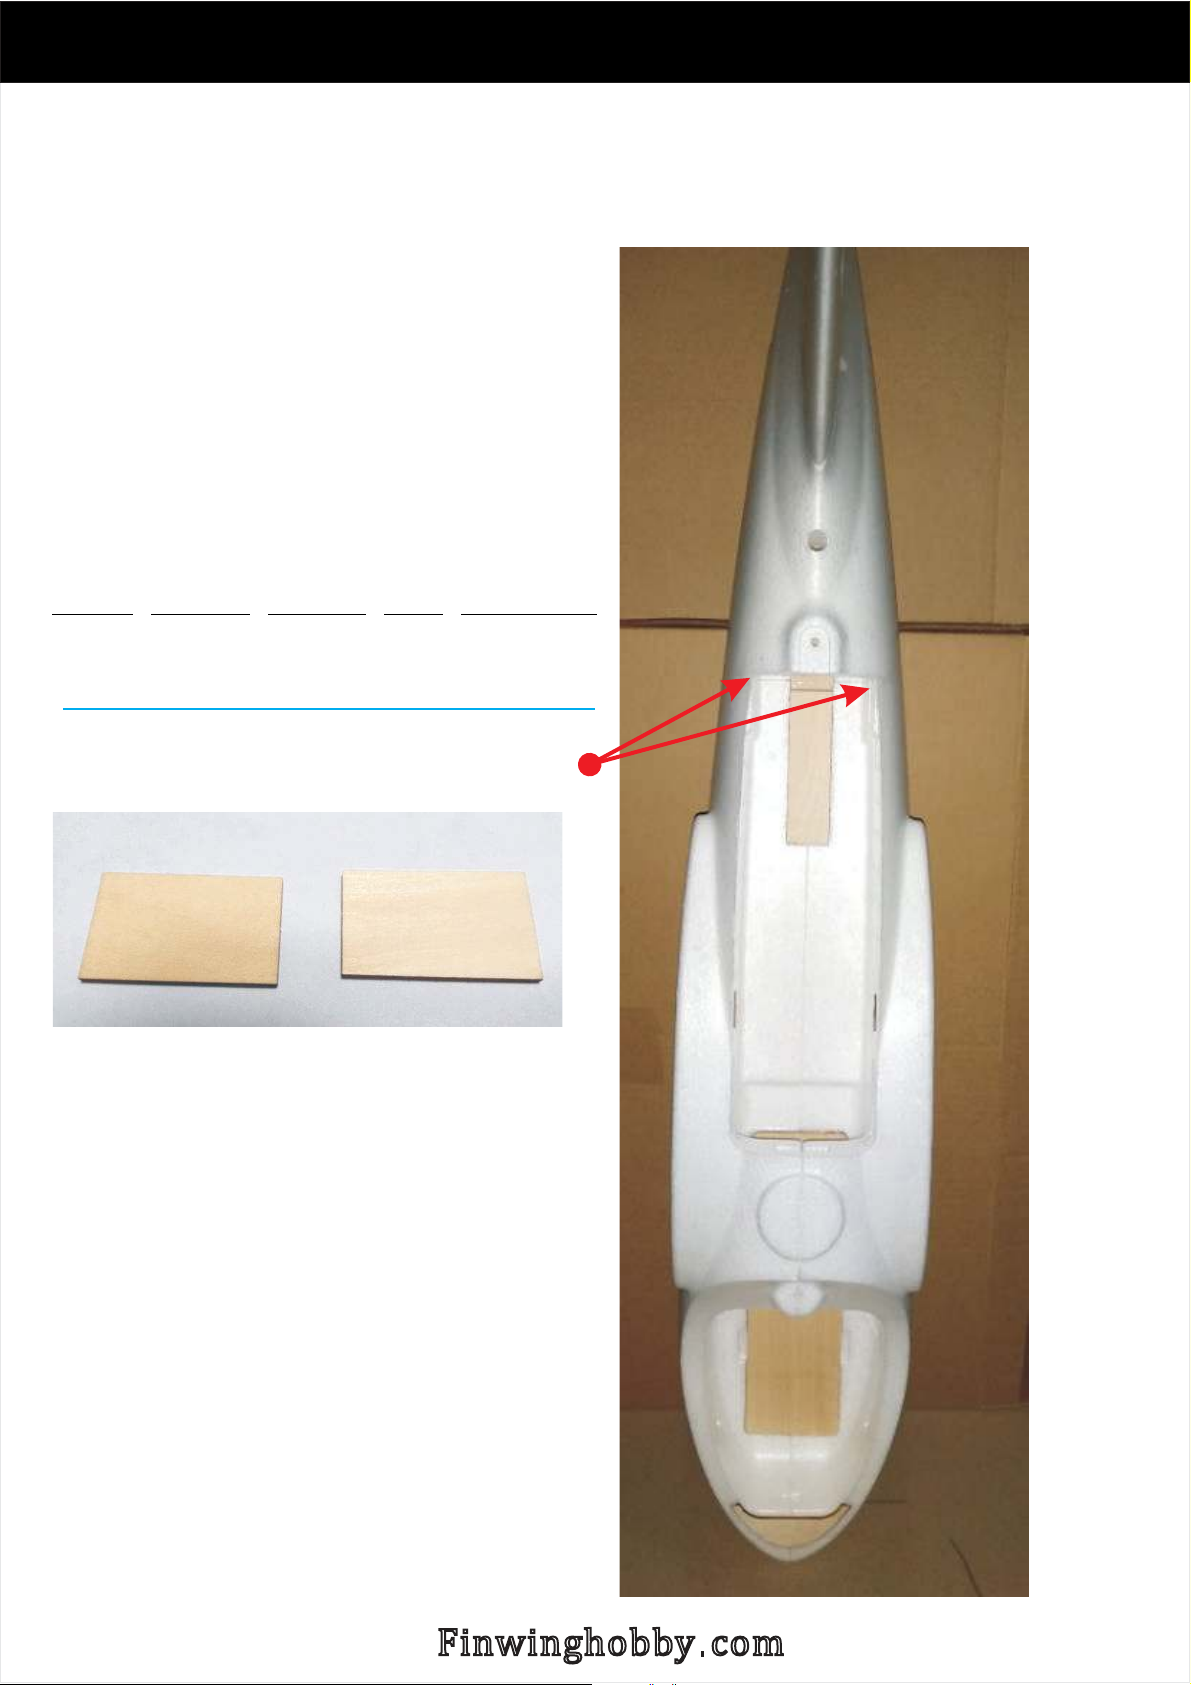
2020 Newly added this plywood
For Non Detachable fuselage-
< >No need for detachable fuselage
Gule to fuselage
for reinforcement
40 25MM*
40 25MM*
Ground
Finwinghobby com.
Page 11
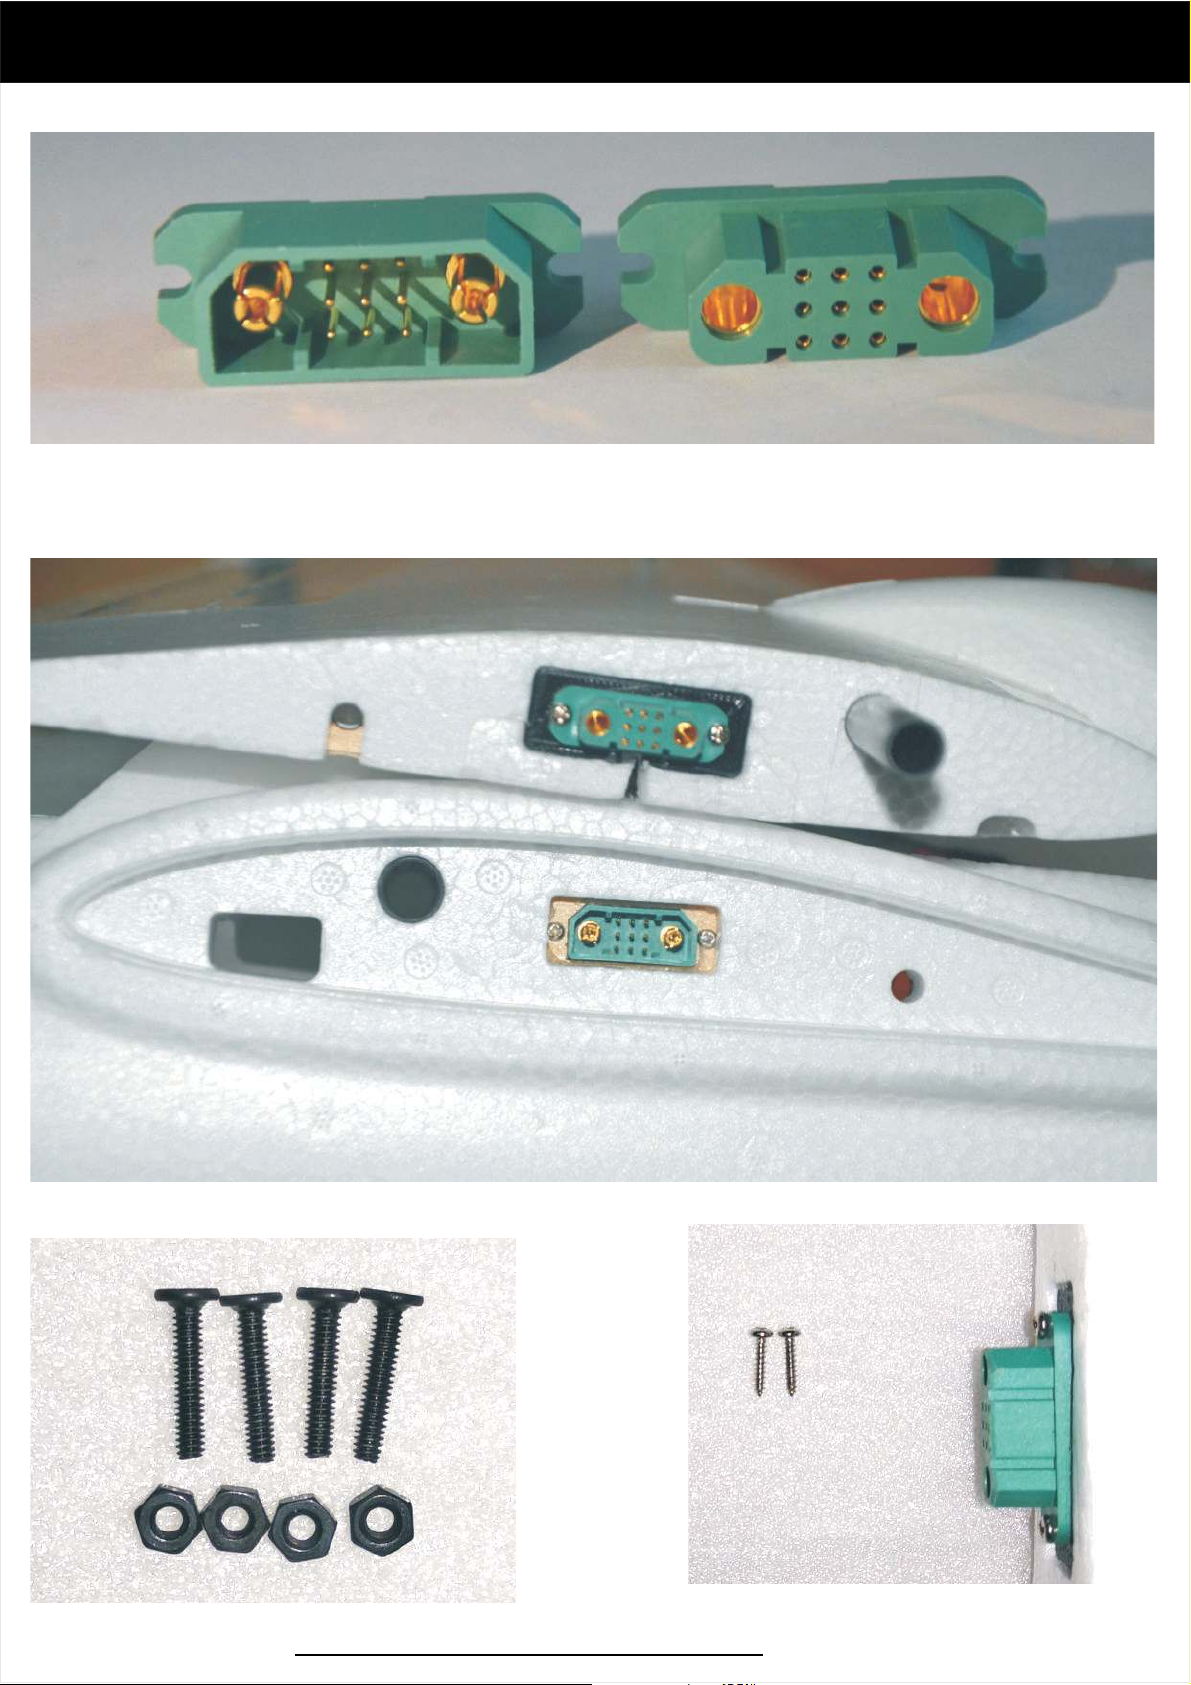
9 Connector+2
Male Female
No regular rules on how to solder wires
do as per your requirements freely
Screws secured Male connector
Female to Wings
Male to fuselage
Screws for
to fuselage
Female Connector
Https www fiwninghobby com:// . .
Page 12
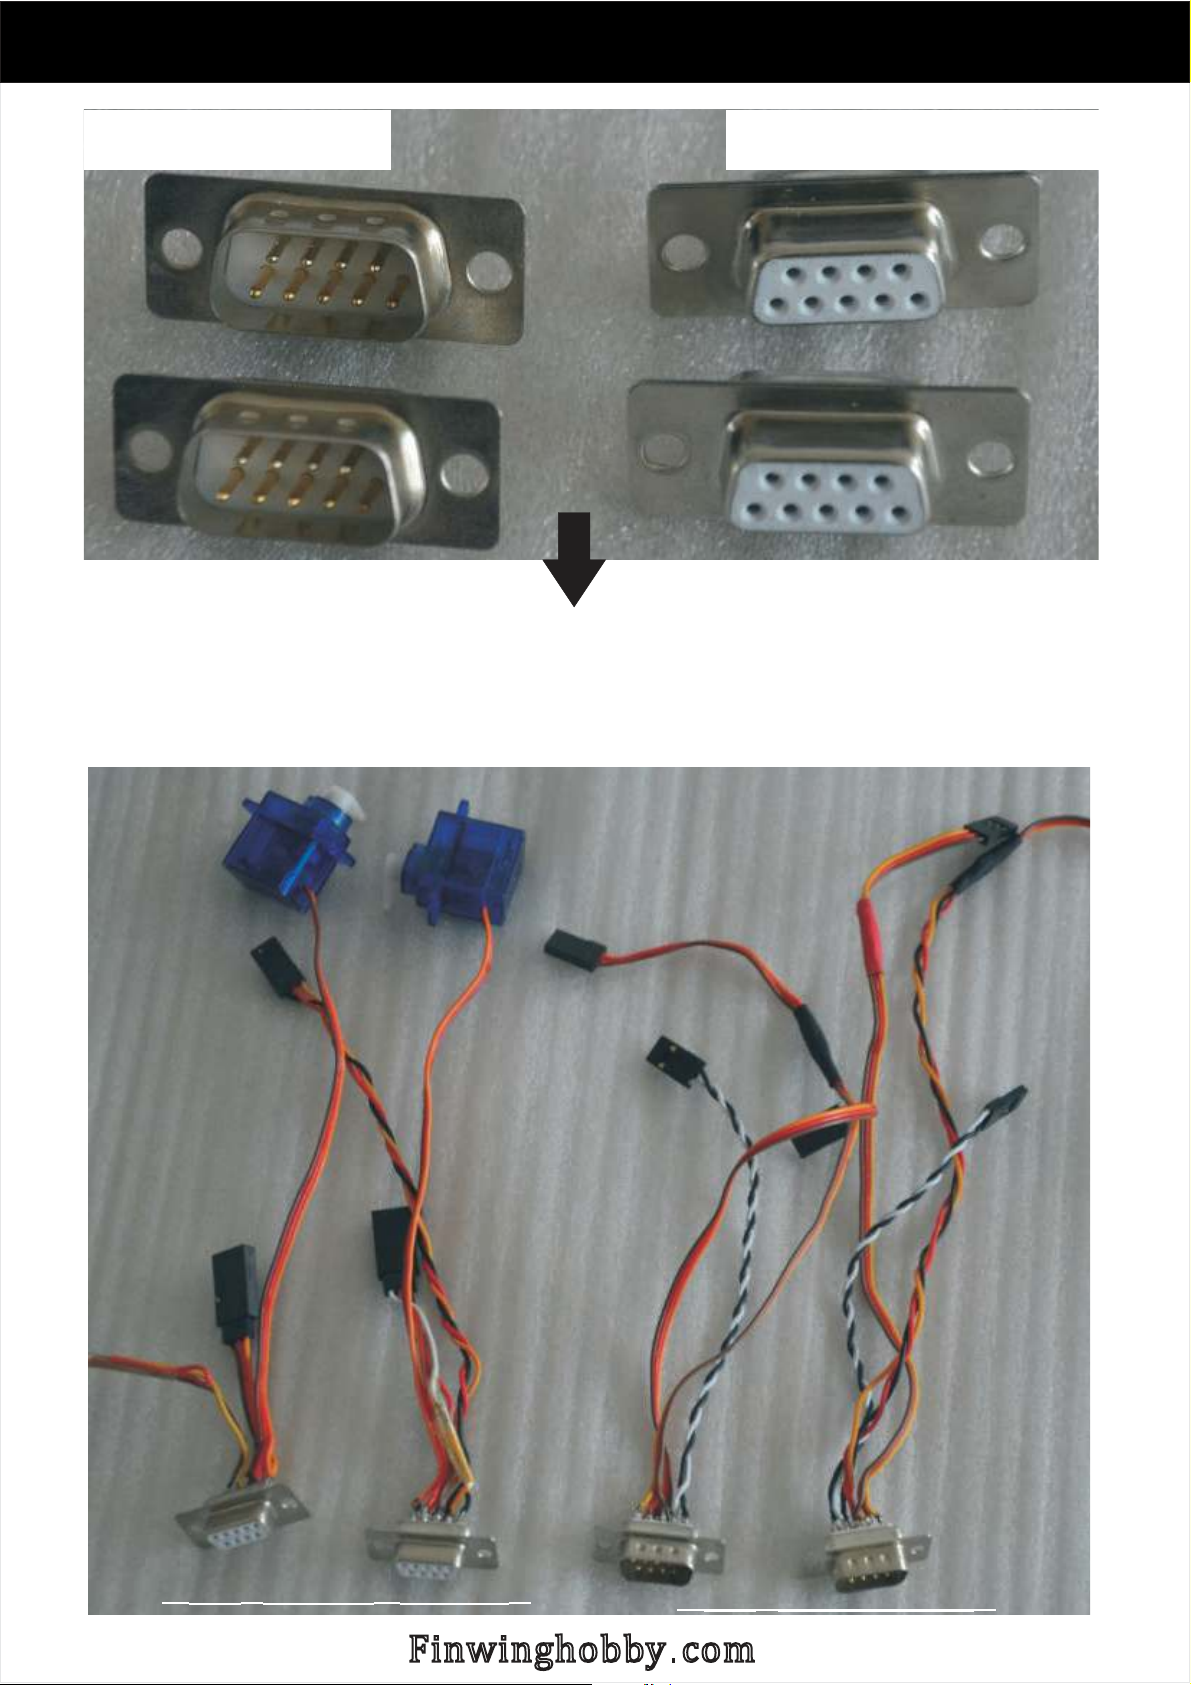
Standard 9PIN Connector
9PIN Male
9PIN Female
( , )Male to Fuselage Female to Wing
There is no regular wire connection
Please do according to your devices wires
,
'
as below just for your reference
( )Aileron
( )TX
( )ESC
( )ESC
( )ESC
( )VTX
( )Aileron
( )TX
( )ESC
( )VTX
( - )To Main wing
( )To Fuselage
Finwinghobby com.
Page 13
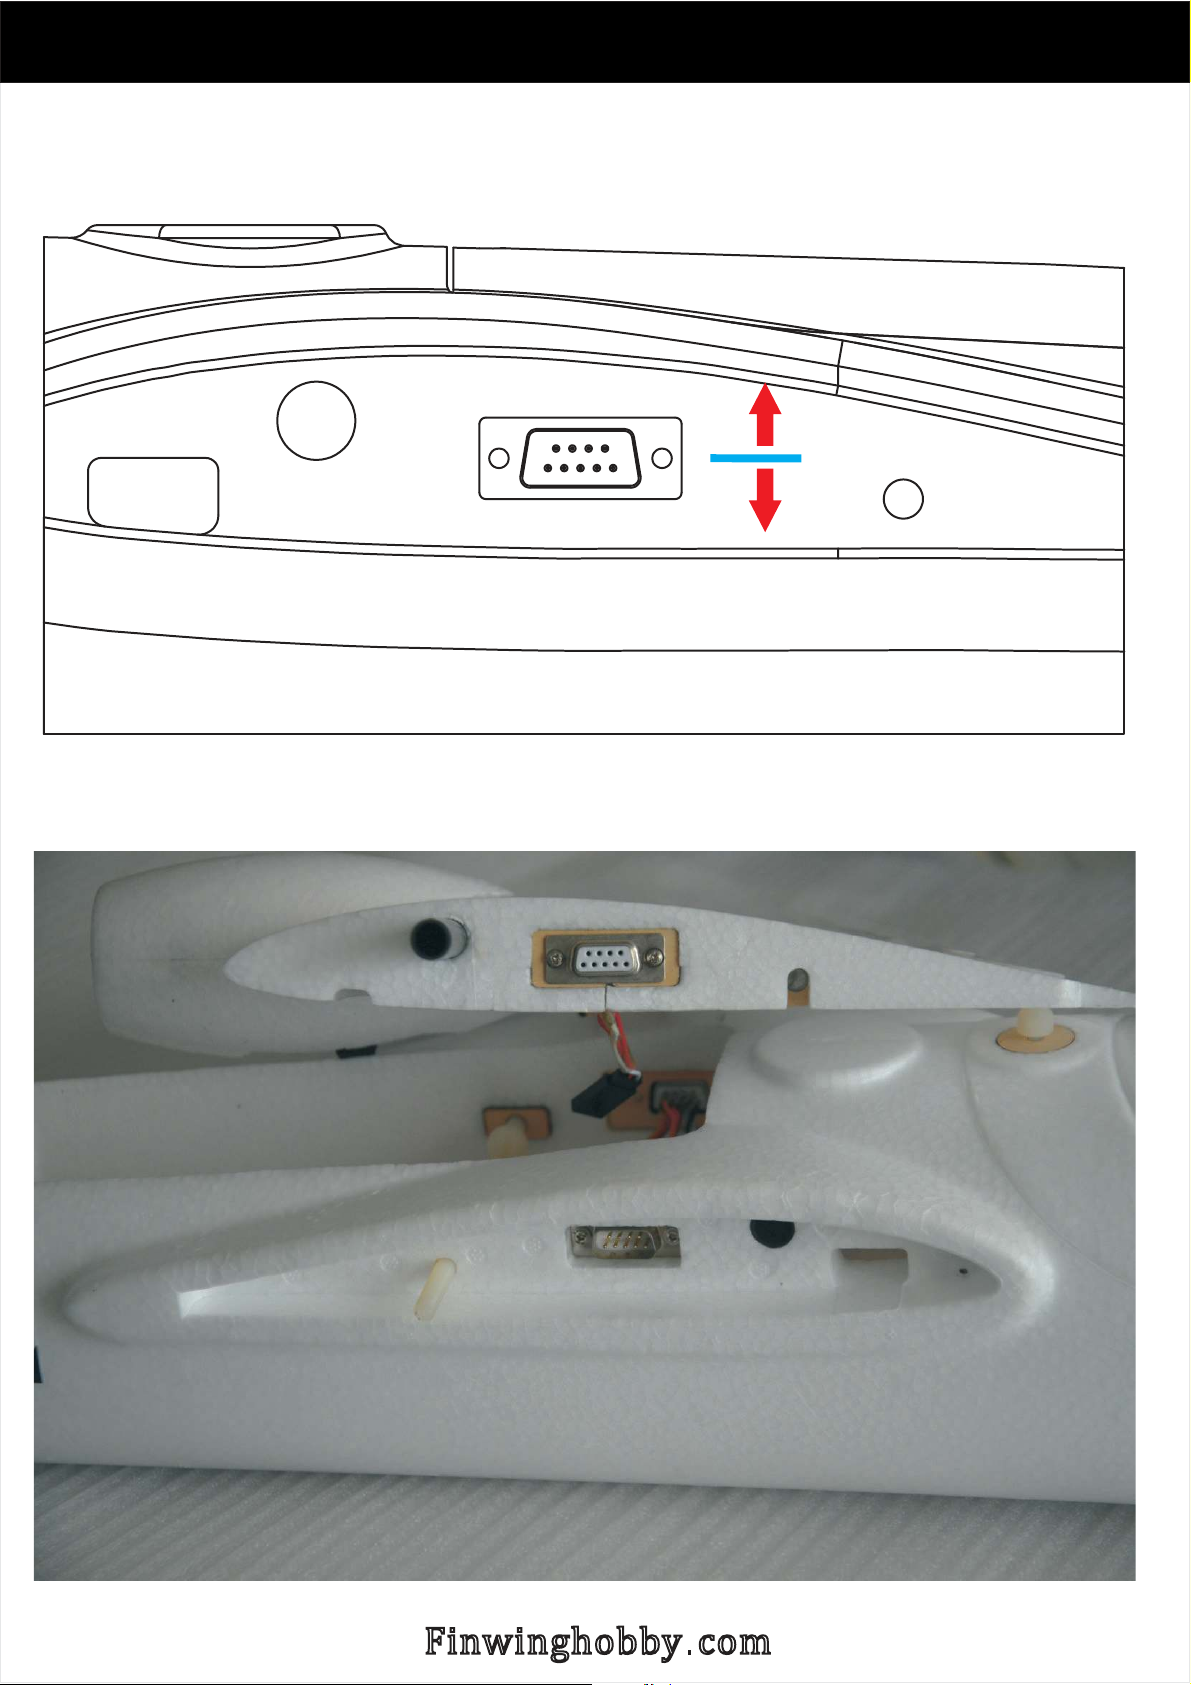
Standard 9PIN Connector
Reminder Correct Orientation:
Finally secured by screws
Finwinghobby com.
Page 14
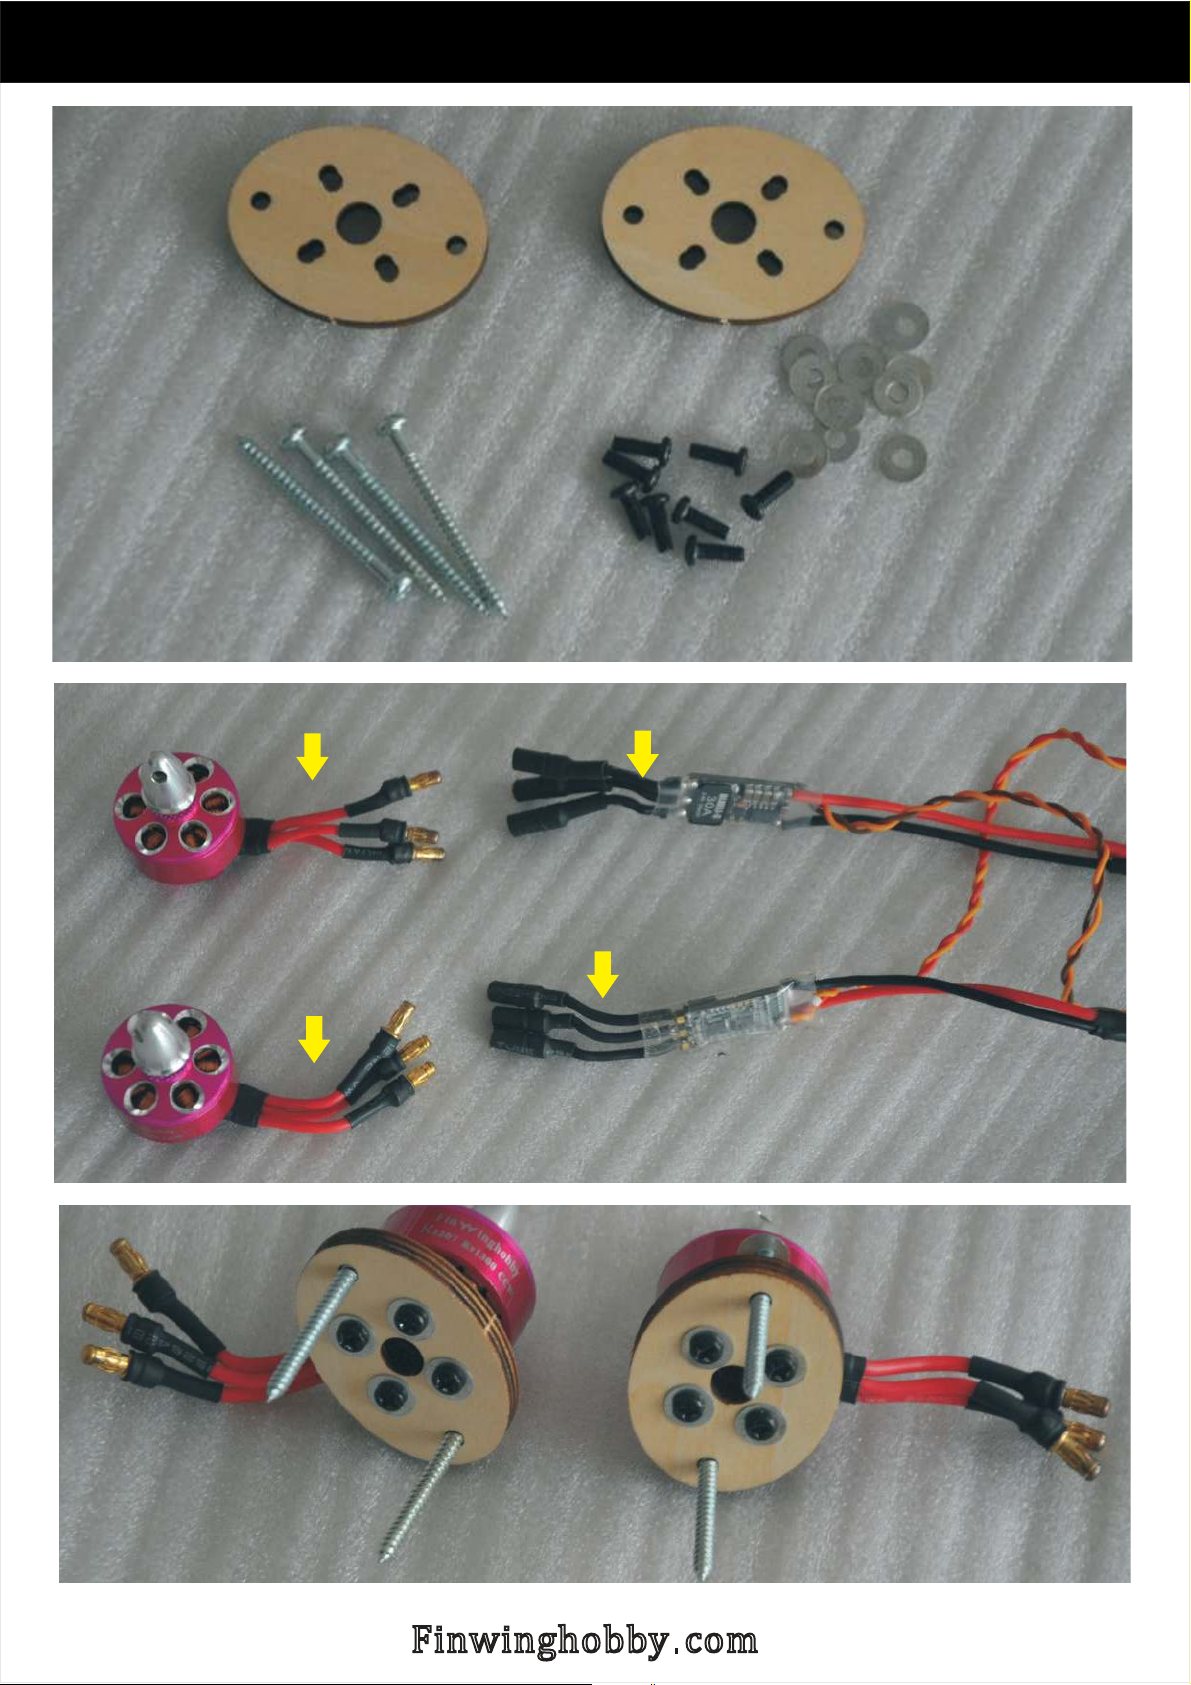
Motor ESC Servo, ,
Screw color silvery or Black
3CM
Wires Length 3 CM. 0
3CM
Finwinghobby com.
Page 15
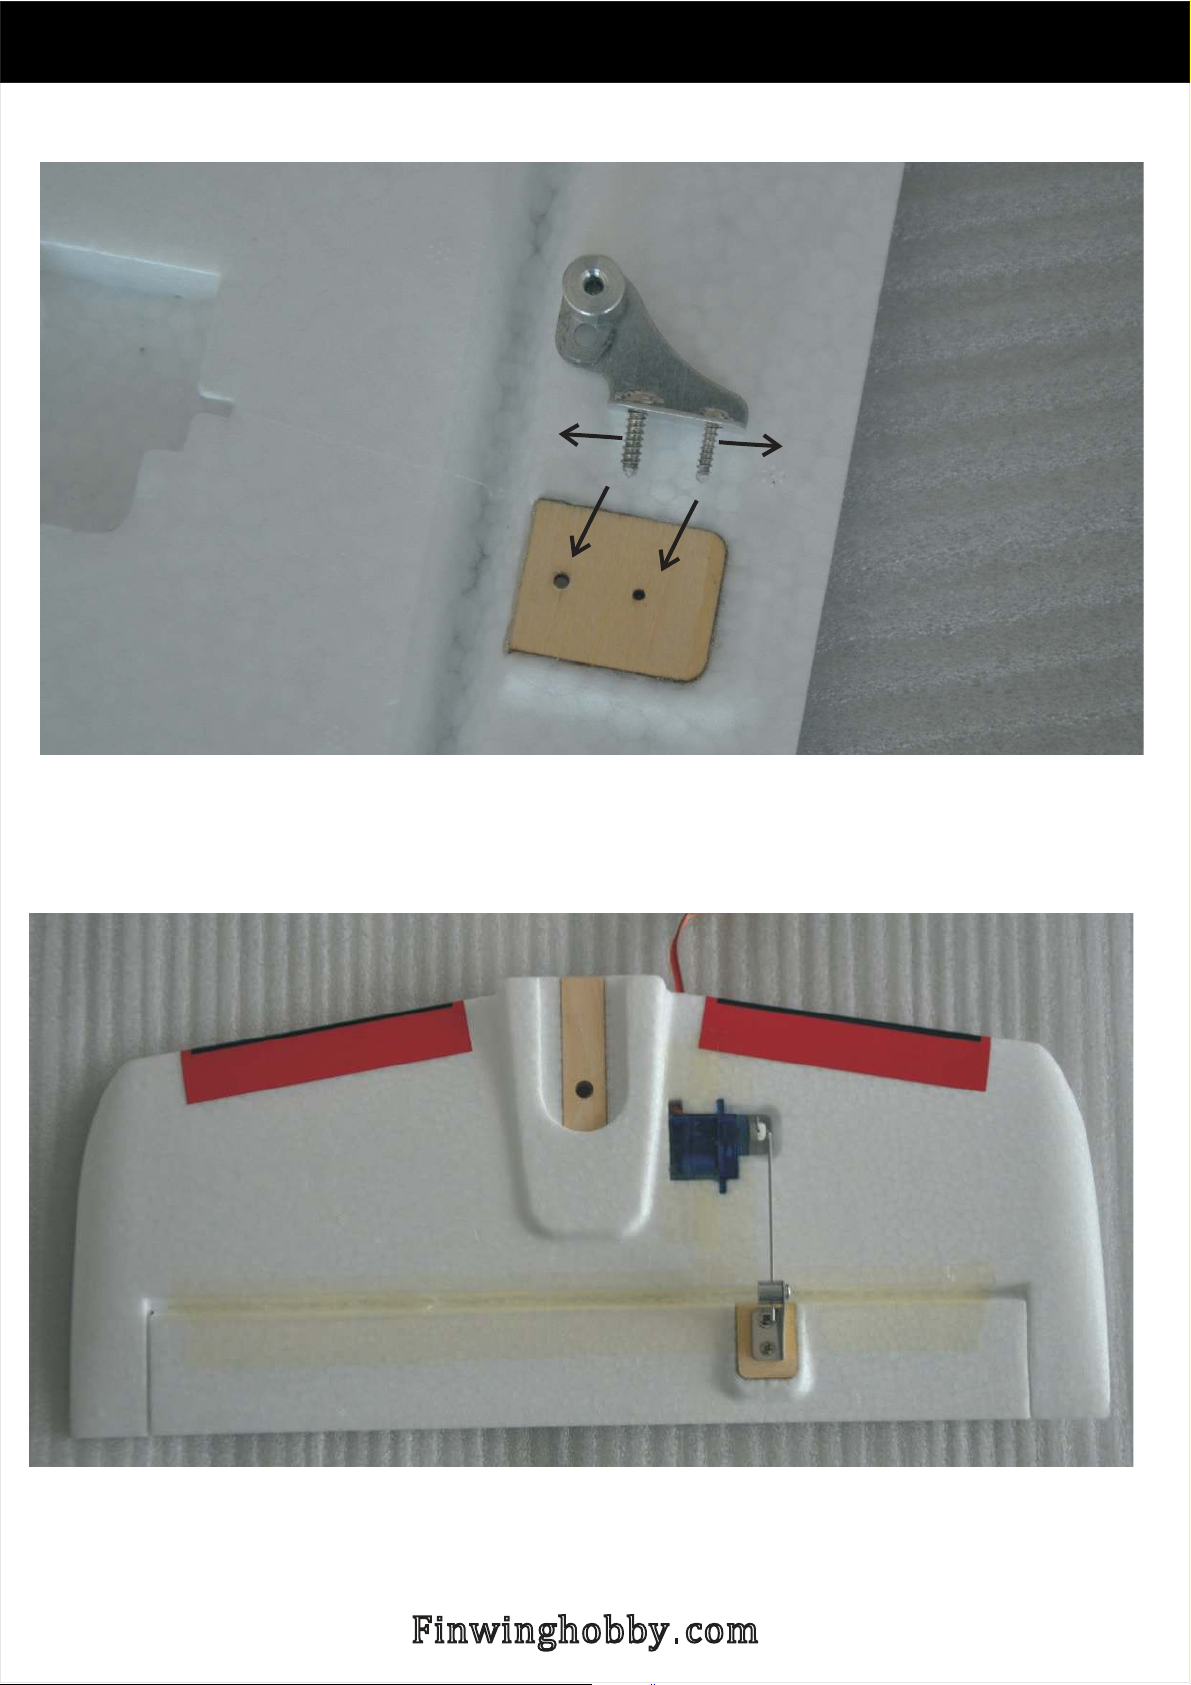
Motor ESC Servo, ,
Servo Horn
Screw
Big one
Screw
Smaller one
Horizontal wing UP
Finwinghobby com.
Page 16
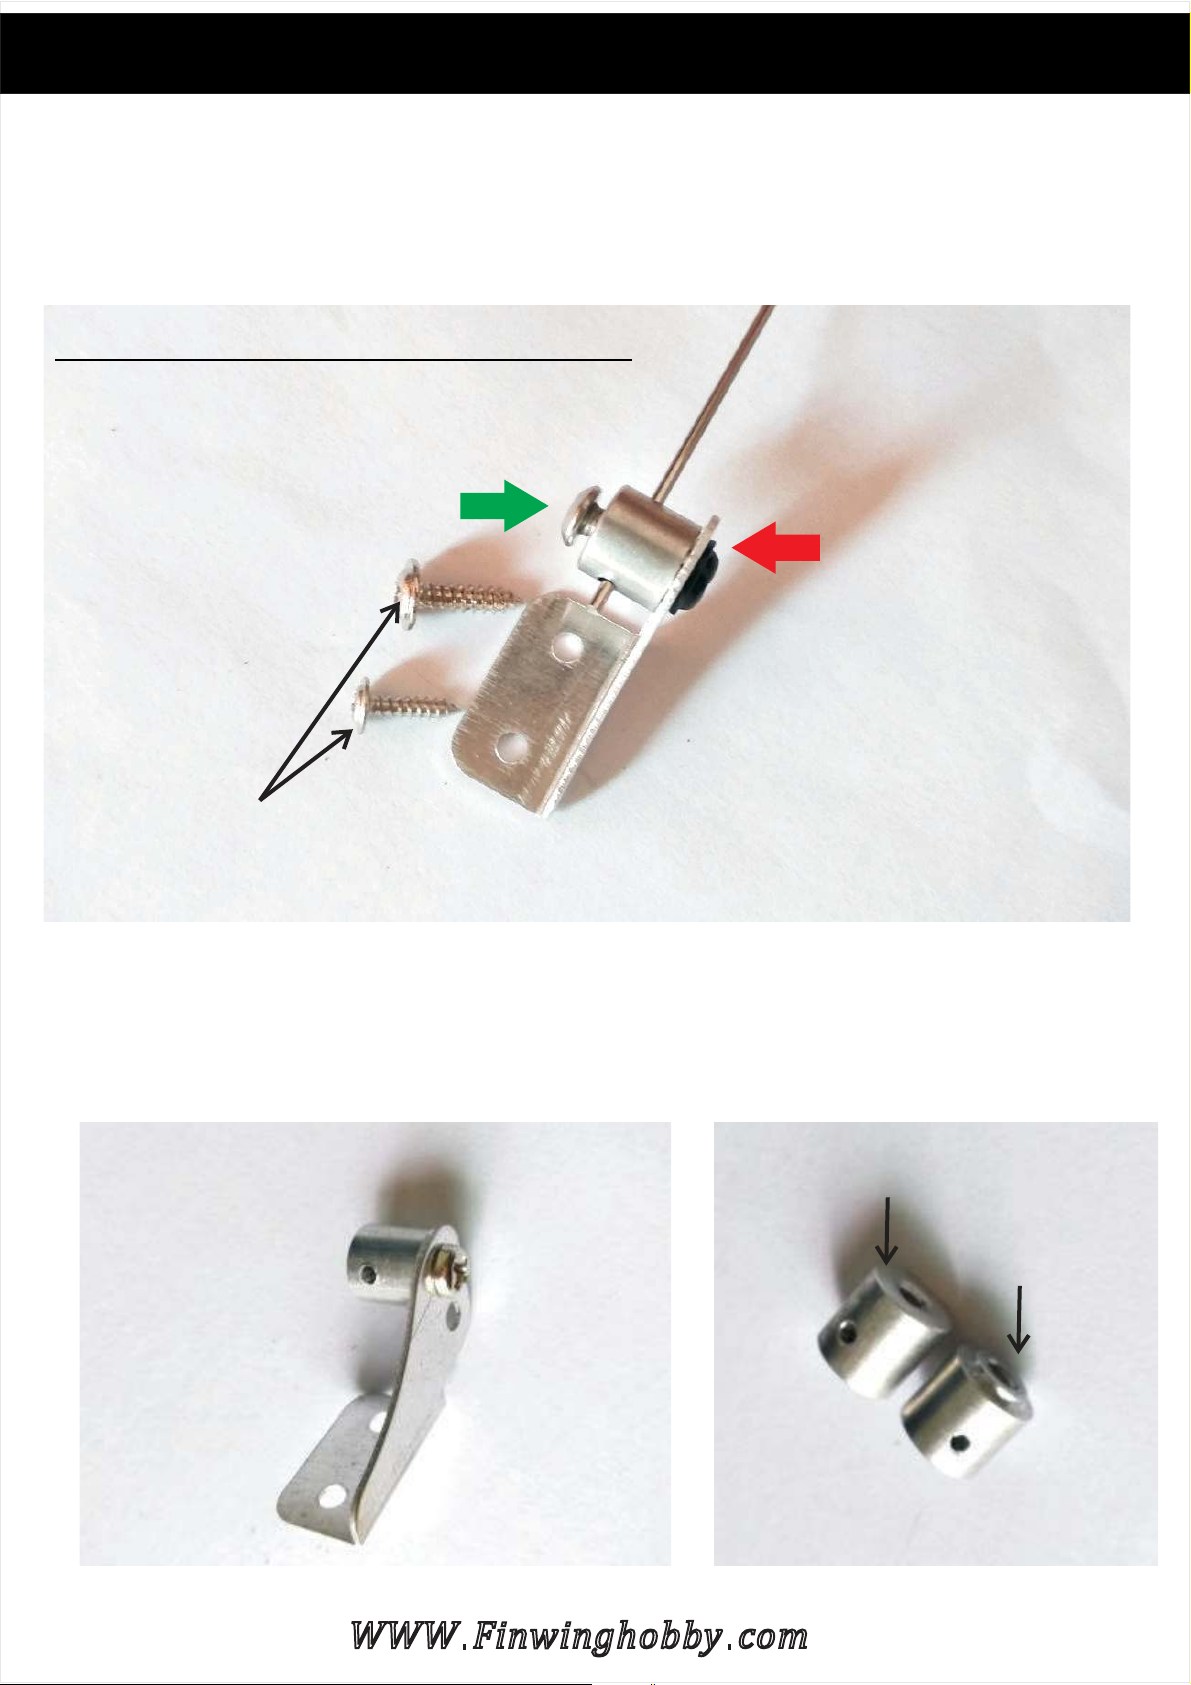
New Servo Horn introductions
Orders after July 2020 will use this new servo horn
Newly upgraded Servo Horn
Use Left Screw to
secure the push rod
Right Screw was fixed
Front 2
Rear 2
This is old one before upgrading
. *6 8
. *0 6
don t screw off'
Old one
WWW Finwinghobby com. .
New One
Page 17
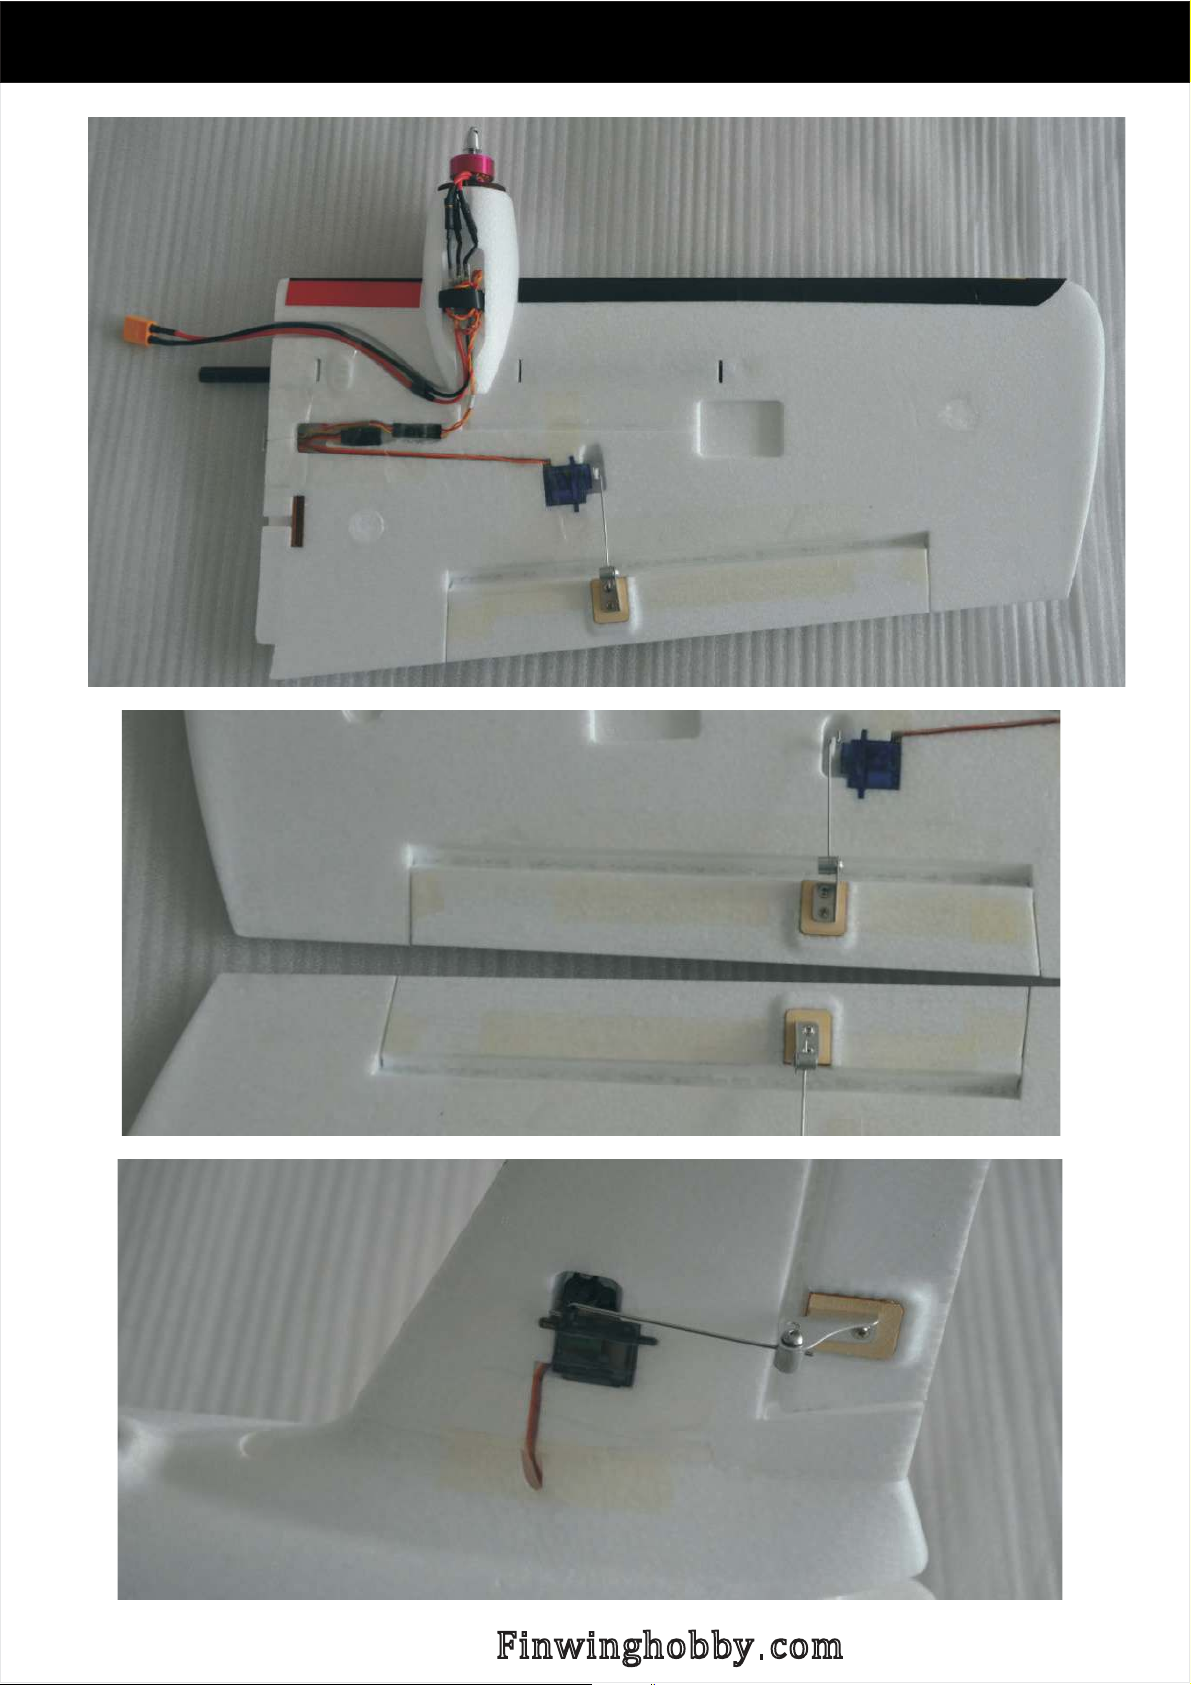
Motor ESC Servo, ,
Main wing-
Rudder
Finwinghobby com.
Page 18
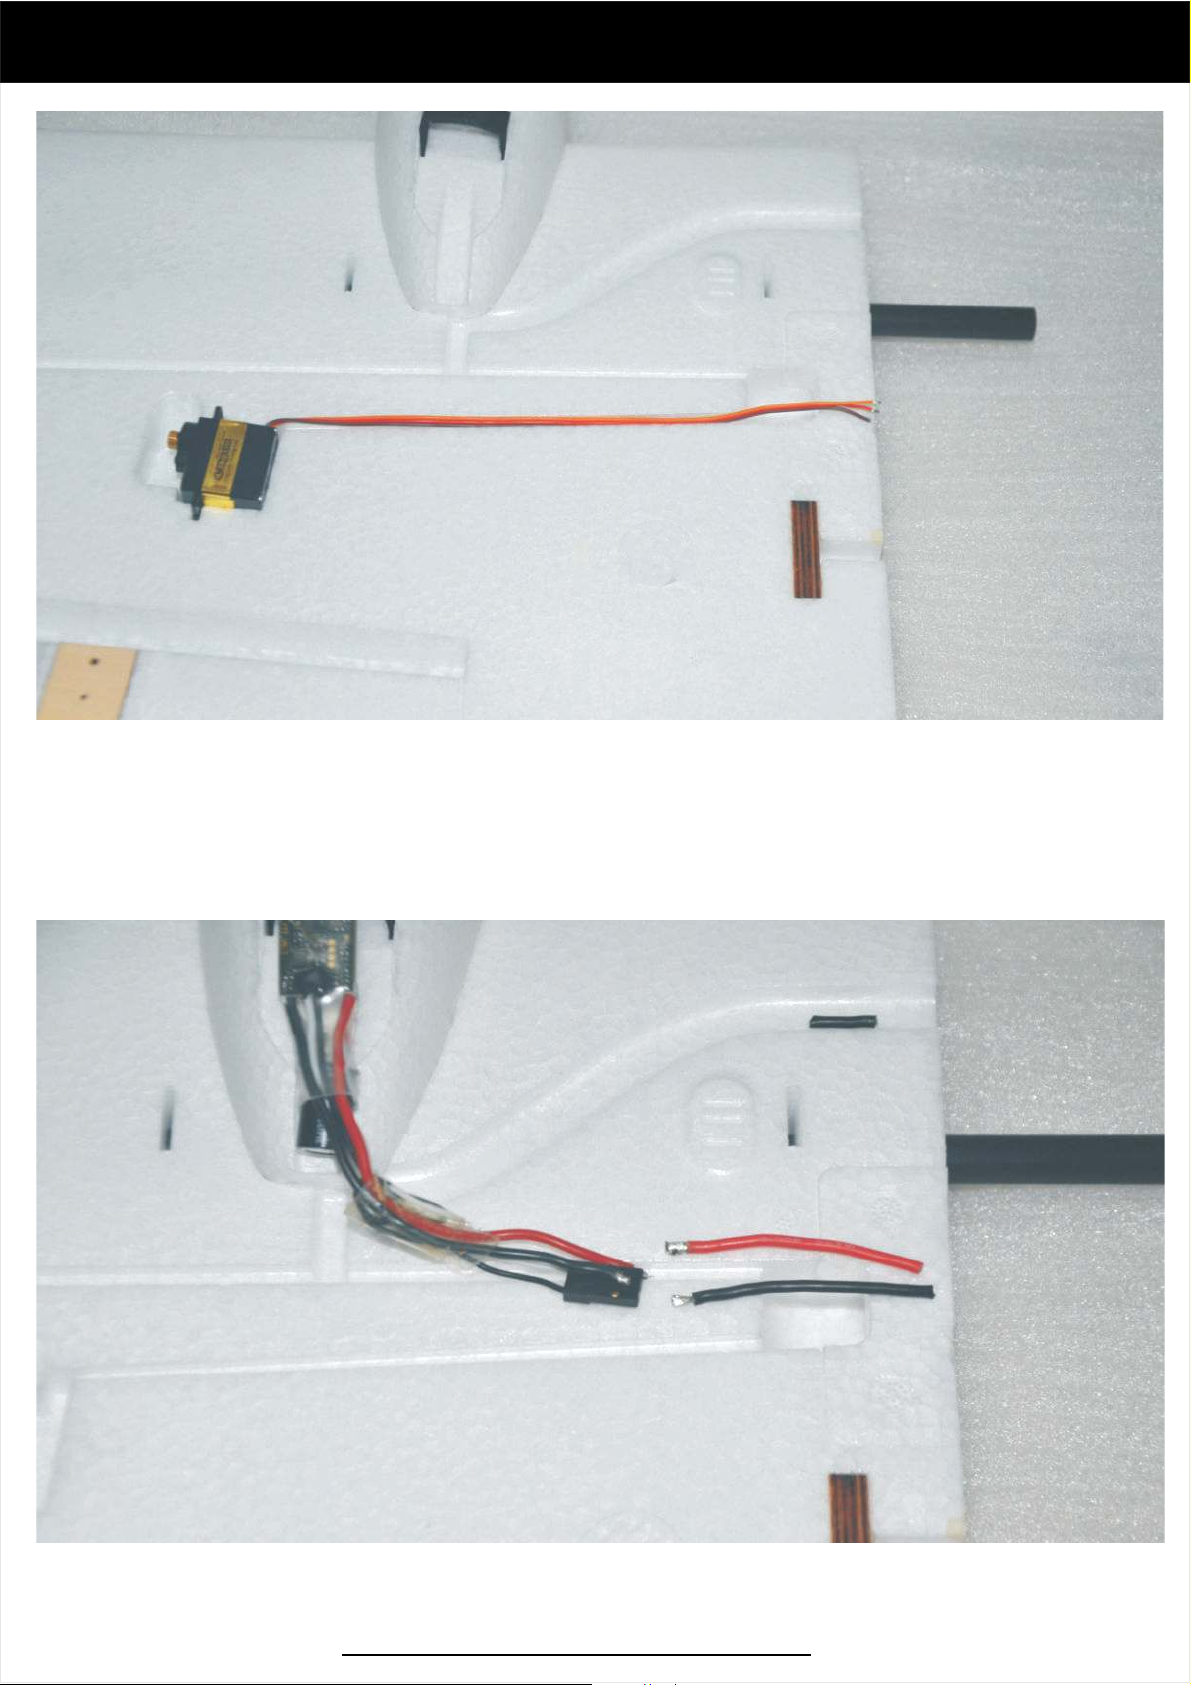
9 2+ Building
Wires length required 16CM
Stock PNP servo wire is long enough
Figure out proper wire length for your devices
soldering to the 9 2 connector directly+
ESC Power wires recommend 18AWG is fine
Https www fiwninghobby com:// . .
Page 19
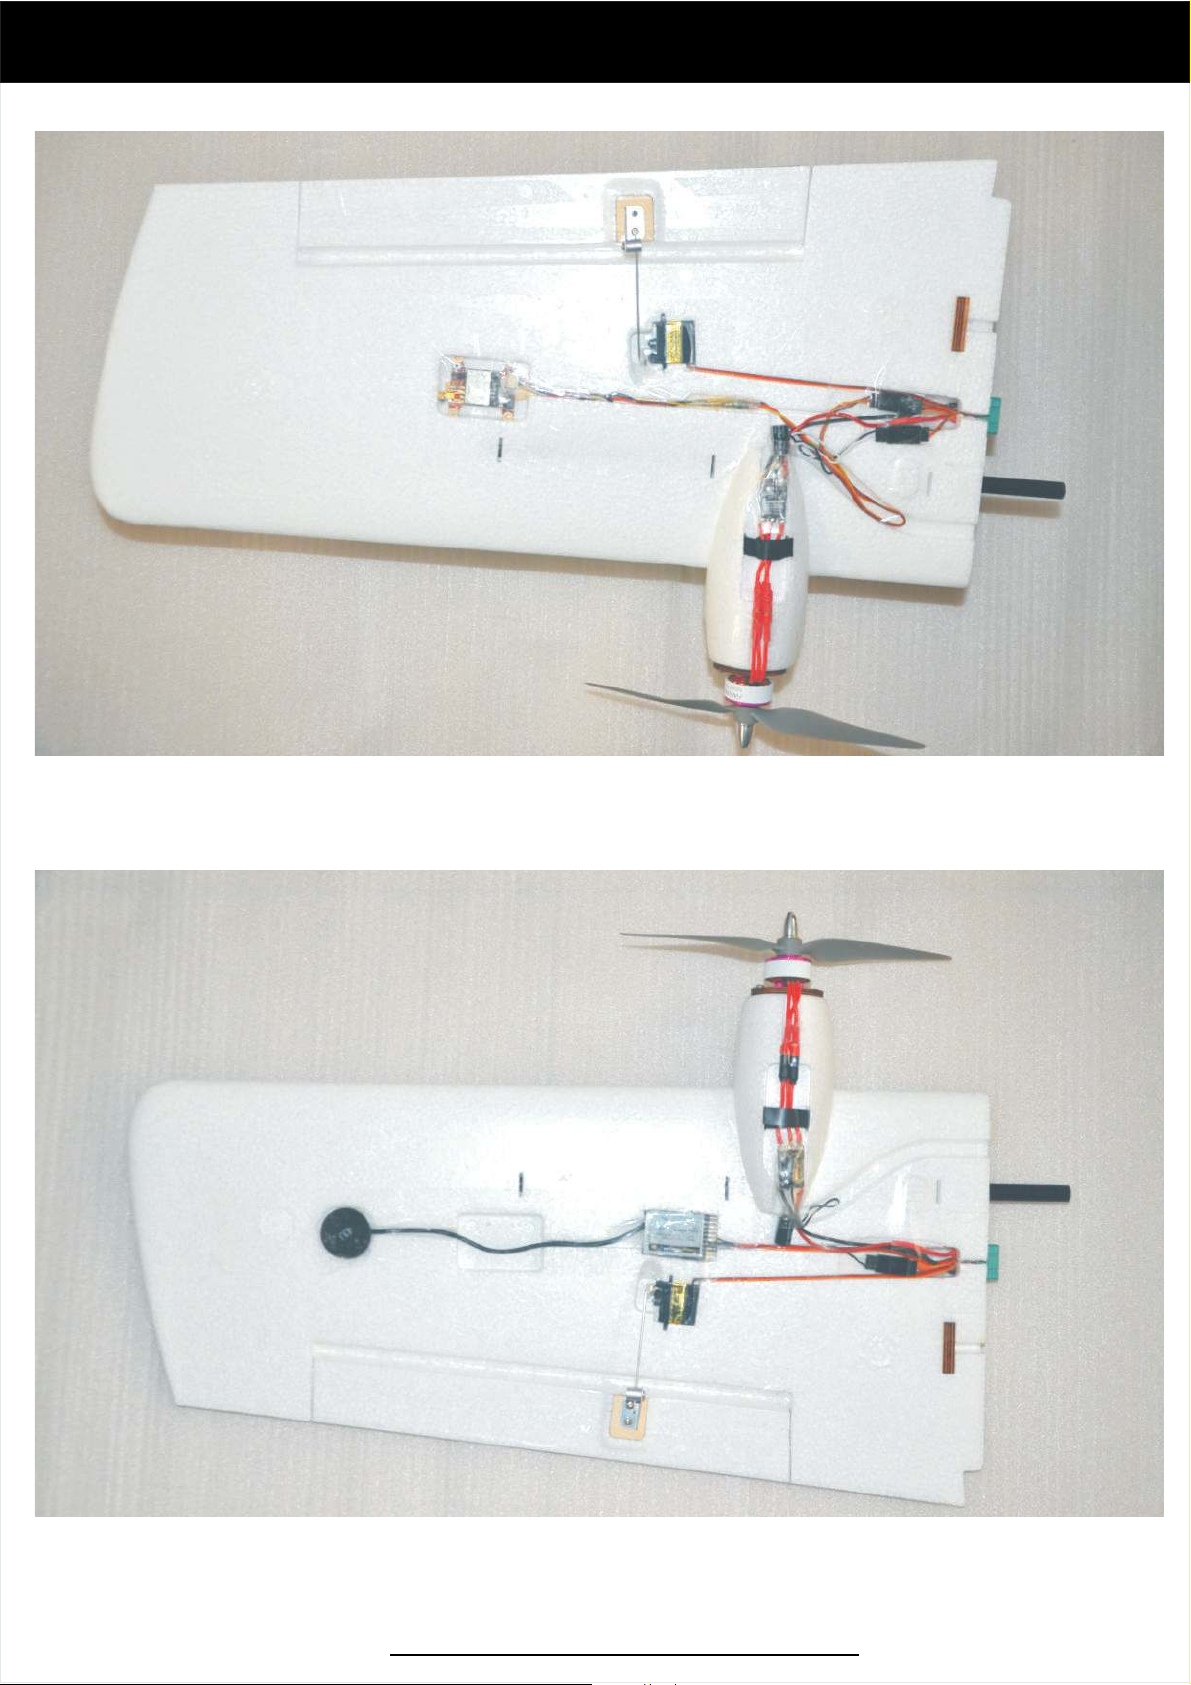
VTX
9 2+ Building
Servo
ESC
Motor
Show in the manual is for you reference only
you can do as per your preference
Motor
ESC
Antenna
RX
Servo
Https www fiwninghobby com:// . .
Page 20
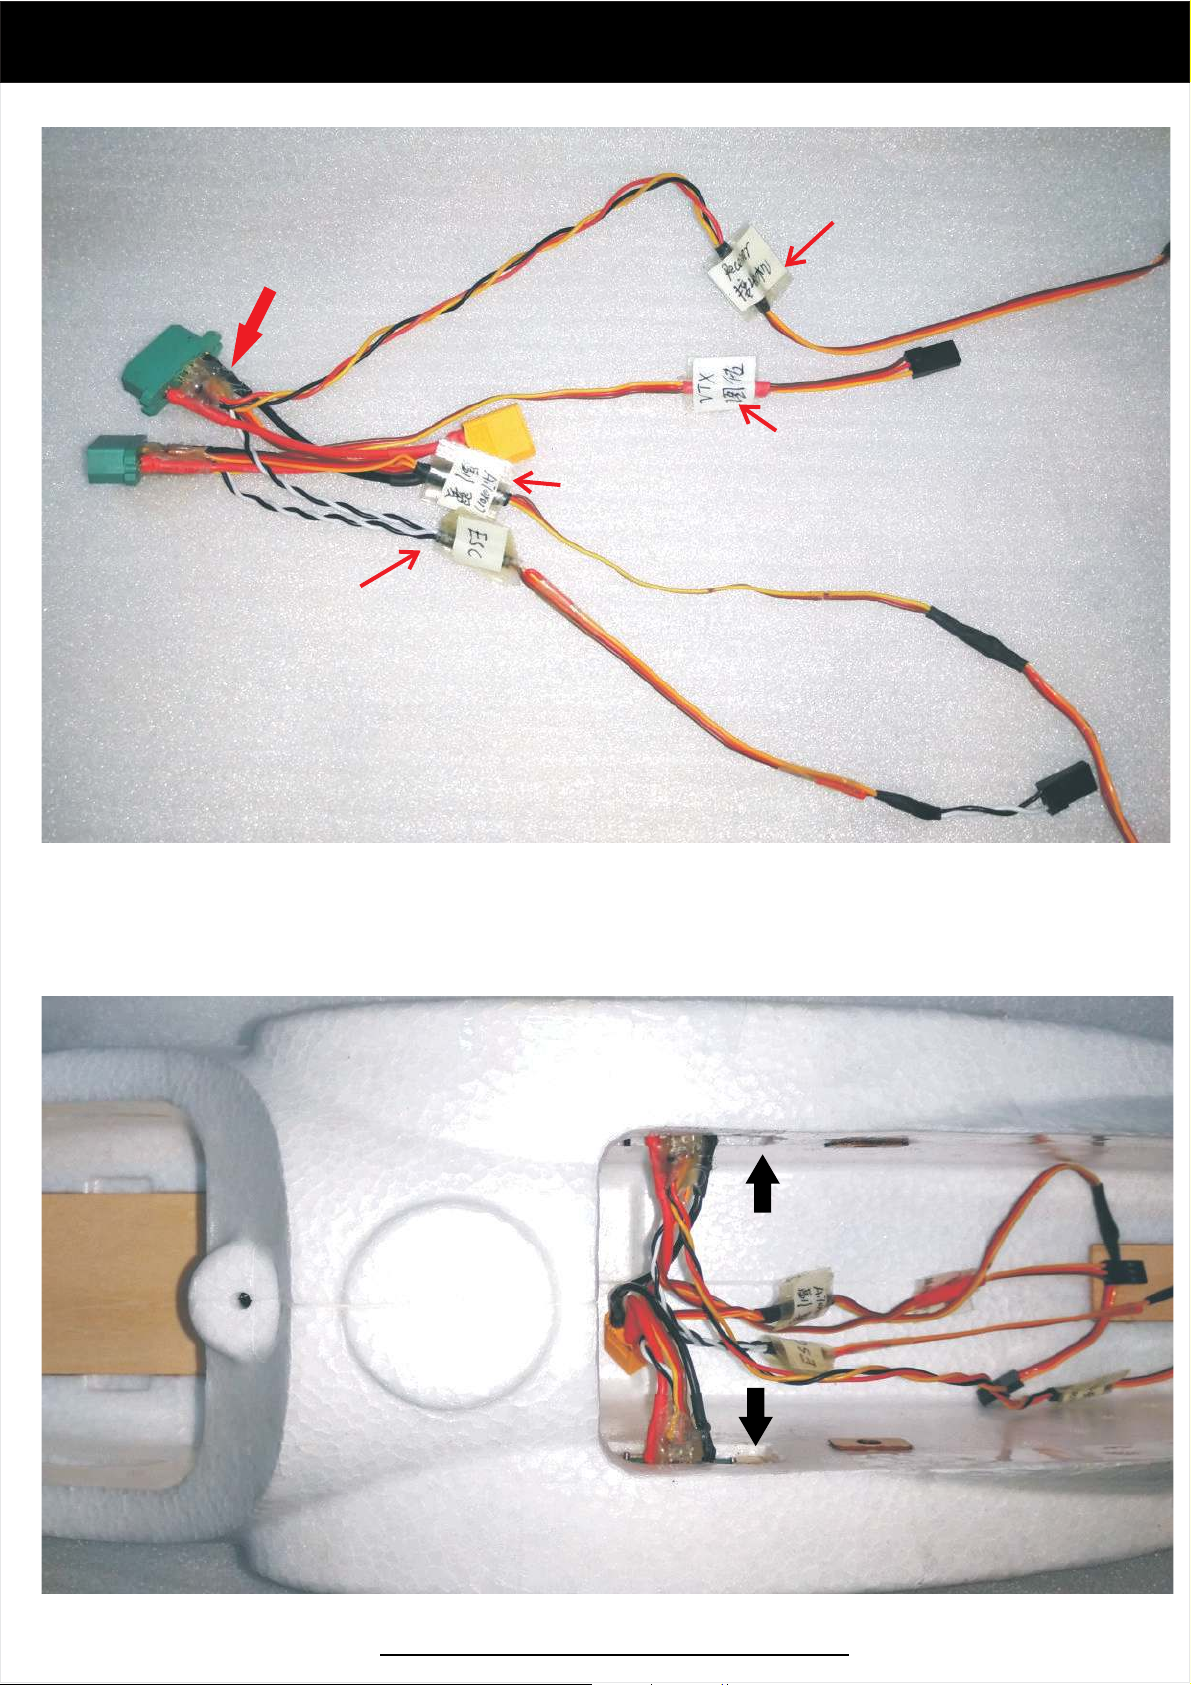
9 2+ Building
Finished male ready to install to fuselage
Shrink film or Hot Melt Glue
to prevent it from loosing
Aileron
in Parallel
Two ESC
Signal Wires
in Parallel
RX
VTX
wires
You can solder all devices and wires before installing to fus l ge
Because it is removable freely c
from inside instead of outside
, onnector could be installed
e a
Https www fiwninghobby com:// . .
Page 21
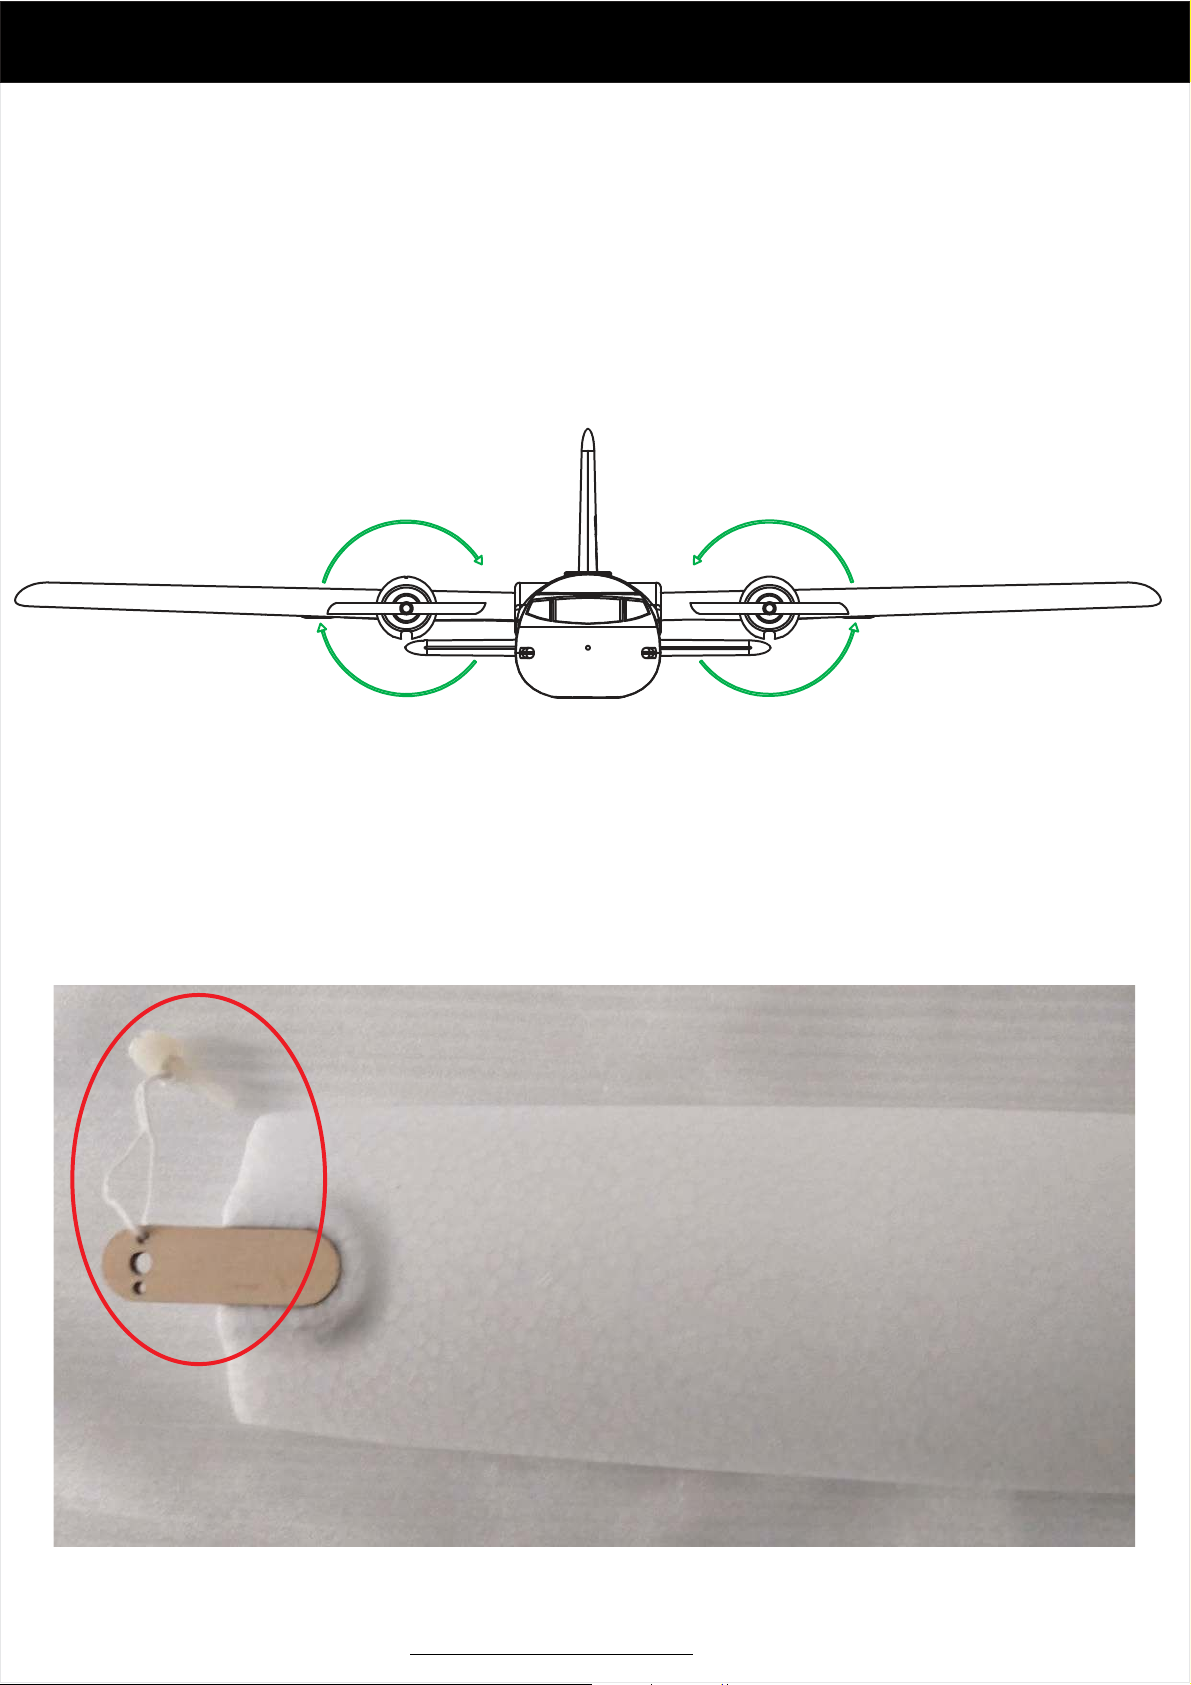
How to install Motors and Propellers
1 Propeller running inward>
2 Left Right> CW CCW
3 Propeller s Character forward> '
CW
CCW
Tie screw like this if you are afraid of missing screws
WWW Finwinghobby com. .
 Loading...