

Page 1
Warranty
Xtracycle KickBack 3 Kickstands are guaranteed to be free from manufacturing defects for
one (1) year from the original date of purchase.
Defective products will be repaired or replaced at Xtracycle’s discretion. To determine if a warranty
claim is valid you may be required to return the product to Xtracycle for inspection. Xtracycle is not
responsible for removal, installation or shipping costs. This warranty applies only to the original buyer
and is not transferable.
KickBack 3 Manual
This warranty does not cover damage from use of this product outside of its intended range or that
resulting from modification or neglect. It also does not cover wear and tear resulting from the normal
use of the product.
Double your warranty to two years!
Register your Xtracycle KickBack 3 within 14 days
of purchase to extend your warranty to two years.
http://www.xtracycle.com/register
Digital Manual:
http://XCY.CL/kb3install
Our mission:
To empower people with
transformational tools that
move the body and spirit.
www.xtracycle.com
A rock steady, dual sided kickstand designed for
strength, safety and easy Xtracycle compatibility.
A
B
C
H
F
G
E
D
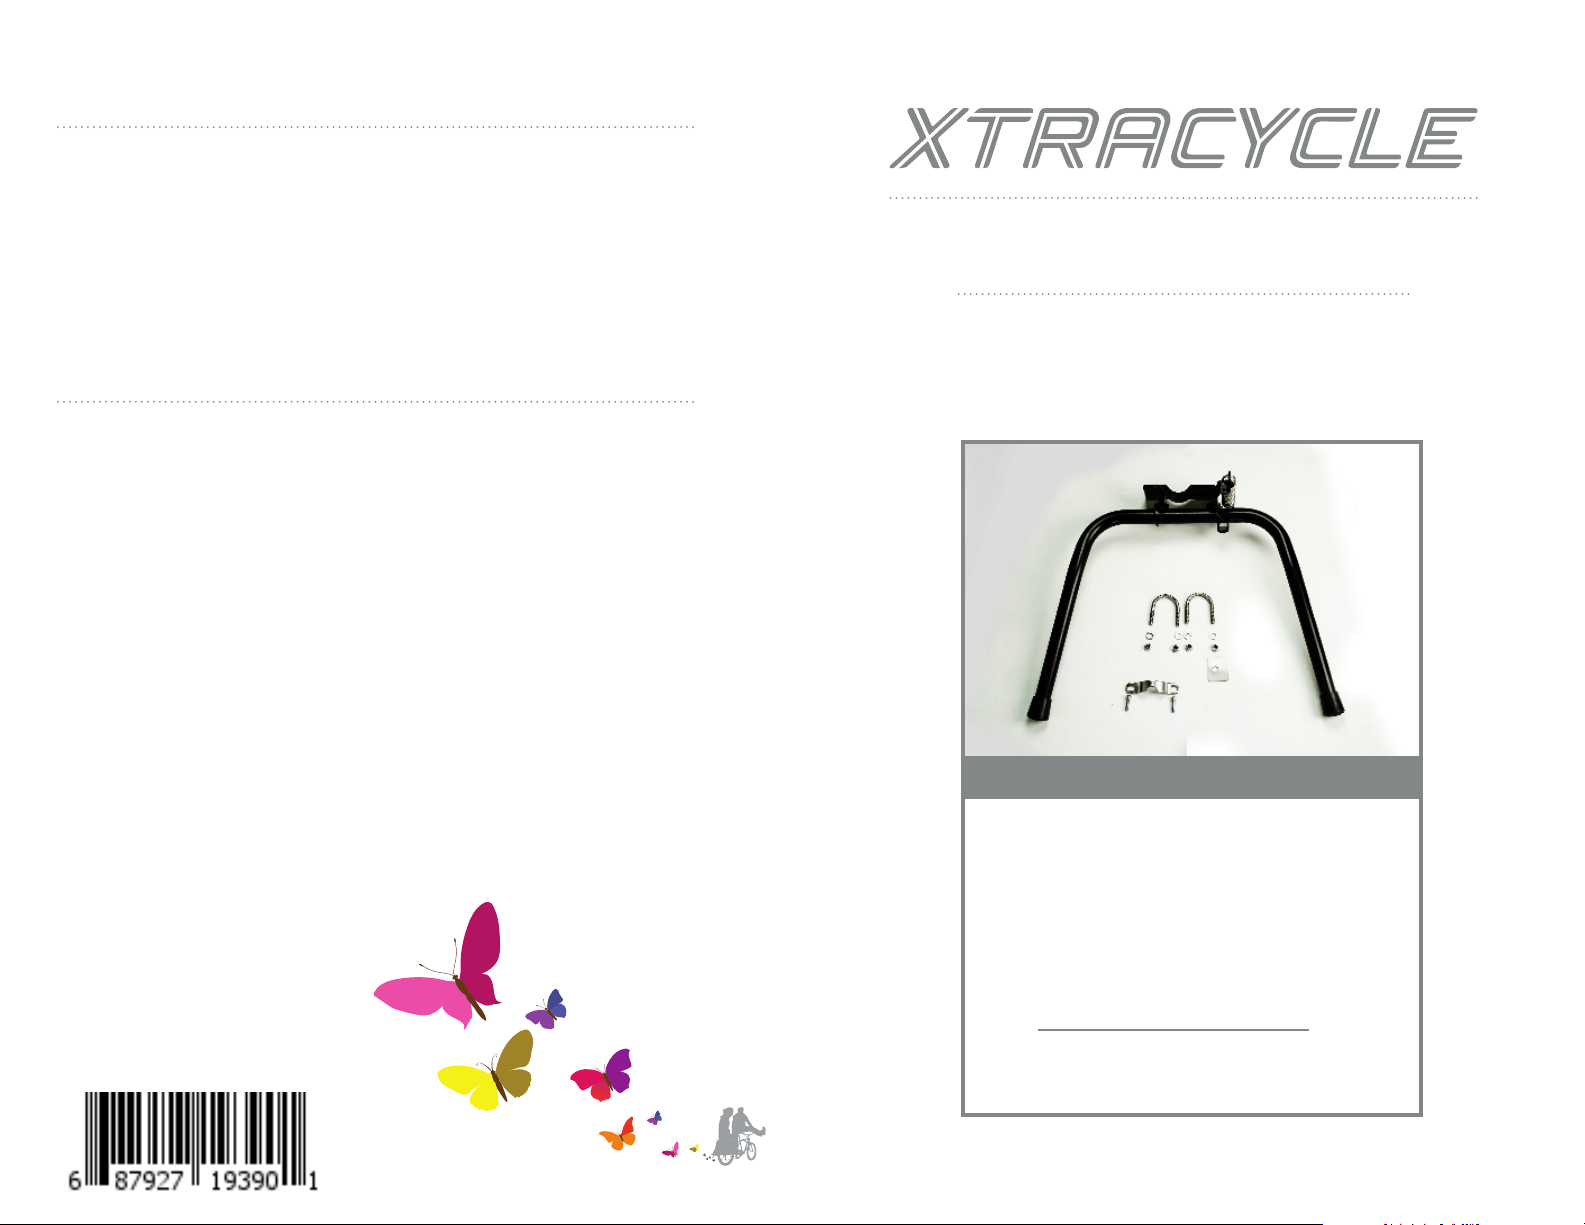
What’s Included:
A: One KickBack 3 (Uncut Legs)
B: Two Xtracycle BridgeBolts
C: Four Nuts and Round Washers
D: One 28mm x 35mm Rectangular Washer
E: Two M5x20mm Bolts
F: Two Plastic End Plugs
G: Two 7/8 Inch Rubber Feet
H: One BoomStrap
Recommended Tools:
10mm Socket Wrench
5mm Allen Wrench
Pipe Cutter or Hacksaw/Cutting Guide
KickBack 3
3KB5000
REV3
www.xtracycle.com
Page 2
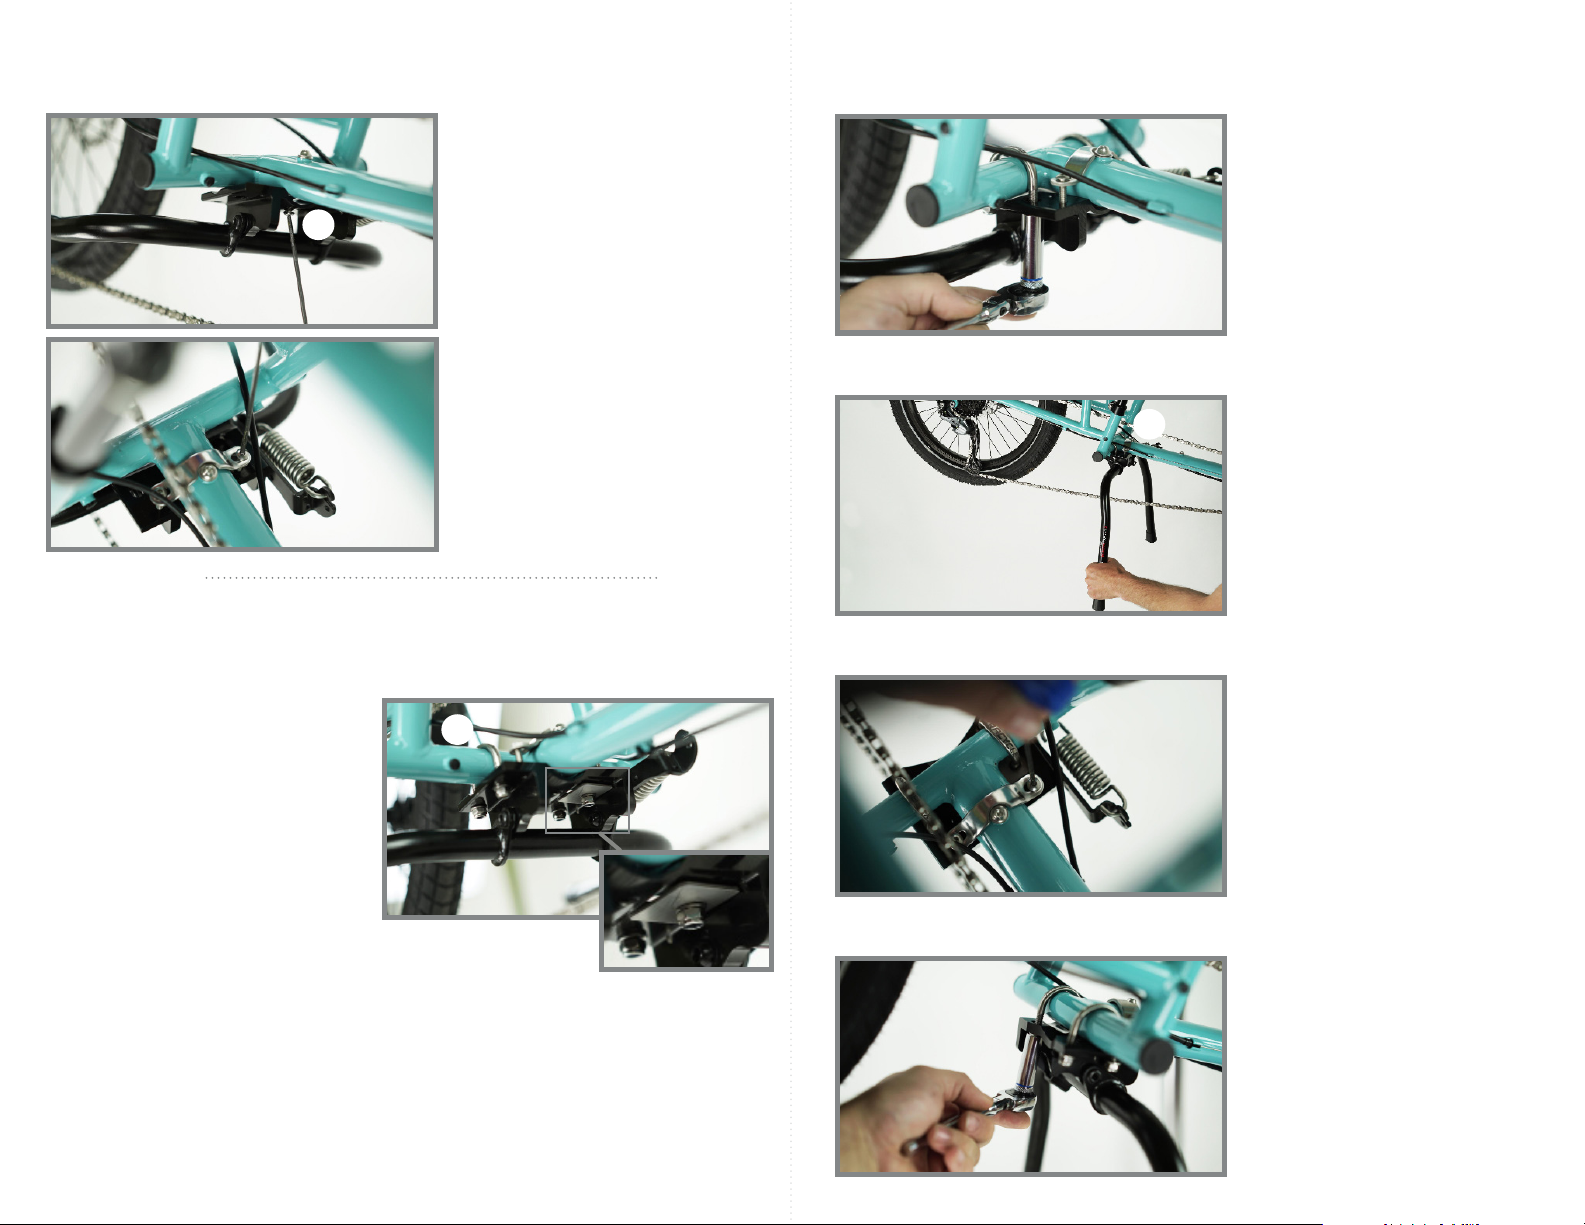
STEP 1:
Hold the Stand in Place
STEP 3:
Tighten Things Down
A
STEP 2:
Install the Bridge Bolts
Step 2a: With the KickBack legs
folded up, place both Xtracycle
BridgeBolts over the Xtracycle’s
front bridge (B).
If your Xtracycle has a threaded
boss on the underside of the
boom tube (A), just ahead of
the front bridge: start to thread
one m5 bolt into it far enough
to keep the KickBack attached
to the frame. Do not tighten.
If it does not: fasten the
included BoomStrap over the
boom tube with two M5 bolts.
Do not tighten.
B
Step 3a: Moving the legs
as necessary, lightly snug all
four nuts with a 10mm socket
wrench. Alternating between
nuts can keep the KickBack
from pulling to one side or the
other.
A
Step 3b: Put the legs into the
down position and pull them
towards the front of the bike
to ensure that the KickBack
is rotated as far forward as
possible and centered on the
boom tube (A).
Step 3c: Tighten the M5 bolts
on the BoomStrap or the single
M5 bolt below to 3Nm.
Step 2b: The front, left BridgeBolt
leg passes through a rectangular
cutout. Place the rectangular
washer over this leg, then lightly
thread on a washer and nut.
Step 2c: Thread a washer and
nut onto each of the other three
BridgeBolt legs.
Note: You will need to lower the stand
to access two of the BridgeBolt legs.
Step 3d: Torque all four nuts
to 6 Nm.
Page 3
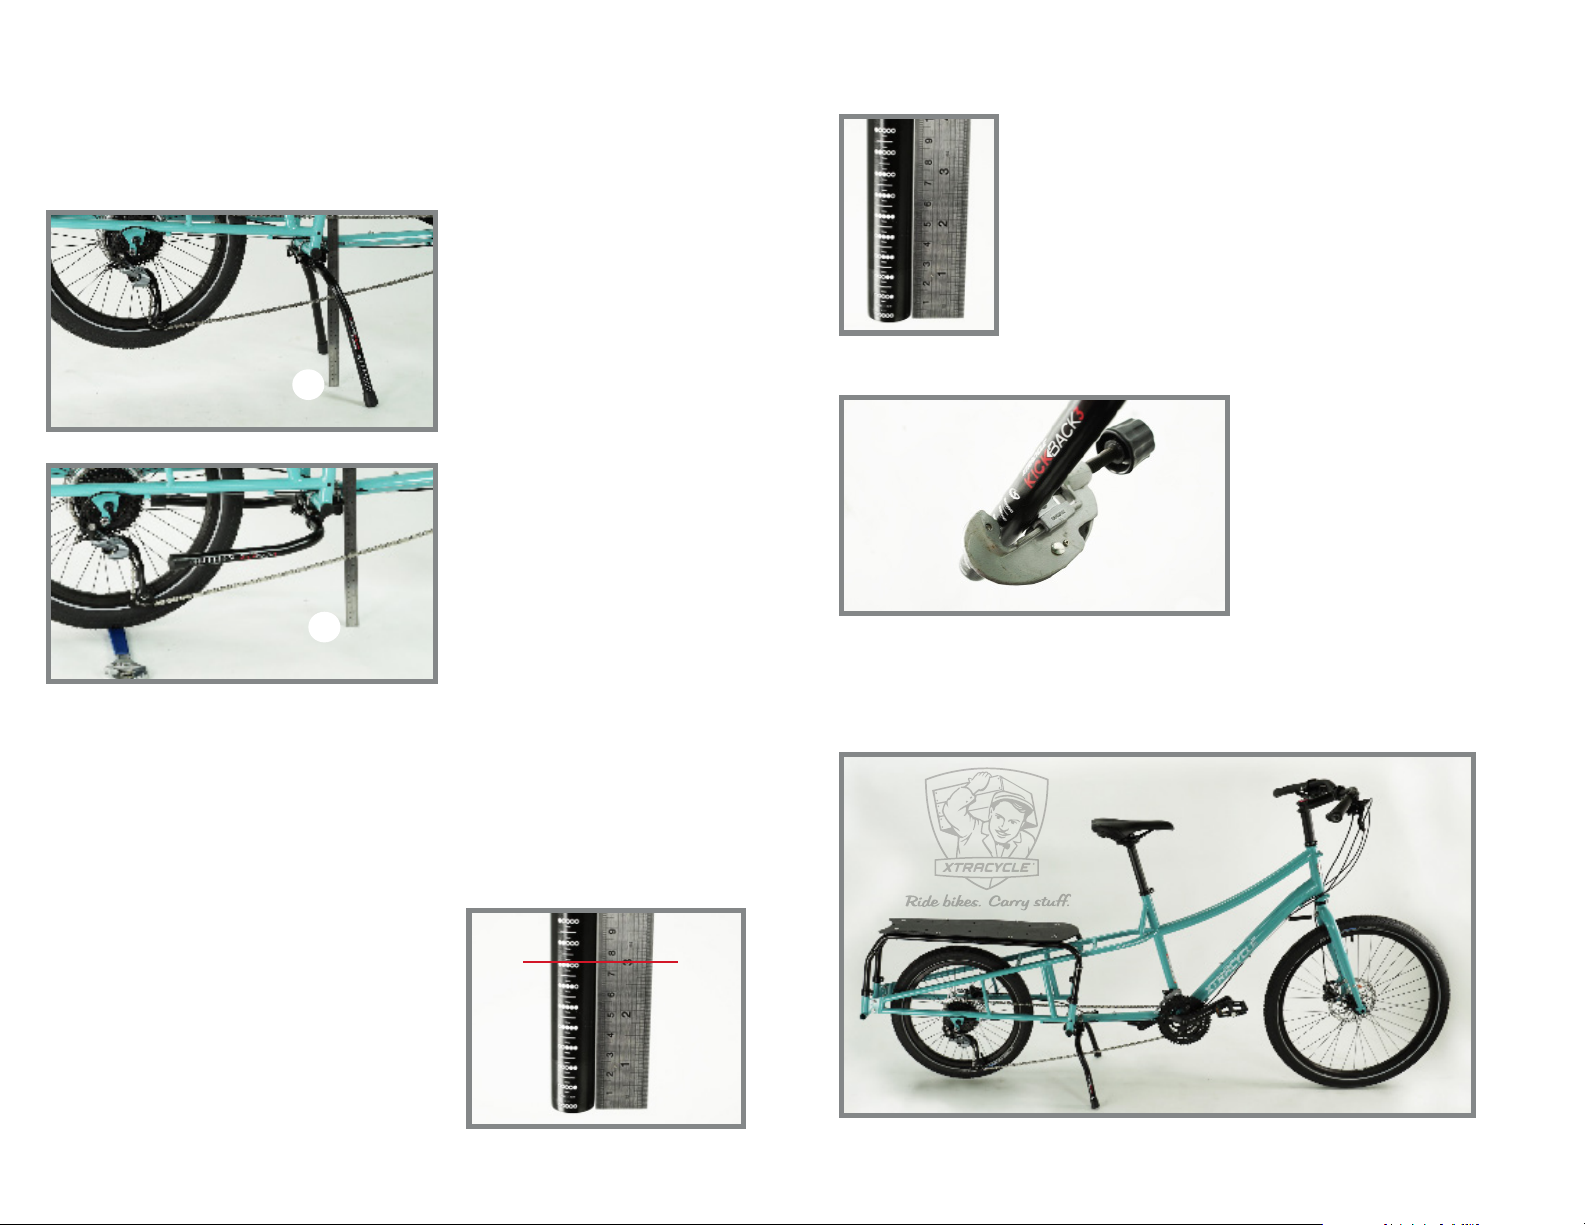
STEP 4:
Measure the KickBack 3
STEP 5 Cont’d:
Note: If you are fitting the KickBack to an EdgeRunner and want to use the
default kickstand height, you can skip to step 5.
Step 4a: With the KickBack
legs in the down position,
measure the distance between
the mounting plate and the
ground (C).
C
Step 4b: With the KickBack
legs in the up position, place
the rear wheel on something a
half inch above the ground (a
larger wrench works great) and
D
Step 4c: Subtract your measurement (D) from your measurement (C) and write
down the result: __________
take the same measurement
(D).
If you’re installing on another Xtracycle or want to fine
tune things, measure up the distance you calculated
in Step 4c from the bottom of each leg and mark that
location to cut.
NOTE: Sometimes the markings on the KickBack legs are
inconsistent, always double check that your cuts are even
with a ruler.
Step 5C: Cut each leg where
appropriate. A pipe-cutter
is the easiest solution, but a
hacksaw and clamp-on guide
will also work.
STEP 6 Finishing Touches:
STEP 5:
Cut the Legs
Step 5a: Remove the rubber feet and plastic
end plugs from the KickBack’s legs
Step 5b:
If you are installing on an EdgeRunner: you can
cut the legs 3 inches (76 mm) from the bottom.
This will leave a little over half an inch between
the tire and the ground.
Replace the end caps and rubber feet. Enjoy your new steady steed!
 Loading...