

Xtorm by A-Solar AM414 User manual [ml]
Hoofdves te 19
3992 DH Houte n
The Netherland s
T: + 31 (0) 30 635 4800
F: + 31 (0) 30 635 4801
www.xtorm.eu
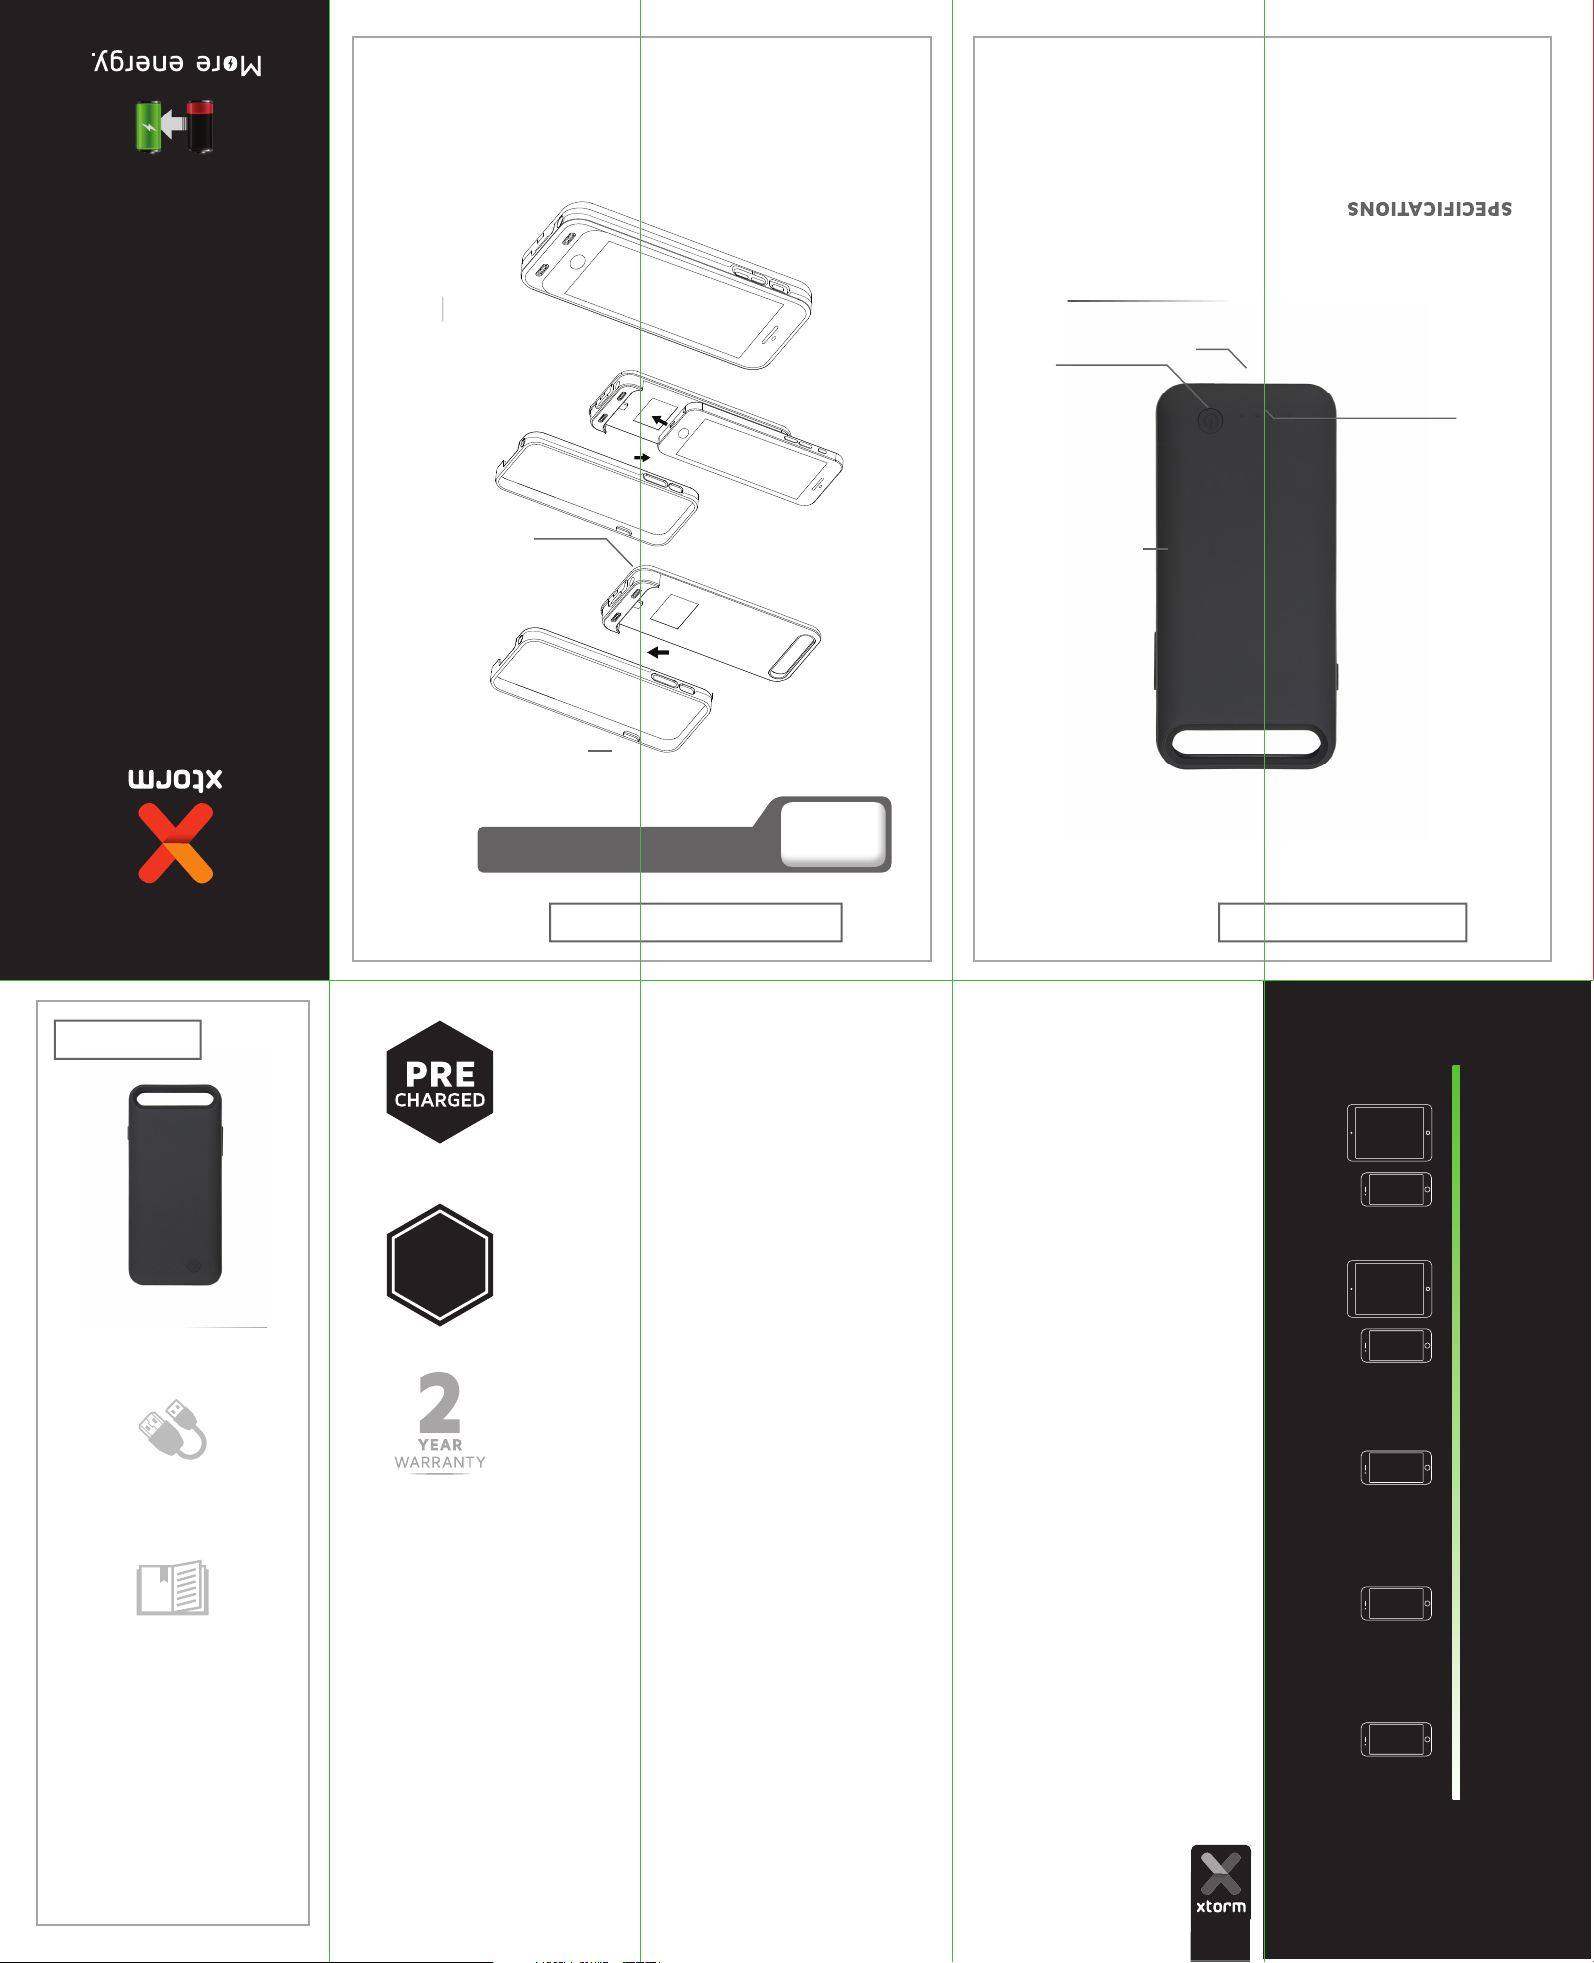
the Lightning connector.
back.
the bumber untill it ‘clicks’ onto the
and the Power Case. Firmly press
Put the bumper over the iPhone
from the top and connect
the Power Case. Slide your iPhone
Place your iPhone on top of
Connecting your iPhone.
INPUT
MICRO USB
POWER BUTTON
Micro USB cable and manual.
Including
Weight 100grams
Dimensions 155x71x15mm
Output 5V/1A
Input 5V/1A
Battery 3100mAh Li-ion
INDICATORS
LED POWER
AM414
Manual
IN THE BOX
POWER CASE
MICRO USB CABLE
X
MANUAL
user
POWER CASE
BUMPER
DESIGN
RUBBERIZED
CHARGED
PRE
QUICK START | FIRST USE
2/6
EN: Warnings
Don’t drop, dissemble or attempt to repair the charger by yourself.
Avoid exposure to water or high humidity.
Don’t expose to any heat source.
Keep out of reach of children.
Don’t use in the presence of flammable gas.
NL: Waarschuwing
Probeer de lader niet zelf te repareren of te demonteren.
Vermijd blootstelling aan water of een hoge luchtvochtigheid.
Niet blootstellen aan een warmtebron.
Buiten bereik van kinderen houden.
Niet gebruiken in de aanwezigheid van brandbaar gas.
DE: Achtung
Versuchen Sie nicht, den Solar Lader selbst zu reparieren.
(Garantieverlust )
Vermeiden Sie hohe Luftfeuchtigkeit oder Kontakt mit Wasser
Verwenden Sie das Gerät nicht in der Nähe von brennbaren Gasen oder
Flüssigkeiten
Halten Sie das Gerät fern von Hitzequellen.
Ausser Reichweite von Kindern halten.
FR: Attention
Ne pas faire tomber ou démonter ou tenter de réparer le produit
soi-même.
Ne pas exposer le produit à l'eau ou dans un endroit trop humide.
Ne pas poser le chargeur solaire près d'une source de chaleur.
Tenir hors de portée des enfants
Ne pas utiliser en présence de gaz inflammables
IT: ATTENZIONE
Non usare vicino ad una fiamma.
Non esporre vicino a fonti di calore elevato
Non modificare la struttura o disassemblare
Smettere di utilizzare immediatamente nel caso si sentano odori strani,
calore, o strani rumori provenire dallo stesso.
Non lasciar giocare i bambini.
Usare solo in luoghi asciutti.
Riciclare l’apparato secondo le norme vigenti nella nazione di utilizzo.
CZ: UPOZORNENÍ
Neupusťte, nerozebírejte, ani se nepokoušejte spravit nabíjeèku sami.
Vyvarujte se pùsobení vody nebo vysoké vlhkosti.
Nevystavujte tepelným zdrojem.
Uchovávejte mimo dosah dìtí.
Nepoužívejte v blízkosti hoølavých plynù.
SK: Upozornenia
Neupustite, nerozoberajte, ani sa nepokúšajte opraviť nabíjaèku sami.
Vyvarujte sa pôsobeniu vody alebo vysokej vlhkosti.
Nevystavujte tepelným zdrojom.
Uchovávajte mimo dosahu detí.
Nepoužívajte v blízkosti hoøavých plynov
SE: varning
Tappa inte, ta inte isär eller försök reparera
laddaren själv
Utsätt inte för vatten eller hög fuktighet
Utsätt inte för värme.
Förvaras utom räckhålll för barn.
Använd ej i närheten av lättantändlig gas.
ES: Atención
No dejar caer el producto.
No desmontarlo ni intentar repararlo, por sus propios medios.
Evitar el contacto con el agua o fuente de humedad.
No exponer la alimentación a una fuente de calor.
Mantenga fuera del alcance de los niños.
No utilizar en presencia de fuentes o gas infl amables
* THIS MANUAL IS AVAILABLE IN DIFFERENT
LANGUAGES ON OUR WEBSITE
PRODUCT OVERVIEW
2X
½
7
1X
½
4
2X 3X
1X
1/6
4000mAh 6000mAh 9000mAh 15.000 mAh2000mAh
AUTO-STOP
CHARGING
You can instantly start charging your mobile decive.
All Xtorm chargers are pre-charged.
Xtorm chargers are always pre-charged. This means
you can start using your new power bank from the
moment you remove it from the box.
The Xtorm Power Bank automatically stops charging
when the connected device is fully charged. This
means you do not have to worry about overloading
your mobile devices.
All Xtorm products have a 2 year warranty in case
something goes wrong. We ensure that you will
receive a replacement if the product fails within 2
years.
XTORM.EU
3/6
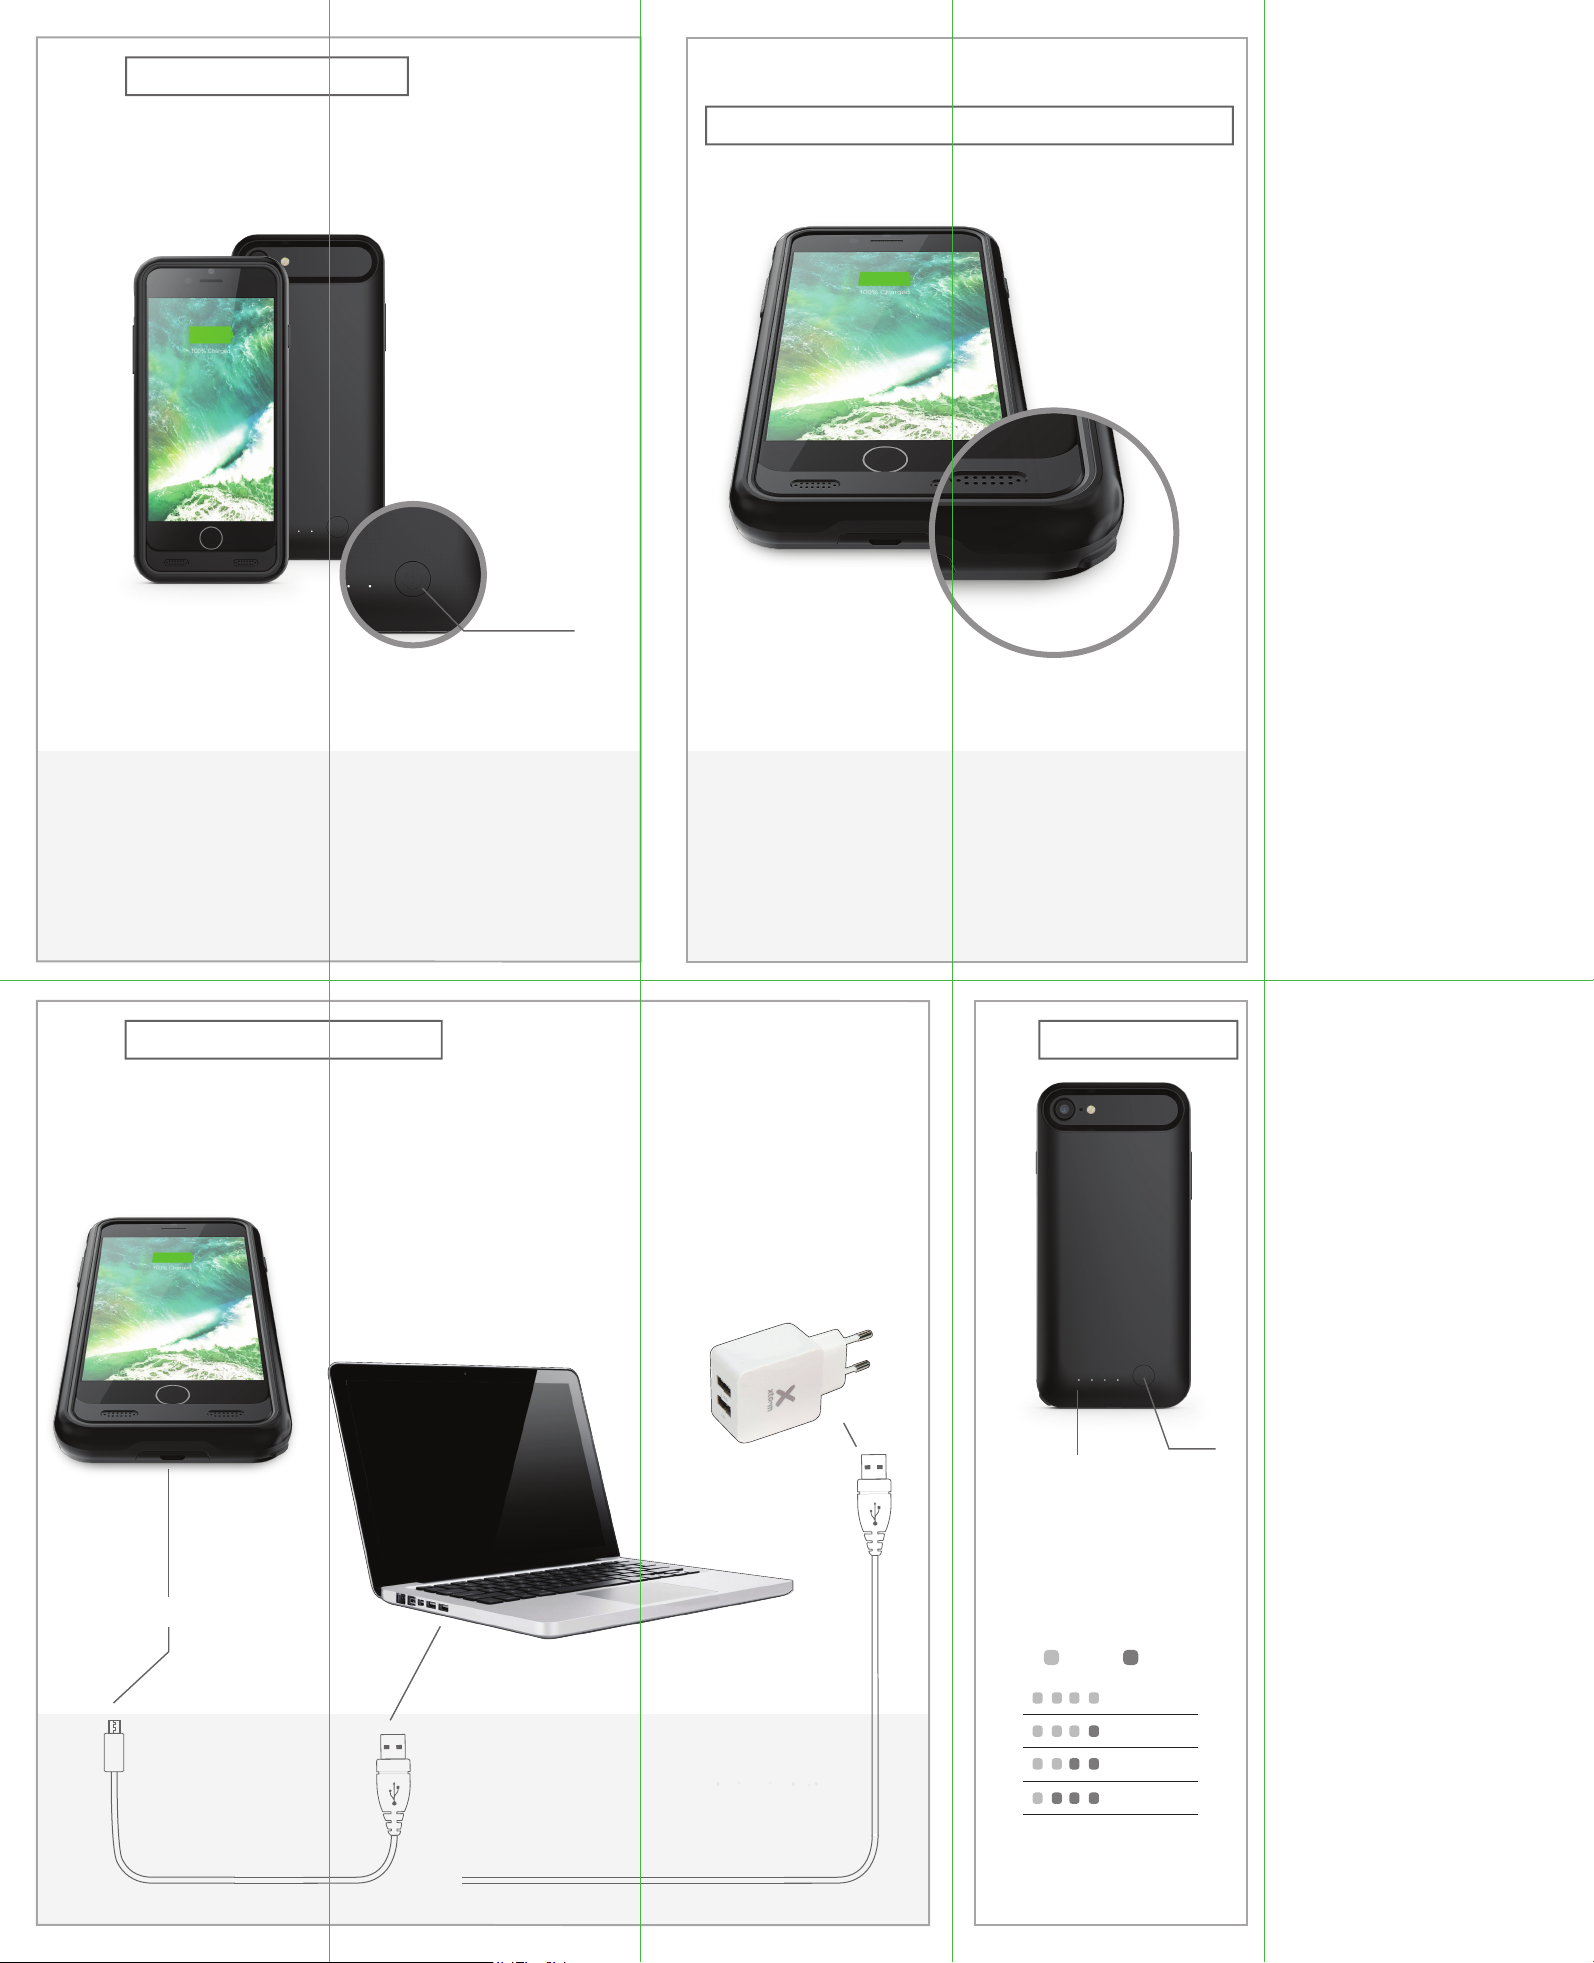
CHARGE YOUR IPHONE
4/6
REMOVE YOUR IPHONE FROM THE POWER CASE
5%
Charge your iPhone.
Press the power button at
the back to start charging.
Expect 1-2 hours charging time.
5/6
CHARGE THE POWER CASE
POWER BUTTON
100%
Start at the lower-right corner of the
Power Case (see above). Lift the
bumper by pulling up the lower right
corner of the bumper (see above)
with your nail or a coin.
6/6
POWER INDICATOR
MICRO USB
Connect the micro
USB cable with
USB IN.
METHOD 1:
Connect the USB cable
to the USB port or with
your PC/laptop.
Expect 3-5 hours*
charging time.
METHOD 2:
Connect the USB cable
to your AC adapter.
Expect
3-4 hours*
charging time.
* By ideal conditions
LED POWER
INDICATORS
CHARGING INDICATION:
Press button 1x
LIGHT ON
1 2 3 4
POWER BUTTON
LIGHT OFF
POWER 75-100%
POWER 50-75%
POWER 25-50%
POWER 0-25%
 Loading...