

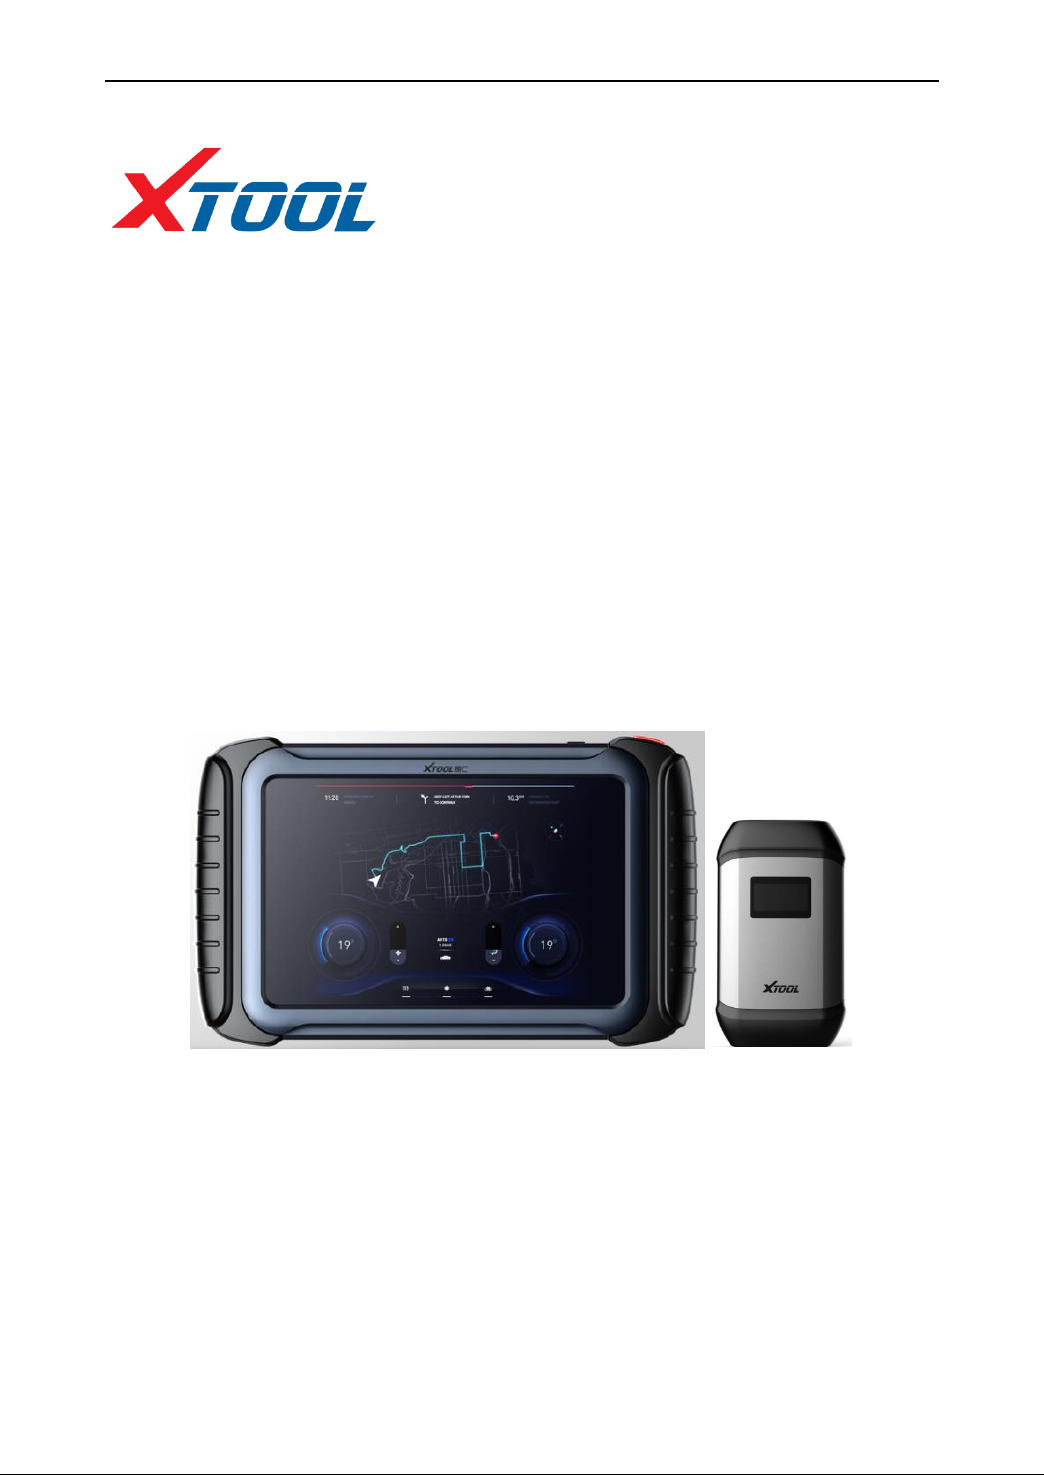
H6 PRO Car Intelligent Diagnosis
Platform
User Manual
Efficient Intelligent Portable
Please read this manual carefully before use.

H6 PRO Intelligent Diagnosis
1
Trademark:
is the registered trademark of Shenzhen Xtooltech Co., Ltd. In countries
that the trademarks, service marks, domain names, logos and the name of the
company are not registered, Xtool claims that it still reserves the ownership of the
unregistered trademarks, service marks, domain names, logos and the company name.
All other marks for the other products and the company’s name mentioned in the
manual still belong to the original registered company.
Copyright:
You may not use the trademarks, service marks, domain names, logos and company
name of Xtool or other companies mentioned without written permission from the
trademark holder.
Responsibility:
Use the device only as described in this manual. The user will be responsible solely
for the after-effects of violating the laws and regulations caused by using the product
or its data information, Xtool will not bear any legal responsibility for that. Xtool
shall not be liable for any incidental or consequential damages or for any economic
consequential damages arising from the accidents of individual users and the third
parties, misuse or abuse of the device, unauthorized change or repair of the device, or
the failure made by the user not to use the product according to the manual. All
information, specifications and illustrations in this manual are based on the latest
configurations and functions available at the time of printing. Xtool reserves the right
to make changes at any time without notice.
After sale:
After-Sale Service Hotline(400-880-3086/ 0755-21670995)
Email: aftersales-services@xtooltech.com
Official website:http://www.xtooltech.com
Safety:
⚫ This product is intended for use by automotive technicians only.
⚫ When the engine is running, please keep the maintenance area well ventilated,

H6 PRO Intelligent Diagnosis
2
properly connect the engine and the building's exhaust system. The carbon
monoxide generated by the engine will cause the body to be unresponsive and
even cause serious personal injury or death.
⚫ Wear ANSI-compliant goggles and keep clothing, hair, hands, tools, diagnostics,
etc. away from running or hot engine parts.

H6 PRO Intelligent Diagnosis
1
Contents
Chapter I About H6 PRO ...........................................................................................................1
1.1 Appearance ...................................................................................................................1
1.2 Interface of H6 PRO Tablet ..........................................................................................2
1.2.1 Top View of H6 PRO Tablet .........................................................................................2
1.2.2 Bottom View of H6 PRO Tablet ...................................................................................2
1.3 VCI diagnostic box appearance ....................................................................................3
1.4 VCI diagnostic box technical parameters .....................................................................3
1.5 H6 PRO technical parameters .......................................................................................3
Chapter II How to Use H6 PRO ................................................................................................5
2.1 Machine interface .........................................................................................................5
2.1.1 Main interface ...............................................................................................................5
2.1.2 Interface icon ................................................................................................................5
2.1.3 Interface Task-bar .........................................................................................................6
2.2 Connecting vehicle .......................................................................................................7
2.2.1 Connecting vehicle .......................................................................................................7
2.2.2 Car diagnostics precautions ..........................................................................................7
2.3 Diagnosis ......................................................................................................................8
2.3.1 Menu selection ..............................................................................................................8
2.3.2 Diagnostic function .......................................................................................................9
2.3.3 Function menu ..............................................................................................................9
2.4 Setting .........................................................................................................................12
2.4.1 [Language] ..................................................................................................................12
2.4.2 [Unit]. .........................................................................................................................13
2.4.3 [Bluetooth] ..................................................................................................................13
2.5 Xtool Cloud (Coming Soon) .......................................................................................15
2.6 One-click upgrade .......................................................................................................15
2.7 Diagnose report ...........................................................................................................15
2.7.1 View report .................................................................................................................16
2.7.2 Data playback .............................................................................................................16
2.8 Remote control ............................................................................................................16
H6 PRO Intelligent Diagnosis
1
Chapter I About H6 PRO
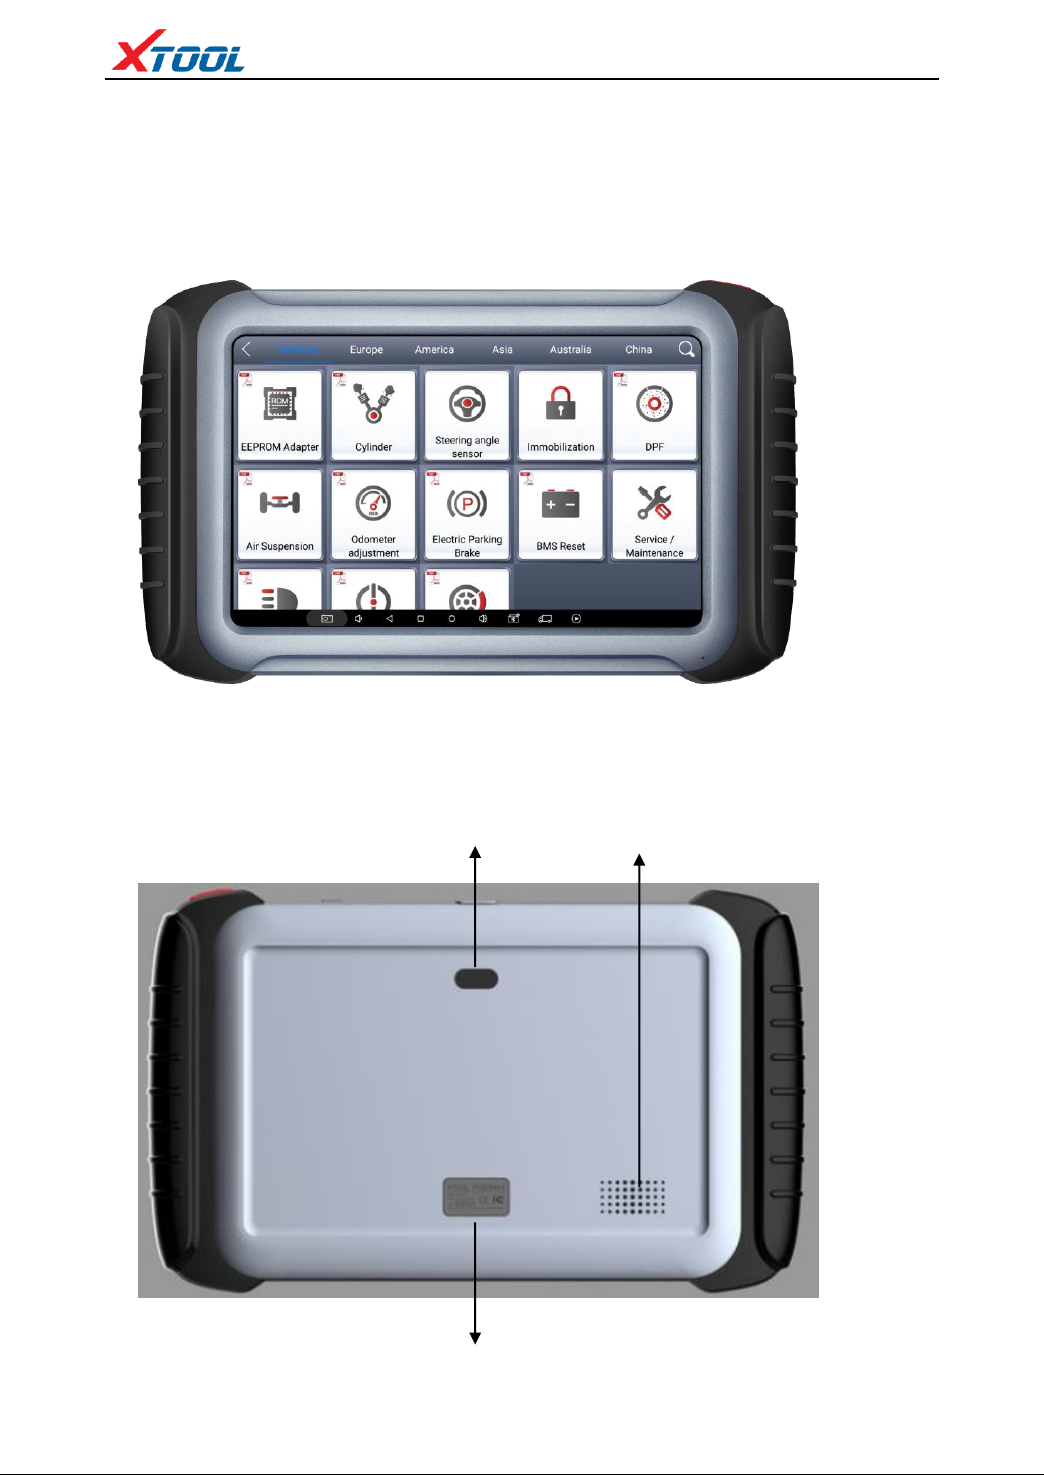
1.1 Appearance
1.1.1 Front View
1.1.2 Back View
② speaker
① Camera
③Nameplate
H6 PRO Intelligent Diagnosis
2
1.2 Interface of H6 PRO Tablet
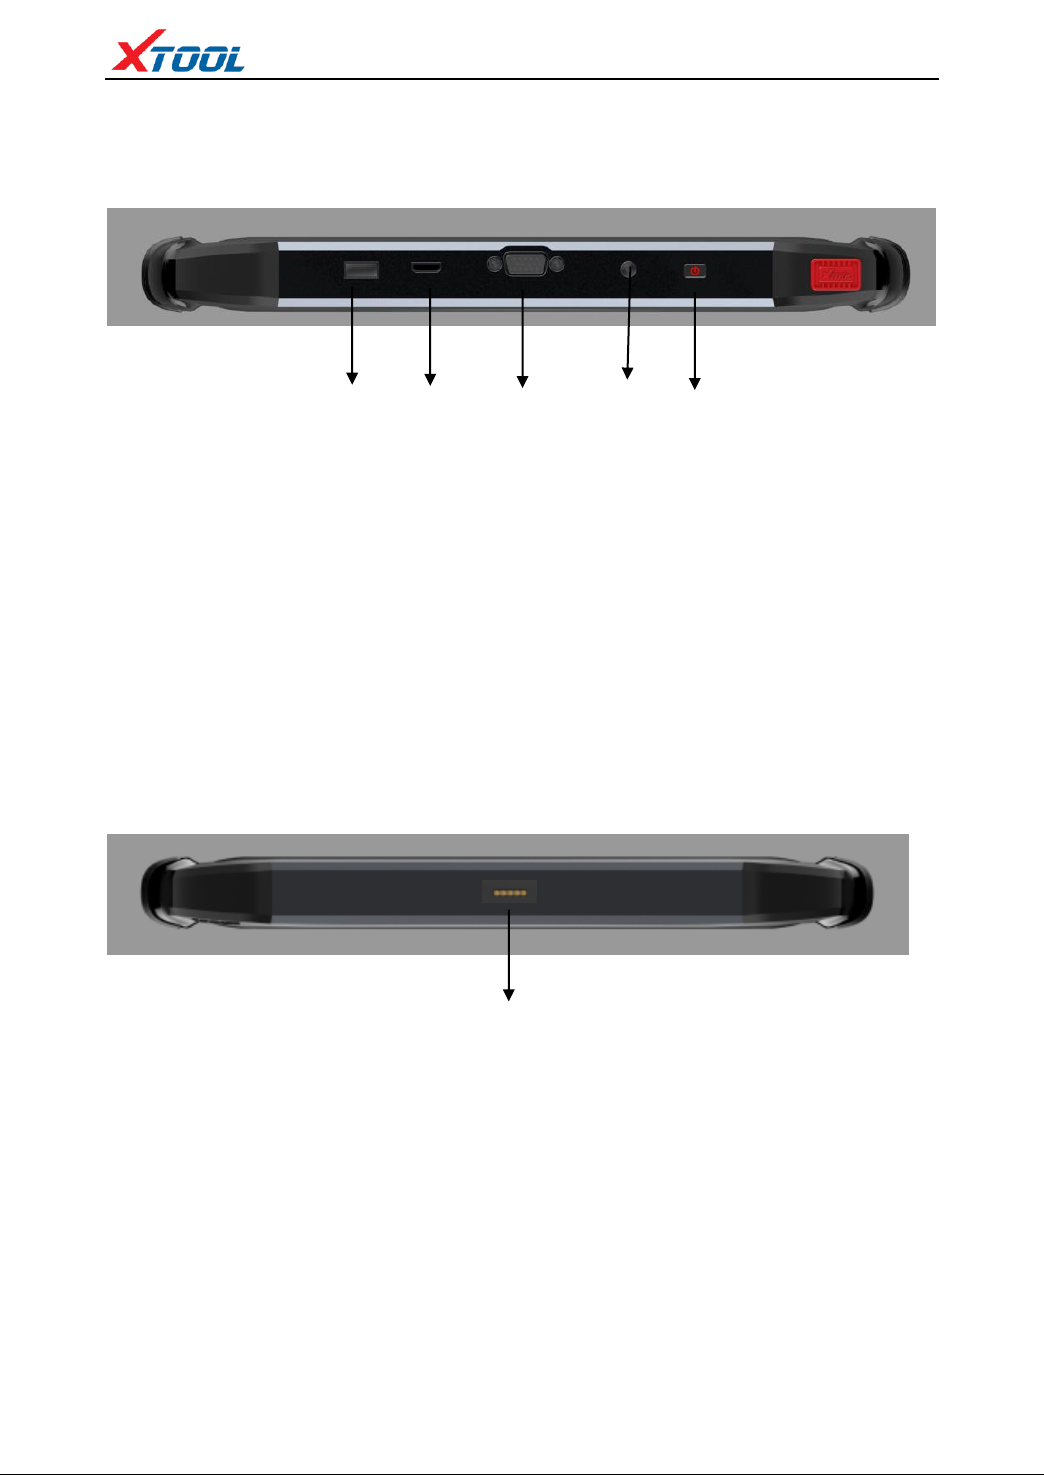
1.2.1 Top View of H6 PRO Tablet
① USB3.0 interface:
② Mini HDMI interface:
③ DB15 interface:
④ DC charging port:
⑤ Power button:
Data transfer via USB cable
Audio and video transfer
Extended reservation port
Device charging, using 12V power
Power On/off button
1.2.2 Bottom View of H6 PRO Tablet
① Charger interface, this is a reserved charger interface
⑤
① ② ③
④
①
H6 PRO Intelligent Diagnosis
3
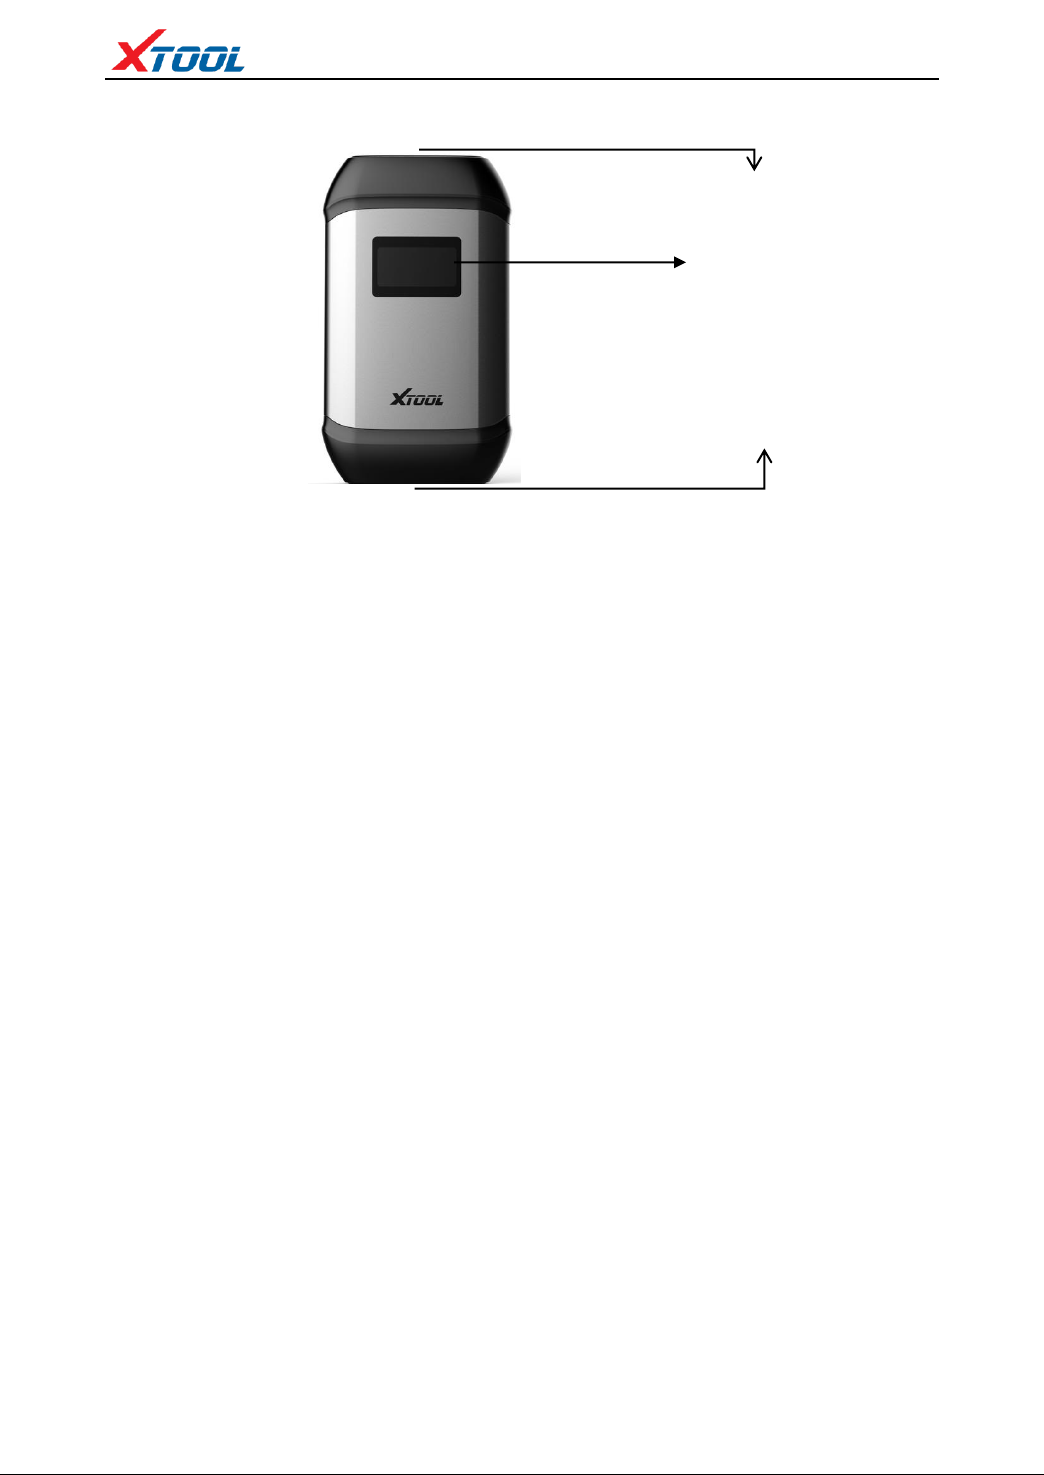
1.3 VCI diagnostic box appearance
① Display: Display voltage, Bluetooth connection status, etc.
② DB15 interface: Work together with the extension cable and various types of
connectors to communicate with vehicle diagnostic port
③ DB9 interface: Work together with DB9 male to USB3.0 cable to
communicate with tablet
1.4 VCI diagnostic box technical parameters
Display screen:
Energy consumption:
Connection method:
Interface:
C P U :
Shell:
RAM:
1.54 inches
2 W
Wired/Bluetooth
USB DB15 test main line interface
ARM processor
Aluminum metal and reinforced plastic housing
1MByte
1.5 H6 PRO technical parameters
Operating system: Android
Processor: quad core processor 1.8GHz
Memory: 4GRAM, 64GROM
Display screen: 1280×800 resolution
Touch Screen: 10.1 inch LED
Camera: rear camera, 8.0 Megapixel, AF with Flashlight.
Interface: USB3.0, DC charging port, MINI HDMI, DB15 interface.
Battery: 13000mAh Lithium-polymer battery
Input voltage: 12V voltage system
①
②
③

H6 PRO Intelligent Diagnosis
4
Working temperature: -20 to 50℃ (-4 to 126℉)
Relative humidity: <90%
Appearance size: 310.92*189.17*36.21 (mm)

Chapter II How to Use H6 PRO
2.1 Machine interface
2.1.1 Main interface
2.1.2 Interface icon
Functional Buttons
Functional descriptions
username
【diagnosis】Read vehicle diagnosis information
【Setting】Language, unit, Bluetooth

H6 PRO Intelligent Diagnosis
6
【Xtool cloud】Online chatting (Coming Soon)
【One-click upgrade】Upgrade software
【Diagnose report】Read vehicle report
【Remote control】Xtooltech support center and function
keys
2.1.3 Interface Task-bar
Function Button
【Function Description】
【Screenshot】
【Decrease the volume】
【Return to the previous interface】
【Show recently used programs】
【Return to the main interface of Android】
【Increase volume】
【Bluetooth connection, show blue when connected】
【Back to the diagnosis model interface】

H6 PRO Intelligent Diagnosis
7
【Record diagnostic data every moment】
2.2 Connecting vehicle
2.2.1 Connecting vehicle
Turn on the car ignition switch, connect the VCI diagnostic box to the car OBDII
diagnostic port, wait for 5 seconds for Bluetooth to connect successfully, and select
the function for vehicle fault diagnosis.
① H6PRO Tablet
② VCI box (communication with the tablet by wire or Bluetooth connection, and
connect with ③⑤ components to the vehicle diagnostic port)
③ Main cable
④ Tested vehicle
⑤ OBDII-16 Adapter (Select other adapters when the diagnostic port is a
non-standard OBDII 16pin connector)
2.2.2 Car diagnostics precautions
1、Battery voltage range on the car: +9~+36VDC;
2、When testing the harness, apply the hand to pinch the front end of the harness for
plugging and unplugging, and do not plug it obliquely to avoid damage to the
terminal.
3、When performing some special function tests, the operator must follow the prompts
and meet the test conditions. If there are special functions, the conditions must be met:
engine water temperature 80 °C ~ 105 °C, turn off the headlights and air conditioning,
the accelerator pedal remains loose. Open position, etc.
4、If the model or electronic control system to be detected is not found in the H6pro
①
②
③
④
⑤

H6 PRO Intelligent Diagnosis
8
diagnostic function, please upgrade the model diagnostic software to the latest version
or consult the company's technical service department.
5、It is not recommended to use the wiring harness of Xtooltech CO., LTD for
connection test to avoid unnecessary loss.
6、In H6pro communication with the vehicle, direct shutdown is prohibited. The task
should be canceled before returning to the main interface.
2.3 Diagnosis
2.3.1 Menu selection
1 、After the VCI diagnostic box has successfully connected the host, you can perform
a diagnostic menu selection.
2 、According to your needs to choose [special function] [European car] [Asian car]
[American car] [Australia car] [Chinese car] for diagnosis, and click on the search icon in
the upper right corner, enter the model for quick search.
3、In addition the diagnostic functions, the R&D team has developed a series of
[special functions] for some mainstream models.

H6 PRO Intelligent Diagnosis
9
2.3.2 Diagnostic function
Take Volkswagen VW as an example, enter [Dash Board] → enter and display.
2.3.3 Function menu
[Read computer information in the car] [Diagnostic code] [Read data stream]
[Action test] [Match] [Basic settings] [Display advanced recognition] [Security
access] [Encoding]

H6 PRO Intelligent Diagnosis
10
1、Reading computer information in a car
Read ECU version information. Some electronic control systems display system
identification or system information menus, which have the same meaning, and read
information such as software and hardware version numbers and part numbers.
2、Fault code
The fault code function can read the fault code stored in the electronic control ECU.
When the fault code is read, the screen displays the fault code and fault code
definitions that were read.

H6 PRO Intelligent Diagnosis
11
Tip: When detecting the faulty vehicle, if the display system is normal or has no fault
code, it means that the relevant fault code is not stored in the ECU or some fault
phenomenon is not within the ECU monitoring range, which is mostly a mechanical
fault. It is also possible that the sensor has a signal deviation in the range, which can
be judged in the data stream function.
3、Read data stream
By reading the data stream function, it is possible to read the data value of the control
unit.
4、Action test
Follow the prompts, for example: the engine is not running and the ignition switch is
on. If the engine is started or the speed signal is recognized, the motion test is forced
to be interrupted.

H6 PRO Intelligent Diagnosis
12
5、Match
Match various function modes.
6、Basic settings
Actuator, sensor initialization.
7、Display advanced recognition
Displays the status of the control unit.
8、Secure access
Set the login code.
9、Coding
Turn on new vehicle features by changing the code.
2.4 Setting
2.4.1 [Language] Check the desired language in the many language options on the
right side of the interface.

H6 PRO Intelligent Diagnosis
13
2.4.2 [Unit] Select the unit of measurement, check the metric or imperial system.
2.4.3 【Bluetooth】
1、Enters the settings, clicks Bluetooth, and then clicks Search. The Bluetooth name is
the corresponding serial number or Diagnostic.

H6 PRO Intelligent Diagnosis
14
2、Entering the H6PRO setup option, the blue icon on the task-bar shows that the
connection is successful.
2.4.4 【Self test】 Detects the VCI box.

H6 PRO Intelligent Diagnosis
15
2.5 Xtool Cloud (Coming Soon)
All car service technicians using our equipment can check the maintenance information we
put on the cloud service platform, and can be used in conjunction with the results of the car
diagnosis, and use the forum to communicate with other users.
2.6 One-click upgrade
The device no longer needs to be inserted into the card for upgrade. Just open the
application and click [Upgrade].
2.7 Diagnose report
View saved files, including diagnostic reports, data playback, and file management.

H6 PRO Intelligent Diagnosis
16
2.7.1 View report
View diagnostic reports for different models.
2.7.2 Data playback
The data playback function allows you to view the model, system, and playback of
recorded data.
2.8 Remote control
The service technician has encountered problems during the repair process. You can

H6 PRO Intelligent Diagnosis
17
open this application for remote assistance and accept support from the Xtool
Technology Center.
1、Boot up, enter the App;
2、Click the [Remote Control] icon to generate and display the device ID;
3、Provide your ID to after-sales technical support staff;
4、The system pops up a window and allows the other party to control for remote
control.

FCC Statement
This device complies with part 15 of the FCC rules. Operation is subject to the
following two conditions: (1) this device may not cause harmful interference, and (2)
this device must accept any interference received, including interference that may
cause undesired operation.
Changes or modifications not expressly approved by the party responsible for
compliance could void the user's authority to operate the equipment.
NOTE: This equipment has been tested and found to comply with the limits for a
Class B digital device, pursuant to part 15 of the FCC Rules. These limits are designed
to provide reasonable protection against harmful interference in a residential
installation. This equipment generates uses and can radiate radio frequency energy
and, if not installed and used in accordance with the instructions, may cause harmful
interference to radio communications. However, there is no guarantee that interference
will not occur in a particular installation. If this equipment does cause harmful
interference to radio or television reception, which can be determined by turning the
equipment off and on, the user is encouraged to try to correct the interference by one
or more of the following measures:
•Reorient or relocate the receiving antenna.
•Increase the separation between the equipment and receiver.
•Connect the equipment into an outlet on a circuit different from that to which the
receiver is connected.
•Consult the dealer or an experienced radio/TV technician for help.
The device has been evaluated to meet general RF exposure requirement. The device
can be used in portable exposure condition without restriction.
Shenzhen Xtooltech Co., Ltd
Company address: 2nd Floor, Building No.2, Block 1, Excellence City, No.128,
Zhongkang Road, Shangmeilin, Futian District, Shenzhen, China
Factory address: 2/F, Building 12, Tangtou Third Industrial Zone, Shiyan Street,
Baoan District, Shenzhen, China
Service Hotline: 400-880-3086/ 0755-21670995
Email: aftersales-services@xtooltech.com
Fax: 0755-83461644
Website: www.xtooltech.com
 Loading...