

Page 1

HD900
1
Declaration
1. This manual is designed for the usage of HD900. No
part of this manual can be reproduced, stored in a
retrieval system or transmitted, in any form or by any
means (electronic, mechanical, photocopying,
recording, or otherwise), without the prior written
permission of Xtool.
2. HD900 is just designed for the professional vehicle
repair or maintenance technicians.
3. Use the device only as described in this manual. The
user will be responsible solely for the after-effects of
violating the laws and regulations caused by using the
product or its data information, in this case Xtool will
not bear any legal responsibility.
4. Xtool shall not be liable for any incidental or
consequential damages or for any economic
consequential damages arising from the accidents of
individual users and the third parties, misuse or abuse
of the device, unauthorized change or repair of the
device, or the failure made by the user not to use the
product according to the manual.
5. All information, specifications and illustrations in this
manual are based on the latest configurations and
functions
available at the time of printing. Xtool reserves the right
Page 2

HD900
2
1.The HD900 work in 11V~36V voltage, please make
2.Please pinch the non-slip grooves but not draw the
to make changes at any time without notice.
6. is the registered trademark of SHENZHEN
XTOOLTECH CO.,LTD.
7. In countries that the trademarks, service marks,
domain names, logos and the name of the company are
not registered, Xtool claims that it still reserves the
ownership of the unregistered trademarks, service
marks, domain names, logos and the company name.
All other marks for the other products and the
company’s name mentioned in the manual still belong
to the original registered company.
You may not use the trademarks, service marks, domain
names, logos and company name of Xtool or other
companies mentioned without written permission from
the trademark holder.
8. Please visit www.xtooltech.com for more information
on the HD900.
9. Xtool reserves the right for the final interpretation of
this manual content.
Precautions
sure the diagnostic socket on your vehicle export
11V~36V voltage.
Page 3

HD900
3
3.Do not test the car with harness that is not from
4.When HD900 is communicating with the car, do not
5.Be gently to avoid vibration or shock when operating
6.When you stop using HD900, please take it out from
7.Ensure the temperature of operating environment is -
8.Avoid damp and corrosive liquids in storage and daily
middle section of the harness when plugging or
pulling out the diagnostic connector. Please plug the
connector vertically to the DLC PORT. Do not plug it
slantly in case terminal damage.
XTOOLTECH in case of any loss.
take out the connector directly. Please cancel the task
AND go back to main menu, and then take out the
connector.
HD900.
the diagnosis port of the car.
20℃to 50℃.
use of HD900.
Page 4

4
Contents
HD900
ChapterⅠAbout HD900
1. Appearance & Interfaces....................................5
2. Technical Parameters......................................... 7
Chapter Ⅱ Diagnose.......................................................8
1. Vehicle Connection Diagnosis
2. HD900 Main Interface
3. OBDII Diagnosis.................................................. 9
Chapter Ⅲ Setting....................................................... 11
. Language Setting
1
2. Contrast Adjustment
. Metric/English Units
3
. Recording
4
5.Information....................................................... 14
Chapter Ⅳ Update....................................................... 15
1. Upgrade Tool Installing..................................15
2. Software Updating
..........................................................13
................................................5
........................... 8
........................................ 8
.............................................. 11
........................................ 12
....................................... 112
......................................... 15
Page 5
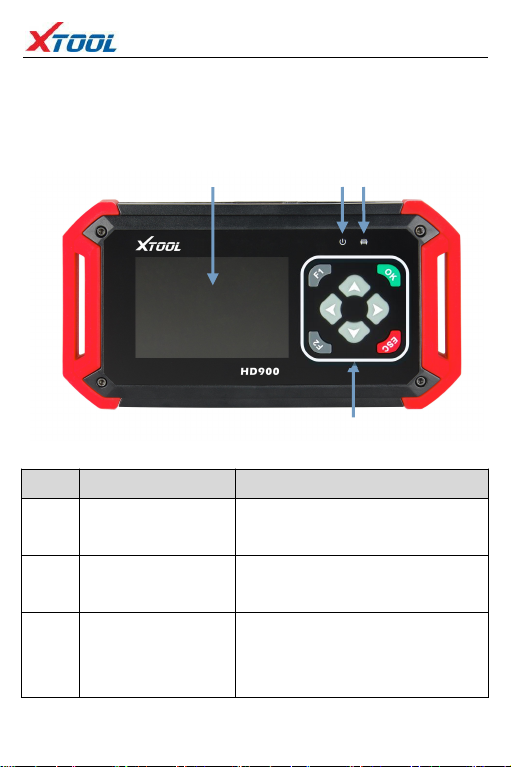
5
ChapterⅠAbout HD900
1. Appearance & Interfaces
No.
Name
Descriptions
①
Display screen
3.5’’ TFT-LCD, showing
testing options and results
②
Power indicator
After power on, it will turn
to red color and always on.
③
Communication
Indicator
When communicating with
the vehicle, it will turn to
green color.
①②③
④
(1) Appearance
The appearance of product is subject to practicality.
HD900
Page 6
HD900
6
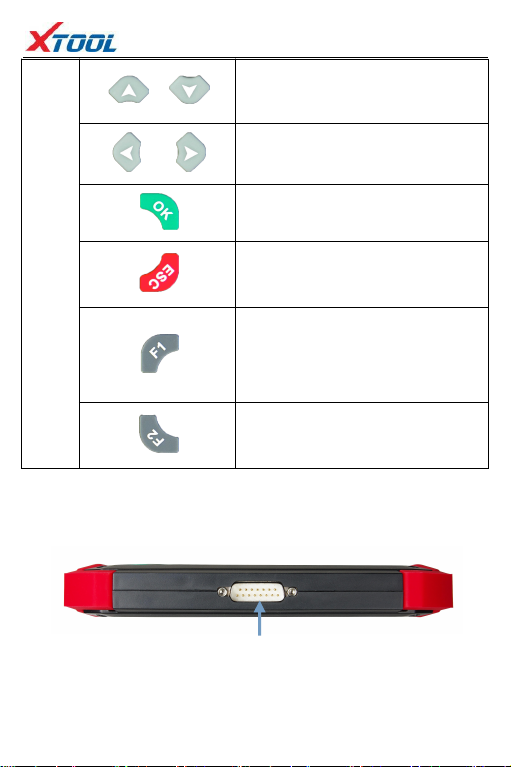
④
Up or Down
Left or Right
Ok
Exit or Back to previous
interface
Special function key,
Retrieve the keyboard and
input the words
Special function key, can be
used as OK.
(2) Top view
:
DB15 Port:Connect to the main
test cable
Page 7
7
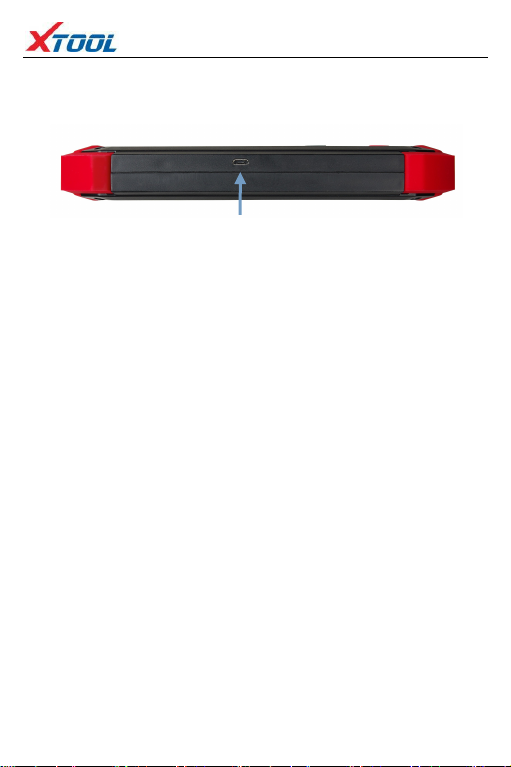
(3) Down view:
Micro USB Port: Connecting PC
USB2.0 port with mini-USB cable to
update SW
2. Technical Parameters
CPU: ARM 32bit CPU 72MHz
RAM: 64K RAM
Program Memory: 512K Flash
Internal Memory: built-in 2GB TF card
Input Voltage: DC 11~36V
External Interface: DB15/ Mini USB
Display: 3.5’’ TFT-LCD Display
Components: Main frame, Test cable, USB cable
Operating Temperature: -20—50℃
Humidity: <90%
Dimension (L*W*H): 7.48’’(L) x 3.94’’(W) x 1.06’’(H)
HD900
Page 8
HD900
8
ChapterⅡDiagnose
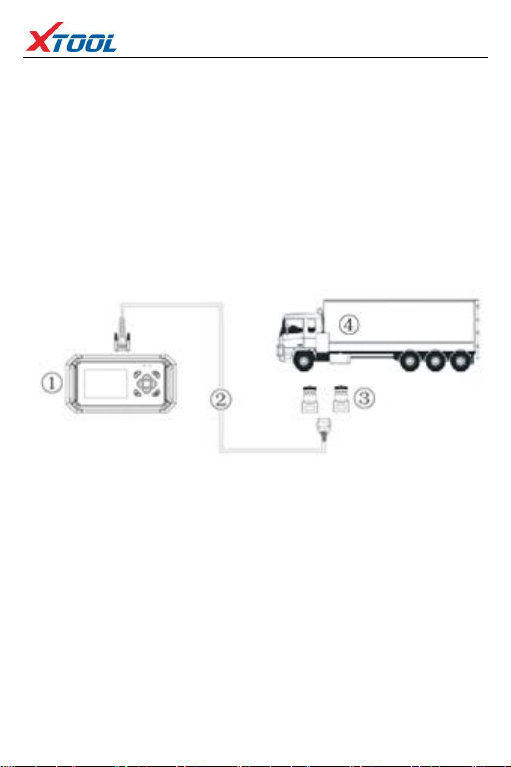
1. Vehicle Connection Diagnosis
(1). Connect the DB15 connector of test cable to the
HD900 main frame and the 6/9 pin connector to the
vehicles DLC port. (Shown as follows)
(2). Switch on the ignition and turn on HD900 to test
vehicles.
① HD900 main frame ② Test cable
③ 6/9 Pin Truck Connectors ④ Vehicle
2. HD900 Main Interface
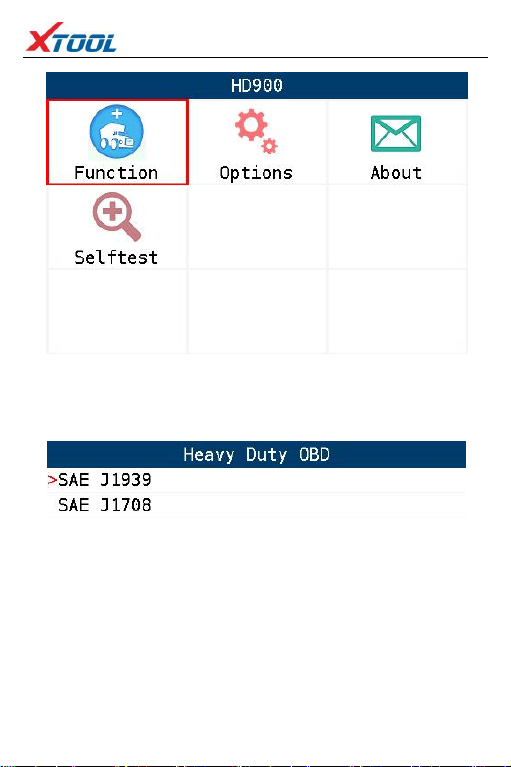
The main interface is shown as below. Select “Function”
to test vehicles; Select “Options” to enter the settings
menu; Select “About” to check the software version,
serial number, etc.; Select “Selftest” to do HD900 selftest.
Page 9
HD900
9
3. OBDII Diagnosis
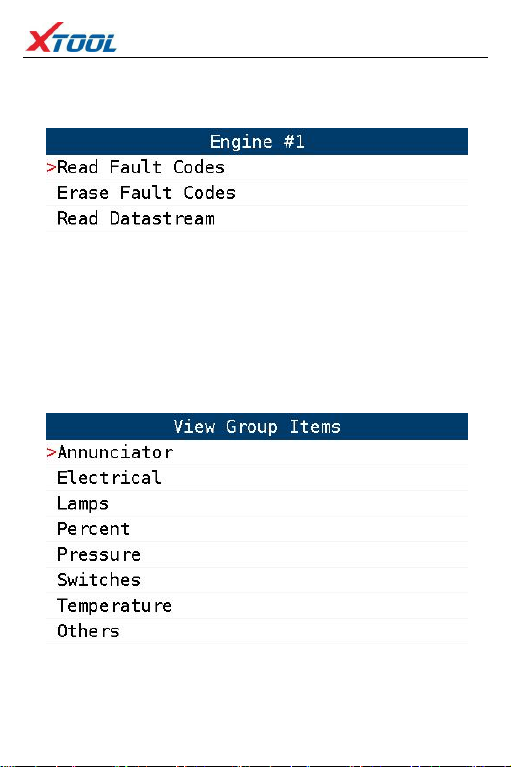
(1). Select “Function” in the main interface to do OBDII
diagnosis.
Page 10
10
(2). Users can choose the protocol according to his
vehicle for diagnosing.
HD900
Page 11
HD900
11
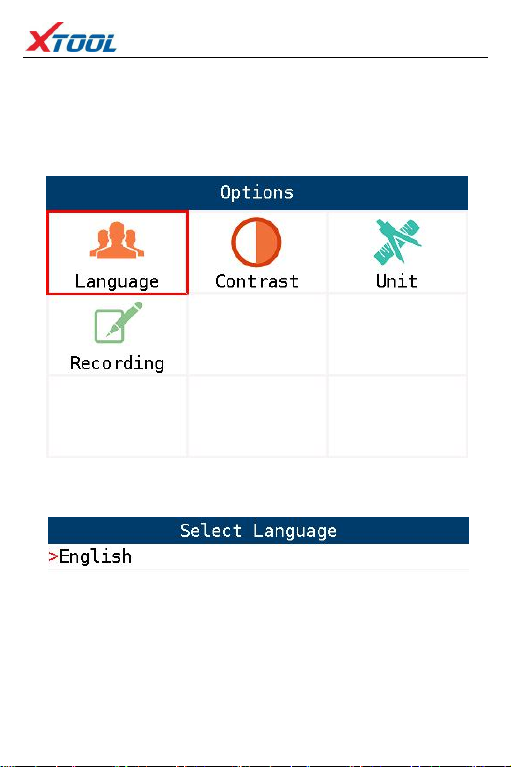
1. Language Setting
ChapterⅢSetting
Select “Options” in the main interface to enter the
settings menu.
Only English language.
Page 12
HD900
12
3. Metric/English Units
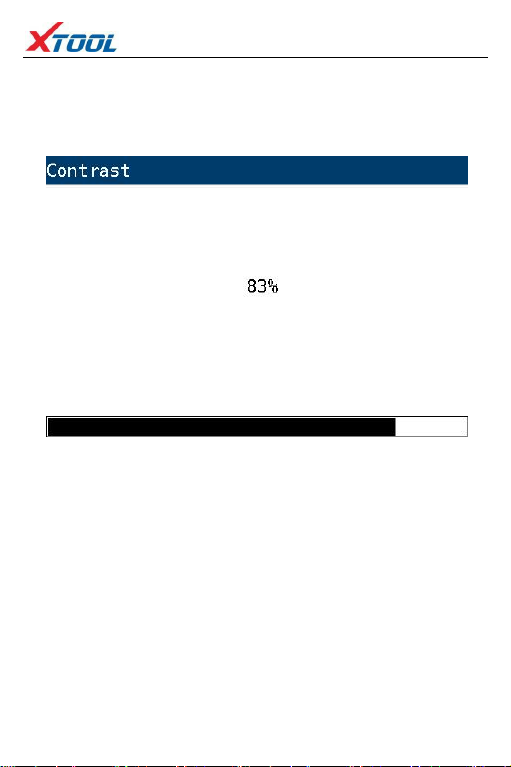
2. Contrast Adjustment
Select “Contrast” and press Left and Right to adjust the
contrast; press OK to save settings.
Select “Unit” and press Up and Down to choose unit;
press OK to save settings.
Page 13

HD900
13
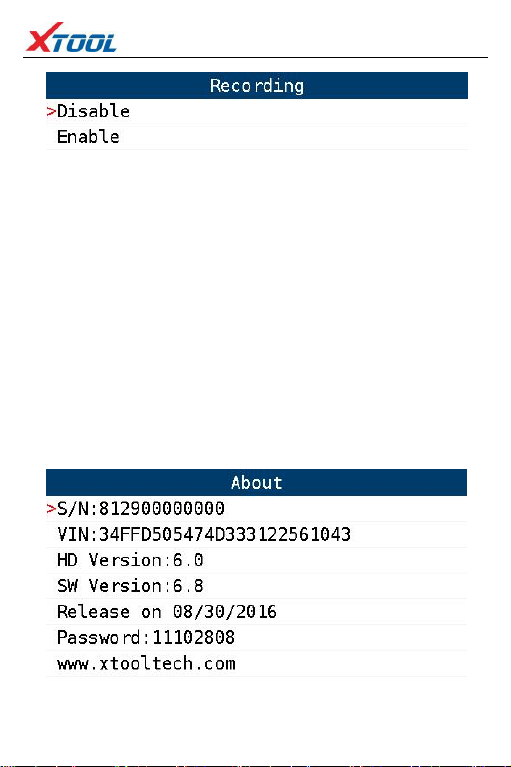
4. Recording
When testing the vehicles, you can record the
diagnostic results and give feedback to the after-sales
department of XTOOLTECH. Select “Recording” and
choose Disable or Enable.
Page 14
14
5. Information
Select “About” in the main interface to check the
information, including the product serial number,
hardware version, software version, password, etc.
HD900
Page 15
HD900
15
ChapterⅣUpdate
1. Upgrade Tool Installing
(1). Visit XTOOL website: http://www.xtooltech.com.
(2). Click the icon of “Upgrade Tool” (shown as below),
then download the Upgrade Tool and save the file to
your computer.
(3). Follow the instructions step by step to install the
Upgrade Tool.
2. Software Updating
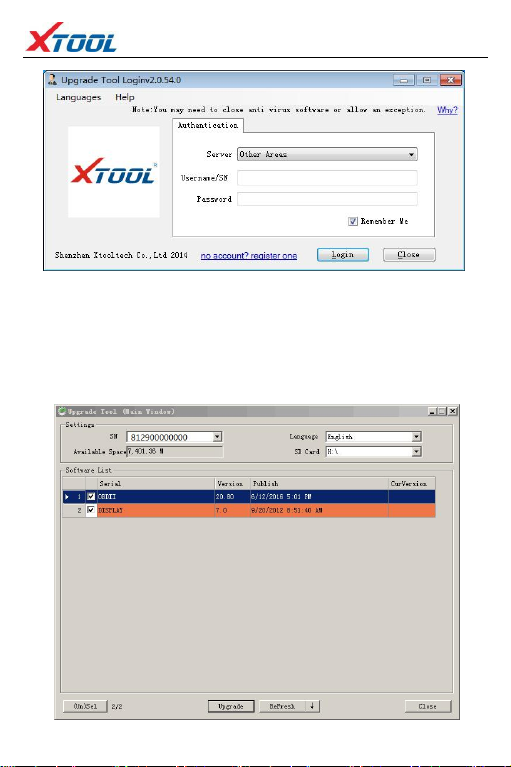
(1). Connect the HD900 main frame to the computer via
USB cable.
(2). Open the Upgrade Tool, input the Product SN and
Password, then click Login. (shown as below)
Page 16
HD900
16
(3). After login, you will see as below; click “(Un)Sel” to
select the software and click “Upgrade” then it will
update automatically.
 Loading...