

Page 1
1
Xtension Recorder
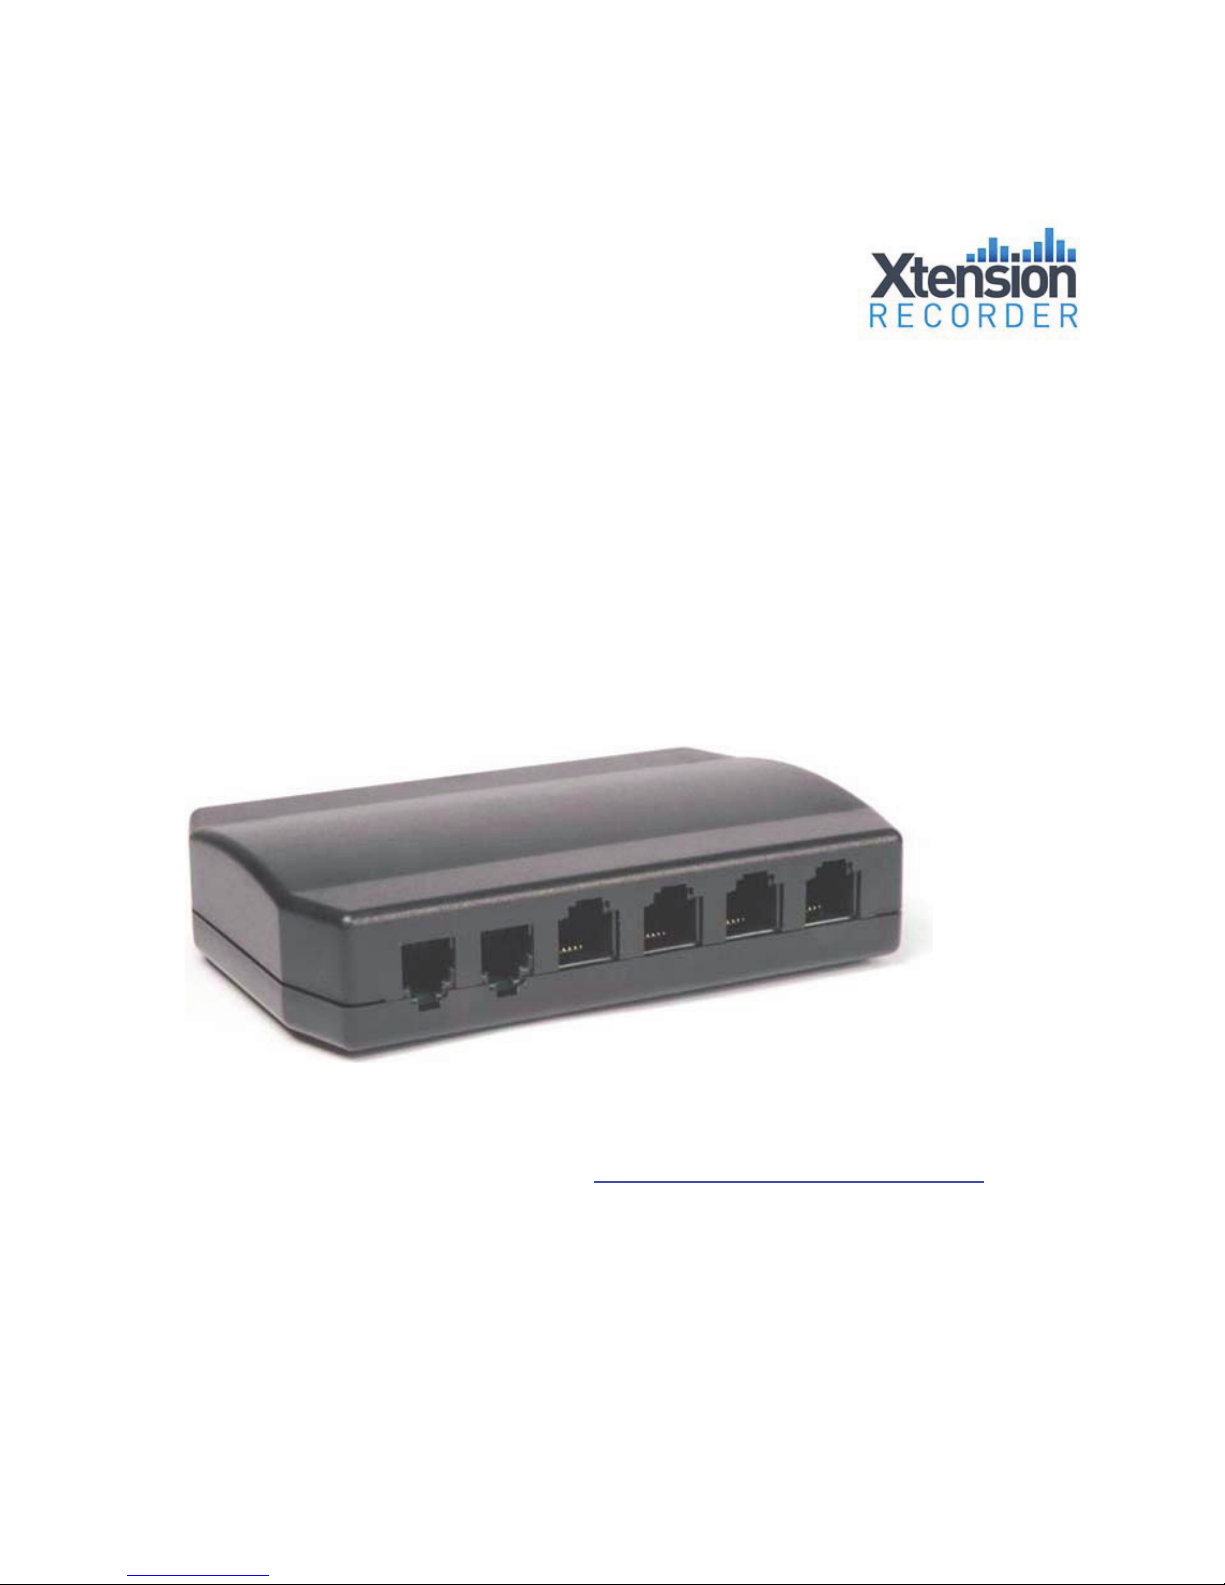
Universal Adapter 2.0
Reference
Guide
Downloads Available at
www.usbcallrecord.com
UK Office: +44(0)1302-835812
US Office: +1 949.587.1226
This guide is Copyright © Intelligent Recording LTD 2008
Page 2

2
Introduction
Thank you for choosing the Xtension Recorder. Your Universal
Adapter 2.0 is a USB device that taps across your telephone line or
the handset jack of your telephone allowing digital recording of your
telephone conversations onto your PC. Using the Desktop software
(included), you can create a file for each call and save this to the
local PC or to a network location.
This guide is designed to help you quickly and easily install your
Xtension Recorder Universal Adapter 2.0 device and its supporting
software. We have also included a summary of the features and
functions available on the Xtension Recorder Desktop software.
CAUTION!
The use of monitoring, recording, or listening devices to eavesdrop,
monitor, retrieve, or record tel
ephone conversation or other sound
activities, whether or not contemporaneous with transmission, may
be illegal in certain circumstances under federal or state laws. Legal
advice should be sought prior
to implementing any practice that
monitors or records any telephone conversation.
PC Compatibility
The Xtension Recorder hardware supports Microsoft
operating systems, which support USB devices such as
Windows 98SE, and ME (using Desktop Software
version 2.4 and below) and Windows 2000 &
Windows XP (using version 2 or version 3.x Desktop.
Note: Windows 95, NT and Macintosh operating systems
are not su
pp
orted.
onnection
Connector Name Description
Do not connect the Universal Adapter to your
computer yet. Please follow the software installation
instructions on page 10 of this guide.
Page 3
3
C
onnections
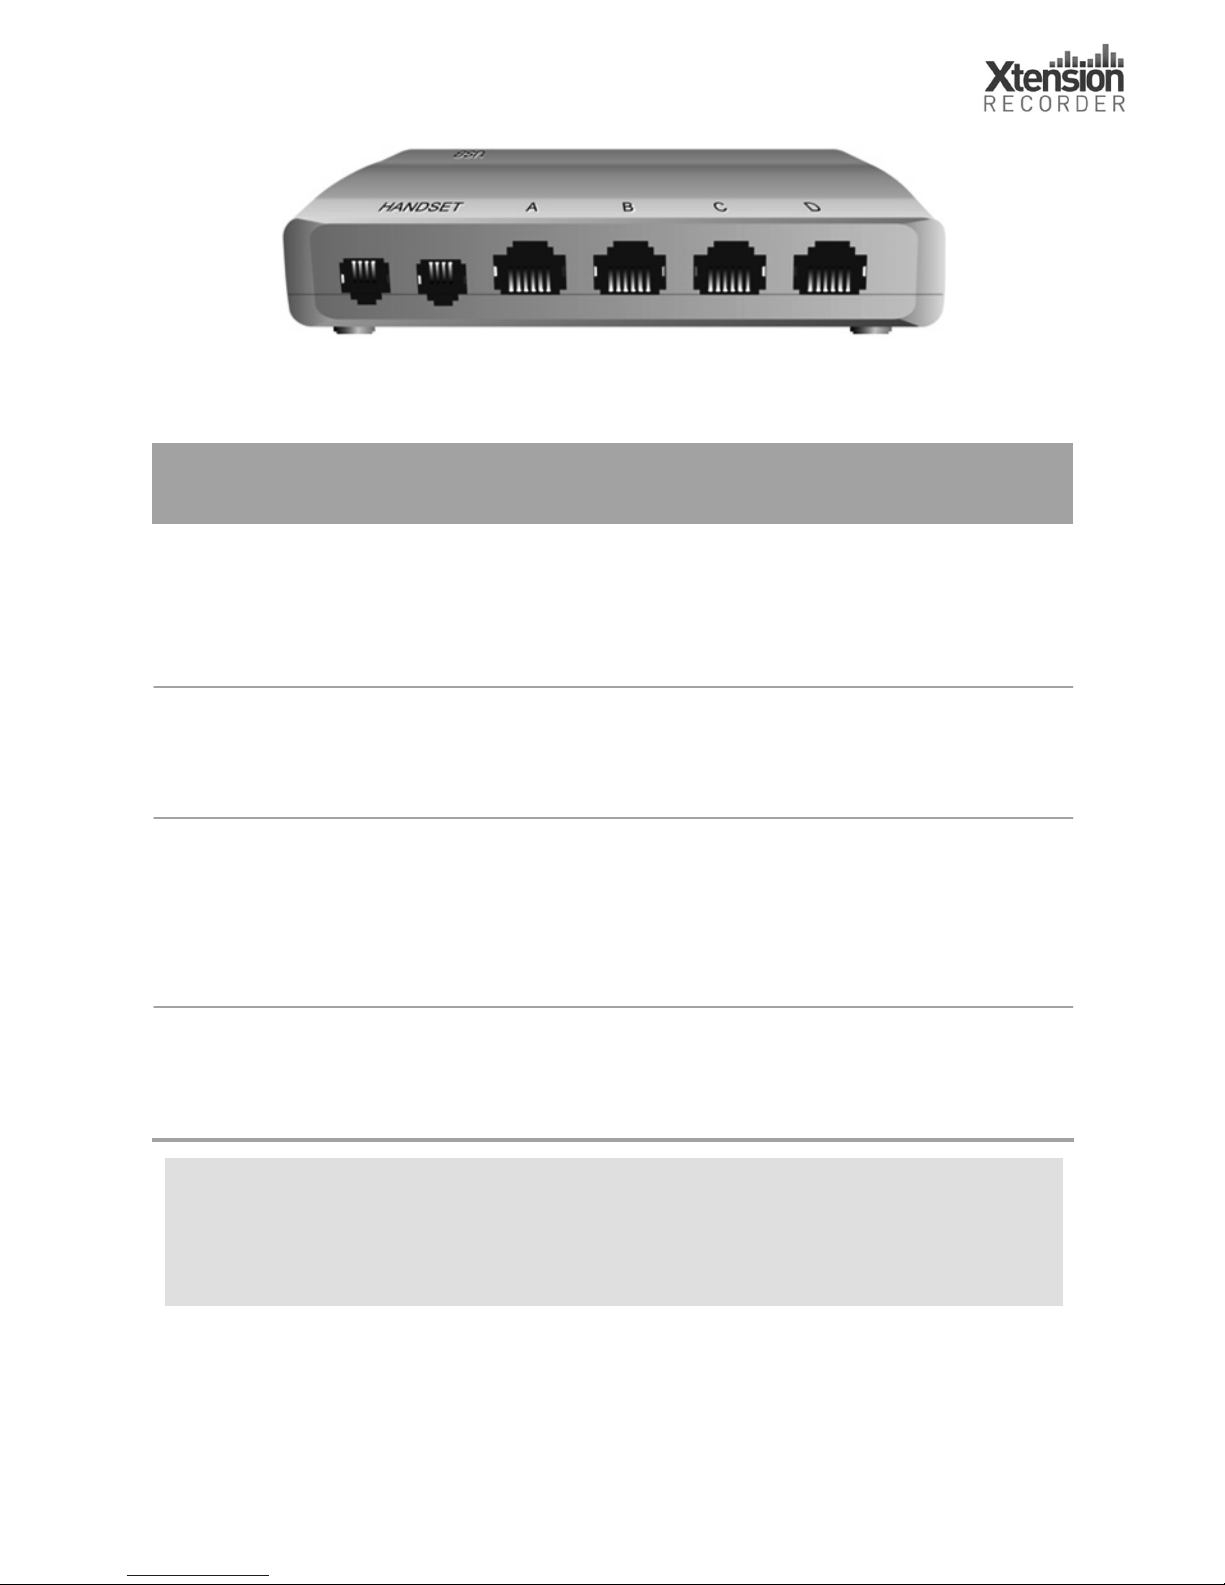
The Universal Adapter has seven connections as described below:
Connector Name Description
Handset Telephone handset in/out Connects to telephone handset
(two sockets) (curly cord) in ‘Handset Only
Connection’ or ‘Mixed
Connection’.
A & B Line connections Connects to telephone line cable
(pins 3 & 4) using pins 3 & 4 – only used on
analogue telephones.
C & D Line connections Connects to telephone line cable
(pins 2 & 5) using pins 2 & 5
-– only used on
analogue telephones.
USB USB Connection to computer Socket to connect the USB lead
between the Universal Adapter
and your computer.
Do not connect the Universal Adapter to your
computer yet. Please follow the software installation
i
nstructions on page 10 of this guide.
Page 4

4
Installing the Universal Adapter
Choosing the Connection
The Universal Adapter supports three types of connection to deliver
the best performance according to the type of telephone you want
to connect:
x Line Only Connection
– records your conversations from the
telephone line.
x Handset Only Connectio
n– records your conversations from the
telephone handset cord.
x Mixed (Line and Handset) Connection
– connects to the telephone
line for ‘off hook’ detection and Dialed Digit Detection, and
connects to your telephone handset cord to record the
telephone conversation.
It is important that you understand the benefits of the various
connection methods to make the correct selection.
Digital or Analogue Compatibility
If you have a Digital PBX telephone, you must use Handset Only
Connection. The features available in Line Only or Mixed
Connections are not available because these require connection to
an analogue telephone line. Digital PBX systems use digital signals
for Caller ID and Dialed Digits. If you need to log Caller ID and
Dialed Digits on a Digital PBX telephone, we offer a series of digital
recorders available. Please visit
www.USBCallRecord.com
for
details.
If you have an analogue telephone, you can choose Line Only or
Mixed Connection to suit your application.
Connection method feature availability
Feature
Line Only
1
Handset Only
Mixed
2
Off hook detect
Dialed digit detection
Record other extensions
Separate local and
remote level adjustment
Advice on Selecting the Correct Connection forYourTelephone
Line Only Connection
and
or
Page 5

5
Connection method feature availability
Feature
Line Only 1 Handset Only
Mixed 2
Off hook detect
x x
9
Dialed digit detection
9
x
9
Record other extensions
9
x x
Separate local and
remote level adjustment
x
9
9
1. Line Only Connection allows recording of parallel-connected telephones. Start
and end recording is detected by VoiceTrigger.
Off Hook Detect is not used because it is necessary to use the audio
signal from any parallel-connected telephone on the line to start and stop the
recording.
2. Mixed Connection is generally the best option if you have an analogue telephone
and do not want to record parallel-connected telephones.
Advice on Selecting the Correct Connection forYourTelephone
Line Only Connection
Select Line Only Connection if:
x You have an analogue phone (Line Only Connection will not work
for digital PBX telephones)
and
x You want to record parallel connected extensions (other
extensions on the same line such as other phones on your home
line)
or
x You do not have a modular connector on your telephone handset
cord.
Page 6

6
If you want to record parallel-connected telephones, you will need
to select
Voice Trigger
for detecting the start and end of
your telephone calls.
The main disadvantage of using Line Only Connection is that local
and remote speech levels are mixed; however, your recorder has
Automatic Gain control to equalize the levels.
Handset Only Connection
Select Handset Only Connection if you have a digital PBX telephone
(a phone that is designed for use on a specific telephone system).
Off Hook Detect
,
Caller ID
a n d
Dialed Digit Detection
will not be
available from your telephone (these require connection to an
analogue telephone line).
Mixed Connection
Select Mixed Connection if:
x You have an analogue phone (Mixed Connection will not work
for digital PBX telephones)
and
x You
do not
want to record parallel-connected extensions (other
extensions on the same line such as other phones on your home
line).
Mixed Connection provides the ‘best of both worlds’ available for
analogue telephones. Mixed Connection uses
Off Hook
Detect
to identify the start and end of calls and enables
Dialed Digit Detection
. The handset connection allows
independent setting of local and remote speech levels.
Line Only Connectio
Note: Do not connect the Universal Adapter to your
computer yet. Please follow the software installation instructions on
page 10 of this guide.
Tele hone line
USB
! Don’t connect yet!
Universal Adapter 2.0
AC
BD
USB
Line Onl Connection
Page 7
7
Line Only Connectio
n
Note: Do not connect the Universal Adapter to your
computer yet. Please follow the software installat
ion instructions on
page 10 of this guide.
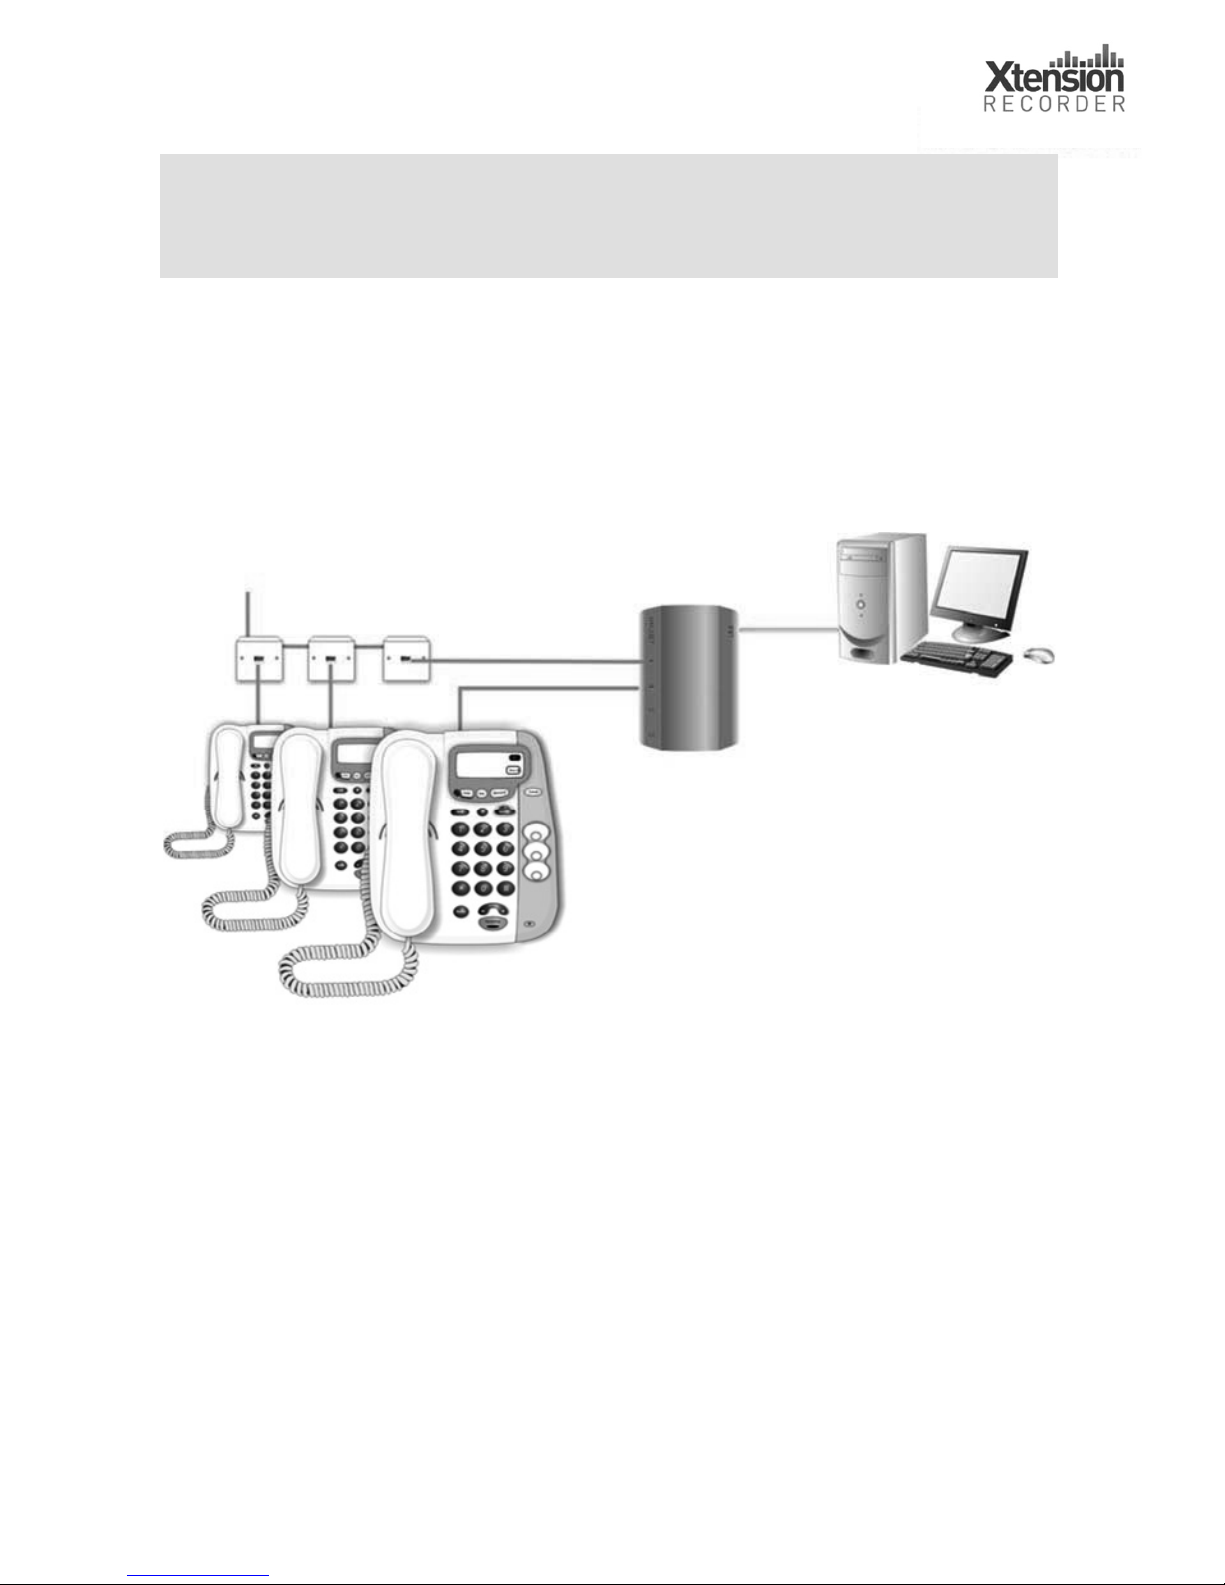
In Line Only Connection, connect your telephone line to the
Universal Adapter through connectors A & B or C & D. As a general
rule, try line connections A & B first; if this does not appear to work,
try connections C & D (see below).
Telephone line
USB
! Don’t connect yet!
Recording from parallel phones
using
Voice Trigger
.
Universal Adapter 2.0
Connections:
A
(or C): telephone line
B
(or D): phone input (use
supplied cable).
USB
: to PC (use supplied cable).
Line Only Connection
Page 8

8
To set up a line connection to the Universal Adapter:
1. Remove your telephone line connection from the base of
your telephone.
2. Plug the line connection into socket ‘A’ (you may need to
change to socket ‘C’ depending upon how your line cord is
wired).
3. Plug the line cord provided into socket ‘B’ and the other end
into the telephone (you may need to change to socket ‘D’
depending upon how your line cord is wired).
4. Proceed to page 10 (
Installing the Software
).
Line Connections A&B or C&D?
Analogue single line telephones sometimes use different
connections within the cables for the telephone lines. For this
reason, the Universal Adapter has two pairs of analogue telephone
line connections: A & B and C & D.
Most single line telephones use pins 3 & 4 (the centre pins) for the
line connections. Use connectors A & B in this configuration. Some
single line telephones in the UK and other related territories use
pins 2 & 5 for the line connections. Use connections C & D in this
configuration.
You will be able to test if you need to change to
connectors C&D after you have installed the softwar
e.
Handset Onl Connectio
Note: Do not connect the Universal Adapter to your
computer yet. Please follow the software installation instructions on
page 10 of this guide.
Telephone line
Handset connections
USB
! Don’t connect yet!
Universal Adapter 2.0
Handset
USB
Handset Only Connection
Page 9
9
Handset Only Connectio
n
Note: Do not connect the Universal Adapter to your
computer yet. Please follow the software installat
ion instructions on
page 10 of this guide.
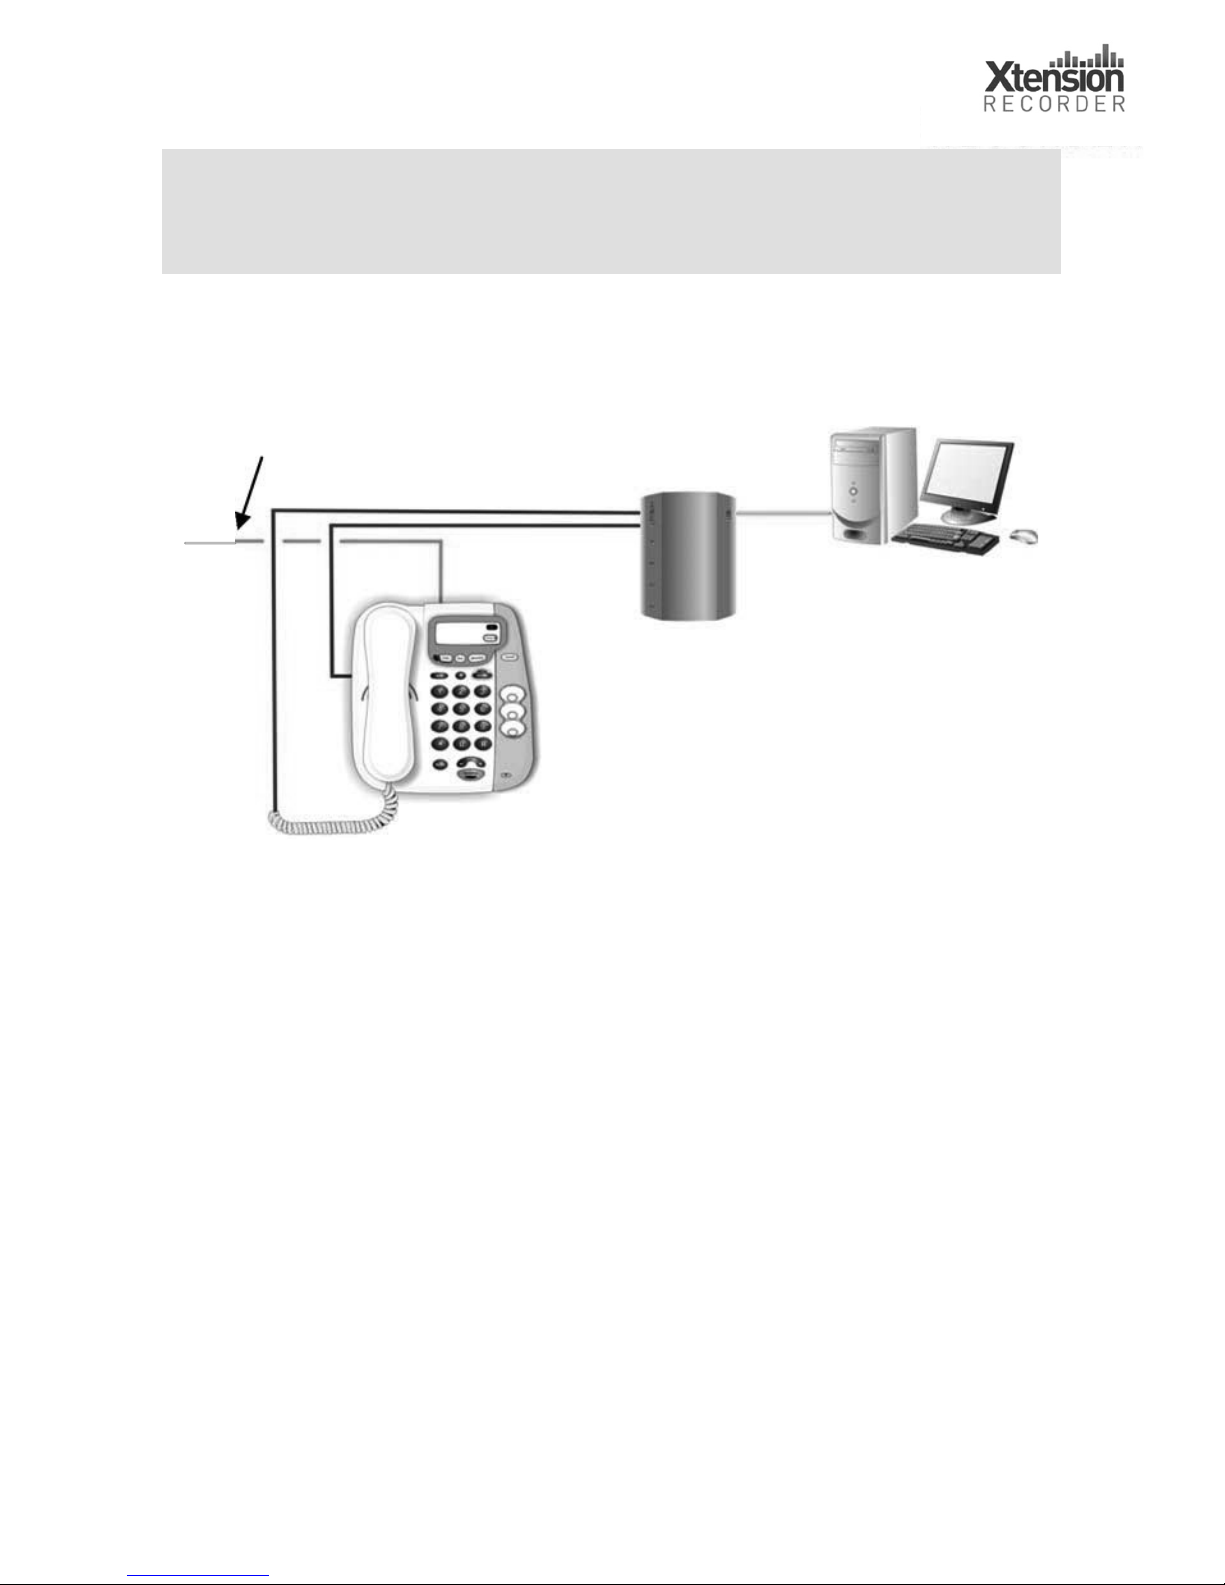
For Handset Only operation, connect your telephone handset (the
curly cord) to the Universal Adapter using the 2 sockets marked
‘Handset’.
Telephone line
Handset connections
USB
! Don’t connect yet!
Universal Adapter 2.0
Connections:
Handset
ports: (1) to handset; (2)
to handset socket on base of
telephone (use-supplied cable).
USB
: to PC (use supplied cable)
Handset Only Connection
To set up a handset connection to the Universal Adapter:
1. Remove the handset modular connector from your telephone
base.
2.
Plug the provided handset line cord into the telephone base.
3.
Plug the removed handset connector into one of the handset
sockets of the device (it doesn’t matter which one you use).
4. Connect the other end of the line cord into the second
handset socket of the Universal Adapter.
Page 10
10
Mixed Connection
Note: Do not connect the Universal Adapter to your
computer yet. Please follow the software installat
ion instructions on
the next page.
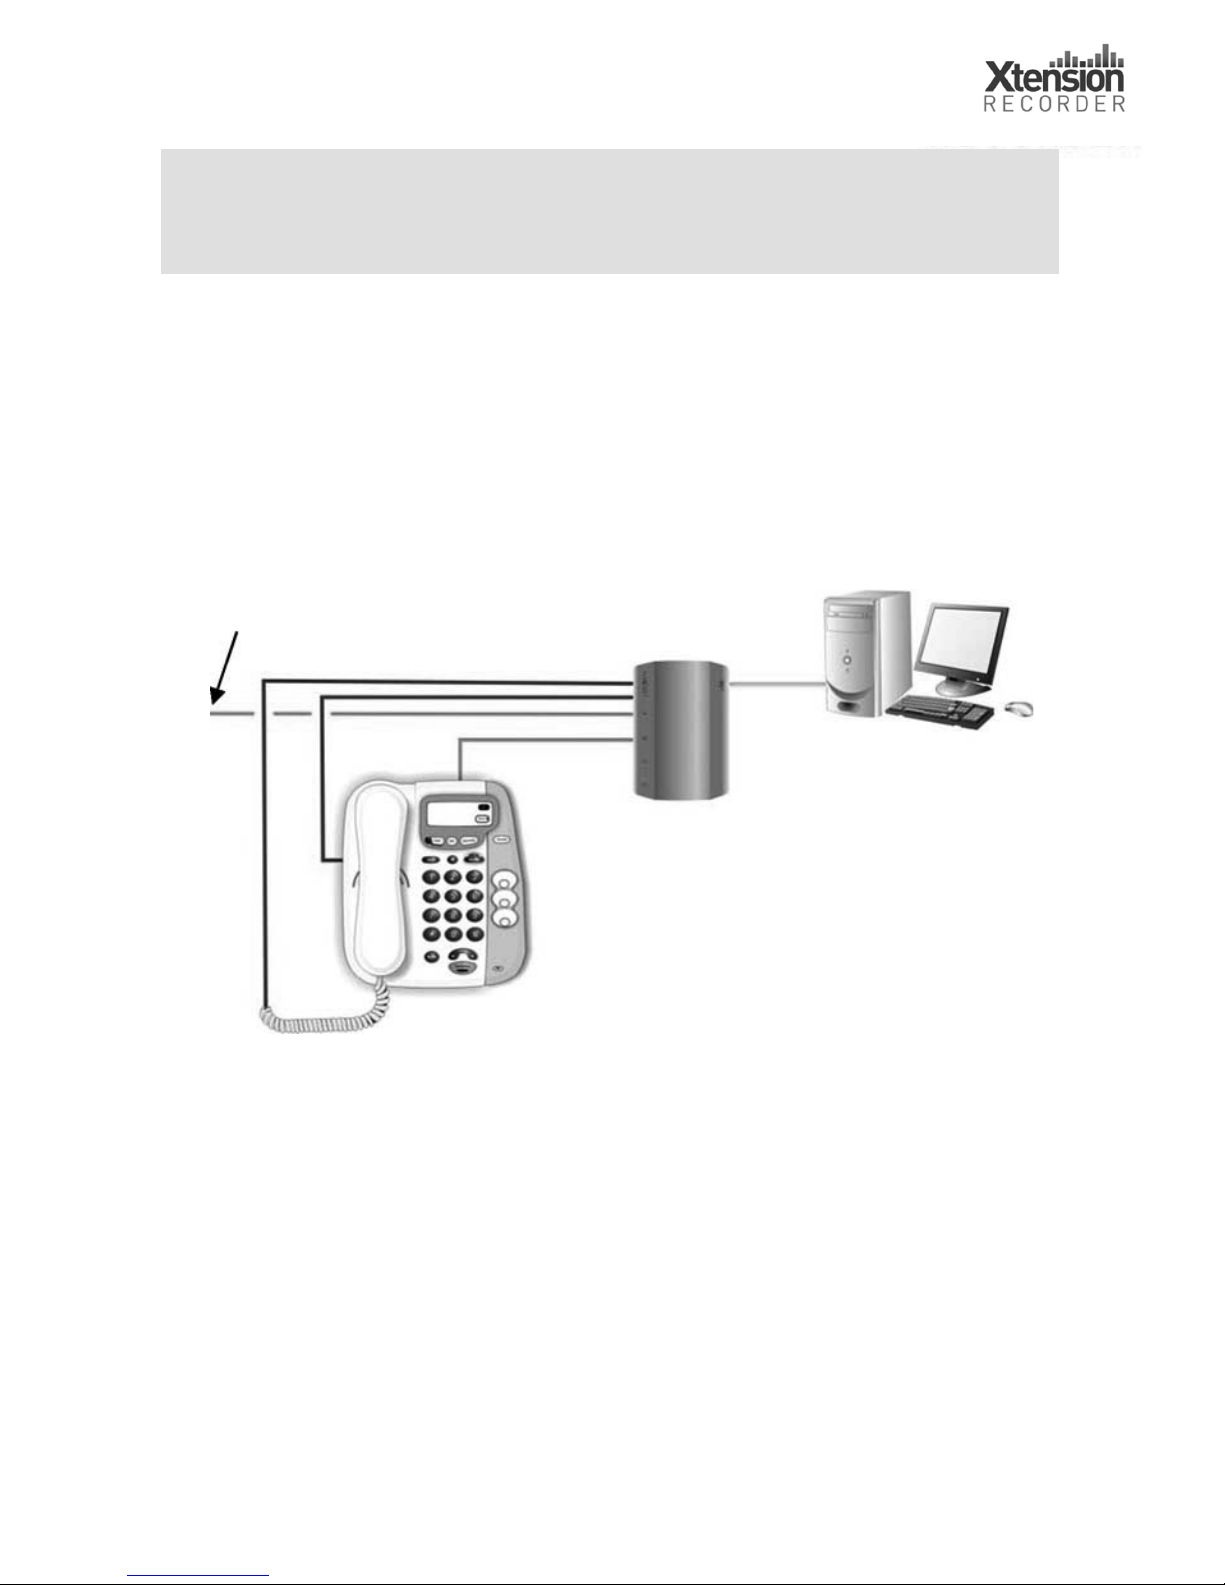
Connect your telephone line to connectors A & B or C & D (see page
7) and the telephone handset (curly cord) through the 2 sockets
marked ‘Handset’.
See the instructions for both Line Only and Handset Only
Connections on the preceding pages.
Telephone line
Han
d
set connections
USB
! Do not connect
yet!
Universal Adapter 2.0
Connections:
A
(or C): telephone line
B
(or D): phone input (use
supplied cable).
Handse
t ports: (1) to handset;
(2) to handset socket on base
of telephone (use supplied
cable).
USB
: to PC (use supplied
cable).
Installing the Software
Register your product at www.USBCallRecord.com/register for
free support and to receive information on the latest upgrades!
Check the Software Version
3.
Run Setup
Page 11

11
Installing the Software
Register your product at www.USBCallRecord.com/register for
free support and to receive information on the latest upgrades!
Check the Software Version
Before you install the software on the CD, check that you have the
latest version by visiting
www.USBCallRecord.com
:
1. Click Support and Downloads.
2. C l i c k
Software and Upgrades
.
3. Click
Enter your Info
.
4. Click
Submit
.
5. Click on
Universal Adapter 2.0
(be sure to select version 2.0).
If the listed version number is greater than that shown on your CD:
1. Download the software onto your PC making a note of the
destination folder on your PC.
3.
Extract the installation files to a folder.
Run Setup
1. Locate the
Setup.exe
file. This will be on the CD or,
if you have downloaded a later version of the
software, in the folder you used to extract the
installation files.
Page 12
12
2. Double-click on the icon or setup to begin the
installation.
3. Follow the on-screen prompts to complete the installation
procedure (it may vary according to your operation system).
You will need to:
x Accept the License Agreement.
x Choose the destination folder where the Program will be
located.
x Specify the location where your recorded calls will be
stored (by default the program creates a My Calls folder
in My Documents.( Note: this location can be changed at
any time after installation).
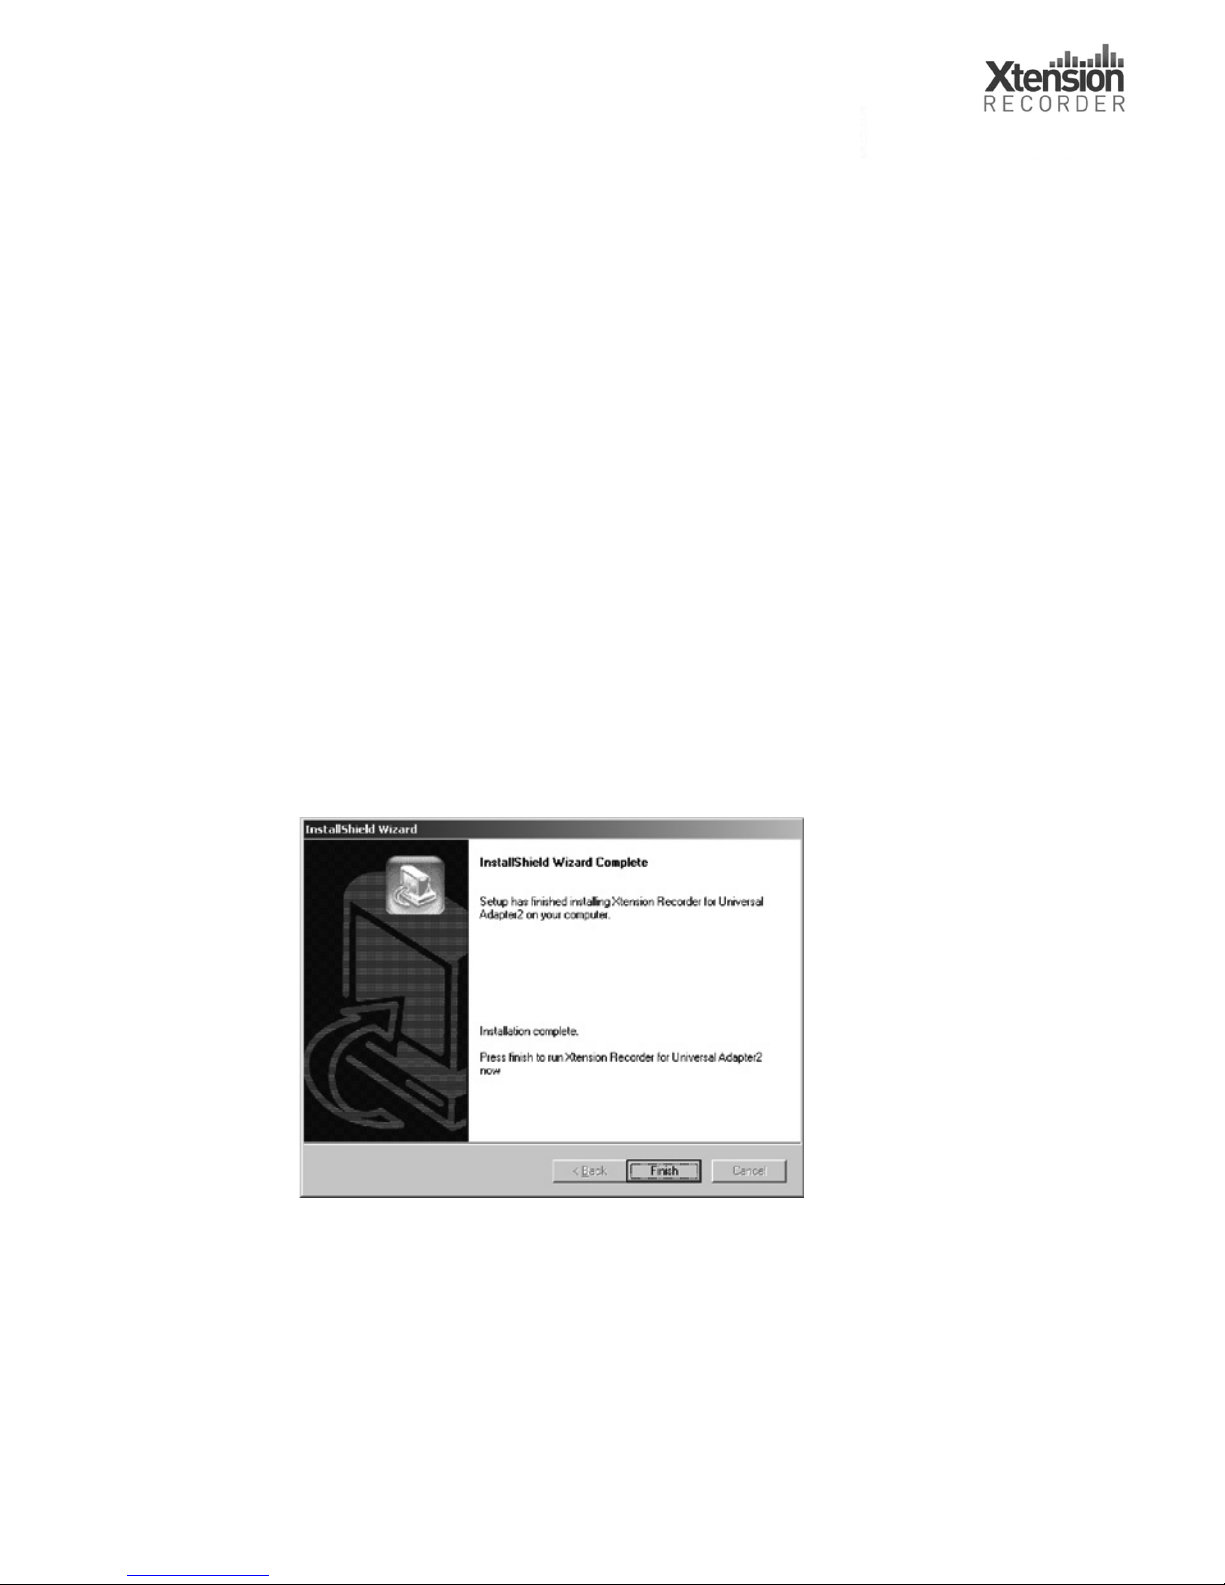
4. When the software installation is complete, click on the
Finish
button. The Install Shield Wizard will
remai n on yo ur PC’s desktop throughout the rest of the
procedure.
6. The installation of the USB drivers starts automatically.
Connect the supplied USB cable to the Universal Adapter and
then insert the other end into a vacant USB port on your
computer.
Page 13
13
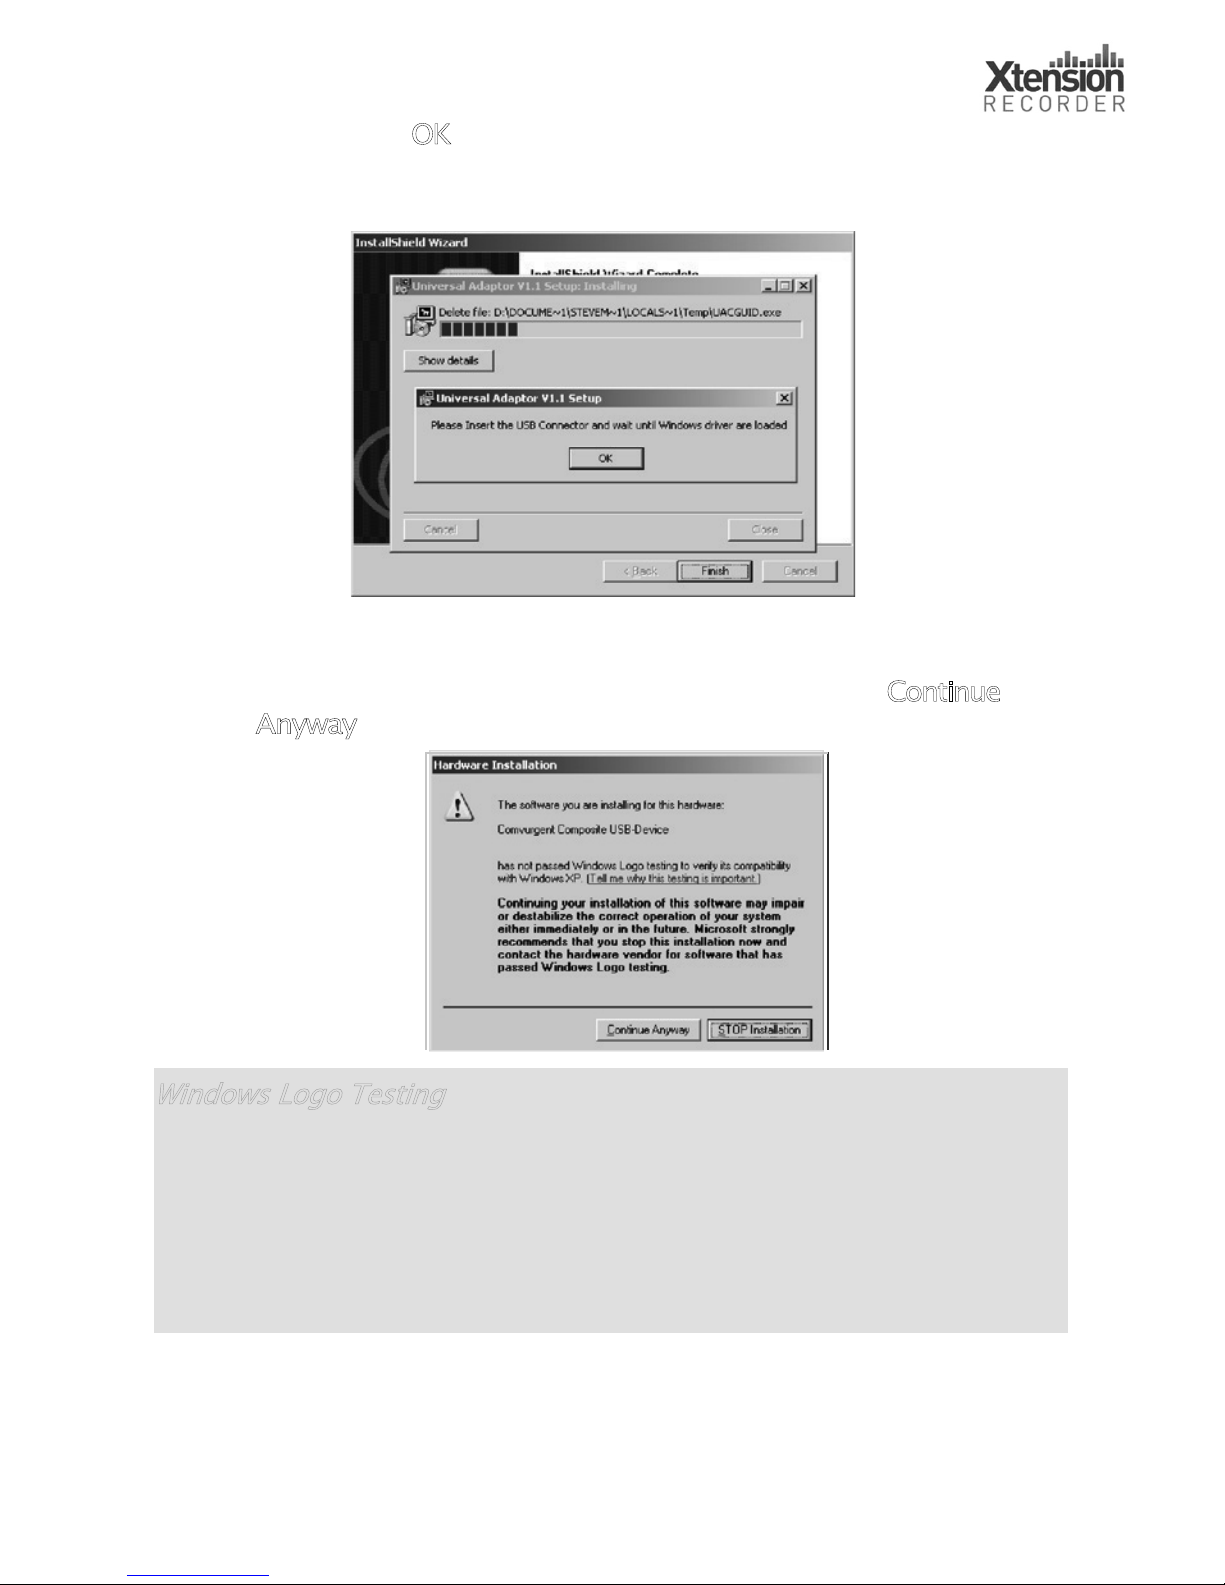
6. Click on the
OK
button. The USB drivers will now be installed.
Please be patient as this may take a few minutes (see image
below).
8. If you receive a warning that the hardware has not passed
‘Windows Logo Testing’ (see below) please click
Continue
A
nyway
.
Windows Logo Testing
Microsoft introduced the “
Designed for Microsoft Windows XP
” Logo
program to ensure that products are compatible with Windows XP. This
software is thoroughly
tested internally and is 100% compatible with
Windows XP.
Page 14
14
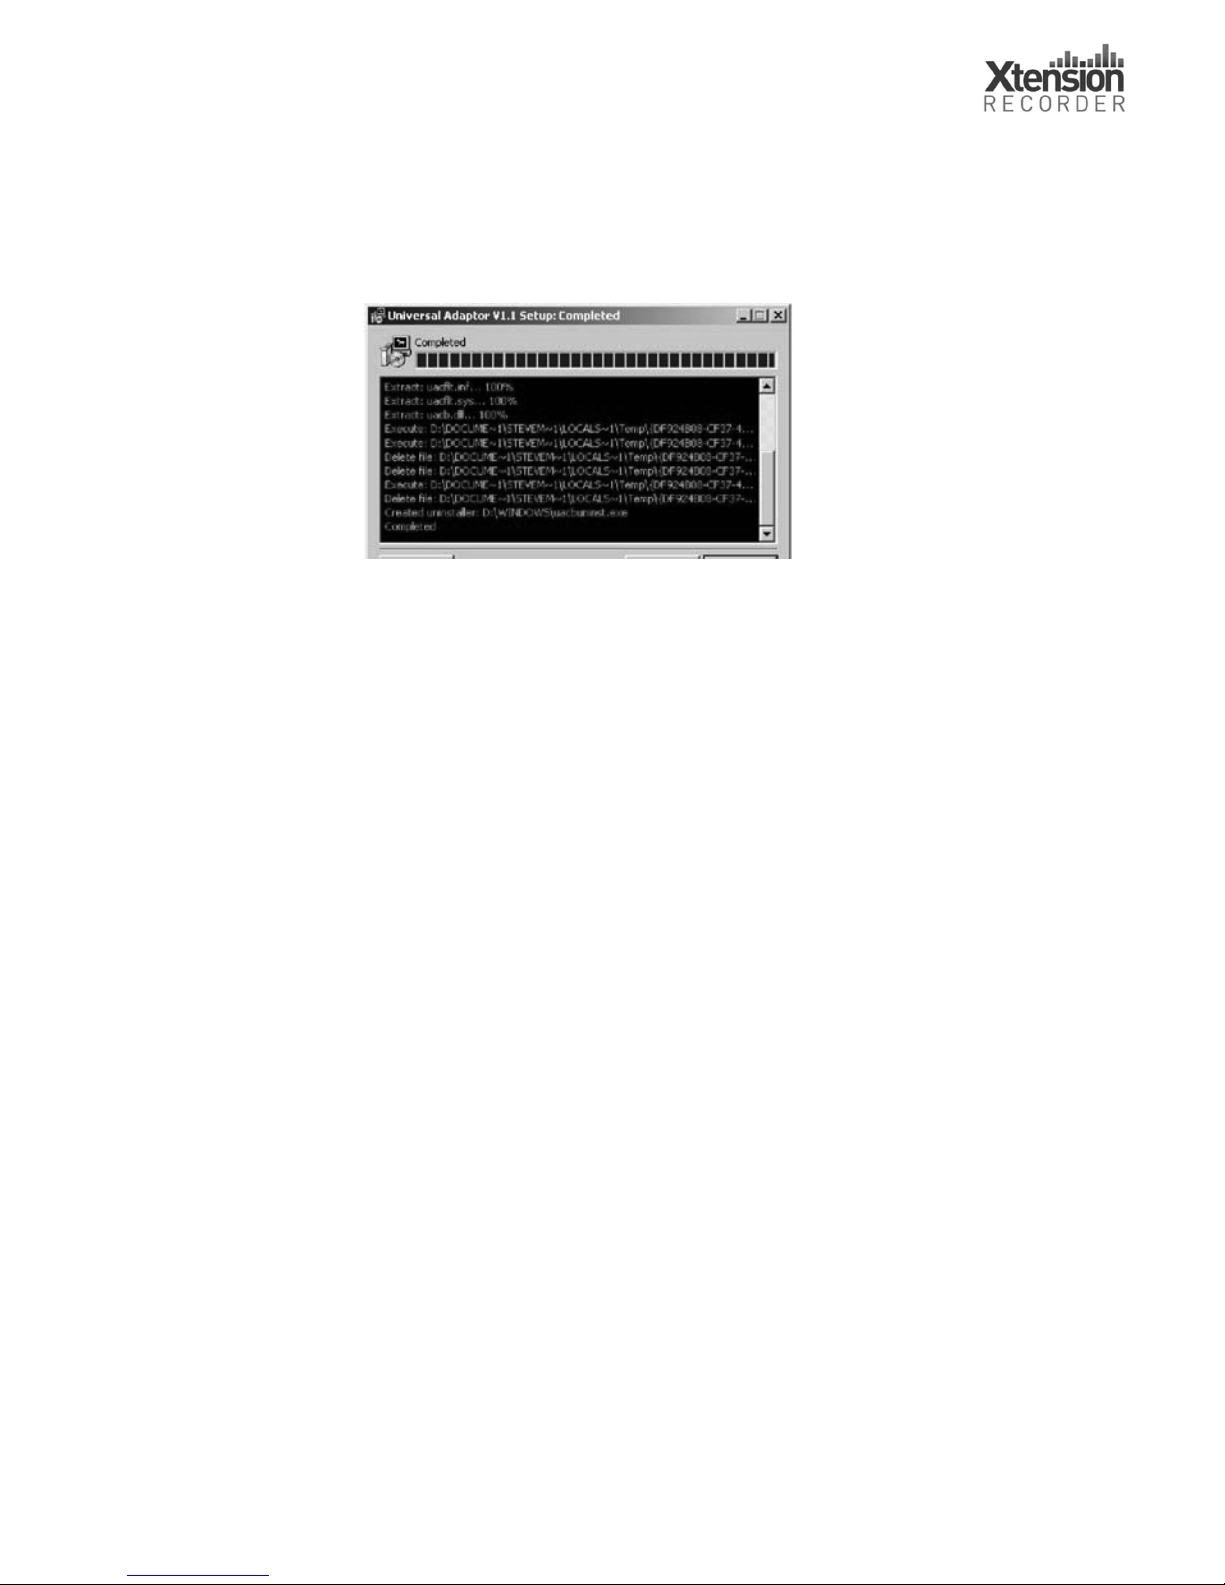
8. Click on the
Close
button to finish the install process.
10. The
Recorder Setup
program is displayed.
The next section describes how to use
Recorder Setup
to
optimize your system.
Page 15
15
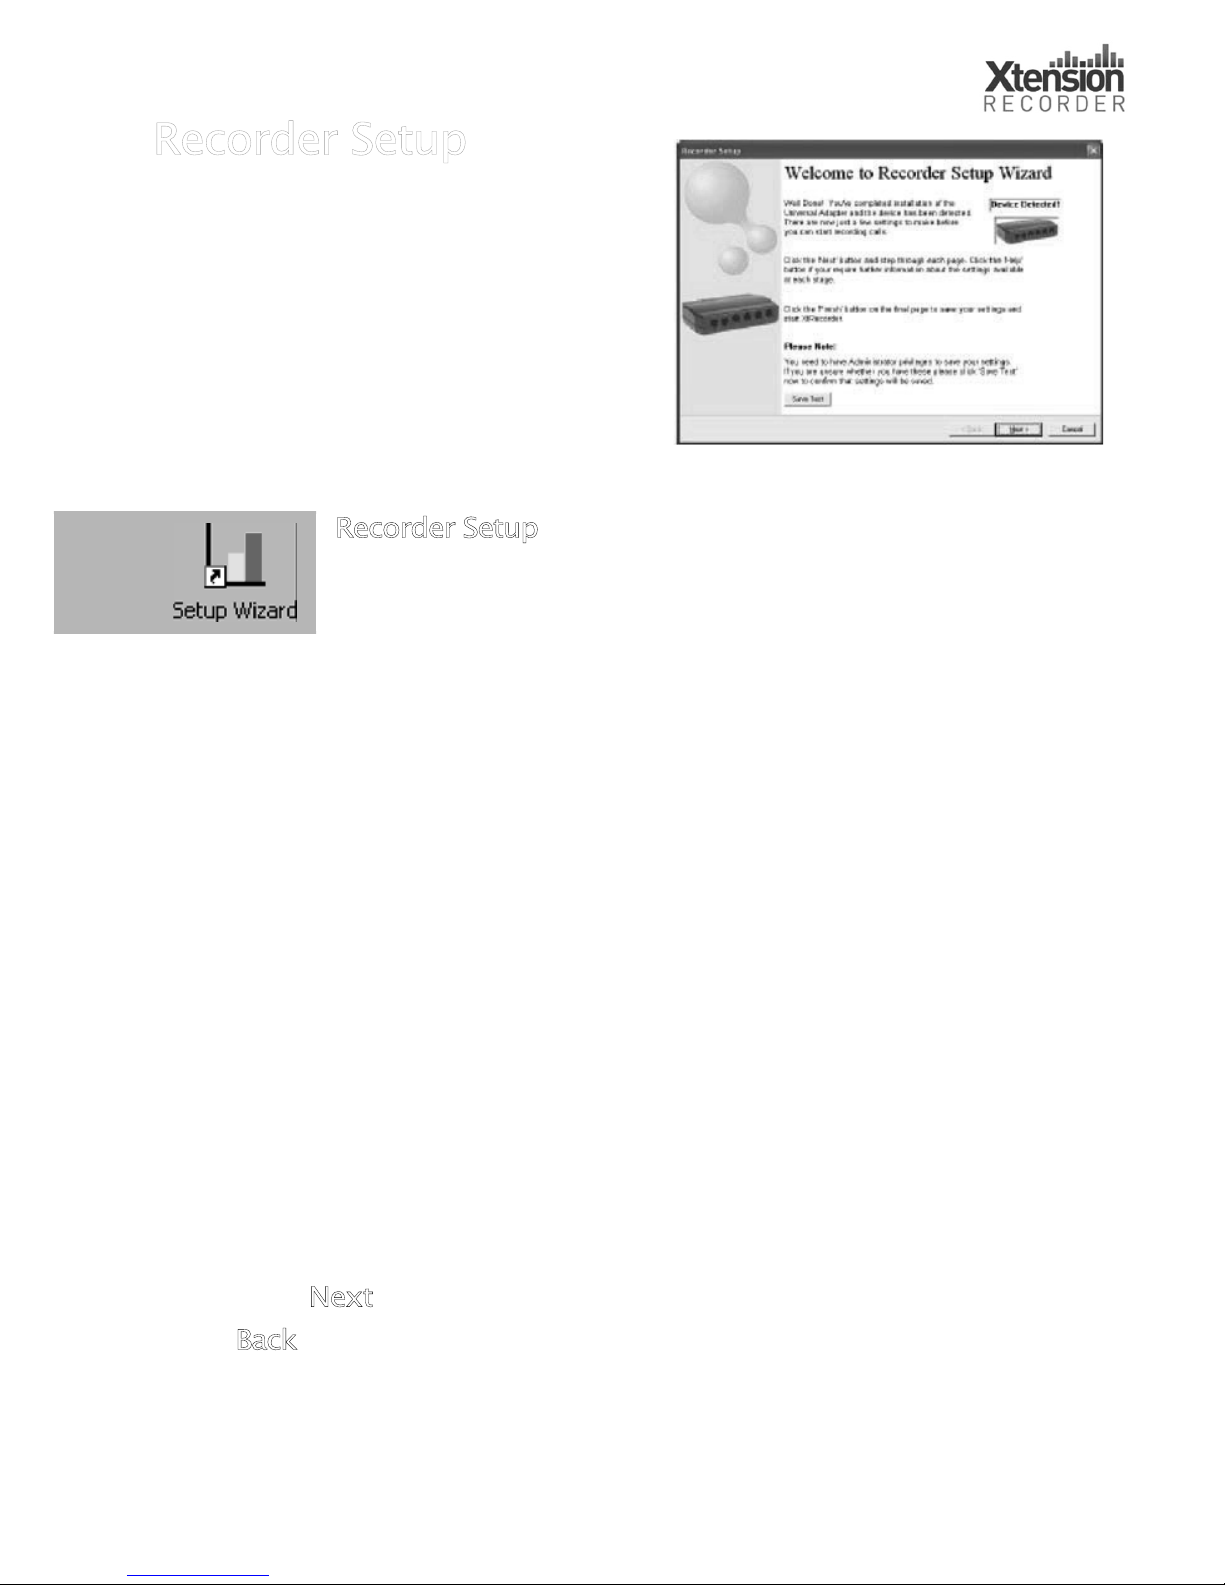
Recorder Setup
Telephone line and handset levels
vary, so we have included the
Recorder Setup Wizard
to help you
optimize recorded voice levels and
specify how the software starts and
stops recordings.
Recorder Setup
starts automatically after software
installation. You can change settings at any time by
selecting the
Setup Wizard
icon from your desktop or
the Comvurgent program group in the Start menu.
There are eight steps in the procedure:
1. Identifying the connection method: Line Only, Handset Only
or Mixed.
2. Choosing a method for starting and stopping recordings.
3. Carrying out an Off Hook test (if selected in step 2)
4. Adjusting audio levels.
5. Adjusting Voice Trigger options (if selected in step 2).
6. Checking dialled digits detection (Line Only and Mixed
connections only).
7. Saving the new settings.
8. Starting and configuring XtRecorder with a test call.
Click on the
Next
button to get started. At any time, you can click
on the
Back
button to return to previous pages and modify settings
you have already chosen. No settings are applied until you have
Page 16
16
completed the Wizard by clicking on the
Finish
button on the last
page.
If you chose to close the Wizard by clicking on the
Cancel
button, any
changes you have made are discarded and the Universal Adapter will
continue to operate under its original configuration.
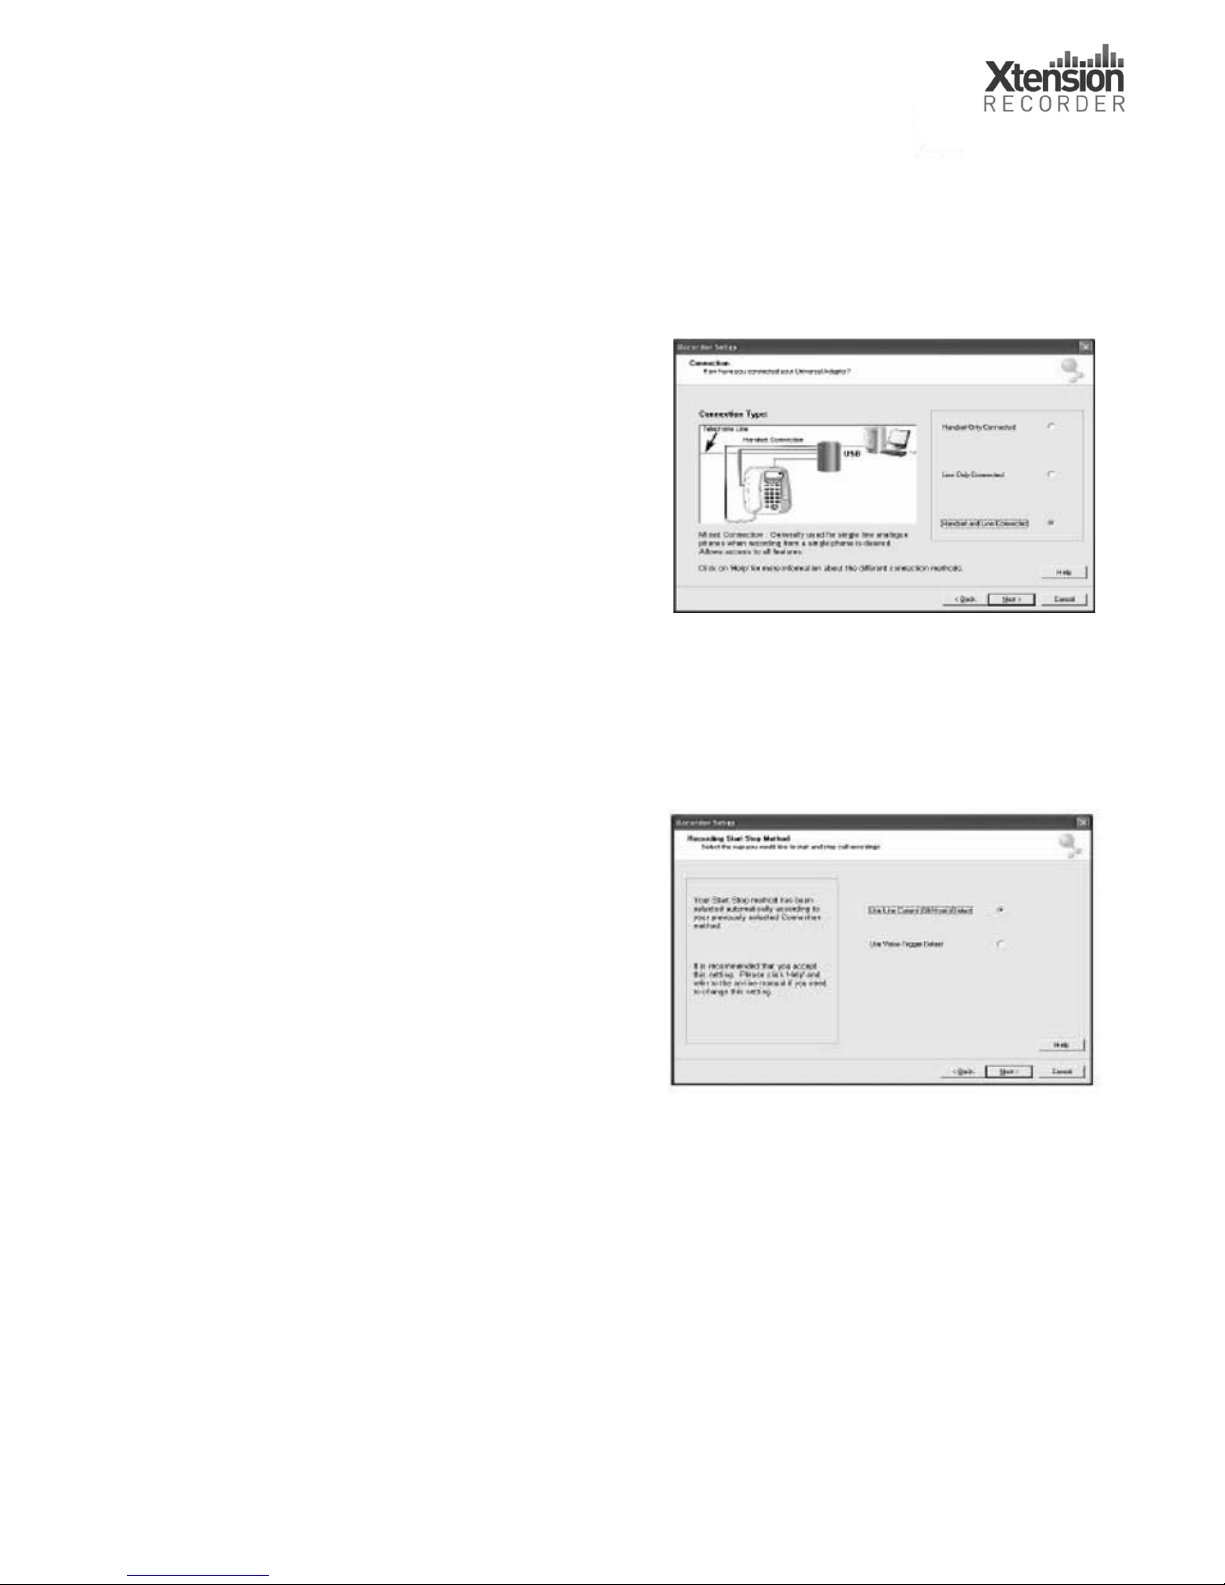
1. Connection
On the Connection page, identif
y
the method you have selected to
connect the Universal Adapter to
your phone:
x Handset Only Connected
x Line Only Connected
x
Handset and Line Connected
(mixed)
Click on the
Next
button to continue.
2. Recording Start Stop Method
On this page, you can select the
method you want to use to start and
end recordings. The Wizard picks
the option best suited to your
connection method and you are
recommended to accept this.
x
Use Line Current
(Off Hook) Detect
– not available with Handset Only Connection.
x
Enable Voice Trigger
x If you select this option, continue to step 4. You will set up Voice
Trigger options in step 5.
Page 17
17
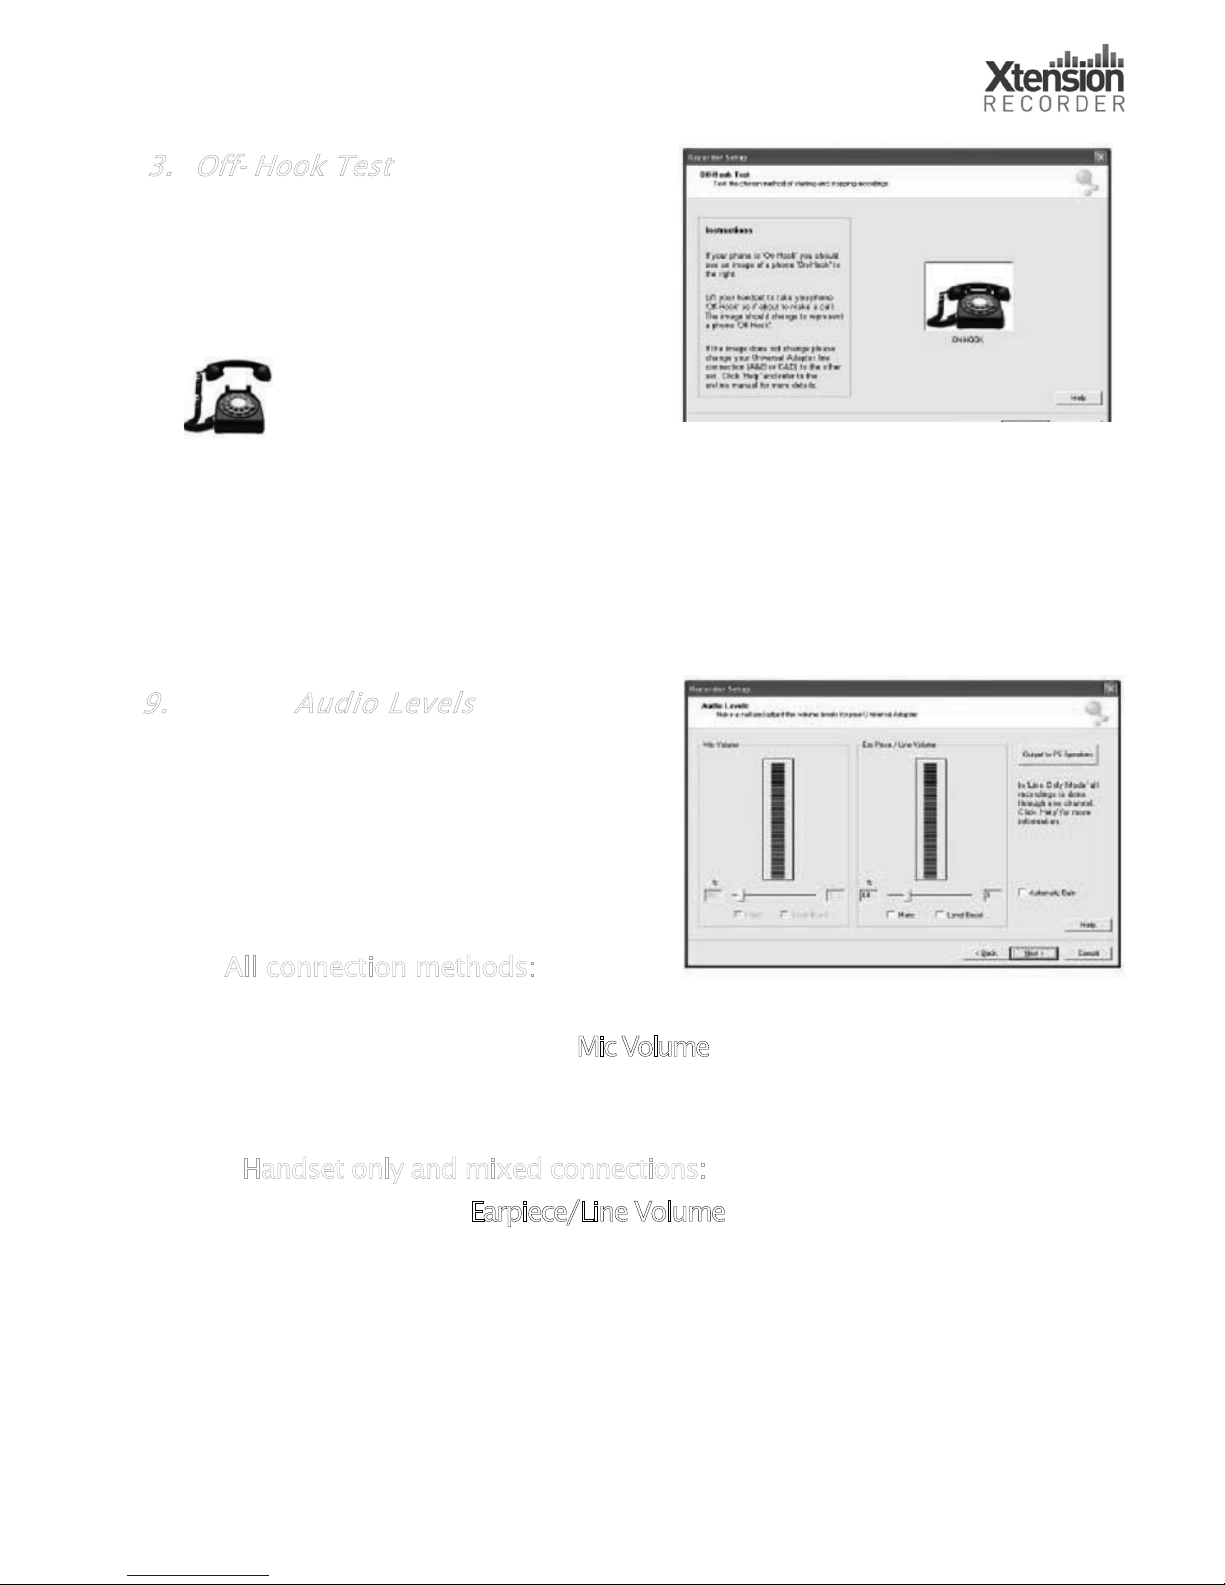
Take the telephone
handset off-hook. The
image should change to show a phone off-hook.
If it does not work, check that you have connected the Universal
Adapter correctly. You may need to change the line connections
from A&B to C&D (see page 7).
9. Audio Levels
This page allows you to optimize
voice levels using the slide controls.
1. Take your telephone off hook
and make a call.
All connection methods:
2. As you speak, adjust the Mic Volume slider to ensure the
level is in the green section of the meter.
Handset only and mixed connections: As the remote speaker
talks, adjust the
Earpiece/Line Volume slider to ensure the
level is in the green section of the meter.
3. Put the phone back on-hook.
3. Off- Hook Test
If you selected
Use Line Current
(Off Hook Detect)
in step 2, this
page prompts you to test the offhook detection.
Page 18
18
5
. Voice Trigger Levels
If you selected
U s e Li ne
C
u r r e nt (O f f - Ho ok) De t e ct
in
step 2 (see page 15), continue to
step 6.
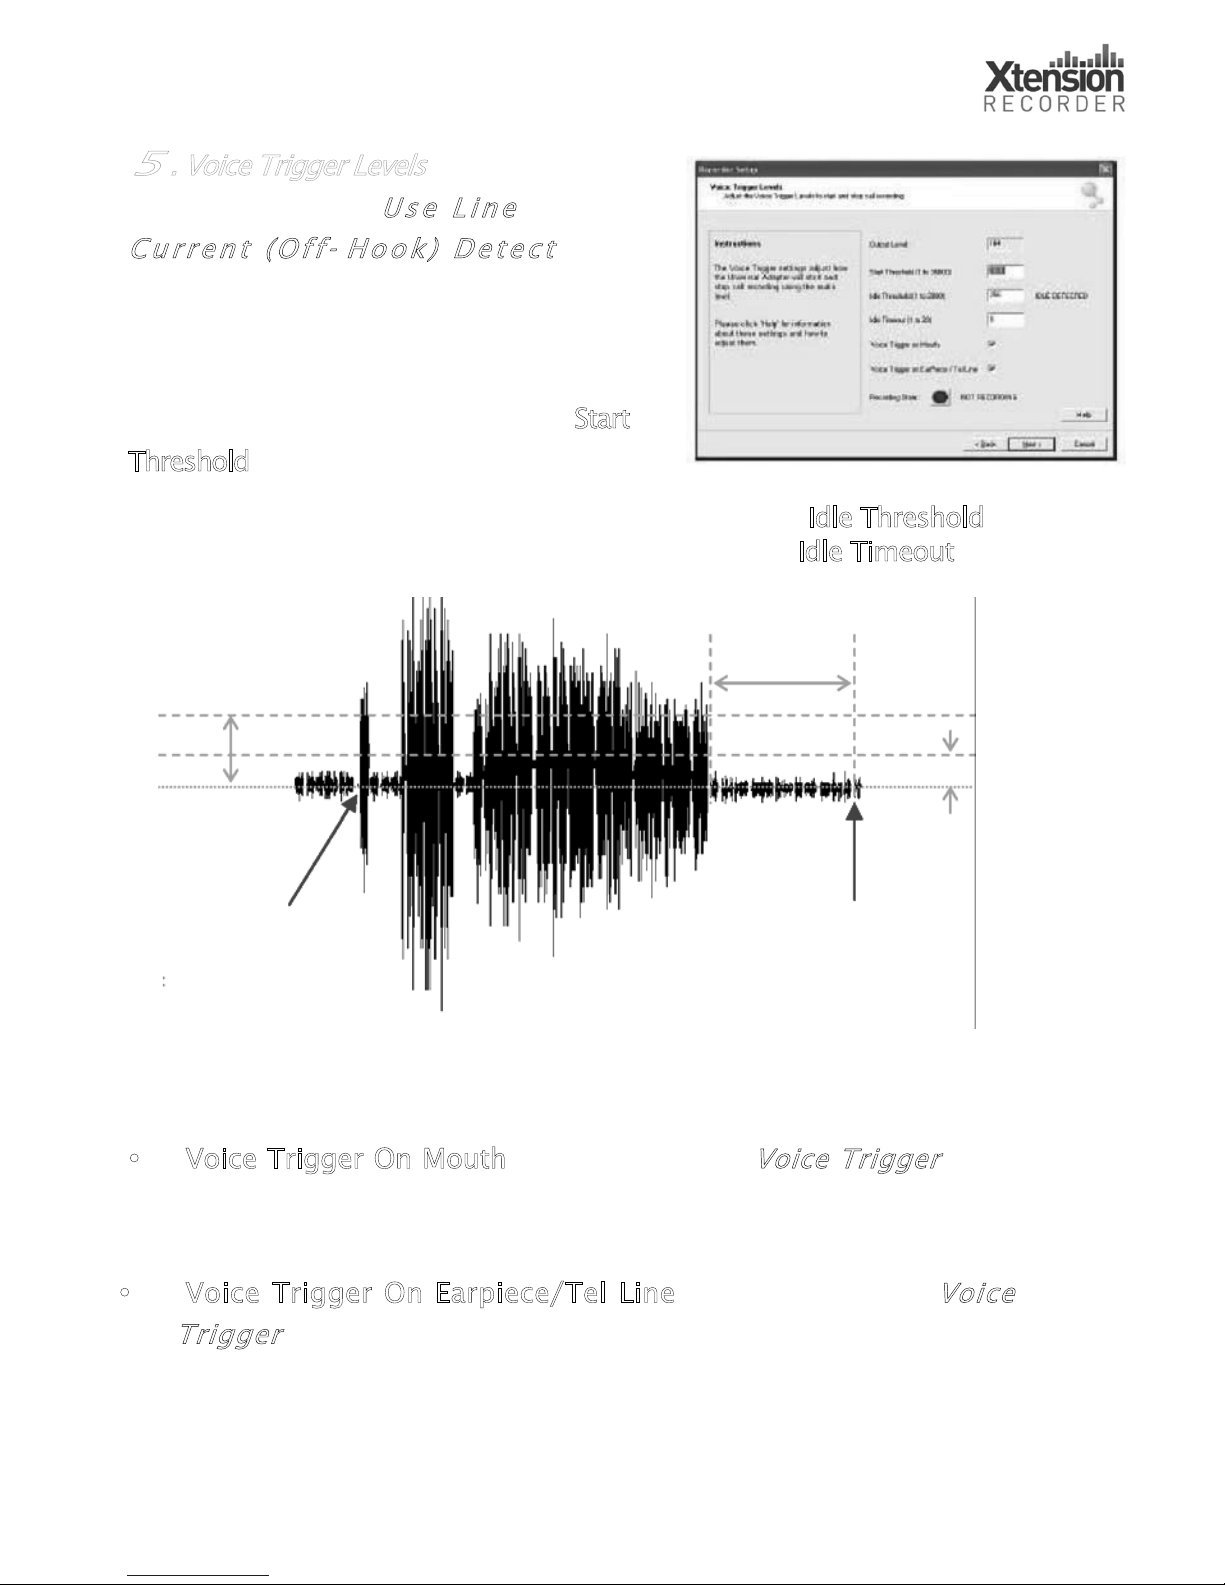
Voice triggered recording commences
when the line signal exceeds the
Start
T
hreshold, for example, when the ‘Off
Recording stops when the line signal falls below the Idle Threshold
and remains below this value for a set period – the
Idle Timeout.
Two further
Voice Trigger
options determine whether XtRecorder
monitors the signal from the mouthpiece and/or earpiece.
• Voice Trigger On Mouth - Select or mute
Voice Trigger
from
the Mouth input. Turn off if you have a ‘Live Microphone’
(telephone microphone is on when phone is on hook).
• Voice Trigger On Earpiece/Tel Line - Select or mute
Voice
T
rigger
from the earpiece/line input. Use to record from
parallel telephones.
Recording Starts
–
signal exceeds Start
Recording Ends
–
signal falls below Idle
Threshold for period
in excess of Idle
Idle Timeout
Start
I
dl
e
Start Threshold
Idle Threshold
Idle Timeout Period
Note.
Page 19

19
The default Voice Trigger settings should suit most applications.
The following procedure explains how you can check that the
settings are suitable for your system:
1. Check the
Start Threshold
.
Take the handset off-hook, and check that the Start
Threshold is triggered (START DETECTED is displayed). If
your telephone has a live microphone and hence higher
noise levels, you may need to set a higher value to avoid
‘false starts’. See also
Voice Trigger on Mouth
, below.
2. Test the
Idle Threshold
.
With the phone on-hook, ensure that the Idle Threshold level
is above the levels in the ‘Peak Level’ boxes (IDLE DETECTED
is displayed).
If you have a noisy line or telephone, you may need a higher
value (>250). If the value is too low it may merge calls; too
high and it may slice calls into several recordings if the
conversation has silence pauses.
3. Set the
Idle Timeout Period
.
Extend this time beyond the default of 8 seconds if your calls
tend to have long pauses.
Note.
If you finish one call and start another within the Idle
Timeout period, XtRecorder will merge the two calls into a
single recording.
Page 20
20
4. By default, Voice Trigger detection operates on both the
mouth and earpiece/telephone line signals. You may want to
change these settings:
x Disable
Voice Trigger on Mouth
if your telephone/
headsets remain in an off-hook state with a live local
microphone, even when the phone is on-hook. The
software then monitors the remote end for the start
trigger (note this only applies to handset connectivity).
x Voice Trigger on Earpiece/Tel Line
- Select this option if
you want to record from other telephones connected on
the same line.
Click on the
Next
button to continue.
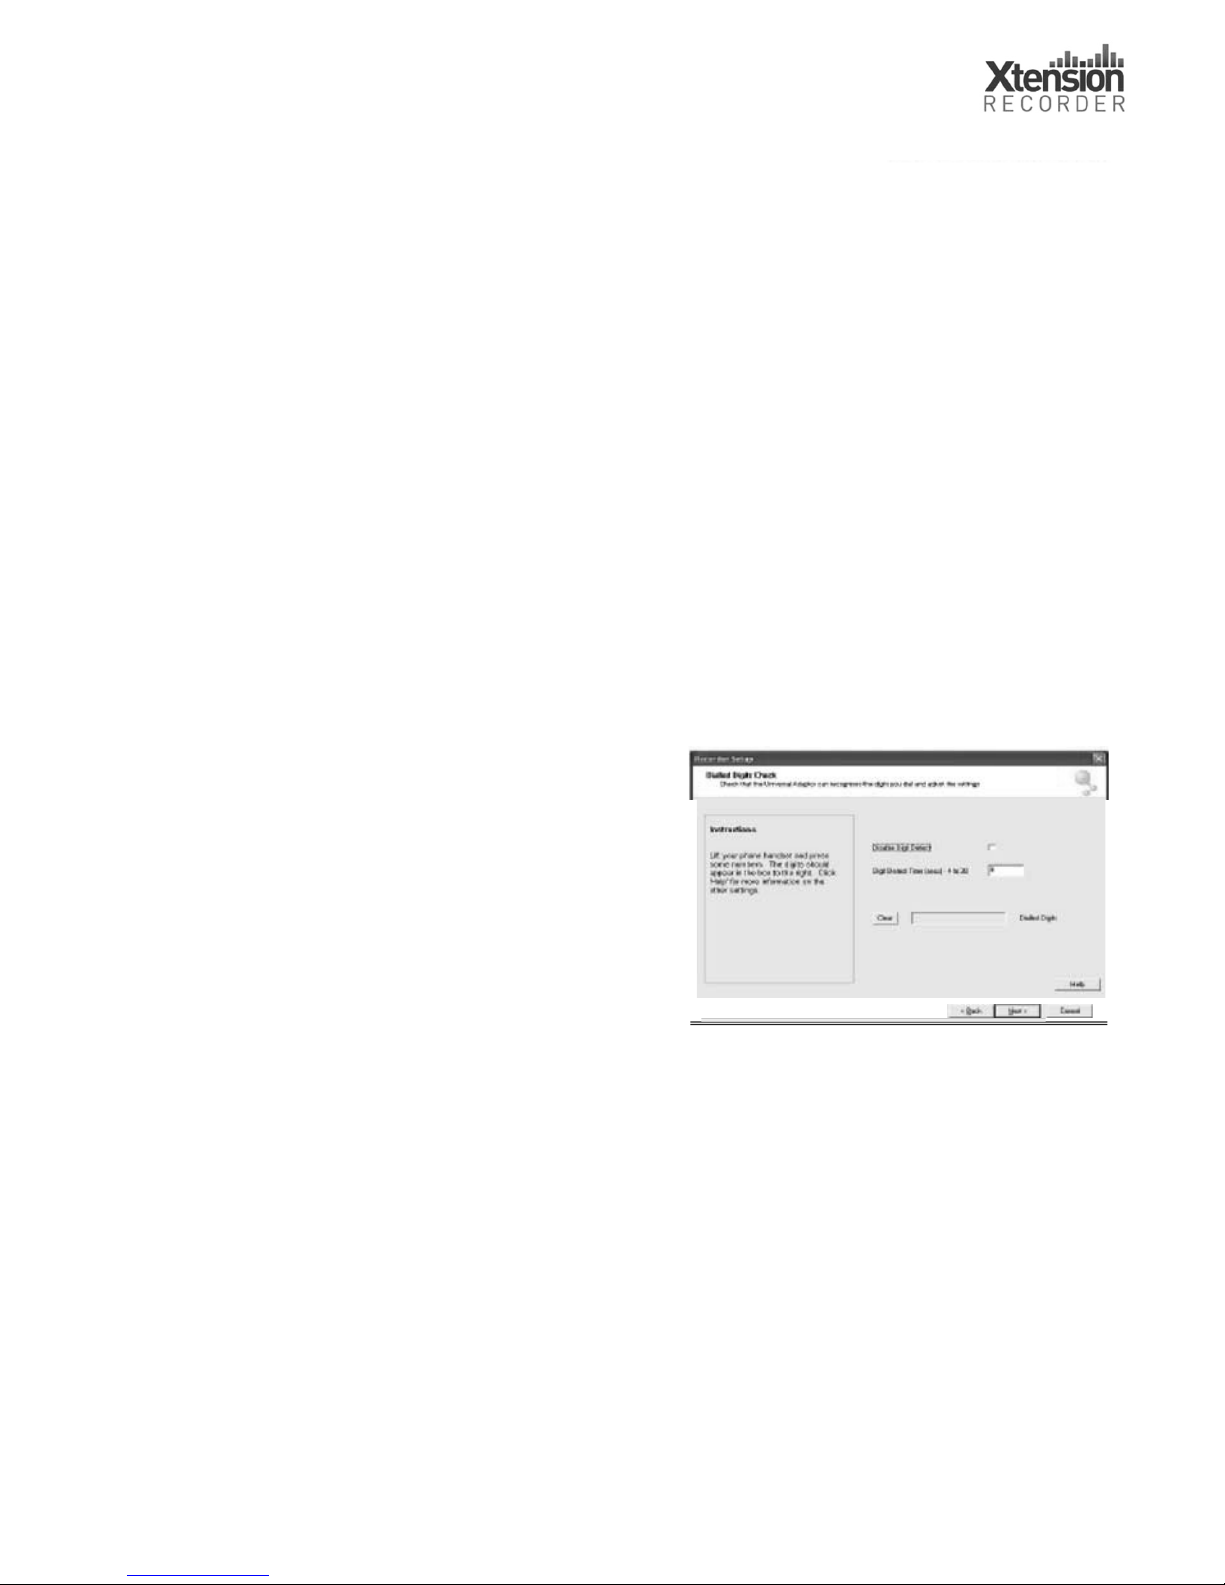
6. Dialed Digits Check
If you are using a Line Only or a Mixed
connection type, then the Universal
Adapter can detect the digits that you
type when making a call. If you want to
use this feature, ensure that the
Dialed
Digit Detection
option is selected.
You should not normally need to alter the settings on this page for
Normal operation.
Digit Detect Time
Note.
Dialed Digit Detection
Next
7. Recorder Setup Complete
Back
Finish
Cancel
Page 21

21
To test Dialed Digit Detection:
1. Lift the handset of your phone and dial some numbers; they
should appear in the Dialed Digits box. Use the 'Clear'
button to clear the display.
2. After the start of a call, and after each key press, the
Universal Adapter will continue to look for further key
presses for the
Digit Detect Time
(in seconds). No further
key presses will be recorded after the Digit Detect Time has
elapsed. You can adjust this period to ensure that spurious
digits are not reported.
Note.
The Universal Adapter uses the tone produced by each key as
you press it to detect which key is pressed. This can occasionally
result in key presses being missed or detected wrongly. During the
course of a call, other noise on the line may cause a key press to be
detected when none took place. If you experience problems with the
Universal Adapter detecting false or spurious numbers you may want
to disable
Dialed Digit Detection
.
Click on the
Next
button to continue.
7. Recorder Setup Complete
You have completed the setup of
your Universal Adapter.
Click on the
Back
button to return to
the wizard and review the settings.
Click on the
Finish
button to save your
settings and launch XtRecorder.
Click on the
Cancel
button to discard all changes and restore the
previous configuration.
Page 22

22
8. Starting Xtension Recorder
After testing your system with the Recorder Setup Wizard:
3. Click on the
Finish
button to store the settings.
4. You are now prompted to register the software. Click on the
link to register online at www.USBCallRecord.com/register
.
Click on the
Cancel
button to continue.
5. The
XtRecorder –Choose Defaults
window is displayed.
Choose one of the three recording options:
Record all calls
Record every call and save until
deleted.
Prompt after call
Prompt to save or delete each call.
1. Click on the
OK
button to continue.
Please refer to the XTR Desktop 3.0 Software Manual for
detailed instructions on the setup and use of this software.
Troubleshooting
Recorder Setup
Xtension Recorder
Recorder Setup Wizard
Page 23

23
Troubleshooting
The following table lists common problems with a brief explanation
of the solution. Check that you have the latest version of software
(see page 10).
In many cases, problems are due to an incorrect
Recorder Setup
configuration.
Xtension Recorder
relies on correct settings of the
Gain Level controls for reliable and quality performance. Please
ensure these are set correctly before attempting to adjust other
parameters (see page 14).
You can start the
Recorder Setup Wizard
by clicking
on the Setup Wizard icon on your PC’s
desktop.
Page 24

24
Problem Solution
Device not
initializing during
installation
Driver for device was not loaded properly.
1. Close Xtension Recorder: right click on the
icon in the system tray (see page 19) and
select
Exit from the popup menu.
2. Insert the CD. Browse to the CD using
My
Computer
or
Windows Explorer
and locate
the
Drivers folder. Find the file named
‘
install’ within this folder and double-click
on it.
3. Follow the instructions to re-install the
driver.
4. Restart Xtension Recorder.
Xtension Recorder
not starting or
stopping
recordings.
Xtension Recorder
continuously
records
Several recordings
are made for each
call
Use Recorder Setup to adjust start/stop
parameters (see page 15).
The
Idle threshold level is set too low. Increase
and save using Recorder Setup (see page 17).
The
Idle threshold is set too high and/or the
Idle Timeout is set too low. Adjust and Save
using Recorder Setup (see page 17).
Page 25
25
Problem Solution
Two calls are
merged into one
(using Voice
Trigger)
This can happen when a call is finished and
another answered quickly: Xtension Recorder
needs to detect silence on the line for a few
seconds to know a call is finished (you can
adjust the
Idle Timeout using Recorder Setup
but this may also result in multiple recordings
for any one call).
Xtension Recorder
will not start autorecording
(using Voice
Trigger)
First, make certain that R
eco rd all
c
all s
is checked in O
ptions in Xtension
Recorder. If this is the case and calls can be
manually recorded by pressing the Record
button, you will need to adjust the Start
Threshold in Recorder Setup (see page 17).
Distant End is too
low
(Line Only
Connection)
Dialed digits not
detected
Xtension Recorder uses advanced CPU
processing techniques to detect the digits
dialed. This is not always perfect depending
upon the method of connection and the levels
and timing of the digits.
When using Line Only connection, local
(Microphone) level is always higher than the
distant end. Select Automatic Gain (see
pa ge 15) to equalize the levels on the line.
Page 26

26
Problem Solution
Line Current Try changing your line connections from A&B
Detect Connection to C&D (or vice versa)
does not detect
telephone off hook
No line signal in Try changing your line connections from A&B
Line Only to C&D (or vice versa)
Connection
Short unexplained
calls
This may be due to some telephones entering
an Off Hook state automatically for a few
seconds to charge a battery (typically 10
seconds). If you want to remove these from the
playback list, simply extend the minimum
duration for recorded calls. (in Options in
Xtension Recorder) to be greater than the Off
Hook time.
Page 27
27
Other great products from Comvurgent
If you are expanding your recording capability or wish to try alternative
ways of recording, check out some of our other products in the
Xtension Recorder range.
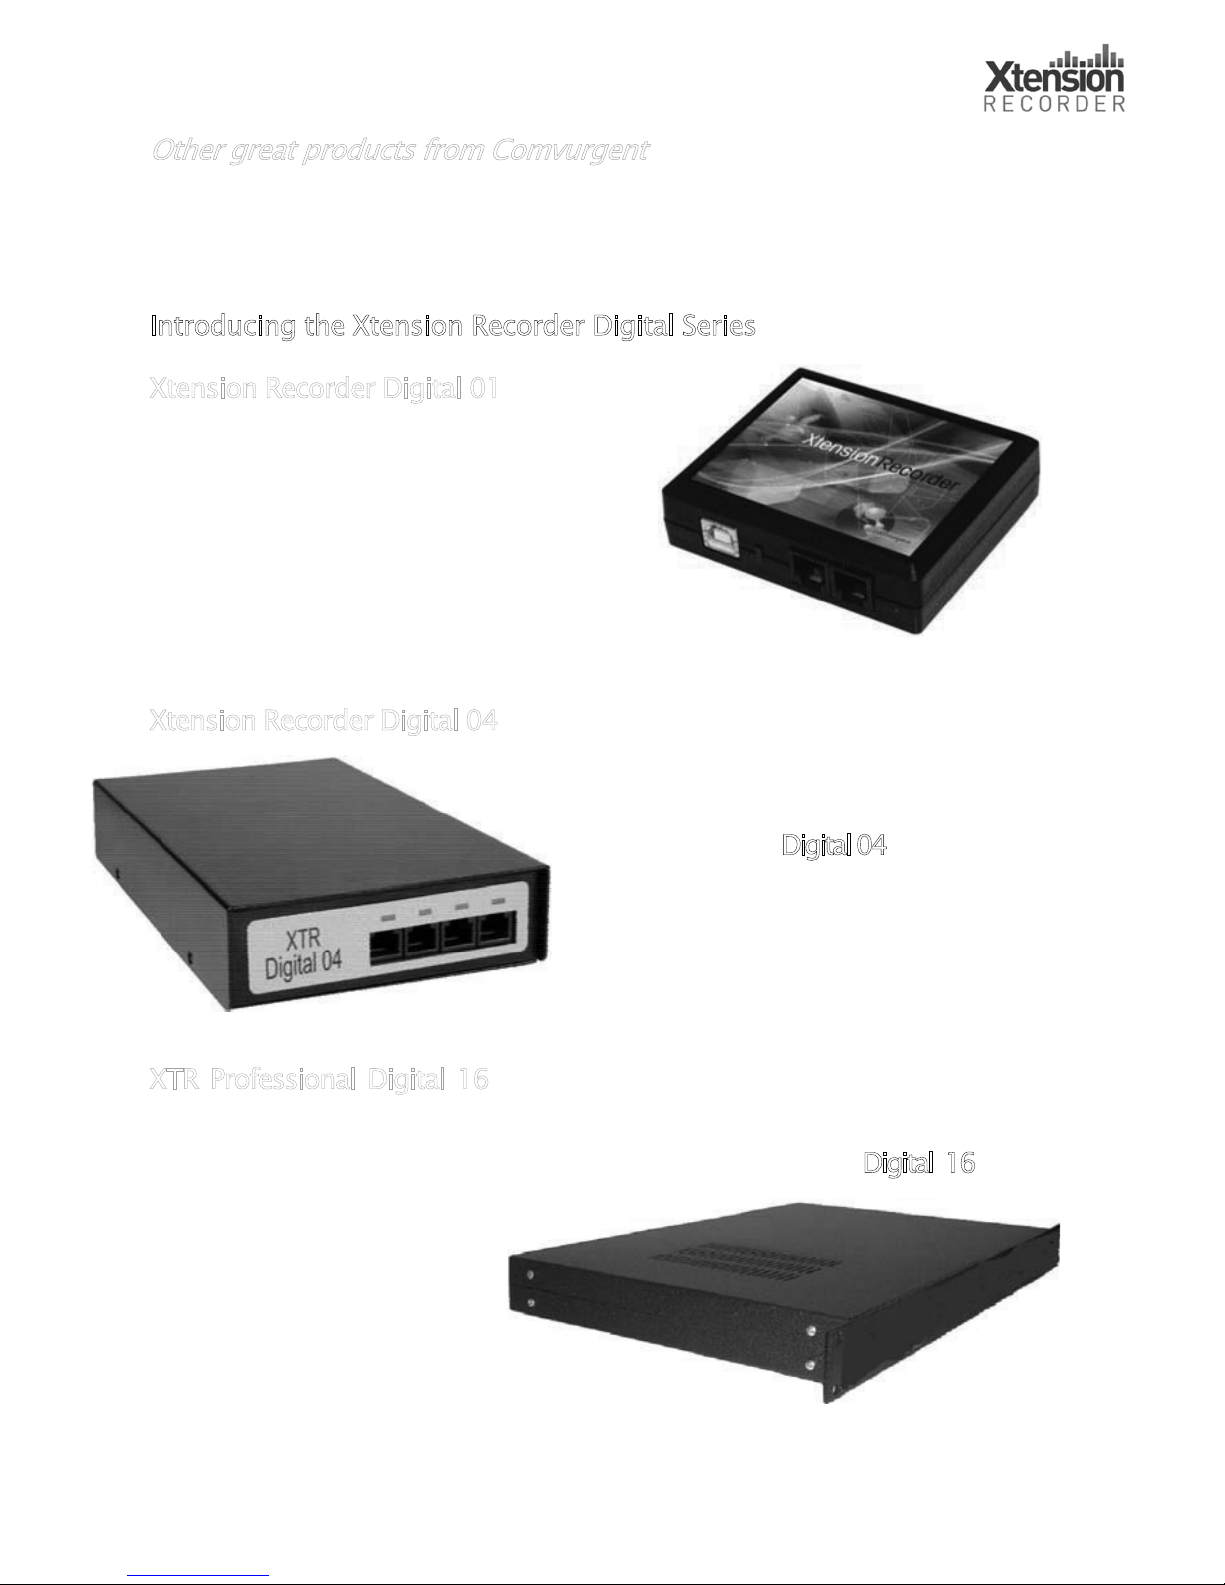
Introducing the Xtension Recorder Digital Series
X
tension Recorder Digital 01 is a
low-cost USB extension desktop
True Digital recorder for most PBX
Digital telephones and comes
complete with our XTR Desktop
applications software.
Xtension Recorder Digital 04 is a stackable 4-port digital USB unit. It
allows cost-effective, fully centralized,
recording for medium-to-large
installations.
Digital 04 includes
both BackOffice software and Call
Manager supervisor
positions.
XTR Professional Digital 16 is a 1 U rack-mounted, stackable, 16-
extension connector designed to be installed in your equipment
room to monitor multiple extensions on one server.
Digital 16 is
designed for higher density
applications and comes
complete with our
BackOffice recorder and
Call Manager supervisor software.
Page 28
28
Call Manager
is the entry-level package, designed to provide
the manager or Super Need to Connect Your Recorder
Centrally.
BackOffice
is the solution! If you need to locate
your Digital or Analog device centrally alongside your PBX,
BackOffice allows you to connect up to 20 Digital 01
devices or up to 48 extensions of Digital 04 and Digital 16
units onto a central server PC. BackOffice delivers costeffective call recording without any desktop clutter.
Besides the Universal Adapter 2.0 we offer the 02/04/08
Channel Analog recorders.
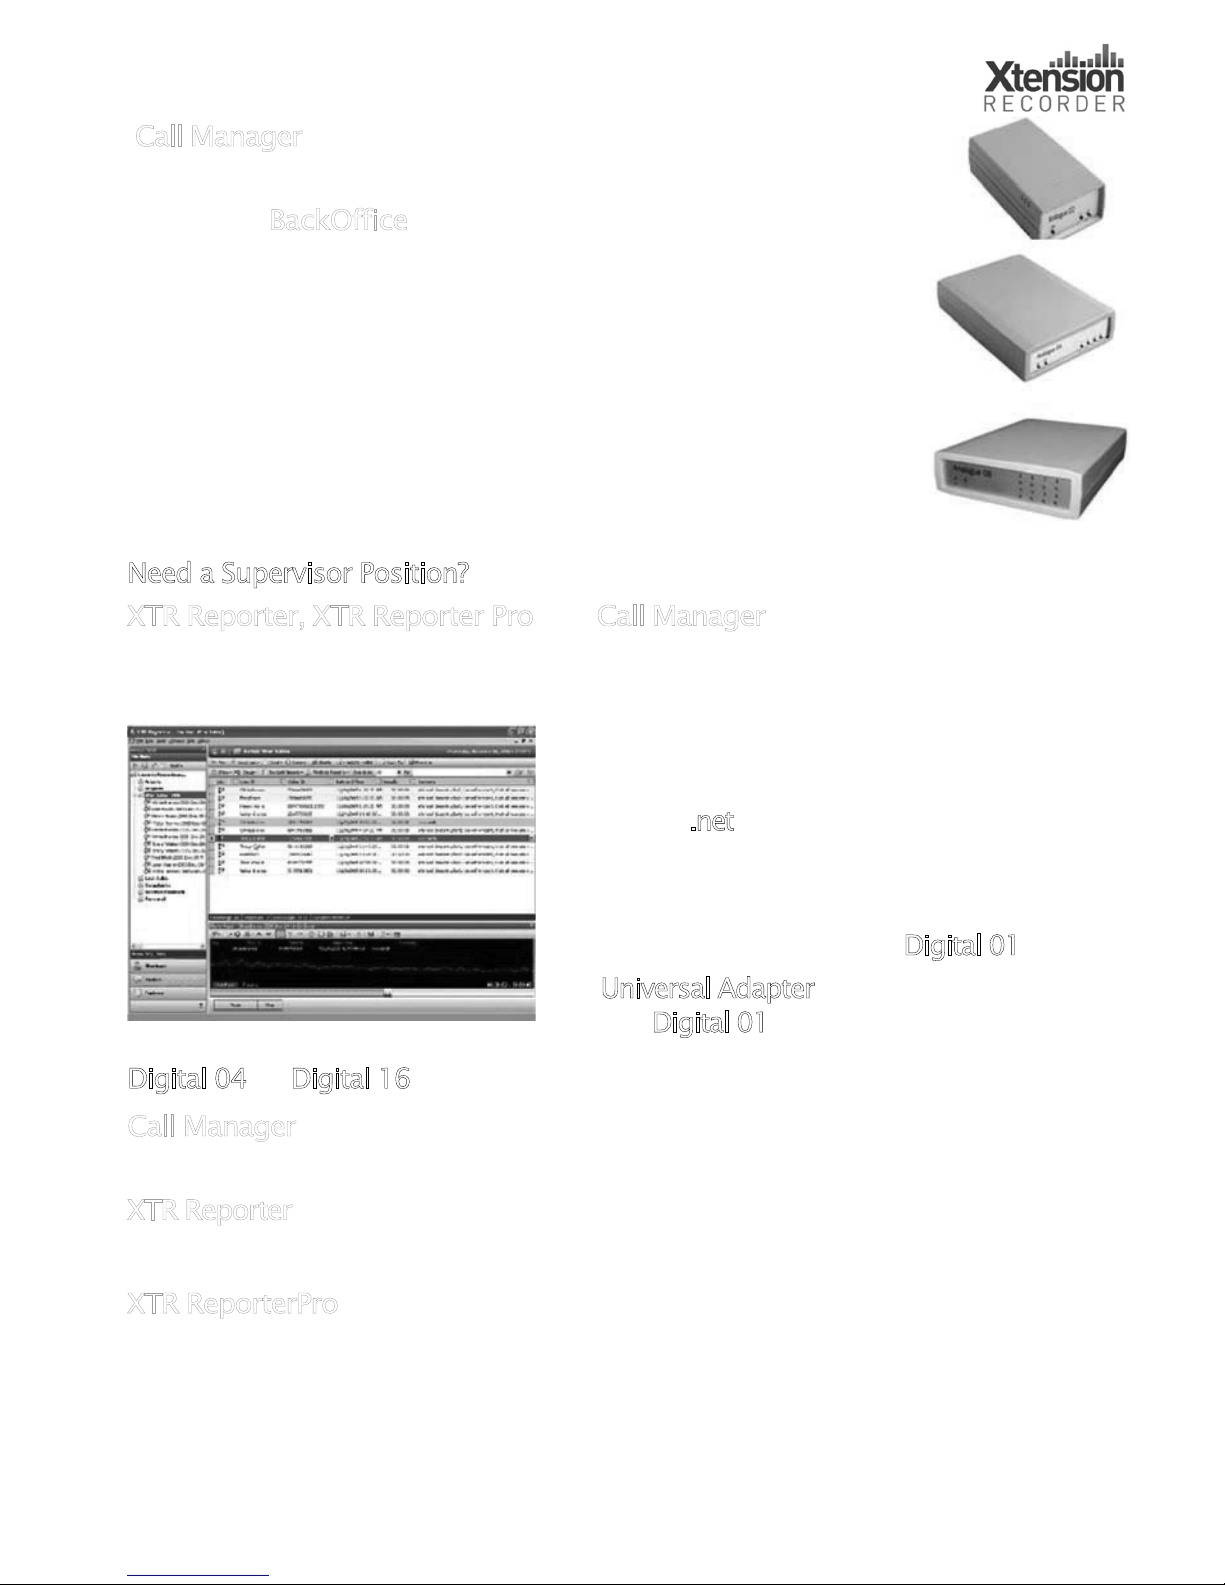
Need a Supervisor Position?
XTR Reporter, XTR Reporter Pro
and
Call Manager
form a
comprehensive suite of advanced visibility, access, retrieval,
playback, analysis and reporting tools for XtR Professional power
users and administrators. All three
applications are built on the robust
Microsoft
.net framework and
designed to manipulate large
volumes of recordings, whether
created by Desktop users (
Digital 01
or
Universal Adapter), or BackOffice
(using
Digital 01,
Digital 04 or Digital 16).
Call Manager
visor with the ability to quickly and easily gain access
to important calls.
XTR Reporter
delivers feature rich productivity tools in a familiar,
ergonomic and easy to use MS Office style interface.
XTR ReporterPro
takes all of the XTR Reporter features and adds our
Call Grading agent Assessment module.
Page 29
29
Register your Xtension Recorder for great benefits!
Register today to:
•
Get Free Upgrades -We are continually releasing new
features and improving existing features. All Xtension
Recorder devices come with free upgrades for life.
•
Kee p info r med on New Pr o duc t s- As we release new
p ro du c ts, we will send you an email (you can opt out if you like)
with brief details.
How to register
Visit www.usballreord.com/register and fill
i n o u r o n l i n e registration form.
Once again, thanks for choosing
Xtension Recorder
.
The Intelligent Recording Team!
Intelligent
Recording
Limited
 Loading...