

Page 1

TC-V100
Manual
Page 2

2
INDEX
1 TC-V100 Overview ............................................................................................................. 1
2 Terminal User Guide .......................................................................................................... 2
2.1 Applications ................................................................................................................. 2
2.1.1 Network ............................................................................................................... 2
2.1.2 Czech keyboard layout ......................................................................................... 6
2.1.3 Display ................................................................................................................. 9
2.1.4 Sound ................................................................................................................. 11
2.1.5 Cinfin CVUSB Client ........................................................................................ 12
2.1.6 User Password ................................................................................................... 15
2.1.7 Screen Lock ....................................................................................................... 16
2.1.8 Network Diagnosis ............................................................................................ 17
2.1.9 Citrix Receiver ................................................................................................... 18
2.1.10 VMware View ................................................................................................ 19
2.1.11 ICA Global Settings ....................................................................................... 20
2.1.12 Date/Time ...................................................................................................... 21
2.1.13 Save Data ....................................................................................................... 22
2.1.14 CDMS Agent ................................................................................................. 22
2.2 Connection Manager .................................................................................................. 23
2.2.1 Remote Desktop ................................................................................................. 27
2.2.2 RDP Connection Guide ...................................................................................... 29
2.3 System Hotkey Instructions ....................................................................................... 35
Page 3

TC-V100 Manual
1
1 TC-V100 Overview
TC-V100 cloud client is based on Marvell ARM CPU:
Fan-less and ultra silent design frees the users from PC noises and creates a
quiet and comfortable working environment for the users.
With small and compact appearance, it can be placed vertically or mounted
behind the monitor, saving more space on the desktop.
Energy saving and environmental protection, ultra-low power consumption,
saving the costs for the customers for a long term.
Abundant cloud-computing clients(RDP specially optimized, Citrix Receiver
and VMware-view)
Support CDMS management agent: centralized and convenient asset
management, remote deployment and remote control.
Automatic search for the terminal service system (CTSS) in LAN and zero
configuration (automatically set up the connection item)
Supports convenient module update: adopts TCPUP(system update tool) or
FTP mode
Supports automatic update of system: configure client IP (or DHCP) and server
IP, and then restart to enter the auto-update mode.
Page 4

TC-V100 Manual
2
2 Terminal User Guide
2.1 Applications
2.1.1 Network
1. Using “Network”
Through “Network” program, you can modify terminal name; activate, deactivate and
configure the network card; add, edit and delete the router items, set the default router and set
DNS, etc.
2. Run “Network” program
Method:
Open control center ->Network.
The operating interface is as Picture 2-1-1-1shows below:
Picture 2-1-1-1
(1) General
This page lists the information of all network cards. In this page, you can modify the terminal
Page 5

TC-V100 Manual
3
name, activate / deactivate and configure the network card.
(a) Modify the terminal name
As the picture 2-1-1-2 shows below:
Picture 2-1-1-2
(b) Activate the network card
When the network card is inactive, please click “Activate” to activate the selected network
card.
(c) Deactivate the network card
Click “Deactivate” to deactivate the network card
(d) Network card Property
Select one network card and click “Property” button, the network card configuration window
would pop up. As the picture 2-1-1-3 shows below:
Page 6

TC-V100 Manual
4
Picture 2-1-1-3
(2) Router
This page lists the router information of all the network cards. In this page, you can add, edit
and delete the router, and set the default router. As the picture 2-1-1-4 shows below:
Page 7

TC-V100 Manual
5
(3) DNS
You can set DNS in below page:
Picture 2-1-1-4
Page 8

TC-V100 Manual
6
Picture 2-1-1-5
2.1.2 Czech keyboard layout
For right setting of the Czech keyboard layout do the settings according to following pictures. It is
important to keep the restarts.
Page 9

TC-V100 Manual
7
Page 10

TC-V100 Manual
8
Page 11

TC-V100 Manual
9
2.1.3 Display
1. Using “Display”
In display property, you can customize the desktop wallpaper, screen saver and screen
resolution. The display properties include: wallpaper, screen saver, screen resolution, refresh rate
and color number, etc.
2. Run the display property
Method:
(1) Right click on the desktop and select “Display”;
Picture 2-1-2-1
(2) Enter control center->display.
The operating interface is as below:
Page 12
TC-V100 Manual
10
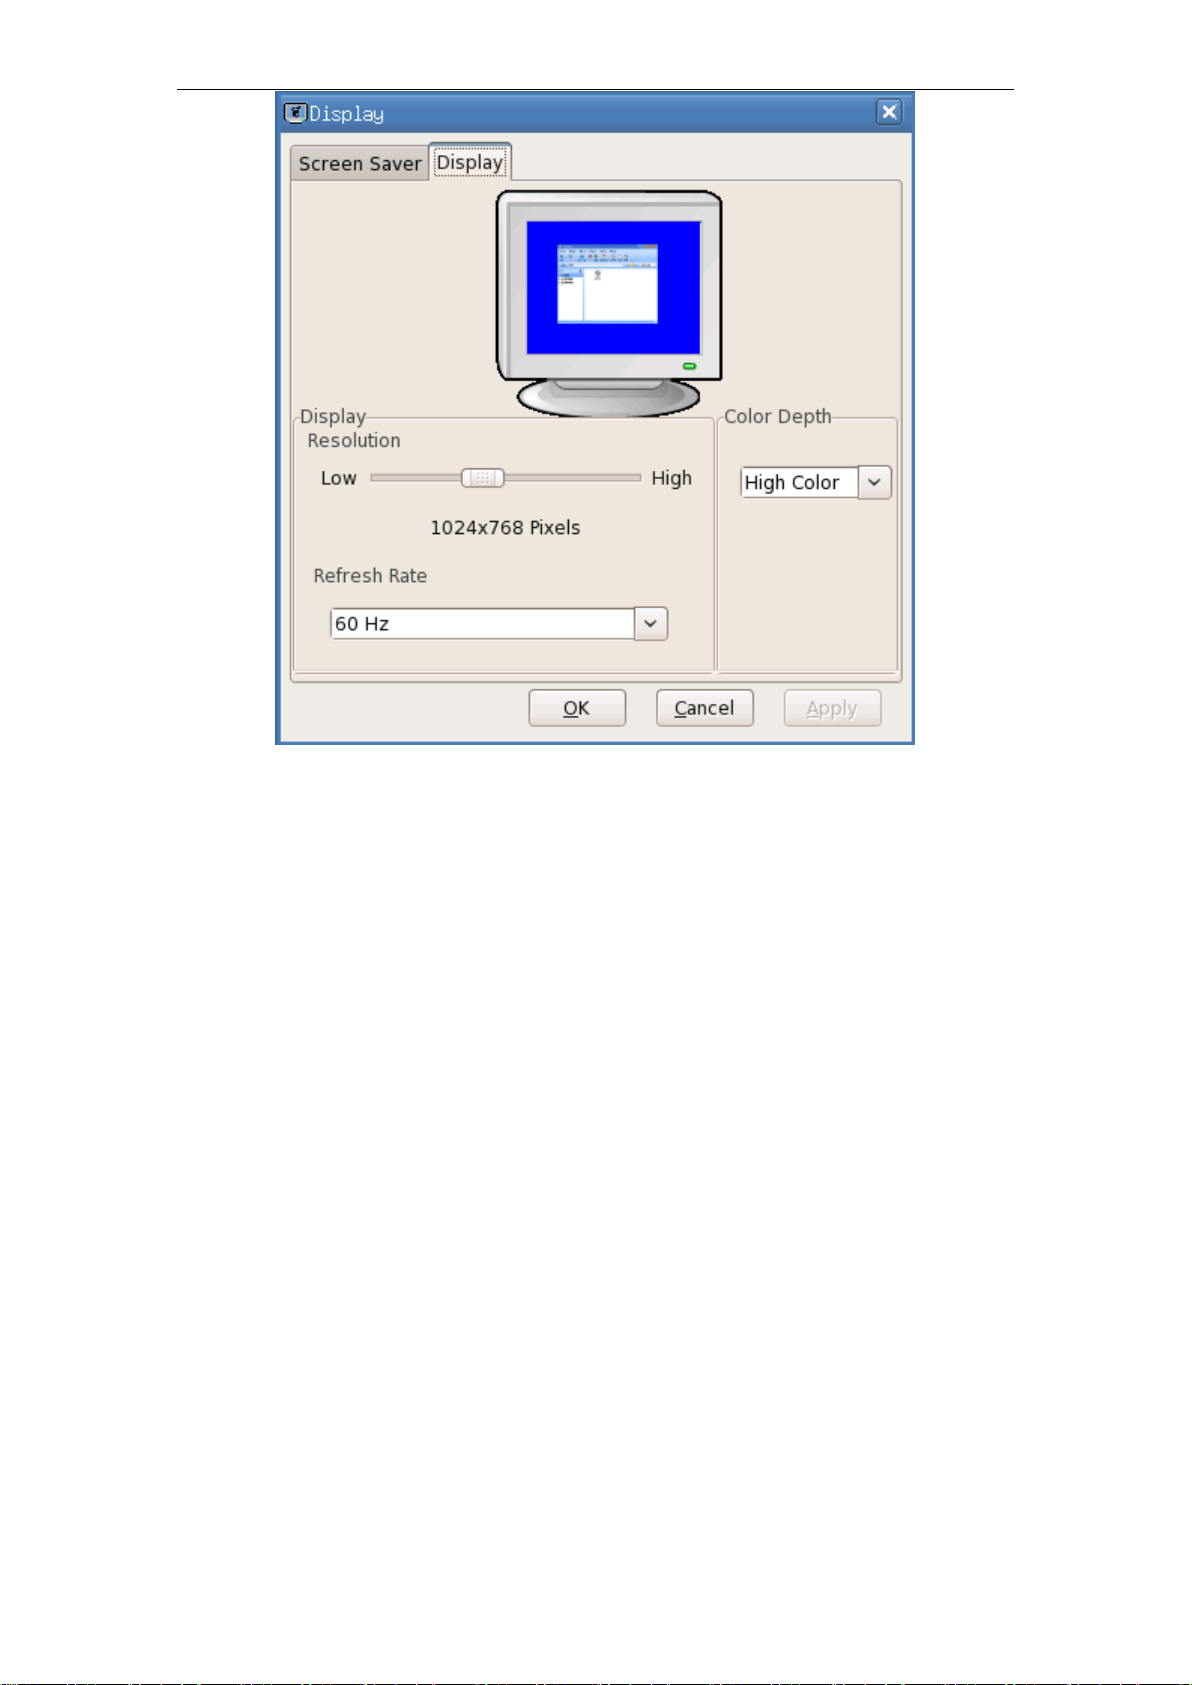
Picture 2-1-2-2
3. Set the display property
(1) Display setting
You can select the resolution and refresh rate;
The color depth can only be “High Color”
(2) Screen saver
In “Screen Saver” page, you can select and set the screen saver program for the terminal, as
the picture shows below:
Page 13

TC-V100 Manual
11
Picture 2-1-2-2
If you select “None” in “Screen Saver” bar, then all the other components in the bar would be
gray; if you select one screen saver program, then you can preview it and set the wait time of the
screen saver; if you need the screen saver program to lock the screen, please check “Lock Screen”.
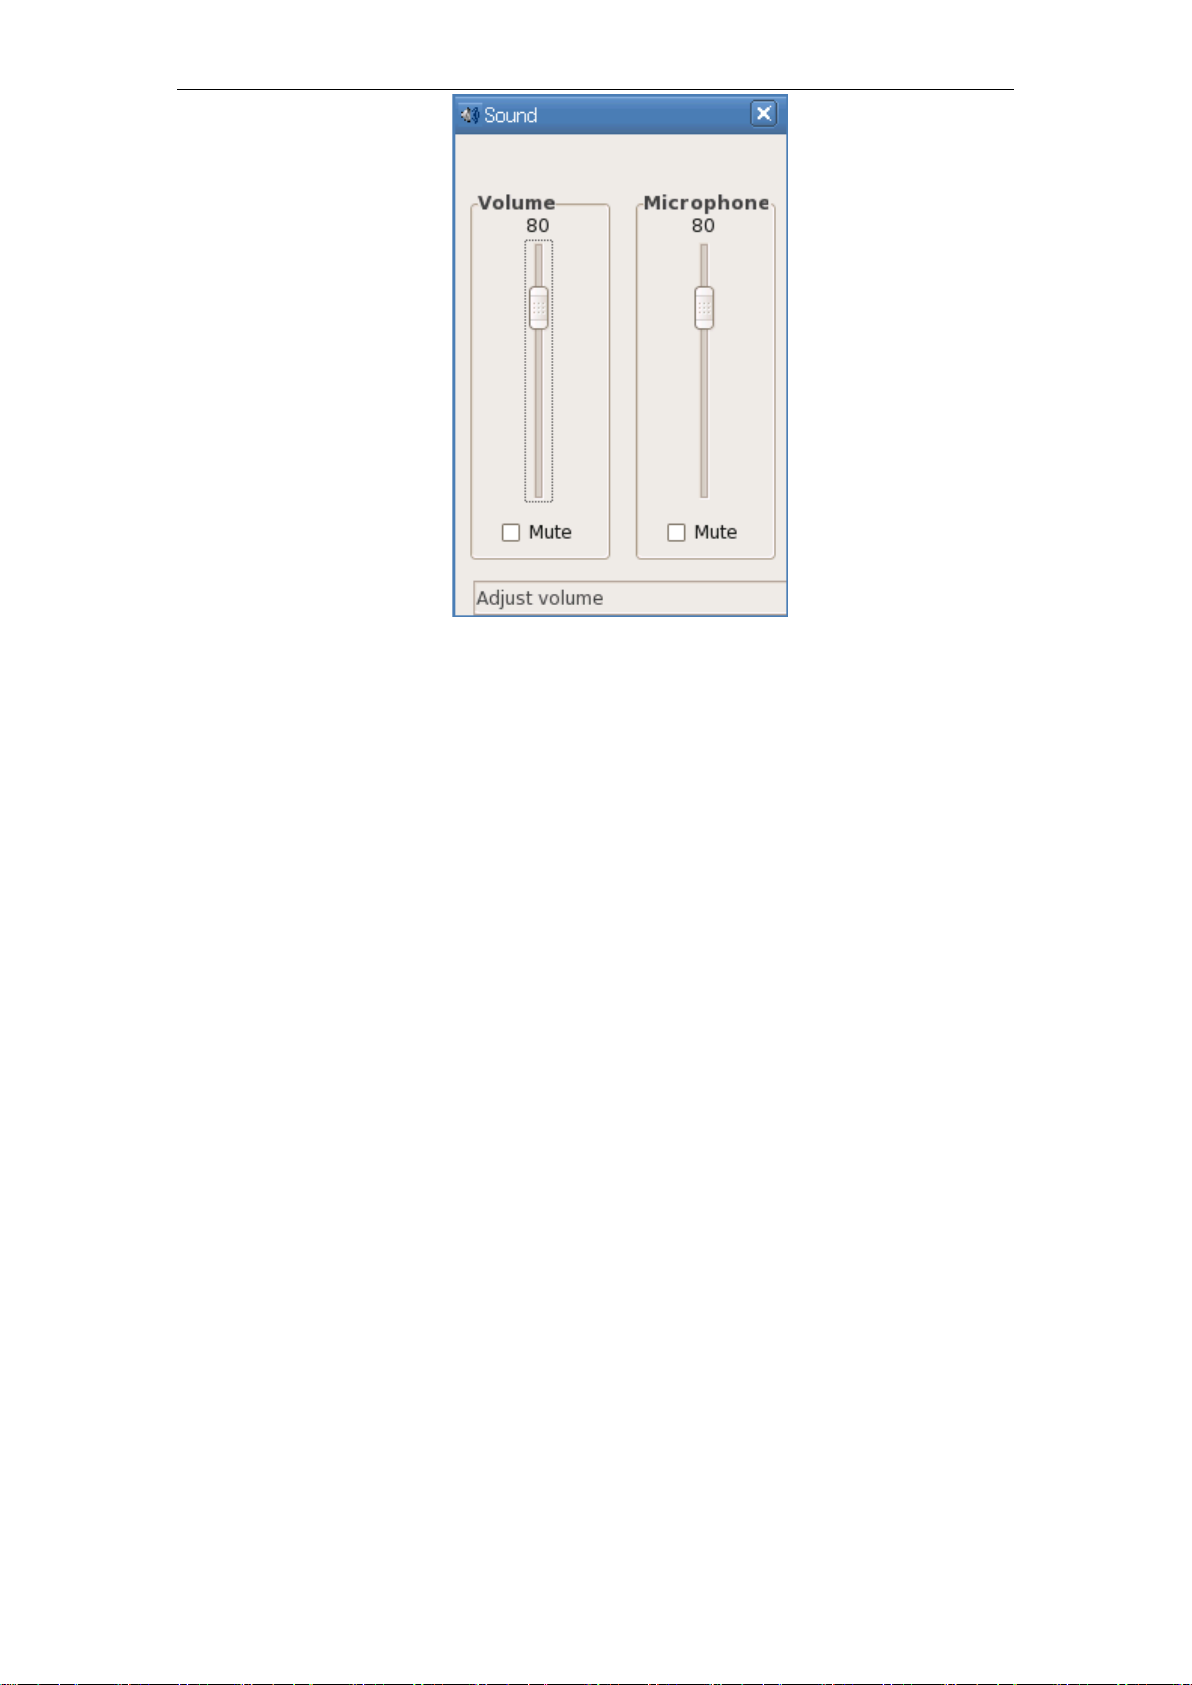
2.1.4 Sound
1. Use “Sound” program
The “Sound” program is used to adjust the sound volume and microphone of the terminal
system.
2. Run the “Sound” program
Method:
Enter “Control Center”->”Sound”
The operating interface is as below:
Page 14
TC-V100 Manual
12
Picture 2-1-3-1
2.1.5 Cinfin CVUSB Client
1. Use “Cinfin CVUSB Client”
Map the USB device which is connected in local terminal to the server. Note: It can only be
used with RDP protocol.
2. Run “Cinfin CVUSB Client”
Method:
Enter “Control Center”-> “Cinfin CVUSB Client”
Page 15

TC-V100 Manual
13
Picture 2-1-4-1
3. Change Mode
In picture 4-1-4-1, click “Change Mode” to change USB device mode between “Local usage”
and “Map usage”. As the picture shows below:
Page 16

TC-V100 Manual
14
Picture 2-1-4-2
4. Mapping Config
In the “Config” page of CVUSB Client, you can set “send speed”, “recv speed” “Auto map”
and “Enable/Disable client”. As the picture shows below:
Page 17

TC-V100 Manual
15
Picture 2-1-4-2
2.1.6 User Password
1. Use “User Password”
Through “User Password” program, you can set the user password which is the password of
starting up / restarting the system, screen saver and system lock.
2. Run “User Password” program
Method:
Enter control center-> User Password
The operating interface is as the picture shows below:
Page 18

TC-V100 Manual
16
Picture 2-1-5-1
2.1.7 Screen Lock
1. Use “Screen Lock”
The “Screen Lock” program is used to lock the terminal screen when you do not use the
terminal and ensure that the terminal would not be used by others.
2. Run the “Screen Lock” program
Method: Use the hotkey Ctrl+Alt+Del to open the screen lock program and lock the screen.
When the screen is locked, all the applications cannot be used and you can only return to the
system interface by entering the correct unlock password.
The operating interface is as below:
Picture 2-1-6-1
Page 19

TC-V100 Manual
17
If the password input is wrong, then it would pop up the prompt and keep the screen locked.
2.1.8 Network Diagnosis
1. Use “Network Diagnosis”
The network diagnosis program is used to check the network status.
2. Run the network diagnosis program
Method:
Enter control center->diagnosis
The operating interface is as below:
Picture 2-1-7-1
3. The destination of network diagnosis
When you ping a certain address, input the address in the destination bar and specify the ping
times (which is 5 by default and 0 means infinite times). For example, enter the address
192.168.48.1 and click “ping” button. The operating interface is as below:
Page 20

TC-V100 Manual
18
Picture 2-1-7-2
The destination bar cannot be blank, or it would pop up the prompt dialog box.
4. Time limit of ping
When you ping some address, the content of time box must be number and should not be
blank or it would pop up the prompt dialog box.
2.1.9 Citrix Receiver
1. Use “Citrix Receiver”
“Citrix Receiver” is a Citrix cloud log on client and can connect to Citrix cloud server. It
supports XenDesktop / XenApp
2. Run “Citrix Receiver” program
Enter “Control Center”-> Citrix Receiver
The operating interface is as below:
Page 21

19
3. Connection
TC-V100 Manual
Picture 2-1-8-1
(a) Select “View” “Citrix XenApp View”
(b) Enter the server URL
(c) Enter the username, password and domain.
Picture 2-1-8-2
2.1.10 VMware View
1. Use “VMware View”
“VMware View” is the VMware cloud log on client and can connect to VMware cloud server.
Currently it only supports RDP protocol and does not support PCOIP
2. Run “VMware View” program
Enter control center-> VMware View
Page 22

TC-V100 Manual
20
The operating interface is as the picture shows below:
Picture 2-1-9-1 VMware View
2.1.11 ICA Global Settings
1. Use “ICA Global Settings”
It is the global setting specified to ICA connections.
2. Run “ICA Global Settings”
Enter control center->ICA Global Settings
3. Setting
(1) Device Mapping, as the picture shows below:
Page 23

TC-V100 Manual
21
Picture 2-1-10-1
(2) Hotkey configuration, as the picture shows below:
Picture 2-1-10-2
2.1.12 Date/Time
1. Use “Date / time”
You can set the time zone and your local date and time information in this
program.
2. Run “Date / Time”
Enter Control Center->Date / Time
The operating interface is as below:
Page 24

TC-V100 Manual
22
Picture 2-1-11-
2.1.13 Save Data
1. Use “Save Data”
The “Save Data” program can save the system settings and even if it is powered off illegally,
the settings can be saved.
2. Run “Save Data” program
Method:
(1) Use the hotkey Shift+F2;
(2) Enter control center->save data
The operating interface is as below:
Picture 2-1-12-1
2.1.14 CDMS Agent
1. Use “CDMS Agent”
In “CDMS Agent” program, you can set whether the terminal can be managed by the
Page 25

TC-V100 Manual
23
management server or specify the management server.
2. Run CDMS Agent
Method:
Enter control center->CDMS Agent
The operating interface is as below:
Picture 2-1-13-1
2.2 Connection Manager
Enter control center-> connection manager, as the picture shows below:
Page 26

TC-V100 Manual
24
Picture 2-2-1
1. There is a list box in this interface which shows the connection items added by users. Each
connection item has 4 sub-items:
(1) Session name
Name of the connection added by the users
(2) Type
It is the type of the connection item added by users, such as RDP, ICA, etc.
(3) Status
When connected, it shows “connected” and when not connected, it would show nothing.
(4) Server
It shows the name of the server or application the users want to connect to.
2. Under the list box, there are these buttons: “Refresh CTSS”, “Control Center(F2)” and
“Shutdown”
The functions of these buttons are as below:
(1) Refresh CTSS
Manually refresh and search for the CTSS server in LAN. When searched, the CTSS
server would be added to the connection manager automatically.
(2) Control Center
Click the “Control Center” button and the “control center” interface would pop up,
where you can do the settings.
Page 27

TC-V100 Manual
25
(3) Shutdown
After you click “Shutdown” button, the below interface would pop up which includes:
Shutdown, Restart and Lock, as the picture shows below:
Picture 2-2-2
2.1.14 Security
Go to the “control Center” and double click“Security” icon to run the program.
Below interface would pop up.
The initial password is blank, so just click “OK”button to enter the
program.
Then you’ll see its operating interface as below:
Page 28
TC-V100 Manual
26
In “System Modification”frame, you can see two options “Allow” and
“Forbid”.
If you select “Allow”, then you can access and configure all the programs
in control center and also the connection manager.
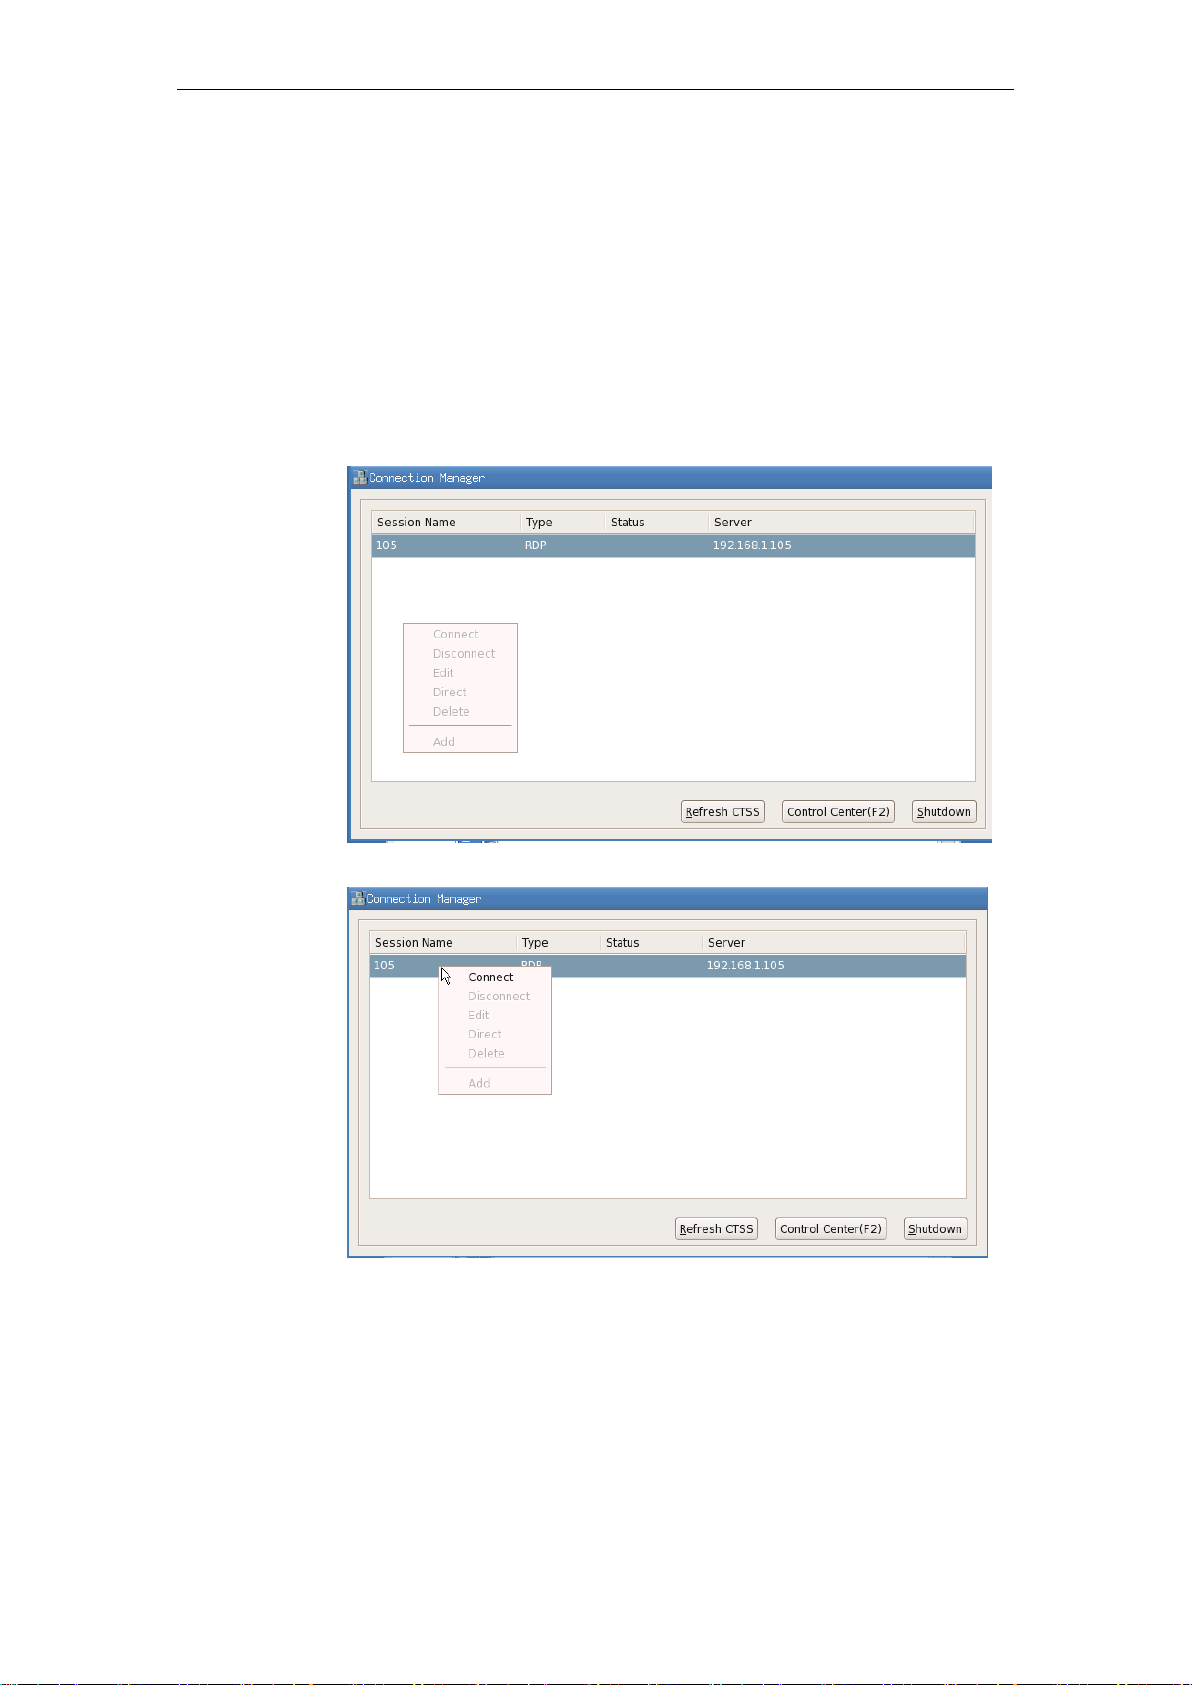
If you select “Forbit”, then:
(1) In connection manager, you cannot add, edit or delete the
connection items, and you can only connect the exiting connection
items, as the pictures blow:
(2) In control center:
Some of the programs are forbidden to access and others are still
allowed to access.
By default,when you select “Forbid” in security program,below
programs are forbidden to access: Network,cloud client,cloud
server,CDMS agent,Date/Time, ica global settings,services,
startup and remote desktop.
Page 29

TC-V100 Manual
27
If you want to add more programs into this protection mode or remove
some programs out of this protection mode,please inform us and then
we’ll send you a new system version.
2.2.1 Remote Desktop
1. Use “Remote Desktop”
3. The remote desktop program is used for the settings of some parameters
related with the remote desktop when the terminal is used as the server side of the
remote desktop (VNC).
4. Include: Whether allow the remote monitoring, select remote check or control
and some security parameter settings of the terminal when the remote host connects
the terminal desktop.
2. Run “Remote Desktop” program
Open control center and select “Remote Desktop”
5. The operating interface is as the picture shows below:
Page 30

TC-V100 Manual
28
6.
Configuration Interface of Remote Desktop
3. Remote Desktop client
For the terminal is used as the server side of the remote desktop, the users
only need to install the client program (VNC viewer) of the remote desktop
on some client machine to use this client program to connect to the terminal
desktop through specifying terminal IP address.
Remark:The version of the client program needs to be 3.3.4 or higher to support
the function of checking the mouse status of the terminal.
4. Sharing
Select whether to allow the remote host to monitor the terminal desktop. If it
is checked, you can configure the remote monitor or control and the parameters
in the security bar. Or the other configuration items would be gray. As the picture
shows below:
Page 31

TC-V100 Manual
29
Do not allow the remote control
2.2.2 RDP Connection Guide
Right click on the connection manager->select “add”-> select “RDP” connection type->click
“Next”, and you would enter the interface of RDP connection settings.
Picture 2-2-1-1
Page 32

TC-V100 Manual
30
Picture 2-2-1-2
1. General
In this property page, you need to enter the name of the new session in the “Session Name”
bar and enter the IP address or name of the server in “Server address” bar. The session name
should not be the same with other RDP connections.
Check “Automatic Login” and you can enter the username, password and domain. When the
system starts up, it would automatically connect this RDP session.
As the picture shows below:
Picture 2-2-1-3
Page 33

TC-V100 Manual
31
【 Note: The session name should not contain the special characters. Some Windows
2000/2003 Server versions would not support the automatic log on to the server considering the
security.】
2. Programs
Check “Run the following program automatically when connected” and it would log on the
server in application program mode. You need to enter the program path and file name and you
can select to enter the name of the folder where the program exists.
As the picture shows below:
Picture 2-2-1-4
3. Device Mapping
In this property page, you can set the audio property: “Bring to this terminal”, “Do not play”,
“Leave at remote computer”. As the picture shows below:
Page 34

TC-V100 Manual
32
Picture 2-2-1-5
4. Display
In this property page, you can set the “Colors”, “Window Size” and connection bar of the
RDP session.
There are two options “8 bit” and “16 bit” in “Colors” setting.
If the full screen option is not checked, you can set the window size to 60%-90%
If you check “Show the connection bar only in full screen mode”, then when RDP session is
in full screen, there would be a connection bar on the top of the screen. Users can use this
connection bar to minimize or close the RDP window.
As the picture shows below:
Page 35

TC-V100 Manual
33
Picture 2-2-1-6
5. Advance
In this property page, you can set the advanced settings and keyboard layout of the RDP
session.
If the “Desktop background” option is checked, then when RDP session is successfully
connected, it would show the desktop background set by the user on the server and you can
modify the desktop background which needs the server support.
If the option “Show window contents while dragging” is checked, then after the RDP session
is successfully connected, it would show the window content when the user drags the window.
This option needs the server to support.
If the option “Menu and Window animation” is checked, then after RDP session is
successfully connected, it would show in animation mode when you click the menu and
minimize/maximize the window. This option needs the server to support.
The “Themes” option allows RDP session has the same theme settings with the server and
you can modify the theme settings.
If the option “Bitmap caching” is checked, then it would open the bitmap caching area when
the client connects to the server via RDP. Starting this option would improve the performance
(especially when the network bandwidth is low) and reduce the network bandwidth usage.
In “Keyboard” option, you can set the keyboard layout of the terminal.
Page 36

34
As the picture shows below:
TC-V100 Manual
Picture 2-2-1-7
6. Options
If the “Connecting Mode” is set as “Quick”, then the “Automatic Login” in “General” and
the options in “Programs” would be gray. When connecting, the connection manager would
prompt the user to input the server address to connect to.
If the option “Enable auto reconnect when network status abnormal” is checked, then it can
prompt the users whether to reconnect when the network status is abnormal(the network cable is
not plugged in or the network is blocked, etc)
If the option “Enable Compression” is checked, then it can obviously improve users’ visual
experience when the network bandwidth is low. It is recommended that users use this function.
If the option “Attach to console” is checked, then it would prompt to install the driver when
there is no driver installed for the peripheral connected to the server.
As the picture shows below:
Page 37

TC-V100 Manual
35
Hotkey
Function
Ctrl+Alt+S
Restore the default display parameter setting
Ctrl+Alt+Del
Lock the screen
Shift+F2
Save the system settings
Ctrl+Tab (or Alt+Tab)
Switch the windows on the desktop(When switching windows in RDP
full screen window, it only supports Alt+Tab)
Ctrl+Alt+C
Open the control center
Ctrl+Alt+A
Check the version information
Ctrl+Alt+U
Module Update
Ctrl+Alt+Shift+U
Set the auto update of the system version. Input the terminal IP and
update server IP and click “ok”, then the system would restart
automatically and enter the update mode.
Picture 2-2-1-8
2.3 System Hotkey Instructions
Page 38

TC-V100 Manual
36
 Loading...